Background and Long Delays
It’s actually been six weeks since I got my one-digit prototype working. Since then, I’ve prototyped the DS1302 real-time clock chip, done troubleshooting on some weird voltage problems, finally fixed the voltage problems, and written a demo of timekeeping with the one-digit display. I haven’t exactly been idle; but I haven’t done anything about expanding the one-digit prototype into a full display.
Well, it’s a slight exaggeration to say I haven’t done anything. About three weeks ago, I cloned the single-digit schematic in EAGLE, edited out the colons and decimal points that won’t be used in the display (between the two digits of the hour, of the minute, and of the second), and got it all to fit onto one “sheet.” But I hadn’t done anything yet about expanding the data bus to make separate latch lines for the six digits, nor had I even started working on a board layout.
Part of the problem was that the freeware version of EAGLE only does board up to about 4″x3″, which was the size of my one-digit display. I knew I was going to have to switch layout software to build a bigger display, and I’m always slow getting around to installing and learning new software. Also, I talked to Tom McGuire, who volunteered to mill a display PCB for me, and he indicated that he couldn’t do a board quite as long as the full display (15-16″). He suggested milling half, rotating around a reference point, and milling the other half, but that sounds a bit tricky to get the alignment just right.
Last week, I finally resolved myself to making the board in three sections, for HH:, MM:, and SS. That makes it easier to manufacture; and if I eventually have a means to make the whole thing in one, I can presumably paste the pieces together into one large layout.
You’re Thinking About Building a Bigger One
Through a strange sequence of events, I was hanging out at Cort’s house Saturday morning, sitting around with Cort and Shannon and Brad talking about various things. I had my PowerBook on my lap and I was tinkering with EAGLE while we visited. That’s right; I finally got back to the clock display.
I saved my six-digit circuit in case I ever want to go back to it, but copied it to a new two-digit layout and chopped out the other four digits. I cut out duplicate connectors and started wiring things together. I laid out the latch lines for all six digits, and set up the bus to have input and output connectors at opposite ends, for daisy-chaining the three boards together (if I choose).
I agonized about how to select/connect the appropriate latch line for each digit. Ideally, I’d like to have DIP headers, and you plug the jumper across the line corresponding to which digit you’re configuring. That would allow reconfiguring one digit as another for troubleshooting, to determine whether a problem was in the controller or the display. Between lack of room on the board to position a full DIP header, and the difficulty of soldering it onto the back side of a single-sided board (so it could be accessed without removing the display from the clock case), I gave in and settled on using a jumper wire to bridge from the latch bus to each digit’s latch line.
EAGLE Circuit → FreePCB Board
I had intended to use FreePCB for designing larger boards, because it looked like a nice package, and I somehow got the impression it could read EAGLE netlists (more on that later), to import part and connection information into a board layout and prepopulate it. FreePCB was designed by an engineer who was dissatisfied with available, affordable board layout software and decided to write his own. He’s done a very nice job!
Only problem is, it does not read EAGLE netlist files. FreePCB reads PADS-PCB format files, and it turns out that’s not what EAGLE outputs. Late Saturday, I tried to transfer my netlist from EAGLE to FreePCB, and quickly found out that the formats are different. Between Google and the FreePCB user forum, the only thing I could find about EAGLE and FreePCB is that the FreePCB author figures EAGLE’s format is pretty simple, and someone could write a translation utility.
So I did. EAGLE generates one partlist file and one netlist file; PADS-PCB has the two combined into different sections of the same file. I wrote a Perl script to parse the EAGLE files and translate into PADS format, and it was really pretty simple.
Except for package types. The export/import files contain an indication of what package type each device has, so the PCB software can prepopulate your layout with appropriate footprints that you just have to drag and drop into place. Naturally, EAGLE and FreePCB use different package names, so I added a hash lookup to translate those as well. Unfortunately, that’ll be the trickiest part of the program–comprehensively identifying and accommodating all the different package types.
By midnight, I had a pretty good translation going and most of the parts placed (but no traces routed) for my two-digit board–and then I noticed that FreePCB doesn’t generate outline milling information. It makes Gerber trace files and Excellon drill files, but nothing for CNC milling. Since I really wanted to be able to mill boards with Tom, and since I insist on being able to mill boards for myself in the future, I quit for the night and waited until I could talk to Tom about options.
FreePCB Board → DeskPCB CNC Mill File
I talked to Tom early yesterday afternoon. I was hoping he had a way to generate outline milling code from standard Gerber trace files, and he pointed me to a piece of software called DeskPCB. It’s $95 for a license, and there’s a time-limited demo available for free download. Generating outline code is exactly what it does–it generates “trace isolation milling and drilling” files out of Gerbers and Excellons. Shows you the original board and the mill pattern right on the screen, too, so you can confirm it’s doing what you expected.
It’s pretty slick! And that means I now have a complete path from circuit design to board production:
EAGLE for circuit design
→ export EAGLE-format netlist and partlist
→ Keith’s script to convert to PADS netlist→ FreePCB for board layout
→ create Gerber and Excellon files→ DeskPCB for outline milling
→ create G-code→ LinuxCNC (née EMC) for CNC mill control
→ mill a board
Very, very cool.
You Doin’ Anything with All That Fancy Software???
Yup, sure am. I sent Jeremy a screenshot of the two-digit parts placement to stitch together into a six-digit display so we could check the spacing. My first version had .6″ between adjacent digits and .4″ between the digits and the colon.
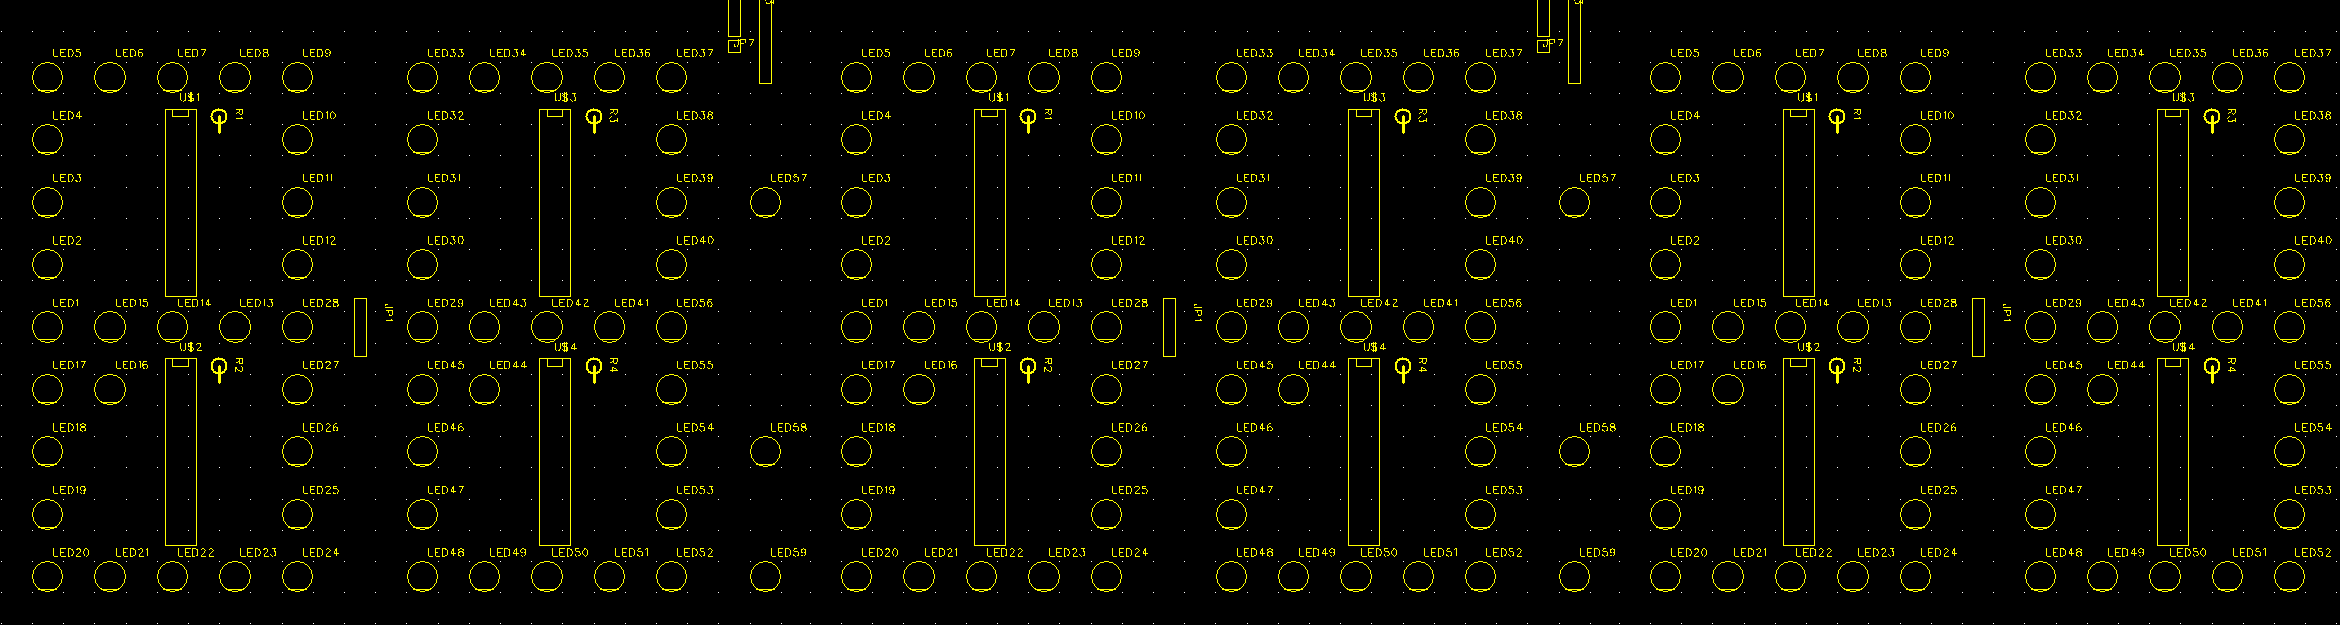
From across the room, that looked like there wasn’t really enough separation to the colon, so I asked Jeremy if he could scoot them another .1″ or .2″ apart.
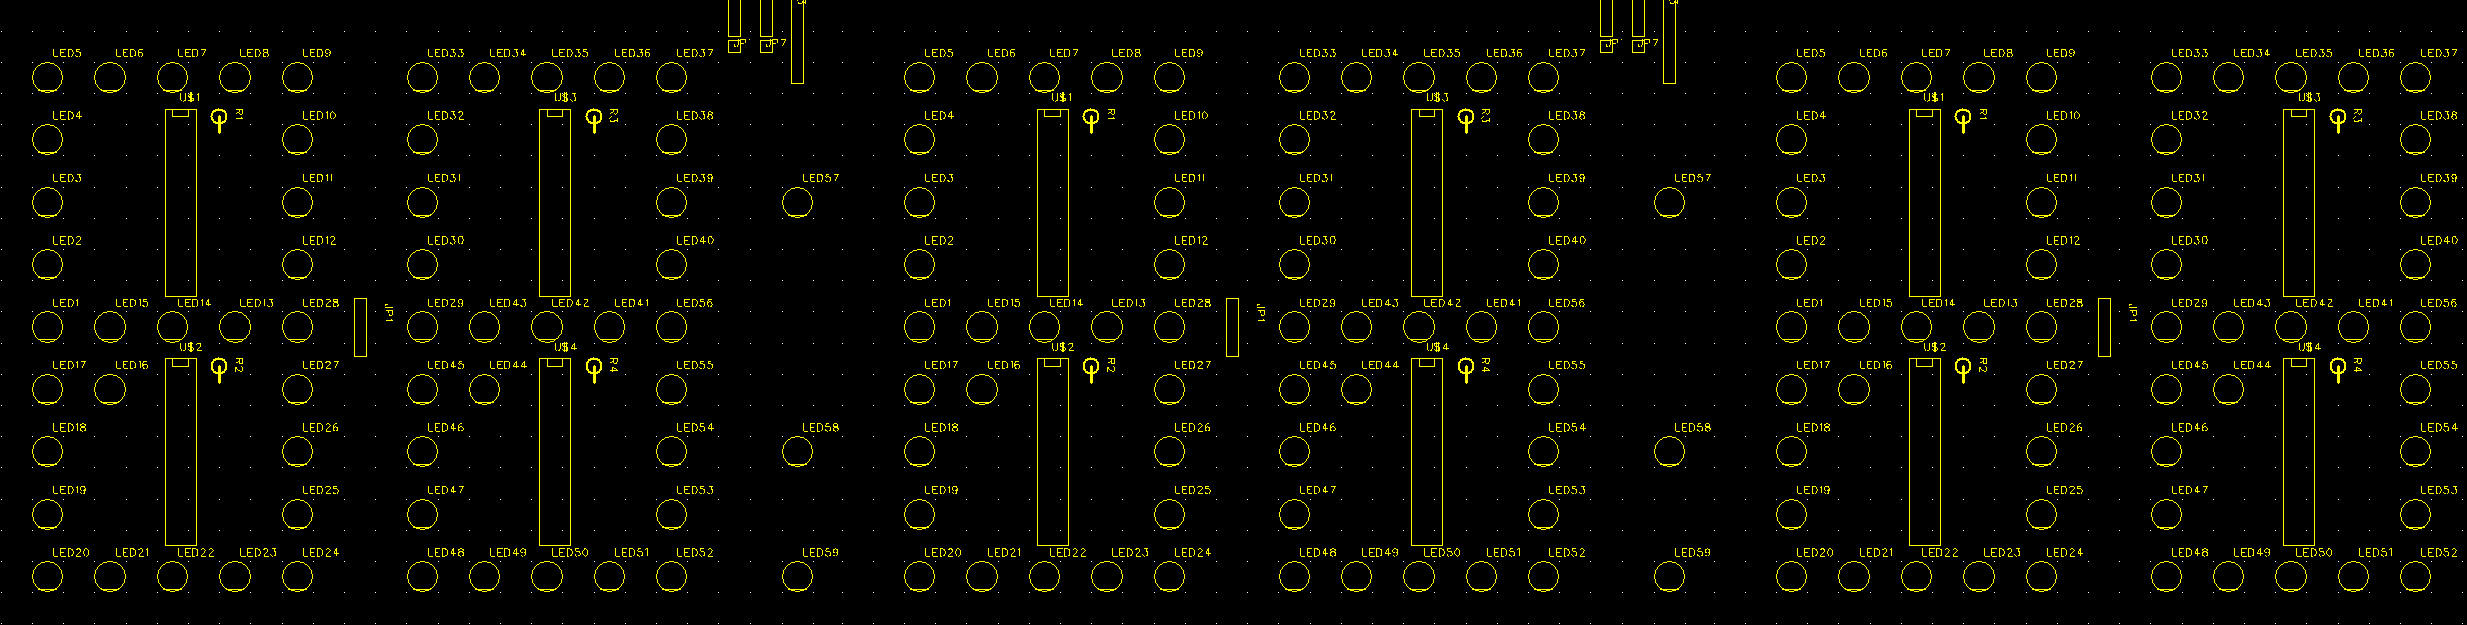
The second version with .6″ on each side of the colon looked good enough that we’re going with it. It’ll be hard to know the exact effect until we see the real thing, but this is close enough to build the first clock. If we want to change the spacing from the first to the second, it’ll be easy enough to do.
I used my single-digit layout as a reference for placing most of the traces on the two-digit, and got all of the new stuff (different power layout, six-digit latch bus) incorporated as well. By late last night, the entire board was laid out and ready to produce.
I’ll still look at it to see whether I can reroute traces to eliminate some of the jumper wires, and I still need to put design and contact information onto it–but it’s a working design that I could now produce if I chose, and that feels great! Tom has Fridays off and offered to take me to his office on a Friday to mill a board, so I’ll see whether I can set something up for this week.
Next Steps
Because the margins around the perimeter of the display aren’t the same as the inter-digit spacing, I’ll actually have three different boards for HH:, MM:, and SS. I’ve laid out the board for HH:, and it’s a trivial matter of spacing to change the board outline for MM:, and spacing and chopping the colon to make the SS. I feel I should build and test the entire HH: board before producing the other two, so I hope to assemble the first board this coming weekend.
At 174 LEDs per full display, plus 31 already used for the prototype single digit (which I don’t plan to disassemble), I’ll only have used 379 of my 498 LEDs, leaving 119 unused–enough that I could comfortably leave an entire HH: board (59) assembled as a working prototype rather than a production board. I’d be happy for it to be the first real board for a clock, but it doesn’t have to if something doesn’t work out.
I have four sample A6276 LED driver chips, enough to power two digits. I’ll need to order more before I can build the entire display.
Tom was planning to help me debug some UART problems (which I haven’t blogged yet) tonight, checking timing with his digital scope and stuff. After that’s ironed out, I can move the controller circuit from breadboard to EAGLE and lay out and produce the controller board too.
We’re getting closer!
I’m an electronics hobbyist, and I’m also having a similar problem importing a schematic from Eagle into FreePCB. (My board is rather elongated, so area isn’t a problem but Eagle Light’s maximum dimensions are.)
If you still have the Perl script you mentioned for the netlist conversion, I would be extremely grateful if I could get a copy.
In any case, I hope you’re making progress debugging your problem with the DS1302 clock chip. I know I spent far too much time on an earlier project debugging some crazy issues with a Xicor X1226 clock. (Similar chip, with an I2C interface and far too many quirky interface issues.) All I can say is follow everything in the datasheet to the letter, make sure your datasheet is up to date, and don’t forget that everything is in BCD. Good luck.
Keith,
have you seen Gcam, here’s the link:
http://gcam.js.cx/index.php/Main_Page
cheers,
DC