I recently brought home a trio of Ender 3 Pro printers needing a little love … that’s a story for another day. But this weekend I put a 0.6-mm nozzle on one of them for doing faster draft prints. Let’s see about some PrusaSlicer settings to take advantage of that.
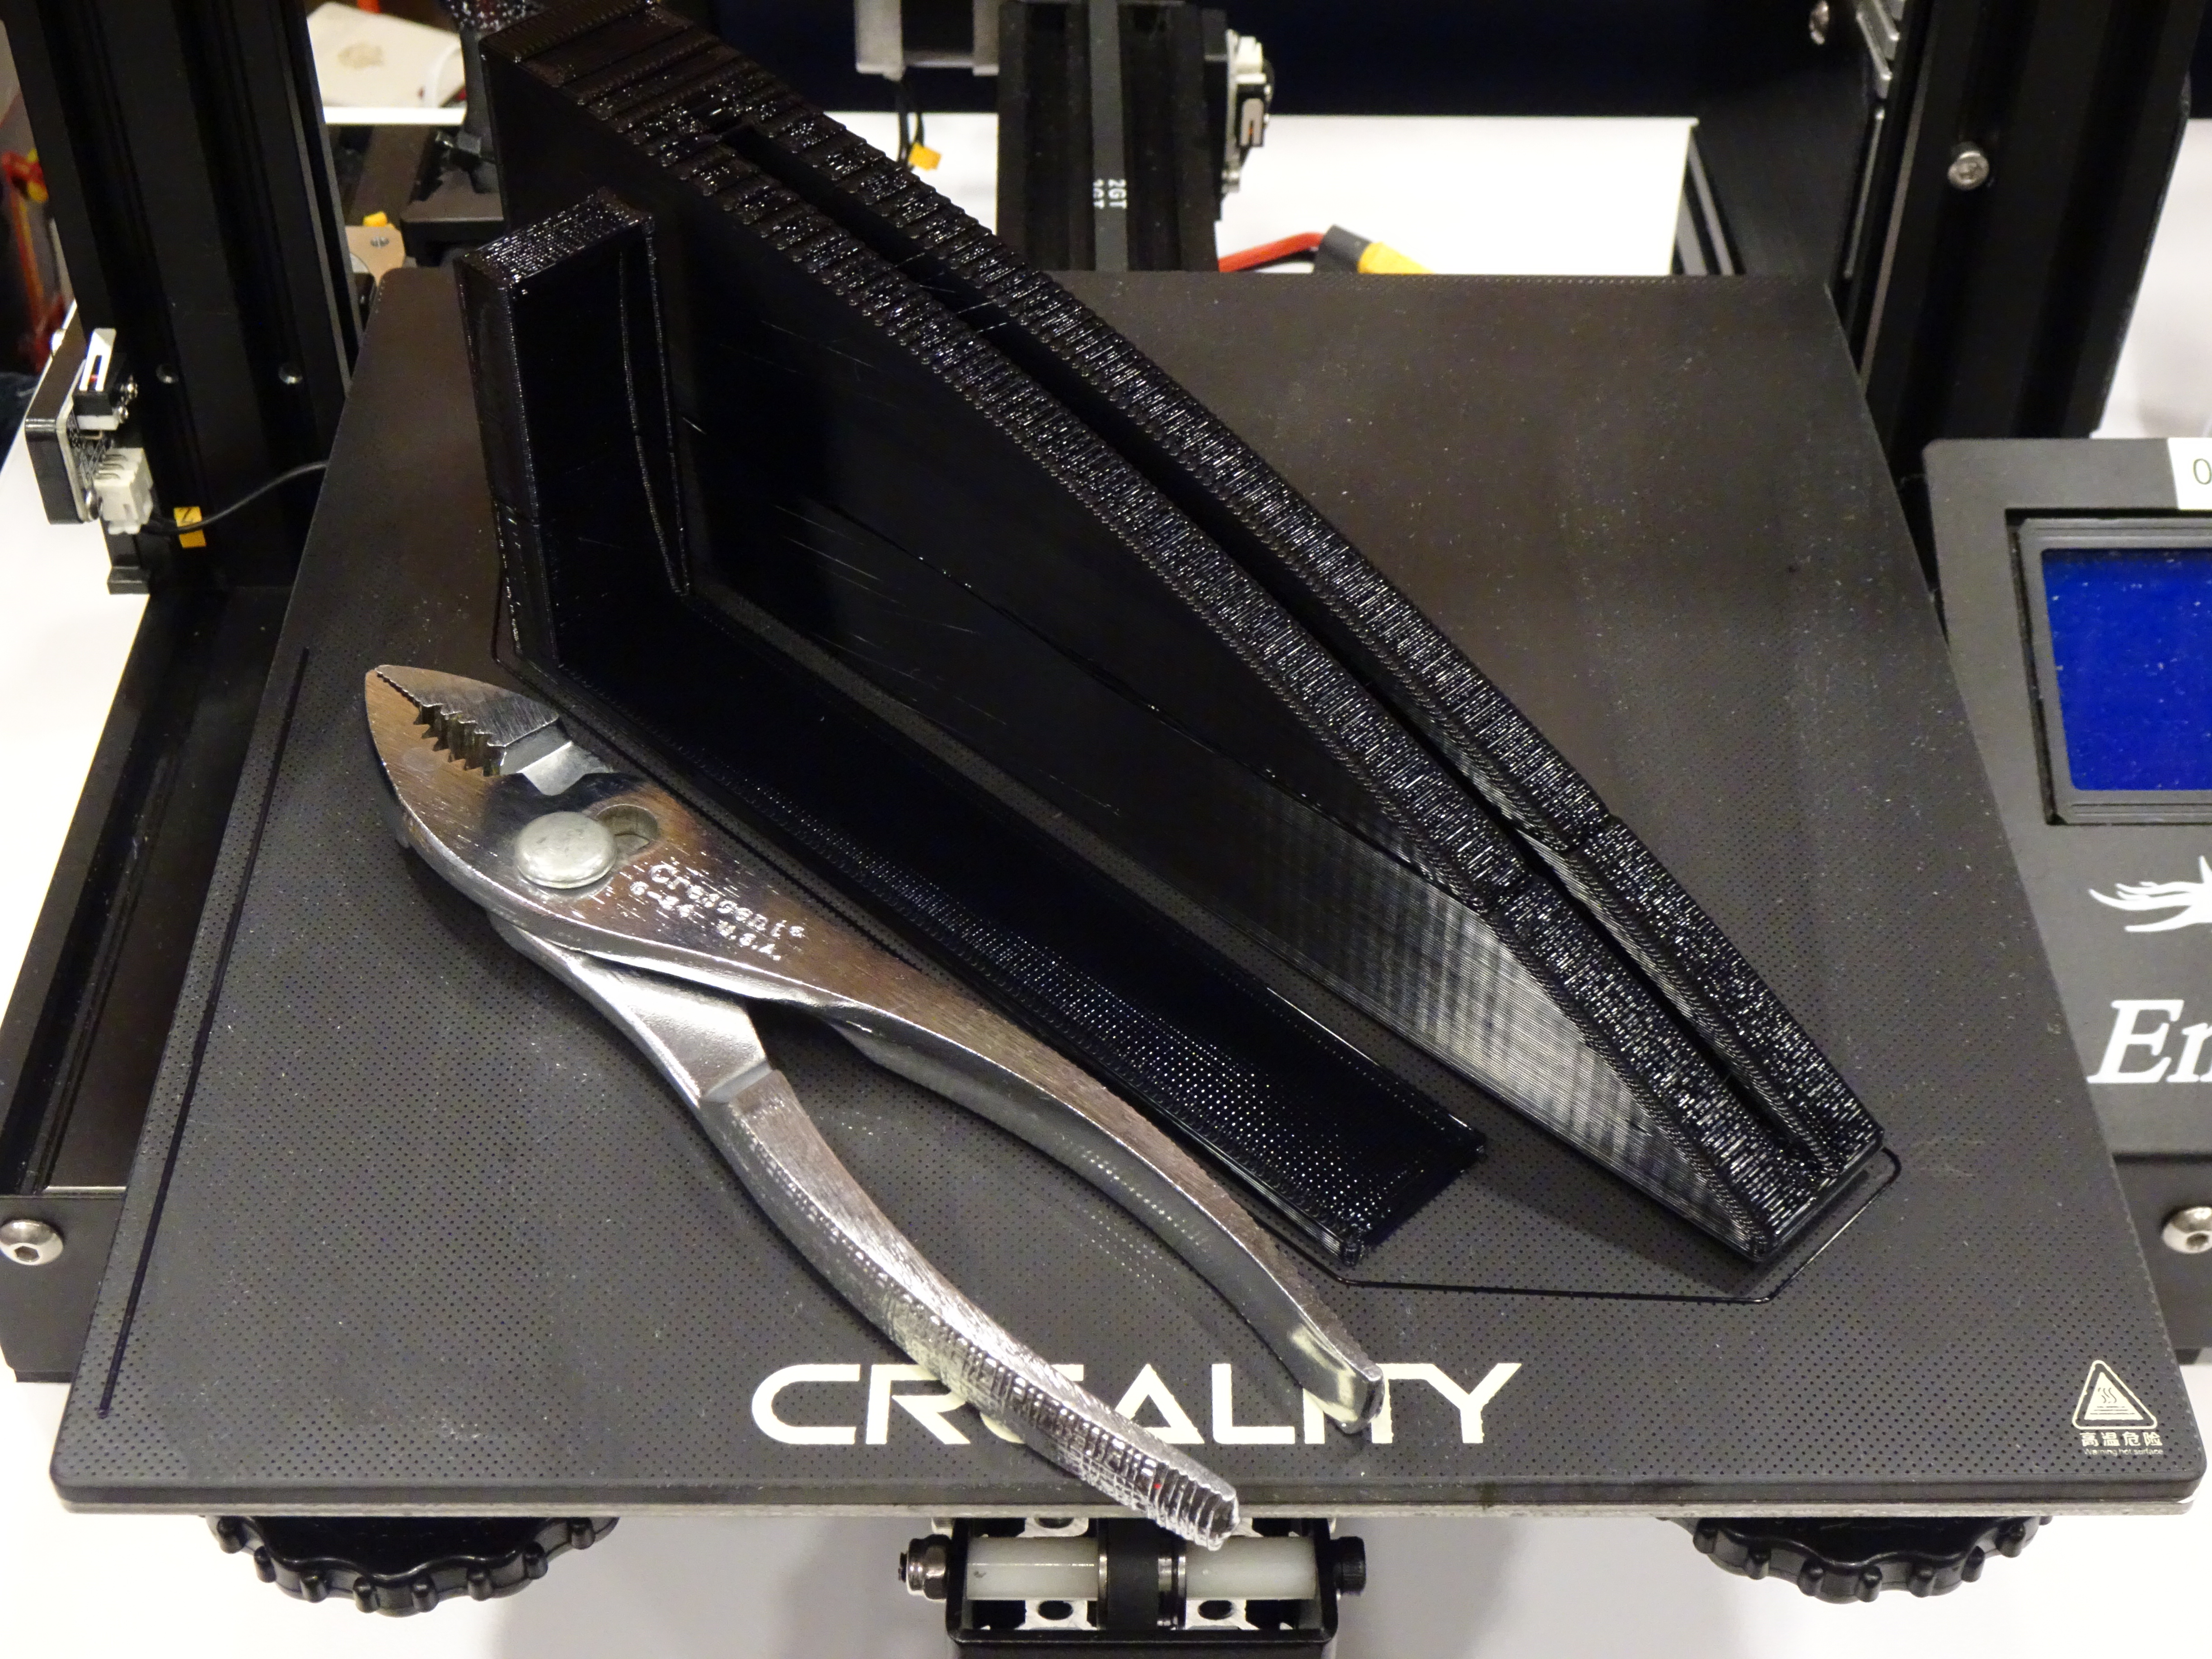
Draft of a wall holder for a chef’s knife:
- 9h12m for Prusa MK3S, 0.20-mm layers
- 11h13m for Ender 3 Pro, 0.20-mm layers
- 4h22m for Ender 3 Pro with the 0.6-mm nozzle
Okey dokey, what do we need to do to configure to use a 0.6-mm nozzle?
Start with PrusaSlicer’s Ender-3 profile and:
Printer Settings / Extruder 1 — configure a larger nozzle
- Nozzle diameter from 0.4 to 0.6 mm
- Layer height limits / Max from 0.28 to 0.4 mm
- Retraction / Length from 5 to 10 mm (the large nozzle is really prone to stringing
- … / Lift Z from 0 to 0.4 mm (because PrusaSlicer only sets this quality-enhancing parameter on Prusa’s own printers)
If we stopped here, the slicer would back off the extrusion feed rate to print the same layer heights and extrusion widths through a larger nozzle with less resistance. In fact, with these settings, we slice at 11h27m — an increase in time attributable to the change in retraction settings.
Print Settings / Layers and Perimeters — configure thicker layers
- Pick the 0.28mm SUPERDRAFT preset and save to a new Print Settings user preset that I named
0.40mm Ender-3 Pro 0.6mm nozzle. - Layer height / Layer height from 0.28 to 0.40 mm
- … / First layer height from 0.20 to 0.45 mm
If we stopped here, the slicer would increase the extrusion feed rate from above because it’s printing thicker layers, but still keep it throttled to print the same extrusion widths. This has reduced the print time to 8h3m.
Print Settings / Advanced — configure wider extrusions
- Extrusion width / Default extrusion width from 0.45 to 0.7 mm
- … / First layer from 0.42 to 0.8 mm (we want to really squish that first layer down)
- … / remaining widths from 0.45 to 0.7 mm
Print time is now down to 5h11m.
This particular Ender 3 Pro has been upgraded from the 4.2.2 mainboard (noisy, very-quantized stepper drive) to 4.2.7 (silent, smoov stepper drive). How much time can we shave off with speed changes and still have acceptable print quality?
Print Settings / Speed — somewhat-arbitrarily-chosen speed increases that testing shows still have print quality concordant with wider nozzle and thicker layers
- Save a new user preset named
0.40mm SPEED Ender-3 Pro 0.6-mm nozzle. - Speed for print moves / Perimeters from 40 to 60 mm/s
- … / Small perimeters from 25 to 35 mm/s
- … / External perimeters from 25 to 40 mm/s
- … / Infill from 50 to 80 mm/s
- … / Solid infill from 40 to 60 mm/s
- … / Top solid infill from 30 to 50 mm/s
- Modifiers / First layer speed from 20 to 50 mm/s
Print time down to 4h19m, with the feature type of Internal infill taking the most time at 1h57m or 45% of the print time.
Hm, can we reduce the time by further increasing the Infill speed?
Print Settings / Speed — increase Infill speed
- Speed for print moves / Infill from 80 to 100 mm/s
Internal infill is still taking 1h57 minutes — the bottleneck is not speed but acceleration for the moves.
Printer Settings / Machine Limits — increase acceleration
- Maximum accelerations / Maximum acceleration X from 500 to 1000 mm/s2 (which is how Prusa sets their own printers)
- … / … Y the same
No decrease in print time or internal infill time — so acceleration wasn’t the bottleneck. Let’s look at jerk:
Printer Settings / Machine Limits — increase jerk
- Jerk limits / Maximum jerk X from 8 to 10 mm/s3
- … / … Y the same
Ah, print time has dropped from 4h19m to 4h7m with internal infill accounting for most of the gain, dropping from 1h57m to 1h47m — regardless of whether maximum acceleration is 500 or 1000 mm/s2 (so we are still limited by jerk, not [yet] acceleration).
Increasing maximum jerk to 12 mm/s3 drops the print time down to 3h58m, still with acceleration at either 500 or 1000 mm/s2 (in this particular print).
Filament Settings / Temperature — make the nozzle heater keep up
- Nozzle: / First layer + 10°C from whatever it was
- … / Other layers also + 10°C
Because the nozzle heater’s job is ostensibly (*) to heat the filament to a desired temperature … but also to take it through a phase change; and with radically increased flow rate, the filament dwells in the nozzle for far too short a time to reach thermal equilibrium; so raise the nozzle temperature to give that filament a chance.
* Do we really think that the filament reaches thermal equilibrium traveling through the nozzle at lower flow rates, or are all of the filament temperatures we use an approximation based on the combination of desired temperature and actual flow rate?
Recapping the gains:
| Ender 3-Pro, 0.40-mm nozzle, 0.20-mm layers | 11h13m |
| configure 0.60-mm nozzle and increase retraction | 11h27m |
| configure 0.40-mm layers | 8h3m |
| configure 0.7-mm extrusion widths | 5h11m |
| increase all print speeds | 4h19m |
| increase maximum jerk to 10 mm/s3 | 4h7m |
| increase maximum jerk to 12 mm/s3 | 3h58m |
| final print time | 4h22m |
Increasing the maximum jerk is the next speed improvement [that I know of] but diminishing returns, and I backed it out. Note, though, that the printer looked positively lazy printing at these speeds.
Note also that I’m having adhesion problems on this new Creality glass. They’re also occurring with a 0.4-mm nozzle and 0.2-mm layer height, but seem to be worse with this particular filament (that I happen to have a particularly large amount of); so I don’t think they’re related to the large nozzle and its speed gains.
Addendum — flow rate
Sorry, forgot to mention that the printer was overextruding and I had to dial down the flow rate. A lot. To 70%. 80% would have been better, but that’s still a lot.
AFAICT a modern slicer is supposed to calculate flows for you no matter what settings you throw at it, so I don’t know exactly how this happened. But be warned that this setup probably requires the addition of reduced extrusion multiplier in the slicer or flow rate in the printer.
Thanks for the recap. I recently got an Ender 6 for quicker prints on large objects. I never even though of adjusting the extrusion widths!
Where is the Flow Rate parameter you adjusted? I,m new to this and following your article along but cannot find it. If you can point me in the right direction it will be greatly appreciated. Just installed a .6mm nozzle due to all the articles i read about speeding prints any your article explains the changes and the reasons for modifications.
Thank you for this article.
Flow rate is in the (most) printer’s firmware, accessible through the printer’s control panel if it exists. It does the same thing as extrusion multiplier in the slicer, but on the printer and potentially dynamically if you fiddle with it during a print.