I just designed and printed a battery holder and I’m shamelessly reusing this image from the blog post about it to illustrate fillets in 3D design:
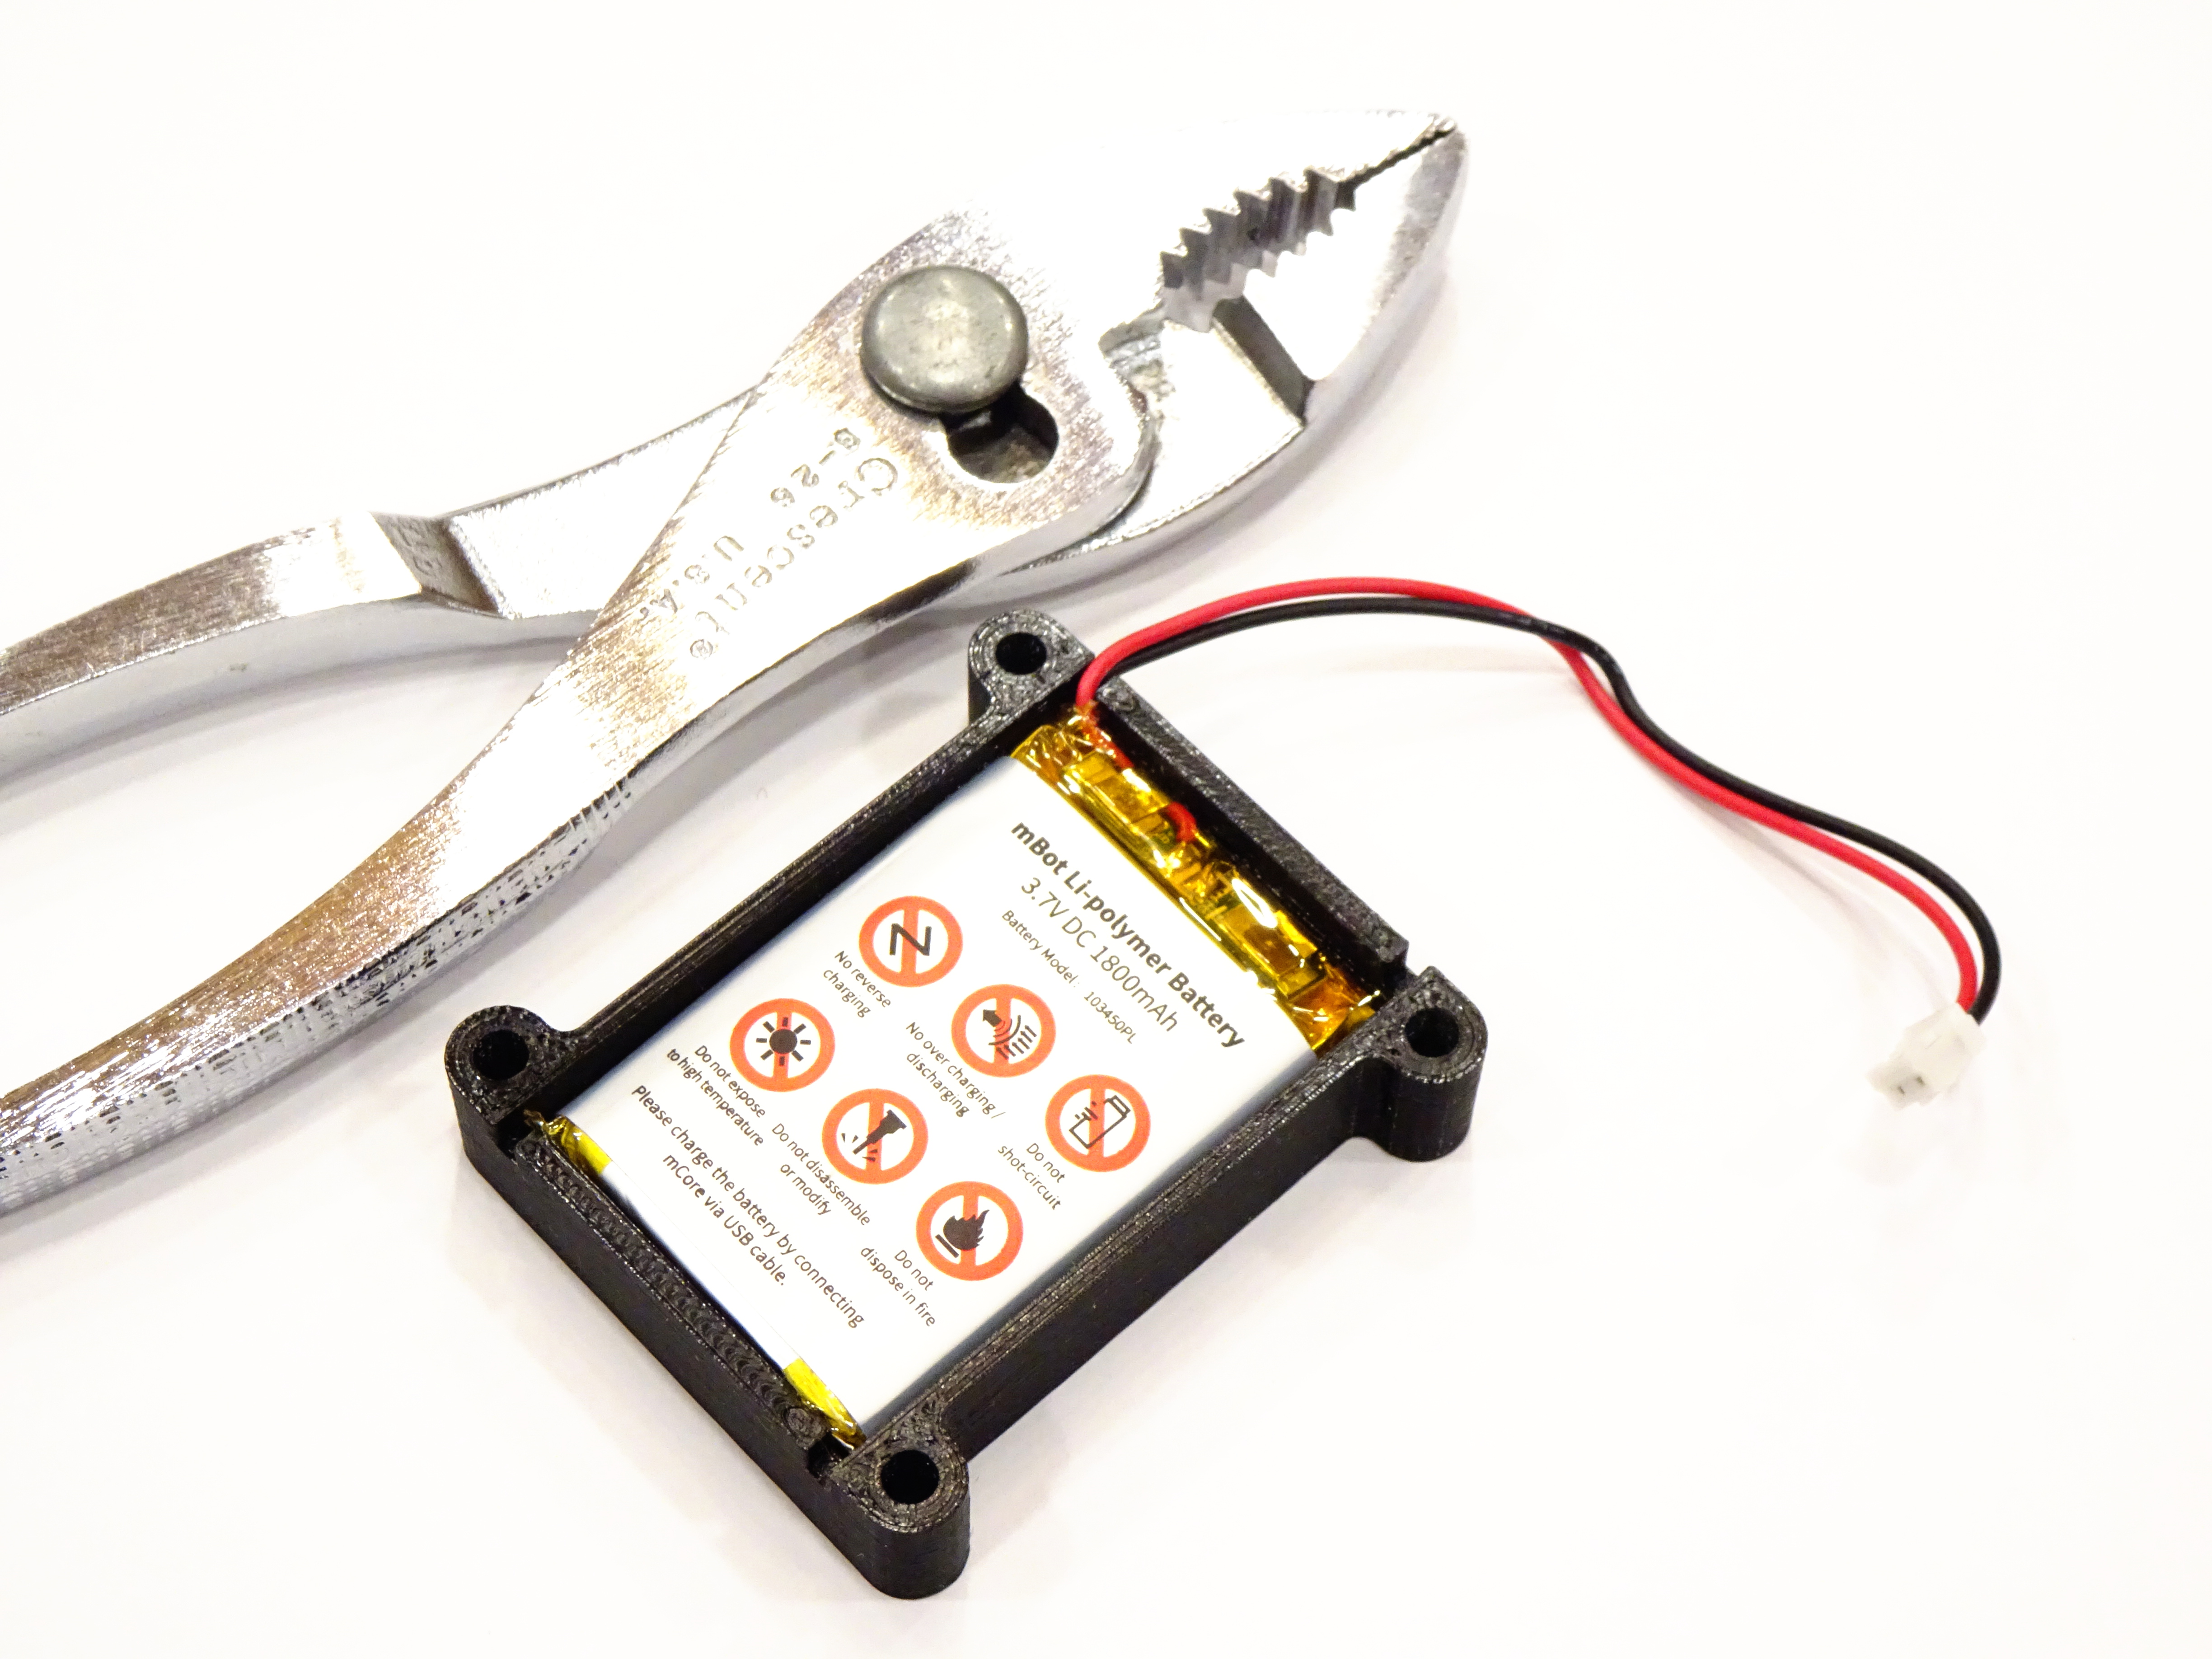
You might notice that the holder’s mounting bosses have nice roundy fillets that are standard in professional CAD packages and have been a wee bit difficult to achieve in OpenSCAD until fairly recently. The ability to design them now is one of two observations in the last week that have really driven my interest in OpenScad’s 2D subsystem. If you’re not interested in OpenSCAD, you’ll probably want to stop reading now. (Who am I kidding — I’m sure that the two of you still reading are interested in OpenSCAD.)
History of Fillets in OpenSCAD
Fillets are ubiquitous in professionally-designed and professionally-manufactured products. A fillet is a rounded-over edge, and the term applies to slightly different effects on exterior and interior edges. A fillet on an exterior edge removes some material to round it over, as though you used a file to smooth the edge, and makes it feel nice instead of scratchy-scrapey. A fillet on an interior edge, like at the bottom of a recess, adds material to round it over, as though you applied caulk to an inside corner and smoothed it out with your finger, and removes or reduces the tendency of material to crack and break at that sharp edge.
At the time of writing, OpenSCAD doesn’t appear to have a native fillet operation. Techniques used to accomplish fillets in OpenSCAD in the past include (in my order of awareness of availability of the features as the software developed):
- Construct filleted boxes (exterior fillets) out of 3D primitives, with spheres at the corners, cylinders for edges, and rectangular prisms for faces. This was … tedious.
- Construct filleted boxes (exterior fillets) by applying a
hull()operation around a sphere in each corner of the box. This gives good results with good performance but it still requires quite a bit more code than what one would rather be able to write as concisely asfillet(r = 3) cube(size = 10). - Fillet the edges of boxes (exterior fillets) by using
minkowski()to “puff out” the exterior of a box by the 3D footprint of a sphere (or other shape of choice). This tends to take quite a lot of computation and requires drafting each edge of the box smaller by the radius of the sphere used in the Minkowski operation. - Construct filleted recesses by using
difference()to carve a shape created with any of the above techniques out of a larger object. - Learn to use any of a variety of user-contributed modules and algorithms, with varying strengths and weaknesses in effect and performance.
offset() Operator in 2D
Lately I’ve been using the offset() operation in the 2D subsystem. I wish I could find where I first ran across using this for fillets, because I’d like to give credit for the idea that predates the nice diagram you’ll now find in the manual.
The idea is simple — to round over an exterior corner, offset the perimeter inward by the fillet radius (shrinking the part) and then back outward by the fillet radius (restoring it to original size). When it’s expanded back out, the radius won’t “reach” all the way to the original sharp corners, so they’re smoothed out.
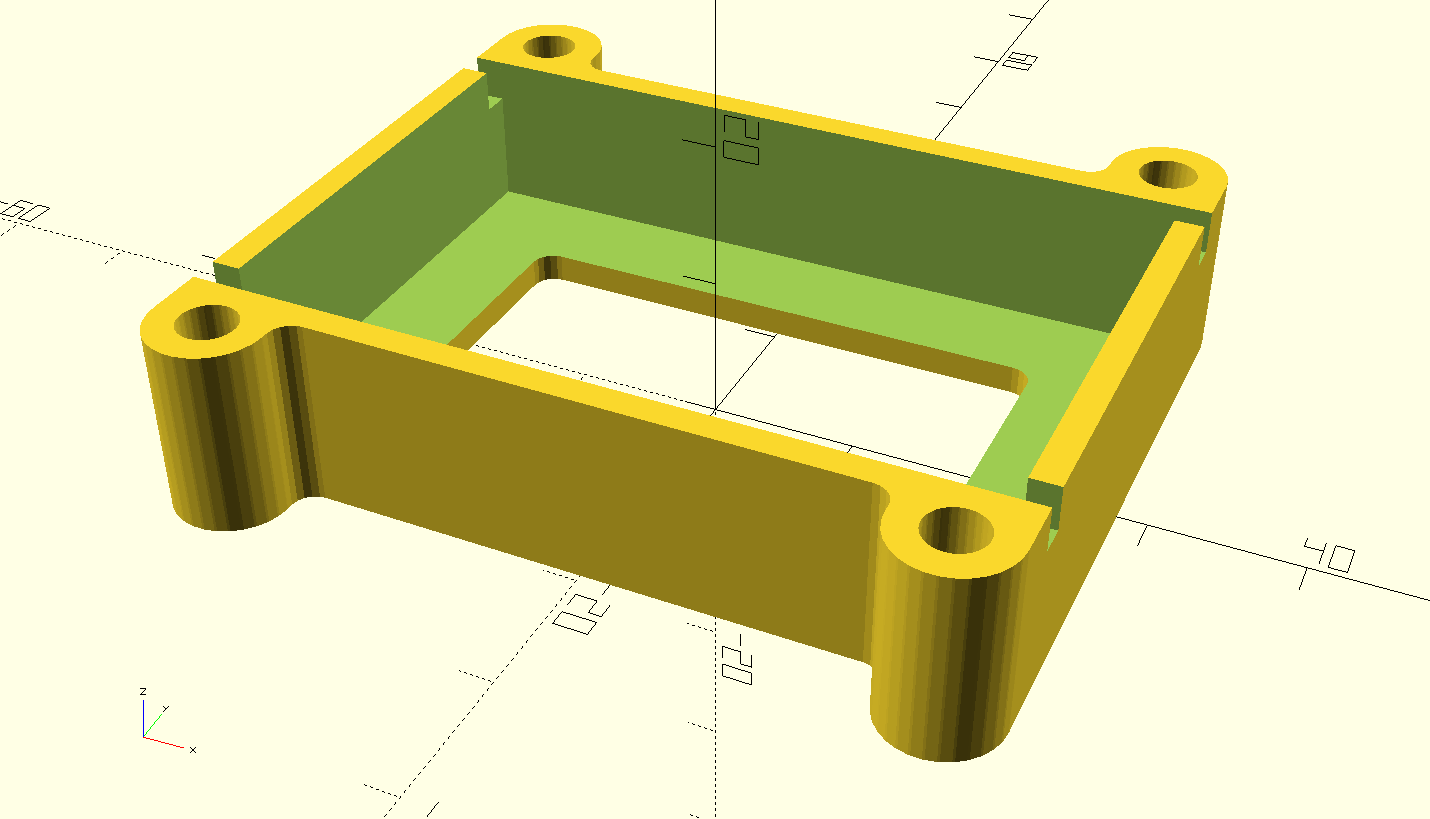
Rounding over interior edges uses the opposite order of operations from rounding over exterior ones, and is what I used in my battery holder:
offset(r = -fillet) offset(r = +fillet) {

   union() {

     posts_2d_with_hull();

     flange_2d();

   }

}
This creates the nice curves where the mounting bosses join the perimeter wall.
I’m very happy with this approach for the things I’ve been designing lately.
The astute reader will have noticed that the availability of offset() only in the 2D subsystem means we can only fillet in the X-Y plane. Which is true, but Thingiverse item 2443544, nominally a simple clip customizer, demonstrates intersecting the extrusion of a filleted shape in the X-Y plane with the extrusion of a filleted shape in the X-Z plane to yield a 3D shape filleted in multiple planes.
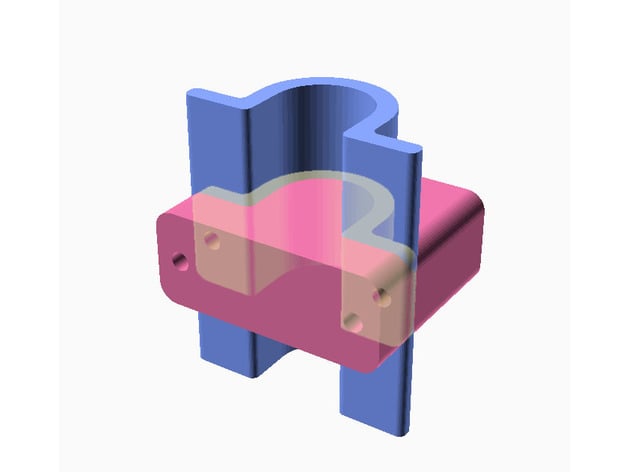
This image is copyright 2017 by Thingiverse user Torleif and is embedded here under the Creative Commons – Attribution license.
The blue extrusion is drawn (and filleted) in the X-Y plane; the pink in the X-Z (in fact, just drawn, then extruded, then rotated as though it had been extruded from the X-Z plane). Then the two are intersected to get the final, grey shape.
This doesn’t solve everything — for example, a professional CAD package allows filleting the curved edge of the grey clip, whereas this method can only fillet the edges of outlines. Nevertheless, this extends even further the possibilities already offered by using offset() to fillet and is a very useful technique.
So fillets have me pretty interested in designing my OpenSCAD objects by drawing and filleting them in 2D, then extruding into solids.