After drilling my board (and finally getting the right holes in the right order), I took it back home to etch. I wanted to print an etch-resist mask on my laser printer and iron it onto the board, and I wanted to do it using plain, glossy paper.
Pads and Holes
I had originally laid out the board using default sizes of 28 mil holes and 50 mil pads. Since I broke too many drill bits and ended up drilling with a 39 mil bit, that would have left me only 5.5 mils of copper surrounding each hole. That’s not nearly enough to solder to, much less enough to consistently align with an iron-on transfer. I went back into FreePCB and increased all the pad sizes to 70 mil, to give about 15 mil of copper around each hole.
Lesson: Keep a good supply of small drill bits.
Lesson: Don’t bump up to larger drill bits if you run out of small ones. Wait for more of the right size.
Lesson: Use larger pads than default when laying out a board for iron-on transfer.
Ironing in Pieces
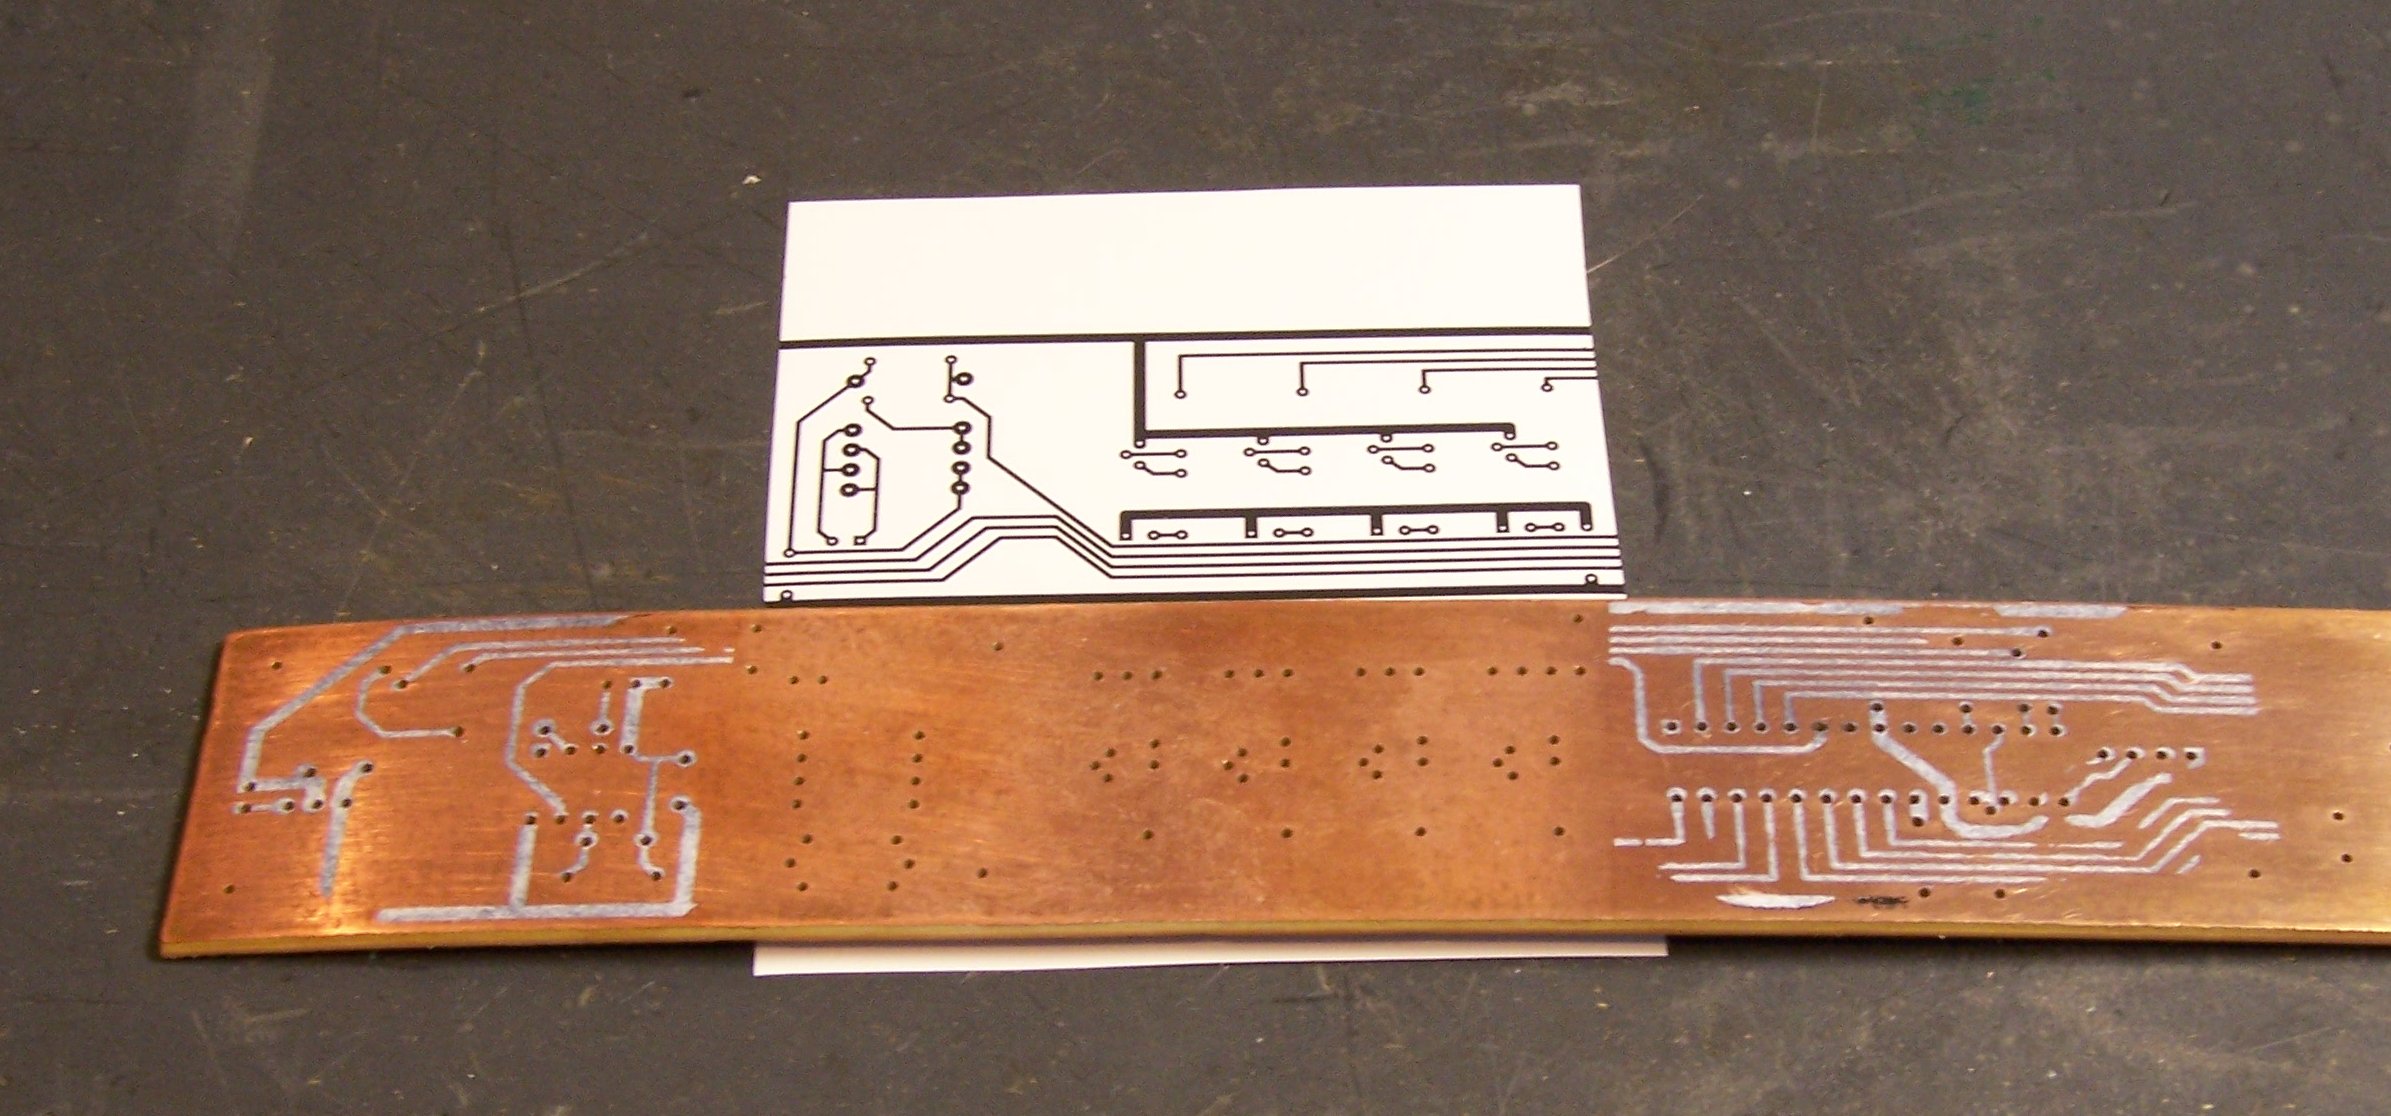
Once I had increased the pad size, I exported the bottom copper layer as an image file. (FreePCB doesn’t seem to have a working Print function.) Because the bottom layer is drawn from the perspective of the top of the board, one would normally mirror it to view how it would look from the bottom. But the iron-on process reverses the image, so I needed to print it unmirrored.
Lesson: Export/print the bottom copper layer unmirrored when making iron-on transfers.
Because the 16.8″ length of my PCB was greater than the size of paper my printer accepts, and because the printer doesn’t seem to print at exactly accurate size, I used the GIMP to chop the image into three pieces, to iron on in sections. I split the image in areas with no holes and all horizontal traces so it’d be easy to line up, and I left about 1/4″ of overlap at each joint so I’d double up toner on the board rather than taking any chance of having a gap.
I ironed the two outer sections onto the board using our household iron set at 350°F and no steam, then soaked the board for half an hour to soften the paper and carefully peeled it off.
A lot of the traces came off with the paper. It didn’t feel like I had peeled the traces off the PCB — it felt like they had never adhered in the first place. Reinforcing that suspicion was how much effort it took to clean the traces off the board and start over — the ones still on the board were well stuck. I ended up using acetone to clean them off the board.
I printed another copy and ironed it on, using the maximum temperature on the iron and the Giles Corey method (more weight). This time I soaked the board for over an hour. Once again, large sections of traces peeled away.
Press ‘n’ Peel Blue and Successful Ironing
I have a few sheets of Press ‘n’ Peel Blue that Joel bought and encouraged me to test drive, and I’d had reasonably good luck the previous time I tried them, so I got them out. To avoid wasting an entire sheet of Blue, I printed the design onto a carrier sheet of plain paper, then cut appropriate-sized sections of Blue and masking-taped them to the paper over the printed areas and printed again.
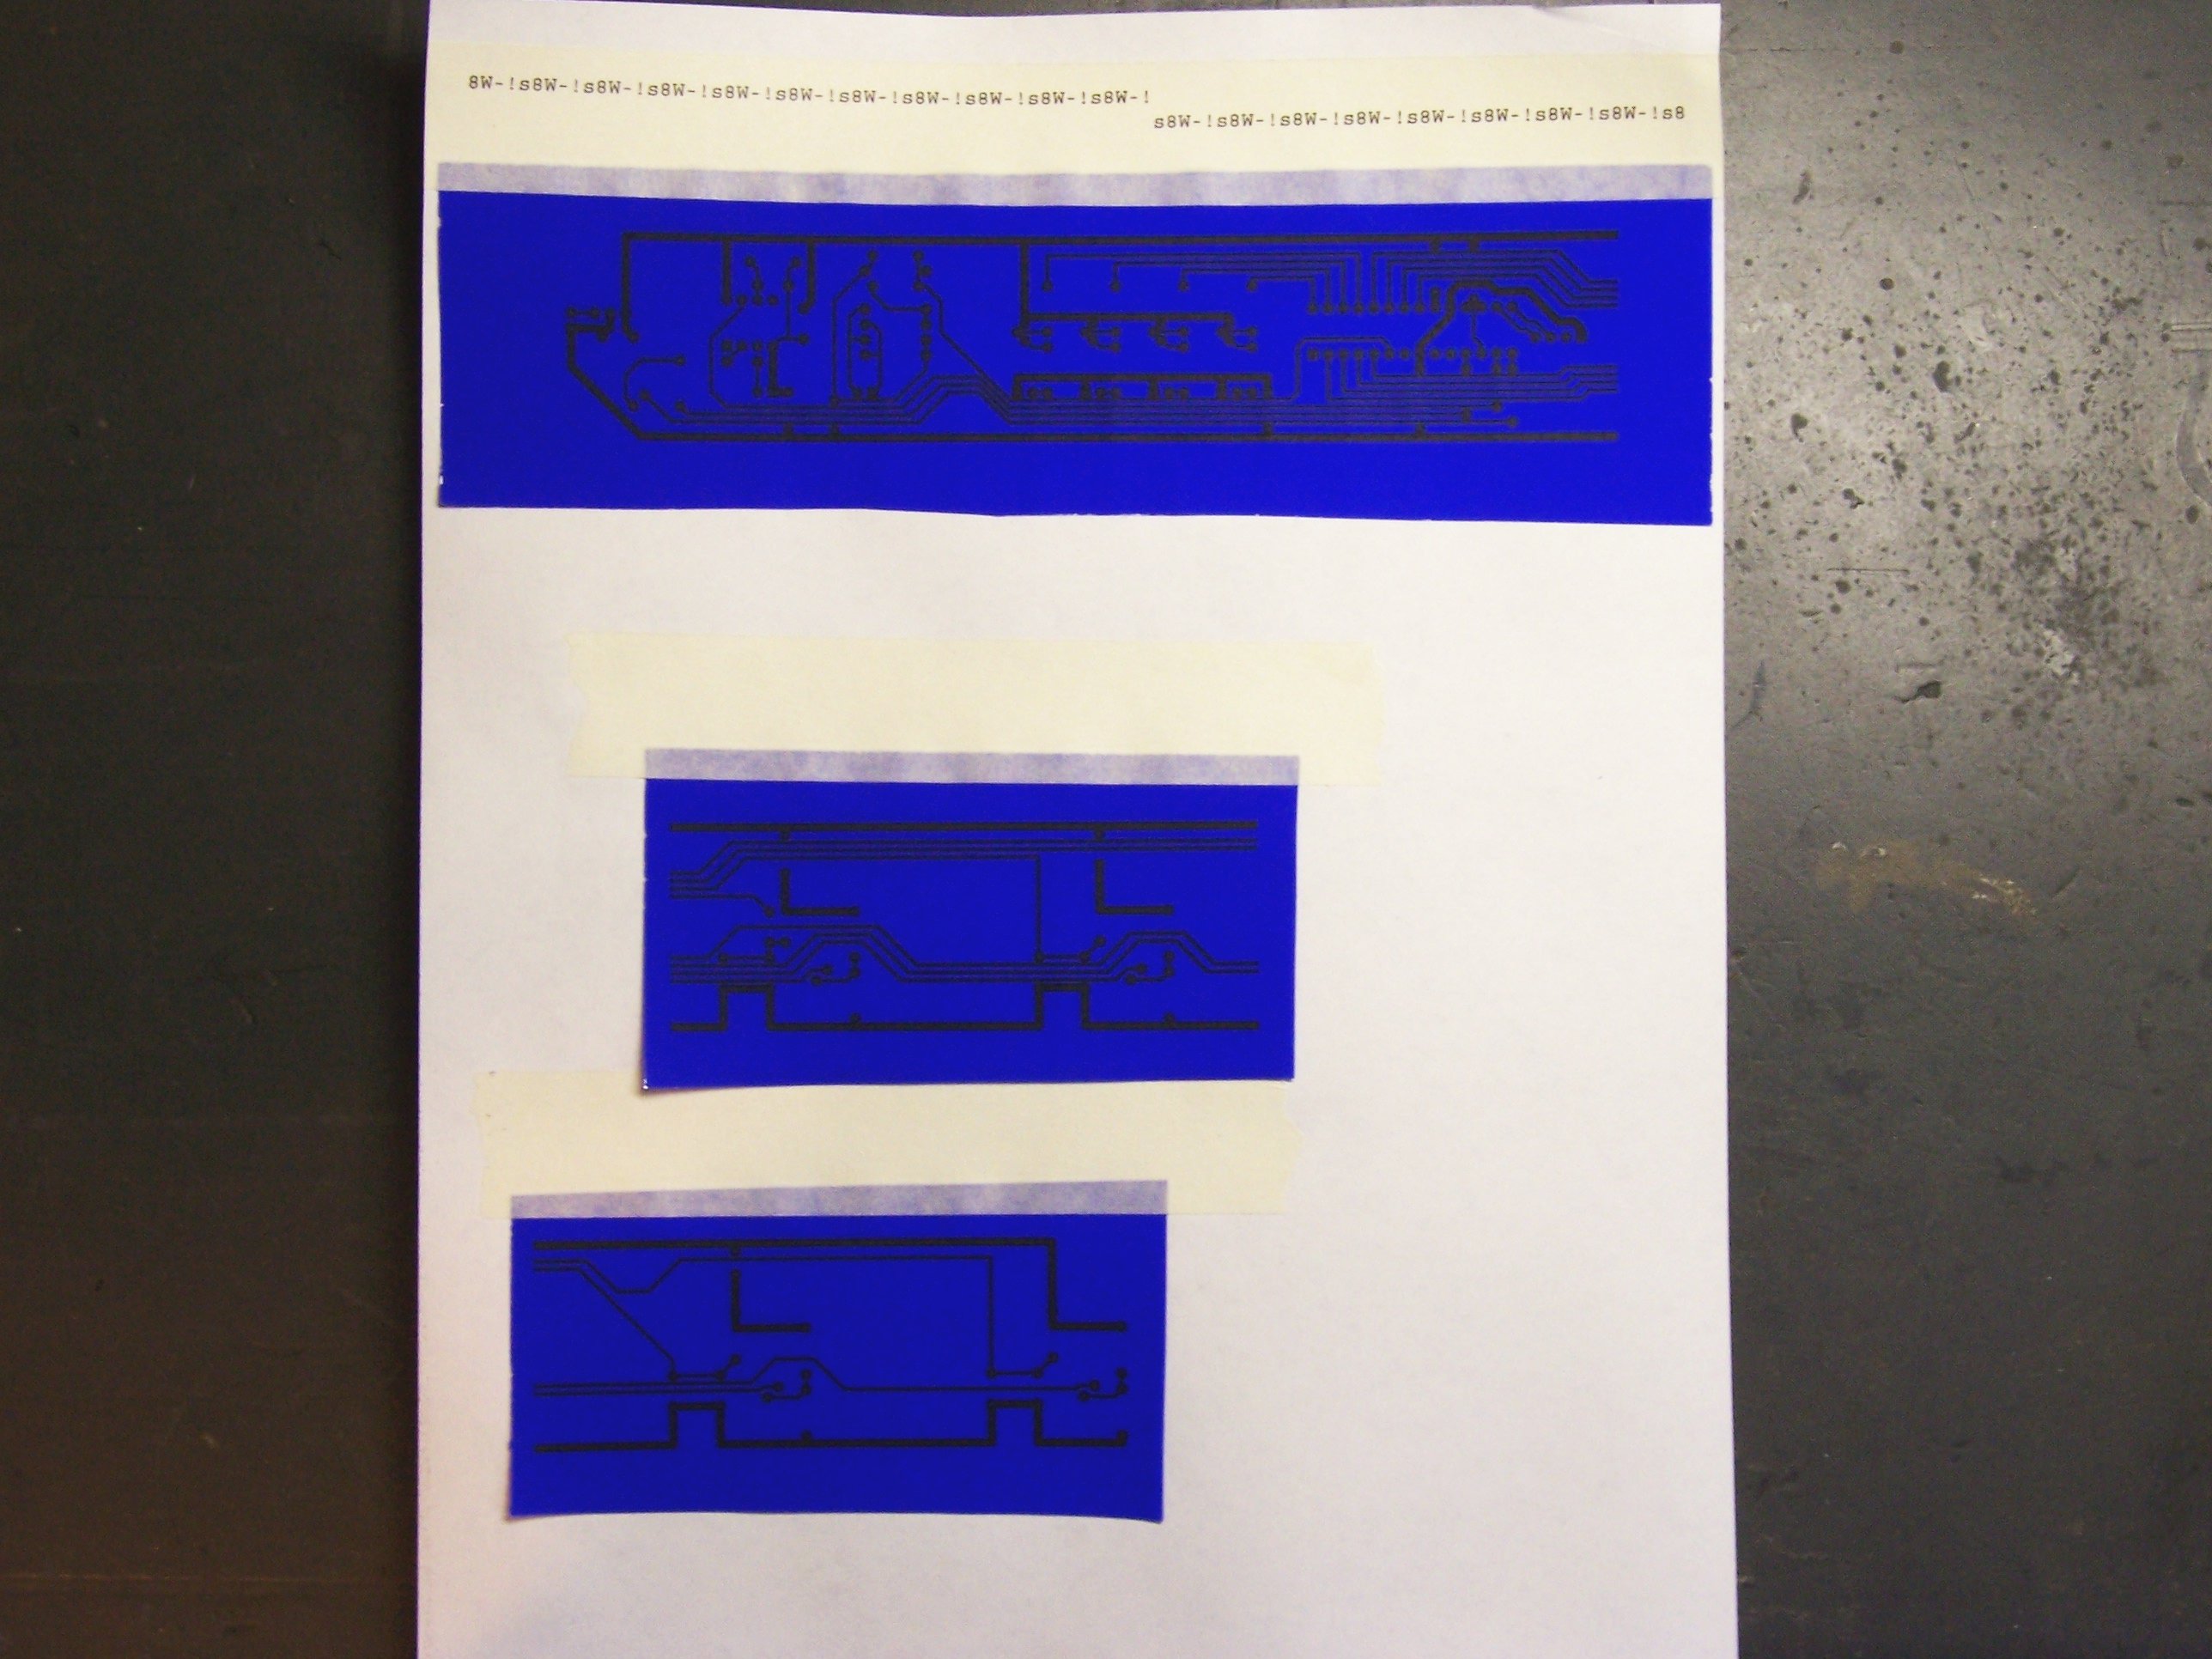
You can see across the top where my printer went nuts printing PostScript source code on the first try, but I got the design printed onto the Blue on the second try. I ironed a section of Blue onto the freshly-scrubbed PCB board, and . . .
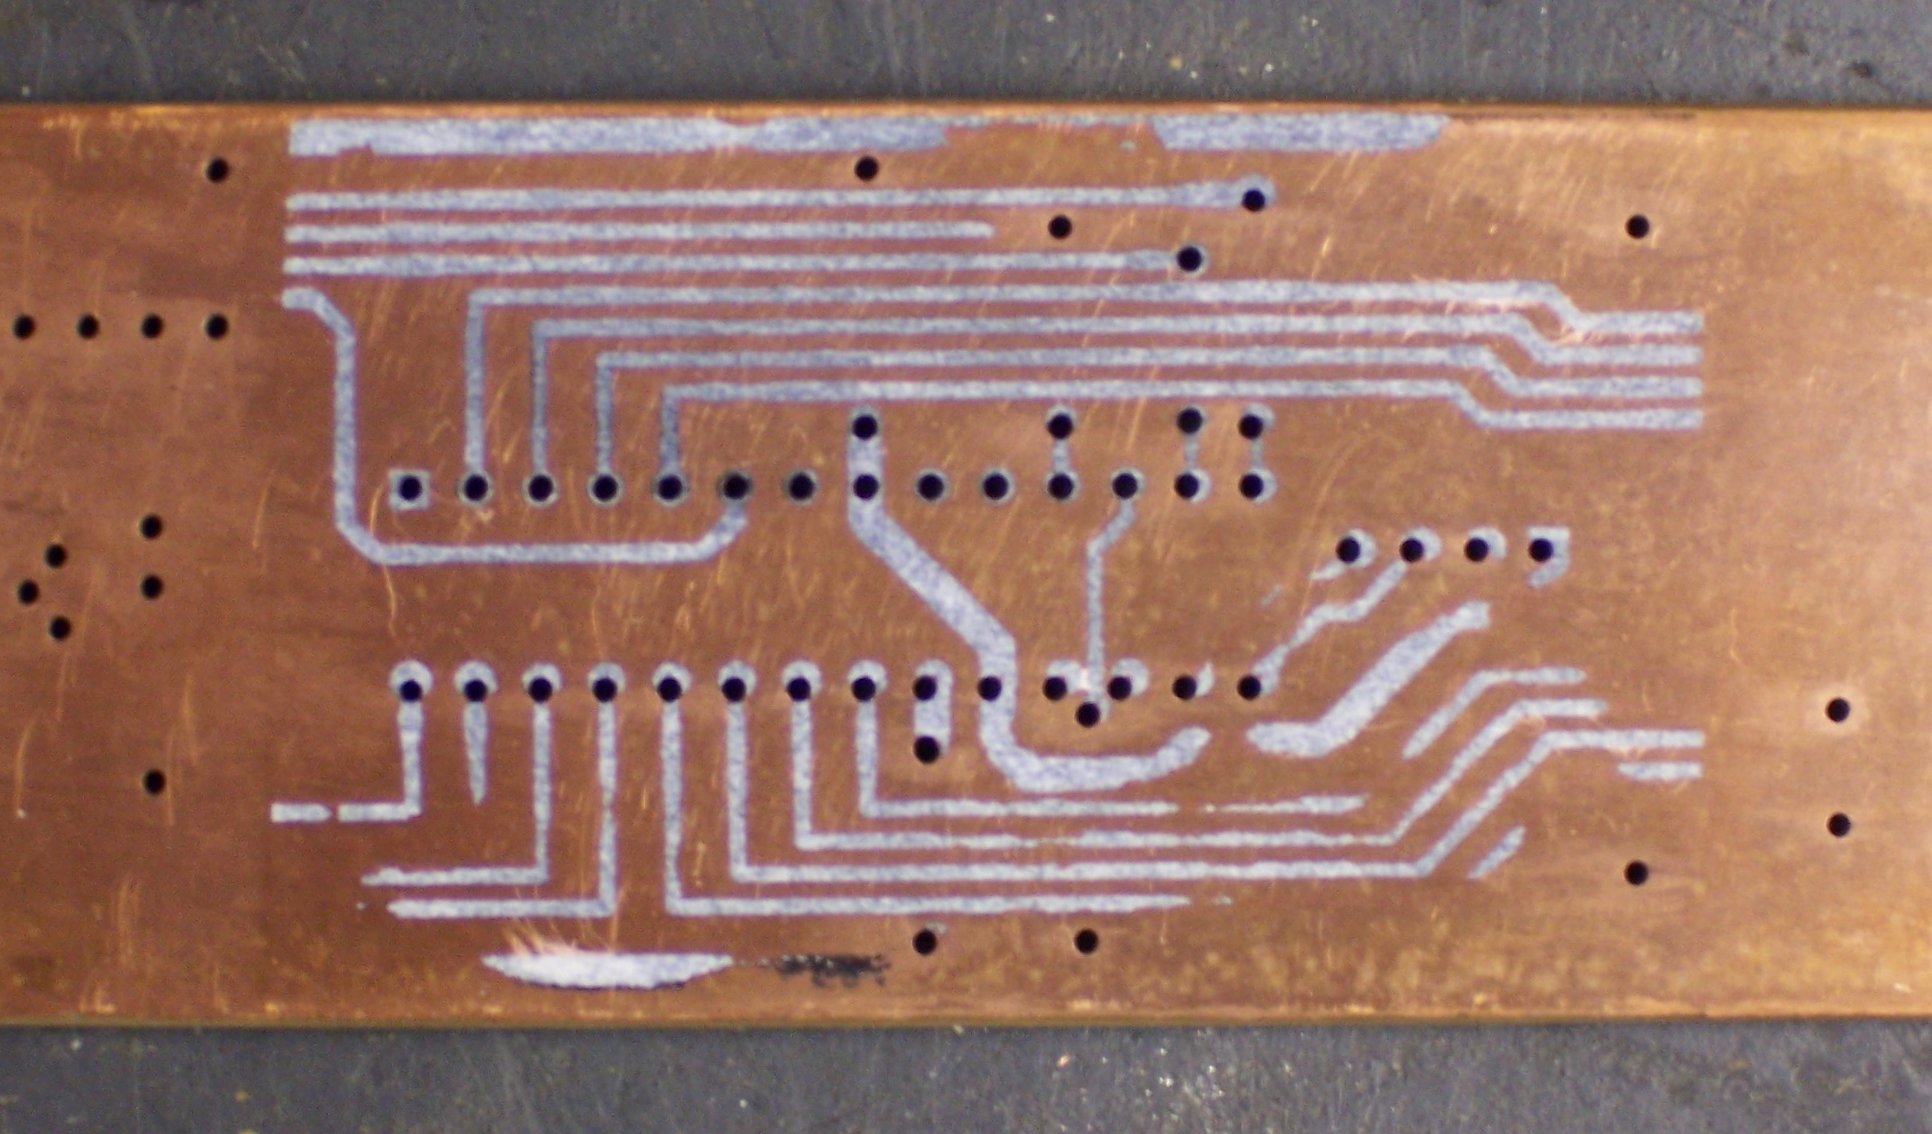
Excellent adhesion most places; terrible adhesion around the holes.
So what’s different about the holes? I think they’re dimpled from when the drill hits the copper and before it starts to bite. The surface is slightly lower, and there’s not enough pressure to adhere the Blue (or the plain-paper transfer) to the copper.
I needed something between the iron and the transfer to help distribute the pressure, even down into slight surface variations. I considered a sheet of felt, but I was afraid that it would be too soft to distribute the pressure well. I settled on a kitchen paper towel folded in half, and voila!

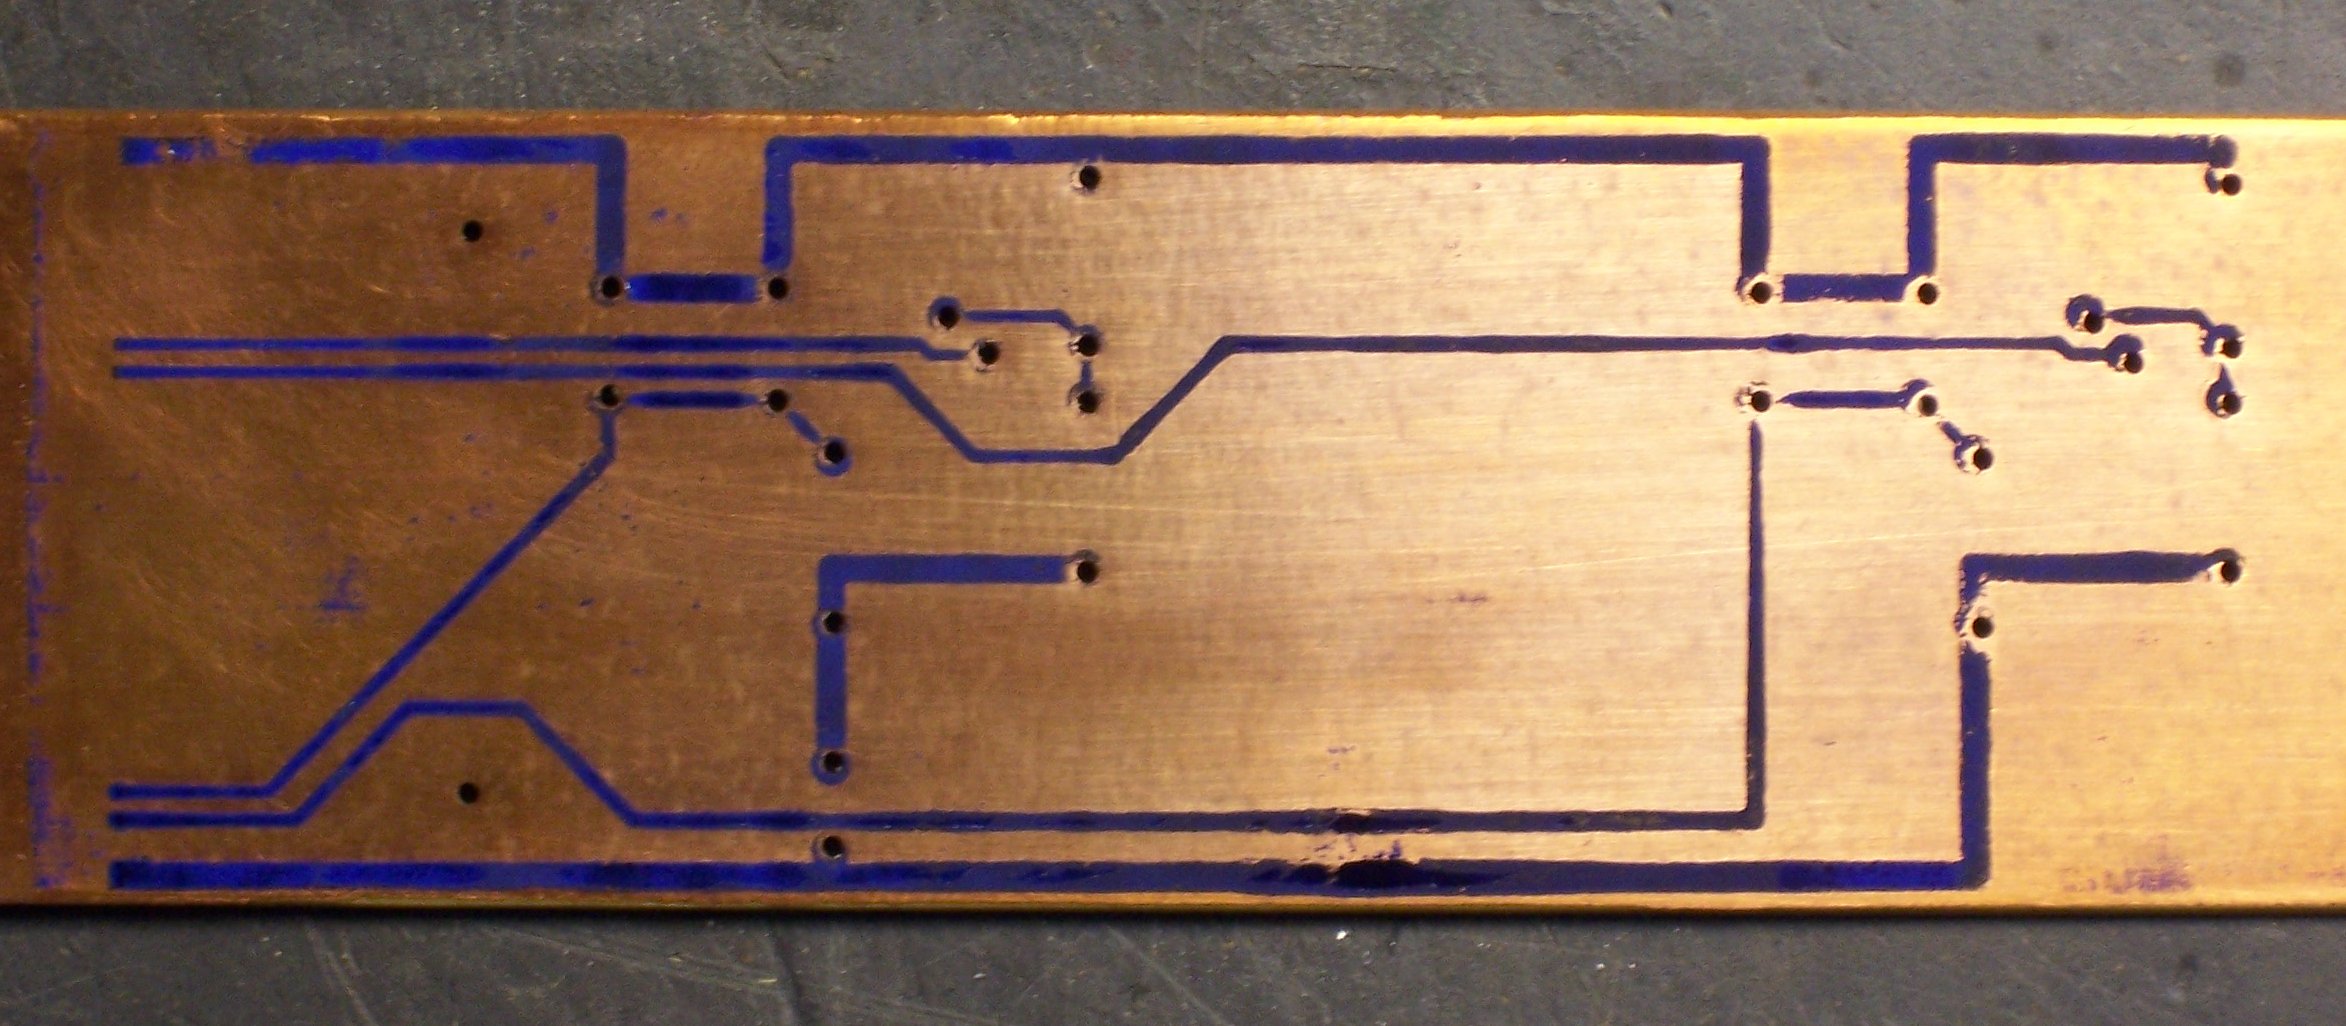
Good adhesion everywhere!
Lesson: Use a thin pad between the iron and the toner transfer to help distribute pressure through surface irregularities.
Etching
I had struggled for a couple of weeks to think of an appropriate etching tank for a board of this size. I needed a plastic or glass tank long enough for the board — but preferably also narrow, so as not to require a huge amount of etchant to cover the board. Finally I thought of a section of PVC pipe, capped and slit in half. $20 and a trip to the bandsaw later, I had an etching tank. (Two, actually.)
Lesson: It’s surprisingly difficult to fully seat a cap on 3″ PVC before the cement sets.
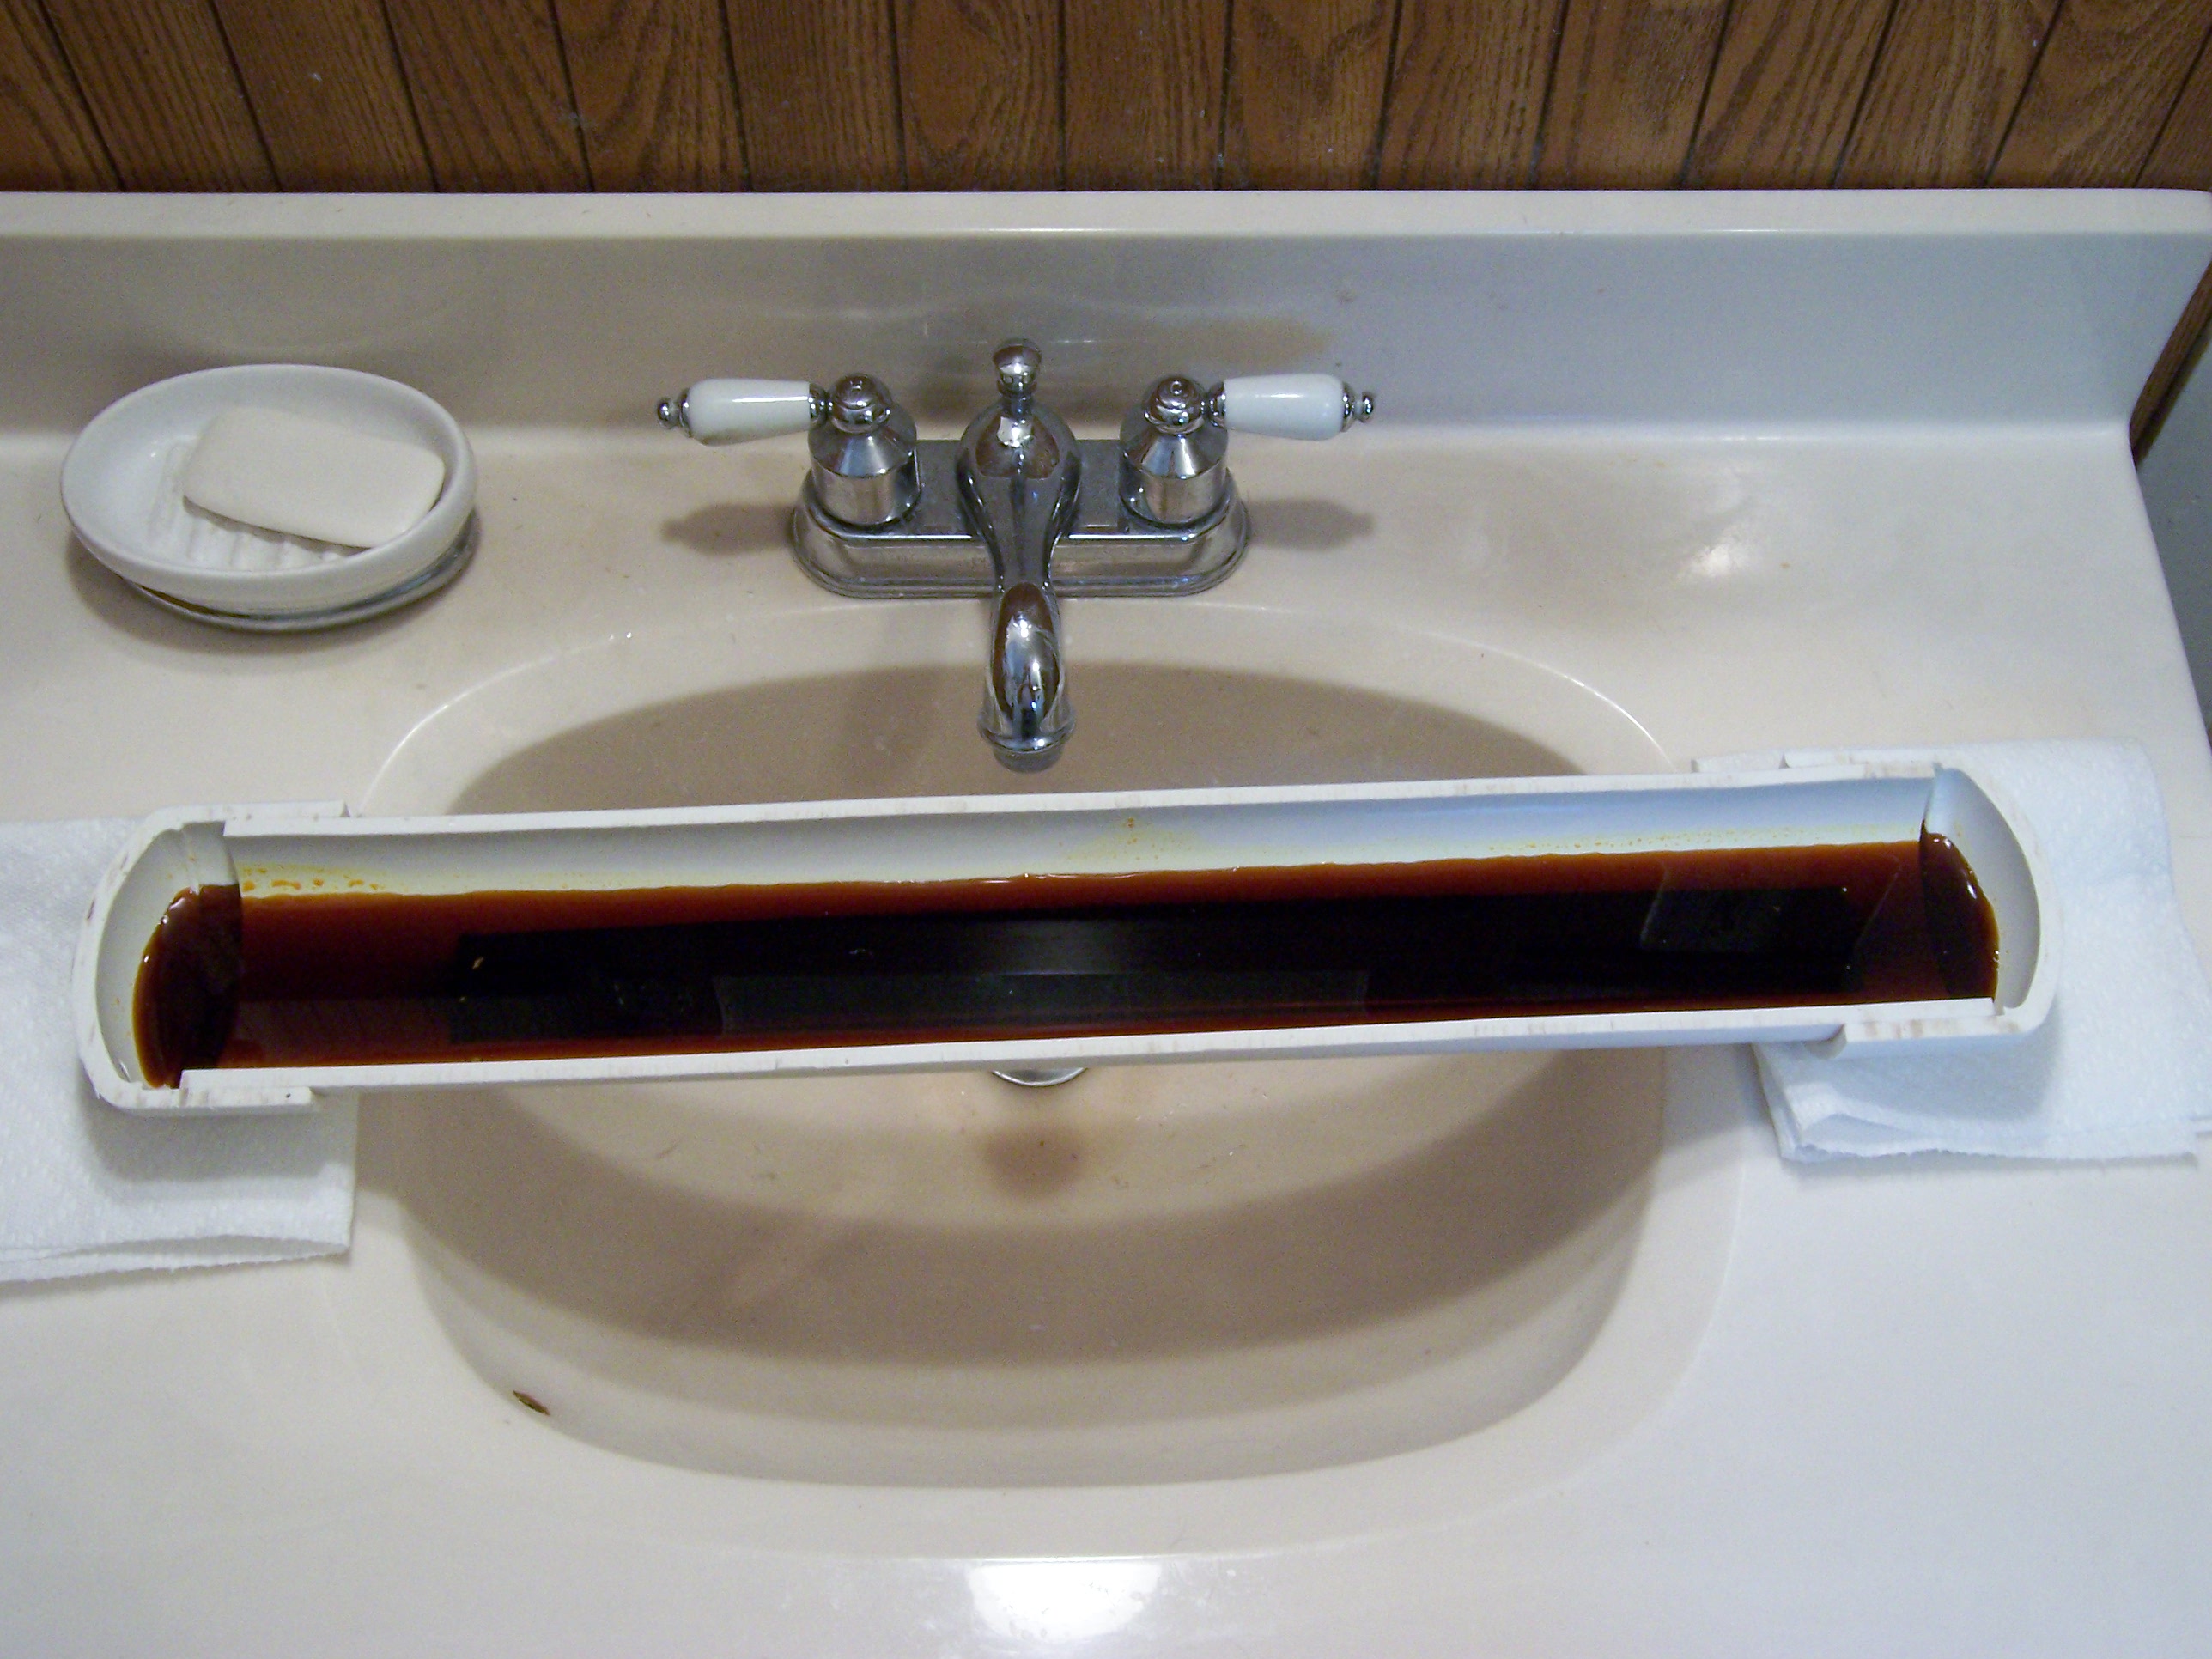
I set the tank over the bathroom sink with the ends on paper towels, in case my PVC glue joints weren’t watertight. Good thing, too, since they weren’t. By the end of the etch, one of the paper towels was stained, and I was particularly glad I’d used it.
Lesson: Use lots and lots of PVC cement to get watertight joints for odd configurations and applications.
At first, the etchant appeared to be removing quite a bit of copper, as evidenced by its increasing opacity. Half an hour in, though, not much was happening, even though I dropped by every few minutes to agitate the tank.
After a while, I got the bright idea to heat the etchant with my heat gun, and the etching really took off at that point, proceeding at a nearly visible pace.
Lesson: Heat the etchant to at least 100°F.
Once all the unwanted copper was etched away, I used a plastic fork to remove the board from the tank and rinsed it under lots of running water. Then I went to the kitchen sink to filter the used etchant into an empty plastic bottle for later reuse.
Lesson: Coffee filters pass about 1/4 cup of liquid etchant before becoming strangely impermeable.
Lesson: Impermeable coffee filters do not make particularly good funnels.
Lesson: Poor funnels tend to spill liquid over the edge into the white porcelain sink.
Lesson: Poor funnels tend to slip down inside the plastic bottle.
Lesson: The nooks at each end of capped PVC hold quite a bit of etchant that spills all over when you’re trying to pour it out.
Lesson: Start the etchant recovery process a couple of hours before your wife comes home so you have plenty of time to scrub the sink.
Results
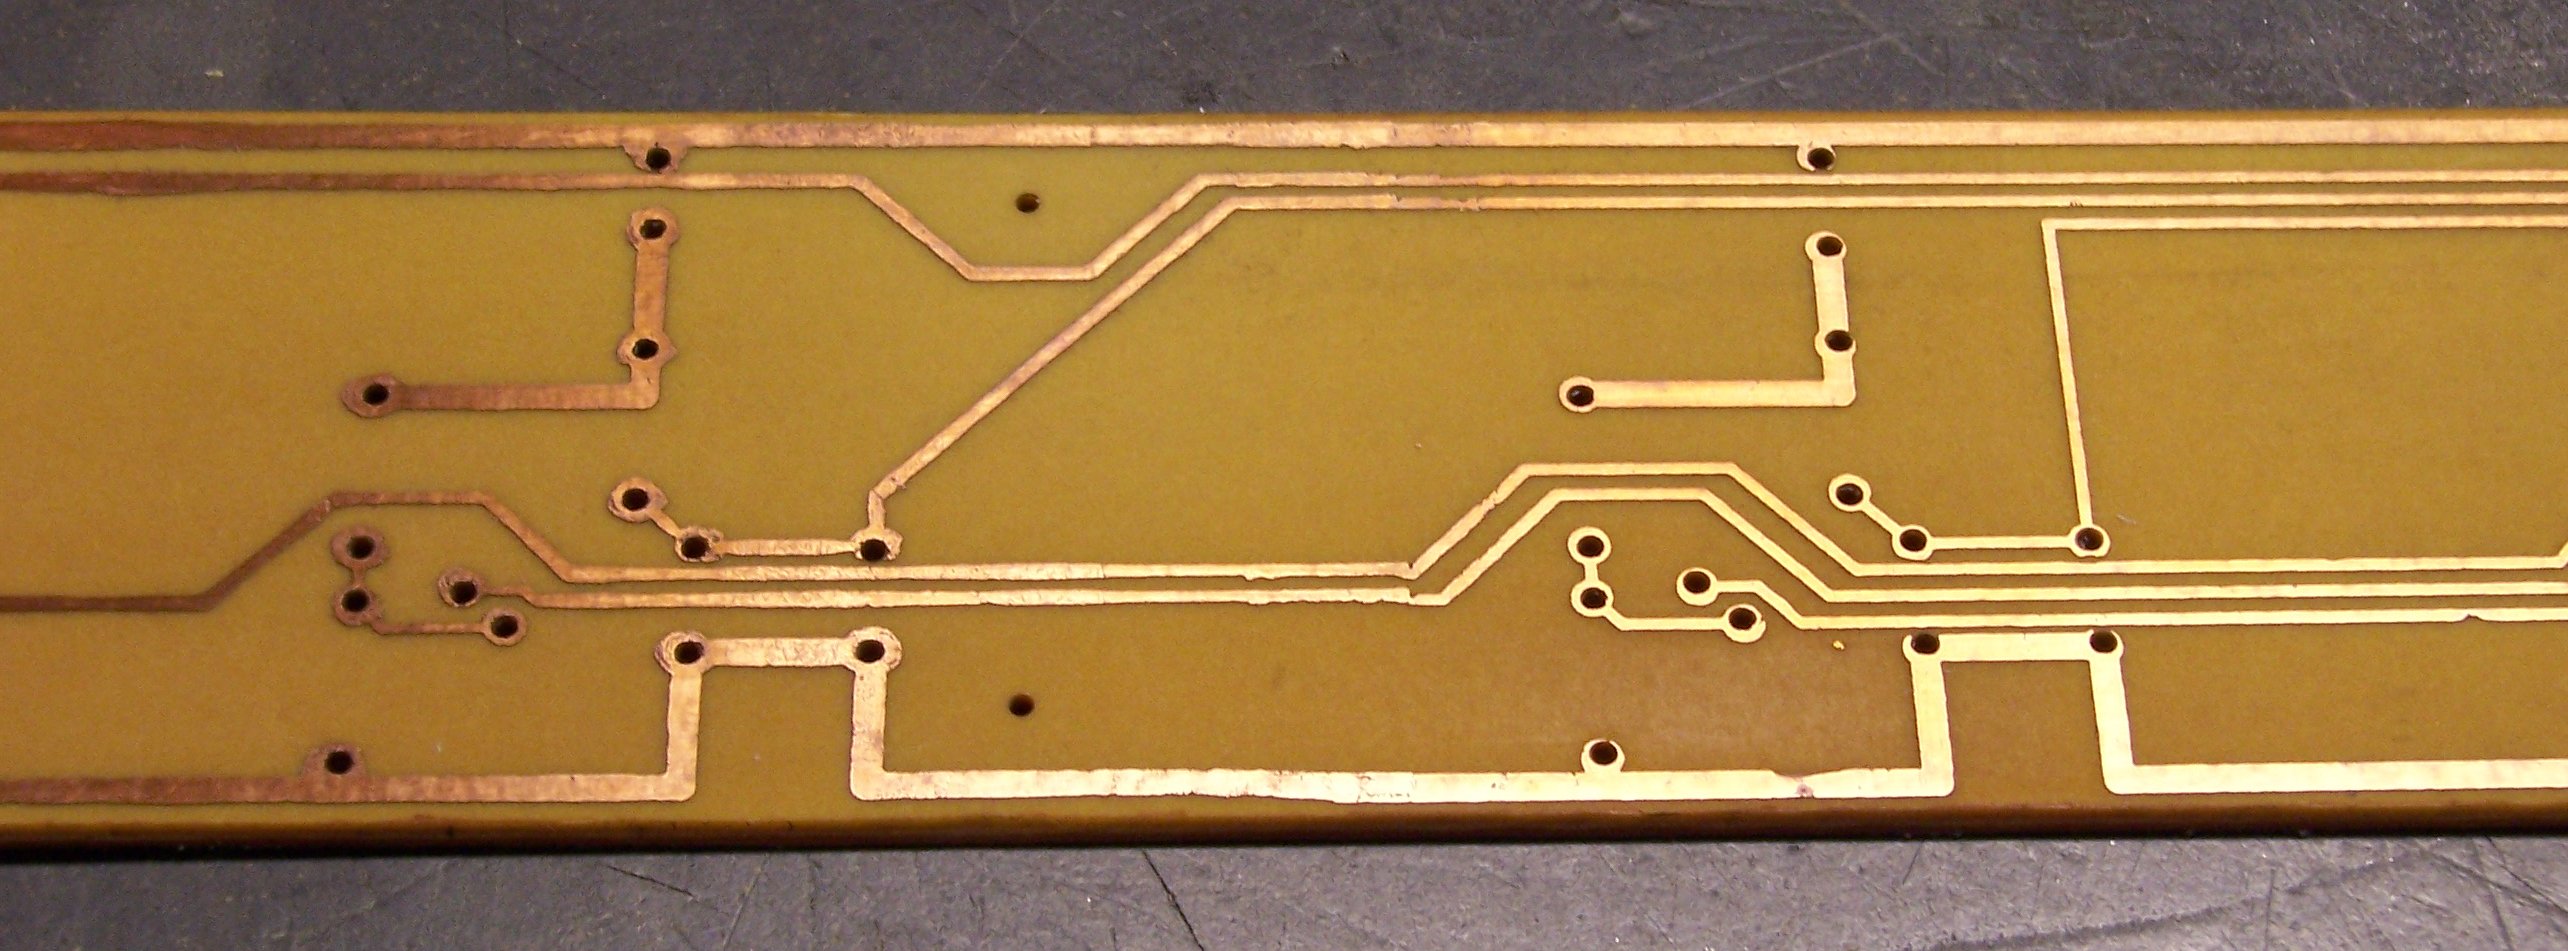
After cleaning the toner off the board with acetone, the traces really look nice. They have reasonably crisp edges and not too bad dropouts. This ended up being one of the nicer boards I’ve made by home etching.
Lesson: Try plain-paper toner transfer next time, using the paper towel pad trick.
Keith-
Loved the humor of your blog entry on PCB etching, especially “Lesson: Start the etchant recovery process a couple of hours before your wife comes home so you have plenty of time to scrub the sink”, got a real grin on that one.
My primary wife almost barred me from further tinkering over that damned ferro etchant!
You really need to try the Muriatic Acide/Hydrogen Peroxide/Water formula: it doesn’t stain and it’s more transparent (pretty blue after use) so you can see what you are doing. Mix it 1:1:1, good cheap and no brown fingers/sinks.
I just tried the Press-n-Peel blue the first time this weekend for some brass etching, and couldn’t get it to stick worth a darn. I’ve read other etchers say they get great results once they get it to actually stick. I’m going to switch back to using the generic photo-paper while I do more research. One guy said just let the PnP cool without quenching, use a burnishing tool, and that the instruction sheet was just wrong, which I kind of agree with at this point.
Anyway, loved your post & and sending it to my wife.
Cheers-
Was there any reason you drilled the PCB before etching?
Drilling after etching should prevent the adhesion problems caused by dimpling of the PCB. Also if your CAD program allows it, you can etch centring marks in the pads. With 1oz Cu this should be enough to centre the drill without needing to use a punch.
If pre-drilling was to align a top and bottom layer; just add some non electrically connected fiducial marks to both layers that you can drill after transferring one of the layers’ artwork to the copper.
Great blog btw, thoroughly enjoyed reading it.
Tom –
Right now I’m drilling most of my boards on my friend’s CNC drill machine. I get best alignment drilling the holes (perfectly positioned) first, then aligning the iron-on transfer to the holes by holding it up to the light. Transfer-then-holes requires careful alignment on the drill machine that’s not easy with the software he uses.
When I hand-drill holes, I definitely etch first.
But . . . as you can see, I got past the dimpling/ahesion problem just by putting a pad under the iron. Which seems to help give me more consistent results anyway. Of course, your mileage may vary.
Sounds like you’re getting lots of experience. Back in the days of Iron-on etch resist (only a couple years ago), we built an aluminum box and tied it to a vacuum cleaner. We added a baffle to the side with perforations at the top.
We laid the PCB, copper side up, Iron-On etch-resist on top of that, then a layer of plastic oven bag material on top. Suck it all down with the vacuum cleaner, adjust the baffle so we don’t burn up the shop vac, and hit the pcb with a heat gun. Cook until the white paper turns the color of a ready-to eat, golden brown marshmallow.
Shut off the vac and allow to cool SLOWLY over about 30 minutes. Make an inspection to ensure the toner is still stuck to the corners. If it’s good, soak it in still water until the paper floats away.
SLOWLY drain the water, and hit it with the heat gun again to final set the etch resist. Non-adhering etch resist will shrivel up.
Touch up with a black Sharpie under an inspection microscope.
Big Secret: Before doing the transfer, thoroughly clean with soap/water, and rinse to get all the soap off, and air dry. At the very last moment, go over the copper with fine grit sand paper to give the etch resist something to grab on to.
Never use alcohol before transferring since it leaves a fine white dust that acts like a mold release. It’s the same reason we need to get all the soap off.
As far as etching goes, my best work was in 1/2 full tupperware while shaking like crazy. Skip the trip to the Gym on the day you do that. 1 oz. Copper came off in about 2 minutes. As the etchant gets old, it’ll take longer.
Nowadays, we have this automated dremel thing that grinds the copper off.
thanks for a great idea! i never thought to use PVC pipe for this application. And i was an electrician for years.
thanks again!
Keith T
Keith T, as an electrician or plumber, you’d be too “close” to PVC pipe and just see it as conduit. To an outsider, it’s a cool cylinder good for holding things.
I liked your lessons as well. I tried a lot of things to etch and finally have a kit in a plastic shoe box. Not much is original, but it has been tweaked for performance. If you are a member of the Automobile Club you receive the Westways magazine. It is about the best ‘free’ source of transfer paper I have found. I use a GBC laminator and a green scrub pad on the boards. My etchant is FeCl and my ‘tank’ is a Zip-Lock freezer bag. This is immersed in hot water held in my plastic shoebox. Agitation is a trim paint roller applied to the outside of the plastic bag. Etching is very fast and controllable, the water bath both heats and helps dilute any leaks. The primary advantage is that this technique uses very little etchant and as long as your board has not poked any holes in the bag, very clean. I clean the toner off using a worn green scrub with laquer thinner, much better than acetone. Disposable rubber gloves keep the etchant at bay.
The effectiveness of the bag, hot water, and roller cant be overstated, it takes about fifteen minutes to do a 3×5 board with about two ounces of etch. No great board prep either, a scrub until matte with plain water and a dry with a paper towel. Wrap board in printed page and secure with scotch tape. Run through the laminator a few times, cool and soak in warm/cold water for a few minutes. This sort of paper does not leave much of itself on the transfer. I have tried the Staples cheap photo paper and it just does not work as well as the magazine paper.
Hi – I’m looking at laminators, and the “maximum document thickness” they accept seems to be about 0.6mm. Can you still get a 1.5mm(?) pcb through easily, or are you using a special “thick document” laminator?!
Thanks,
Graham, I’m not using a laminator; I’m using a clothes iron.
Thanks for the writeup.
I use the muriatic acid / peroxide etchant. Works like a charm, especially if you keep it warm.
The ultimate thing to use instead of an iron…Steal the fuser assembly out of a dead laser printer. My HP 5Si croaked a few years ago and I didn’t have the heart to pitch it. It now lives on serving as the press-n-peel to pcb fuser. I hook it up to the mains , keep an eye on the temp sensor with an ohmmeter, turning the lamp off when it gets warm enough and crank the boards through by hand 5 or 6 times. Then quench them under cold water. Works like a charm!
Mark K – I love your idea of hot water bath and plastic bag. Really makes life easy. I use disposable plastic food containers that Chinese food comes in.
Re the use of Magazine Paper, please excuse my ignorance but wouldn’t the printed material in the magazine page transfer as well. I have had reasonable (not great) success with cheap dollar shop photo paper. I too use the HCl:H2O2 combination – less hassle from the homefront than the FeCl3.
Ivor, the printed material in the magazine is ink that’s dried on the page. The toner transfers because it’s plastic melted to the page and re-melts when you iron it. I haven’t used magazine paper myself but I hear it works!