With several filaments I’ve used lately, I get a rough surface on the top of my prints that makes me think the printer is depositing too much filament. I took a bit of time today to learn how to calibrate that; and one of the same tutorials gave a nice reference for nozzle temperature calibration, so I did that, too.
These notes are as much for me as for thee, as I expect to run through this again with more filaments in the future.
Nozzle Temperature Calibration
I went with the temperature calibration first, as I figured there was at least a chance that the extrusion temperature would impact the amount of die swell as the filament exits the nozzle.
Although I’m using PrusaSlicer (because it’s preset with Prusa’s recommendations for my MK3S), I followed the instructions on Slic3r’s very well-written calibration page. I downloaded heattower.stl from Thingiverse, followed the instructions to temporarily override the amount of infill and number of solid layers, and printed it. During the print, I reduced the temperature 5°C every 5 mm, or thereabouts, by hitting the control panel button, selecting Tune / Nozzle:, and dialing it down.
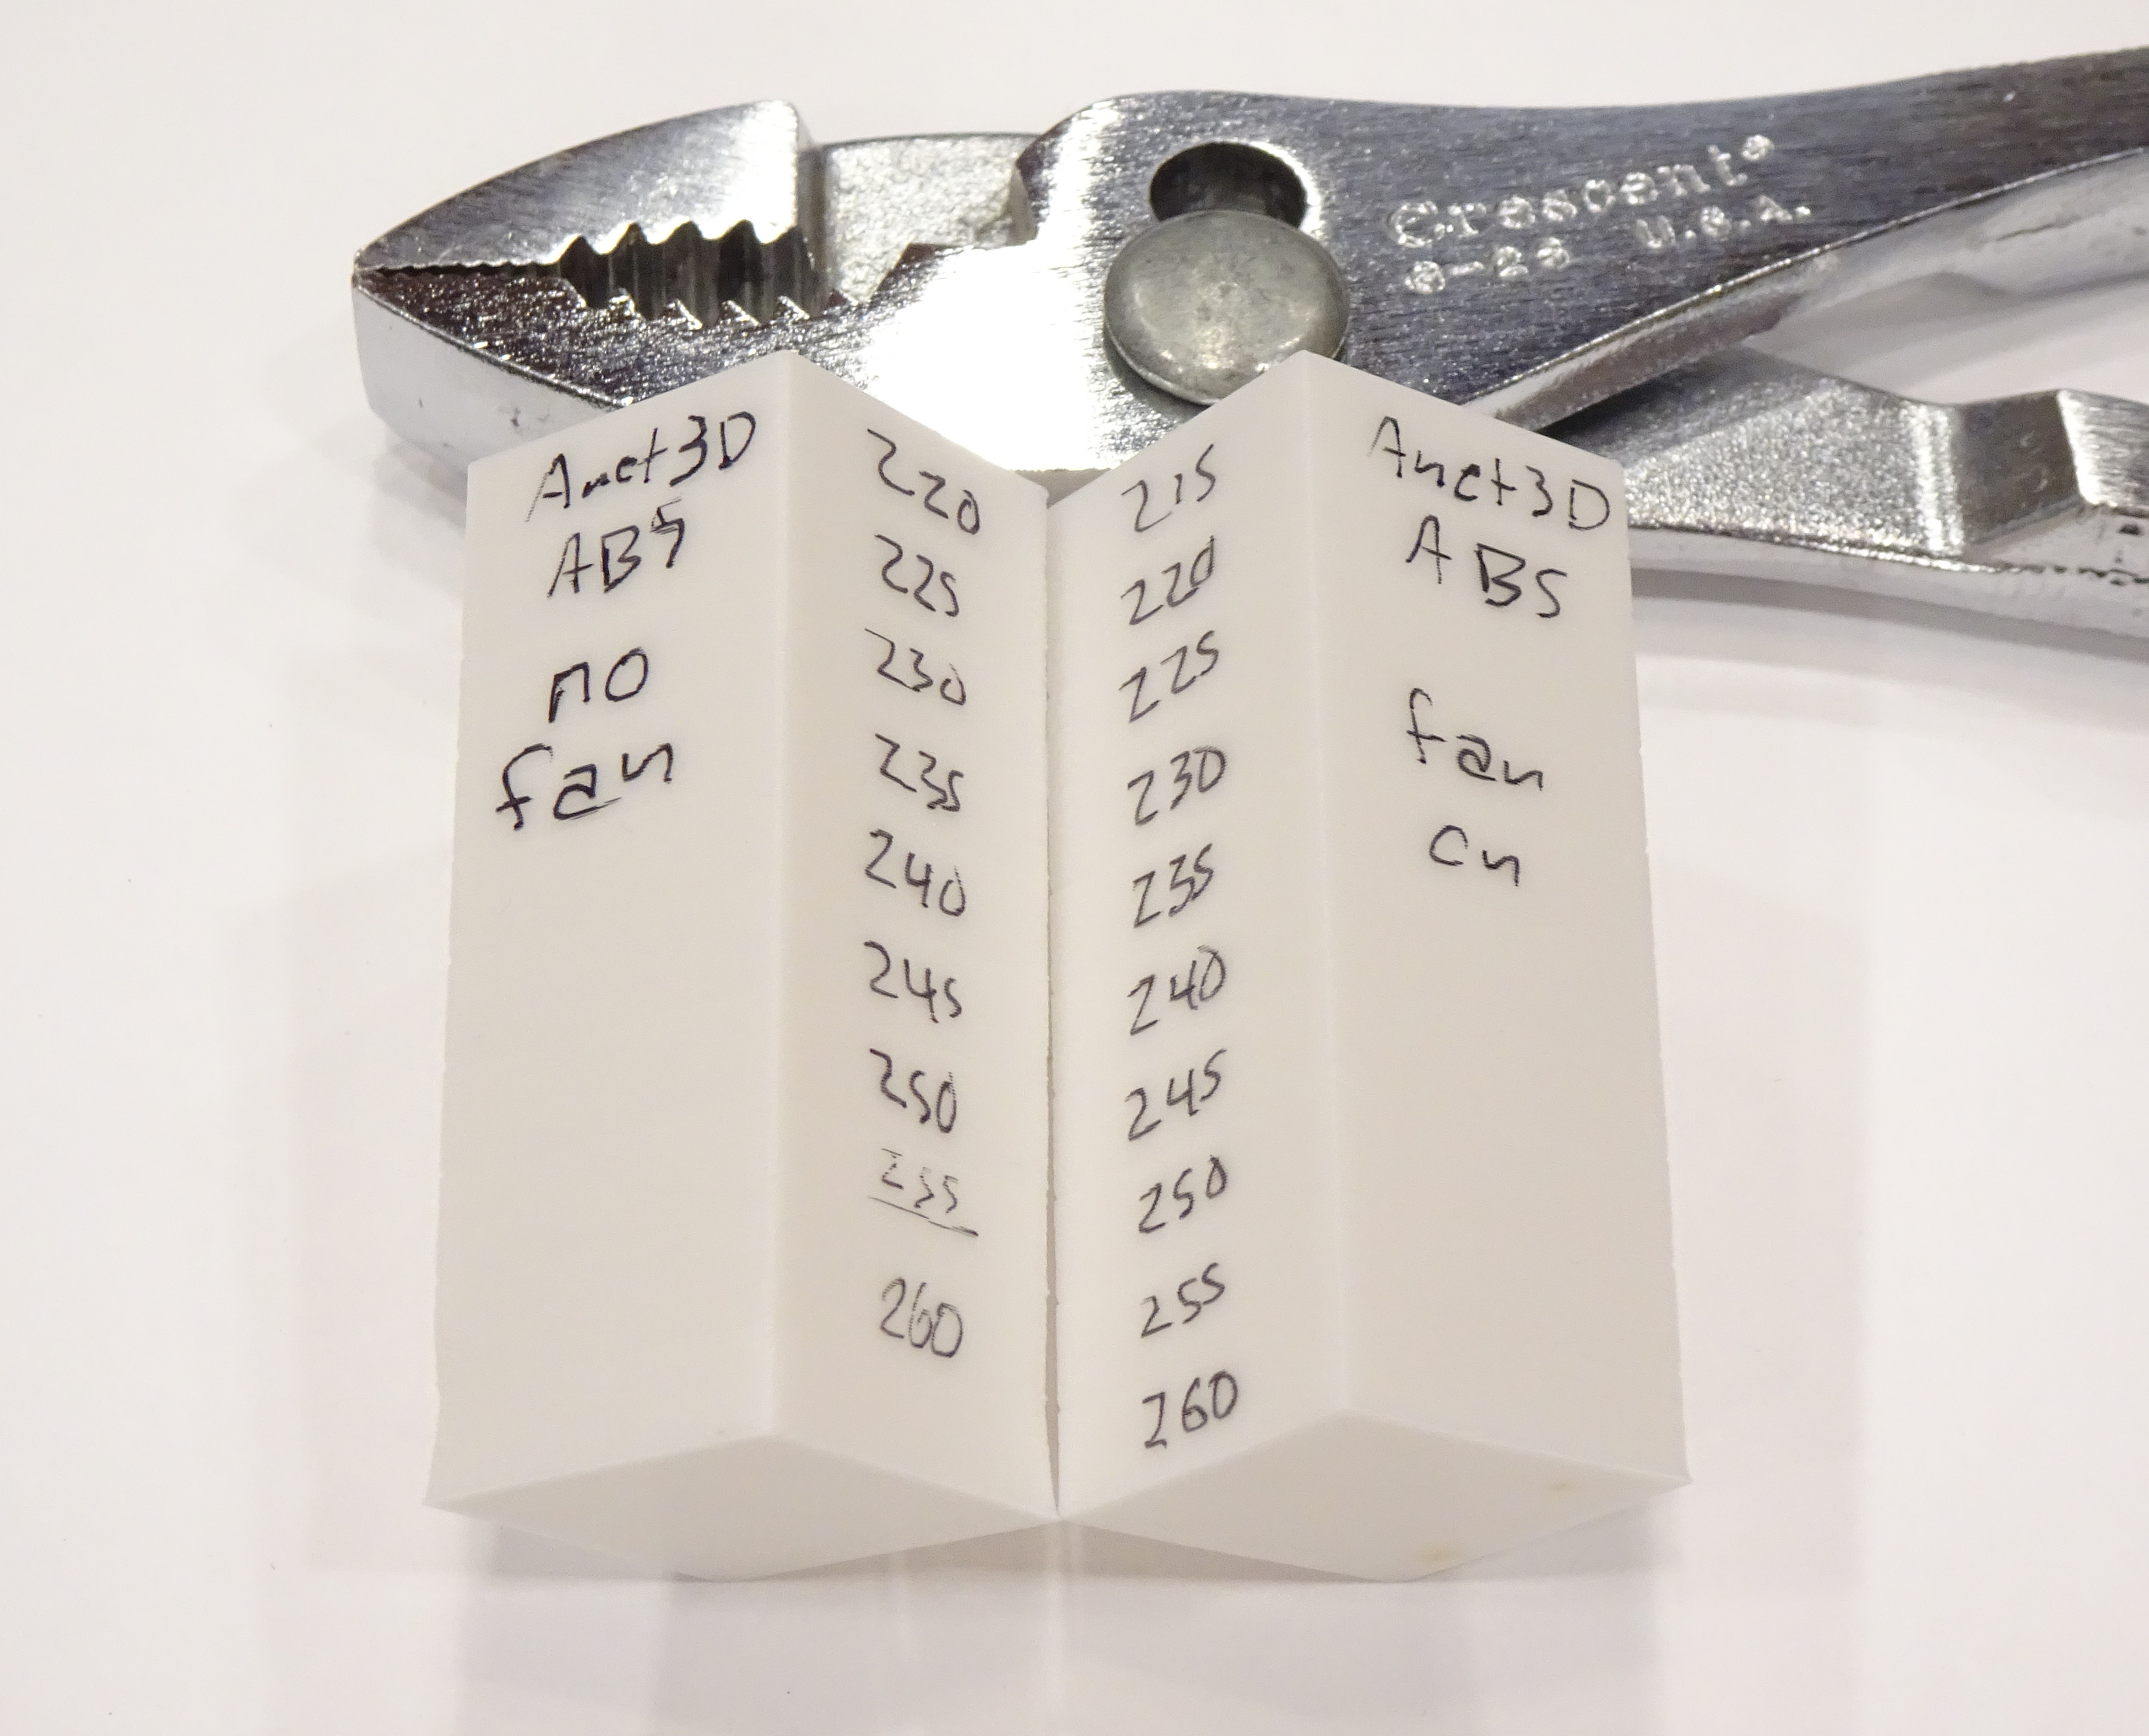
The first pass produced the lovely squishy-based tower on the left, suggesting that top end of the filament’s recommended range of 230-260°C is too hot and the best printing happens in the lower region of the range. But most of the way through, I realized the part cooling fan wasn’t running because Prusa + ABS; so I changed the PrusaSlicer settings to turn on the fan and repeated the print, giving the clean and tidy tower on the right. With the fan on, I got perfect results throughout the recommended temperature range and a bit of delamination just below the recommended range.
I picked 250°C as a nice value likely to give good laminations and entered it into PrusaSlicers Filament Settings First Layer and Other Layers extruder temperature settings.
I later turned off the part cooling fan because without an enclosure (that I haven’t built yet), it does increase the propensity of the part lifting off the build platform. But I stand by my temperature as a good choice for strong layer adhesion, with or without the fan.
Extrusion Multiplier
I had to read up on the extrusion multiplier. It’s the name given to the amount to scale up or down the rate of filament flow to get the nominal extrusion size. In addition to the Slic3r’s calibration page, it’s also covered in a Prusa article.
Before setting the extrusion multiplier, I checked my filament diameter, as that will impact the rate of flow. I don’t have a two-decimal-point metric caliper, so I measured my filament as 0.070″ diameter at several points along a meter of length. Converting to metric, I got 1.778 mm, which I plugged into PrusaSlicer’s Filament Settings / Diameter value.
Thinking about whether this was a real difference in diameter or the limits of my caliper’s precision, I note that 0.001″ = 0.0254 mm and conclude that this filament really does seem to be measurably thicker than nominal, by about +1.6%. Not a lot, but that would account for some extra filament and crowding in my prints.
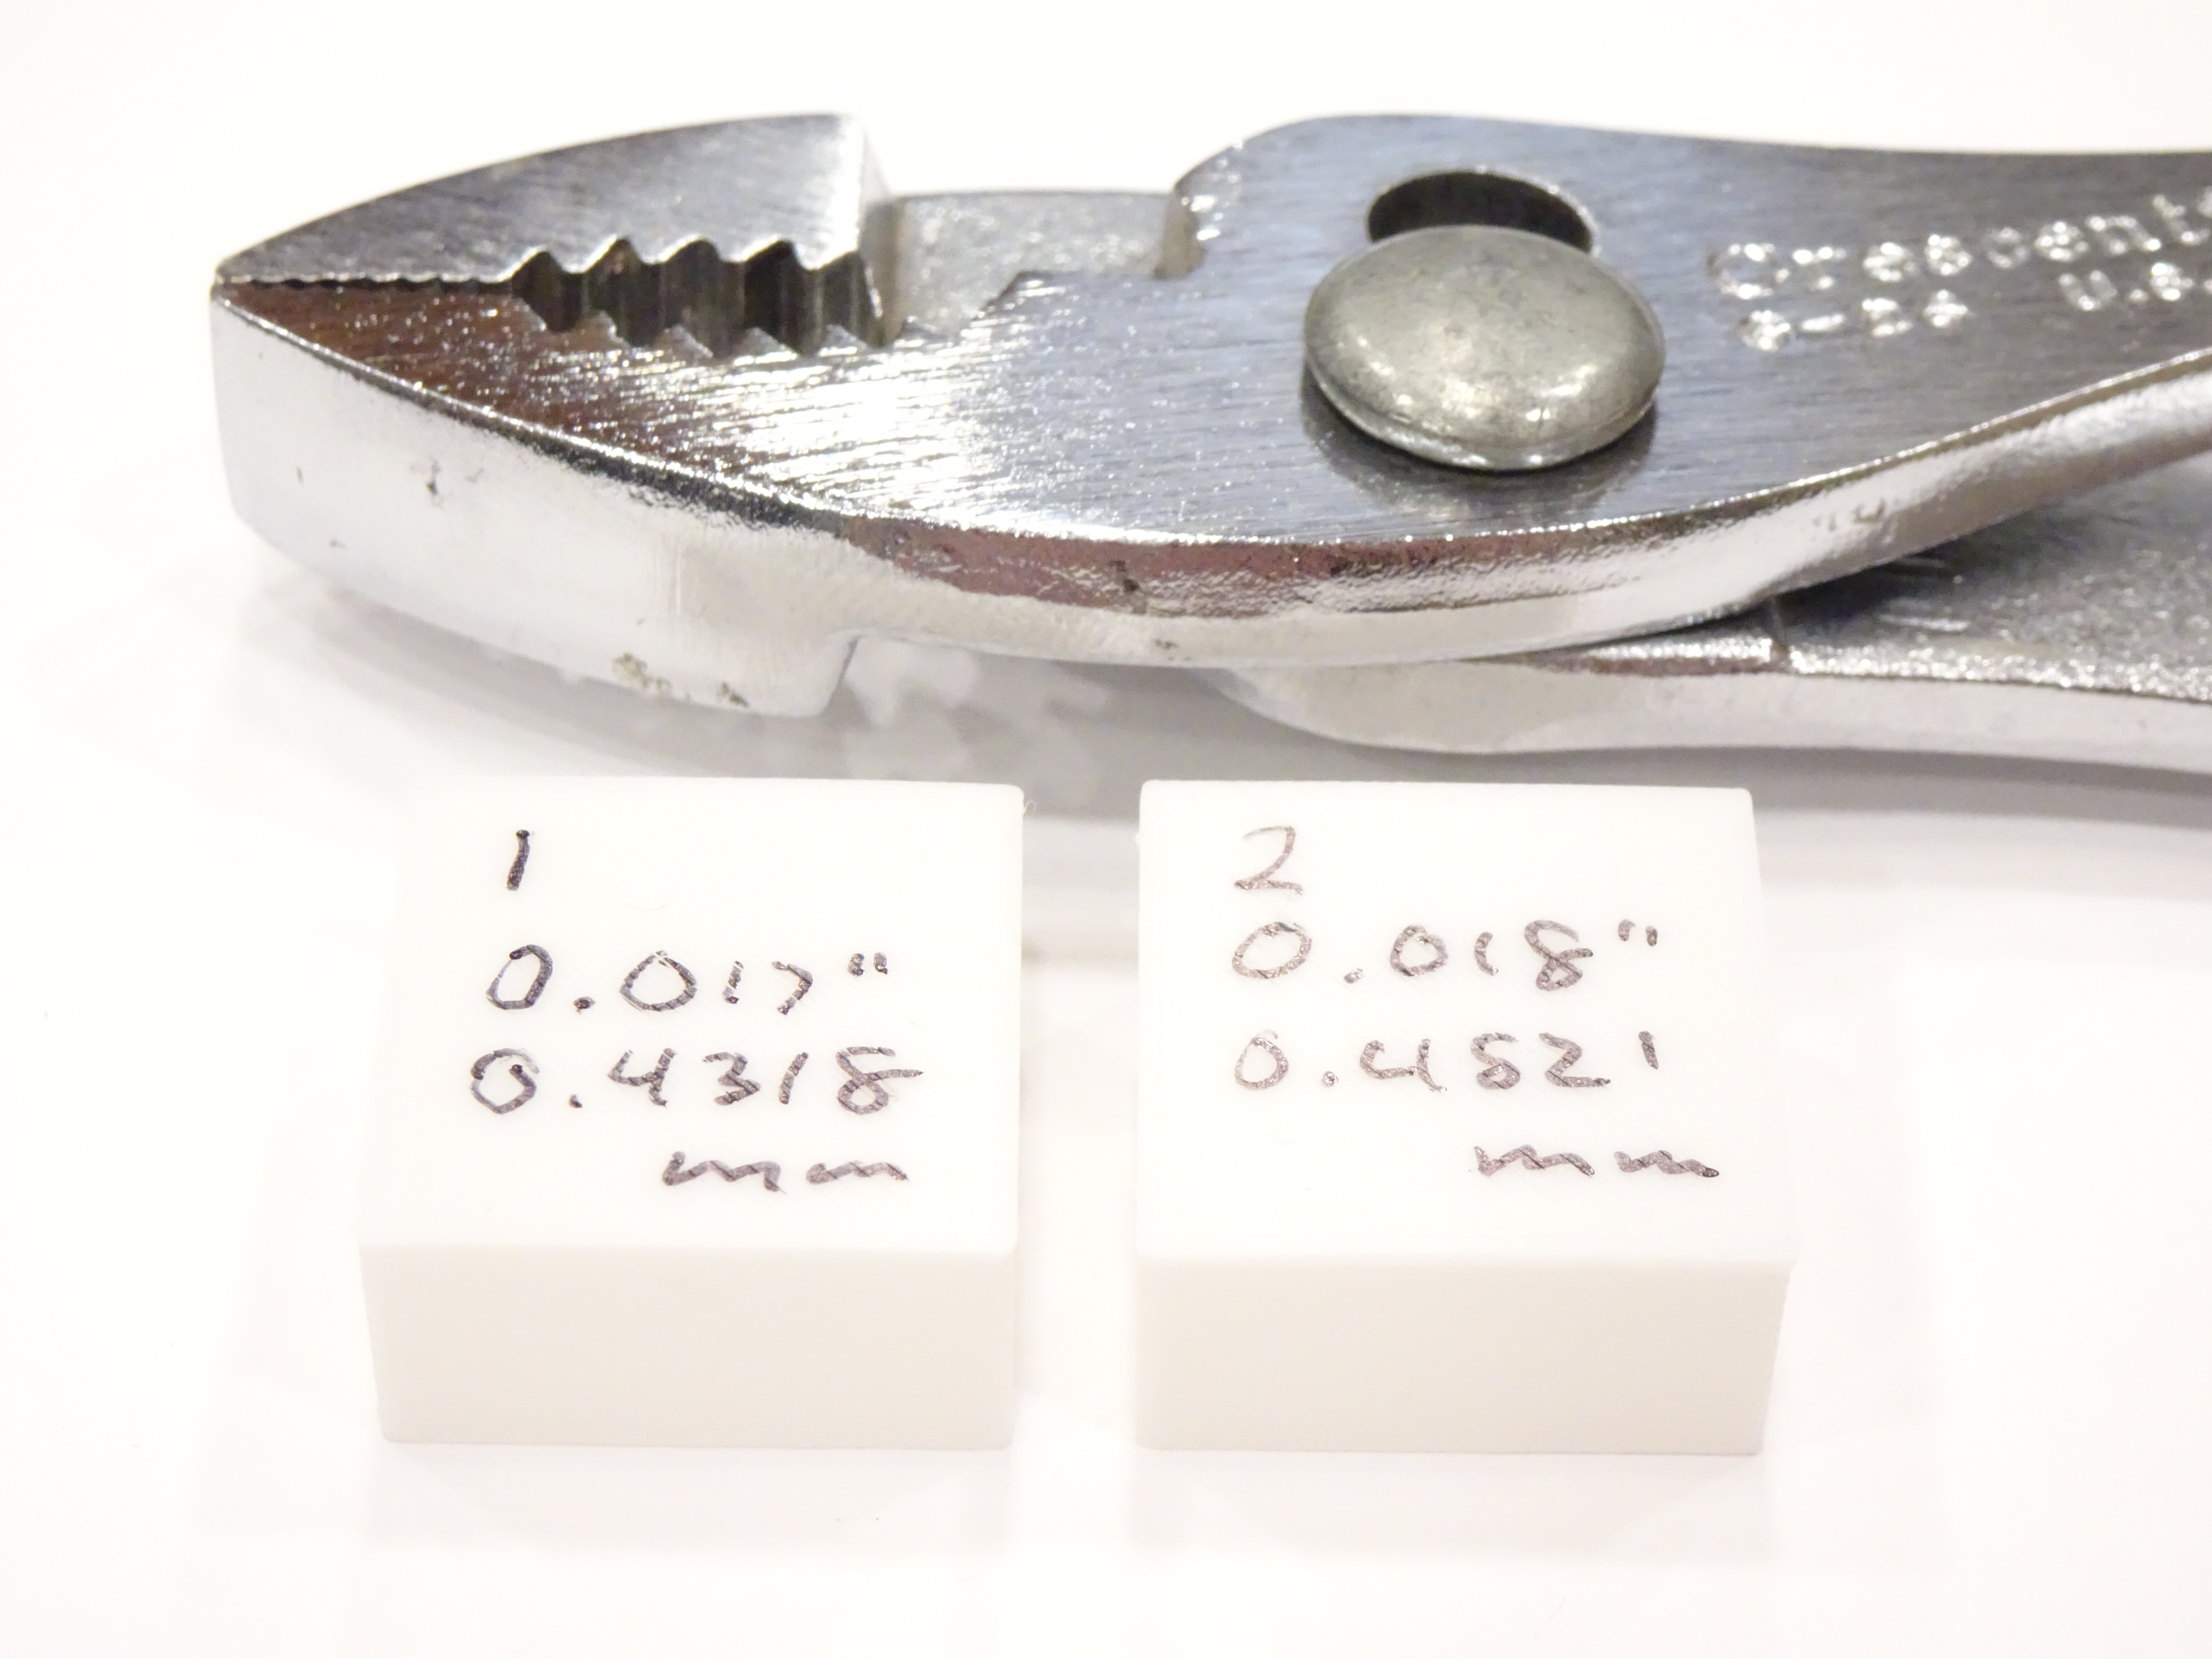
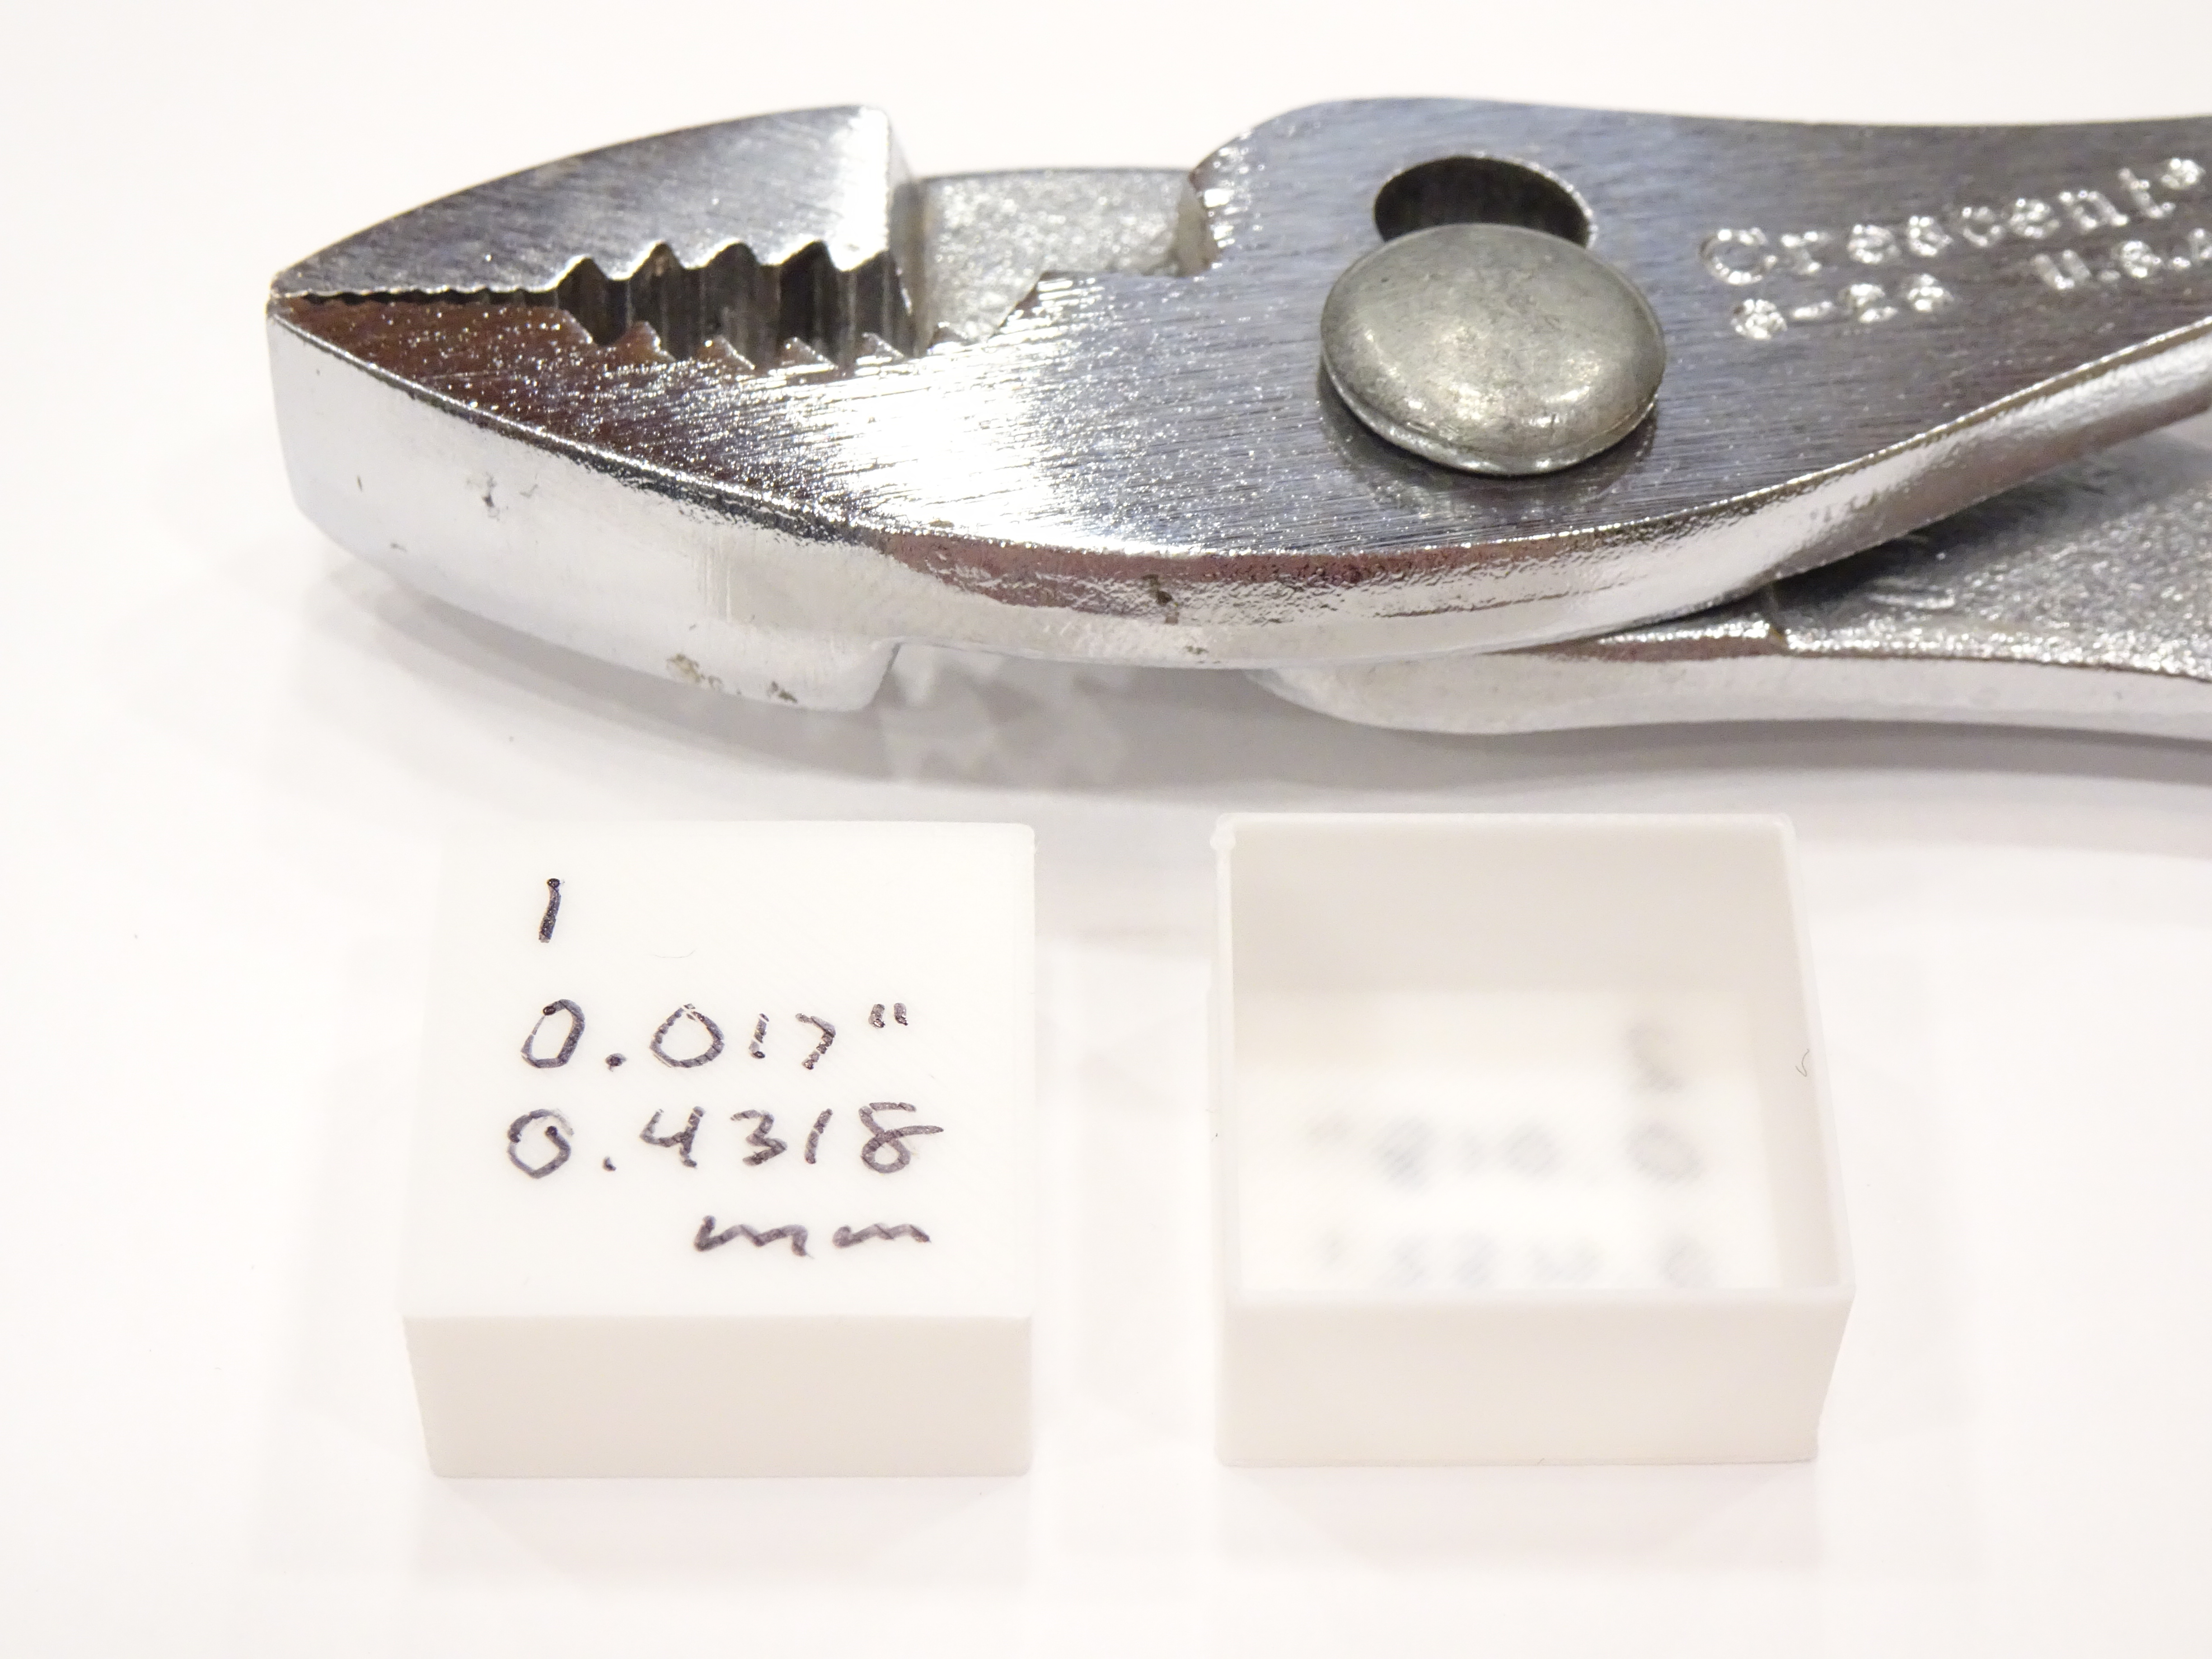
I then printed the first hollow calibration cube, on the left (shown upside-down for convenience of penmanship), and measured its wall thickness at 0.017″ ≈ 0.4318 mm. According to Prusa, this was supposed to come out to 0.45 mm, so I set the Filament Settings / Extrusion Multiplier to 0.45 mm / 0.4318 mm ≈ 1.04. I printed the second calibration cube and measured its wall thickness at 0.018″ (paying attention to how close the pointer was to the marks on my caliper dial) ≈ 0.4521 mm. That was just larger than it should have been, so I reduced the Extrusion Multiplier to 0.45 mm / 0.4521 mm * 1.04 ≈ 1.035 and called it done.
Net Change
I note that increasing the reported filament diameter by 1.6% reduced the flow rate by about 1.5% and then the new extrusion multiplier increased it 3.5% for a net effect of increasing my flow by about 1.9%. That was not the outcome I expected, but I’m sticking with it until I can credibly demonstrate why those changes were incorrect.