Back in 2018 when I got the CupCake out to fix the extruder-stall problem from 2014, it had a new problem of the Z motor not doing what it was asked. The stalling motor was enough to stall me for another couple of years; or was the skipping motor enough to cause me to skip ahead to 2020 for further diagnosis?
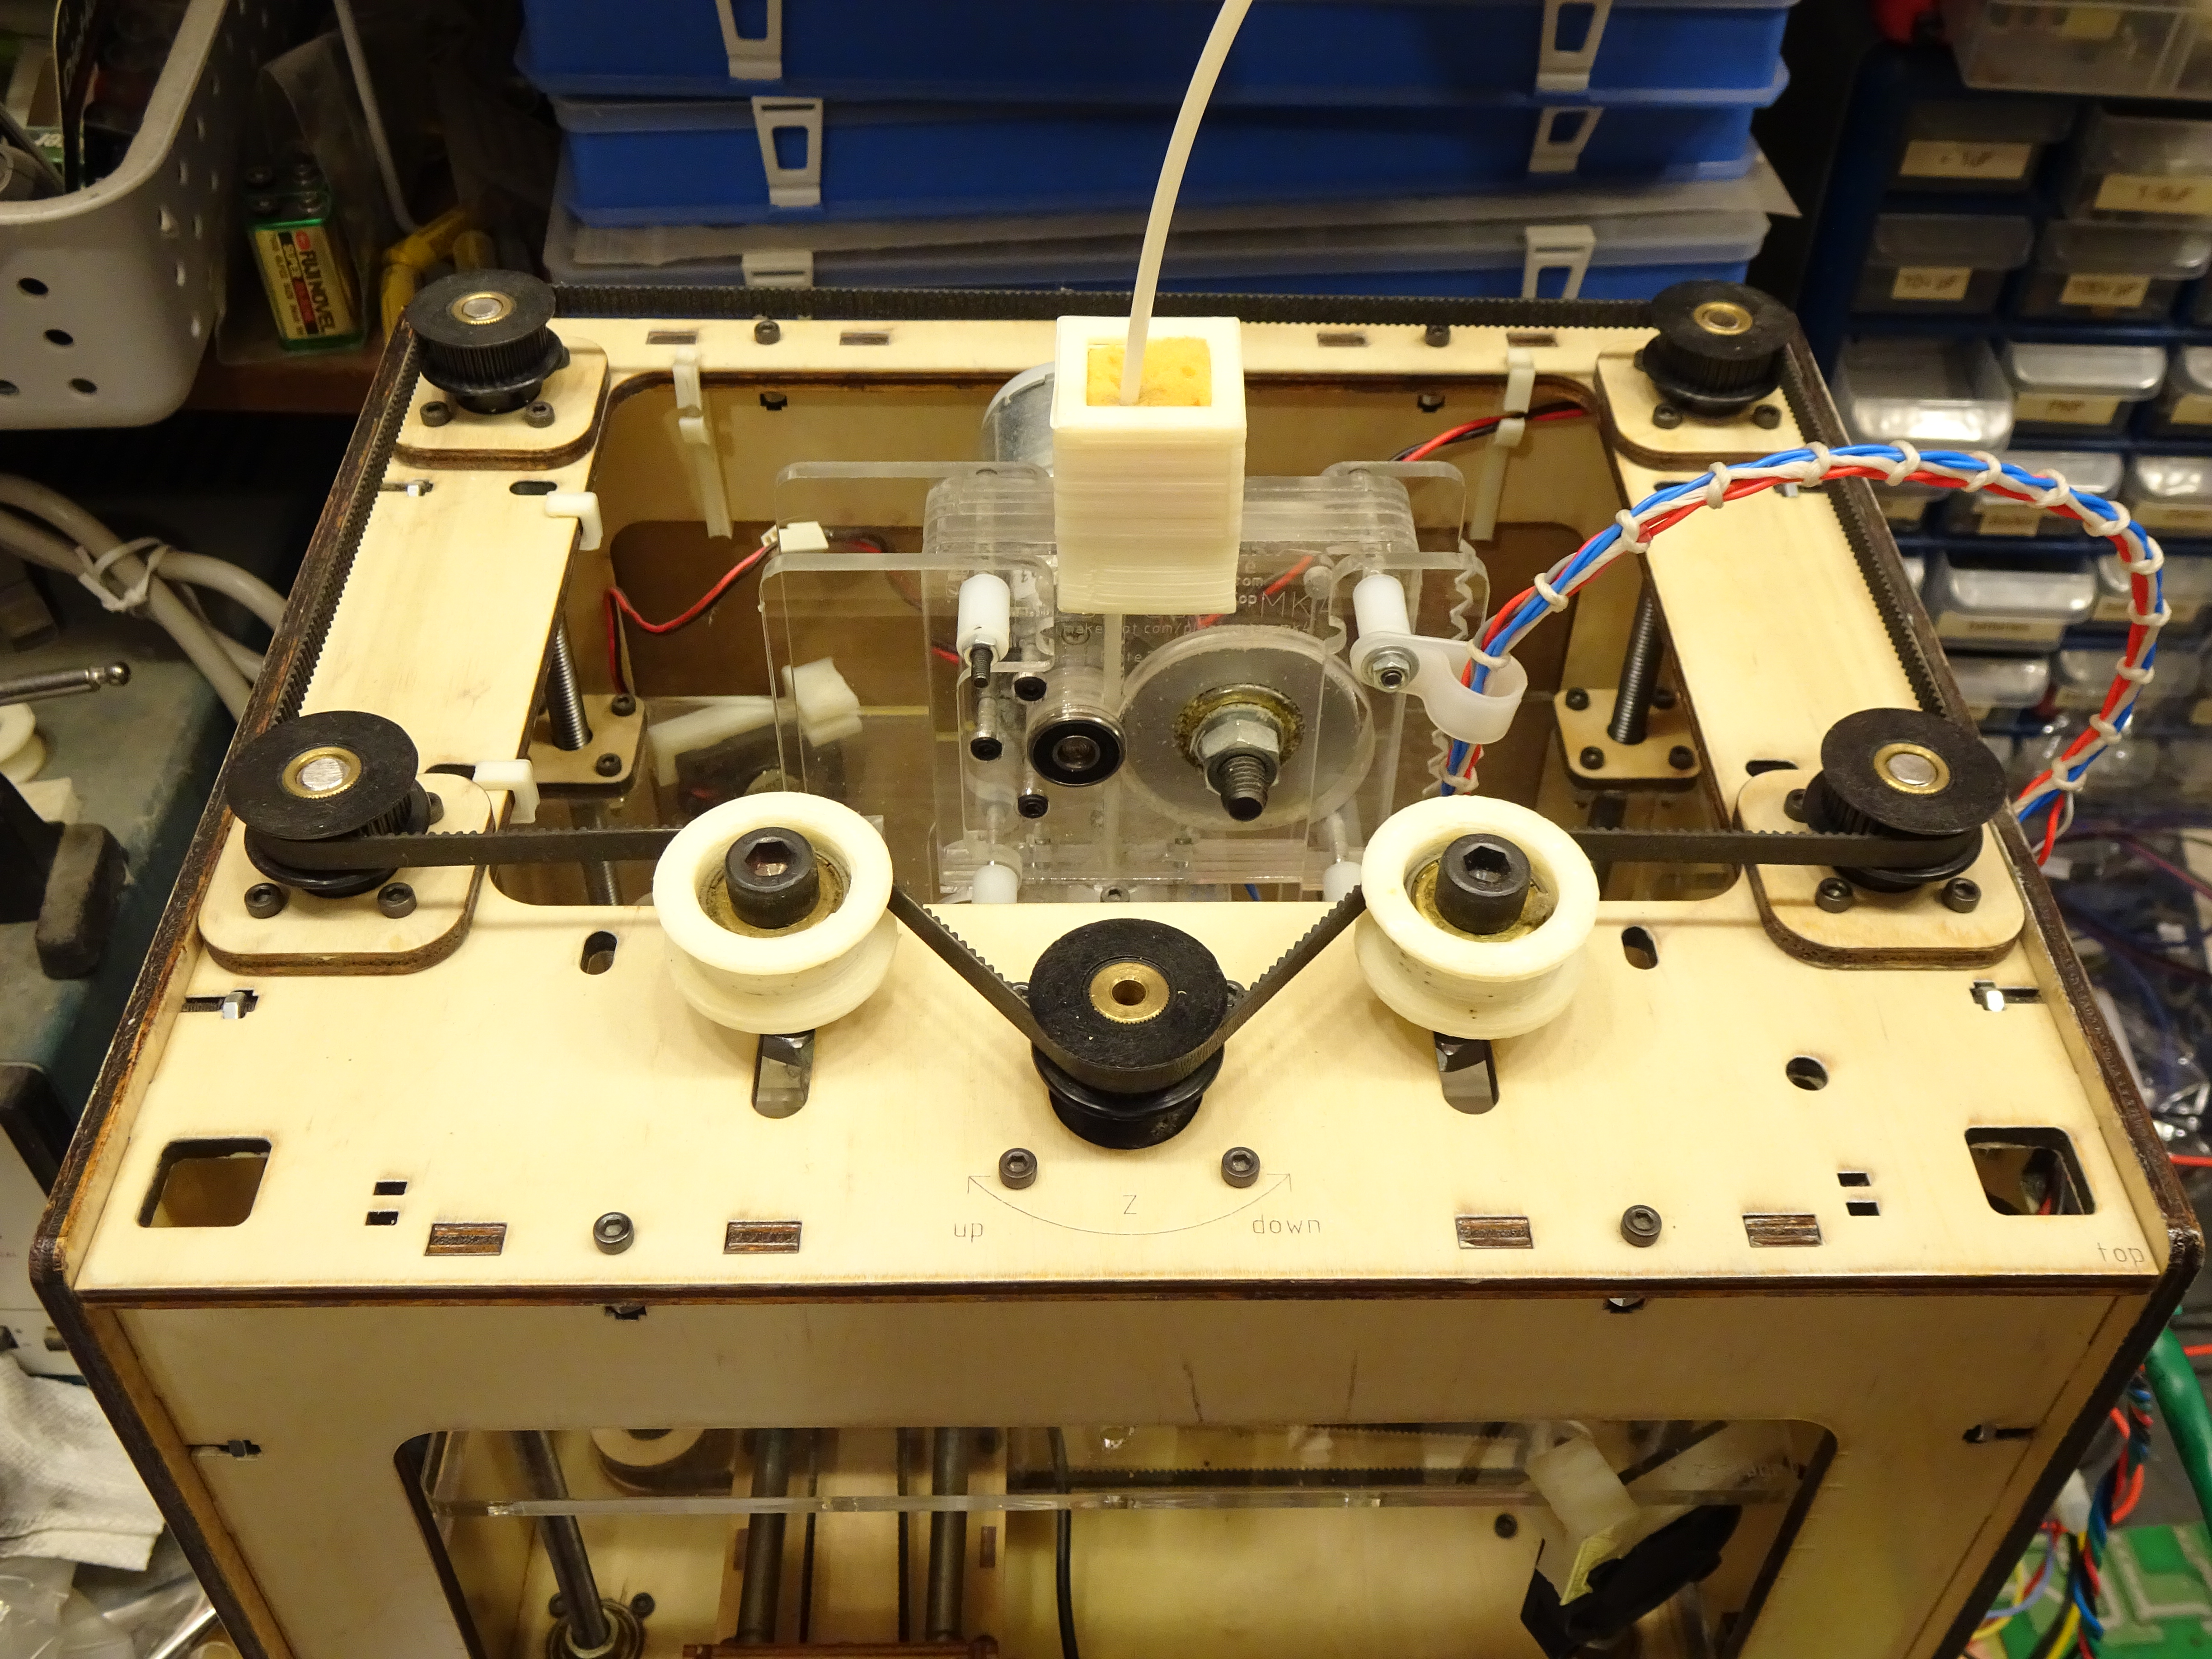
The CupCake’s extruder mounts on a Z stage that lowers down to the build platform. The Z axis is run by a stepper mounted inside the frame at the front, with the central black pulley on the motor shaft driving the belt that connects the four black pulleys on threaded rods protruding down into the machine to raise and lower the Z stage by its corners.
As I was testing in 2018, and again this spring, what should have been continuous movement of the Z axis getting down to the platform to start a print would once in a great while pause and resume. I didn’t hear the characteristic clack/clonk of a stepper motor skipping steps, but it was hard to be sure. But whatever the cause, if the Z motor wasn’t running completely reliably before a print, there’s a fair chance that it could misbehave during a print. Plus a printer with neither Z probe nor Z endstop makes it hard enough to set first layer height already; I don’t need to play this game in Nightmare mode.
Part of the challenge was replicating the problem. In the first run at Cort’s house, everything worked initially, then finally misbehaved many minutes into a print. After restarting the print, again it took many minutes before the next failure, suggesting that we were going to have a dickens of a time watching the problem on a scope and reinforcing my decision to take it to his house where we could use his digital scope with triggered capture.
However, after some fiddling, we discovered that if I used the ReplicatorG control panel to continually jog the Z up and down, at least after the printer was warmed up, it would occasionally pause, which we could hear as well as see. That in turn led to an even more interesting discovery.
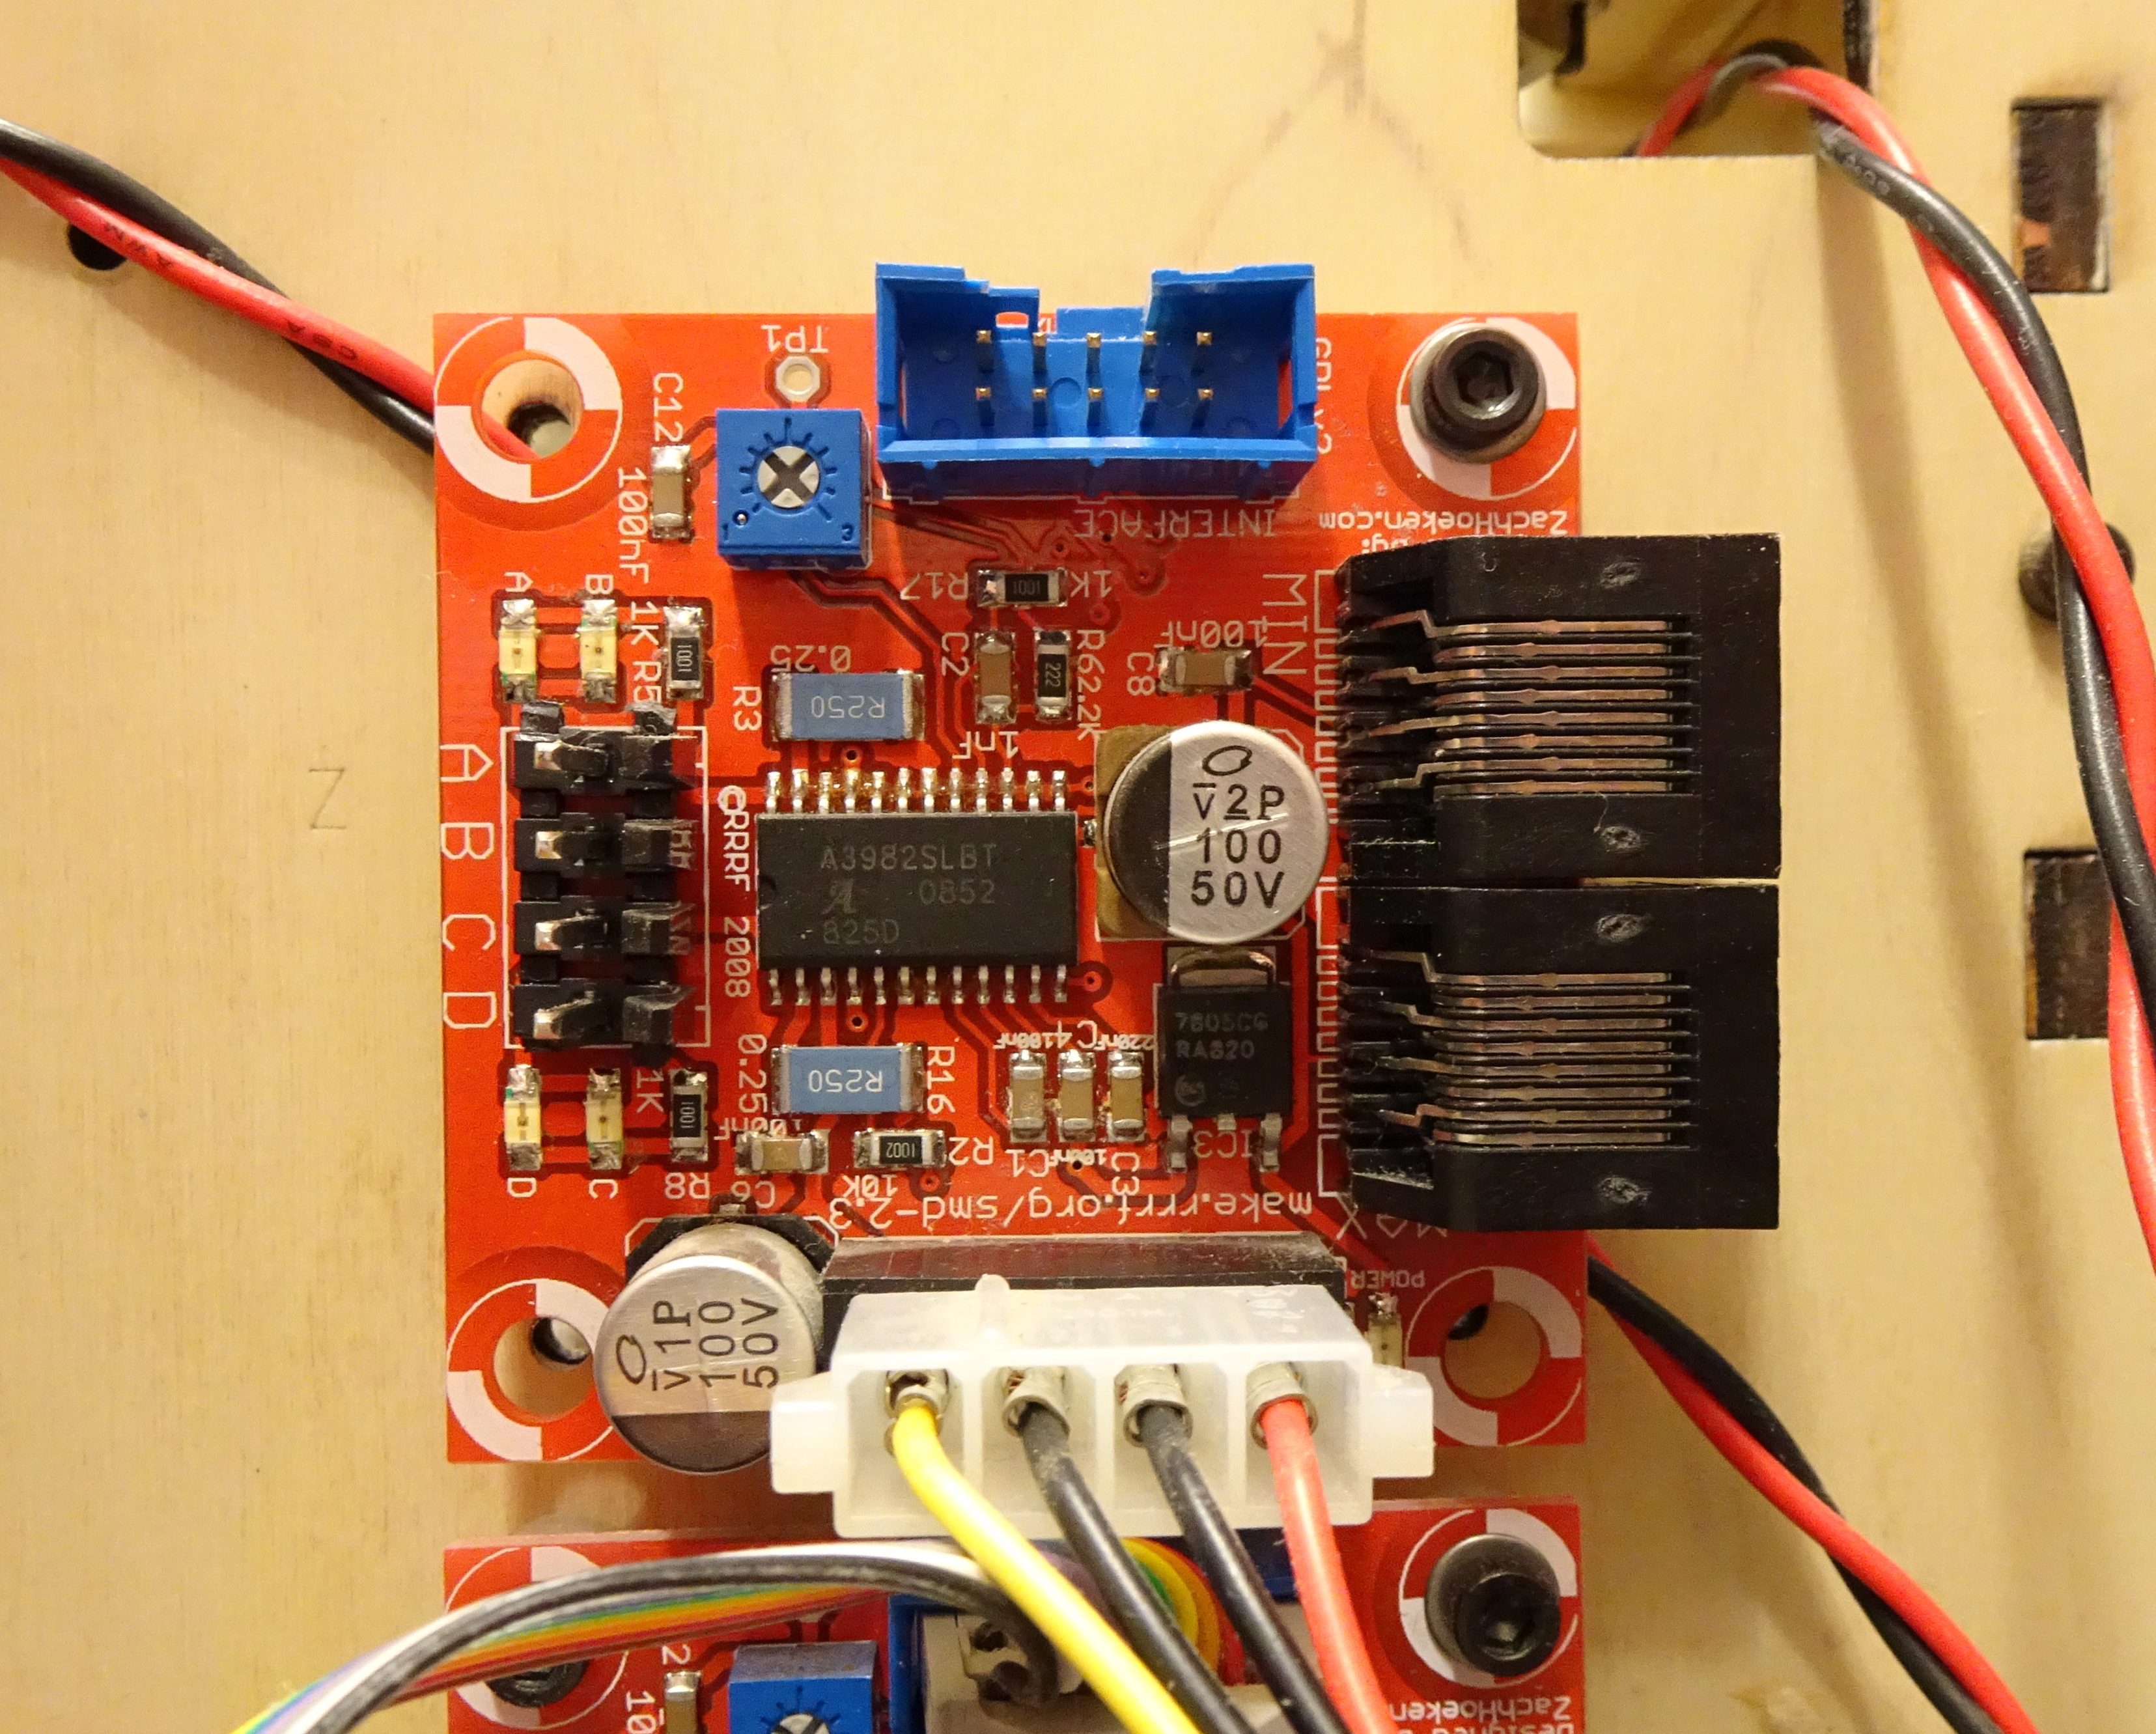
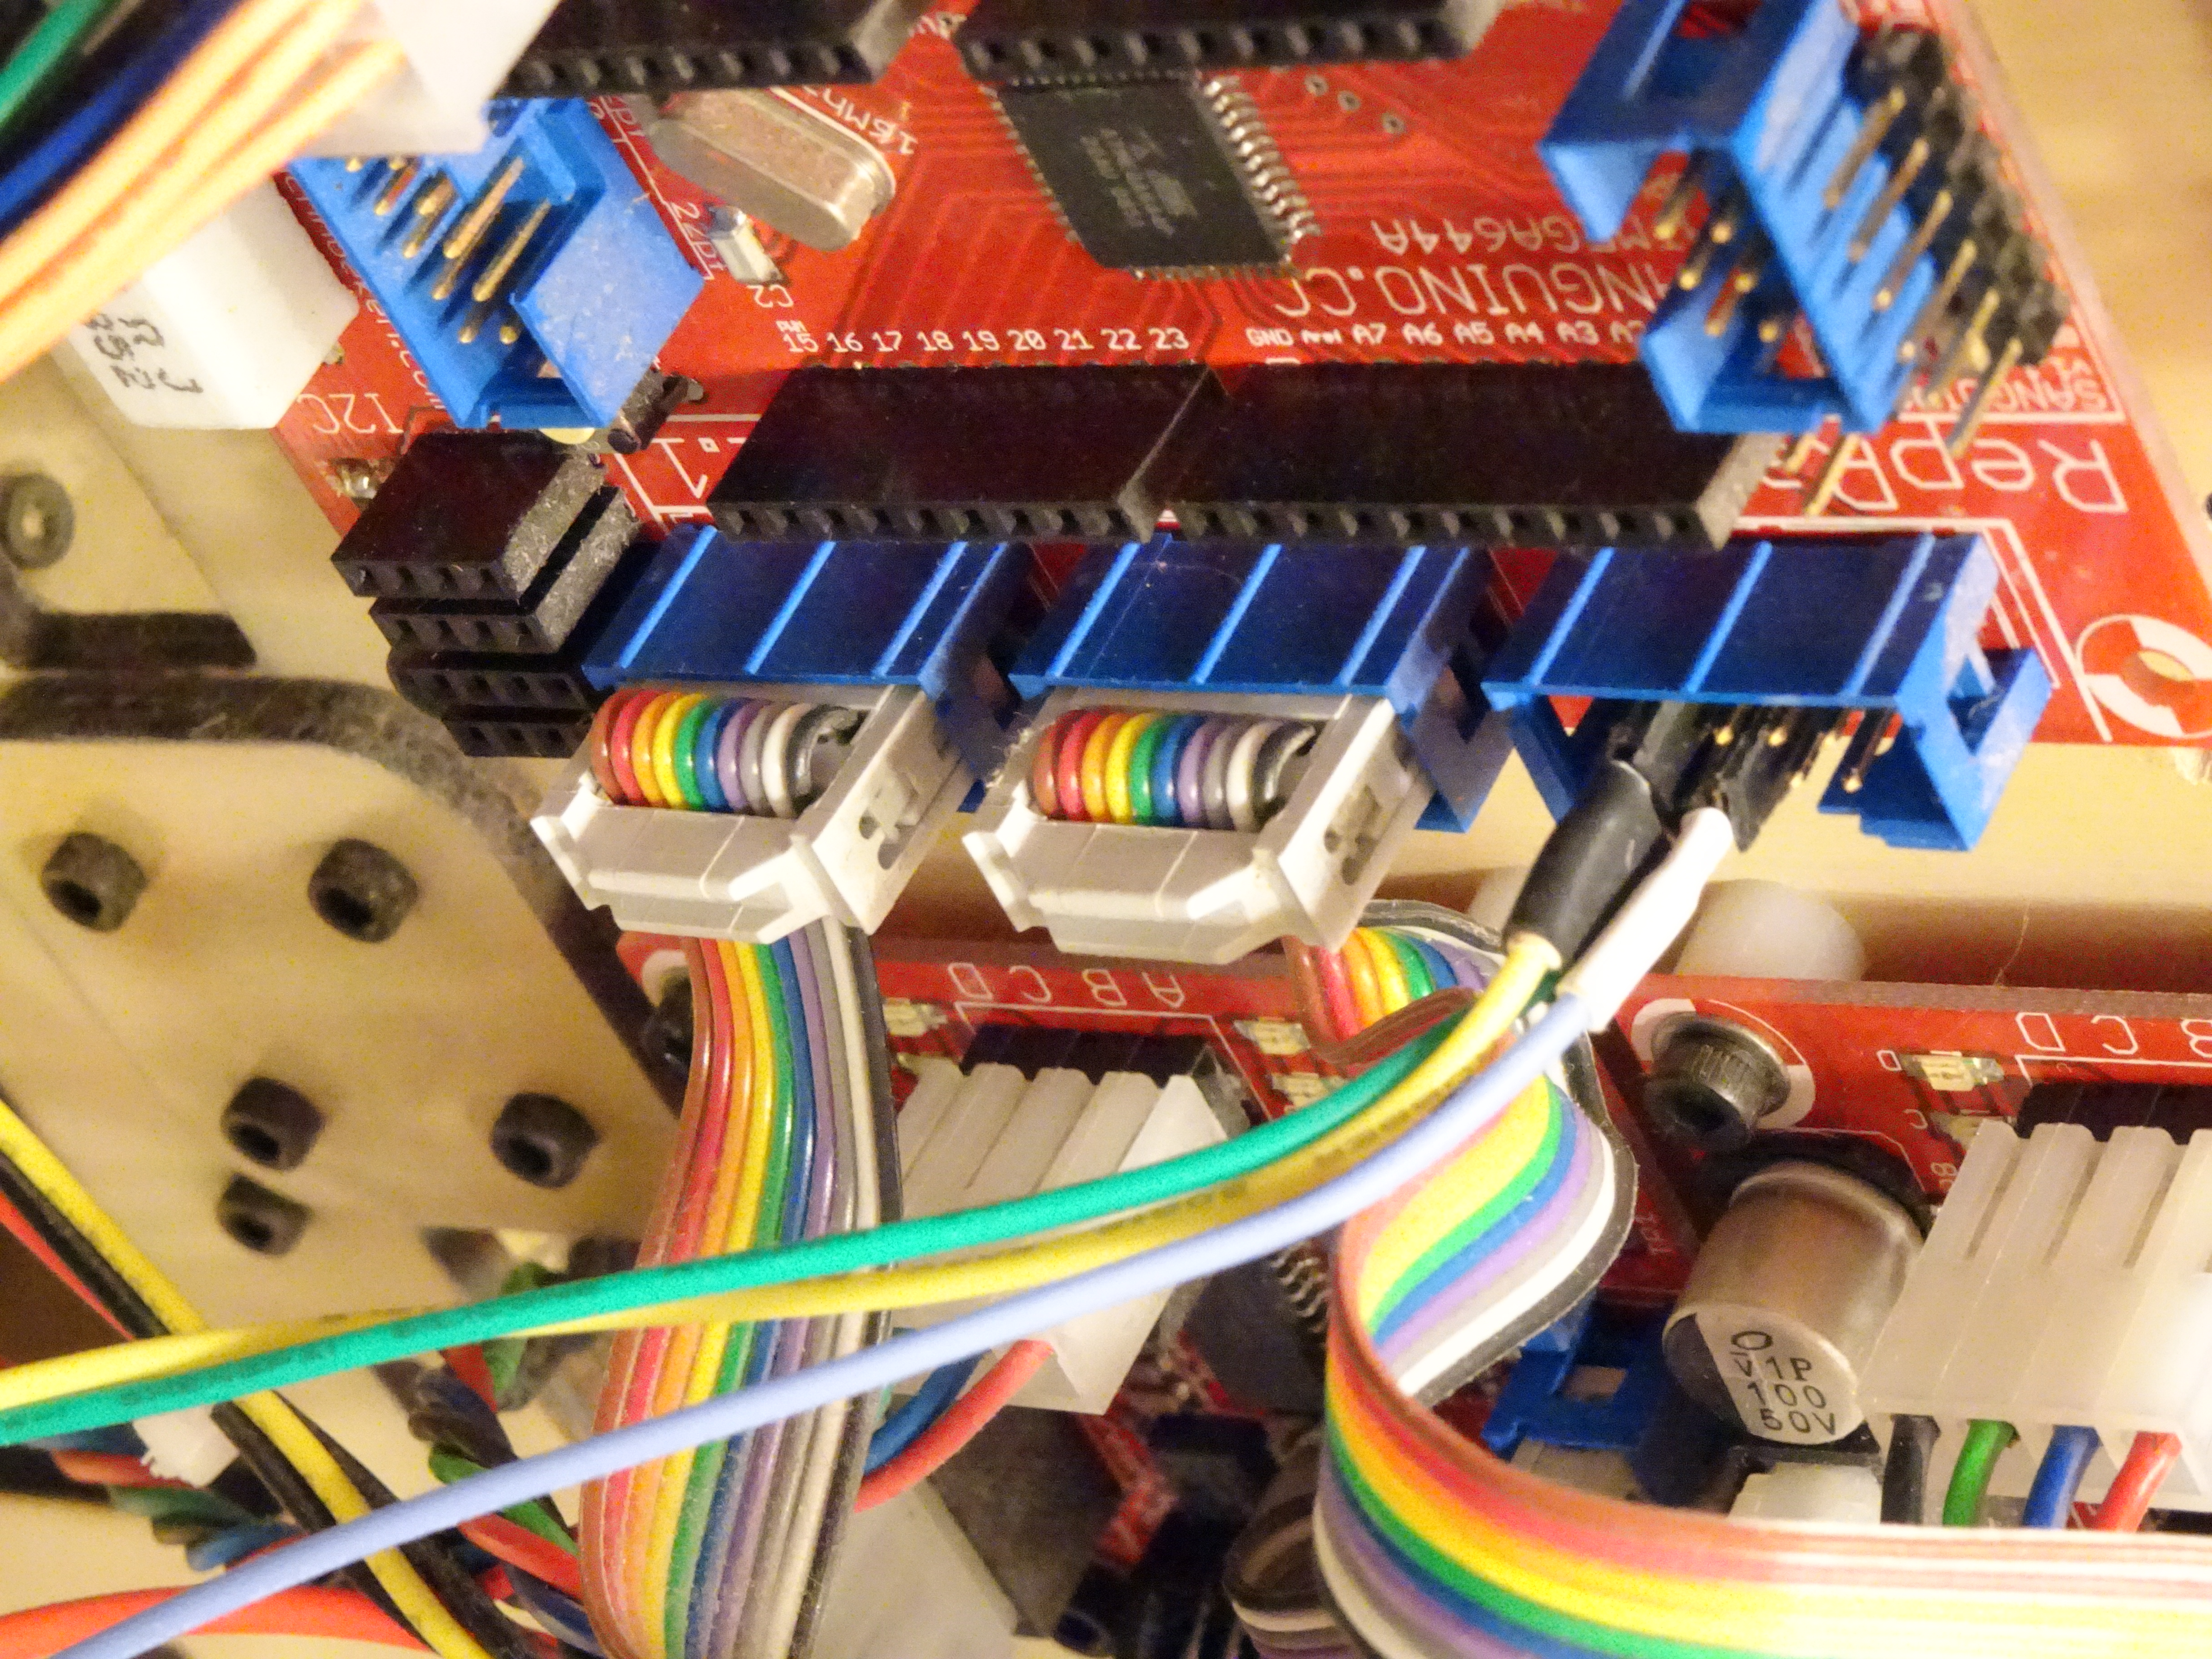
All of the steppers on the CupCake are powered by Zach’s RepRap stepper motor driver 2.3 boards. In the orientation shown, power connects on the lower edge, the stepper on the left, communications on top, and optional endstops on the right. Immediately above and below the motor connector on the left are LEDs that light as the two coils of the bipolar stepper are each driven in their positive and negative directions — and what we noticed was that when the motor stalled, the LEDs were briefly off.
Hang on; that’s not your usual stepper motor failure! The most common failure of a stepper motor is when it tries to drive a load that (in general or for a moment) requires more torque than the motor can provide. Instead of moving forward one step, it will jerk back three steps, causing the clack or clonk I mentioned earlier. (The second most common failure of a stepper motor is when it’s driven faster than it can run and just goes bonkers.) But in both of these cases, the driver will still be trying to move the motor, and mine wasn’t.
We could choose to probe the situation with test equipment or we could swap parts and see where the problem followed. With a lower psychological barrier to entry, we elected to swap parts.
I swapped the communications and motor cables between the Y (good) and Z (bad) axes. The problem remained with the Z axis, suggesting that the driver board wasn’t the problem and making us wonder about a motherboard issue like a stall in the main execution loop. I put the motor back on the Z board where the Y communication was still connected and told the ReplicatorG control panel to move the Y to in reality move the Z … and the Z still stuttered, suggesting that the motherboard and communications weren’t the problem. I swapped in a spare CupCake stepper driver board for another data point; the Z still stuttered. The only thing in common with all the test cases was the Z motor.
I began preparing to swap the Z motor but couldn’t get the pulley off of this one without a puller that I didn’t have along, so we had to stop replacing parts and start using our brains. Manual movement of all three axes on the CupCake seems to take more force than on other printers … and well it might, as the Z-axis threaded rods aren’t commercial lead screws and the X and Y axes travel on bushings instead of bearings. But more importantly, the Z axis in particular seems to take more torque to move than it did when it was new, which could be caused by the motor being gunked up from age and the upper and lower bearings getting gunked as well.
Each stepper driver board has a reference potentiometer to set the motor coil current … and the one for the Z stepper was already at maximum with no option to turn it up to 11. If the motor was drawing more than the 2 A that the A3982 could provide, perhaps it would go into shutdown and stop driving the outputs, which would explain the blanking of the stepper coil LEDs. And if the ravages of time caused the one stepper on the oddball axis to go from originally using just a little less current than the driver could provide to now needing just a little more, then what to do next?
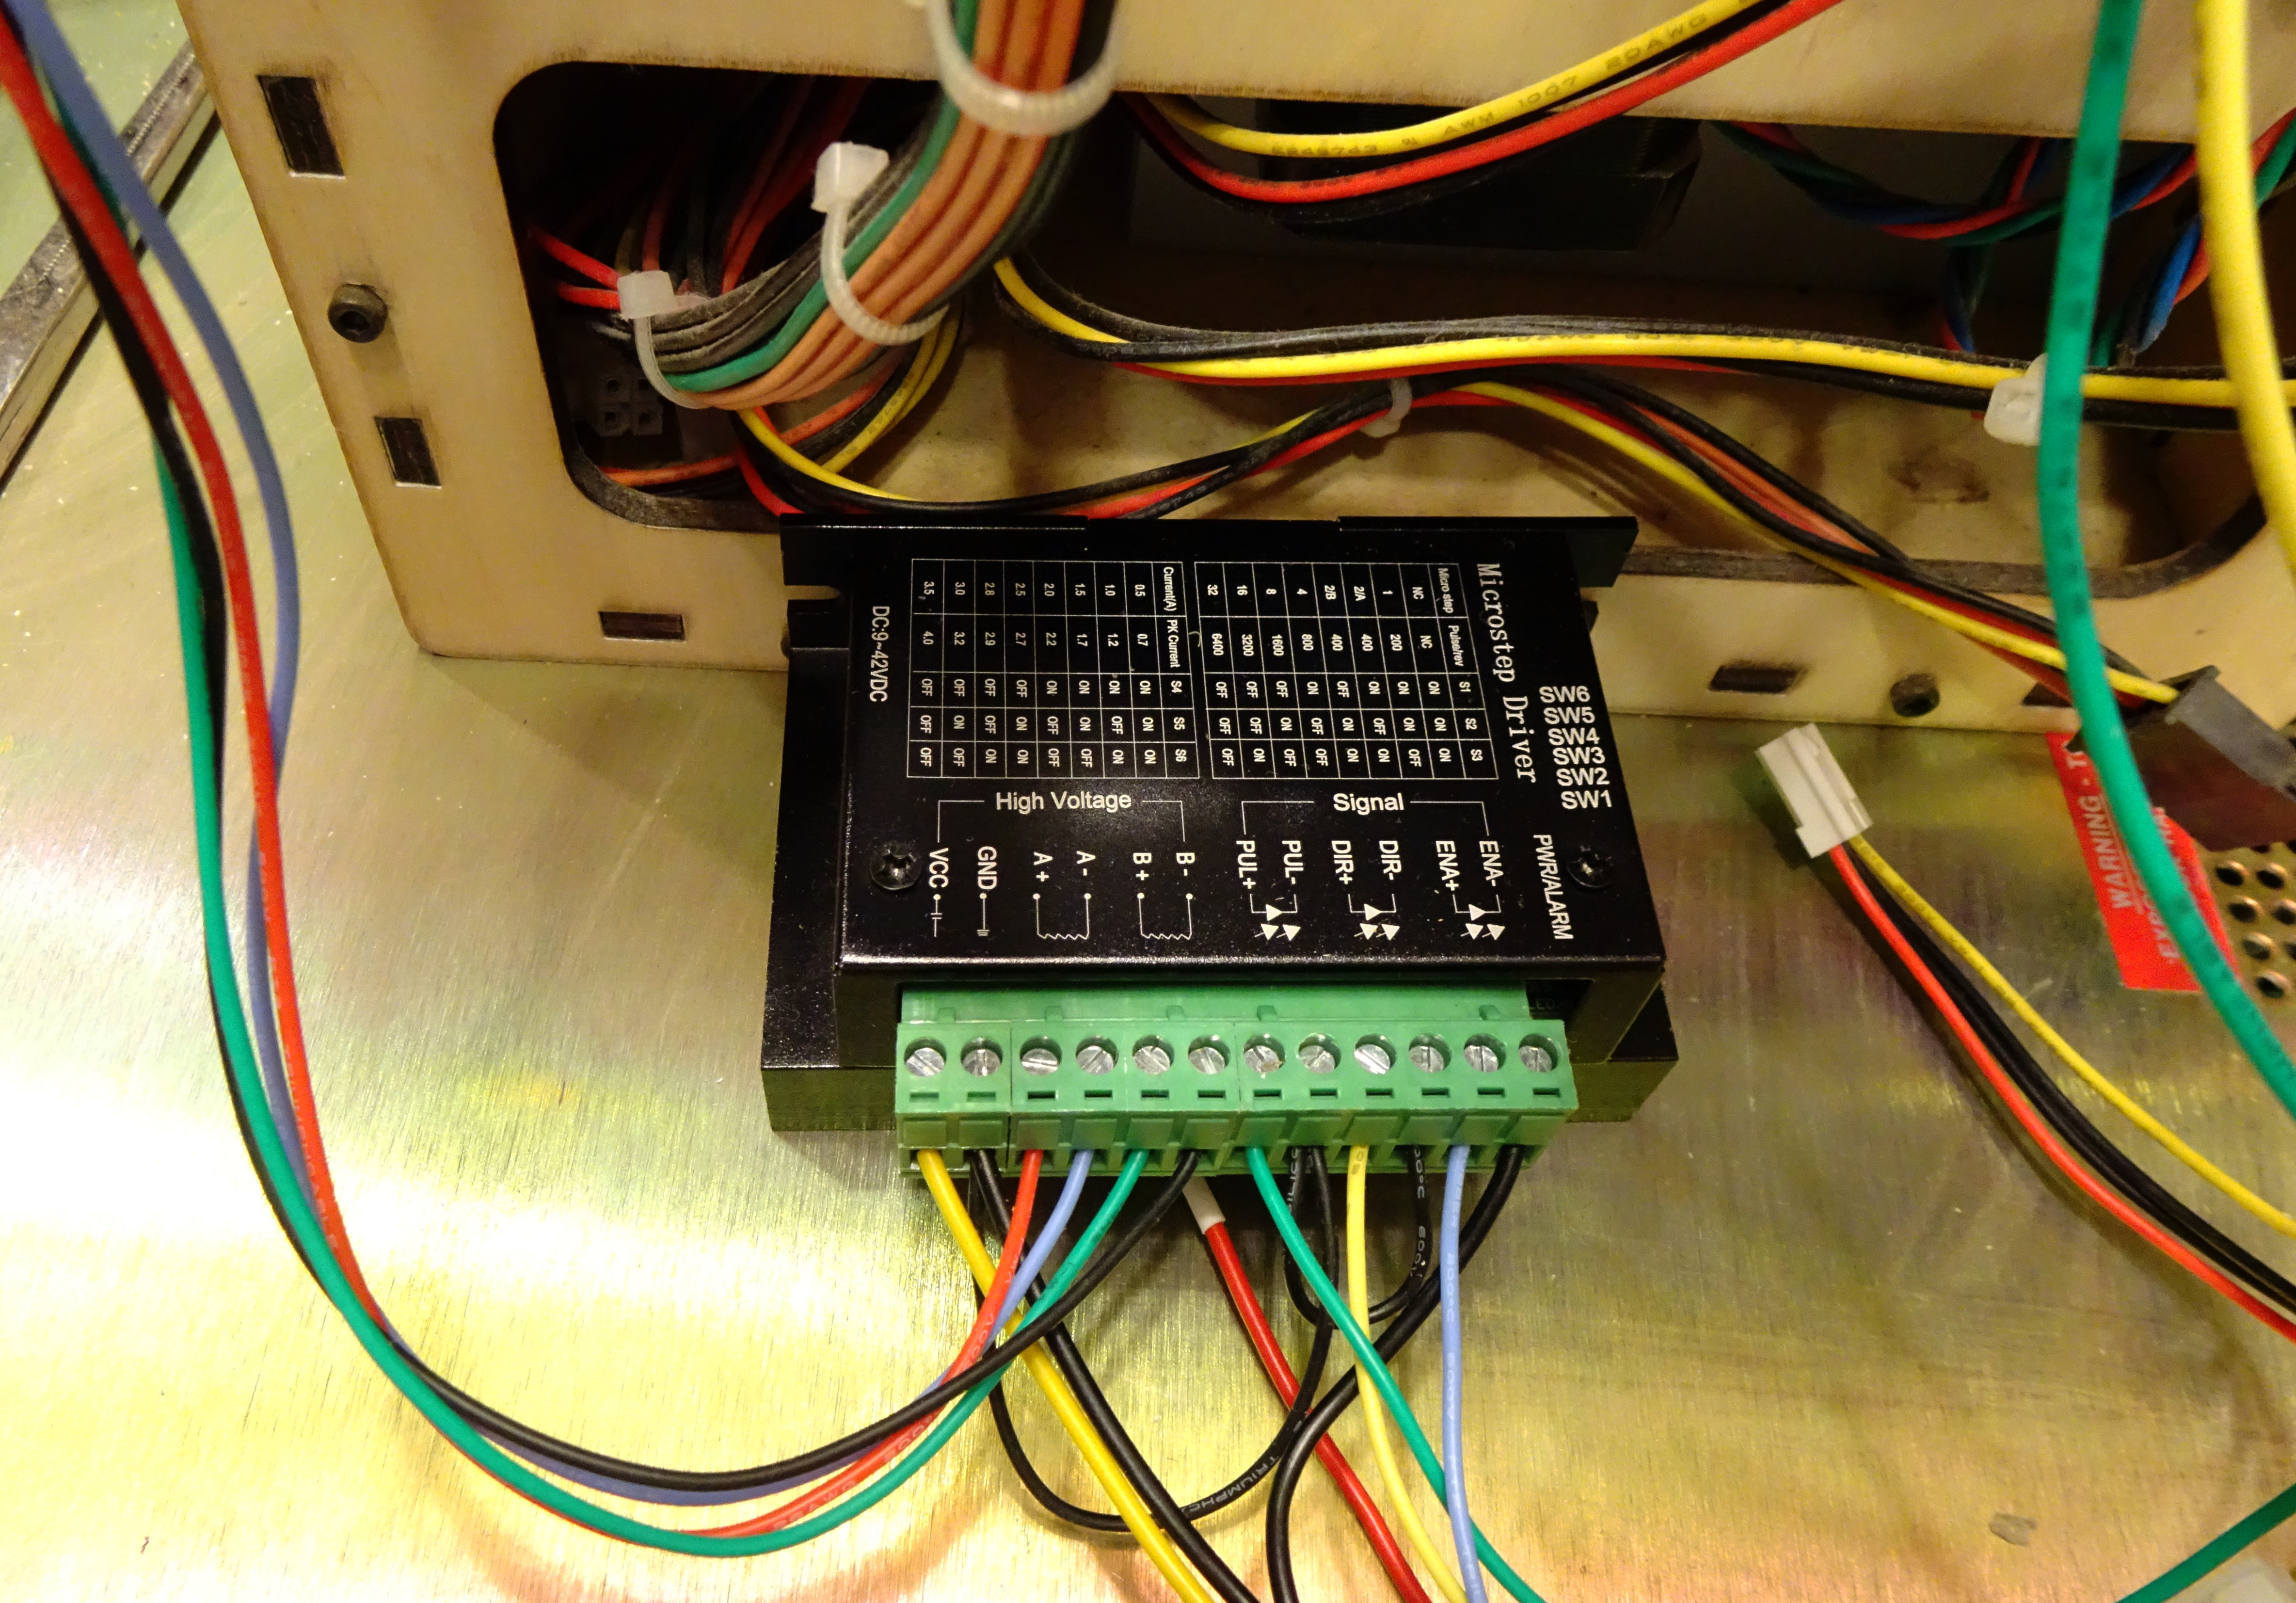
In the dual interests of troubleshooting the Z axis and of resuming Z operation to be able to troubleshoot the extruder problem, the answer was to use an external stepper driver that could provide more current. I had already purchased this guy for fiddling with on the bench; so on the next visit, I brought it along; we hooked it up to drive the Z; and nothing. Didn’t even light the activity LED inside. A bad unit!
On the subsequent visit — and mind you, these visits are about a month apart, so I’m exercising some patience and restraint here — I took a new stepper driver module that I’d purchased and it also did nothing, which was incontheivable. Turns out that the external module’s ENA input is really a /ENA input and Cort and I were both too punch-drunk on the first attempt to think of that possibility.
The driver module is actually quite pleasant to wire, because having pins for both ends of the optoisolators on each signal input mean you can feed it either active-low or active-high inputs by choosing whether to connect signal and 5V or signal and ground. I mean, if you stop to think about what logic style each signal is using.
Not having a spare connector for the motor plug, Cort soldered the wires to heavy pins salvaged from some piece of equipment and I drew up a housing, which we printed in “galaxy blue” one of Cort’s printers. The pins are a tight friction fit in the housing and a looser fit in the motor plug, so it worked well.
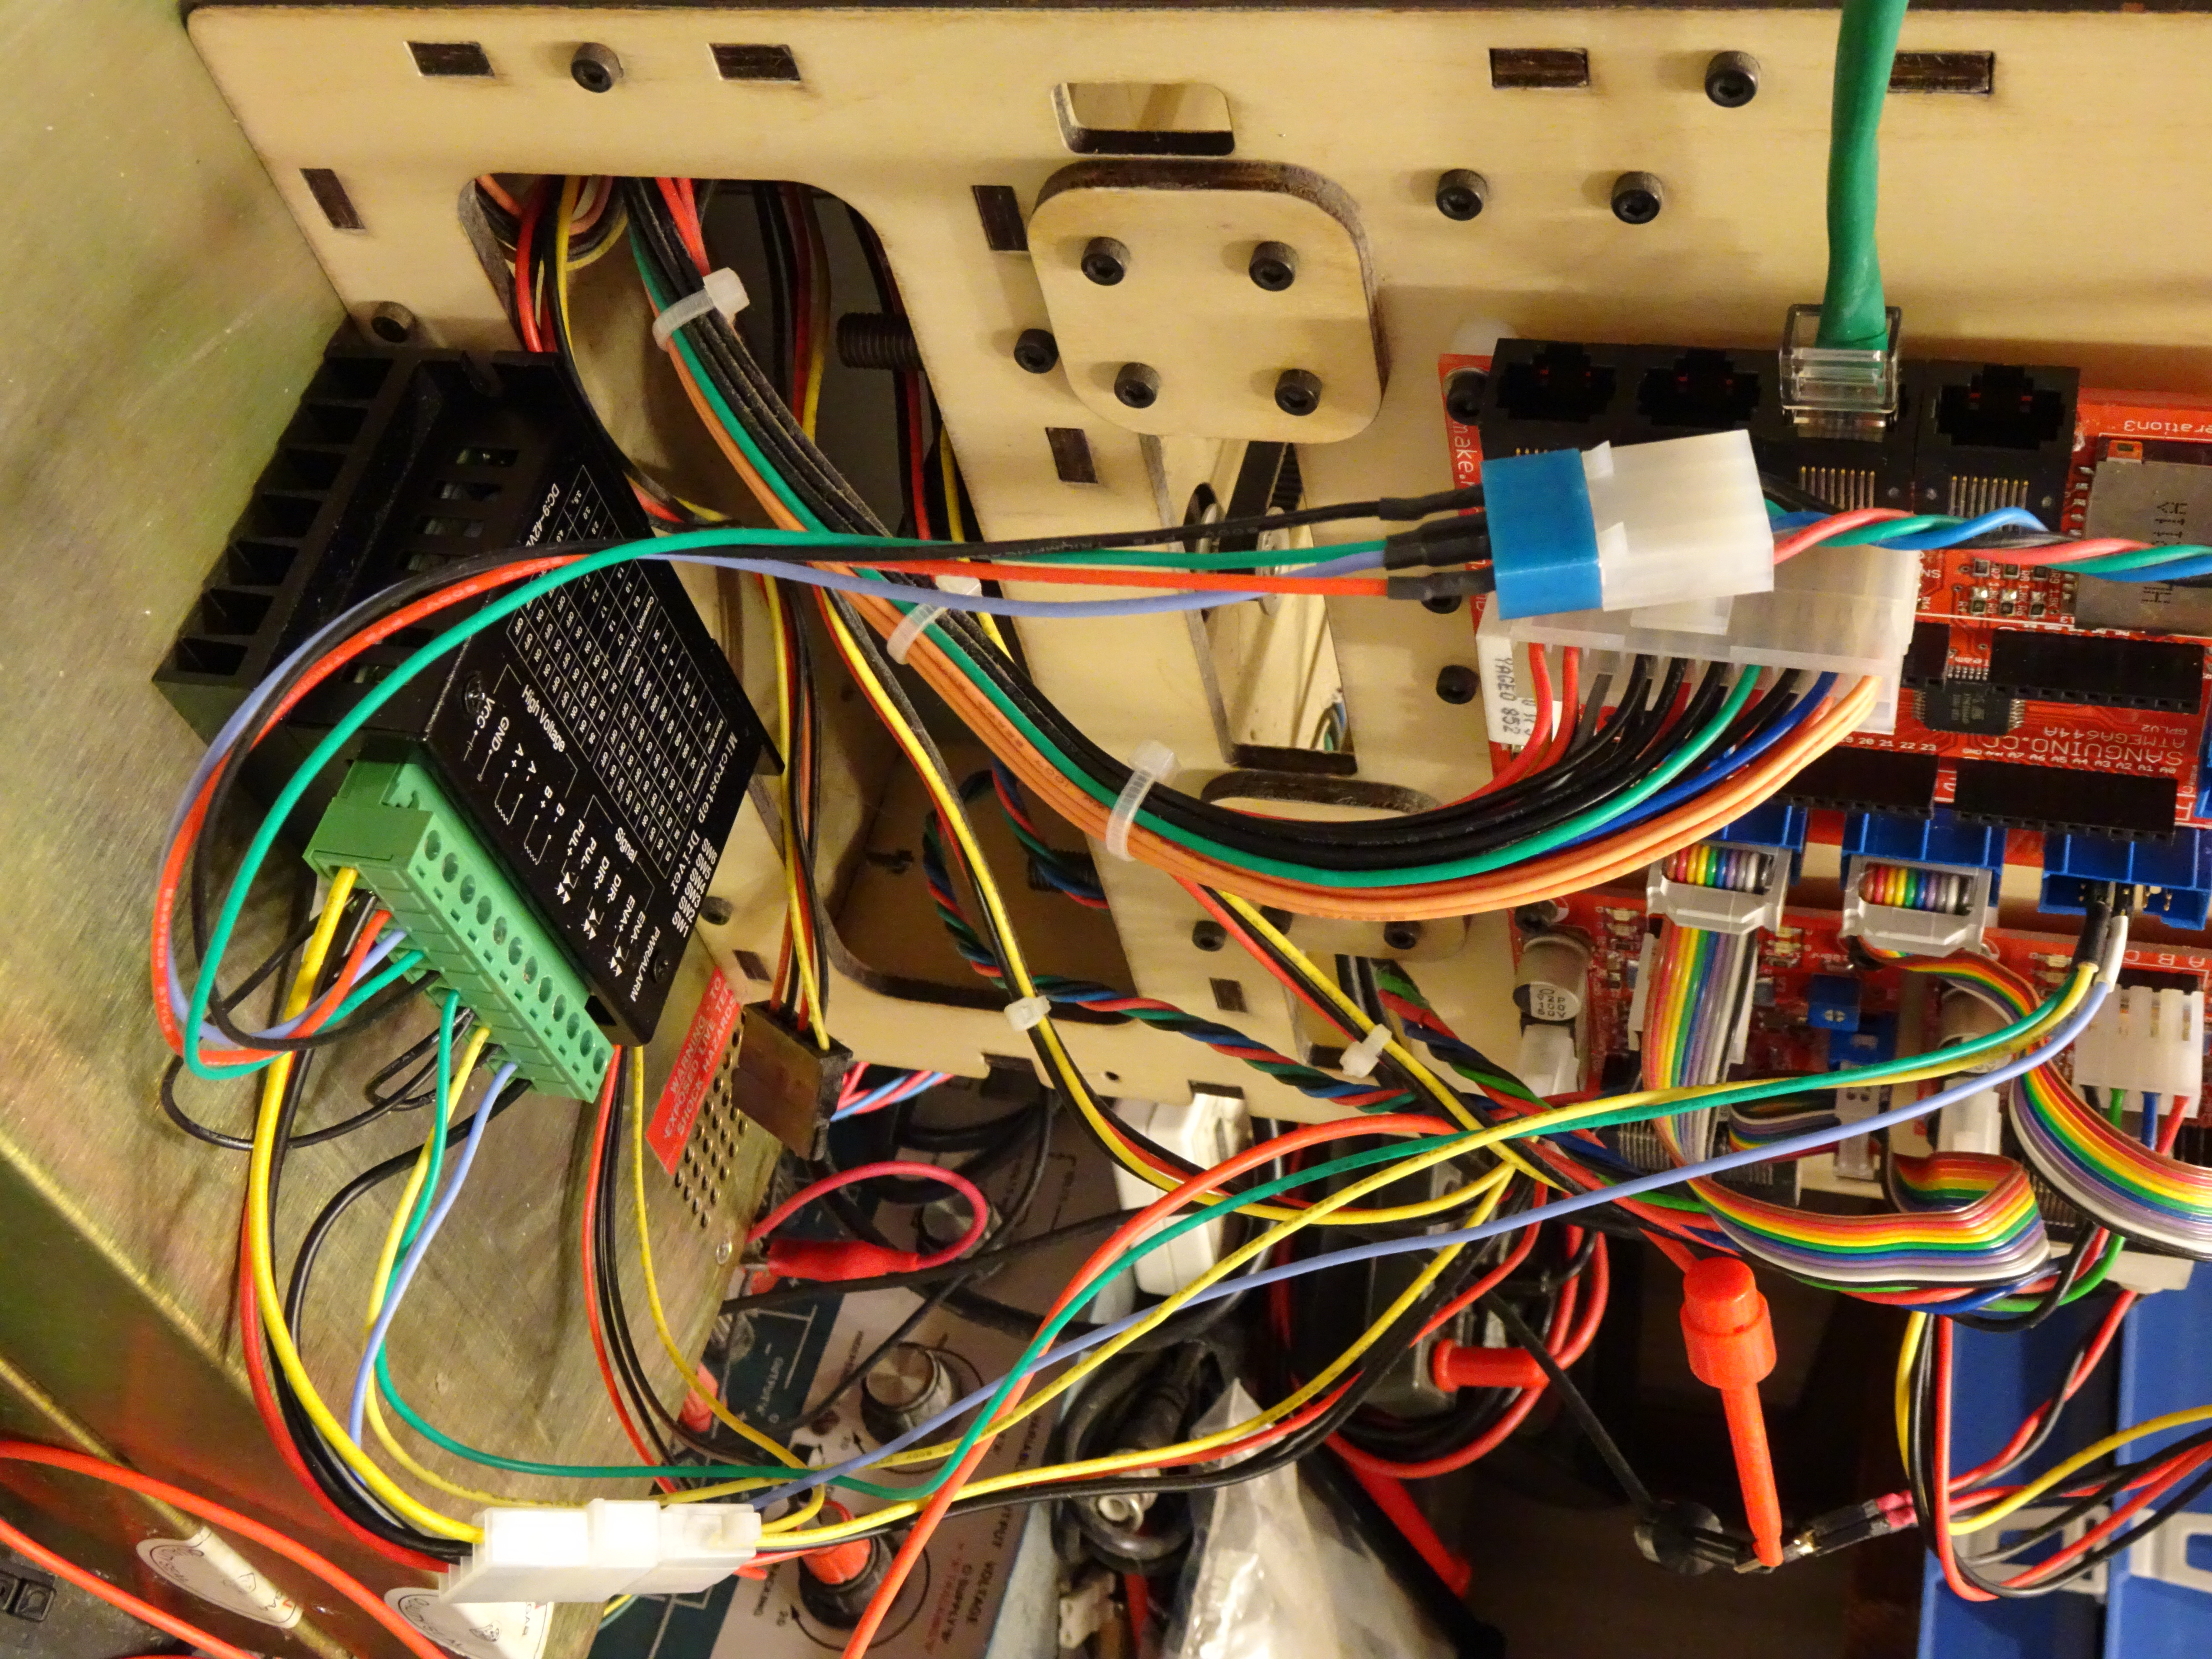
Cort fiddled together some jumper wires for the appropriate signal lines out of the Z-axis jack on the motherboard, and the whole thing Just Works.
With the stepper module DIP switches set for 1.5 A, the Z stepper loses steps in the traditional way. Set for 2 A, it hasn’t failed yet, not in subsequent testing nor in my actual use this past weekend. That reinforces my notion that the Z stepper’s current demand has just barely climbed up over the capacity of the original Allegro driver — and got me past the Z problem and able to diagnose the extruder problem.
When it’s not posing for a glamour photo, the stepper module tucks nicely into the bay next to the printer’s power supply.