
The bus has a locking gas cap but didn’t come with the key. Fortunately the cap was unlocked, so I could at least fill gas. Also fortunately, I found in the glovebox the original gas cap. So last night I put the original cap onto the gas tank and brought home the locking cap to make a key.
While taking off the gas cap and fishing out the retaining wire, I noted that this fill spout has nothing for the lock to lock against; so there’s no way I can see for this cap to actually lock. So why did someone replace the original with a locking cap? Because of the retaining chain — the original cap didn’t have one, there’s no good place to set the cap while filling, and the retaining chain is very handy to keep the cap captive.
That left me with a removed locking gas cap and no reason to make a key for it. But I already had the cap loose; so why not go ahead with an evening’s keymaking entertainment.
Wafer Tumbler Locks
I guessed correctly that the cam lock would be a wafer tumbler lock. Many thanks go to Matt Blaze’s Notes on Picking Pin Tumbler Locks for giving me the terminology after the fact to describe what I did last night.
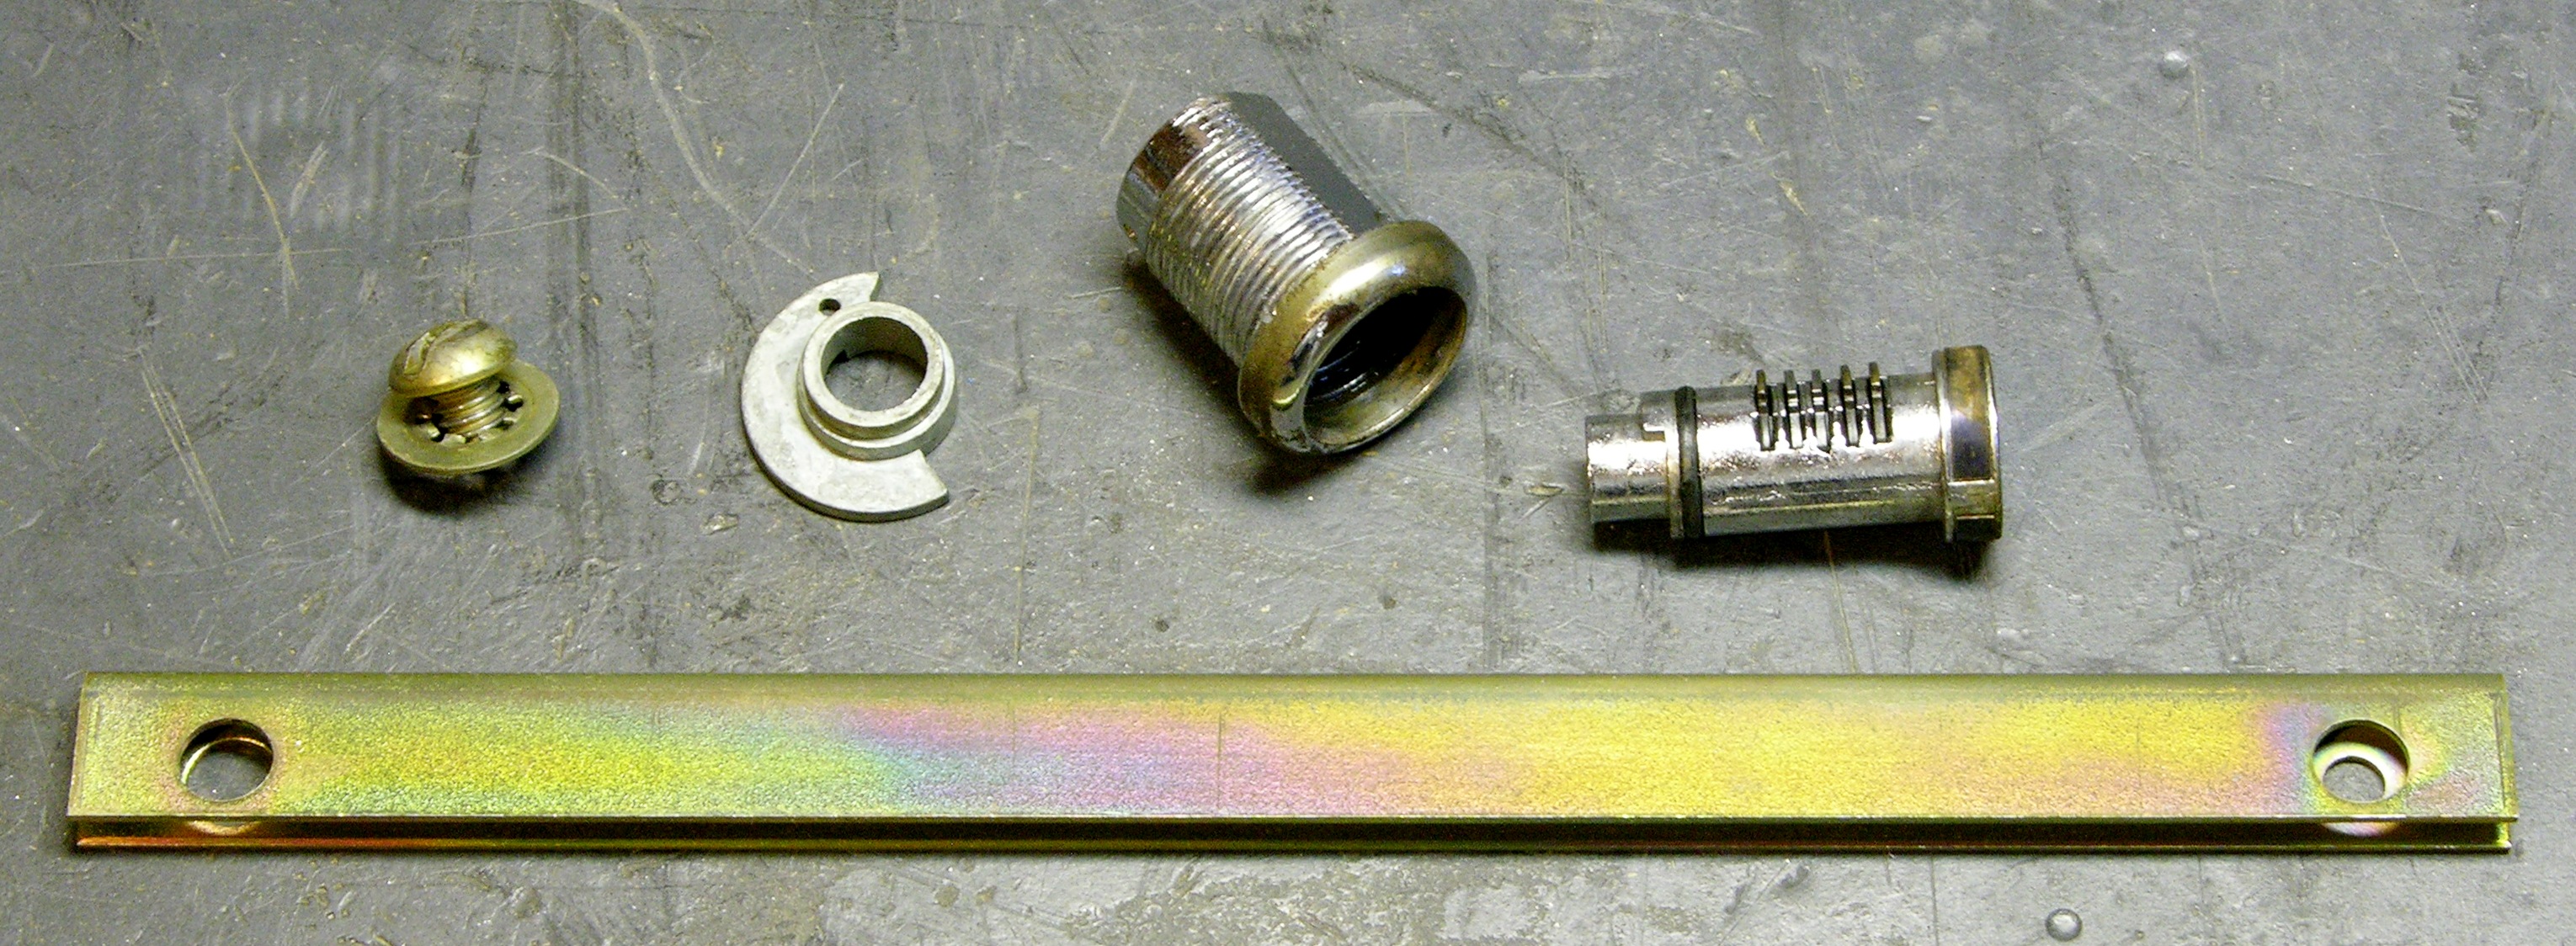
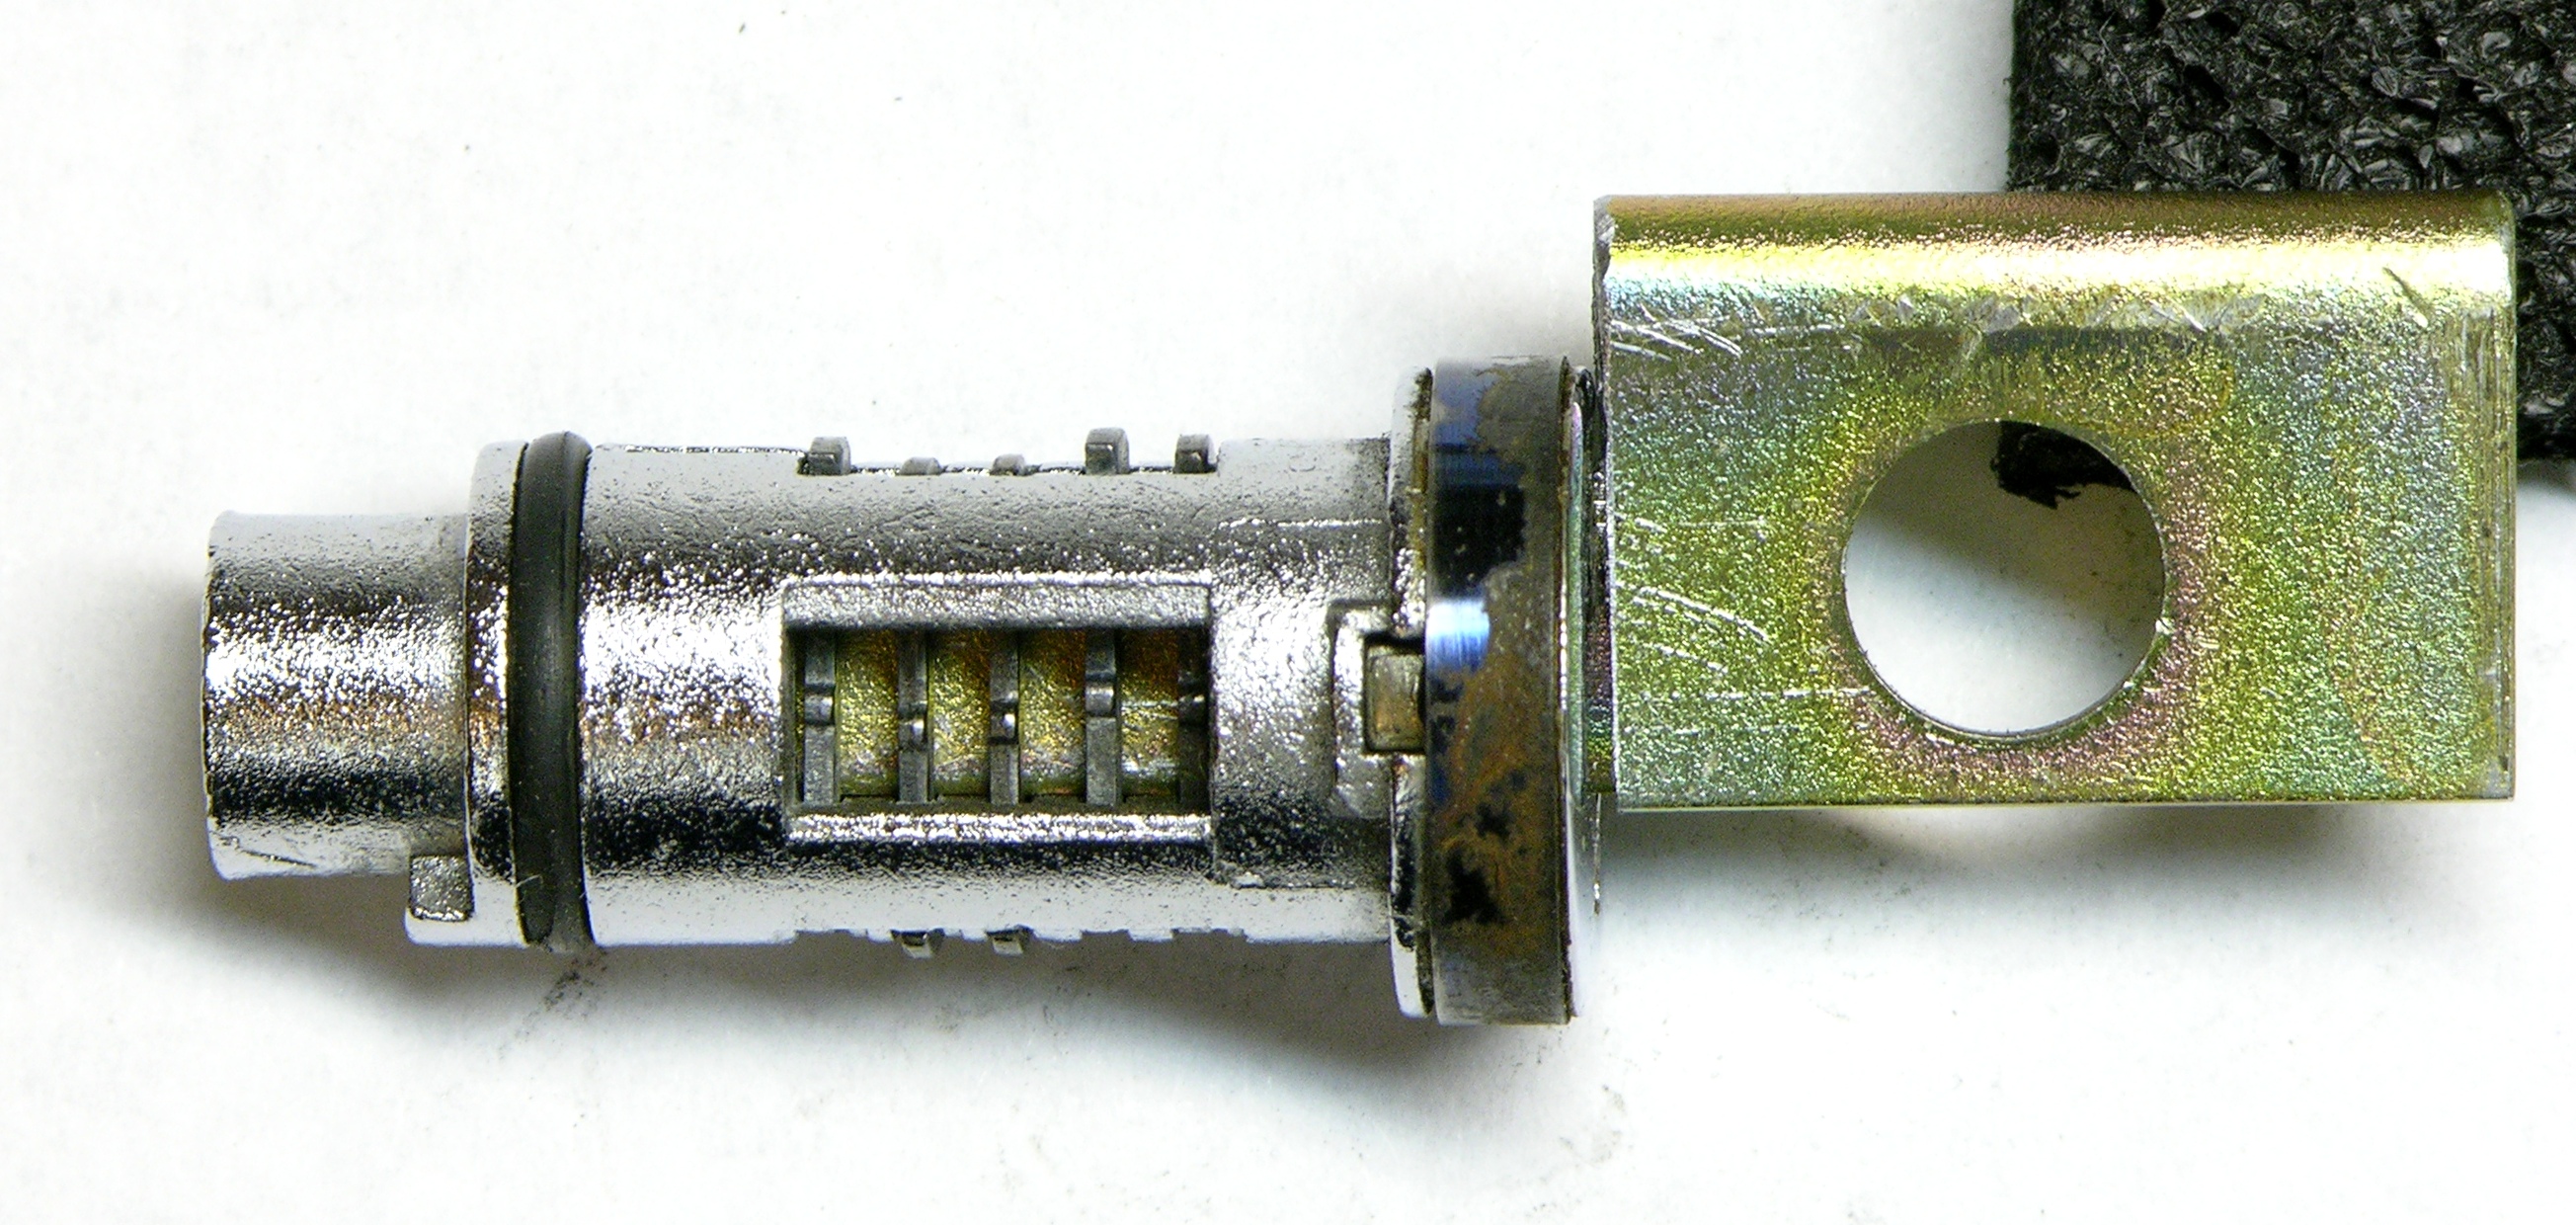
From upper right to left, the tumbler lock has a plug (4) that rotates in a shell (3). The cam (2) mounts on the back end of the plug and is held in place by a machine screw (1). The bracket at the bottom is the sheet metal I used to make my new key.

The plug has a keyway running through it lengthwise. Crossing the keyway are slots for the wafers, which the springs in the slots press toward the bottom of the lock.
The wafers have slots through them at different heights (in this case, only two different heights among my five wafers); the key fits through the slots and its “bitting” (mountains and valleys) press against the ends to raise the wafers against the spring pressure. The correct key will raise each different wafer to the correct height to align its ends with the circumference of the plug, allowing the plug to rotate in the shell.
Making a key for a cheap wafer lock is easy because the lock is easily disassembled and the mechanism is visible (unlike pin tumbler locks). One can simply insert a key blank, mark the wafer positions on the blank, and file the blank until it works — that is, until the wafers are all aligned in the plug.
In this case, making a key was even easier than usual — the keyway has no ridges (“wards”) to require the key to have grooves, so I didn’t have to get a real key; I just used a thick piece of sheet metal. For arcade games that came without keys, I’ve taken the locks to the hardware store to buy a matching key blank and then taken it home to make the bitting.
Making the Key
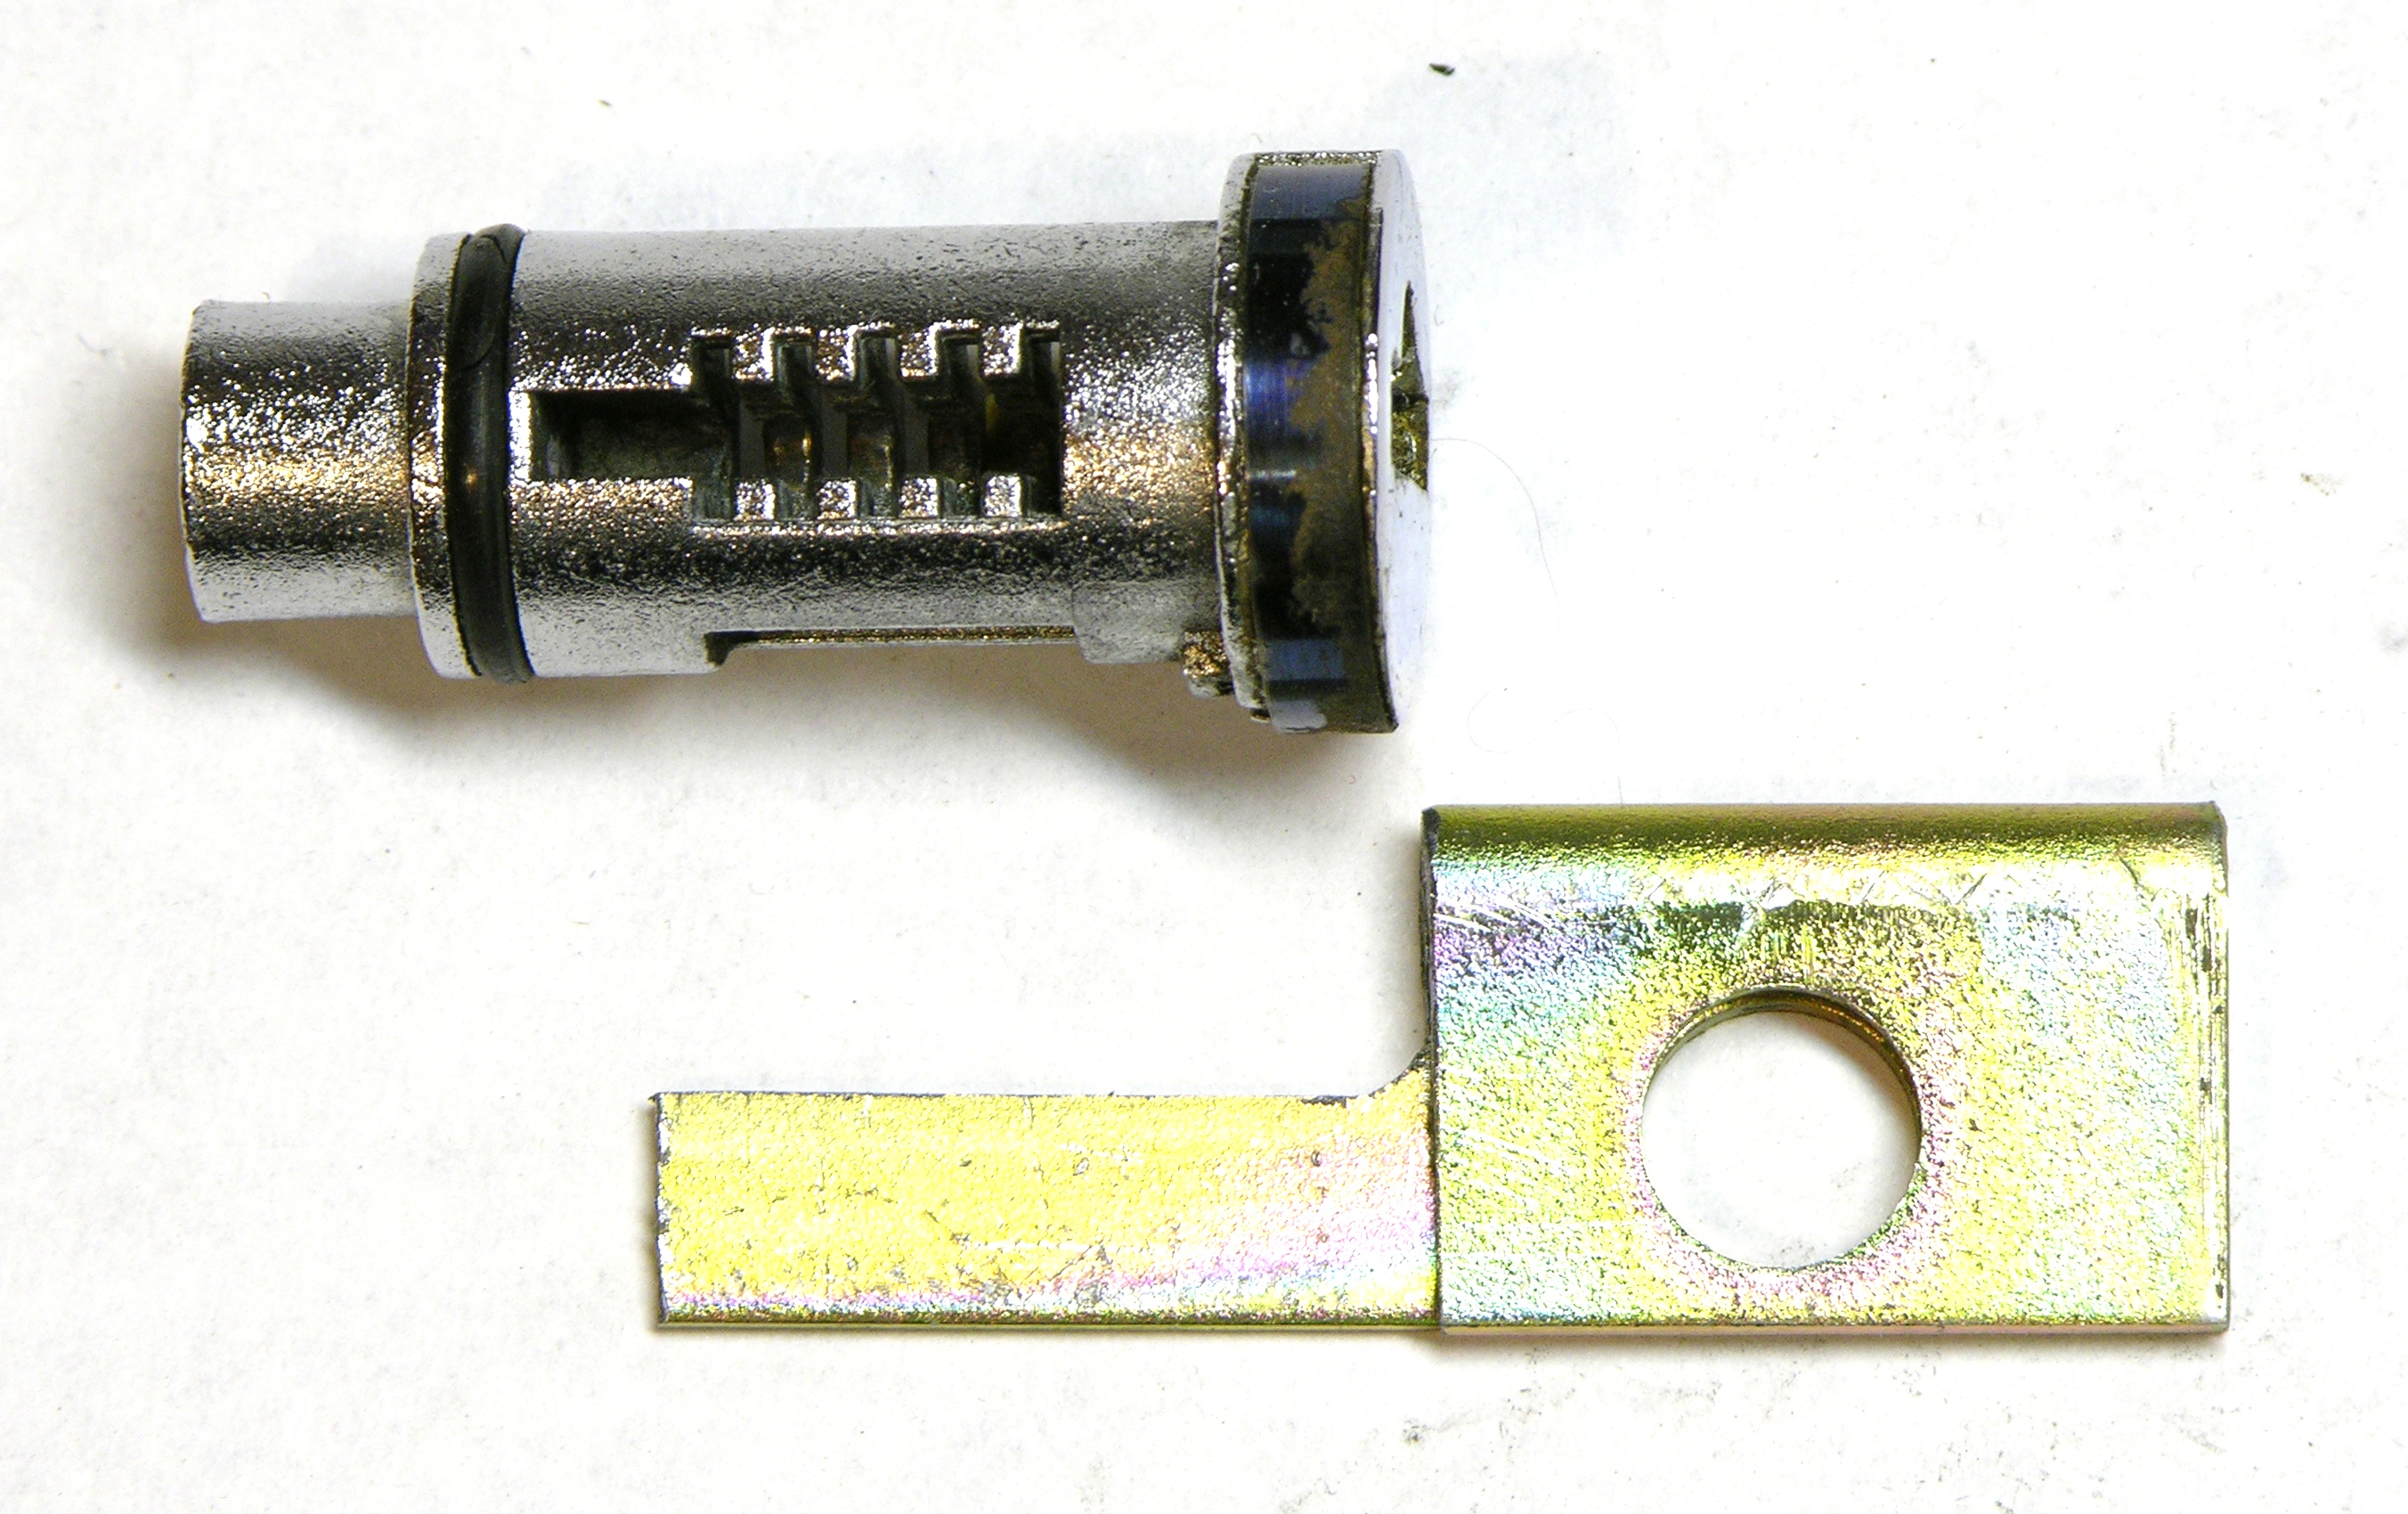
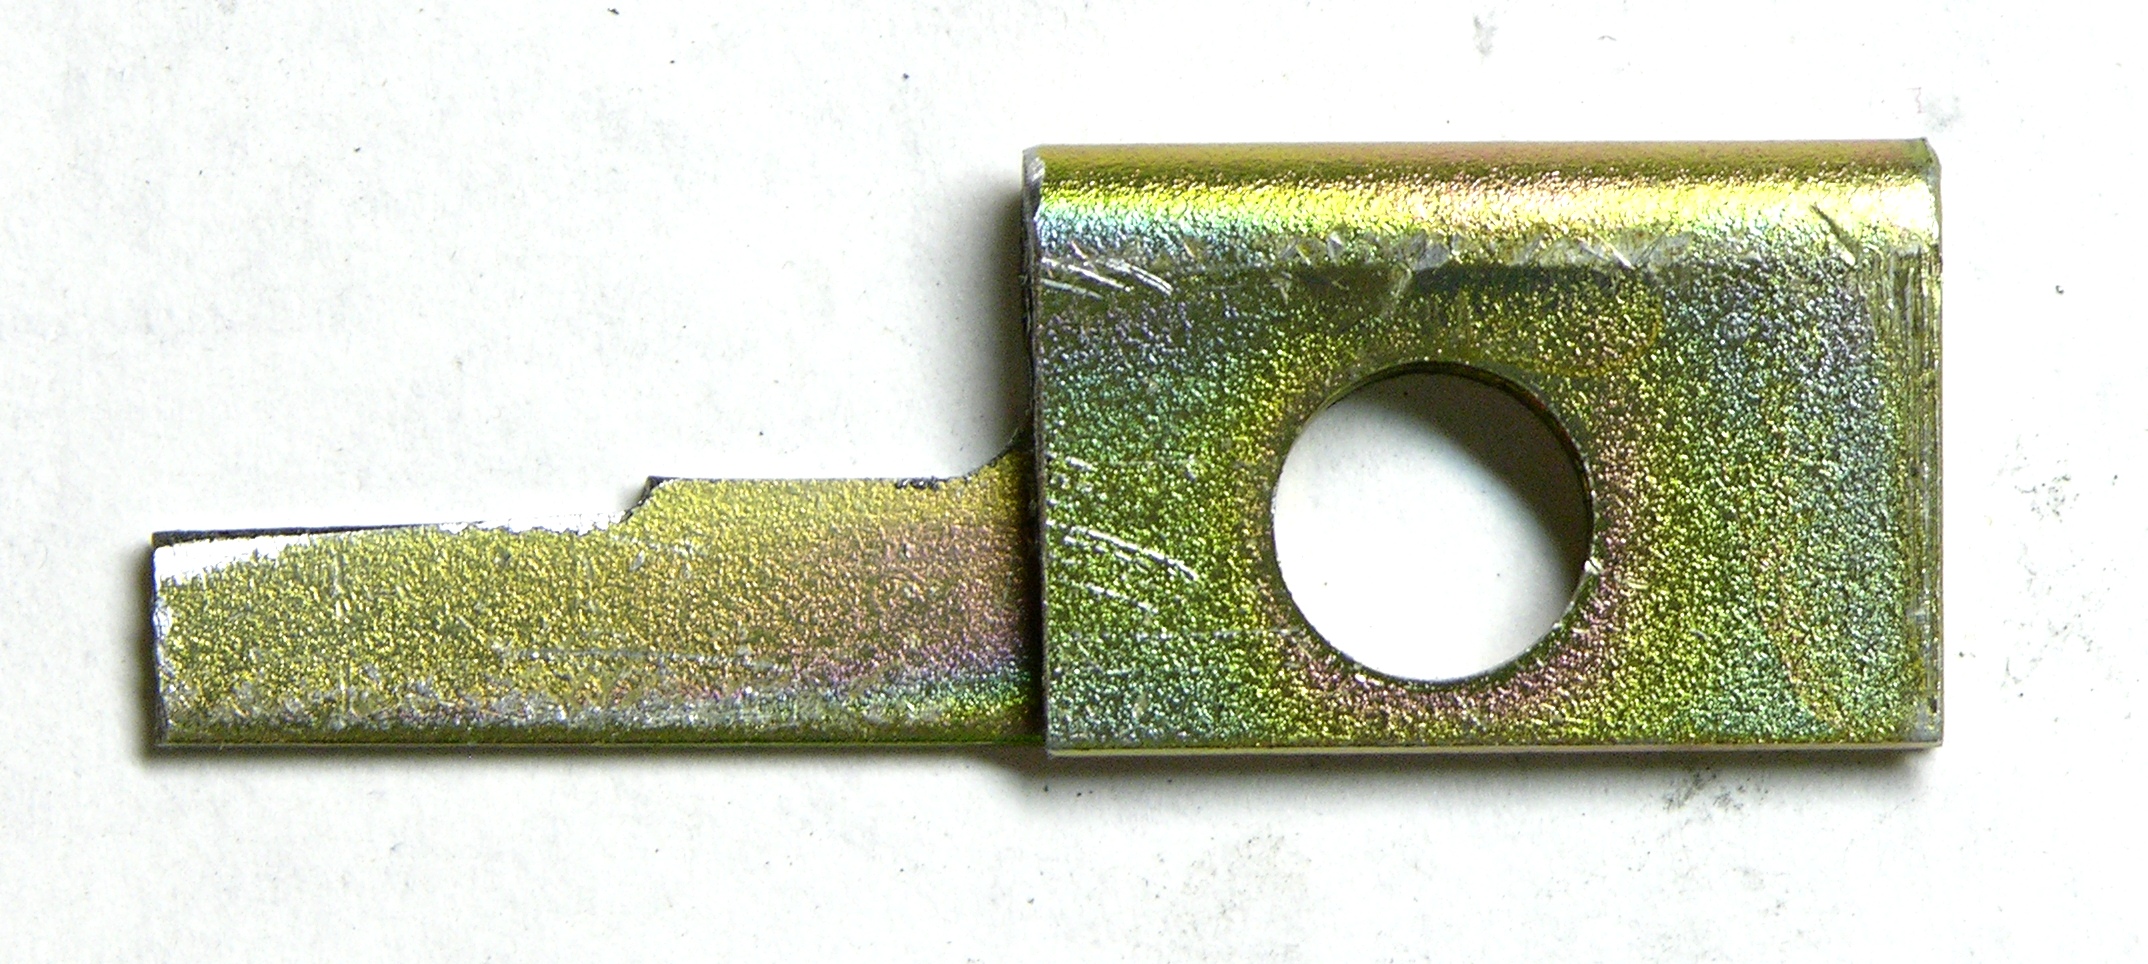
First I hacksawed a key-sized section off of the metal bracket, sawed it into a key-like shape, and filed the burrs off the edges. I made the length such that the key head would fully seat against the plug face without the end of the key bottoming out against the end of the keyway.
I filed the key so it was narrow enough to fit through the wafers’ holes, then inserted the key into the plug with the wafers removed and marked the positions between wafers. I repeat the marking during the filing (bitting) process; but it’s easier to do the first time with the wafers out.
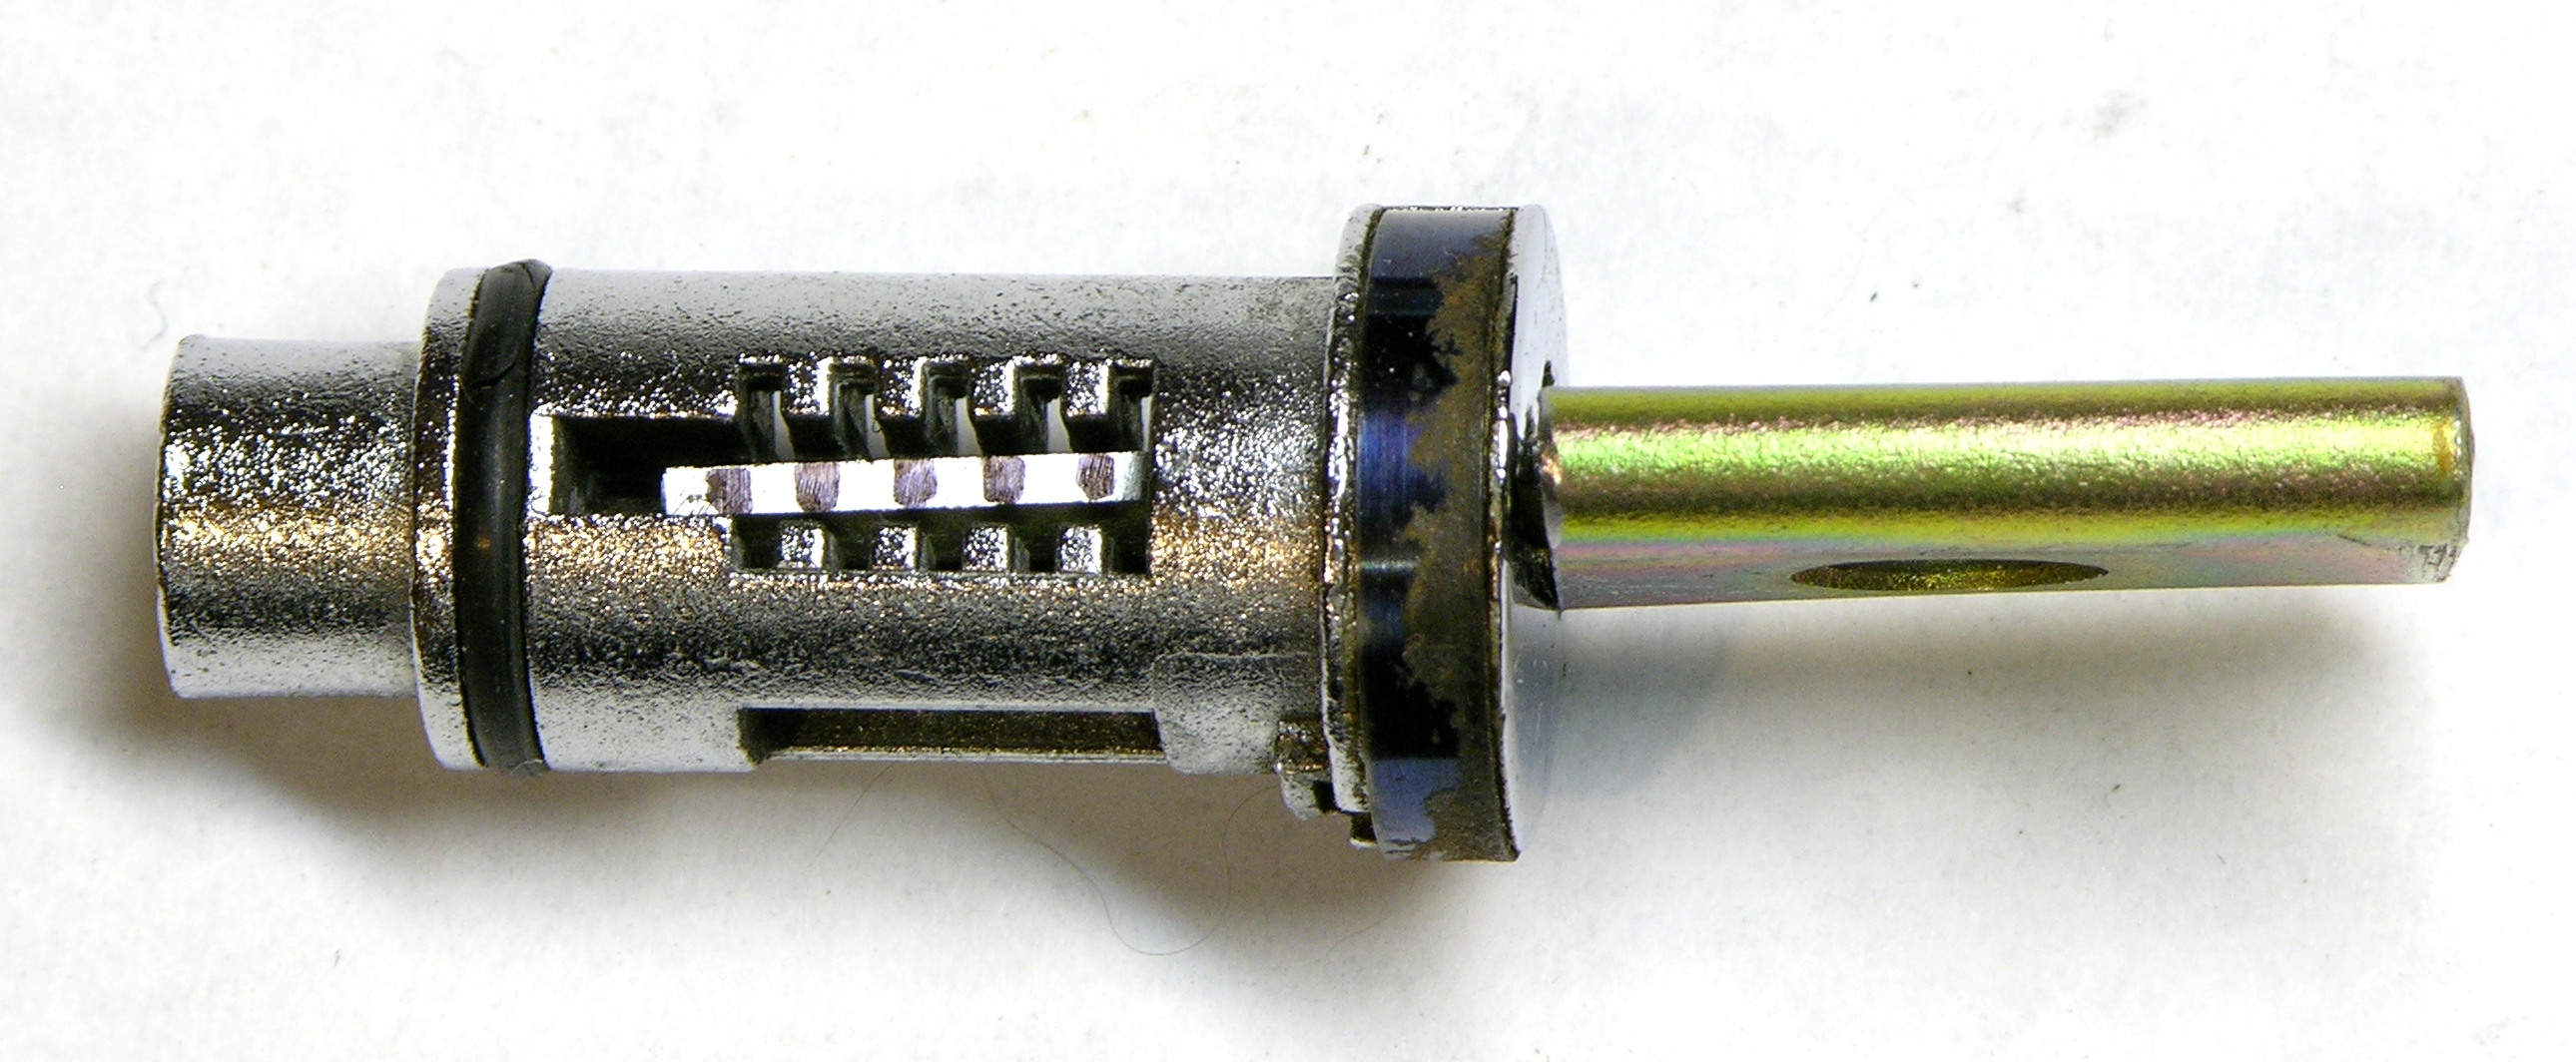
Then I reinstalled the wafers and inserted the key blank into the keyway. Because the leading end of the key wasn’t tapered yet, it didn’t raise the wafers for me like the tip of a finished key, so I used a small screwdriver to poke each wafer until its hole aligned with the key blank.
Here you can see the effect of the difference in hole positions among the wafers — the flat, unbitted key raises the wafers to all different heights.
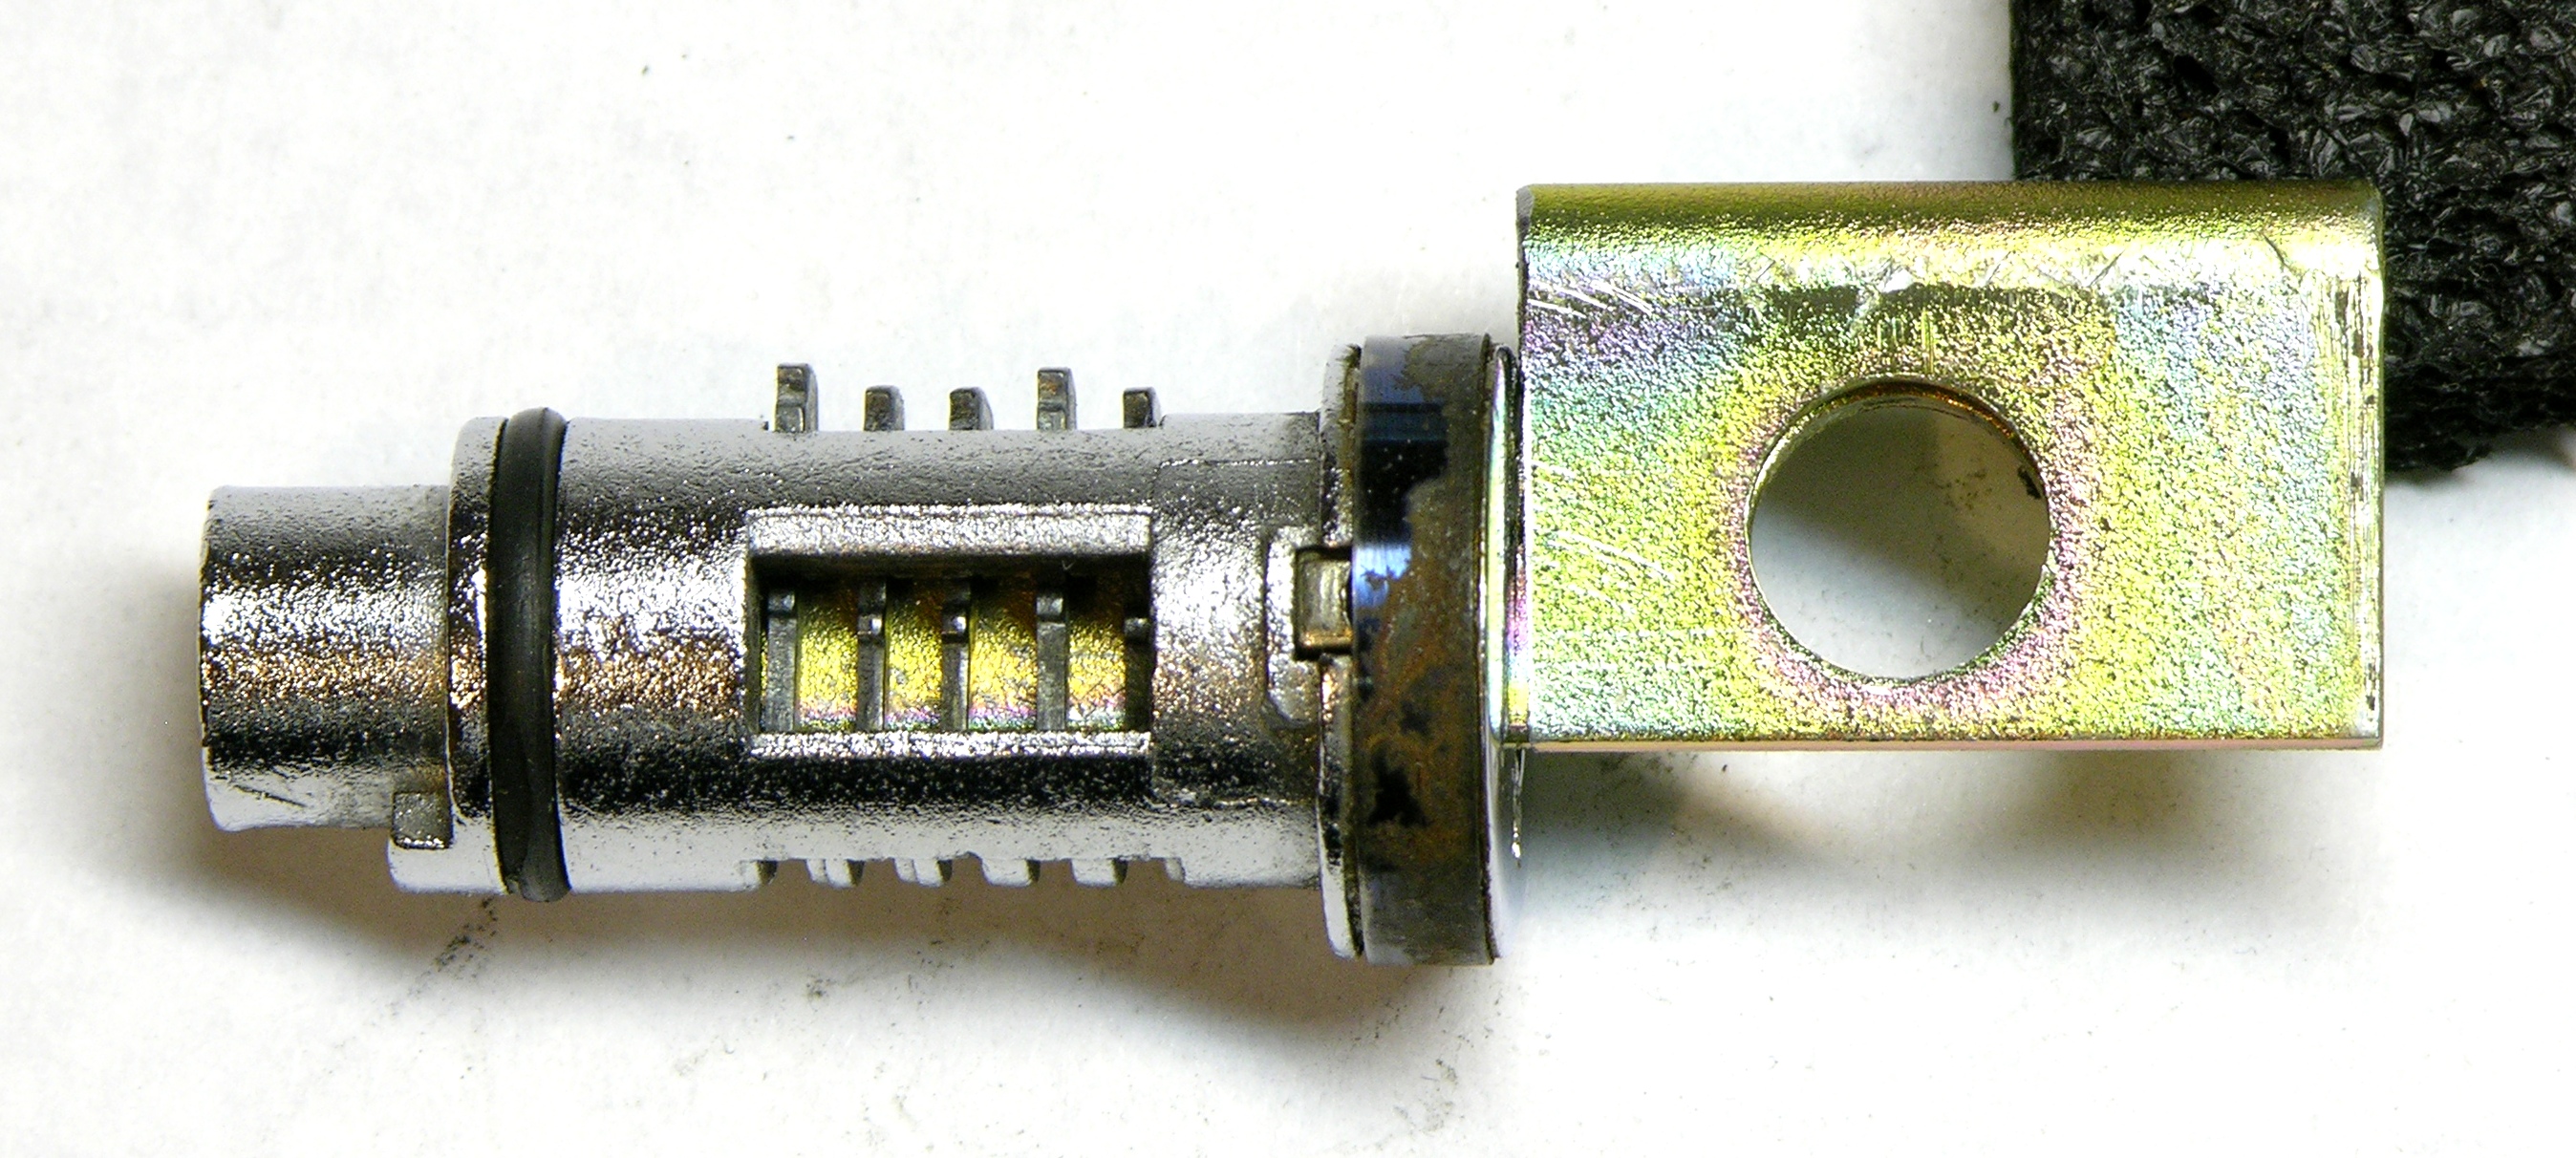
I removed the blank and filed it down enough to make the lowest wafers flush with the surface of the plug.
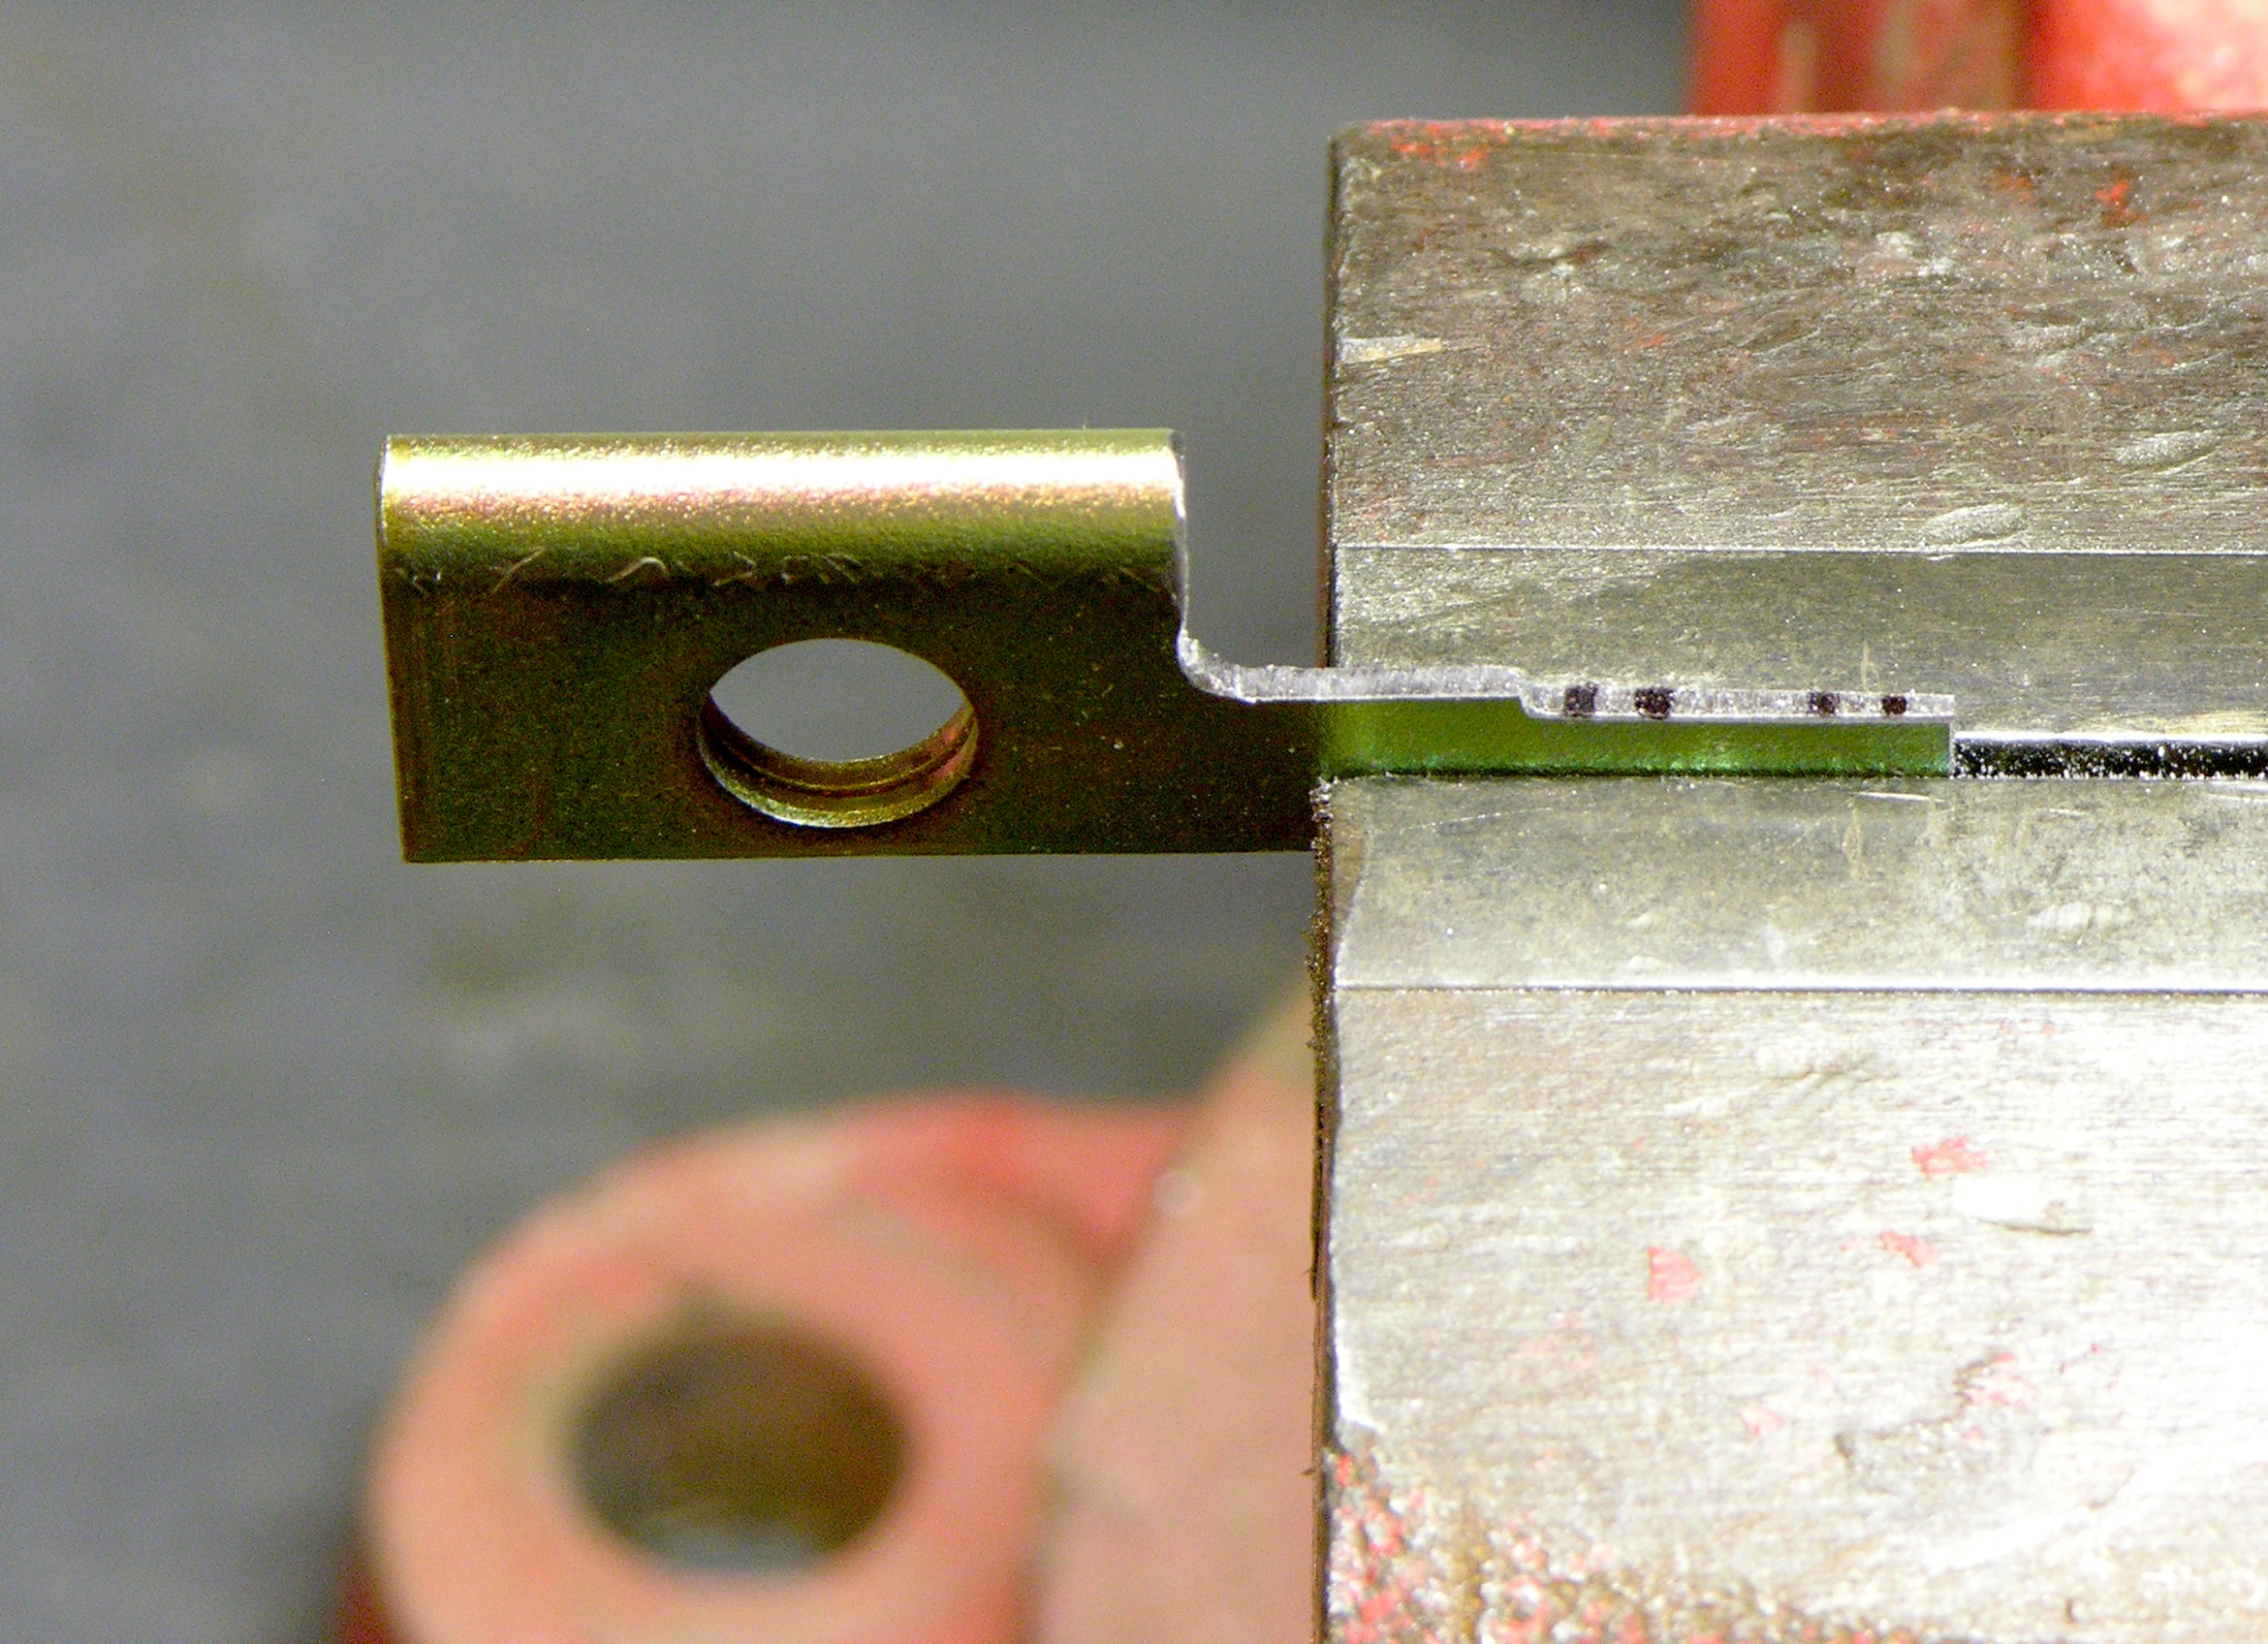
This represents the maximum width of the key bitting — no part will be thicker than this.
I reinserted the key and remarked the wafer positions — in particular, I marked around the two that still needed to be lowered. I then used a round rat-tail file to file grooves into the appropriate positions on the key blank until the key fit the lock with all of the wafer ends (almost) exactly flush with the surface of the plug.
Unfortunately I neglected to take a picture of the plug with the finished key lifting the wafers to the right heights. Use your imagination.
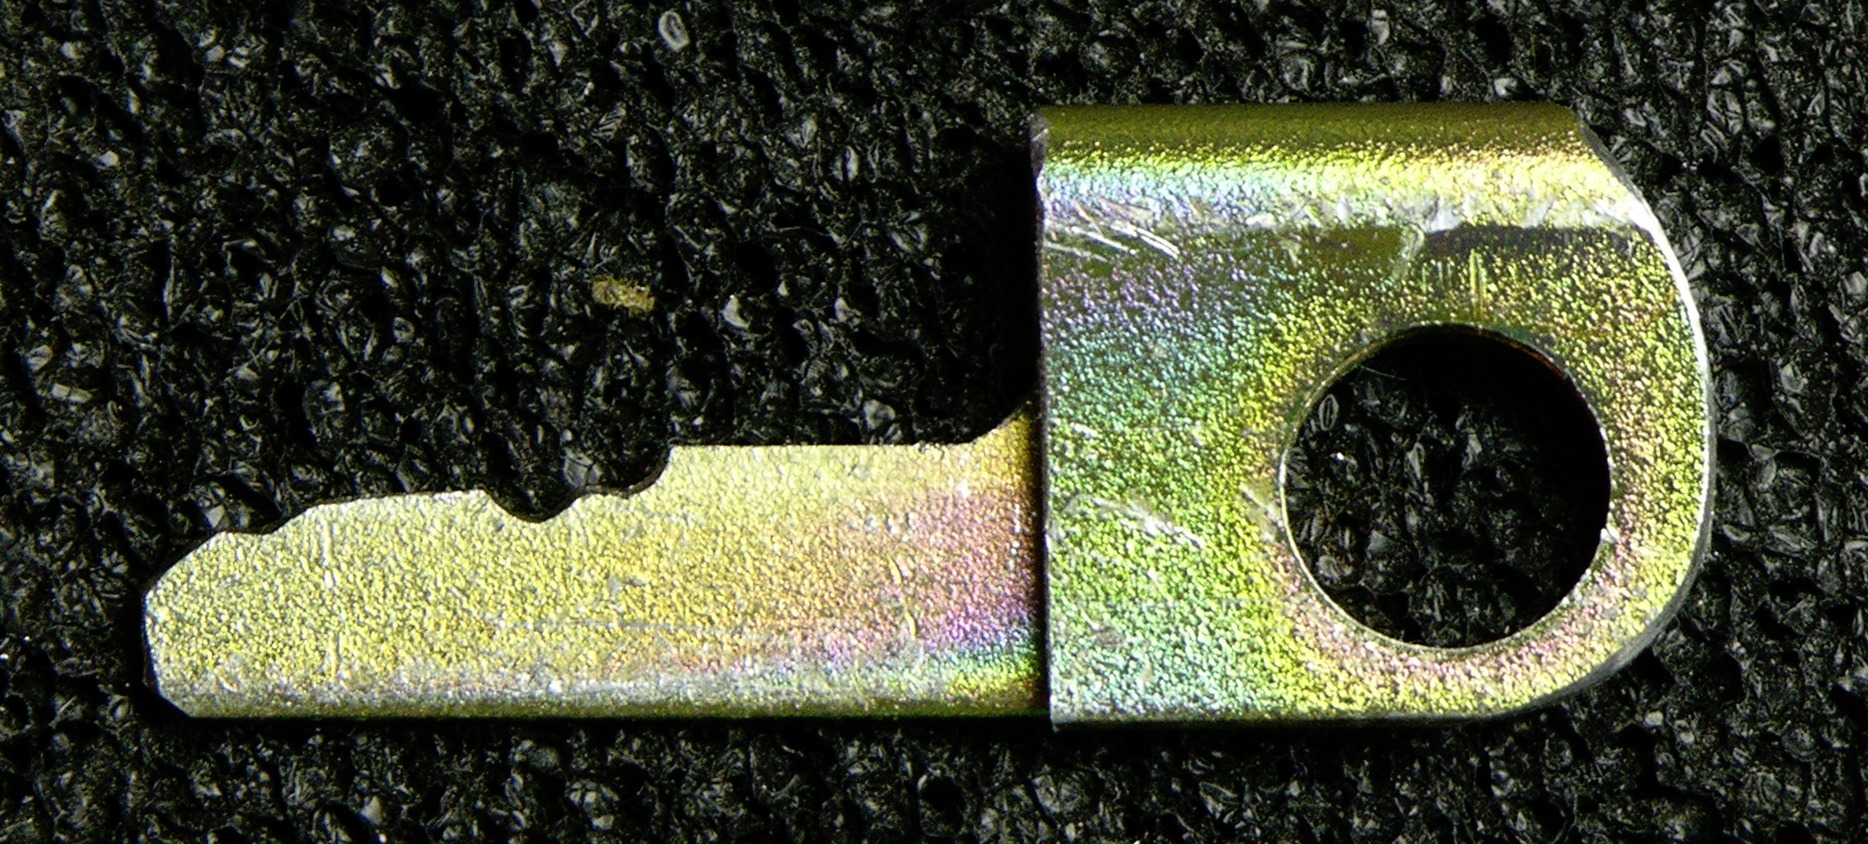
For convenience on my keyring (which is stupid since I can’t lock the gas cap anyway so there’s no point in carrying this key, but whatever), I rounded the corners of the key head with hacksaw and file.

The finished key operates the reassembled lock as smoothly as any consumer-grade commercially-produced key.
And the Cam is Extra-Useless
The lock can be installed in the gas cap in two orientations 180° apart. The lock shell and plug have stops to allow only 90° of rotation. Reinstalling a lock is always a bit of a puzzle to make sure it’s going in the right orientation.
But in this case, I’m not sure there is a right orientation. Here’s the locked position, in which I can remove the key. (The lock could also be installed rotated 180°.)

Here’s the unlocked position, in which I can’t remove the key.
So, uh, splain to me how one of those is locked and one is unlocked?
This isn’t a quarter-turn gas cap like on my cars; it’s a threaded cap that screws onto the end of the filler pipe. My best plan for this cap would be if one were to weld (before installation, obviously not on an existing tank) a washer onto the end of the filler pipe with the same outer diameter as the pipe and 1/2″ smaller ID, and change the stops in the lock so it moves the cam through 180° rotation.
Then the lock’s cam could rotate toward the outside of the cap to engage behind the tube’s washer, preventing removal of the gas cap; or toward the inside of the cap to clear the edge of the washer, allowing removal of the cap.
Alternatively, one could weld (again before installation) a ridge onto the inside of the filler pipe, thick enough that the cam would stop against it when in the locked position, preventing rotation of the cap on the threads.
As it is, I just don’t see how this cap could actually lock. Perhaps the cam actually reaches the interior surface of the pipe, and there’s enough friction (and jamming action from the cam) to prevent turning. I guess I’ll see if I can find some magic behavior when I reinstall it.
Oh and By the Way
Ich rieche wie Benzin
Einen Kraftstoff wie Benzin
Sounds like you’ve been listening to a bit of Rammstein whilst working on the bus. )
)
Matt, not while actually working on the bus; but yes, from time to time.
I remember seeing your lighthouse circuit before and I just watched the video again. That’s really nice! I need to find someplace to use that so I have an excuse to build one.
Also love your camera flash method for NiCad rejuvenation! I have a number of NiCad packs that could use dendrite removal, and the camera flash is a really clever way to charge up the high voltage yet limited current for safe removal. Very nice!
Hi Keith, I’ve been meaning to find an actual use for my lighthouse too. I built it as an experiment and have been at a loss for a real application. I don’t really need a rotating beacon in my flat…
So if you can think of a use, let me know!
The camera flash idea wasn’t originally mine, there’s an instructable. But I made the blog post because I was so fed up trying to find any info about renovating NiCad packs that you didn’t have to pay for sight unseen. It is a nice use though because as you say the voltage is reasonable high but the current nicely limited. Wouldn’t want to put my tongue on it though…
Love your site by the way. I’m always amazed at the detail you put into your write-ups. Do you use a voice recorder like a TV pathologist? Or do you just have a great memory.
Matt, maybe rotating beacon on top of the bus?
If I do come up with a use, I’ll probably want it brighter. It’s not easy to Charlieplex with transistor drive, is it? I’d probably end up having to use some driver IC — and then it’s not really your slick, minimally driven beacon any more.
Ooooh — maybe a rotating beacon inside the bus to indicate some kind of emergency condition or power-down, like something from “Out of Gas”.
As to the detail in my writeups, it’s a matter of taking photos as I go, and the photos jog my memory. Things like specific voltages and currents I’ll often record directly into the blog instead of writing down on paper; but the rest is just out of my head.
I’m glad you enjoy it! I wish I had a good way to know how many of my electronics readers are subscribing to (or becoming regular visitors of) the bus site.
“out of gas”… How about “Too fast, gonna time travel”, or “Got no breaks!!!”
I’d half planned to make the beacon into an “Is it safe?” indicator for the toilet at work. (Too many blokes all in the one office…)
I’d thought to use one of those battery powered LED dome lights as the doner case, the sort when you push the dome in to turn it on/off. Then I’d have my circuit “spin” inside the dome for 3 minutes, with each additional trigger adding another 30 seconds or so until enough time had passed for “fume dispersal” after which the circuit enters sleep mode.
I never quite managed to build it though as our baby came along and life changed dramatically.
RE: the bus blog. You could always ask people if they read both blogs? I’ll bet there’s a lot of lurkers!
Count me in as an electronics blog fan that is now a bus blog fan. =)
My dad did a bus conversion when I was a kid (late 80′s). I don’t remember many details but it was originally a 64 passenger school bus and had been painted dark blue before we got it.
Be very careful what kind of lights you put on the outside of the bus (or, for that matter, on the inside of the bus). Certain states can be very particular as to the colour of lights. This can be especially problematic when taking a vehicle with approved lights in one state into another state.
But, you probably already knew this.
As for why have a locking gas cap that doesn’t lock, well, it’s very presence my deter some people from attempting to siphon gas (“Drat! It has a locking gas cap. We’ll try another vehicle.”).
Plus, with the retainer, it’s less likely to be lost than a non-retainered cap, which makes it much better than a rag (Can you say “Rolling Molatov Cocktail”?).
Dave
Where can I find a locking gas cap? Haven’t had much luck with the web. Thanks.
L. Arnold, I don’t know. Haven’t looked for one myself. Maybe ask at an auto parts store?