Roof Ribbing

January 27th, 2013

Just discovered this snapshot from last year on my cell phone:

Schoolbus with drying dew

I was driving by on a sunny morning after a dewy night and noticed the arched pattern of damp and dry regions along the edge of the roof. (As always, click the image for the full-size version.)

I think that should be telling me something about the roof ribbing (which the rivet patterns suggest continue across between window stiles, as one would expect) and the presence or lack of insulation between them, but I’m not quite sure what.

At some point I’d like to know, as (A) I might want to cut a hole in the roof for an air conditioner and (B) I might want to run wires in the ceiling to augment the marker lights on the outside and the speakers on the inside.

Best Fit of Carpet Scraps

November 30th, 2012

I have this preowned carpet in good condition, see, but it’s in small and medium pieces. My brother has a carpet-seaming iron and plenty of tape. I’d like to use what I have on hand and get the bus livable, then make it perfect later with a beautiful carpet beautifully installed. (Fire bullets, then cannonballs.)

Let’s use the computer to help figure out how best to fit the scraps into the bus, shall we? If you’d like to play along at home, the drawing file is available for download at the end of this post. I’d love for someone to come up with a better plan than I have so far.

The Pieces

Bus interior carpet pieces

The gridded part of the drawing is the main floor area of the bus (omitting the area under the driver’s seat and forward of the front door), with the front of the bus at the top of the drawing. The dark rectangles are obstructions — kitchen cabinet in front and toilet riser in back (not to be carpeted) and wheel wells in the middle (requiring more than just laying carpet flat over them). The dotted line in back is where the bathroom wall will go. The carpet pieces are light brown, oriented in the direction of the nap, and translucent on the drawing so we can see how they overlap.

The large piece already set in the back of the bus is … already set in the back of the bus, cut to fit around the toilet, and slit to fit between and over the wheel wells. The dark brown areas in the upper corners are the translucent carpet piece overlapping the charcoal wheel wells.

This slide is the “kit” with which to start.

I expect to have bunks or desk filling most of the wall space in the main room (like the kitchen already does); so the center aisle will remain the primary walkway.

Plan 1: No seam in the walkway

Bus interior carpet plan 1

I (virtually) took the long strip from the left, laid it down the main aisle, cut it to length where it met the piece already set in the back, then sliced that cutoff down the middle and used the two pieces to fill the front passenger side and the middle driver side. I changed the color from light brown to eye-catching-ugly to designate it as a set of pieces that had been cut.

The thin, dark areas are where pieces overlap (translucent in the drawing, remember) and would be cut to fit.

This has the advantage of not having a seam getting walked on all the time. It has the disadvantage of requiring two seams the length of the entire forward area of the main room.

Plan 2: Cut it in half

Bus interior carpet plan 2

I cut the long piece in half lengthwise and seamed it together, which only requires one long seam. The design is symmetrical but in my opinion not particularly helpful. It requires several more seams (both horizontal and vertical) right at a high-traffic chokepoint between the wheel wells. And it has a seam right down the entire main aisle.

Plan 3: One extra piece

Bus interior carpet plan 3

This still has a seam down the main aisle but reduces the seams in the wheel-well area by not arbitrarily choosing to cut the long piece into equal lengths.

What to do?

I lean toward Plan 1 with no seam down the main aisle and I give a strong nod toward the elegance of Plan 3 being doable using only two of the available pieces. (The back piece is actually slightly longer than drawn so is probably long enough to make up for the height of the wheel wells.)

I might be working on this tomorrow (Saturday). Comments and suggestions welcome.

Here’s the file in OpenOffice/LibreOffice Draw format.

Carpet Cleaning

November 22nd, 2012

Still waiting on brake repair but can’t let the world pass by while doing so. Thanksgiving Day and my family takes the evening meal together. What better opportunity to clean the preowned carpet that I want to install in the bus?

It was tricky running the Rug Doctor up and down those bumps up front, but well worth it.

I did three full passes over all of the large and small carpet scraps, got really tired of running in and out of the house to empty the extraction tank and mix more cleaning solution, and was still pouring fairly-dark grey water out of the tank after the third pass. But that’s enough; I’m done. The carpet is now rid of obvious dusty and dirty spots and is a uniform color and texture. It’s also further relaxing its bends from being rolled up in storage.

It’s 50F outside somewhere near here; it feels like 60F outside here in the still air; and it has to be 70F inside the bus with a clear sky and the sun shining down. The front door, back hatch, and all the windows are open and a breeze is blowing through to dry the carpet.

$25 to rent the machine, $6 for a bottle of pre-treatment spray that I don’t think really did anything over as large an area as I used it, and $13 for the jug of cleaning concentrate.

Now make a computer model of the floor of the bus and of all the carpet scraps so I can see how best to fit them in. And as soon as they’re dry, borrow my brother’s carpet seamer and start cutting them to fit and piecing them together.

First Night in the Bus

April 21st, 2012

I’ve just come inside from my first night sleeping in the bus. It was a trial run in my own driveway to find out whether I needed anything more than the futon, a bottle of water, and a reading light in order to spend the night. Answer: I really don’t, but I learned several important things from the experience.

Backing the Bus into the Driveway

When I had the bus parked on the street in front of my house over spring break, I noticed a lot of vehicles driving by slowing down to gawk at it. Yes, it was a large obstacle parallel-parked on the street; but you can tell the difference between slowing down to get around an obstacle safely and slowing to a crawl, sometimes stopping altogether, head(s) turned to look.

Friday of that week, the police chief stopped by to visit with me about the bus. My mother worked for him when she was city office receptionist and court clerk, he’s an old friend of the family, and he’s very considerate, so this was not a stressful experience for me like it could be for some.

He came with several issues:

  • You can’t park a big purple bus on the street in front of your house. It creates a traffic hazard.
  • We’ve been receiving complaints.
  • This license plate is expired and belongs to a 1986 Chevy and you can’t move another license plate onto a bus like that.

I explained that I had the bus there to work on during spring break and that I was planning to take it back the next day, that it really is a 1986 Chevy, and that it really is currently tagged and insured but I haven’t been able to find the 2012 sticker for the license plate.

He was satisfied and sought nothing further from me; but before bringing the bus home yesterday (having initially thought I’d park it on the street overnight), I contacted the city administrator, another old acquaintance whom I deeply admire. He replied,

If your converted bus is lawfully registered, tagged, and operable, you can park it on the street. We would prefer that you don’t because it causes congestion and a potential traffic hazard. Will rely on your good sense to decide.

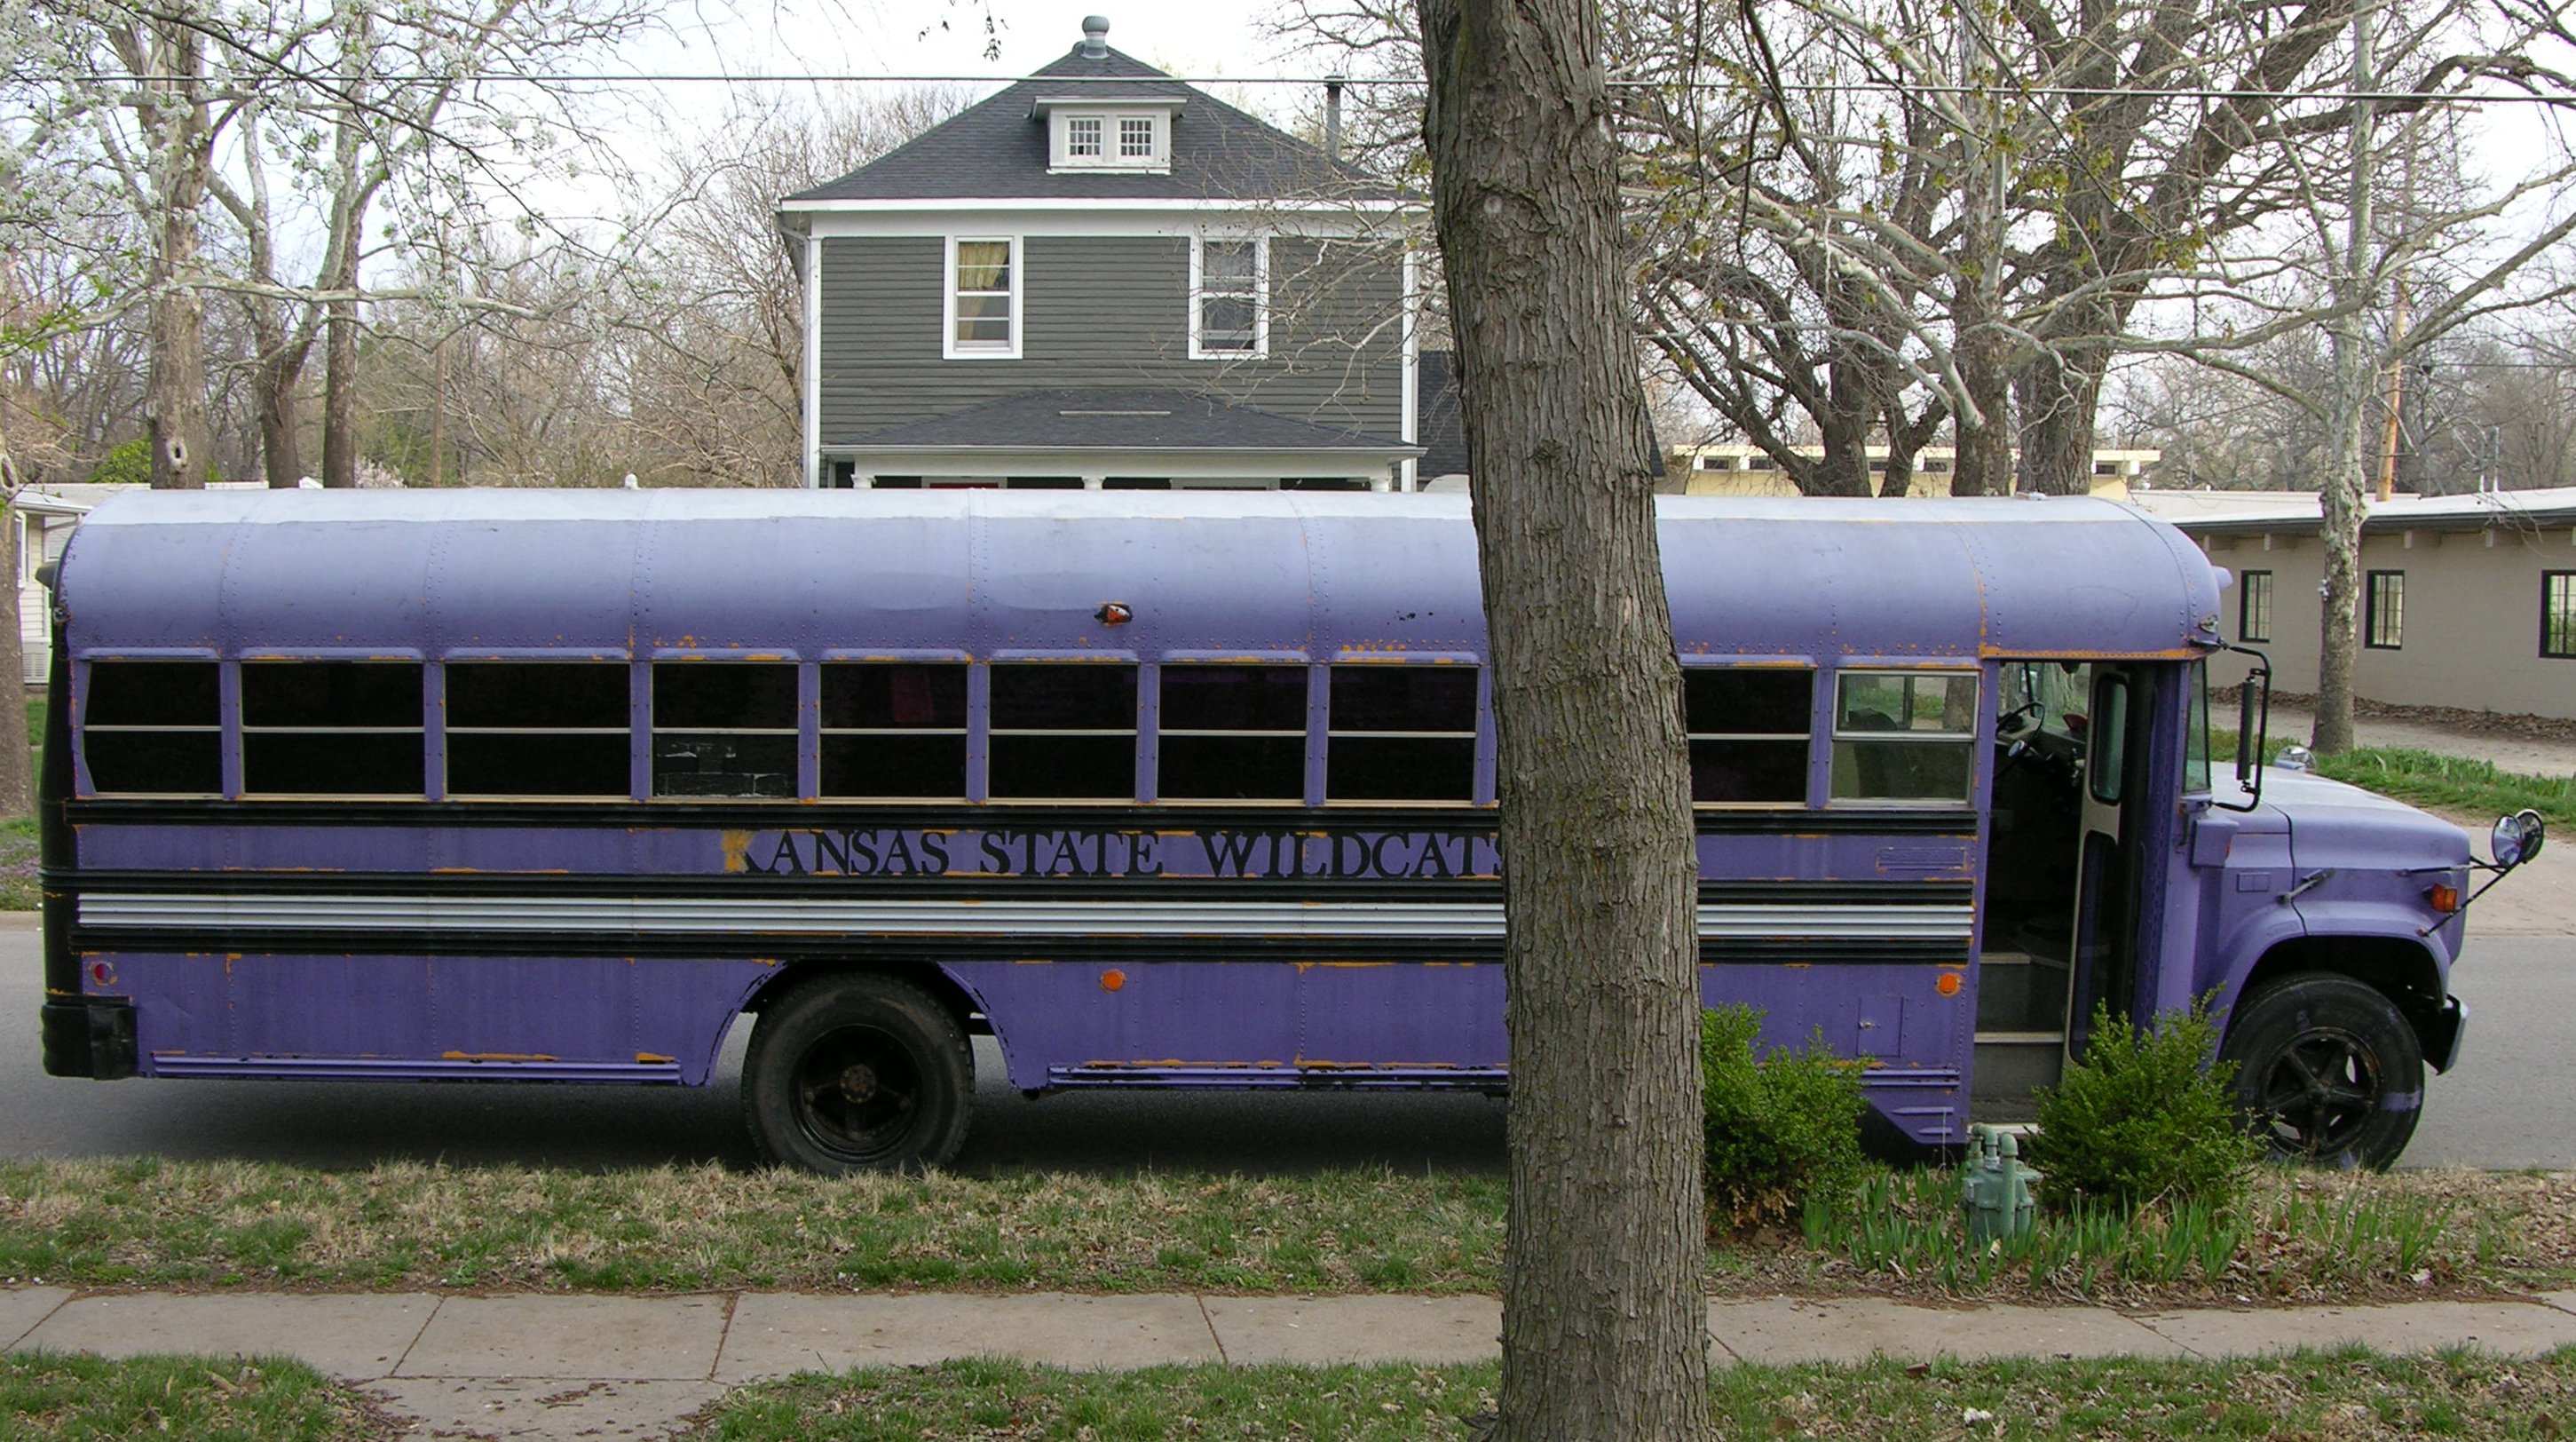
I appreciate the direct yet polite approach and resolved to do what I could to keep the bus off the street — which meant backing it into my driveway.

I frequently backed the bus onto the concrete pad at my brother’s property, parallel parking close to the shed — but that has a long approach and plenty of room to correct.

With the long distance behind the rear axle and the broken right-side wide-angle mirror, I was concerned about getting my angle right to back into our single-car driveway. With the long distance behind the rear axle, the doesn’t-seem-steep-in-a-car driveway and crown of the street, and my experience gouging the street with the back of the bus backing it out of my driveway, I was concerned about scraping on the way in.

The solution to both problems was getting the back wheels onto the corner of the “alluvial fan” at the bottom of my driveway while the bus was still angled, then straightening quickly. And this required a better view of the right rear wheels than I thought I had available — but I practiced backing the S-curve into my brother’s alley near where the bus parks and that went well. At home on my own driveway, I got the wheels almost exactly where I wanted them and pulled forward a bit to straighten once, though I think I wouldn’t have had to.

Lesson learned: Backing the bus takes less practice, on top of my experience backing other moderately large vehicular combinations, than I had guessed.

Preparing for Night

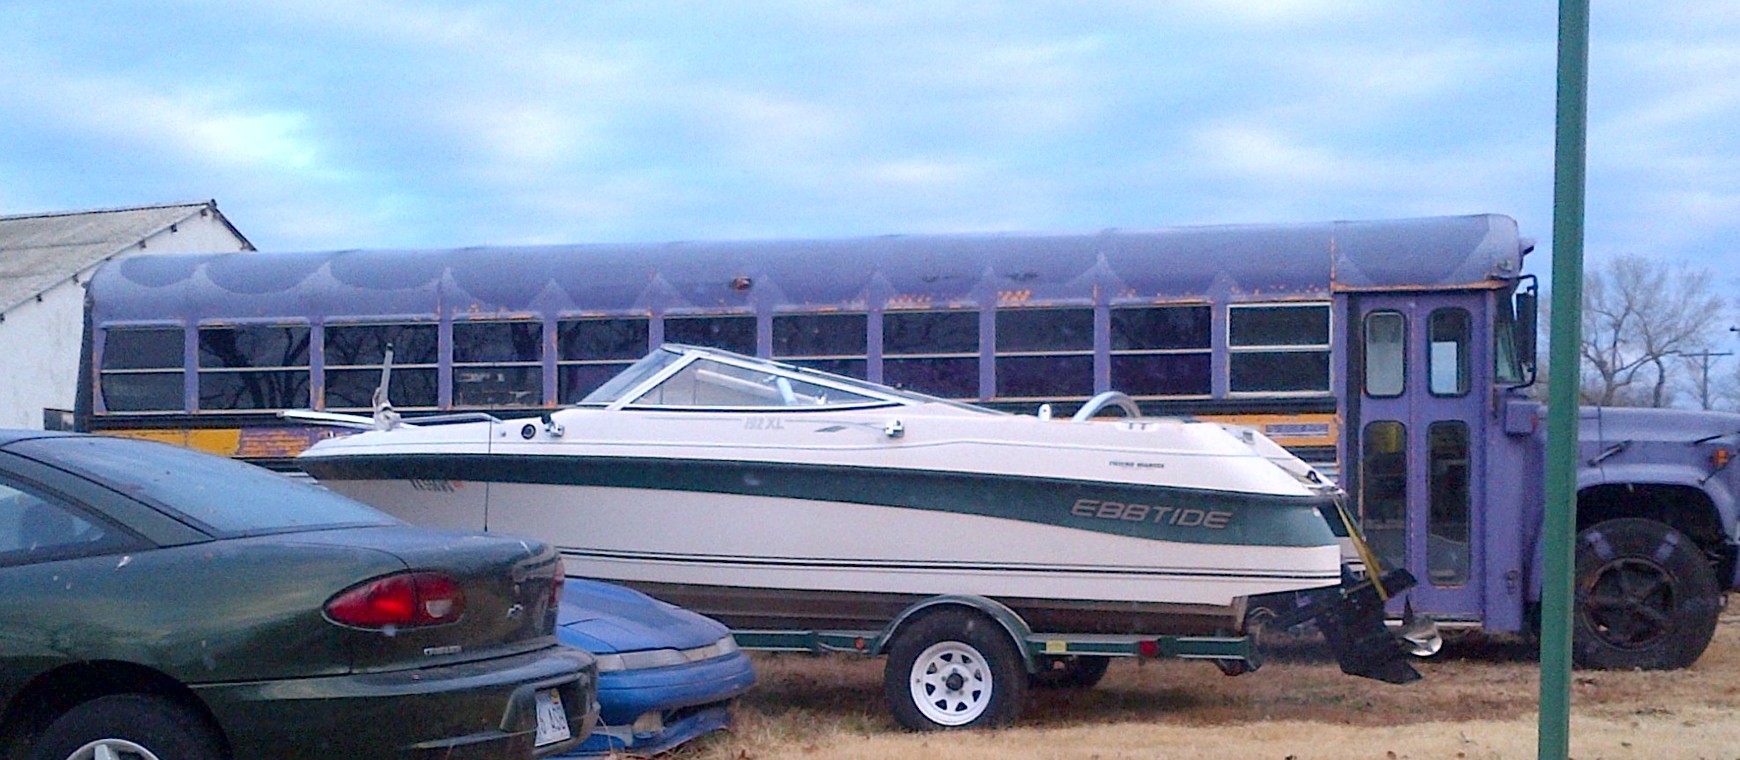
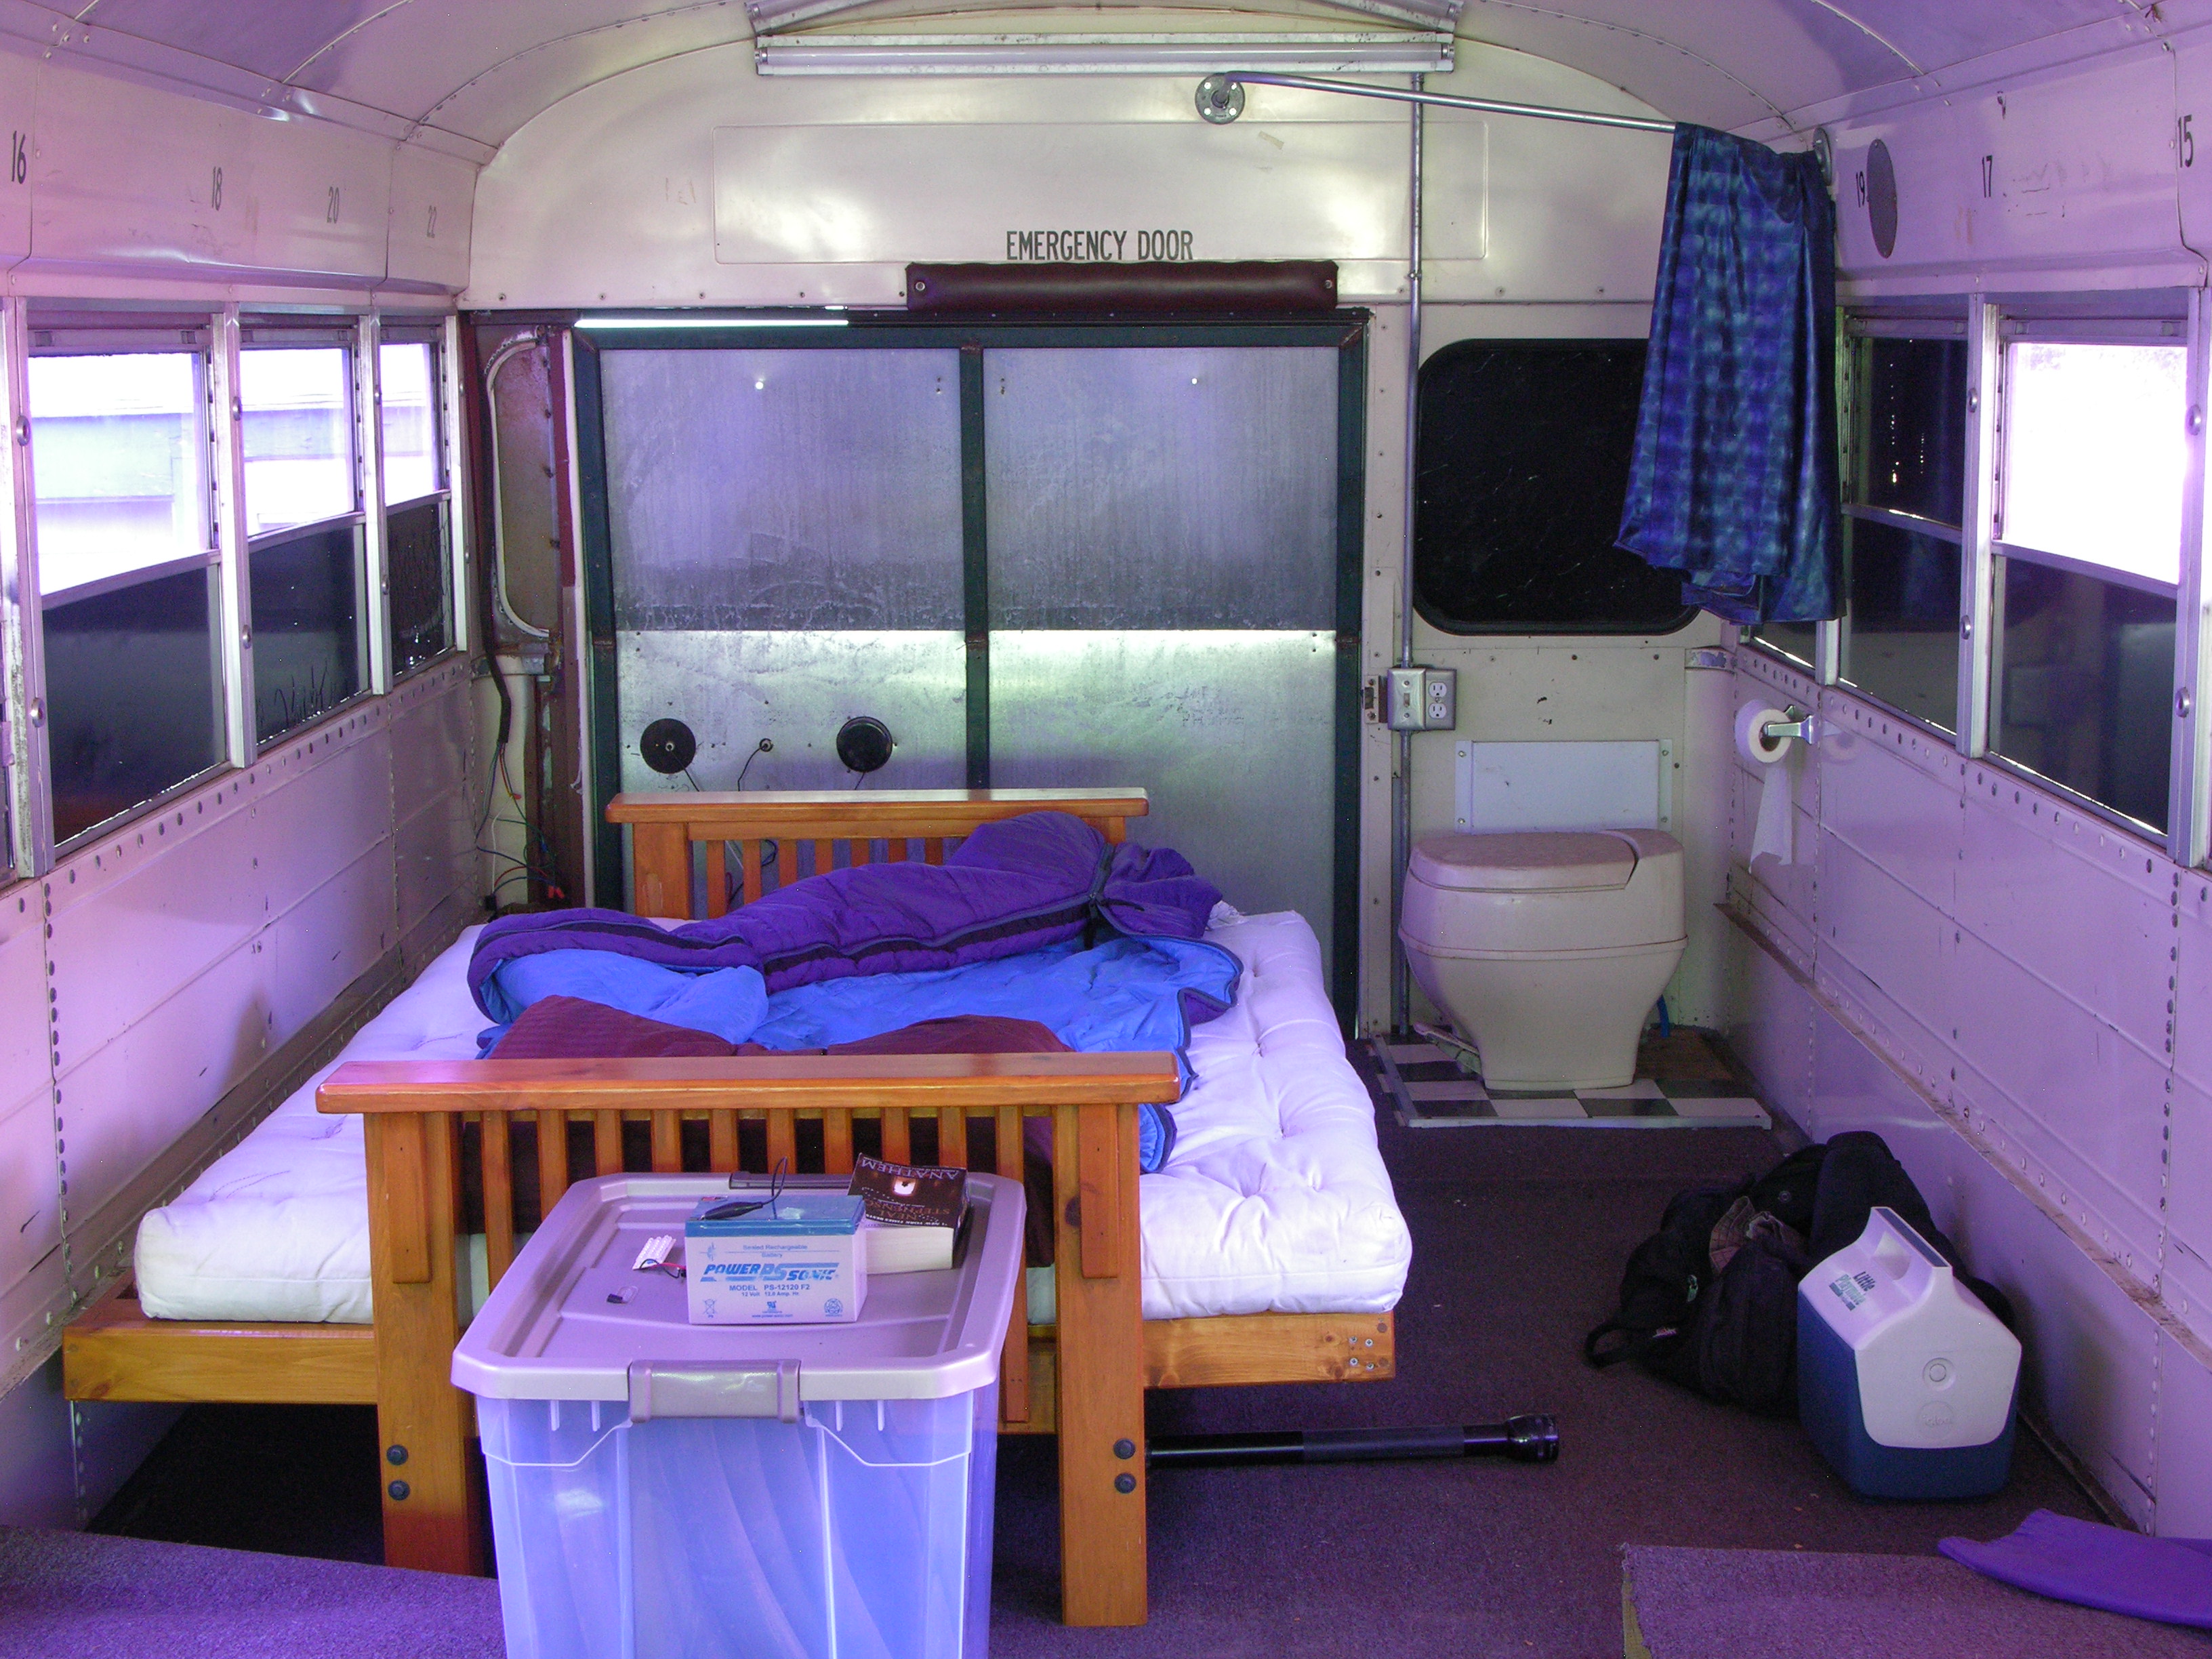
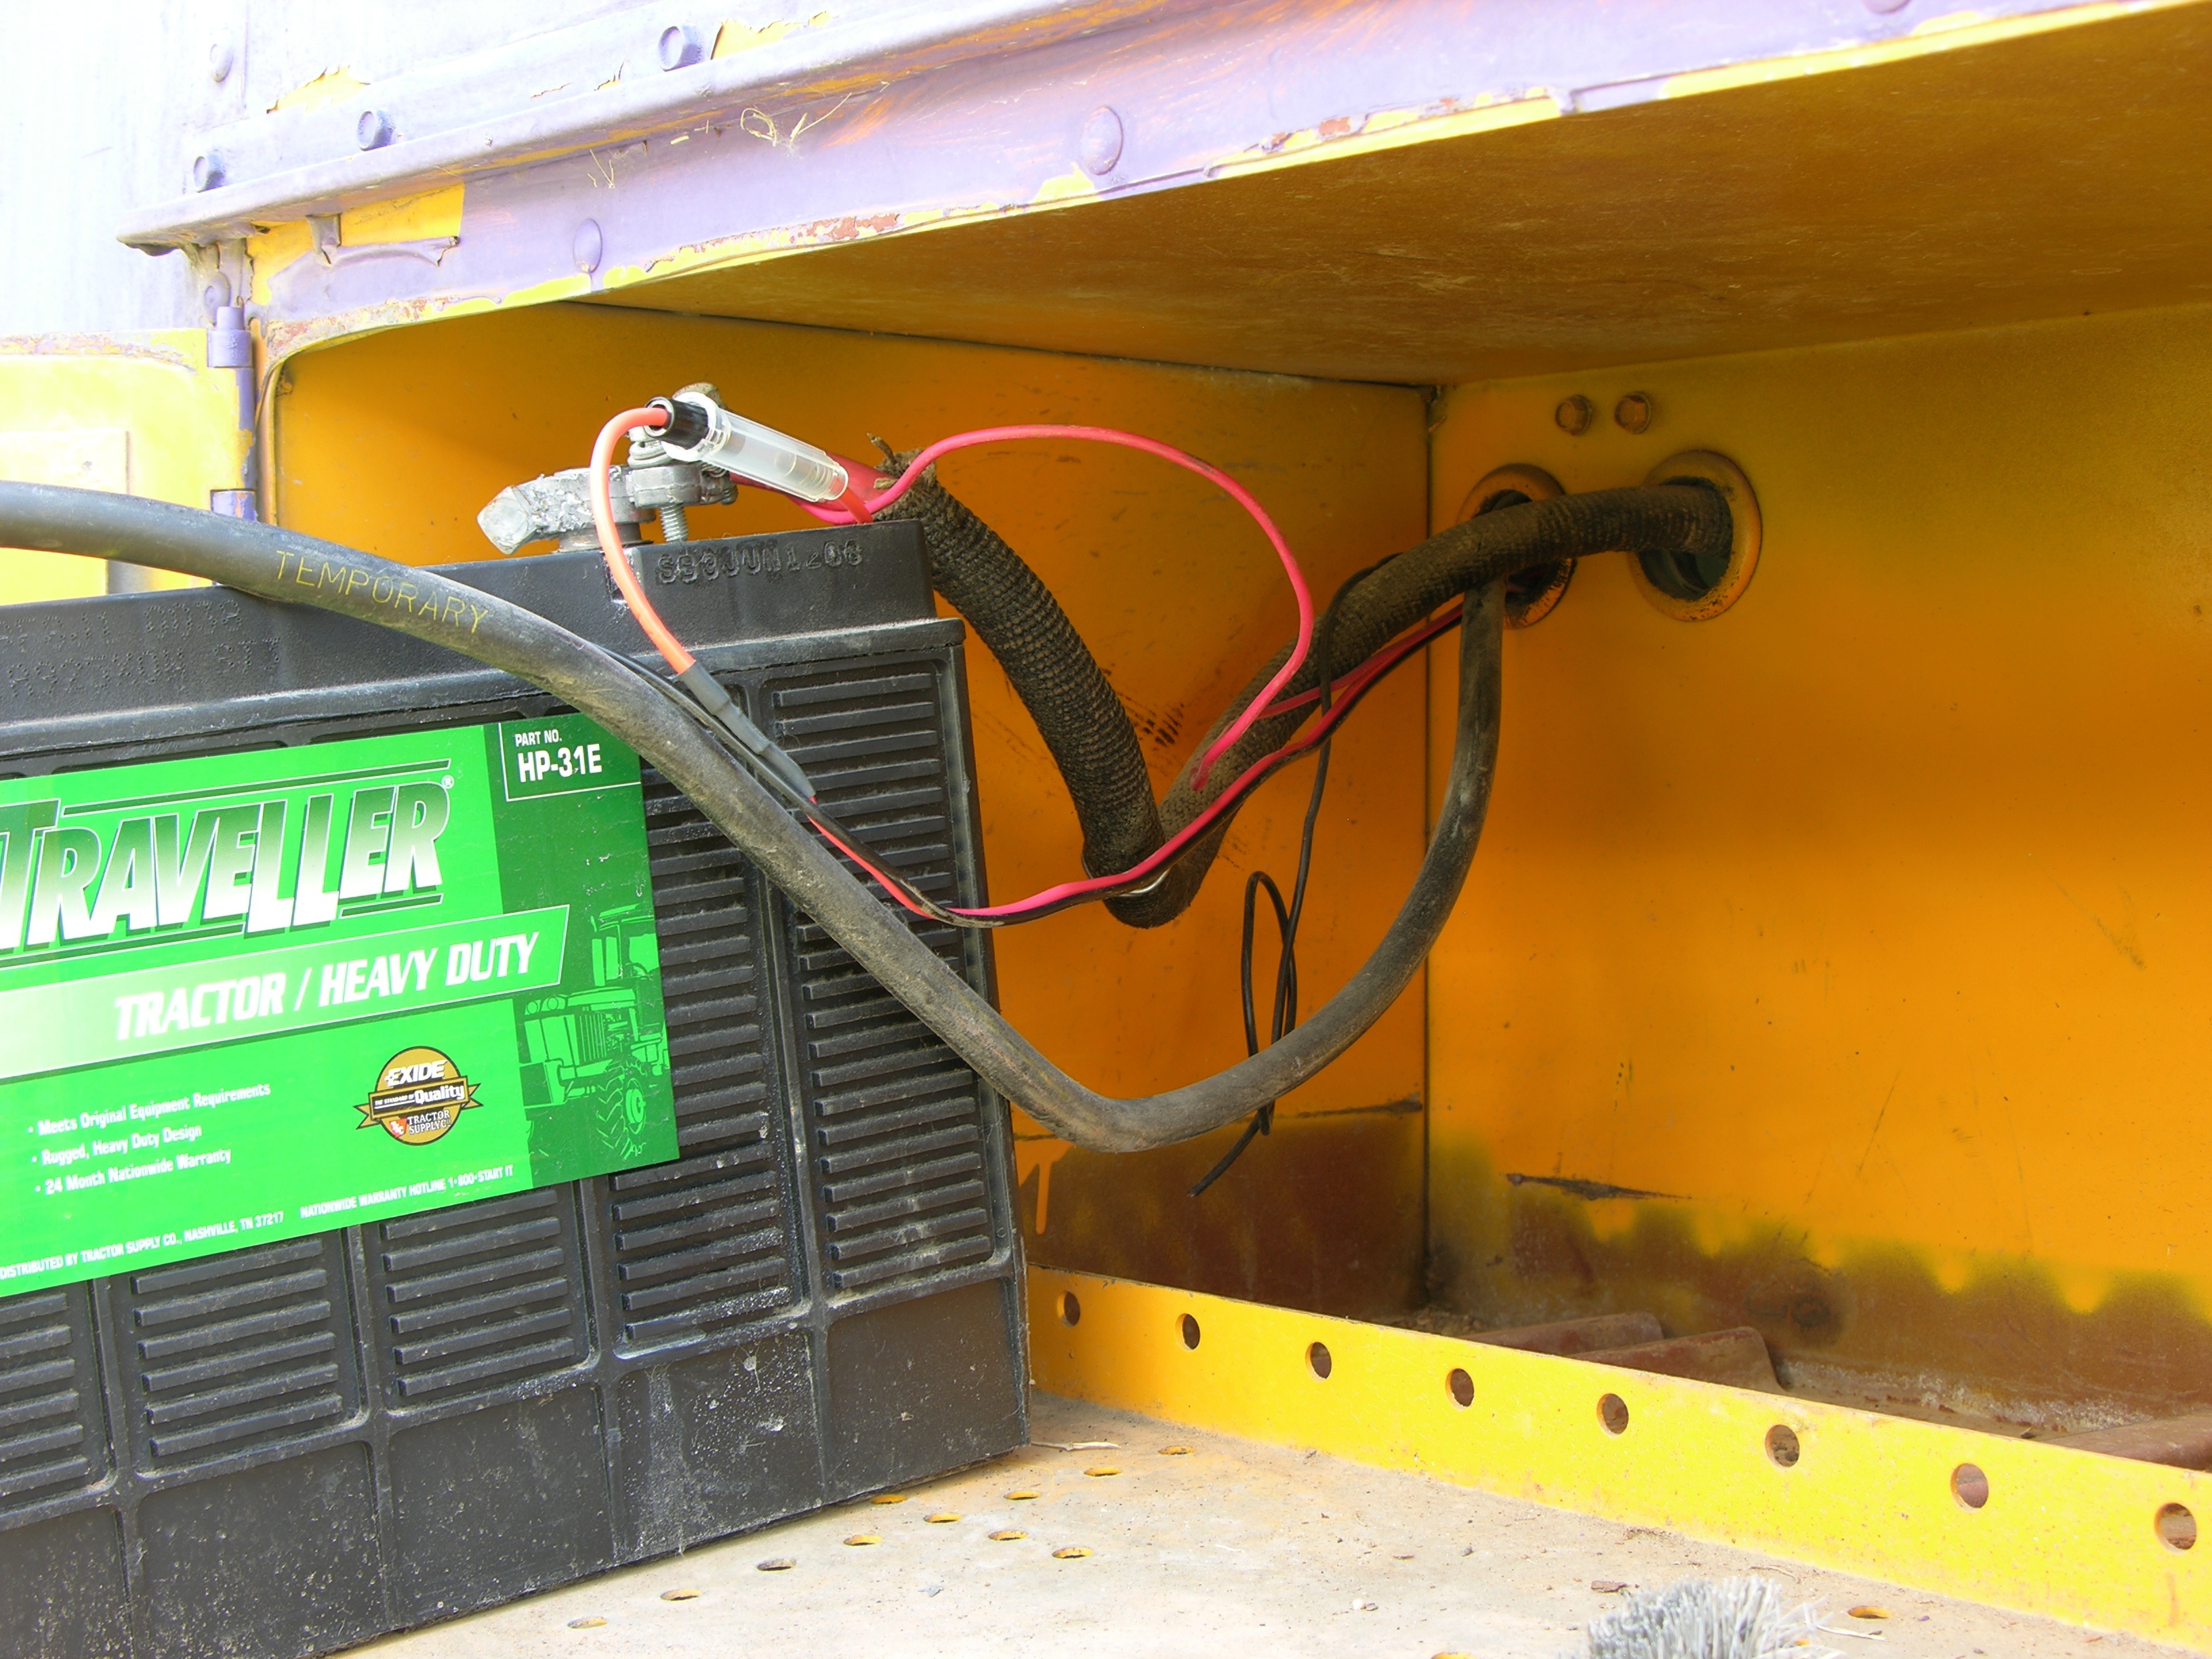
With the bus in position, I started readying it to sleep in. The futon had been folded flat into a queen bed and I folded it back up to a couch/twin, to see whether it would work for me to sleep on while taking up less floor space. I brought out my sleeping bag, pillow, and book, and I set up a makeshift lantern out of a secondhand 12V AGM battery and an LED panel so I’d have a reading lamp that (A) wouldn’t drain the bus’s starting battery and (B) I could turn off when I was ready to sleep without getting out of bed to go to the switch panel at the front of the bus.

Rear interior of schoolbus RV with futon

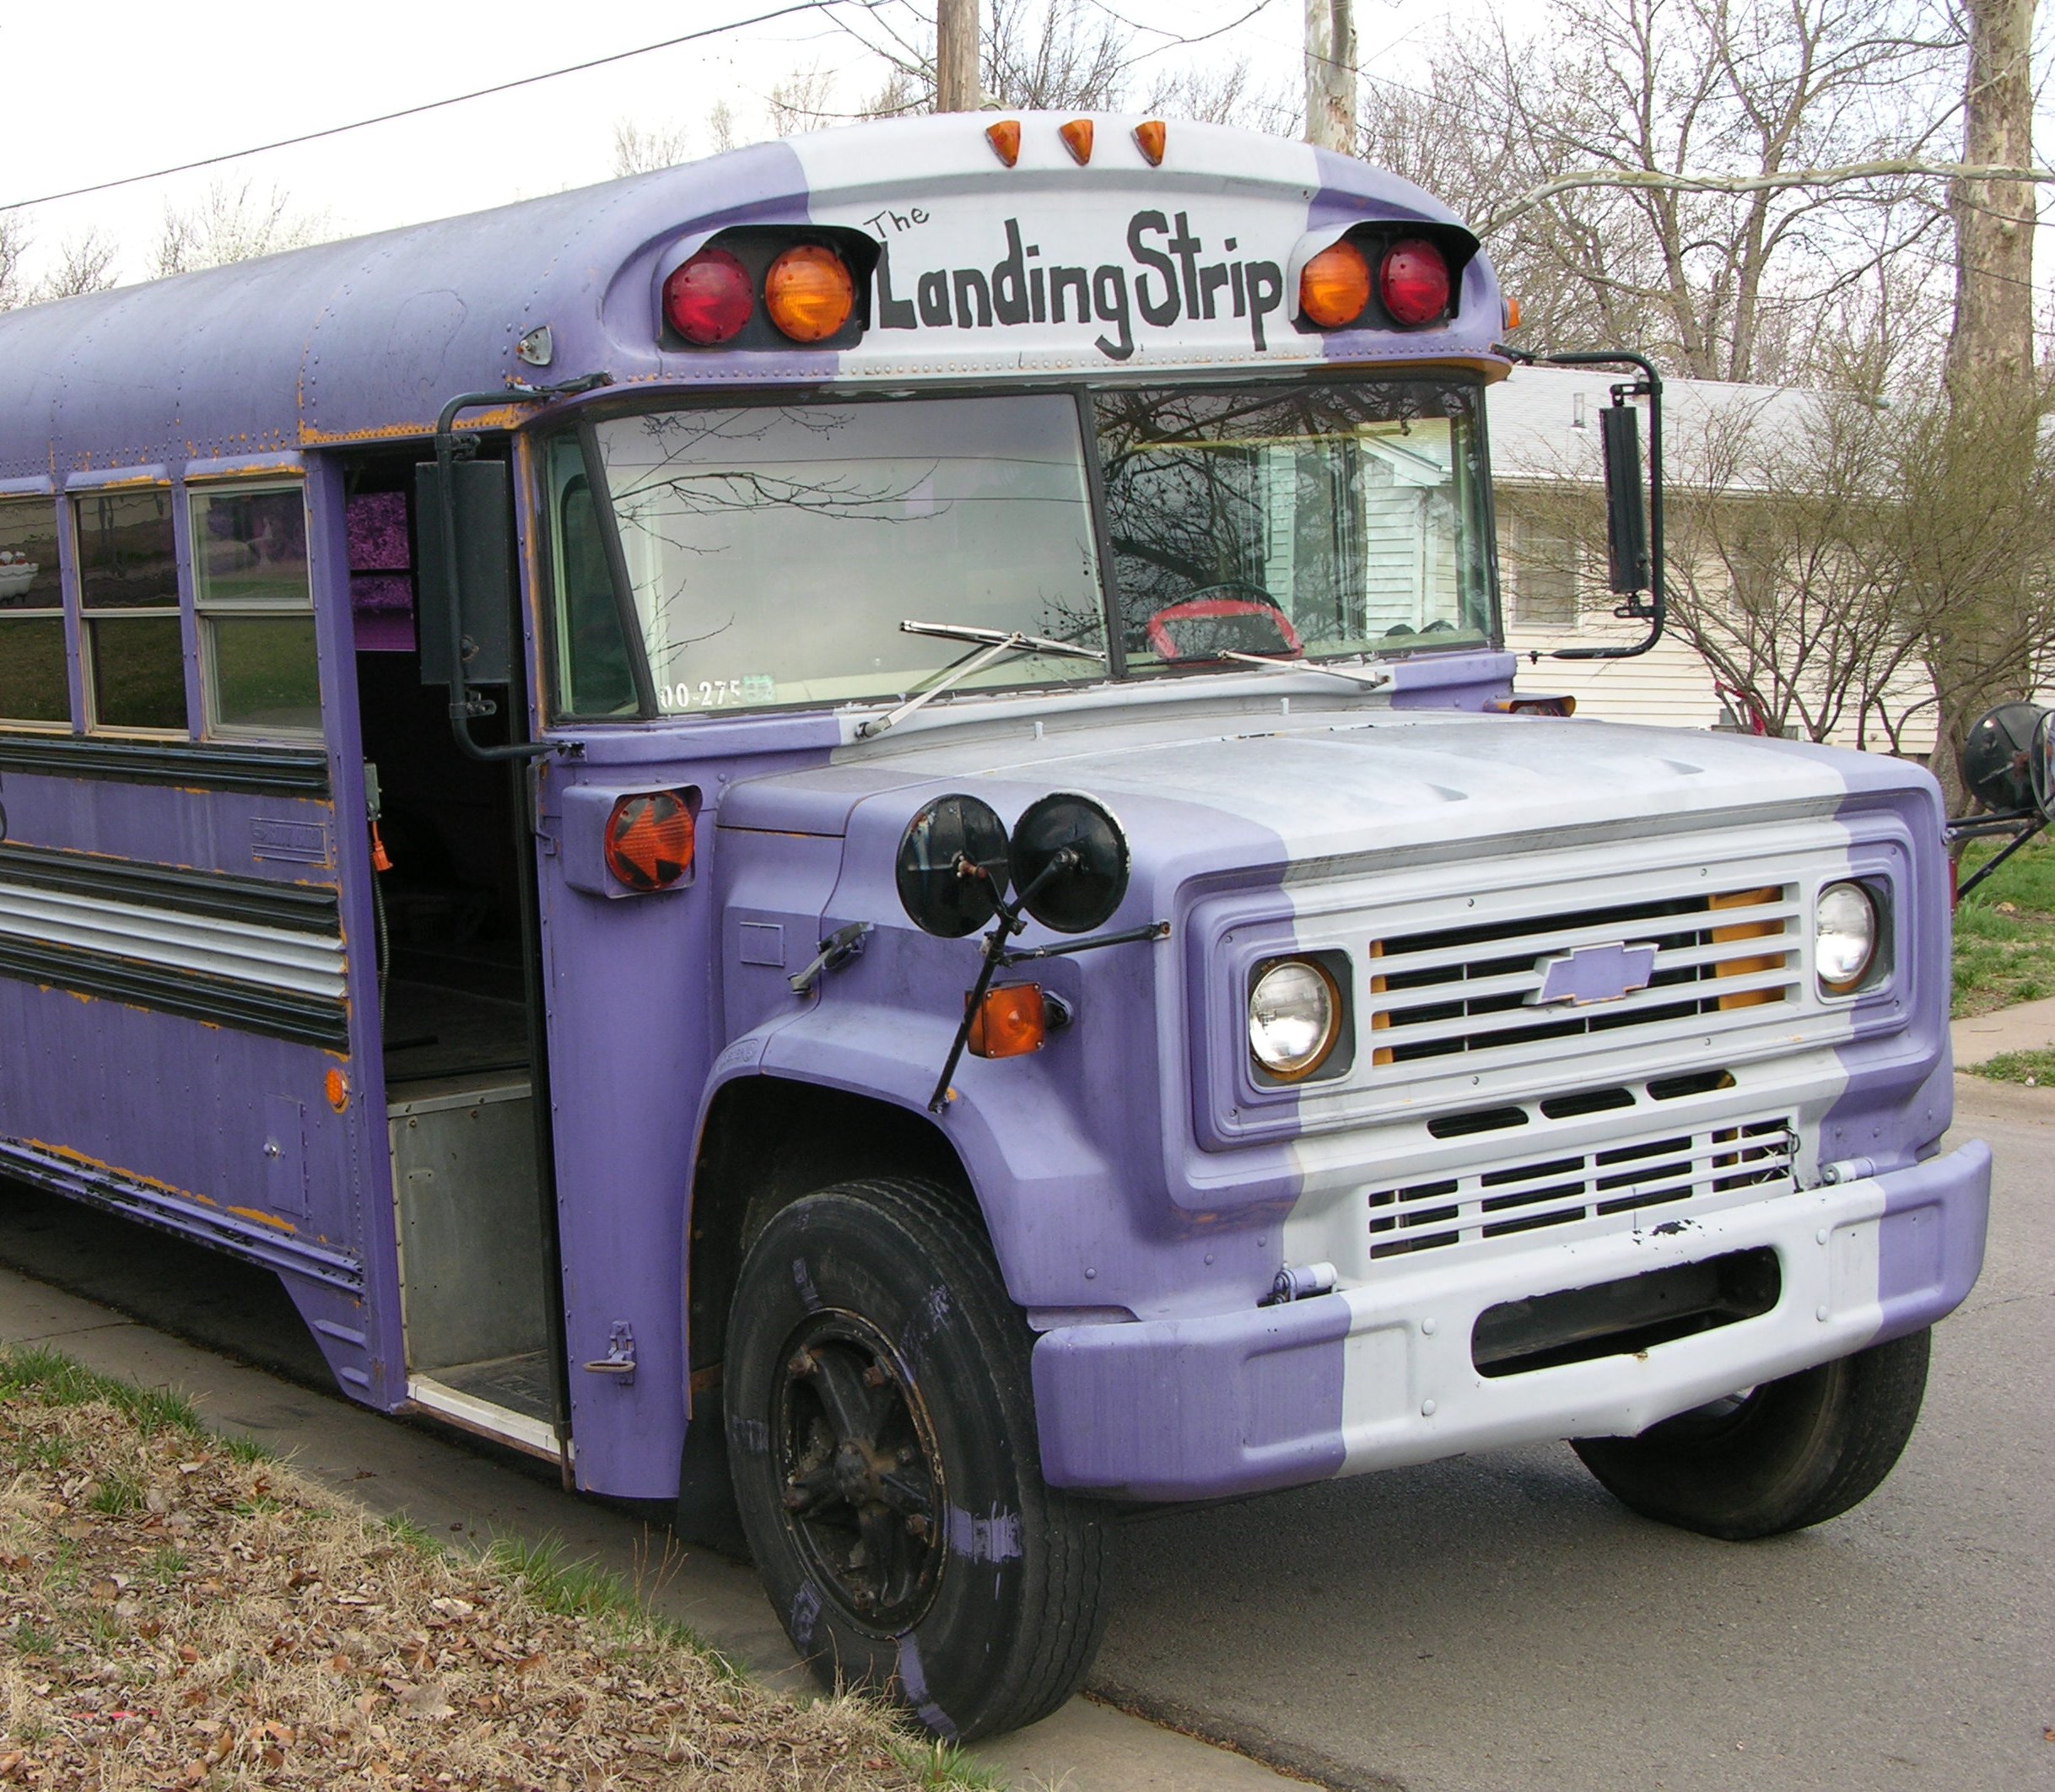
All of the purple except the sleeping bag is from the window tint, of course.

Futon and Slope

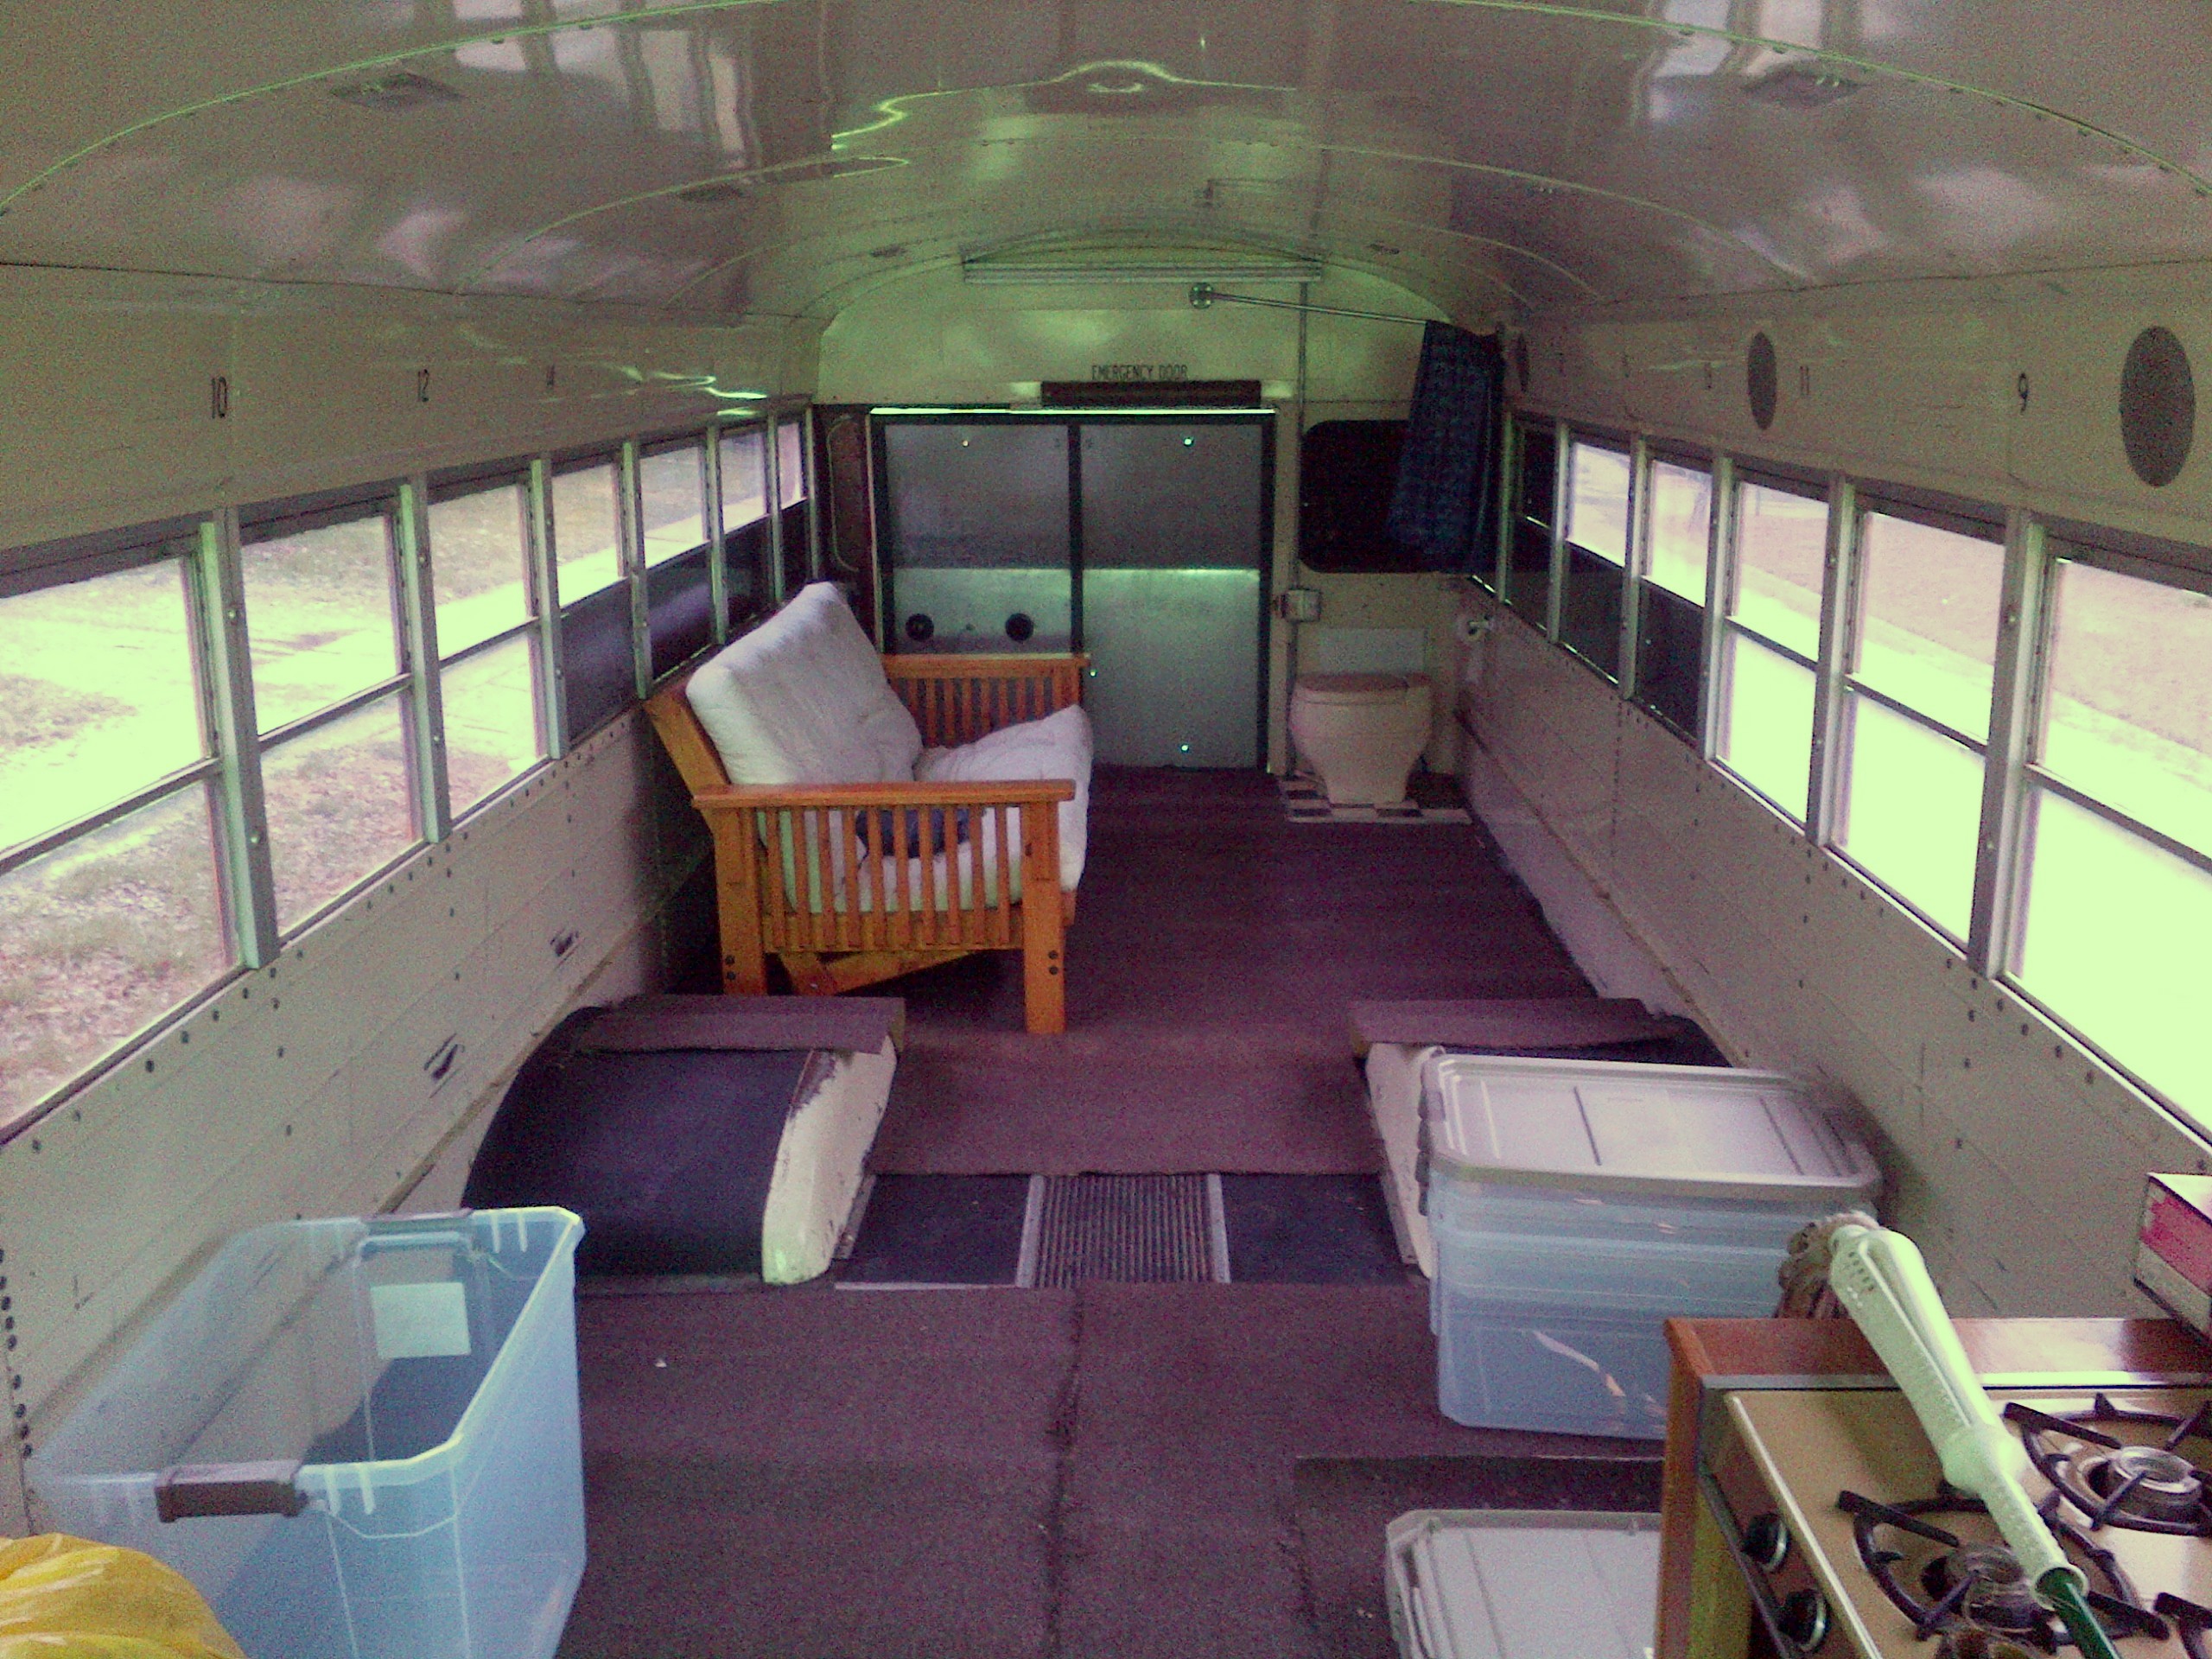
Most of this arrangement worked well, but I quickly found myself dissatisfied with the slope of the futon bench and got up to lay it flat into a queen bed again. This was an extremely important finding, because one of the things I most wanted to learn from this trial run was how I’d react to the bus being parked on non-level ground.

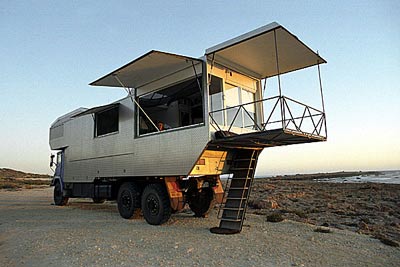
Purpose-built RVs have hydraulic jacks to level the RVs and stabilize them from rocking while parked. The bus doesn’t have levelling jacks, and I’ve wondered whether I’d need to add some — whether I’d mind it being parked on a slope or rocking while guests are moving around in it. The angle of the futon seat is steeper than that of any slope I’m likely to park on — but given my discomfort, I think I should at least look into the stackable levelling shims that you can set in front of your wheels and drive onto.

Lessons learned: Don’t sleep on the futon in couch configuration. Look for some means to level the bus when parked for night.

Kerosene

At some point during the night, I thought I noticed a smell of diesel fuel inside the bus, which doesn’t make much sense as it has a gasoline engine. This morning I figured out the only likely cause — the futon was in storage next to an armchair my uncle and aunt discarded after a kerosene jug leaked onto it during their interstate move (and my brother thought he might eventually want the chair). Easy enough — finish cleaning the futon mattress and wait it out. I also keep a package of eucalyptus in the bus and rather like the smell it imparts, even two years old.

Lighting

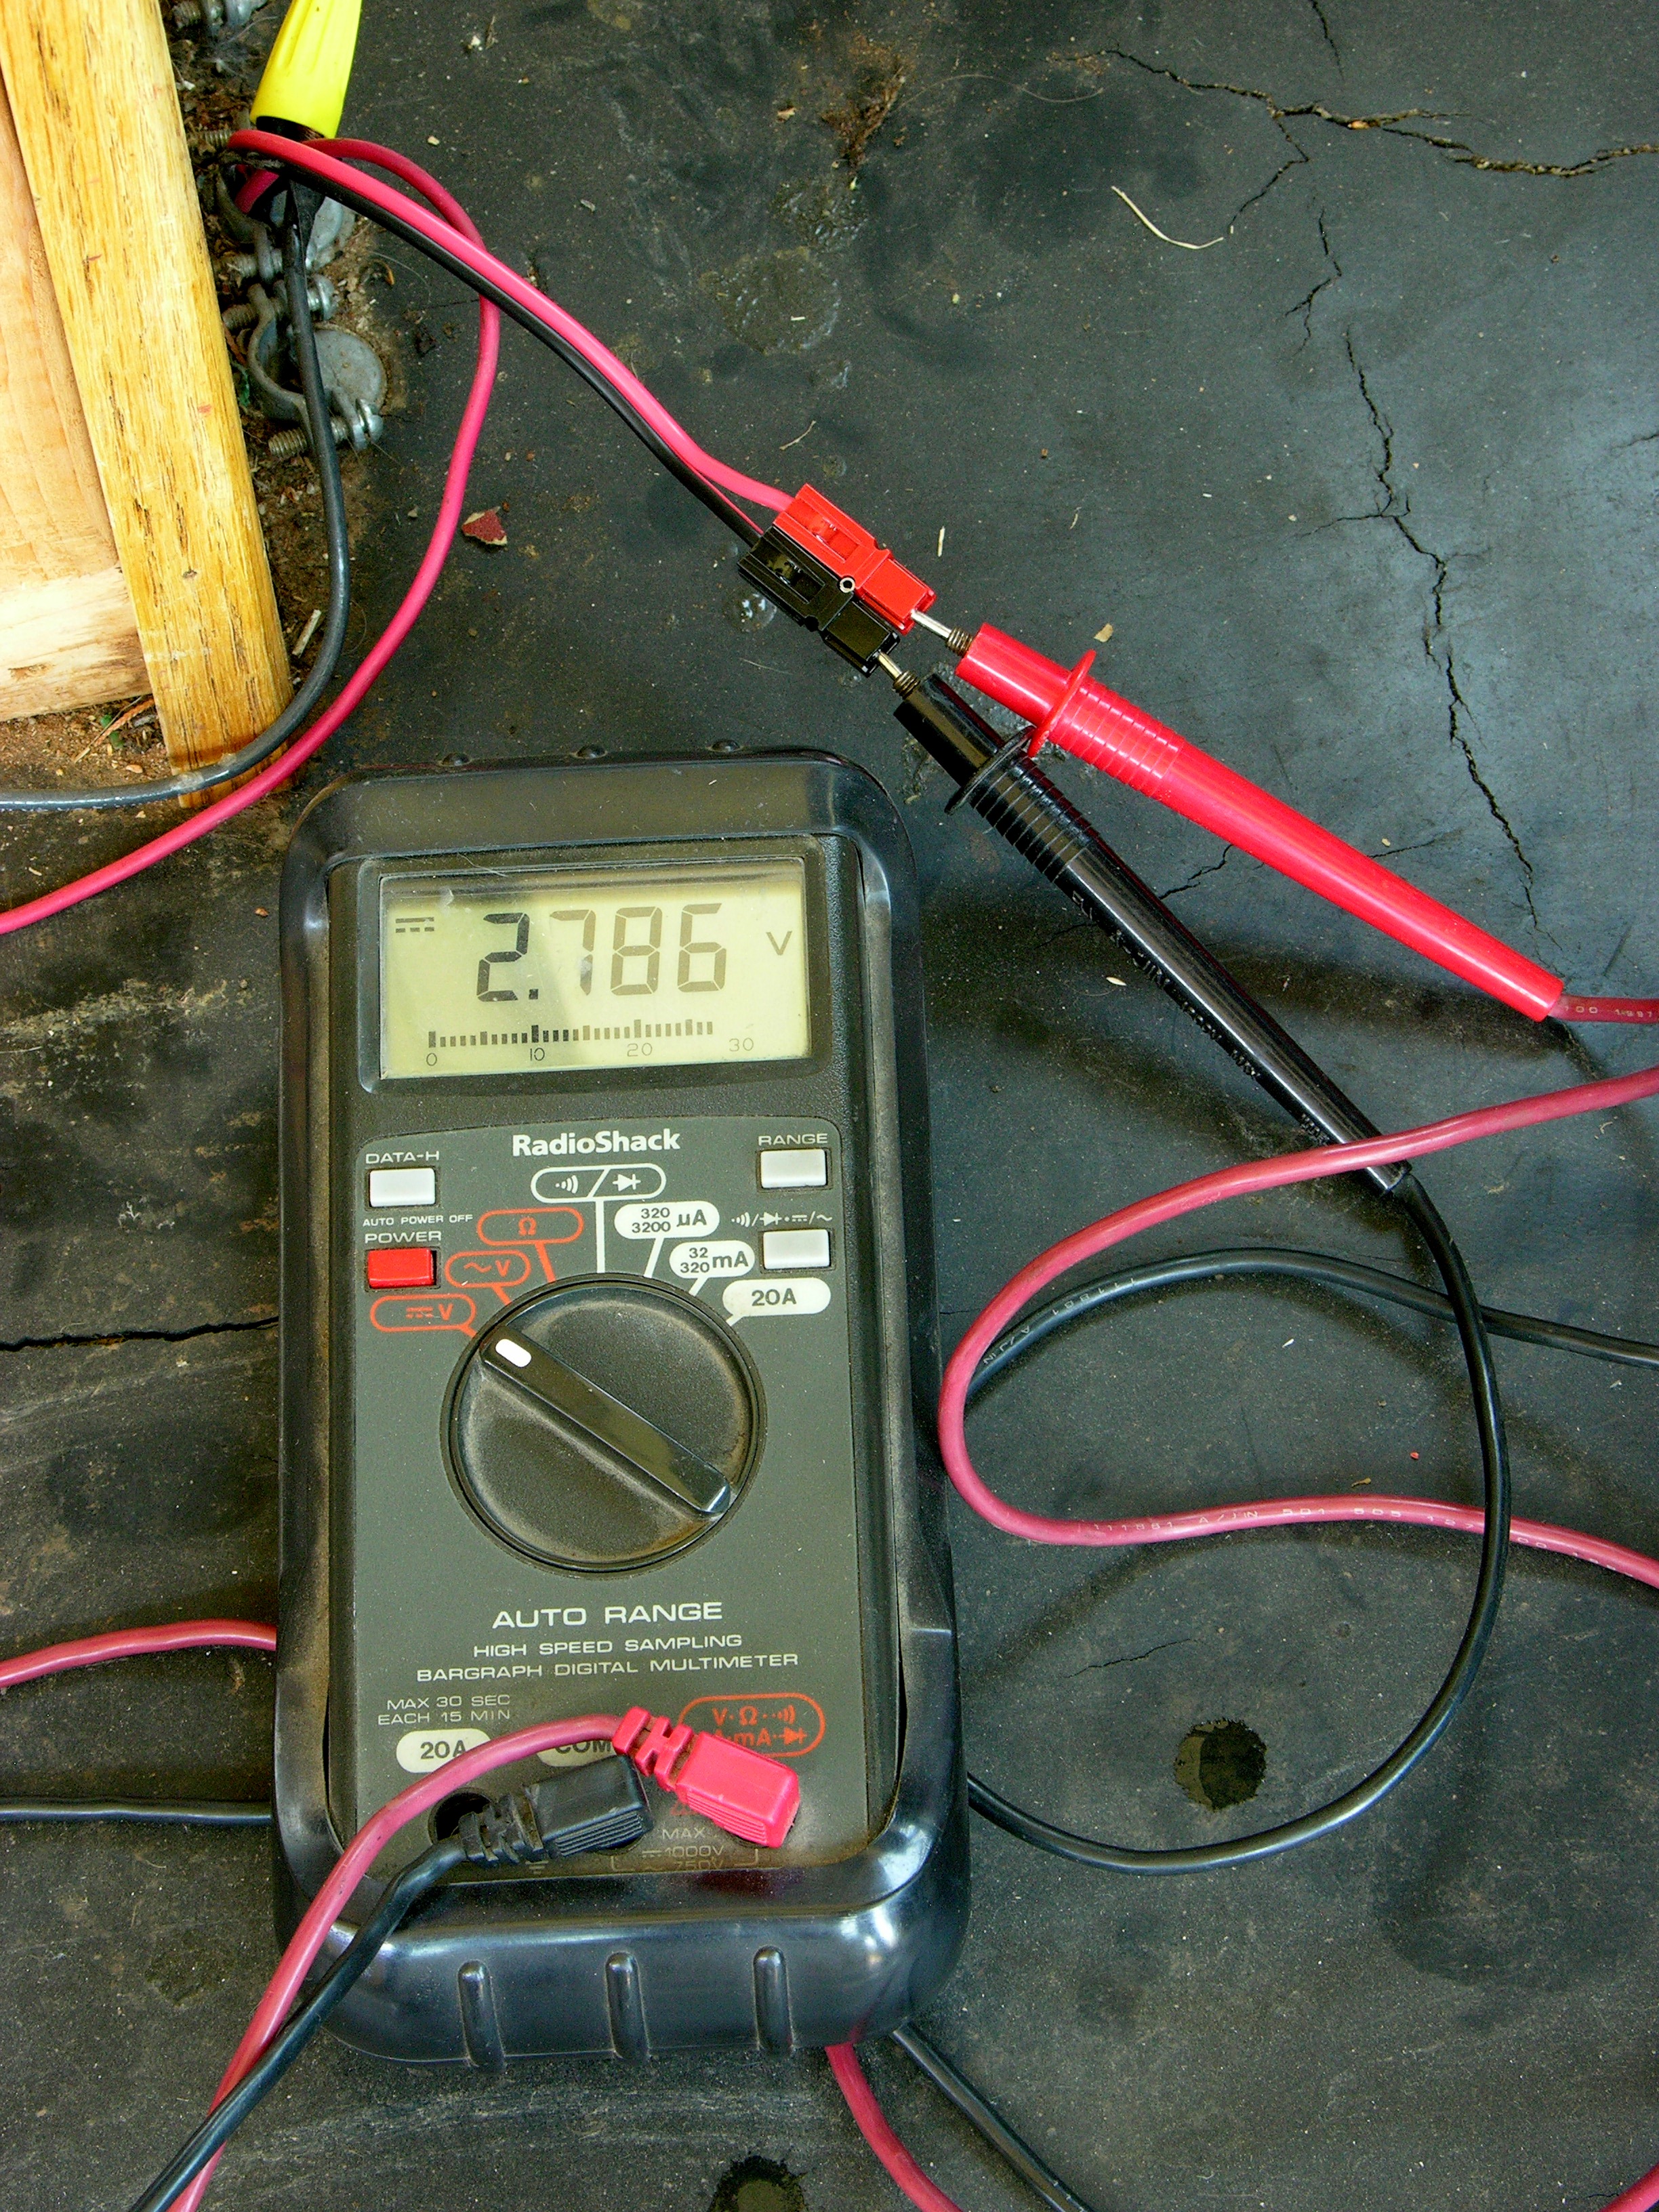
I’ve previously used the bus’s dome lights for work lighting in the evenings and noticed them getting considerably dimmer as the evening wore on and they drained the (not huge) battery. That’s why RVs have separate starting and house batteries; but I haven’t yet set up a house battery and separate wiring.

My LED reading lamp worked very well. After an ice storm, I had previously used the same LED panel with a smaller, 7.5 Ah battery and left it shining all night with minimal dimming, so I expected good results from the lamp. It doesn’t provide as much overall illumination as the dome lights — but I intended it for task lighting, and it performed admirably. This validates my plan to use warm white LED spotlights for reading lamps.

Lesson learned: LED lamps are easily bright enough for reading and impose much less drain on the battery than the dome lights.

Outside Noise and Light

I heard quite a bit of noise from cars driving by, and once from people walking by, until I fell asleep. I actually got up at one point thinking I must have left a window open, but it was not the case. I’m surprised how little the bus attenuates external noise, and I’m not sure it’s practical to cut that down much.

Lesson learned: If parking in town, be prepared for city noises.

I also had a fair bit of light shining in, from our porch light, the neighbors’ driveway light, and cars driving by on the street. It didn’t bother me much and I’ve already intended to replace the purple window tint with mini-blinds, which give a wider range of choices for view and darkness, but it could bother some guests.

Lesson learned: Until I install blinds and a windshield screen, be prepared for light at night.

Futon, the Morning After

I normally sleep on a (firm) waterbed, and when I sleep in hotel beds or on friends’ floors in a sleeping bag, my hip joints usually hurt by morning. Sleeping on the futon was no exception; so for my own comfort, it’s fairly important to build a dedicated bunk with the right cushion for me.

This will suit my purposes anyway, as the futon is wide, taking up fully half the width of the bus even in couch configuration, and angled, making it difficult to secure to the wall for travel. A slim bunk firmly attached to floor, wall, and ceiling will meet my needs and take less space.

Lesson learned: Building a bunk will probably make the most difference for my next night in the bus.

Chilly

Daily temperature graph

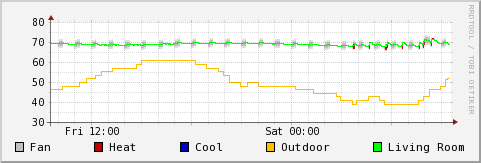
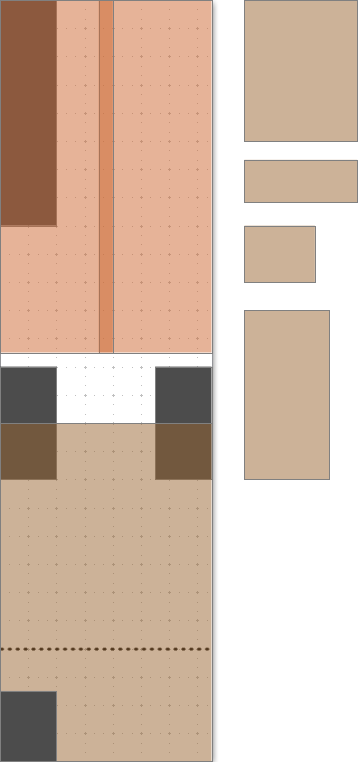
The orange line is the outdoor temperature, pulled from the nearest METAR station; it was about 40°F when I woke up. Outside and in the bus. And I like it. And my friends most likely to travel with me like it. And I hope to travel mainly in cool spring and fall, plus to cool altitudes, so I can expect a lot of it.

But not everyone would like it. And I know the windows rattle and don’t seal well. And the floor is thin, though the carpet helps some. One can always open windows if it’s too much warmer inside than out, so it’d be nice to tighten it up a bit. On the other hand, for this bus and how I want to use it, I don’t think a full-scale insulation job is worth the effort.

Lesson learned: Improve the weather sealing wherever feasible.

Used Carpet

April 15th, 2012

Ultimately I want to have a soft but sturdy cream-colored carpet in the bus — and yes, I’m well aware of the challenge of keeping a light-colored carpet clean in an RV. That’s actually part of what I’m interested in about it — I don’t want the bus, in spite of its humble origins, to be shabby inside. I want it to be nice inside, and I want to treat it as though it’s more like a great hotel room than a tent.

But the bus isn’t ready for great carpet until it has furniture and a bathroom and a kitchen; and I want to be using it already before all that’s done permanently; and I had some industrial carpet from a former job that (if I remember correctly) had been in service for something like a month between a roof leak that destroyed the old carpet and a planned redecoration. It’s not a great carpet; it’s better than not having carpet; it’s in reasonably good condition other than having been stored in dusty locales for a decade; and I can’t think of a better use for it than serving temporarily in the bus.

Schoolbus RV conversion interior, forward view

Over spring break I fetched the carpet and unrolled it inside the bus to start to relax out the curves from being rolled. One piece is just barely narrower than the bus and fits from the back up to the wheel wells. Another piece is almost as wide as from the starboard wall to the port side of the aisle — but I think I’ll actually splice this so I can have the whole floor covered.

It’s not really purple, nor dark mauve. It’s brown. The window tint is purple. GAHH.

Schoolbus RV conversion interior, rearward view

Looking back a day later, after rough-cutting to fit the wheel wells and carrying the futon back in (prematurely, as it’s way heavier than I remember and makes it very awkward to adjust the carpet position), you can see how the seams may come together (though without the gap between the wheel wells). And I learn that my brother has a seaming iron and some leftover tape, which is great! I can practice on this free, cheap carpet before doing the real thing.

I will need to clean the carpet — it’s a bit tacky. My best plan is to get it seamed together so it’s a little more rigid, then rent a carpet cleaner. I’m open to suggestions from anyone with experience, though.

Also open to suggestions on how to “tack” down the carpet at the edges and ends of the bus. With this one, at least, I don’t intend to go as far as using a carpet stretcher and tack strips. But I should do something at the front and back to cover the cut edges and anchor them a bit, and I haven’t yet figured out how to go about that.

Mötsenböcker’s Lift Off Latex Paint Remover

April 15th, 2012

Neighbor Dan got the front brake hoses put back on and the brakes working. In spite of another brake problem, I drove the bus to my house to work on over spring break, with the two main intentions being removing purple paint and readying the interior for carpet.

The first part of the week was non-stop rain, so the paint removal waited until Thursday. It turned out to be fairly effective but still time-consuming, so I didn’t get as much done as I would have liked.

Schoolbus covered in purple latex house paint

The bus, as you may recall, is covered in purple latex house paint. I’d like to repaint it some other color, but the latex isn’t tough enough (nor was it applied well enough) to paint over. A wire wheel on an angle grinder takes all the paint down to bare metal quickly; but I’ve been looking for an intermediate approach that would get the purple off without forcing me to immediately mask, prime, and paint the whole bus — a significant undertaking for which I’m not ready yet.

I recently searched again for a chemical product that might be effective at removing latex while preserving the underlying factory paint job and found Mötsenböcker’s Lift Off latex paint remover. It’s clearly targeted at removing latex spills that haven’t cured yet, but I figured it was worth a shot. It says it can remove latex paint from doors, tables, etc. — things from which you wouldn’t want to strip the original finish — and buried in one of its brochures is the claim that it can remove latex paint spills from cars. Still bearing in mind that it’s probably talking about fresh paint, it seemed worth a look.

I see now that it’s available through Ace Hardware, and I’ll try Graber’s for my next jug. But at the time, the only place I found it was through the Home Depot web catalog. It says it’s available for in-store pick-up, but that doesn’t mean it’s available in-store; it means you can pay the full shipping rate to have it sent to the store so you have to drive there yet to pick it up. (I don’t understand people who design web ordering systems and why they don’t spend more time shopping at Amazon.) So I paid $20 for a gallon and about $8 to have it shipped.

Schoolbus with some purple paint removed

It smells like bitter apples, it says it’s biodegradable, and it works on years-old latex paint in varying degrees. Some of the paint became as soft as a balloon and I was able to scrape it away in yard-long ribbons, making a perfect division between purple and yellow. Some of the paint didn’t seem to soften much at all. It absolutely and single-handedly made it feasible to strip the purple paint.

Several observations and tips:

  • Scrub the surface clean before you start. Lift Off over dirt just cleans the dirt and doesn’t soften the latex.
  • Put it in a spray bottle. Spray it generously onto the surface, keeping in mind that any runoff is wasted. As soon as it’s dry enough that it’s not running, spray more. My best results were in spots and during times that I was able to keep the surface damp for an hour or more through repeated application.
  • Remove anything that’s not latex before you start. I thought the black lettering was done in latex, but it didn’t soften at all and it prevented the Lift Off from working on the purple paint underneath. I later removed the black paint with a scrubby-abrasive disk on my drill and the Lift Off mostly worked on the purple under it.
  • Don’t expect to scrub the paint off with a sponge or brush. The softest parts came off nicely using a razor scraper. The medium parts came off poorly using a razor scraper. The tough parts came off poorly using the abrasive disk and the drill — but less poorly than without Lift Off.
  • Its effectiveness varied dramatically across different areas, and I haven’t figured out why. It doesn’t seem to correlate directly to sun damage to the latex — the paint on the window stiles is tougher than the paint on the body panels.
  • It does appear to have slightly softened the yellow paint, though not so much as to concern me for my purposes.
  • It was well worth my expense and I expect to use at least two more gallons, on the other side and on the roof.
  • Be responsible and pick up your latex paint. Latex is not a biohazard and Lift Off is biodegradable, so household trash disposal should be fine.

Sanding Away “The Landing Strip”

Schoolbus with former owner's logo

I want the bus to be innocuous and not draw attention from vandals; nor turn KSU rivals into vandals; nor draw undue attention from law enforcement, who have a tough job to do, have stressful encounters all day, and can create stress and take up a lot of time even when one is meticulously abiding by the law. So in addition to wanting to be rid of the purple paint, I’ve been eager to get all of the lettering off as soon as possible.

Schoolbus front-end header, sanded

While waiting for one application of Lift Off to do its magic, I climbed up onto the housing aft of the hood and sanded the name off of the header above the windshield. It was more black paint, so it had to come off for the Lift Off to work (next time); and it’s good to have it gone already.

Rebuilt Brake Hoses

March 6th, 2012

The bus being a mid-80s Chevy chassis, the theory is that the front right brake seized because the clamp that anchors the flex line rusts; the surface rust increases its thickness; the increased thickness decreases its interior diameter; the reduced ID squeezes the hose; and the squeezed hose passes high-pressure brake fluid from pressing the pedal but not as readily low-pressure brake fluid from the caliper’s return action.

Replacement hoses not available.

Rebuilt schoolbus brake hoses

Central States Thermo King to the rescue, again — remanufactured from scratch. $35 each. Hoses back to Neighbor Dan. Reinstallation promised for this weekend … and then he still has to check out the geyser from the reservoir.

Right, that’s another story.

<scrunches forehead really hard, squeezes eyes closed, clenches fists> I believe … I believe … I believe I will get to drive the bus again someday!

Solar Trickle Charger

July 4th, 2011

The bus has been parked for a year and a half due to a brake caliper seizing. For much of that time, the keys have been at Neighbor Dan’s shop and he’s been waiting to fit it into his repair schedule. That’s a topic for another day; but for now, let’s talk battery charging.

Car batteries left alone and unused tend to self-discharge, but the bus’s starting battery seems to discharge a little faster than I can account for just from disuse. I’ve kept my van battery topped off with a $15 solar trickle charger from Harbor Freight, and I recently modified one to use in the bus.

Bus battery with trickle charger wiring

The bus’s battery compartment is below and behind the driver and is accessible through a door in the bus’s apron. In the long term, I’ll be routing much heavier DC wiring throughout the interior; but for charging, I ran a 4′ section of 18-gauge two-conductor cable out the back of the battery compartment and up through a hole the previous owner had made in the floor.

I put a 1A fuse inline with the positive terminal connection, as the 120mA solar charger should never come near that much current and I would prefer the 18-gauge wire not become a fuse during a short-circuit. I can easily change the 1A fuse out for a larger one later.

Anderson Power Pole wiring in schoolbus RV conversion

The cable emerges from the floor behind the driver’s seat, where I terminated it in Anderson Power Poles. The battery is deeply discharged — less than 3V. This battery may not resuscitate, but at least the charger will be there and ready for the next one.

Solar trickle charger on bus dashboard

During the afternoon the dashboard was in shade, but the charger still read about 17V open-circuit. With it plugged in, I immediately measured over 5V at the battery. Although it obviously hasn’t charged the battery that much that fast, it’s a good sign.


Updates

Date Voltage
04-Jul (pm) 2.79
04-Jul 18:34 5.43
05-Jul 17:57 8.00
06-Jul 19:23 6.90 *
10-Jul 17:06 9.01
11-Jul 18:01 9.12

* The positive terminal cable clamp had been cracked and broke off from flexing on 06-Jul. Replaced 09-Jul.

Rob Gray’s GrayNomad Chronicles

November 17th, 2009

I don’t normally make blog posts just to link to other blogs or sites, but Rob Gray’s GrayNomad Chronicles calls for an exception.

Rob Gray's Wothahellizat RV conversion

Rob and his wife Chris have stepped out of the corporate rat race and are circumnavigating Australia full-time in an RV conversion he designed and built on a six-wheel-drive army truck chassis. Rob is a professional nature photographer with a stunning portfolio, and his travel and RV conversion blog entries are peppered with great photos and wry Australian humor humour. Go read!

Hydraboost

November 13th, 2009

Things have been quiet here for a while, but that’s not because nothing’s been happening — I’m just behind on writing about it. This one dates back to July. (Sheesh!)

I had noticed that the power steering fluid was low and was disappearing after I refilled, and I’d had the engine compartment cleaned so I could see where the fluid was coming out. On a Saturday afternoon after the cleaning, Jonathan opened the hood and found that the cleaning wasn’t necessary to locate the leak — a hose was shooting a sheet of fluid out of a crack in its side when I pressed the brakes. When I pressed the brakes? Ah, hydraboost.

Leaking hydraboost hose on '86 Chevy schoolbus

The hose is on the driver’s side of the engine compartment and joins a couple of pieces of steel line that run up to the brake master cylinder and down to the power steering gearbox. It’s part of the hydraboost system — the power brakes are powered by the power steering pump rather than by vacuum pressure, as on many passenger vehicles.

Chasing a New Line

Well, drat, I took careful notes of all of my phone calls trying to find a replacement or rebuilt line and now can’t find them. Working from memory:

I started with Bumper to Bumper in Newton, who were recommended to me as being a good source for parts for big ugly things. They had nothing, but referred me to a hose company in Wichita. They weren’t actually in the business of making this type of hoses, but referred me to someone else, who referred me to someone else, whom I visited after work.

Meanwhile I called O’Reilly Auto Parts in Newton, who had nothing but suggested I call the Chevy dealership. This was the most promising lead so far — I got a part number, the information that it was a discontinued 20-year-old part, and the locations and phone numbers of the three dealerships in the US that showed the line in their inventory locator. I also got the price — when new, $230. Okay, WOW.

California was supposed to have two but told me they hadn’t uploaded inventory to the locator service for at least two years and didn’t have any. Another place (Oregon???) also didn’t have any. Alaska has four of them, new old stock (so they’re probably brittle by now), for the original price. Plus shipping. Uh, no.

After work I raced across Wichita to the company in the southwest industrial district who rebuilds hoses and tubing, arriving just barely before they closed. They looked at the compression fittings where the hose joined to the tubing and the amount of rust pitting on the steel line and told me that they likely couldn’t put on new fittings that wouldn’t leak.

But I should try “CSTK,” who brazes new fittings onto tubing. On the north edge of town — literally about as far away as you can get in the Wichita metro area. And only a few minutes from closing.

At least it wass on my way home, so if I didn’t make it I wouldn’t have gone out of my way.

I made it.

Central States Thermo King

CSTK turned out to be Central States Thermo King, who normally work on cooling systems (reefer trucks) and manufacture hoses that have to bear much higher pressure and contain much smaller molecules than those of my power steering fluid. They took my line and said they’d have it ready the next day.

I went back, picked it up, and paid them $37.14 for their work. I felt like I should have tipped them half the $200 I saved, but I’ll opt for trying to send a little more business their way instead.

Spiffy brazing job on rebuilt hydraboost hose

Look at this immaculate work. They cut off the old fitting and brazed on the butt end of this new crimp fitting.

Newly fabricated hydraboost hose section

I think the pressure rating on their hose should be … adequate … for my power steering / brakes system.

Rebuilt hydraboost hose

I fished the whole line back through and around all the obstacles, reattached it and all the clamps that hold it in place, and refilled the power steering reservoir.

No more leak, but the power steering is still growling (even now, after driving it occasionally for several months and running the steering back and forth from end to end a number of times). I first attributed this to air in the system that needed to work out — and it may be — but I also note that the power steering pump clearly has a bearing going out, and I need to replace it before I get too worried about getting all the air out of the system.

Ah, well. It’s progress.

Expenses

$37.14 rebuilt hose