Archive for the ‘Plumbing’ Category

Water Pump Repair Attempt #2: Silicone

Tuesday, July 14th, 2009

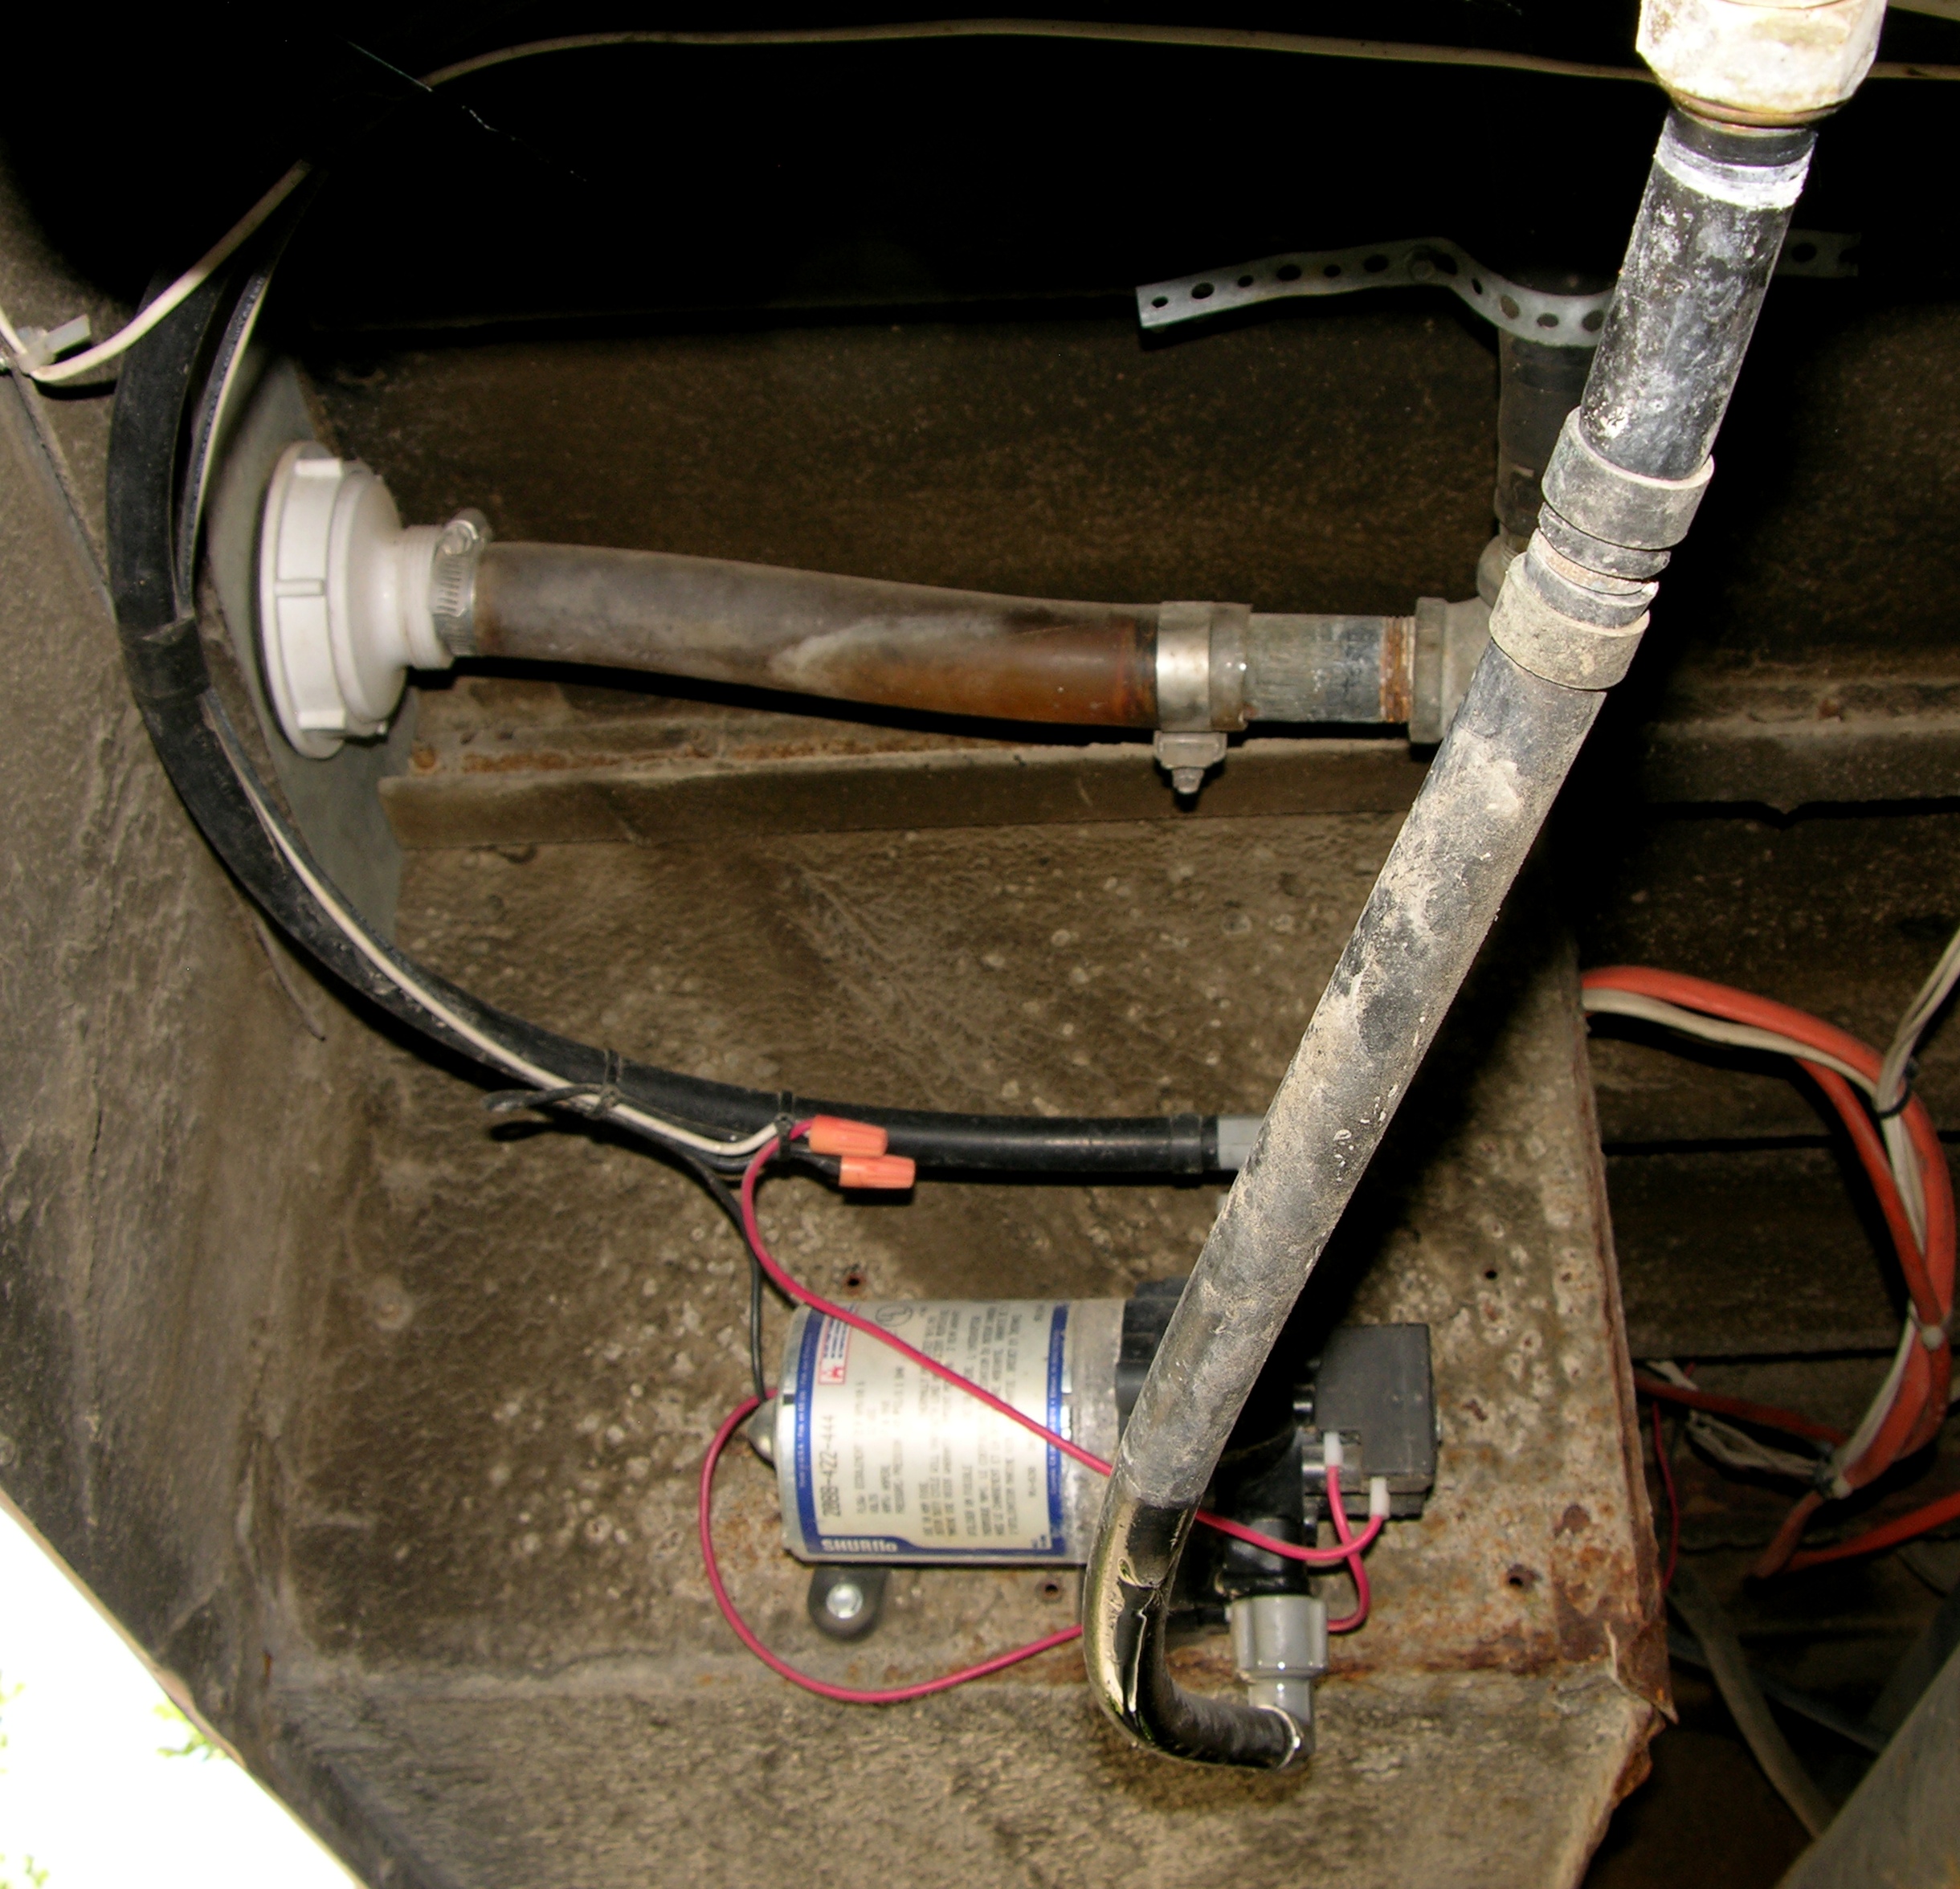
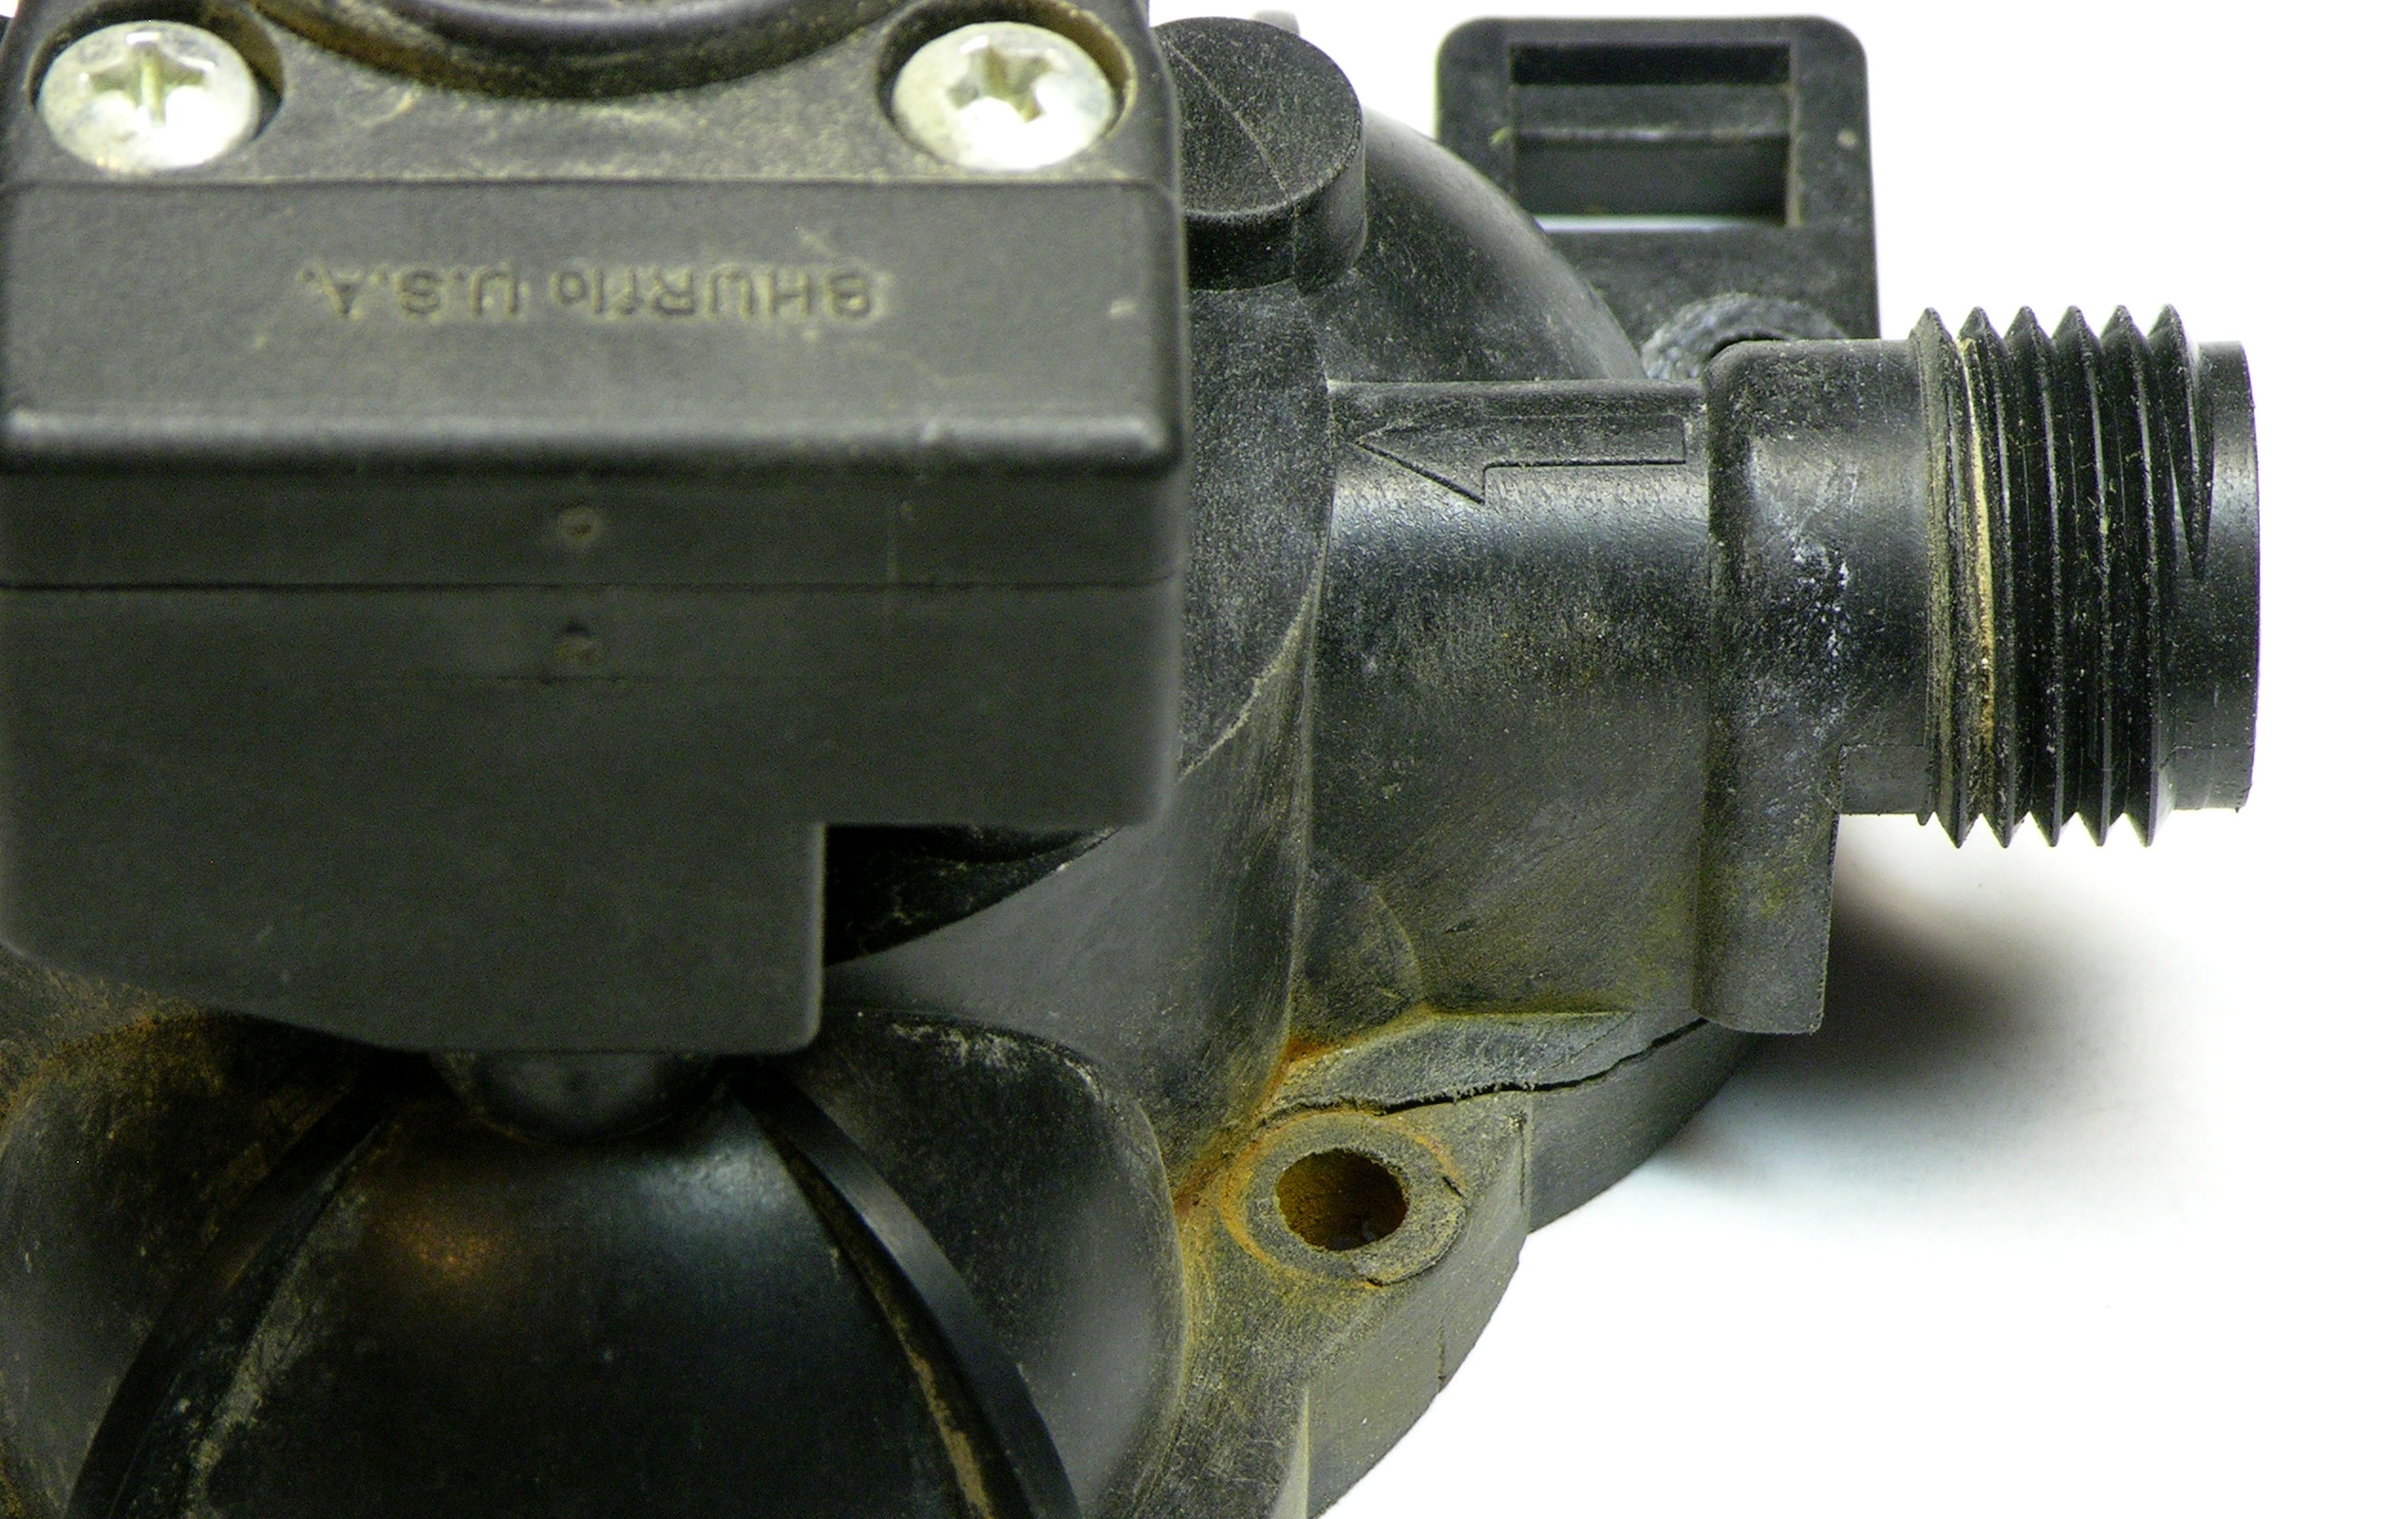
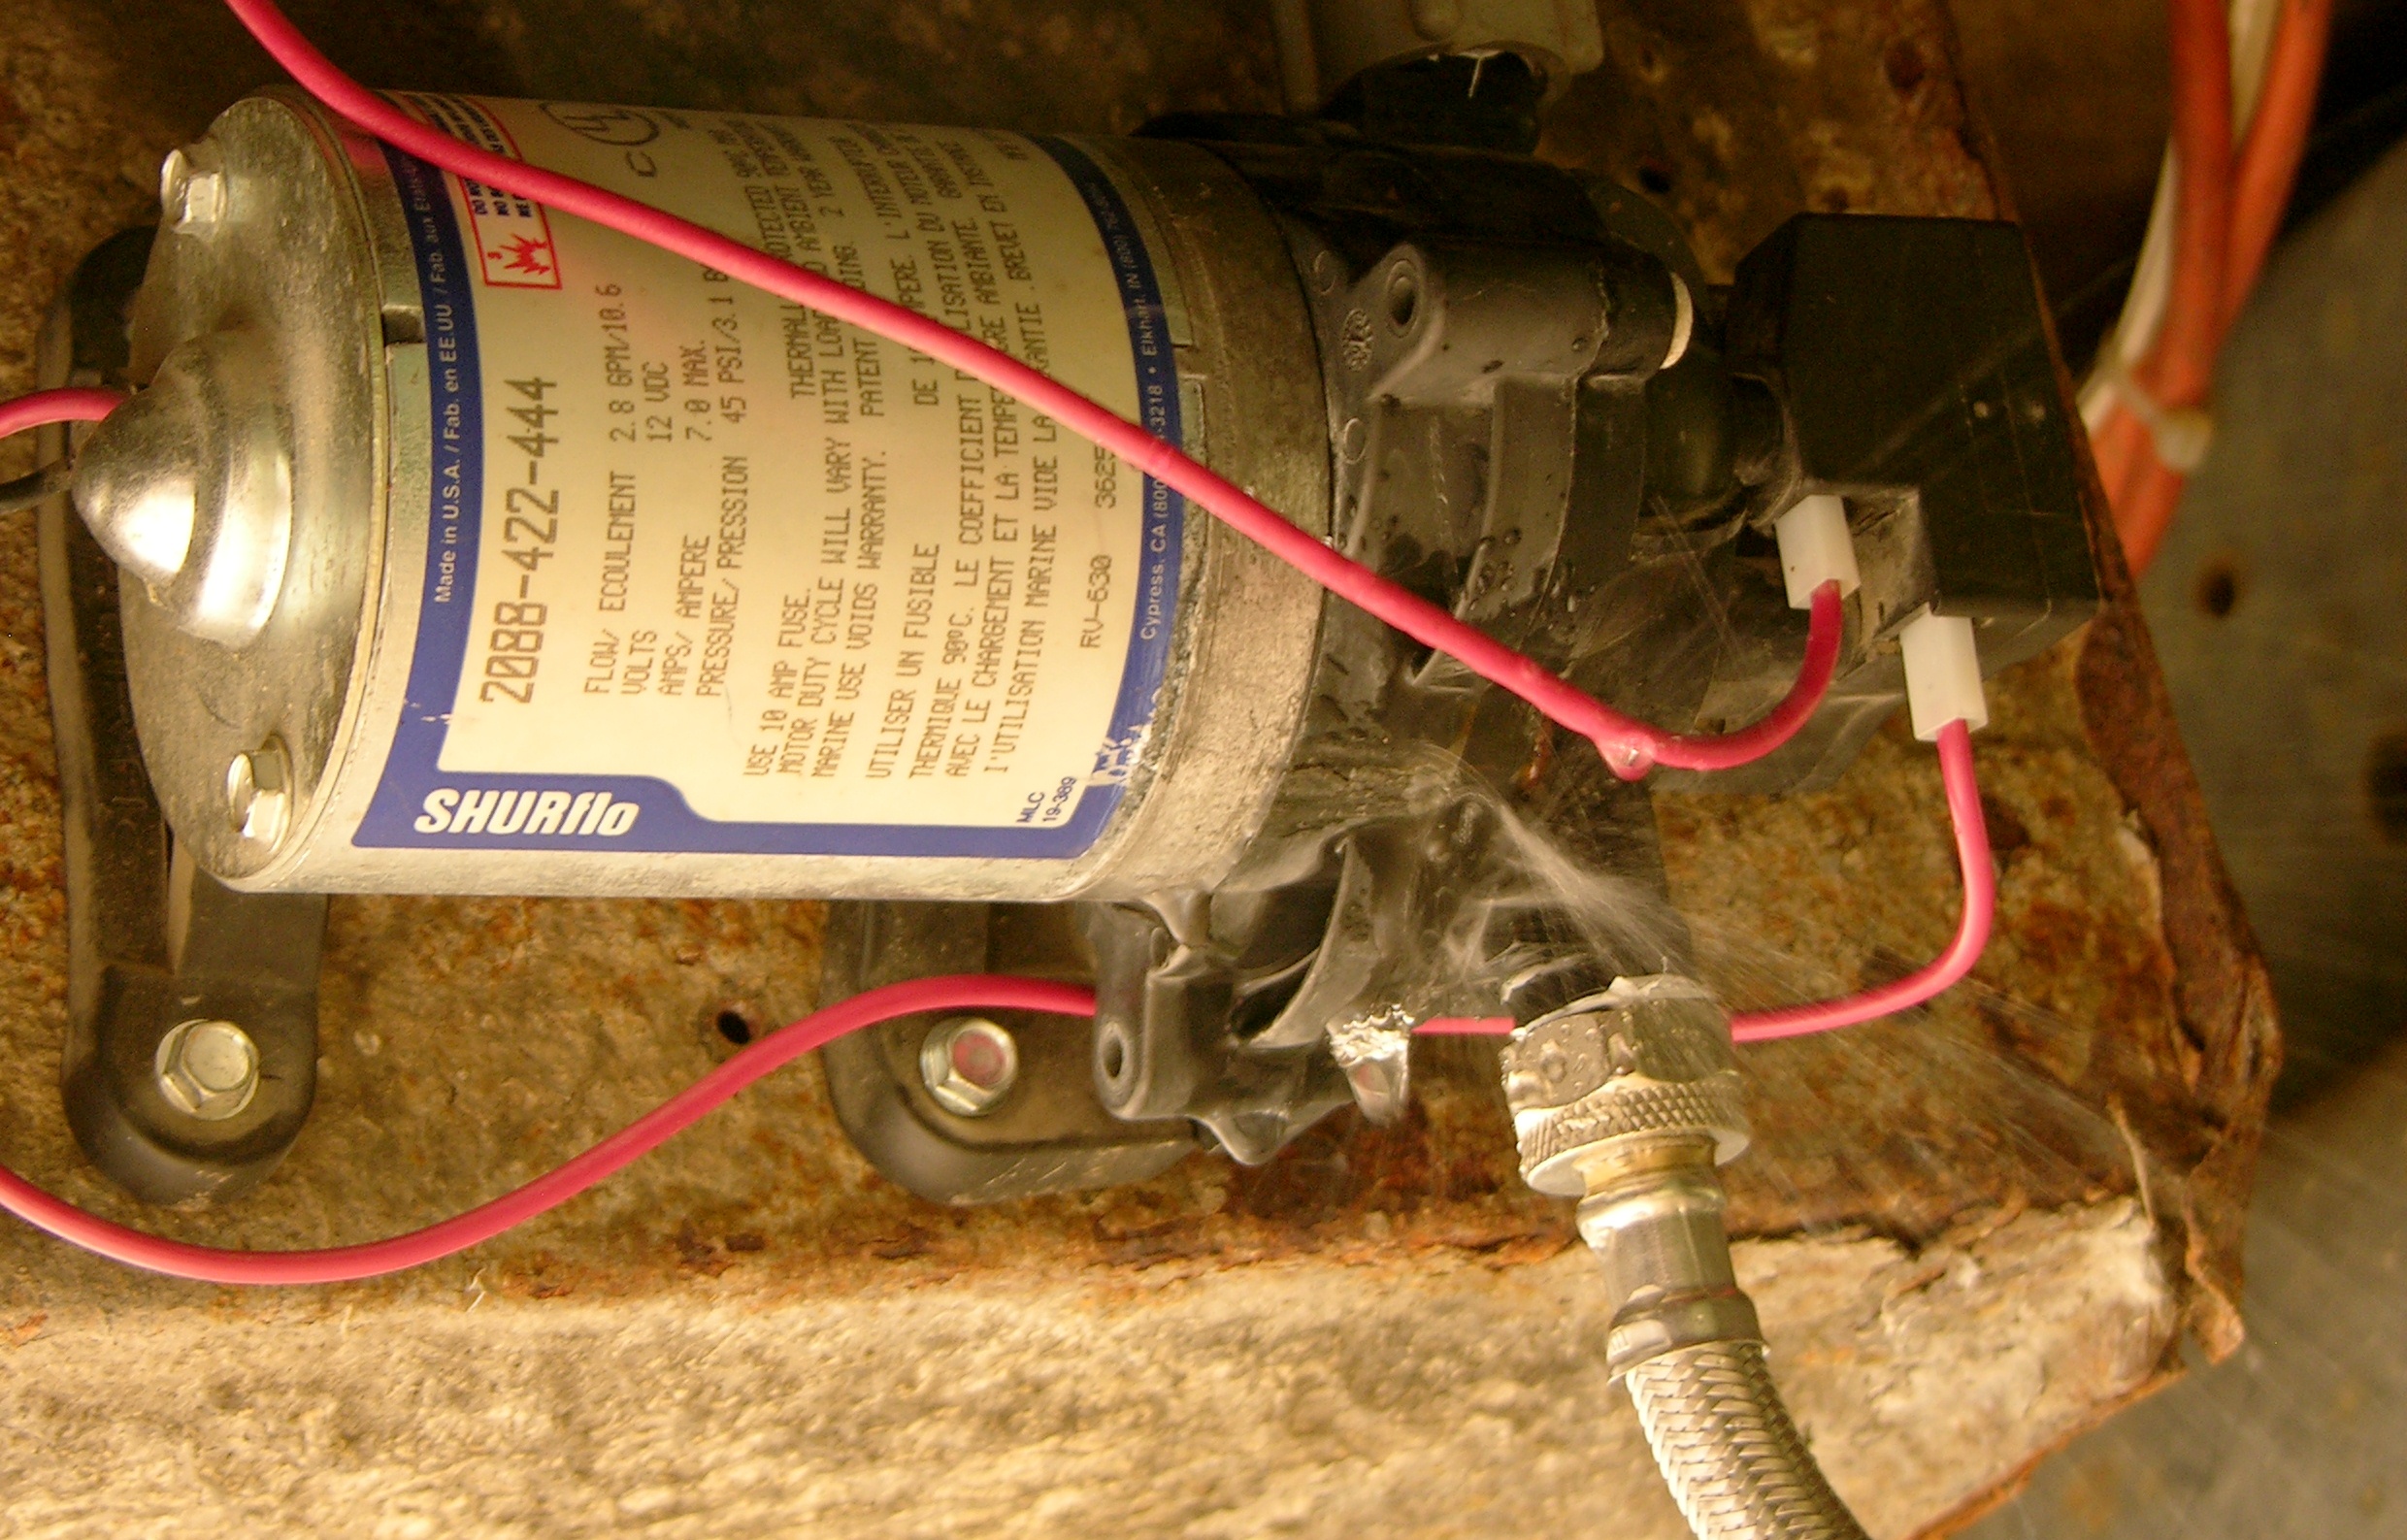
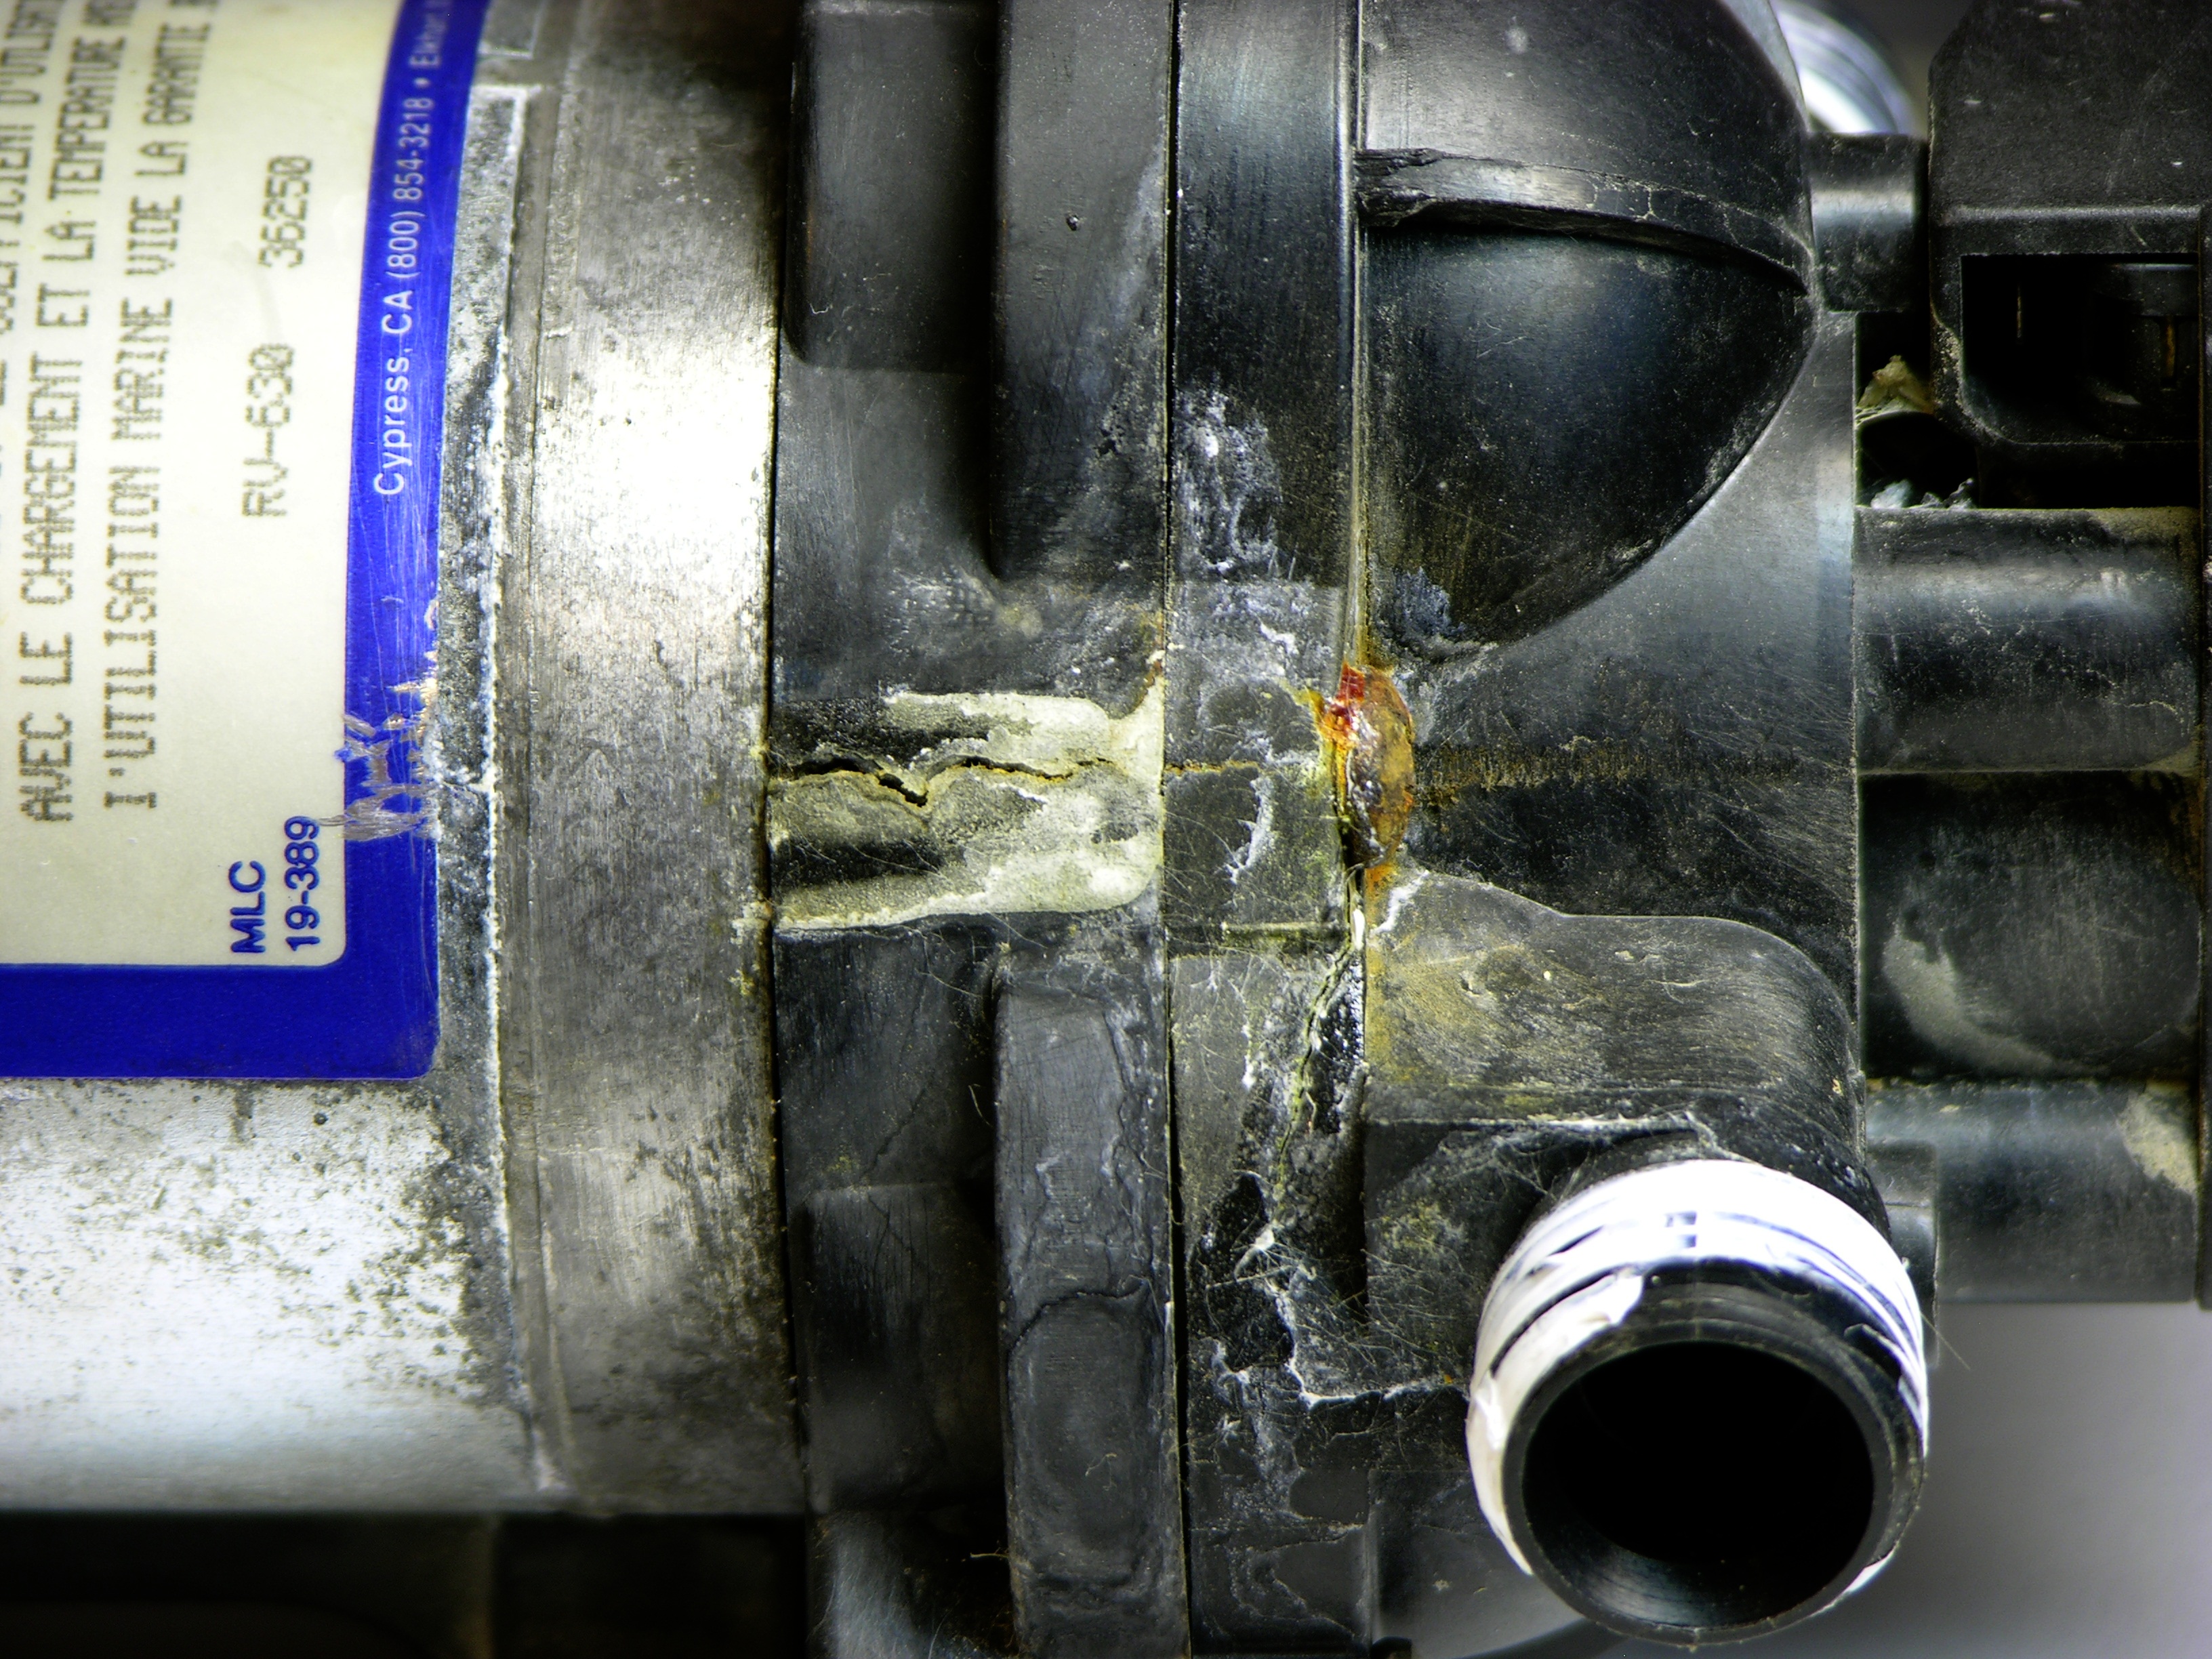
I had previously reglued my cracked water pump with superglue, and it was still spraying water out of this area while pumping.

Cracked pump case

Initially I thought I was trying to repair the pump just for fun — and I still mostly am. But when I window-shopped for replacement pumps and found them in the $70-150 price range, I thought I might try a little harder to fix it, especially since I’ll want a bigger pump when I install a shower but I’m not ready to figure it out and shop for it yet.

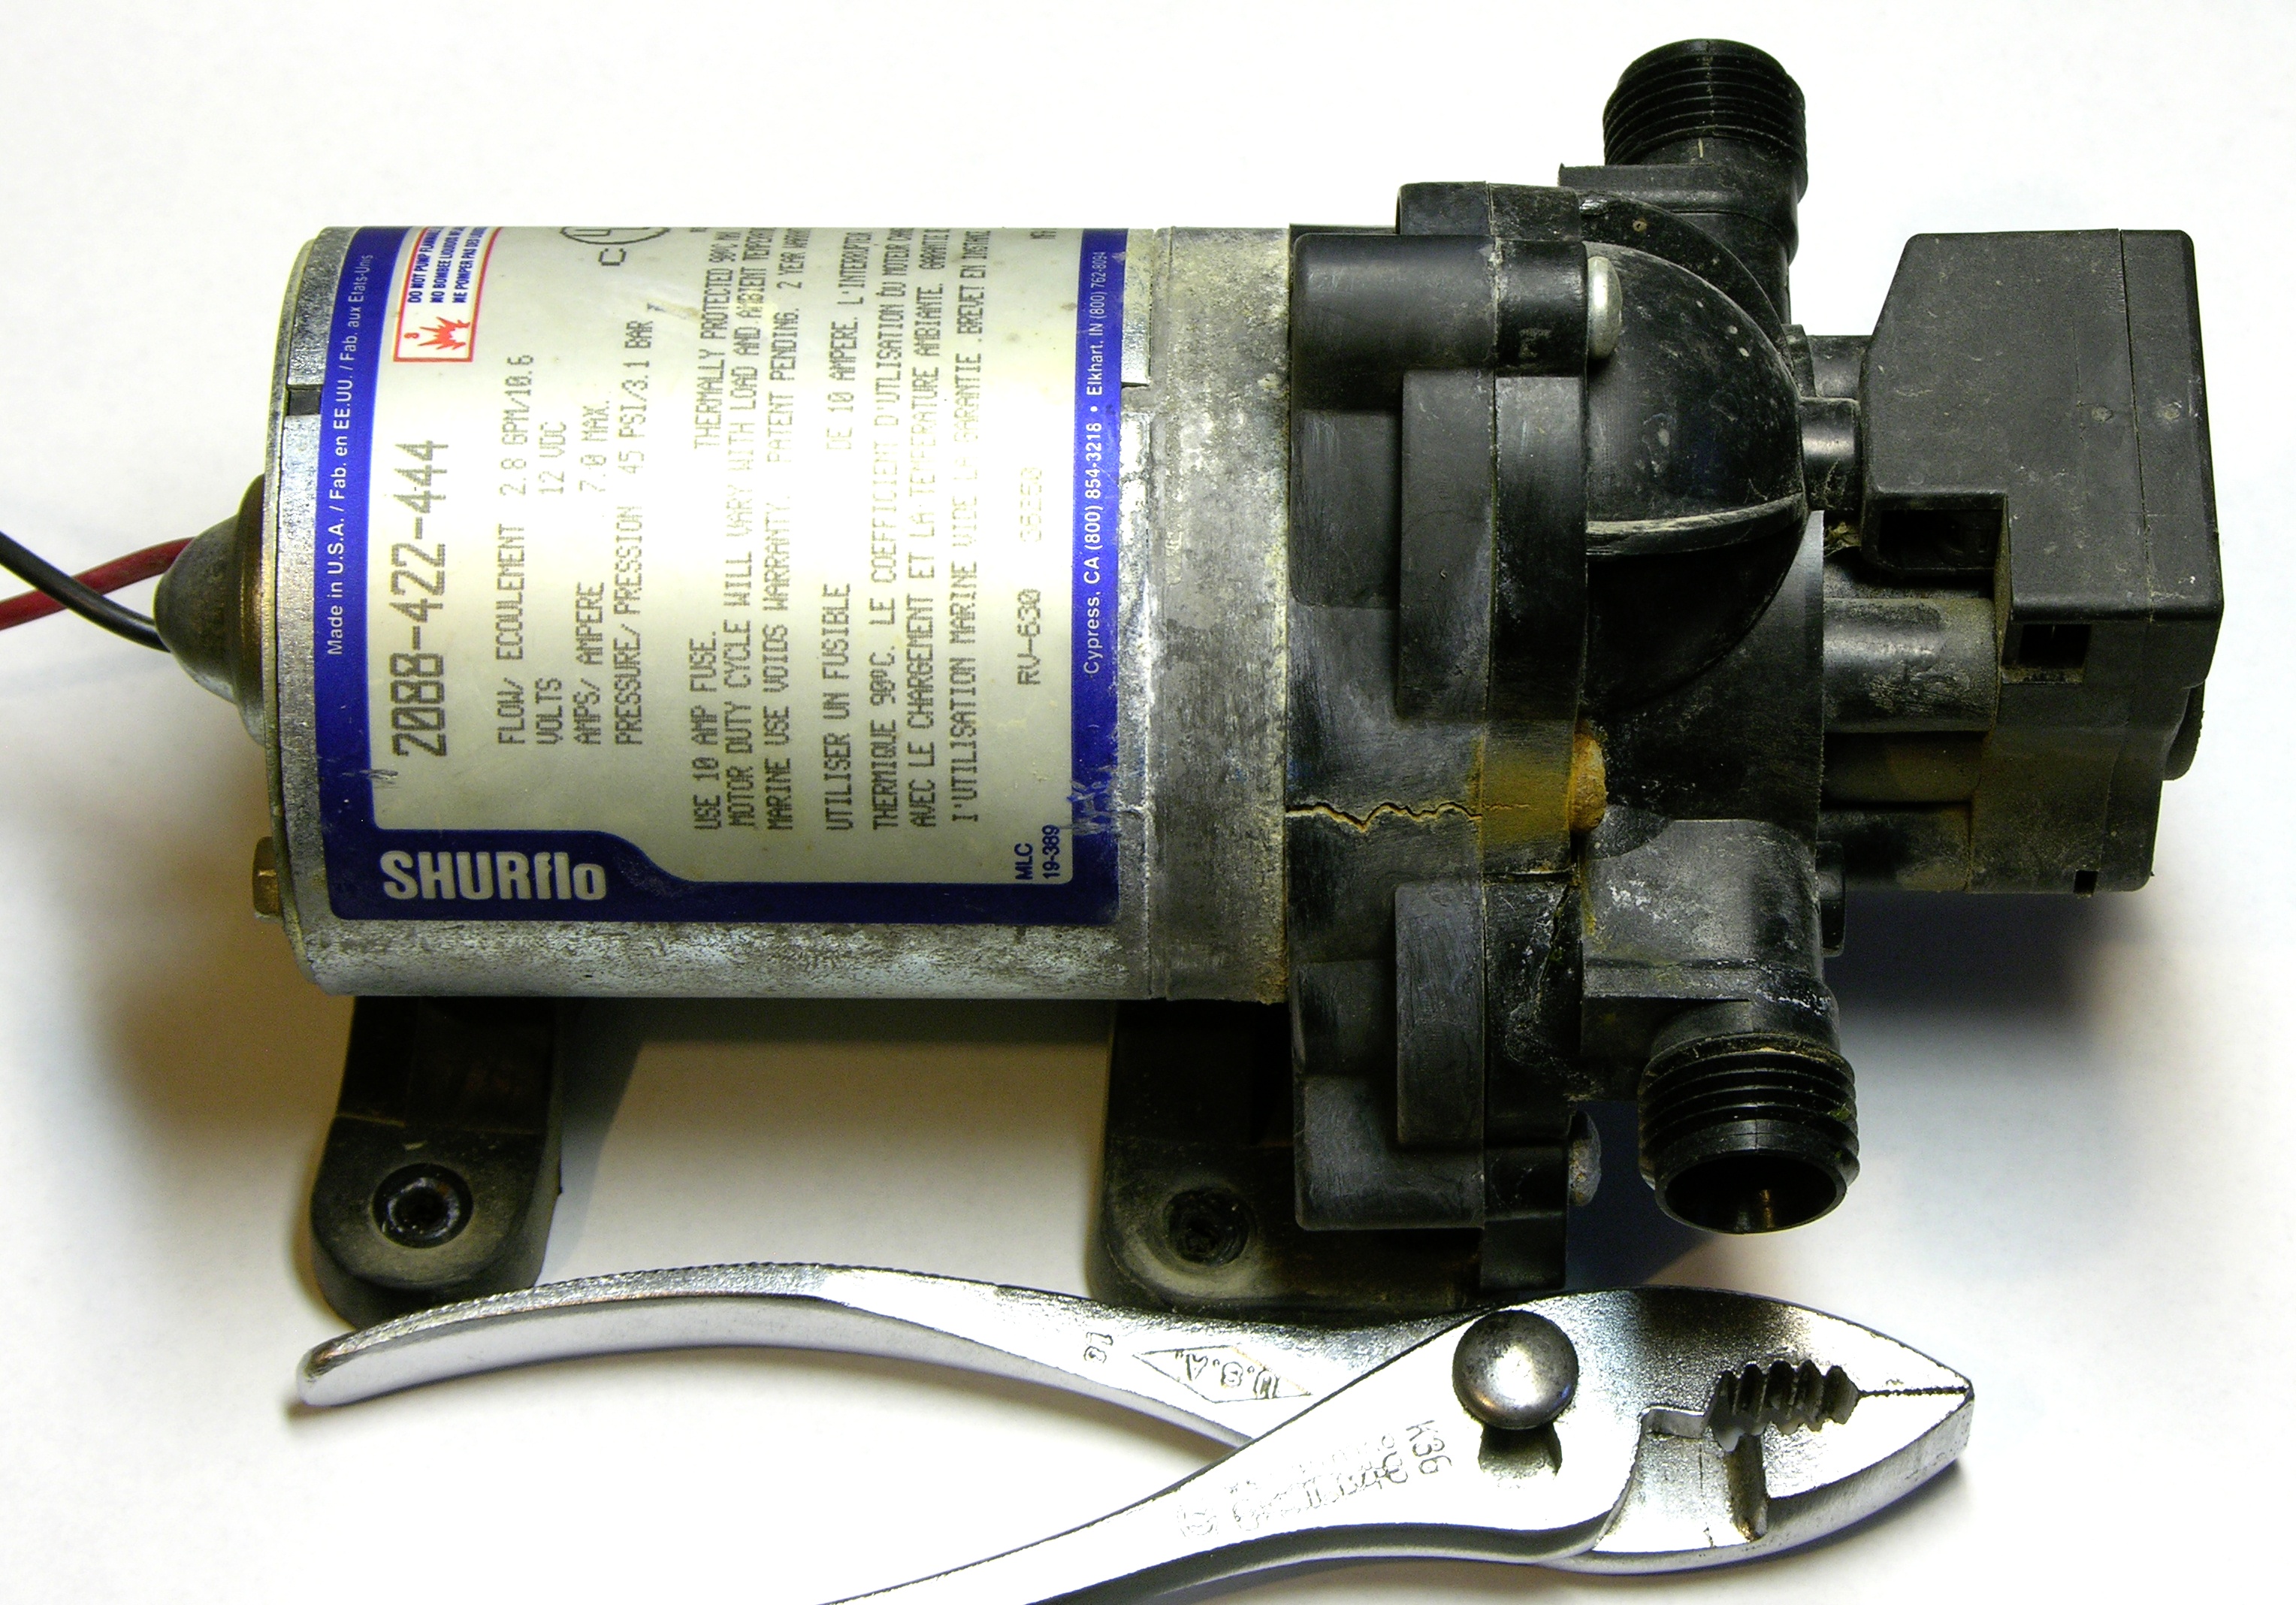
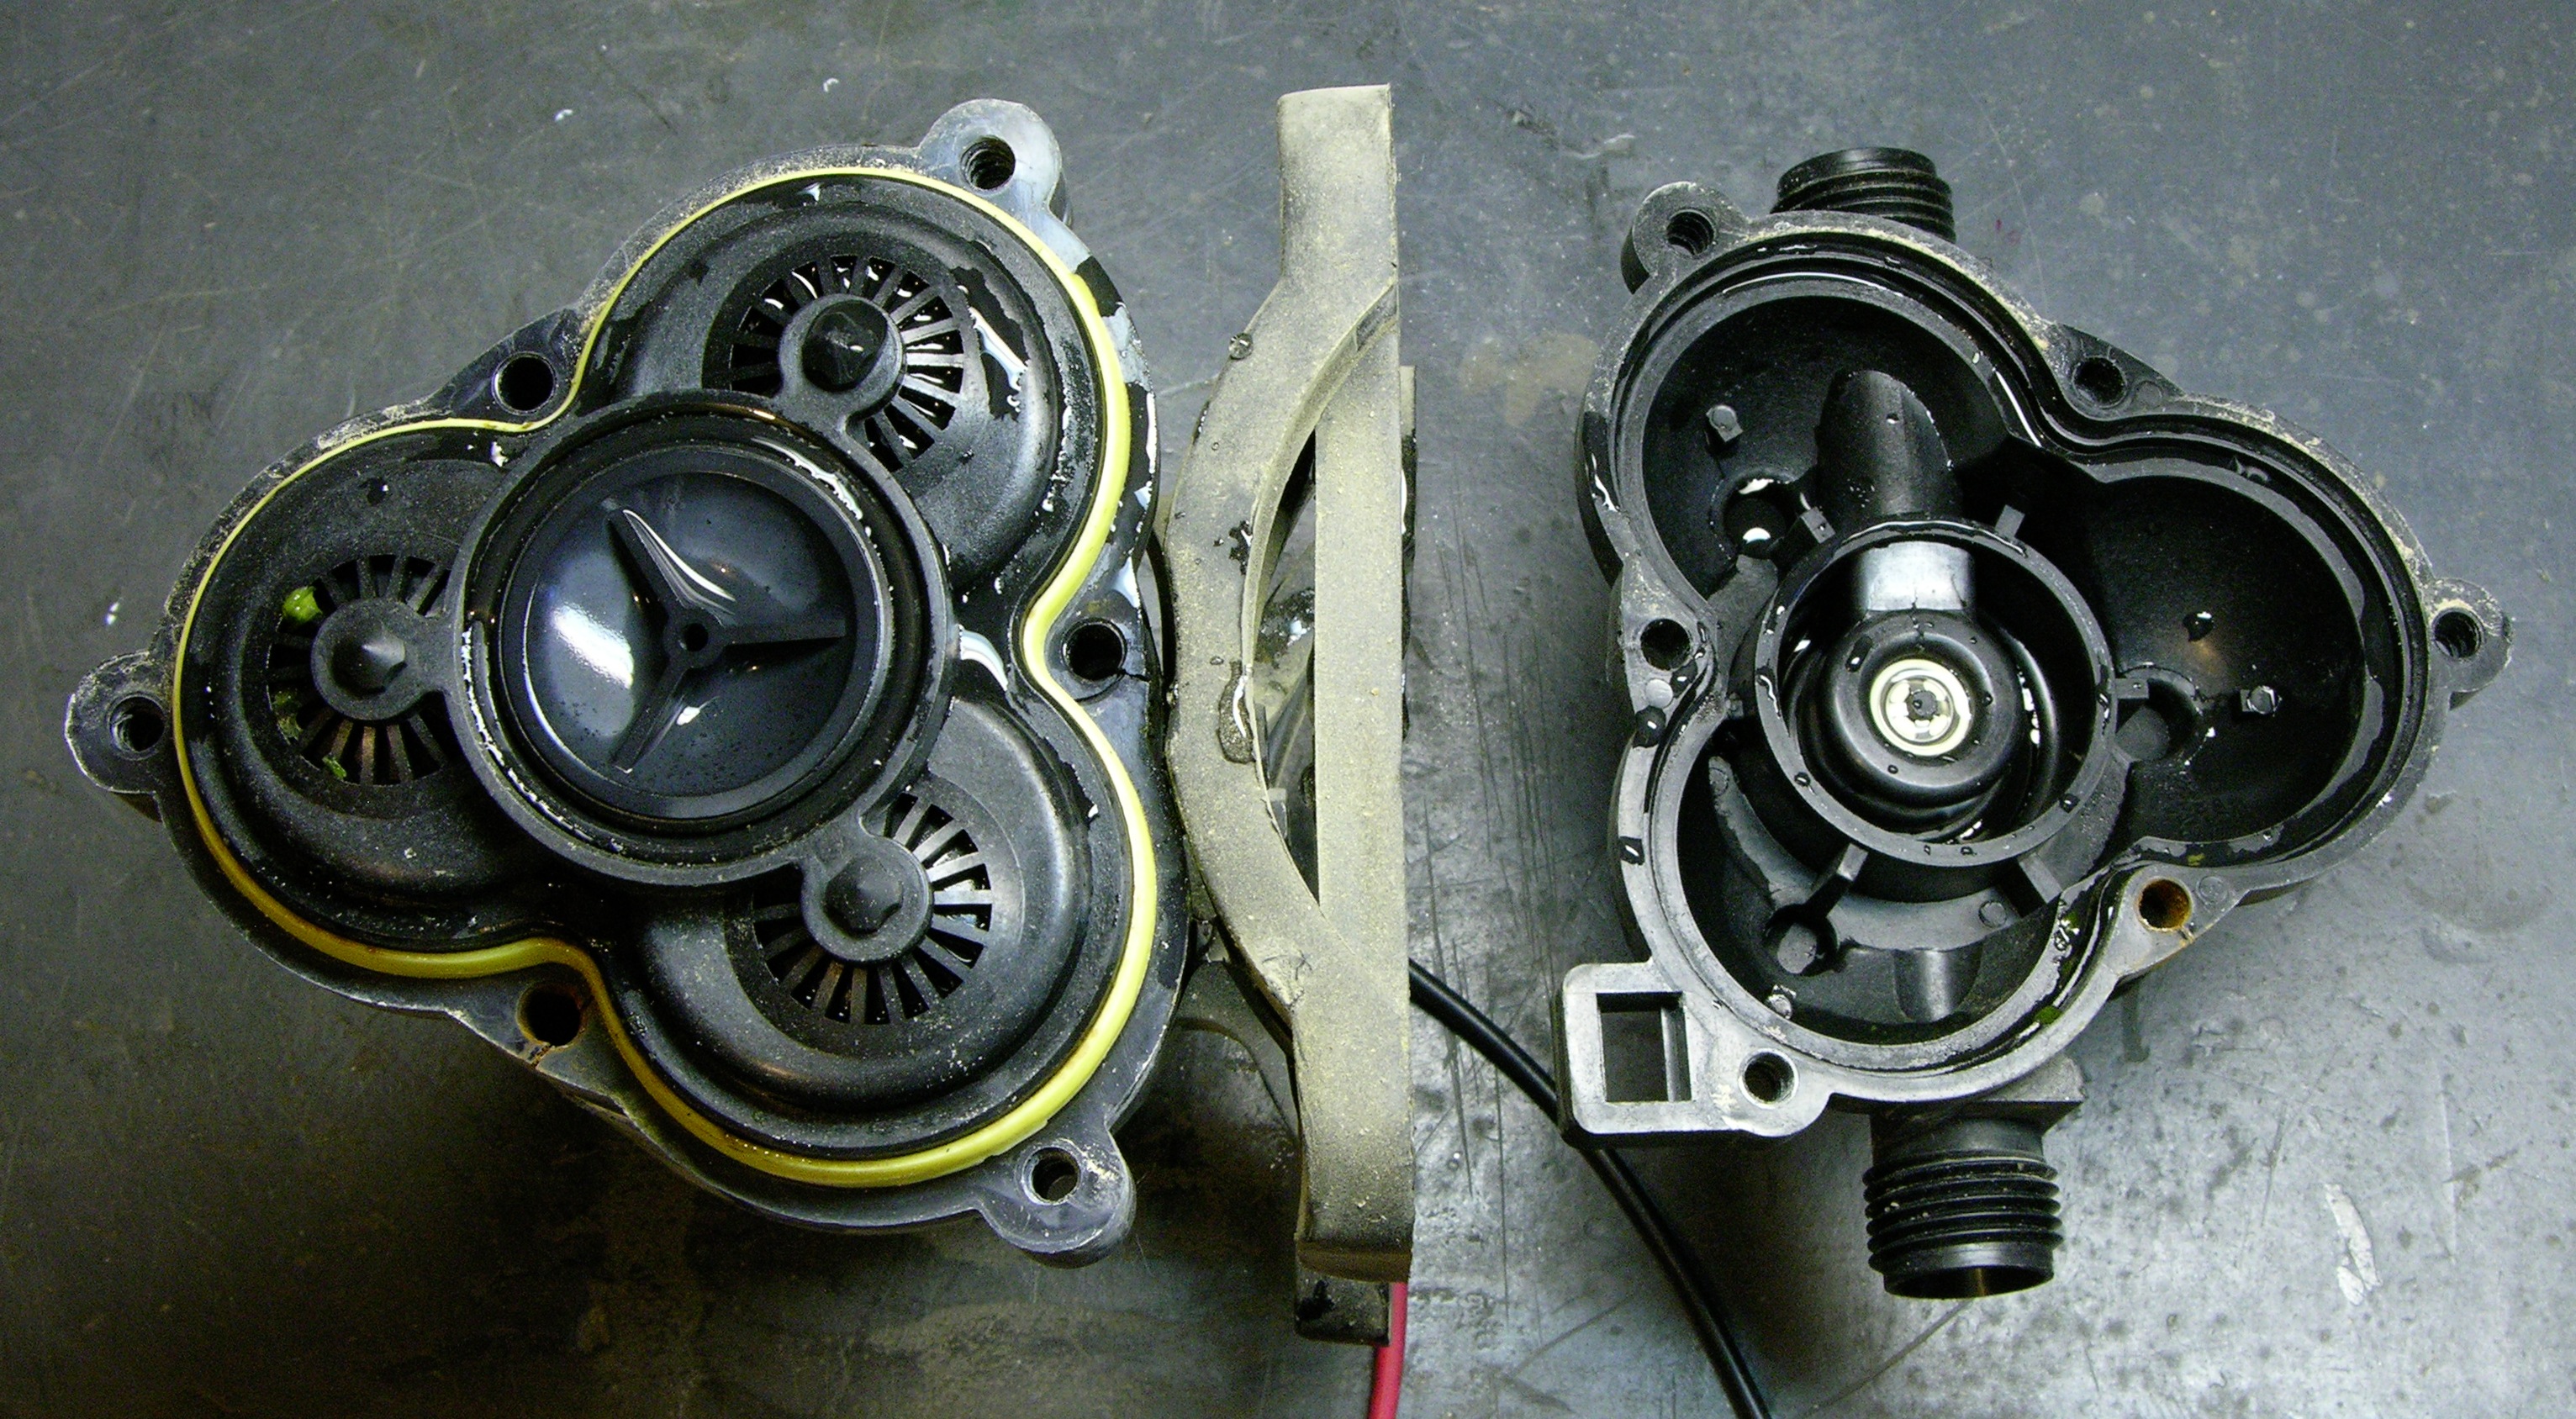
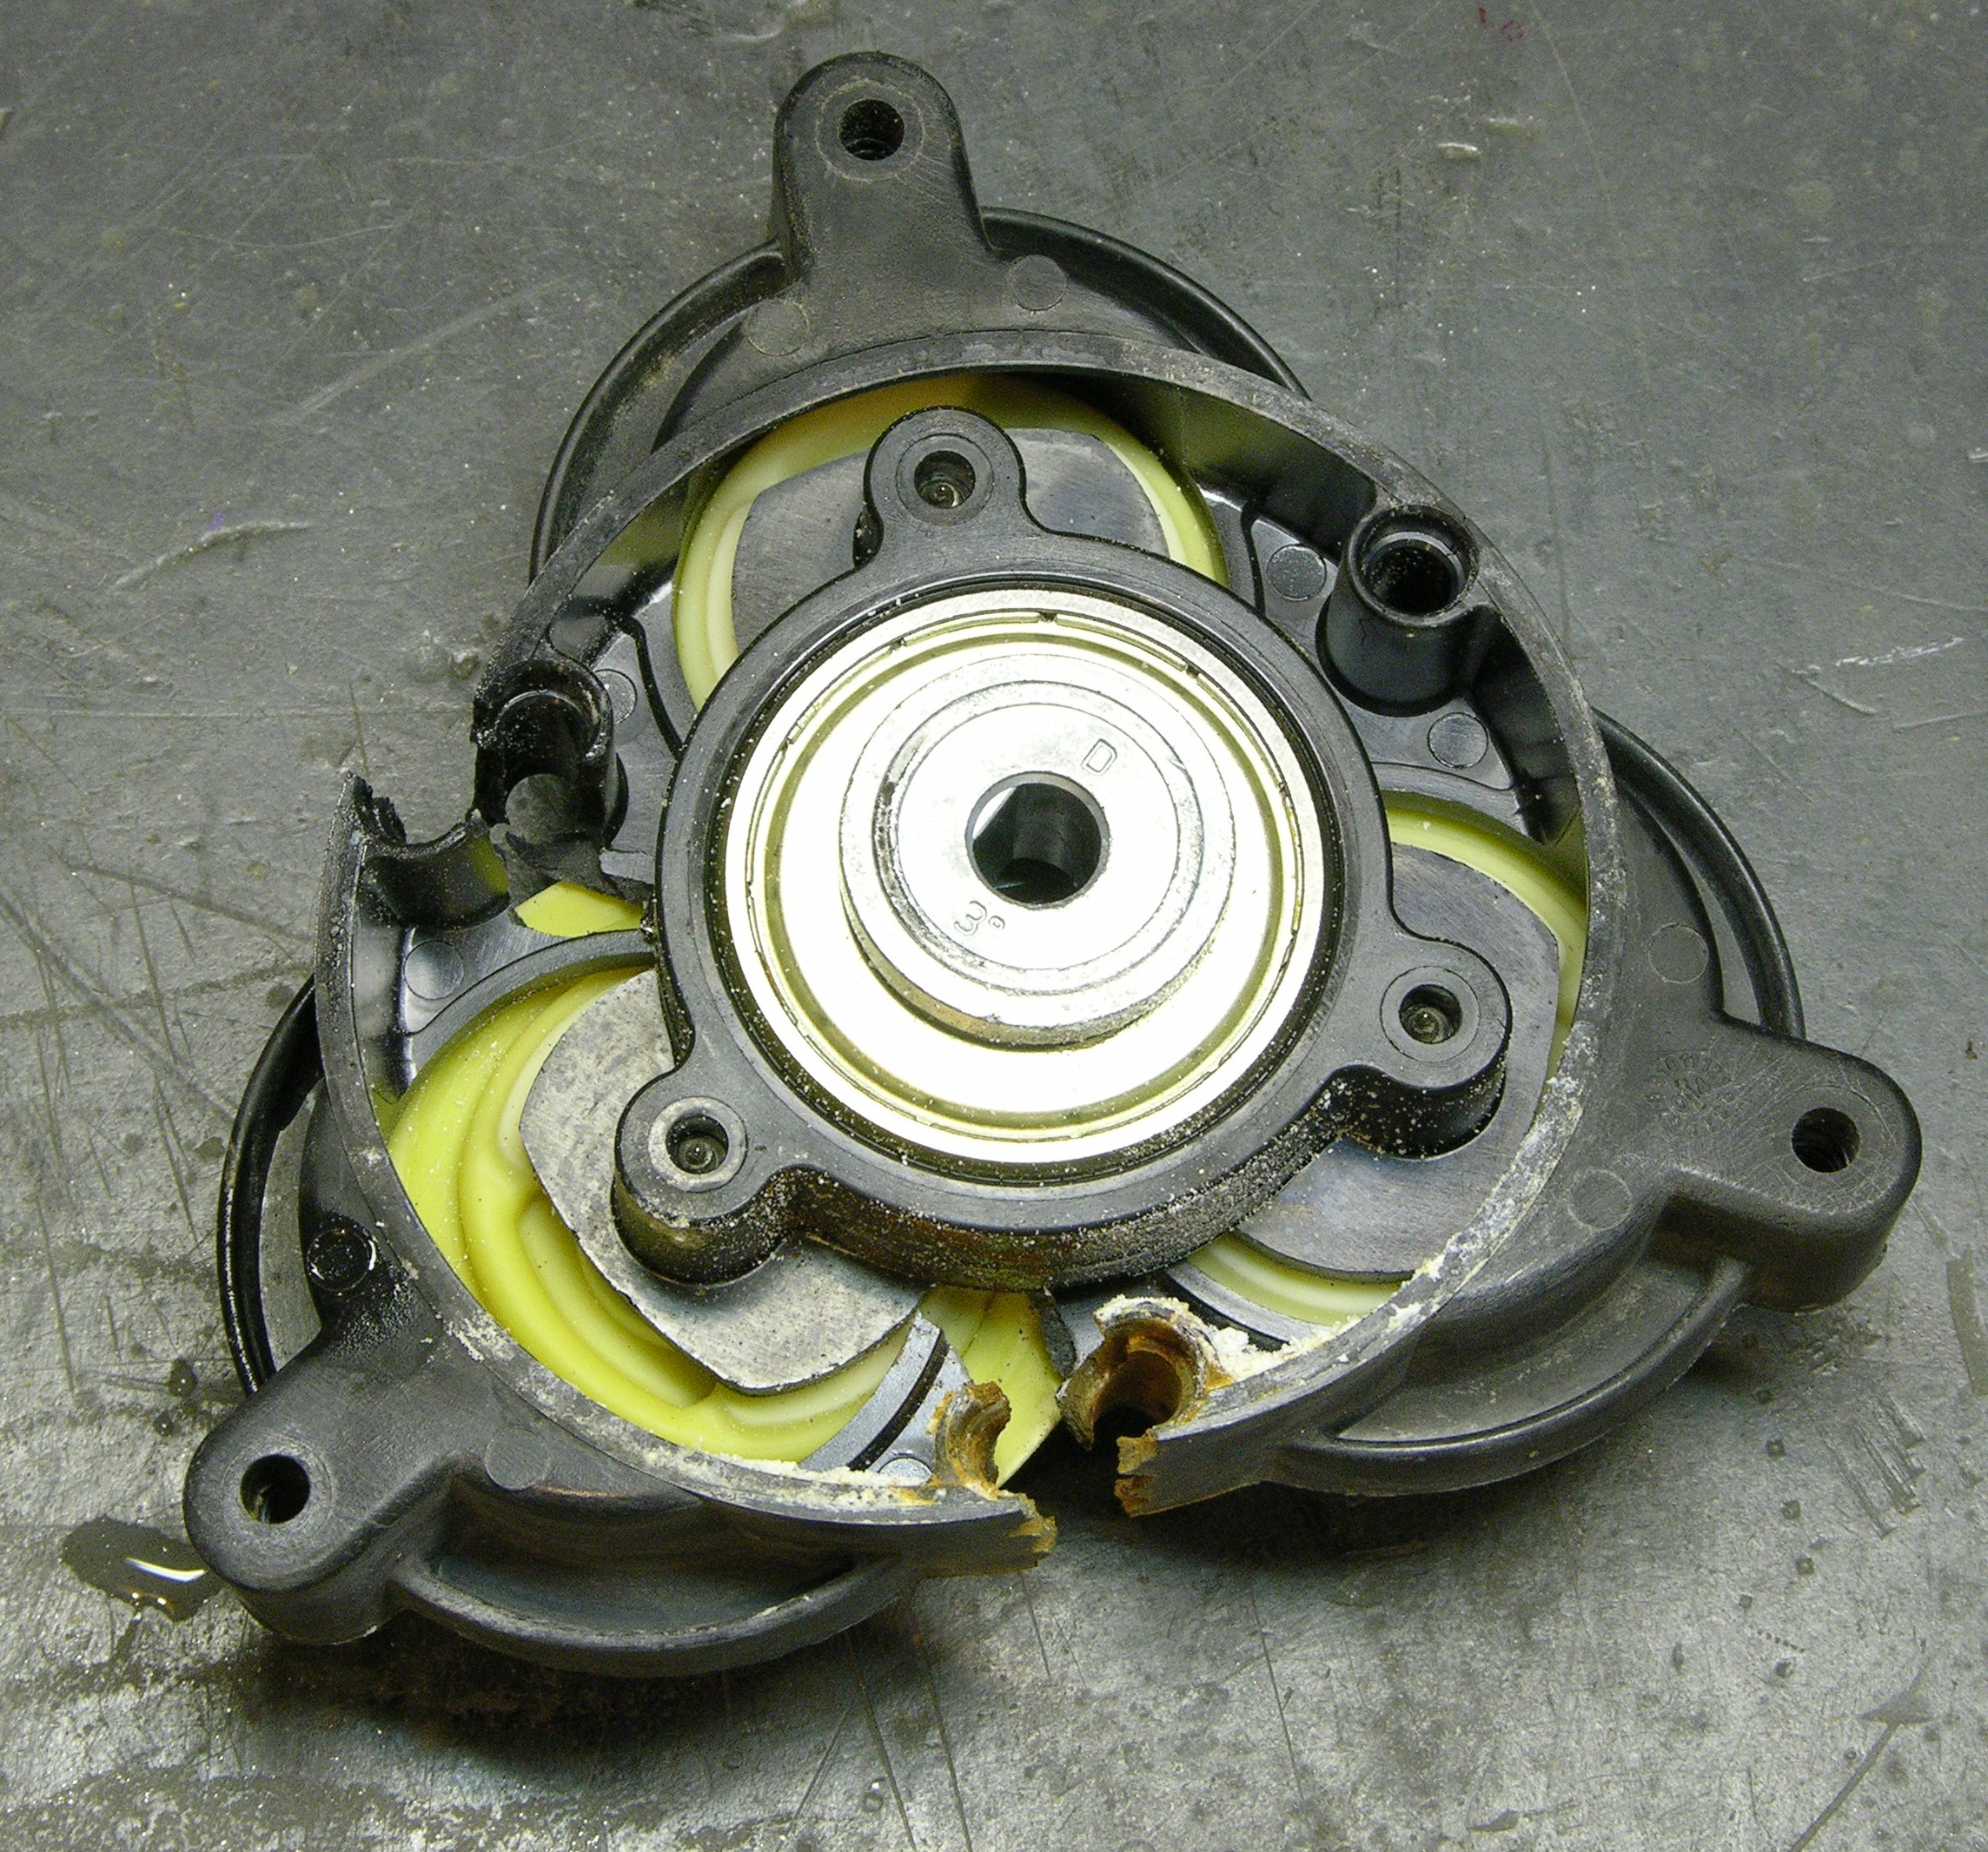
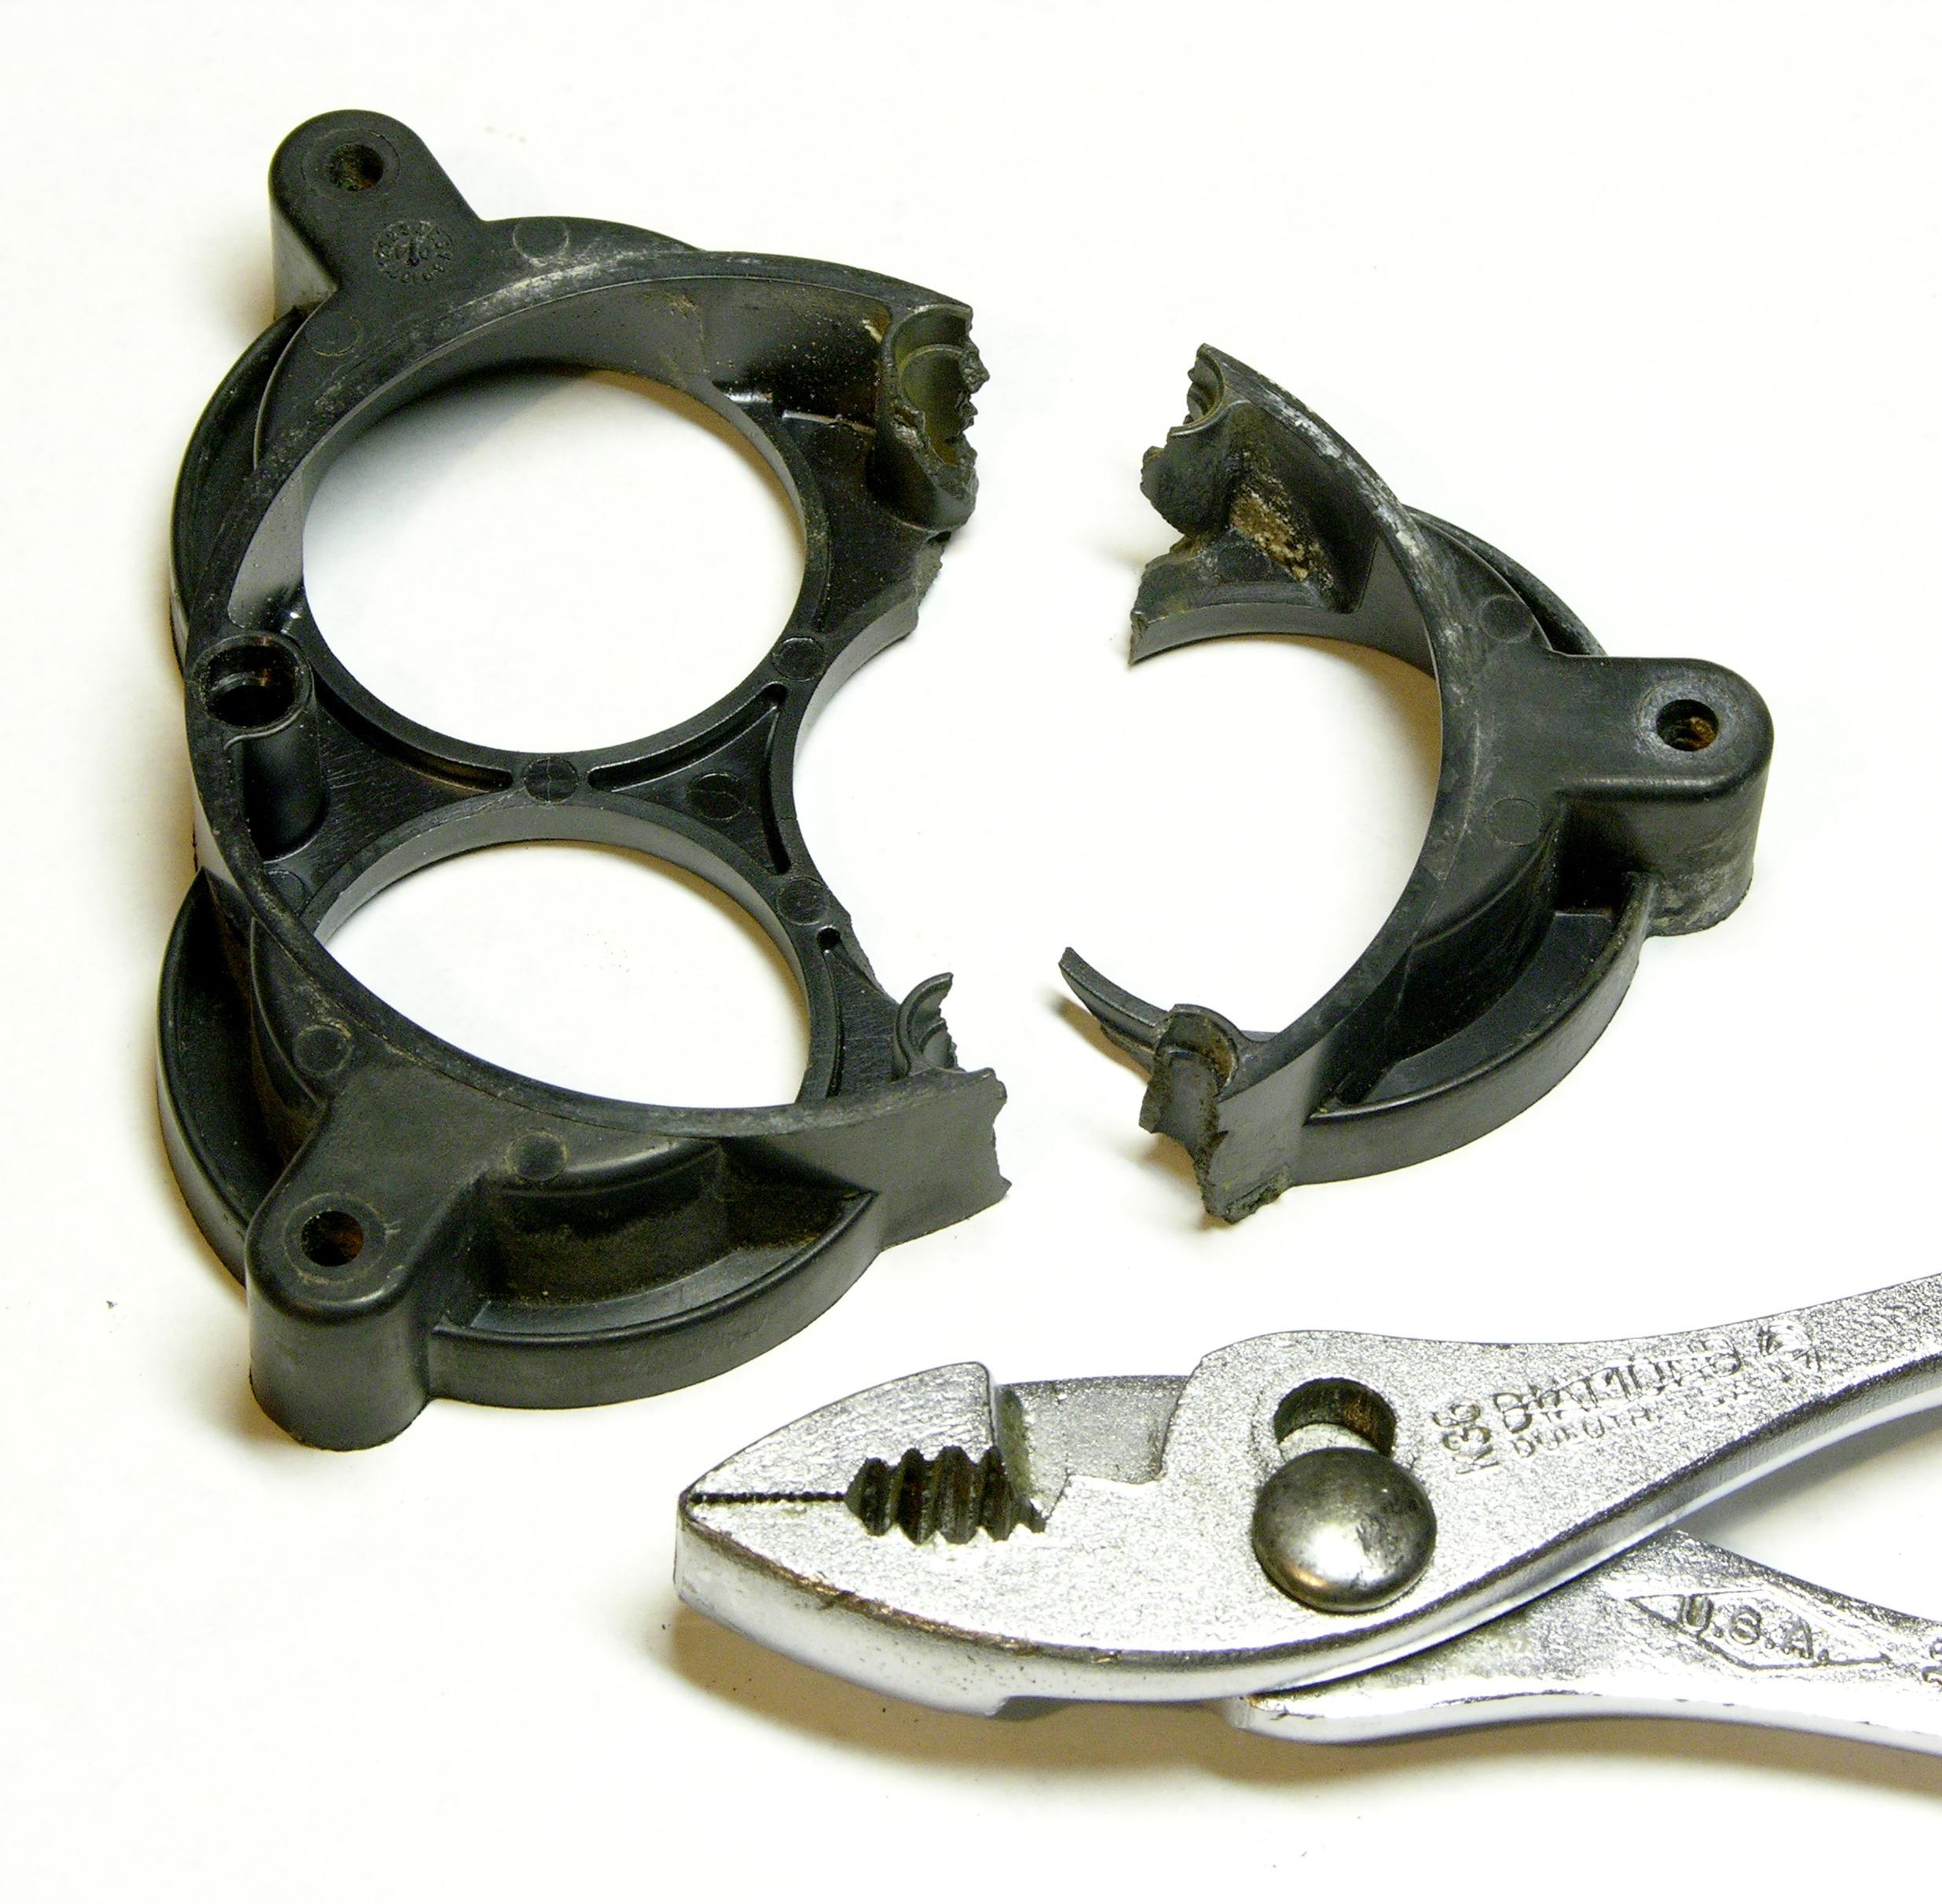
The plastic collar that bolts to the motor should stay dry during normal operation — a rubber gasket press-fits between that piece and the three-dome-shaped housing where the water flows.

Crack in pump case

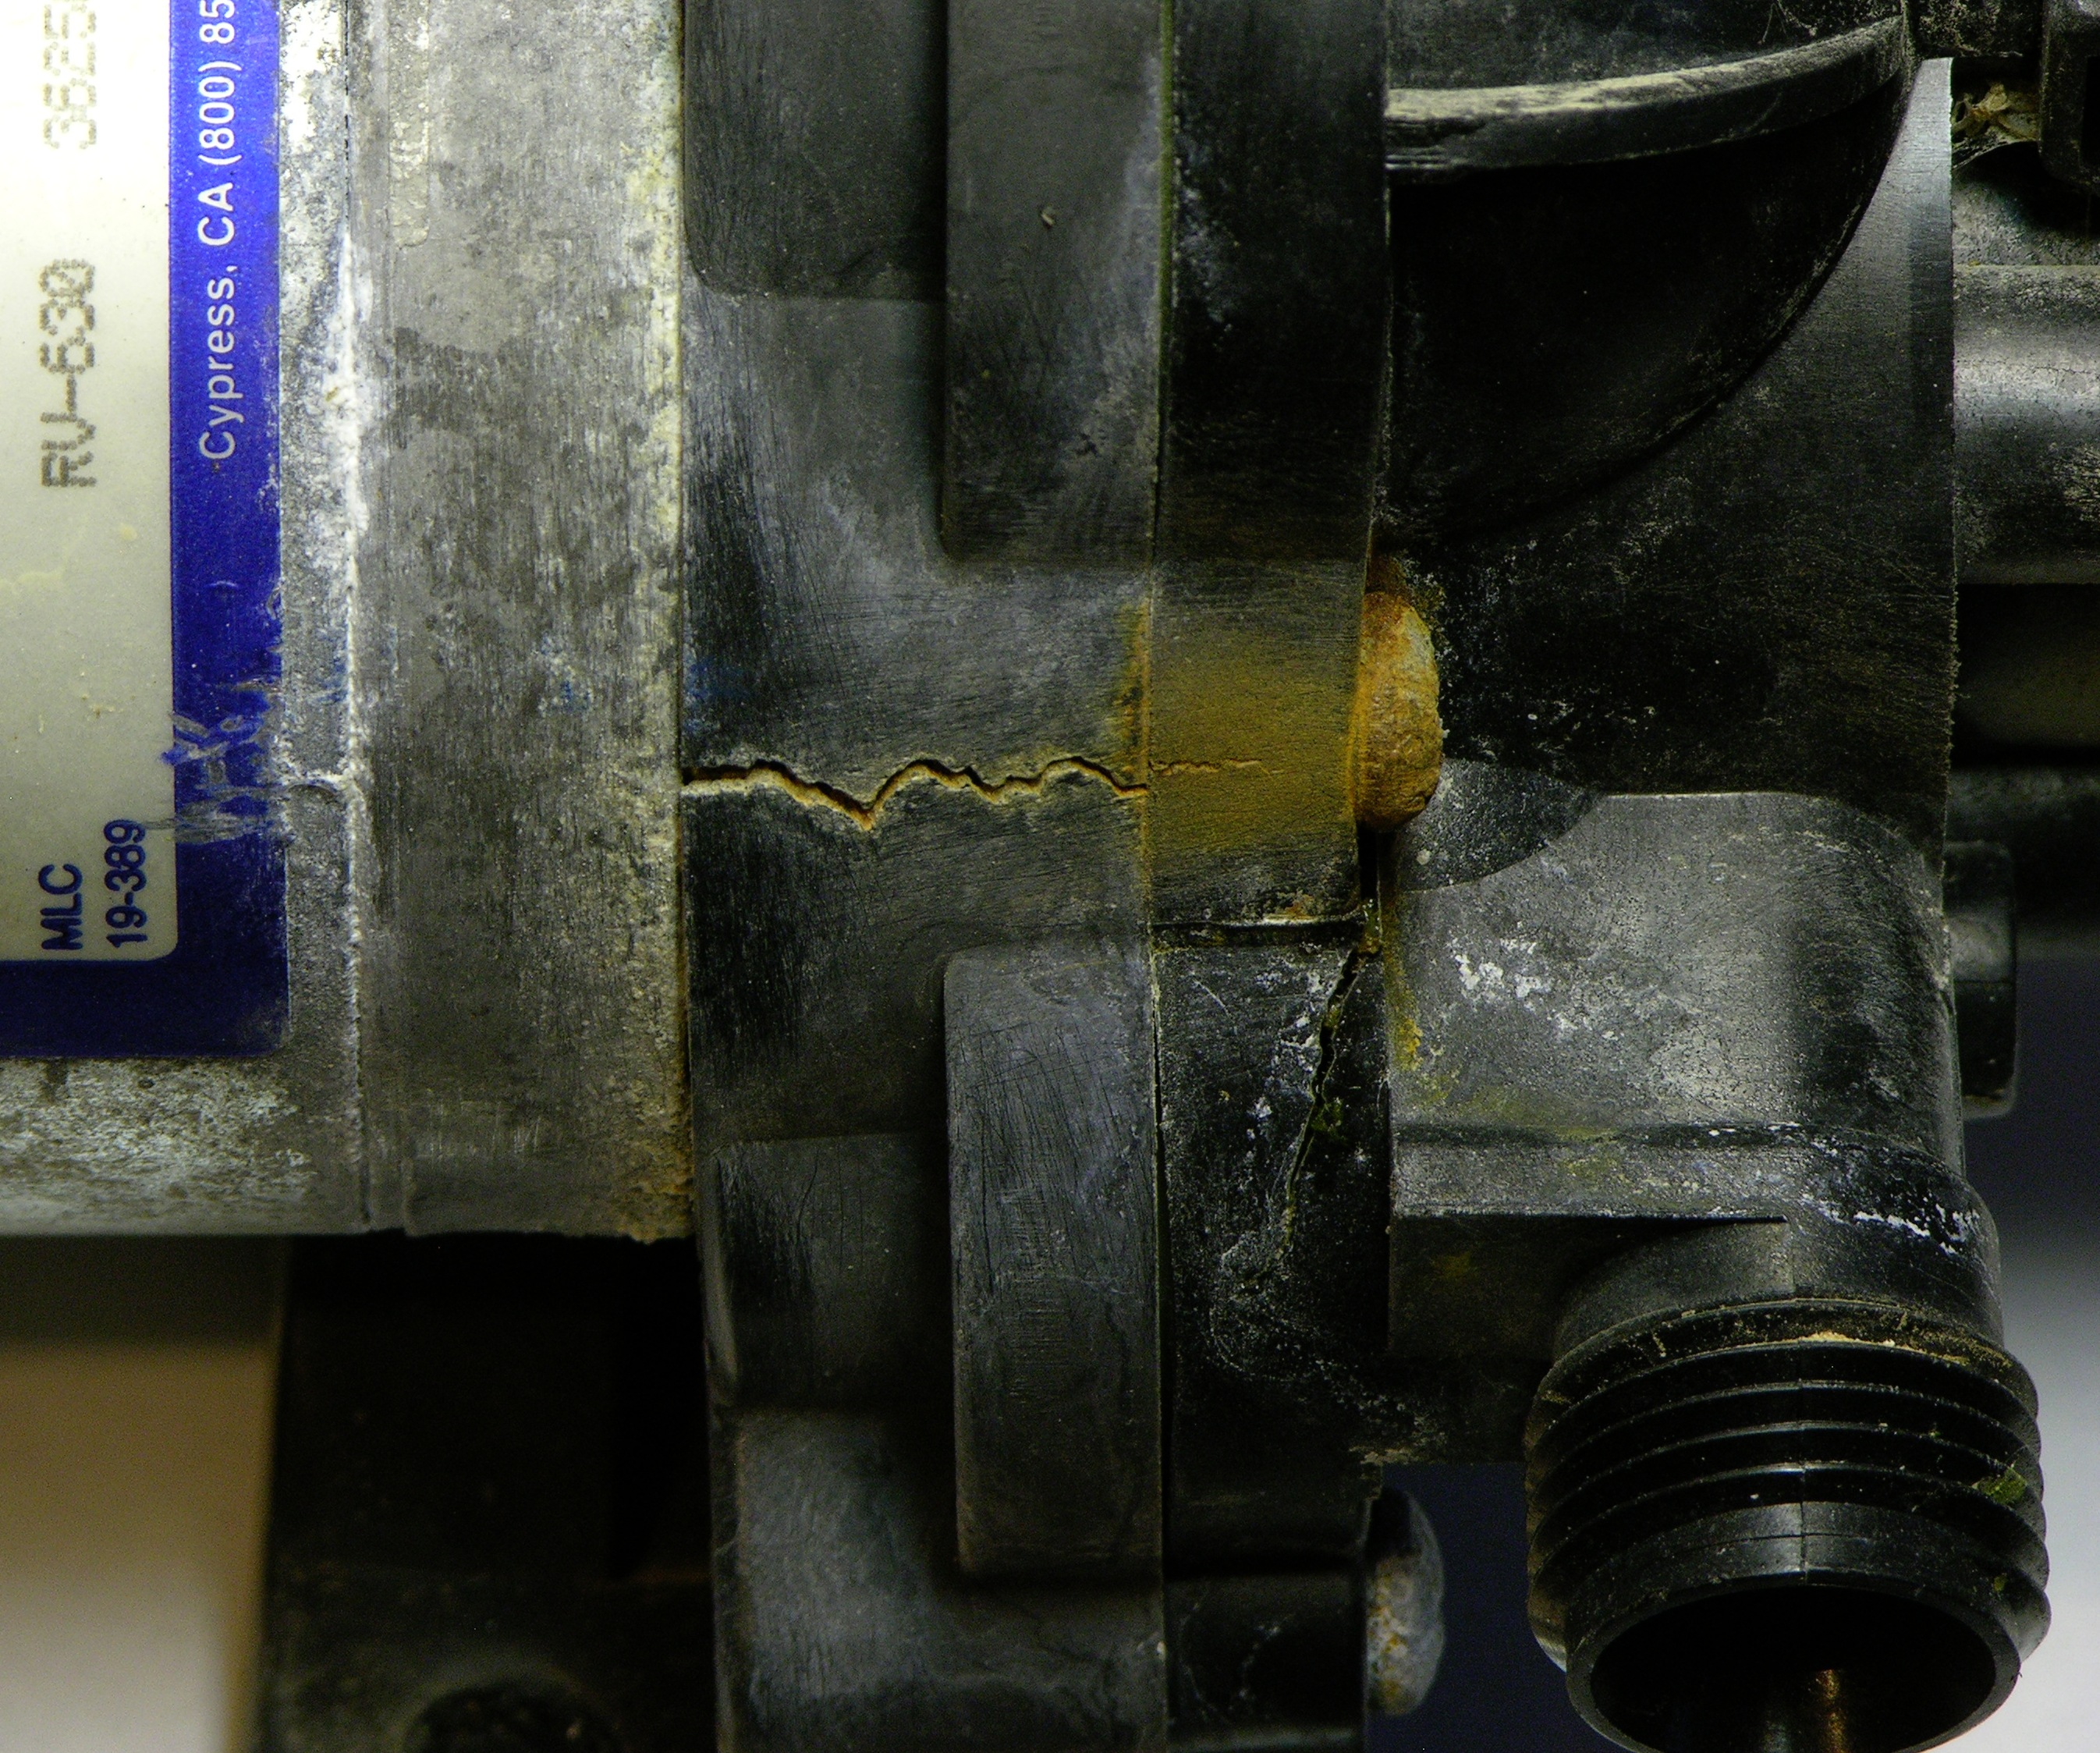
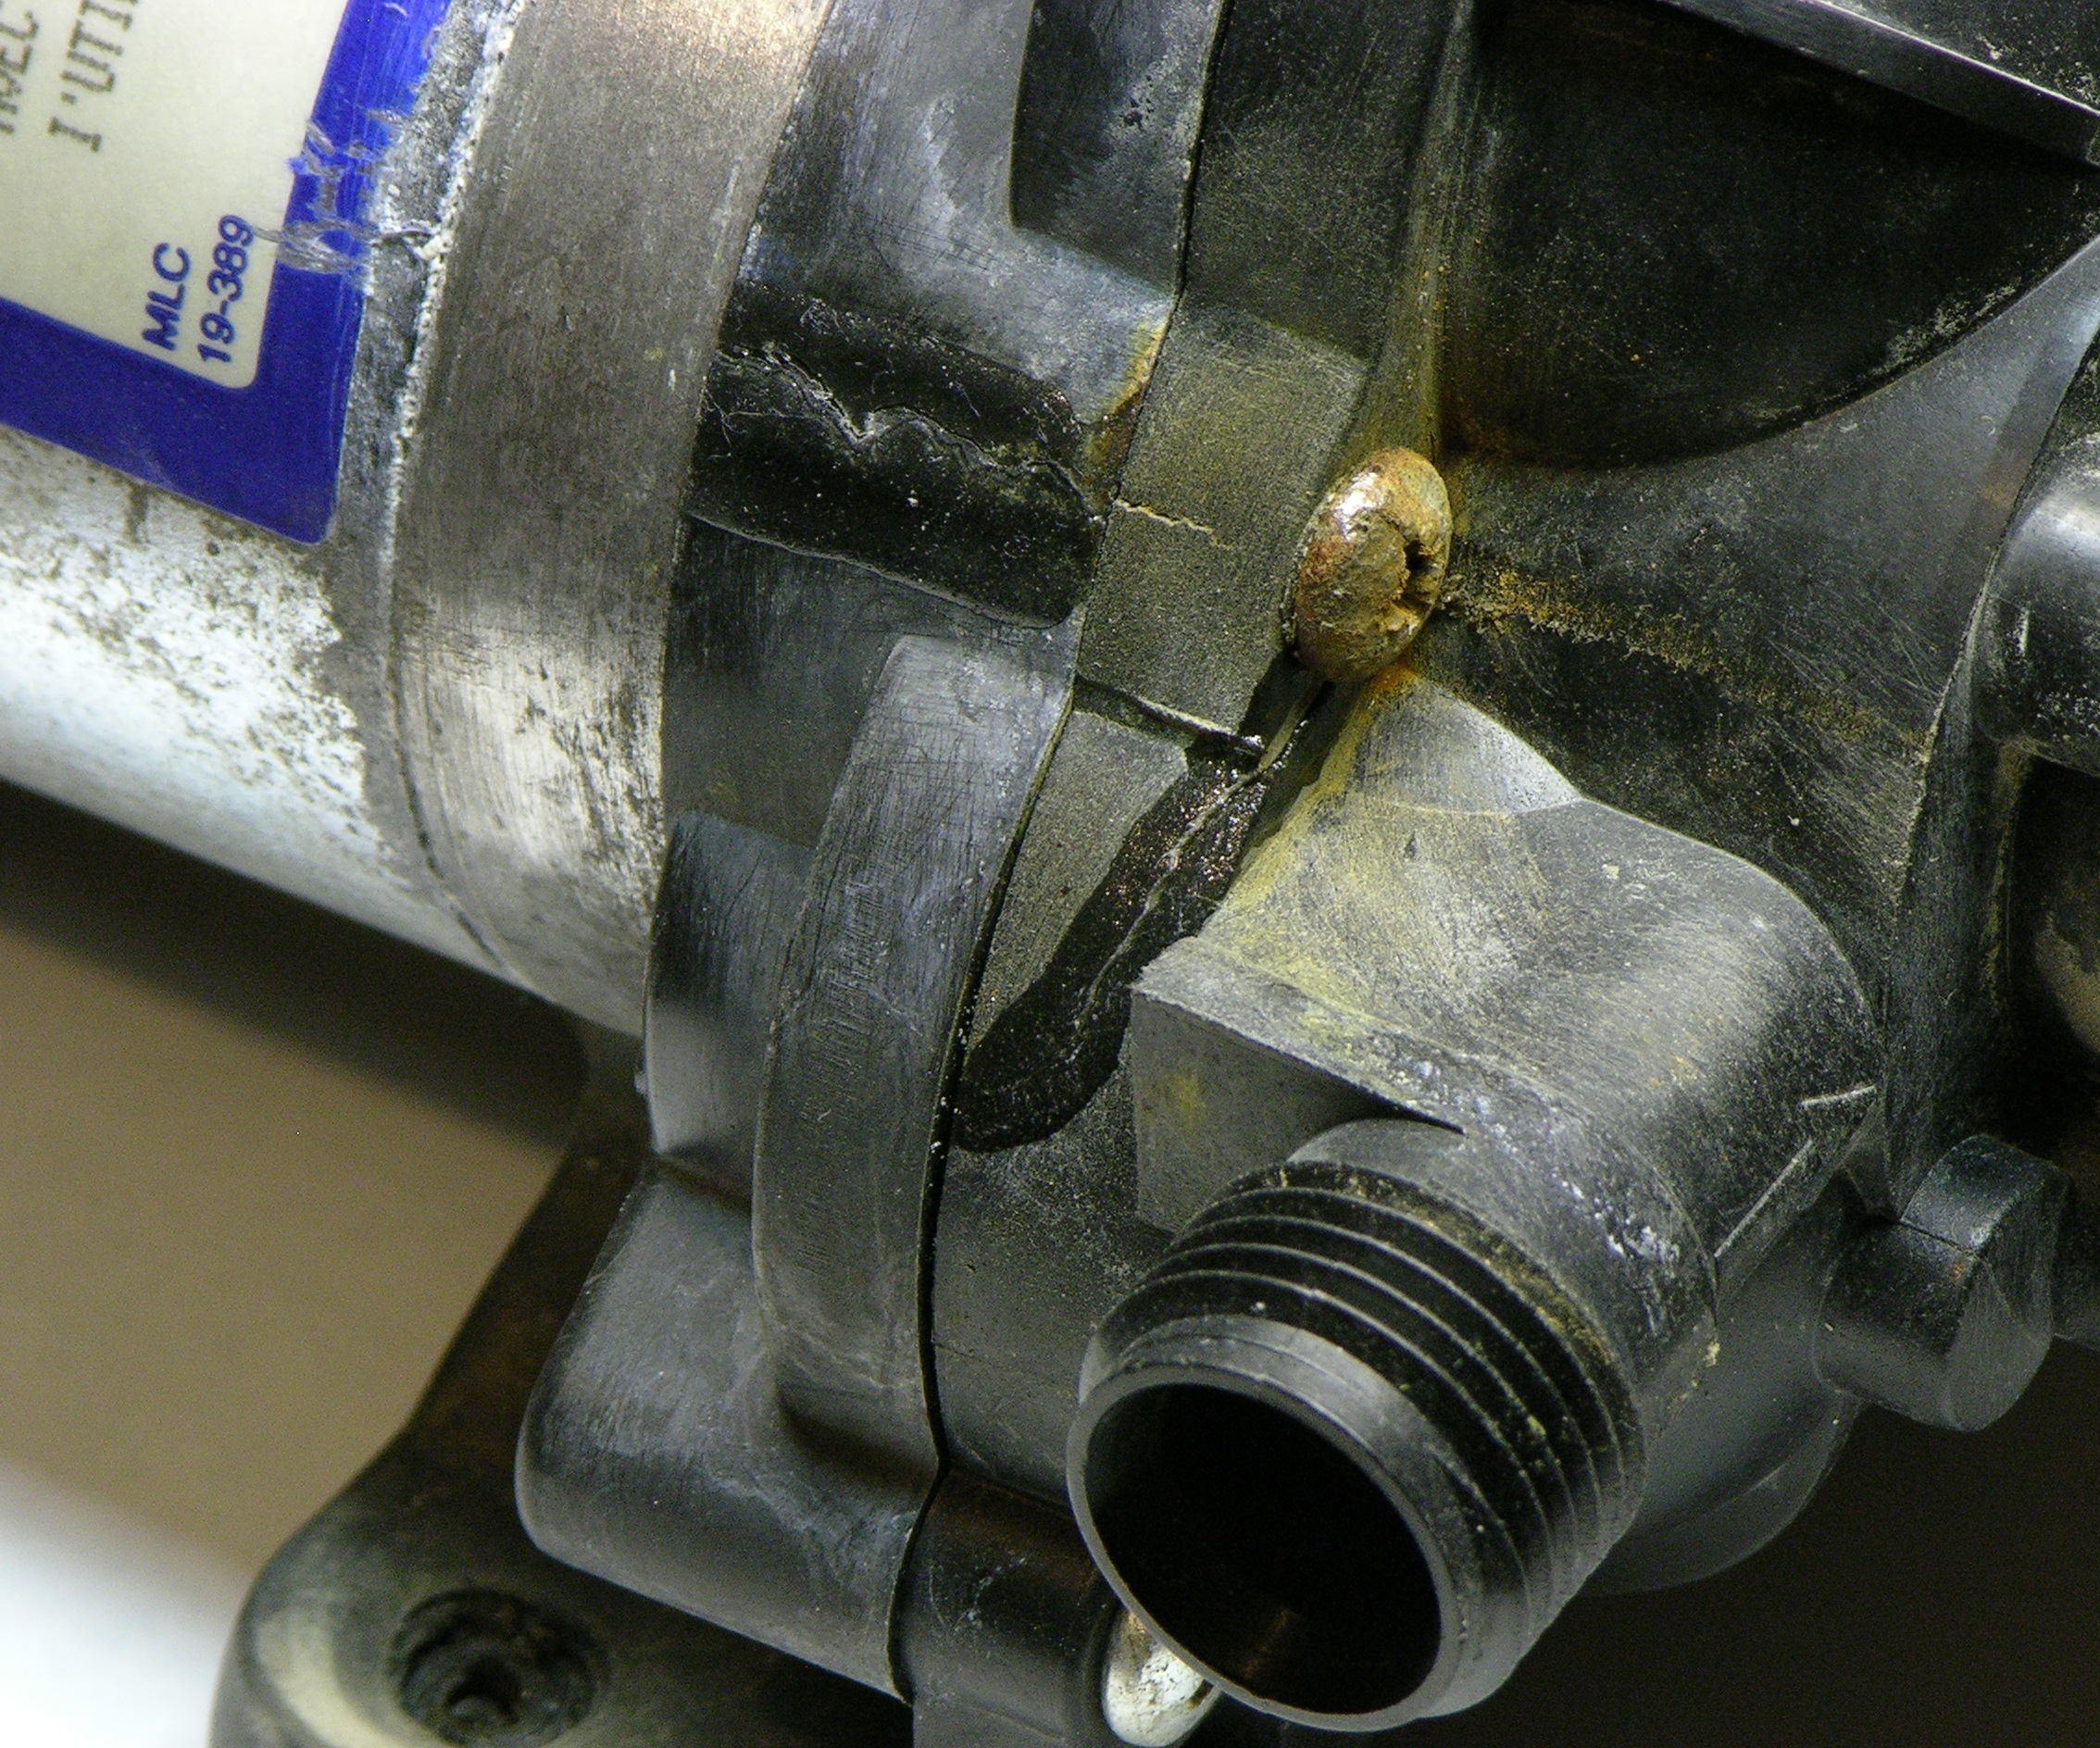
I had superglued that horizontal crack (which is vertical in the previous picture), but it’s still (or again) open. For repair attempt #2, I scraped off the superglue, then undercut a groove along the crack below the lip, to have more room and surface area for RTV to take hold.

Cracked pump case with silicone RTV sealer

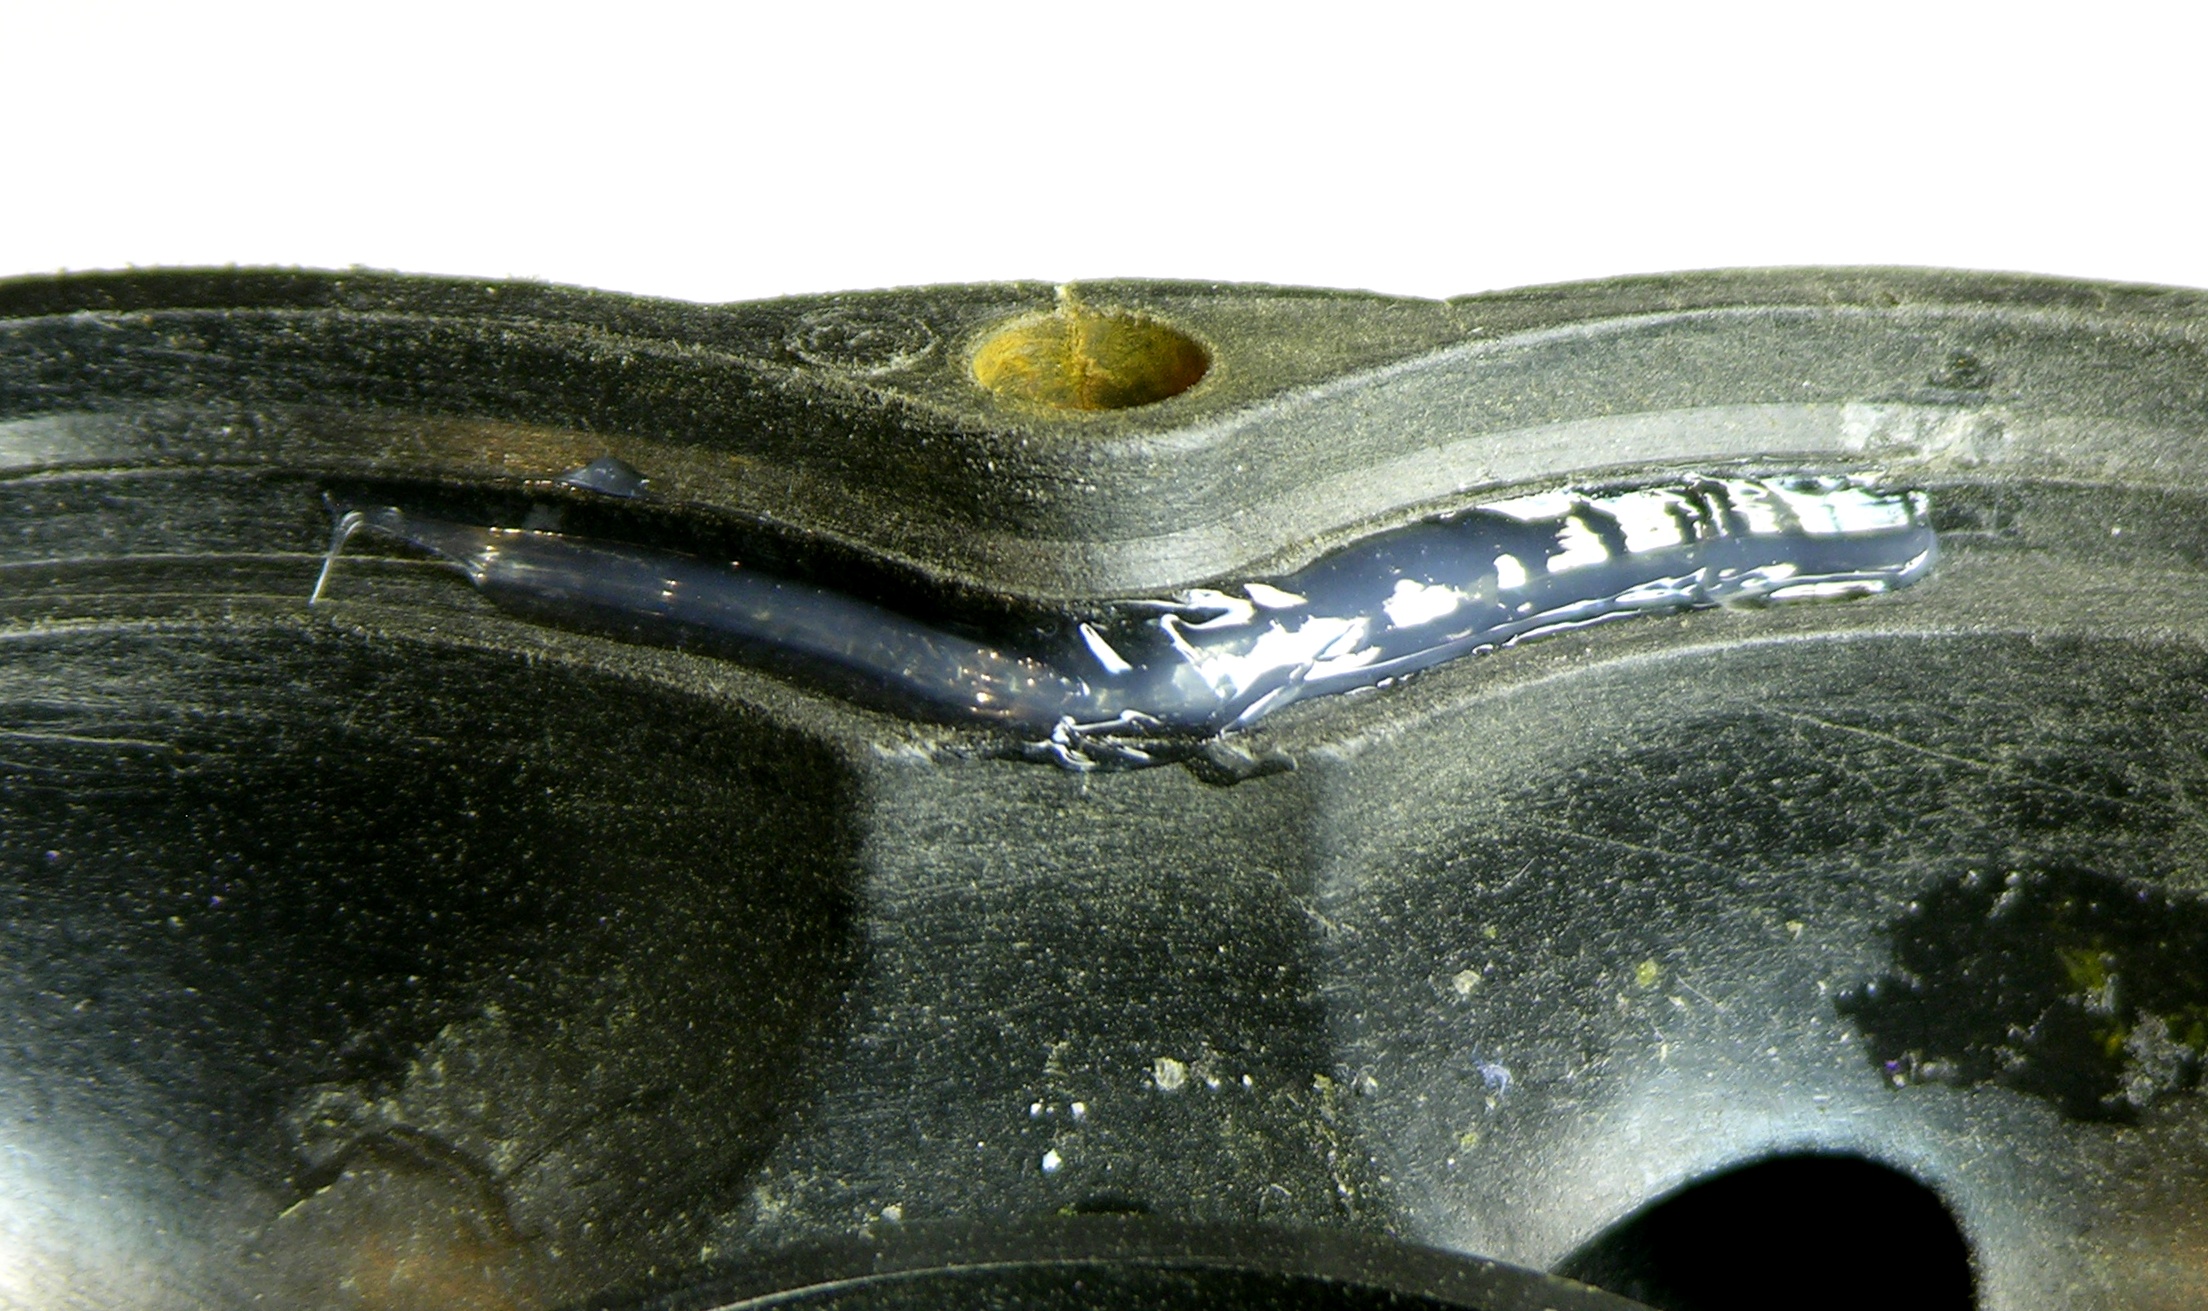
There’s actually about as much RTV behind the edge as there is in front, and it seems to hold pretty well. The mating edge of the rubber gasket is chamfered, so the RTV here doesn’t interfere with the gasket.

Cured, reassembled, and reinstalled, the leak has been slowed from a spray to a dribble. Seems like it’s worth another cleaning and seal attempt to see if I can catch the last bit of leak.

Replacing the Toilet Supply Line

Tuesday, July 7th, 2009

More work with Lawrence, or I should say, byLawrence, this weekend.

Leaking RV toilet supply line

When I filled the water supply tank and turned on the pump, a beautiful sheet of water jetted out from the top of the toilet supply line. My camera could not do it justice.

The bus’s sink is plumbed from the water pump with black hose. White cross-linked polyethylene (PEX) runs from the water pump to the rear of the bus, where it inexplicably coupled to more black hose that ran up to the toilet. The black hose had split open all along the top of its curve, hence the effect above.

Lawrence has recently built a proper shower in his basement and is converting his household plumbing to PEX, so he had tubing and supplies on hand. I cut off the crimp fittings, he donated a few feet of blue PEX and more crimp fittings, and he reconnected the toilet so it no longer leaks. It can be filled with water, flushed, and everything!

Came in very handy for wringing out my dishrag while scrubbing grunge off the cookstove.

Expenses

None, to me. I later saw about the same length of PEX at Graber’s Ace for $2.50; Lawrence’s would have cost less in bulk. The fittings might have been another $1-2.

Water Pump Repair Attempt #1: Epoxy

Tuesday, July 7th, 2009

A couple of weekends ago I filled up the bus’s (nominally) fresh water tank. (Never mind all the grossness; it’ll get cleaned before I drink from it, but I have to start somewhere.)

RV fresh water pump mounted to wall of battery compartment

It didn’t take long to notice the water leaking from the lower end of the pump and dripping back down the line from the tank. Hand-tightening the lower (supply) fitting increased the rate of leakage.

For perspective, the tank is out of view above the camera, the white plastic ring is the fill neck and the clear tube and galvanized pipe are the fill lines, the pump is bolted to the aft end of the battery compartment, and the black hose from the top of the pump curves off to the left and then up into the bus to the sink.

RV fresh water pump with cracked housing

I drained the tank, removed the pump, brought it home, and cleaned it,

Crack in RV fresh water pump housing

at which point the problem was much more obvious in good light.

RV fresh water pump, top part of case removed

Out of curiosity, I opened the pump to see where all and how badly it was cracked.

Broken RV fresh water pump housing

Ah, pretty badly, then, eh.

Broken RV fresh water pump housing

Since it looked fairly easy to clean the broken edges, I was further curious whether plastic-repair epoxy would do any good. I scrubbed the broken ends with a wire brush, then mixed up and applied the epoxy. I clamped it up to cure overnight.

Cracked RV fresh water pump housing

Meanwhile, the housing was also cracked in a couple of different places. I epoxied it, clamped it up, and let it set overnight as well.

Glued RV fresh water pump housing

Upon reassembly, the glued cracks did appear to hold together.

Still leaking

But still it leaks.

Looking at how it’s built and where the water is coming out, I think it’s leaking out that large crack that goes circumferentially past the screw. Maybe a thin coat of RTV on the inside of the housing would stop the leak?

This repair is mainly for entertainment, mind you. But if it gets me by until I get the shower built and require a higher-capacity pump, so much the better.

Gas Stove

Tuesday, July 7th, 2009

Over the holiday weekend, Lawrence donated a gas cooktop from a popup camper he tore apart long ago, and did just about all of the work to hook it up in the bus for me.

Stove before cleaning

The cooktop fits the upper part of the counter opening perfectly. There’s no oven and I’ll want one eventually — but this is free and available right now.

Stovetop before cleaning

This is from early Saturday morning before I did lots of scrubbing.

Bus propane tank with new regulator, hose, and fittings

It took about five trips to Graber’s Ace Hardware, buying and returning one regulator and buying another, and several conversations with a very knowledgeable and helpful employee to find the regulator with the right fitting for this tank and hoses and lots of brass adapters for every connection — two to three at every junction (converting between flare, compression, and pipe fittings; different sizes; and different genders).

RV gas cooktop

Late Saturday afternoon: installed, connected, and clean. The bus propane tank was (predictably) empty, but Lawrence hooked up one of his grill tanks long enough to do a leak test and light one burner.

RV gas cooktop with lid up

The inside isn’t quite as clean, as the grungy bits are harder to reach. I’ll come back with a long-handled scrub brush and do a little better on this.

Buying Propane

If you’re passing through the Newton area and need propane, I can’t say enough good things about Payne Oil. I took the bus out yesterday to get some propane and had a great conversation with Eric Payne. Like the Graber’s employee, Eric is also incredibly knowledgeable, helpful, and friendly.

He educated me that my propane tank is from a forklift and is made to be set on the ground, filled in an upright position, and then remounted horizontally on the forklift. He couldn’t completely fill it while it was horizontal because the overfill vent wouldn’t work in that position, but he said it was about a seven-gallon tank and he could first test that it was empty and then put in five gallons. I bought only two gallons so I could retest for leaks before going whole hog and filling up.

He showed me the used RV propane tanks they have in the back from trade-ins. They mount horizontally, but the fittings are all on the front instead of on the end. They’re made to go behind a door (no lock, in case of a need for emergency shutoff) and they look really easy to fill and access. He said he could sell me any of them for $1 / gallon capacity. Although some looked rusty and made me a little uncomfortable, I’m definitely considering a used one (after one of his techs certifies that it’s okay) because because …

Today Eric looked up the cost of new tanks and emailed them to me. Granted these were much larger than the spares he had; but he found $750 for a 23-gallon and $1250 for a 20-gallon made as two smaller tanks hooked together. Even with the $50 trade-in he offered on my forklift tank, that doesn’t seem like the best way to spend the next $1000 on my bus. I think we were both surprised by the cost.

Expenses

free gas cooktop
$86.51 gas regulator, lines, and fittings (!)
$6 2 gallons LP
$92.51 total for connecting gas stove