While trying to print a replacement cap for a spray bottle (which I ultimately want to do in PLA, but that’s what broke my extruder and I’m working my way back up to it), sizing the cap properly for the bottle was complicated by the cap shrinking unevenly while the build was still in progress. I knew I needed to turn down the build platform temperature as soon as the first layer had adhered; but the cap was so thin that the platform didn’t lose heat fast enough to make much difference.

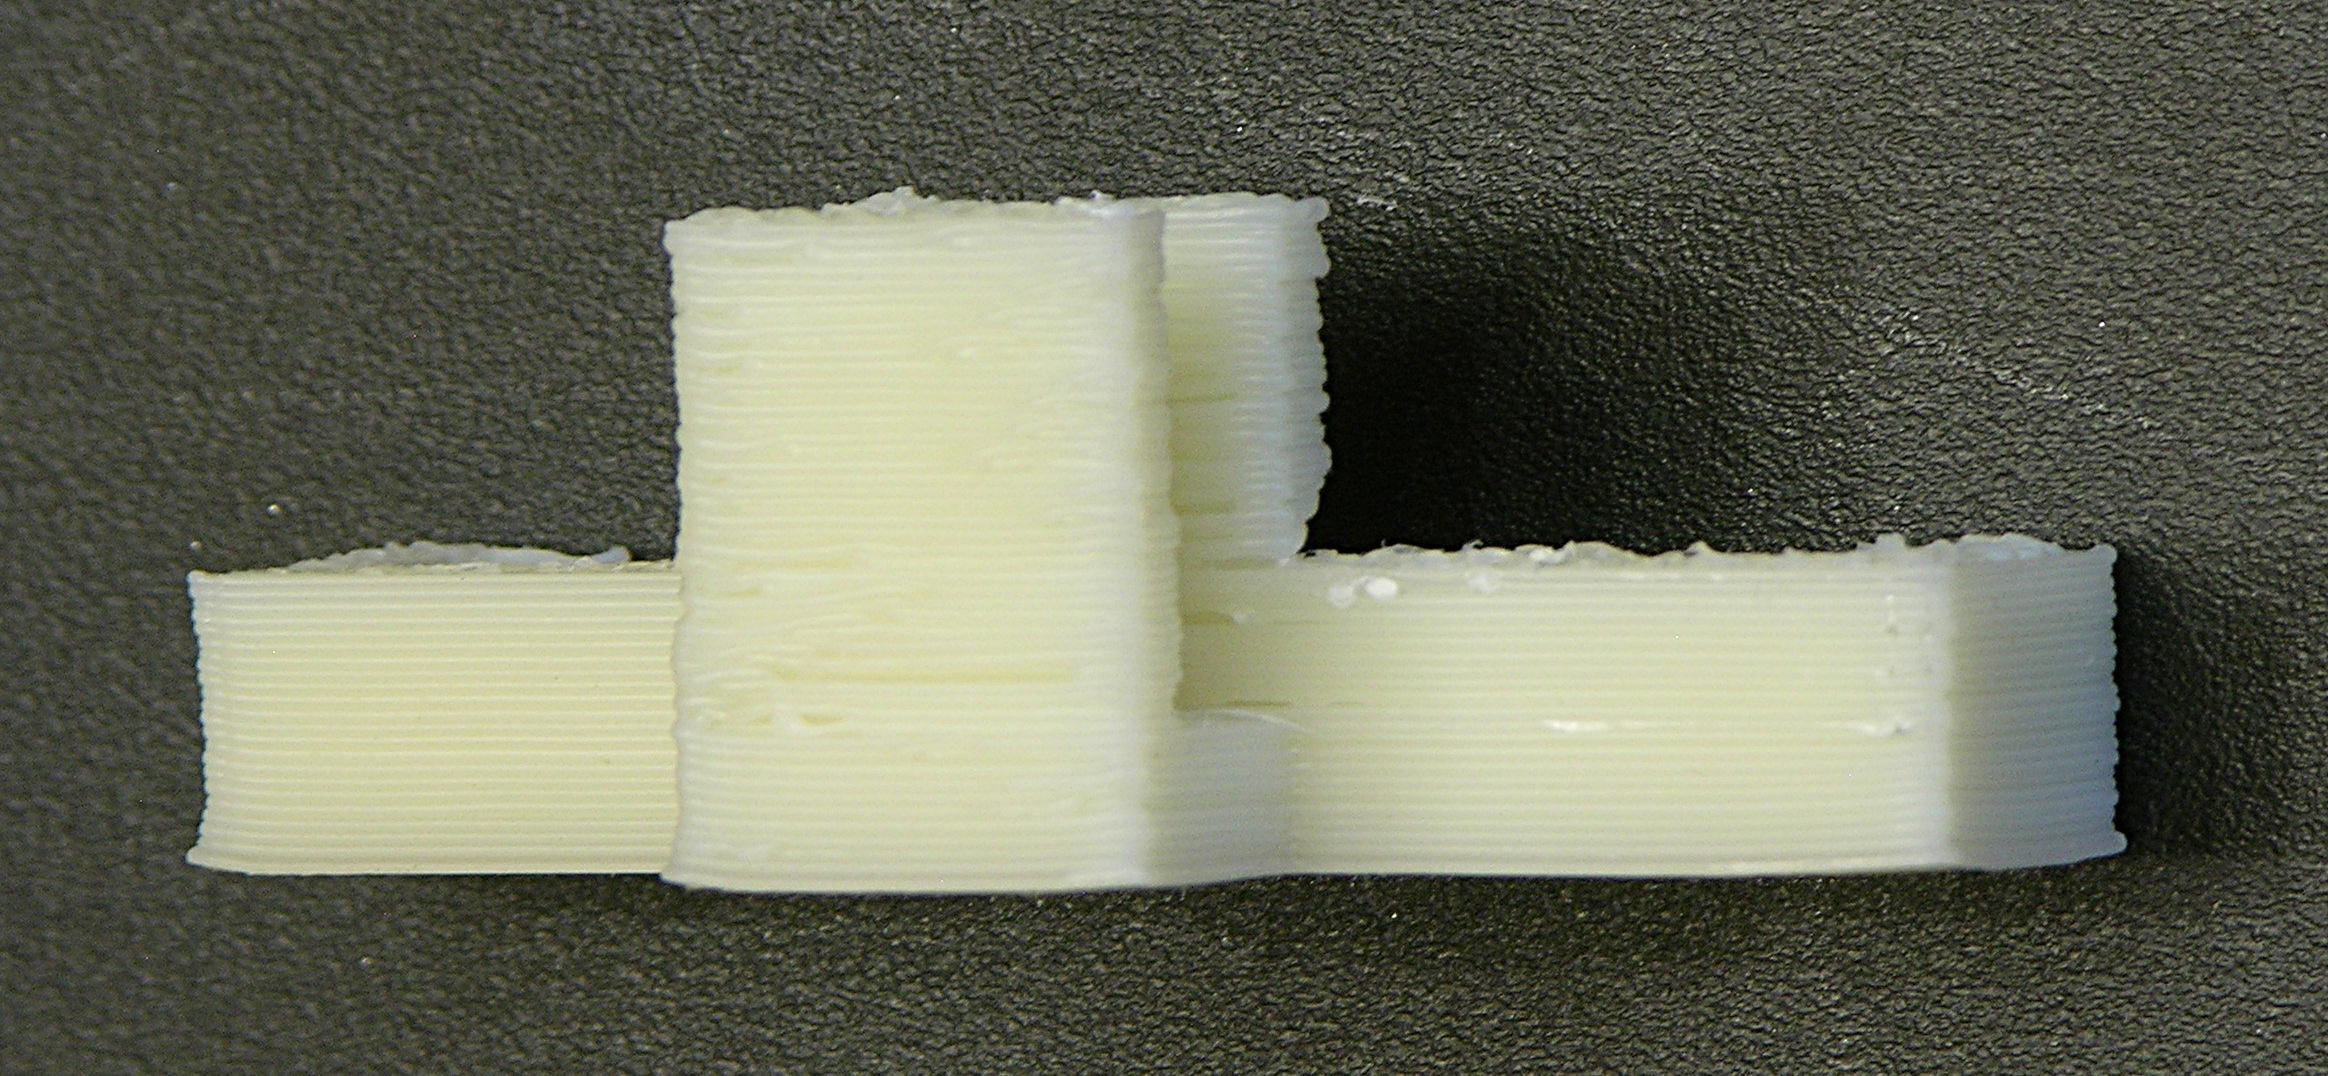
I connected a spare DC fan to my bench power supply, set it just outside the CupCake’s build chamber, and dialed it down until it barely spun. Holy schmoly! The left cap (you’ll need to click the image for the larger version), made with no cooling, looks like an art project woven out of twigs; the next one is extremely smooth on the side that was facing the fan — better than anything I’ve printed before!
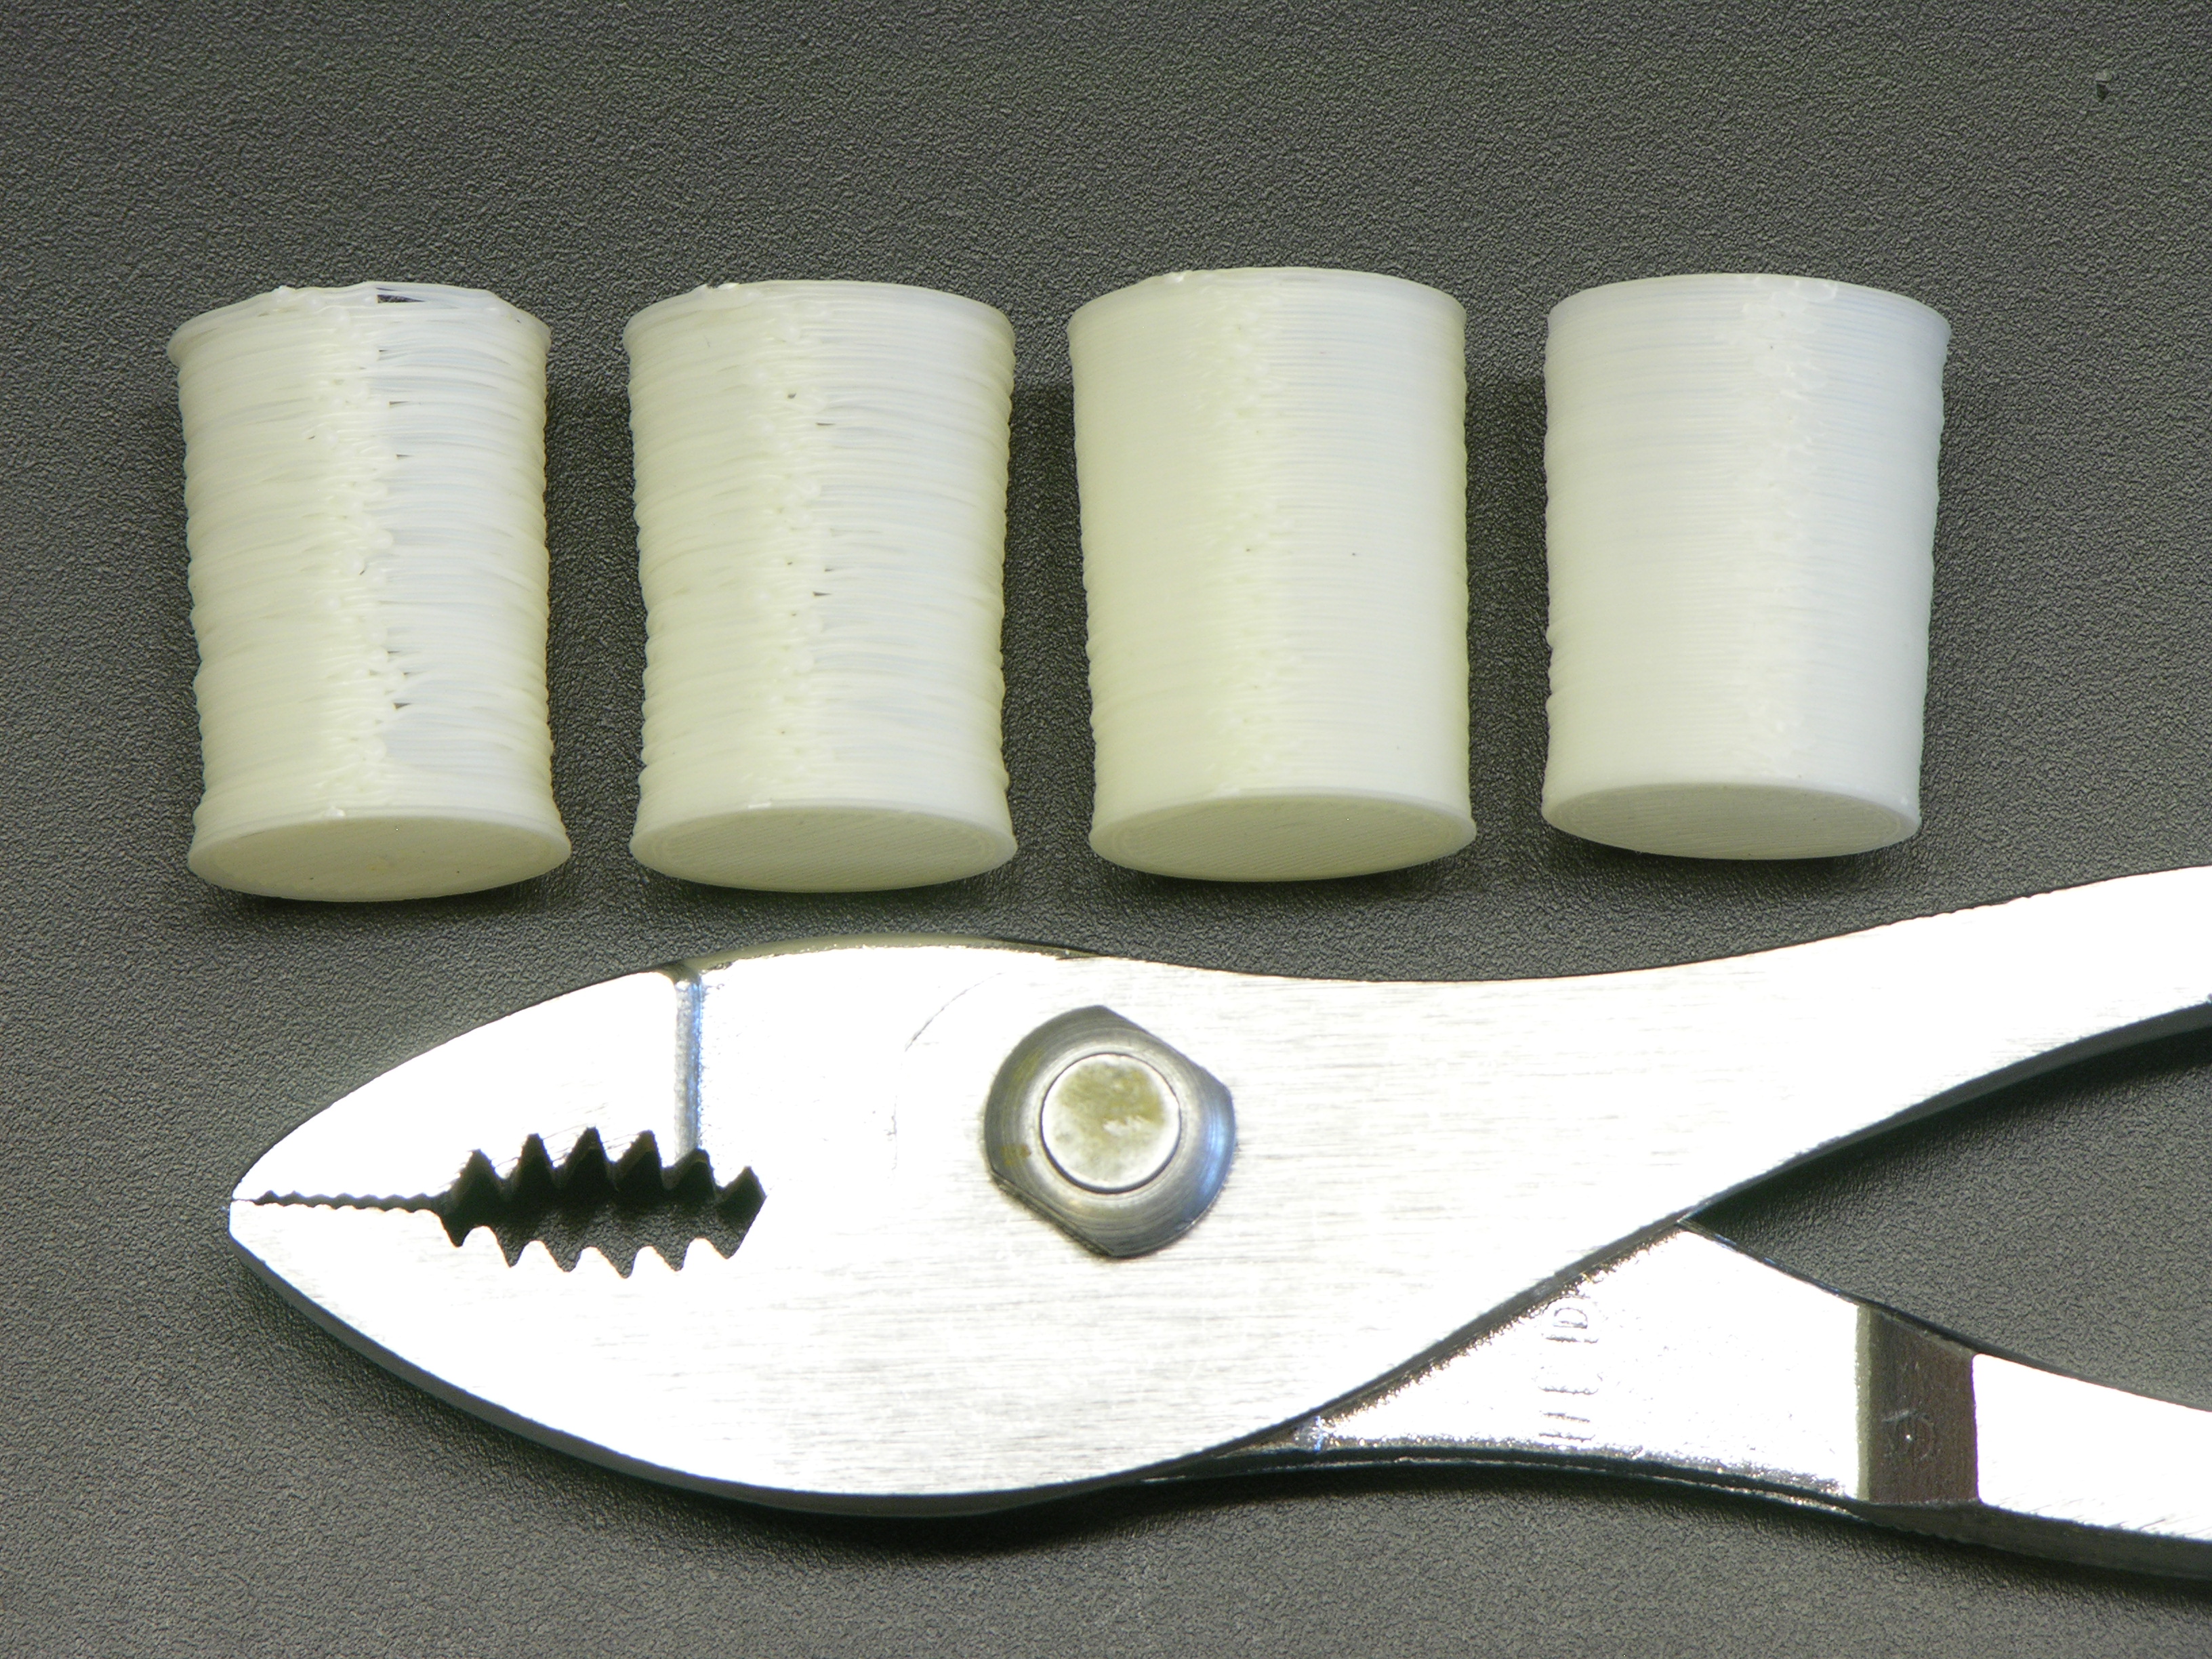
The “seam” was on the side away from the fan and doesn’t look so as great as the fan side — but if one fan is good, two are surely better, right?
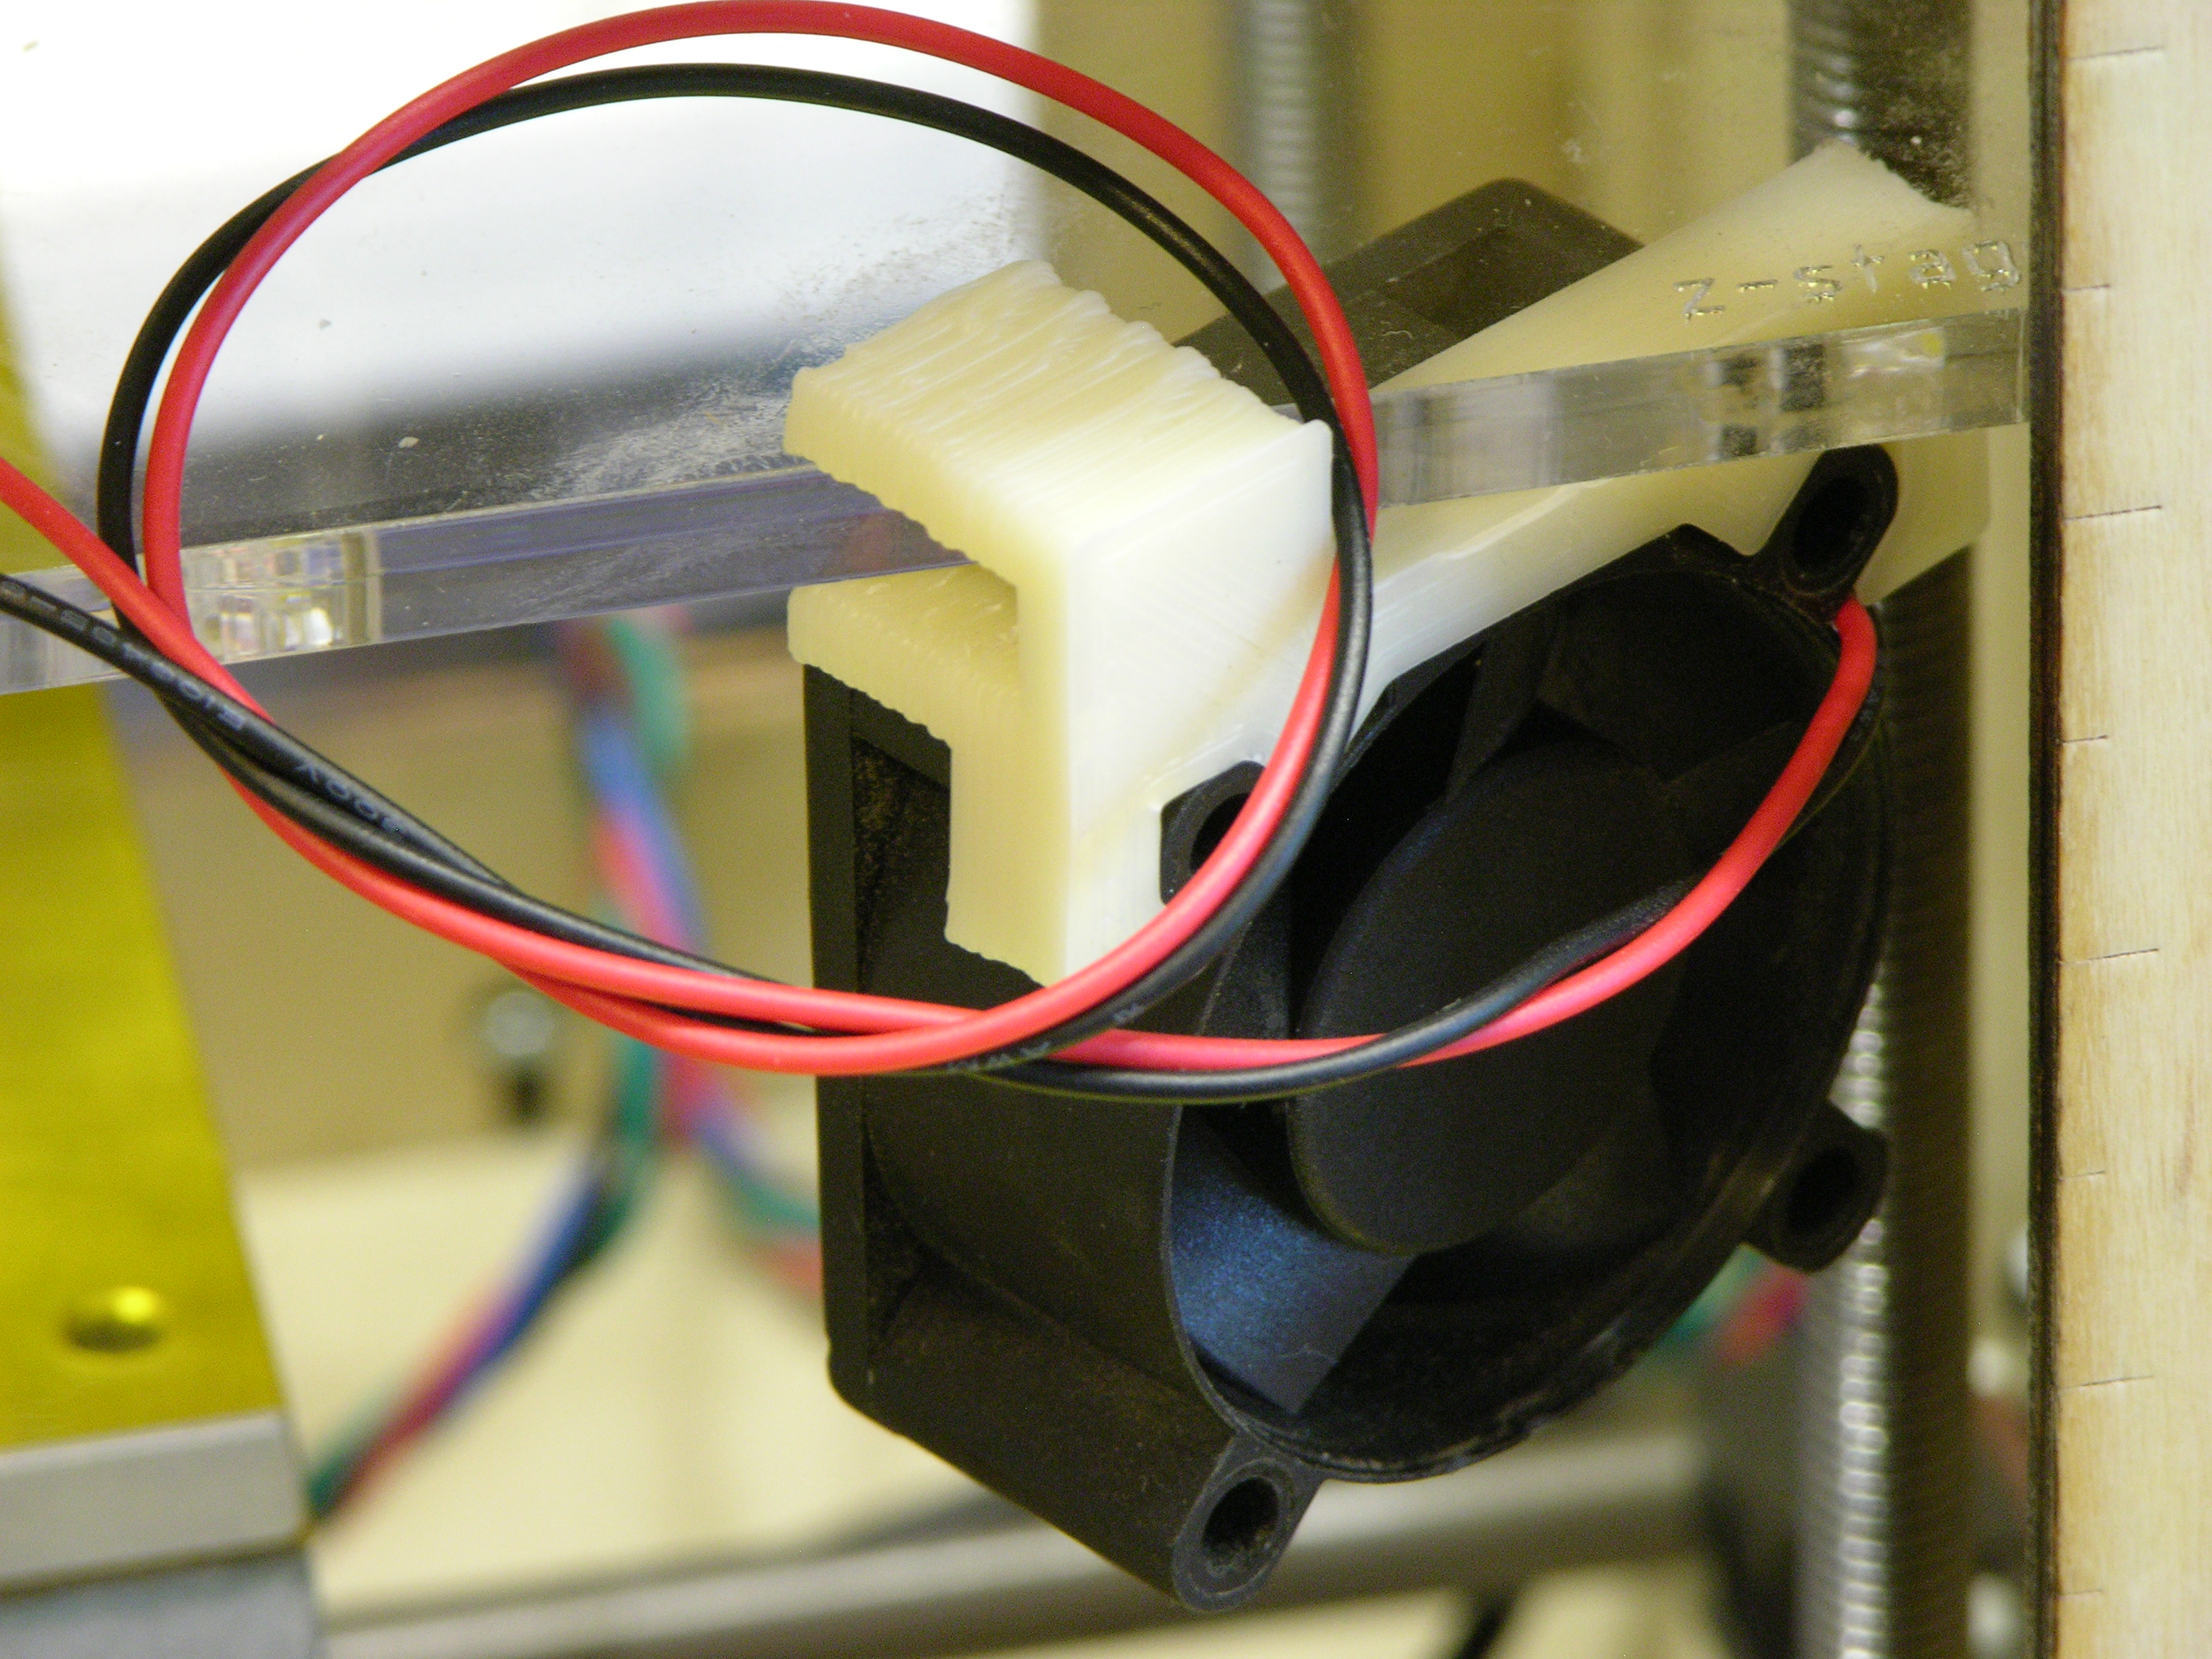
I designed and printed clips to press-fit onto a couple of 1.6″ DC fans I had sitting around (the clip is good enough to use but I have some dimensional tweaking to do before posting on Thingiverse) and positioned them at opposite corners of the build chamber, blowing around opposite sides of the object on the build platform. (Hey, I’m from Kansas. Vortices come naturally to us. Go buy a Vornado.)
The third and fourth prints above are with two fans running, trying to find optimal airspeed to cool the deposited filament but not cool the nozzle so much that the ABS solidifies before exiting. (I filed down the seam on the fourth; it didn’t really print quite that well.) I think the ultimate combination may be an enclosed build chamber to raise the overall temperature and fans to cool the layer just printed.
Many CupCake, RepRap, and Hydraraptor operators have added cooling fans, but I don’t recall seeing dramatic before-and-after pictures. Based on what I’ve observed during mesmerizing hours of watching the CupCake print, it’s obvious why it helps — without active cooling, the previous layer is still molten enough that the soft extrusion being deposited by the nozzle still applies enough force to squish the previous layer out of the way in some random direction. It may have been deposited in the right place, but it’s not in the right place any more after the next layer moves it. With cooling, it stays put.
Z-Axis Wobble and Ooze
The CupCake carries the extruder up and down on a platform supported by four threaded rods. It’s a very economical design, but the rods are less precisely straight than Acme threaded rod and aren’t a perfect fit for the ID of the pulleys at the top. The combination of these factors results in the extruder platform swaying from side to side as it moves up and down. The effect is very visible during high-speed movement but still present during low-speed movement.
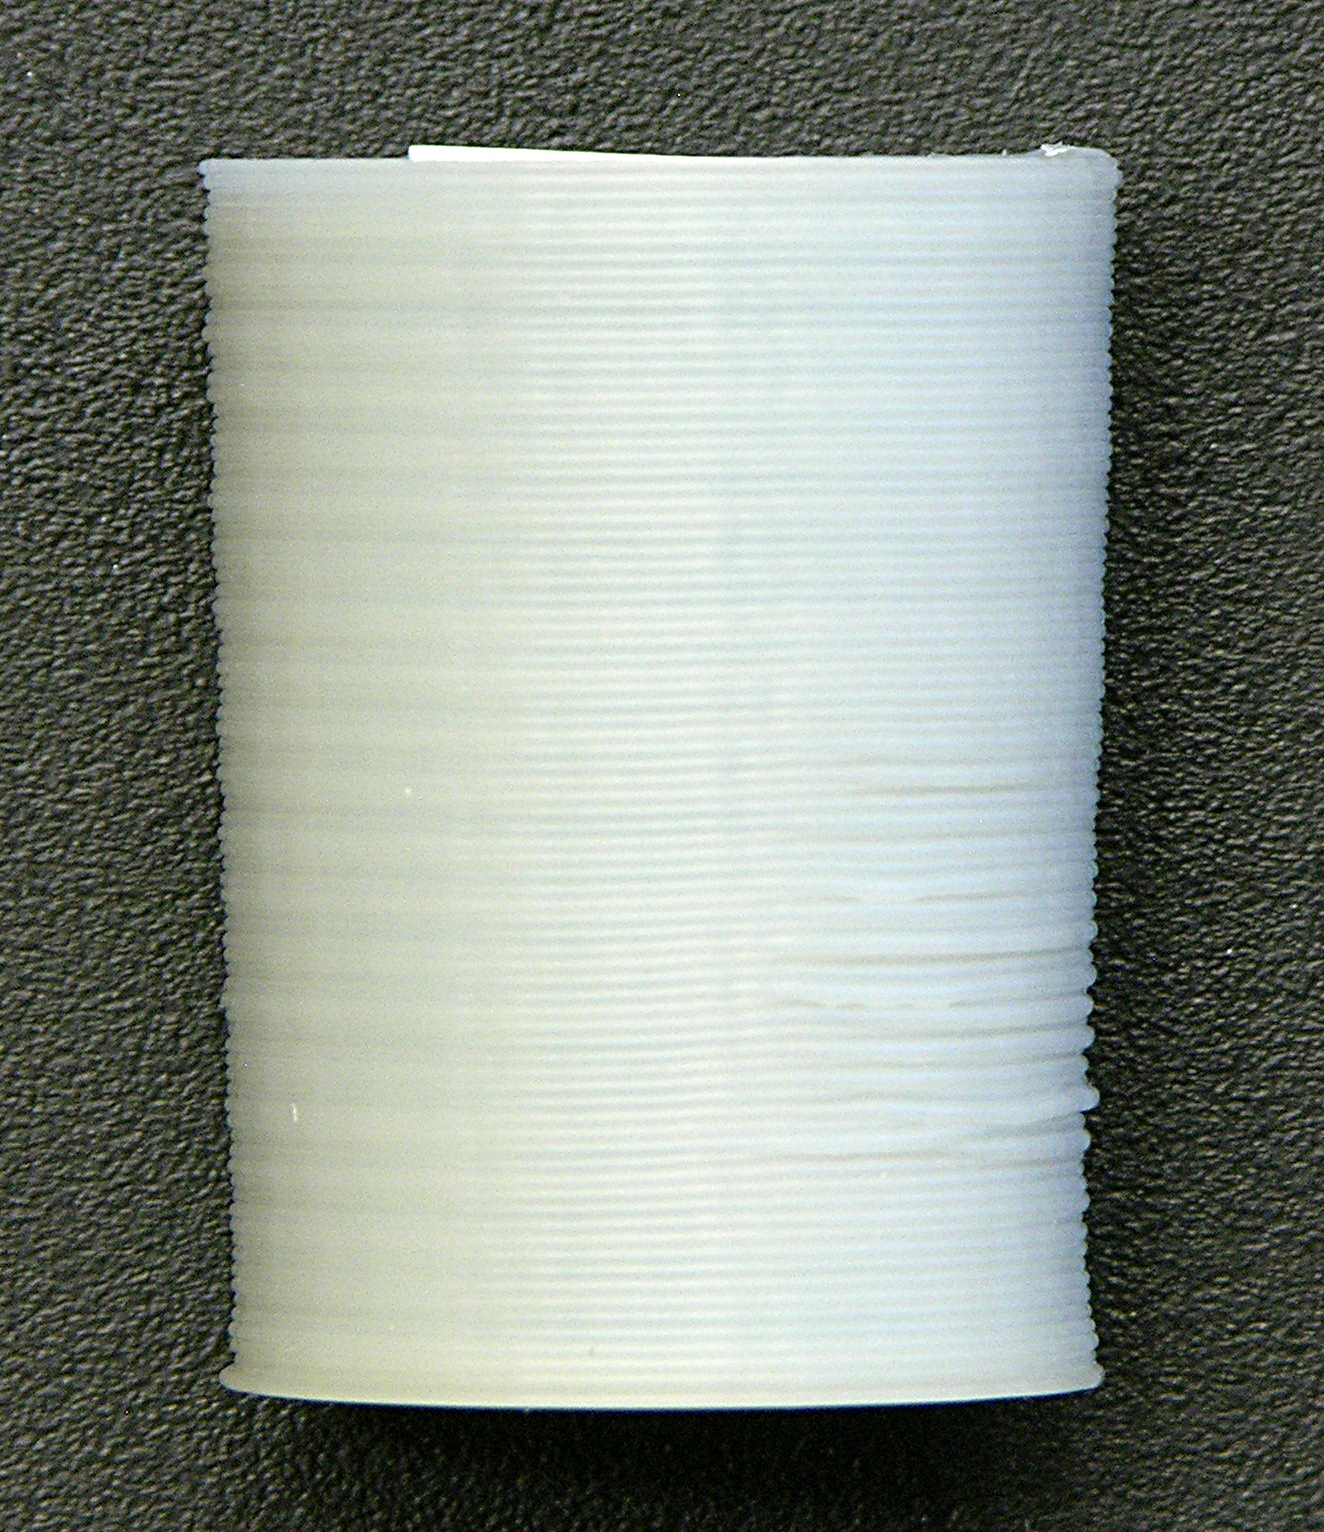
My printed objects are finally at a high-enough quality that I can see the Z-axis wobble represented in the perimeter of the object. The faint ripples visible toward the left edge — about four and a half filaments high — match the thread pitch of the threaded Z-axis rods and are caused by the extruder circling through the X-Y plane as it raises during the print.
This effect is well-known and is a solved problem. Thingiverse user “twotimes” has designed a wobble arrestor that adds rigid, smooth rods to the Z axis and new bushings attached to the extruder stage to follow them in a perfect vertical motion. It’s time!
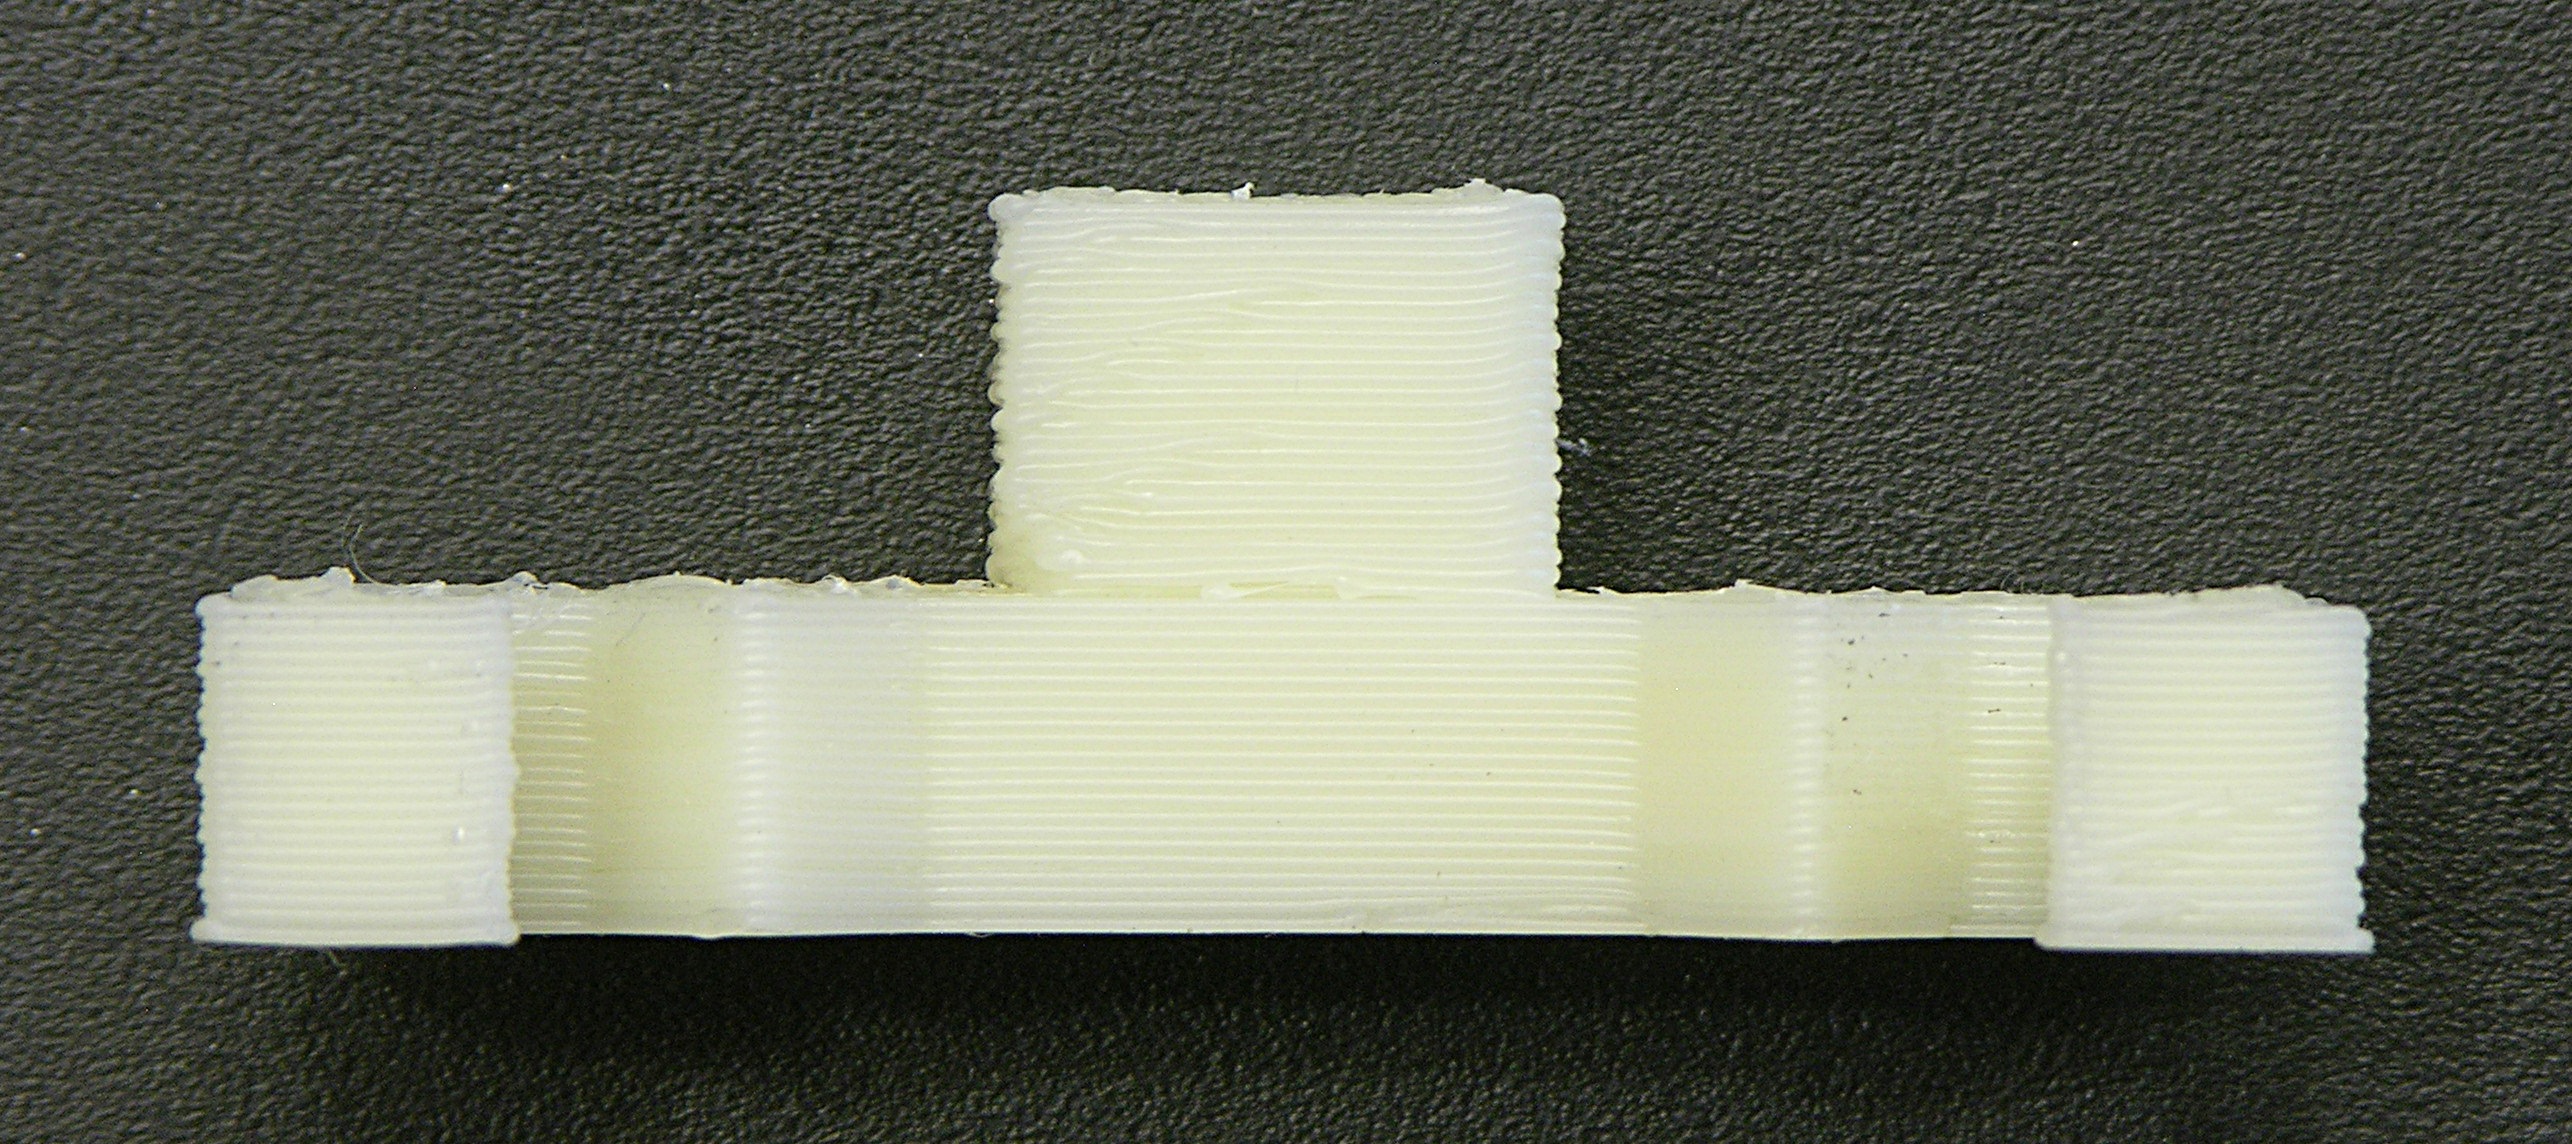
The ripple is visible at the left end of the elevation view of this fan clip (and more obvious in person than in the photograph), but it is other imperfections that catch my eye. From the front, the bottom section looks very good, but the tower at the top (which once installed is the lower part of the extruder stage clip) has considerably more variation in filament position.
From the back, note the relatively high quality up to the top of the rearward extension for the clip — until which point the entire object has a single, contiguous perimeter. Above that level, the quality of the rear tower is much worse and the wall facing it is somewhat worse than below. The quality of the forward tower drops precipitously after the top of the main clip body.
Some of this may be due to the smaller cross-section leaving less time for the fan to cool the filament, but I place most of the responsibility on the filament drive in my extruder. It’s still the DC gearmotor design; the geartrain has a lot of backlash; and it’s not good at fast reversals. I’m optimistic that a stepper design will control the oozing, already improving the print quality, as well as making it practical to enable Skeinforge’s Cool plugin to pause printing between layers while the fan cools the just-extruded filament.
There’s a slow-down option in Skeinforge that helps a lot. I think it’s enabled in the more recent ReplicatorG versions’ default profiles.
I was able to take almost all of the Z wobble out of my Cupcake by isolating the two worst Z rods and using two wobble arresters, centering the all four rods carefully within their 8mm nut sandwich, and then arranging the two worst rods so they were diagonally across from one another. Twotimes’ Z-rider is a big set of prints and gives a seriously awesome result, but you could get 90% of that quality increase by just using the same techniques I did.
MakerBlock, I think two of my Z rods are much worse than the others, and I was looking to wobble-arrest them before going full-bore to the Z rods. I’m having trouble printing the detail in the wiggle arrestor springs, though. May need to do the stepper filament drive first.
Thanks for the remarks!
@Keith: Actually, I’m not even using the fancy-schmancy ones! This is the one I’m using: http://www.thingiverse.com/thing:3091 Using more than two makes the Z platform too unstable. Since these wobble arresters don’t actually attach to the Z platform, so they can’t push or pull it out of whack. I like the engineered solution behind those springy ones, but these worked so much better for me.
I wonder if there’s a way to measure part strength? I’m curious if this affects integrity at all.
Carboncanyon, that’s an interesting question! My hunch is that hot mooshy ABS sticks more strongly to hot mooshy ABS than to warm, solid ABS; so the cooling might hurt part strength. On the other hand, ABS that overlaps perfectly with the ABS below it probably sticks more strongly than ABS that’s all helter-skelter.
My heater is no longer reaching 225°C, even without the fan, and it looks like I’m going to have to take it apart and rebuild it yet again. After that I’d be happy to build a test block and break it, but I’m not quite sure how best to measure the breaking force with instruments I have available.
@Carboncanyon, @Keith: I was actually discussing the concept of printed part interlayer adhesion and strength with someone the other day. I think the ideal test object would be a tall thin wall. Then, try to bend/flex the part and see how far you can flex it before it will snap and it’s shape as it snaps.
Printing in PLA recently, I broke some failed prints to see how well the interlayer adhesion was – I found that my very thin (~1.5mm) parts didn’t crack along layer lines as I was expecting, but in a random-ish pattern.