I still have notes to share about the rest of the mechanical assembly and I have so many thoughts about the wiring; but I just powered up the Voron to test the mainboard and want to record my thoughts while they’re fresh.
No, my Voron won’t run Marlin; but the test firmware does.
I bought my Voron’s non-printed parts in a kit made by Fysetc, and the kit’s mainboard is Fysetc’s own Spider 1.1 board designed in conjunction with the Voron team. I’m impressed with the board’s specifications, even more so with more recent ones.
Fysetc provides test firmware to exercise the board’s IO (wiggle steppers; read sensors and display the results on the LCD) and I thought, that’d be a nice validation before figuring out how to install and configure the Klipper firmware.
You can flash the test firmware onto the Spider in a couple of different ways; but my decision tree was narrowed by my board being old enough that it may have shipped without a bootloader and almost certainly shipped with a now-deprecated 64K bootloader. After reading the test installation instructions and the bootloader details and instructions a few times, I settled on using the USB Device Firmware Update (DFU) method to install the test firmware bundled with the 32K bootloader. Two birds, one flash, as it were. With a newer board that for sure had the 32K bootloader on it, I’d have just used the SD card firmware installation.
USB DFU programming requires a USB connection (duh) between a host computer and the target board; and why would I fuss around with a different host when the Voron already has a Raspberry Pi 3B+ with a USB connection to the Spider mainboard. That meant it was time to install the OS on the Pi; and that meant picking the UI to control the printer’s Klipper firmware. I chose OctoPrint because it’s somewhat familiar; but it’s also frequently described as bloated, slow, and unsuitable for use on a Pi. Fluidd and Mainsail are alternative Klipper UIs specifically developed to be fast and lightweight and I may switch in the future.
Raspberry Pi Image Installation
First I installed Raspberry Pi Imager, which I’ve never before used and will never again not use, on my Linux desktop.
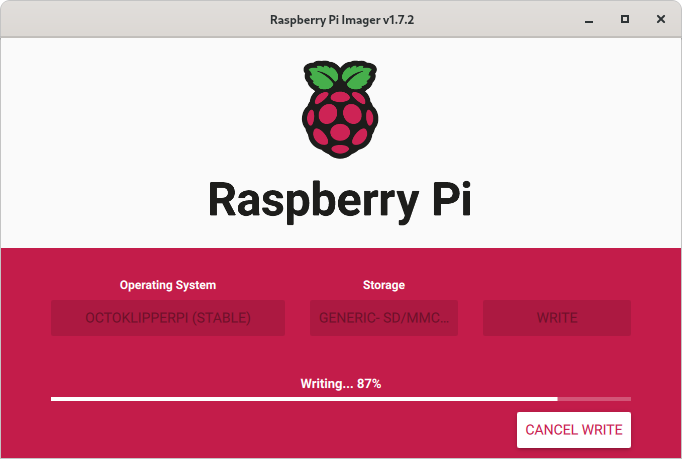
It’s a simple, clean tool for browsing available Pi images and preconfiguring user accounts and networking. First, under Operating System / CHOOSE OS, pick
Other specific-purpose OS3D printingOctoKlipperPiOctoKlipperPi (stable)
I have no prior experience with OctoKlipperPi, but it purports to have some of the Klipper framework already set up for you, so I’ll give it a try.
Then pick the (one and only) card to write to under Storage / CHOOSE STORAGE. It doesn’t prompt to insert the removable storage — the dialog is just completely blank as though broken when no removable media is installed — so I inserted the SD card and it showed up as Generic- SD/MMC - 8.1 GB, which I selected.
Finally, click the gear for advanced settings, where I preconfigured my image:
- [X] Set hostname: voron24
- [X] Enable SSH
- (*) Use password authentication
- [X} Set username and password
- Password: <redacted>
- [X] Configure wireless LAN
- SSID: <redacted>
- Password: <redacted>
- Wireless LAN country: US
Then SAVE the configuration and WRITE the image. When finished, move the SD card from the host computer to the Pi.
Update Software
Linux (including Raspbian) tends to have a lot of updates and I wanted them applied before starting to configure the system and flash the Spider board; so I wanted to boot the Pi, and I wasn’t ready yet to power it from the Spider’s 5V supply (which is advised against when flashing firmware). I’ll just grab a spare Pi 5V power supply … it’s in the box … in the tote … in the stack … oh look!, I’ll boot the Pi from this USB battery. (With the Voron power disconnected.)
Apply all the updates:
sudo apt-get update

sudo apt-get upgrade

sudo shutdown -r now
While those updates were running, I added the Pi to my DHCP and DNS records; but you do you.
Then make sure that the DFU programmer is installed:
dfu-util --version
Install it if it’s not already there; but I was good to go.
DFU Programming the Spider Bootloader and Test Firmware
With the Pi disconnected from power again and the Voron power still disconnected:
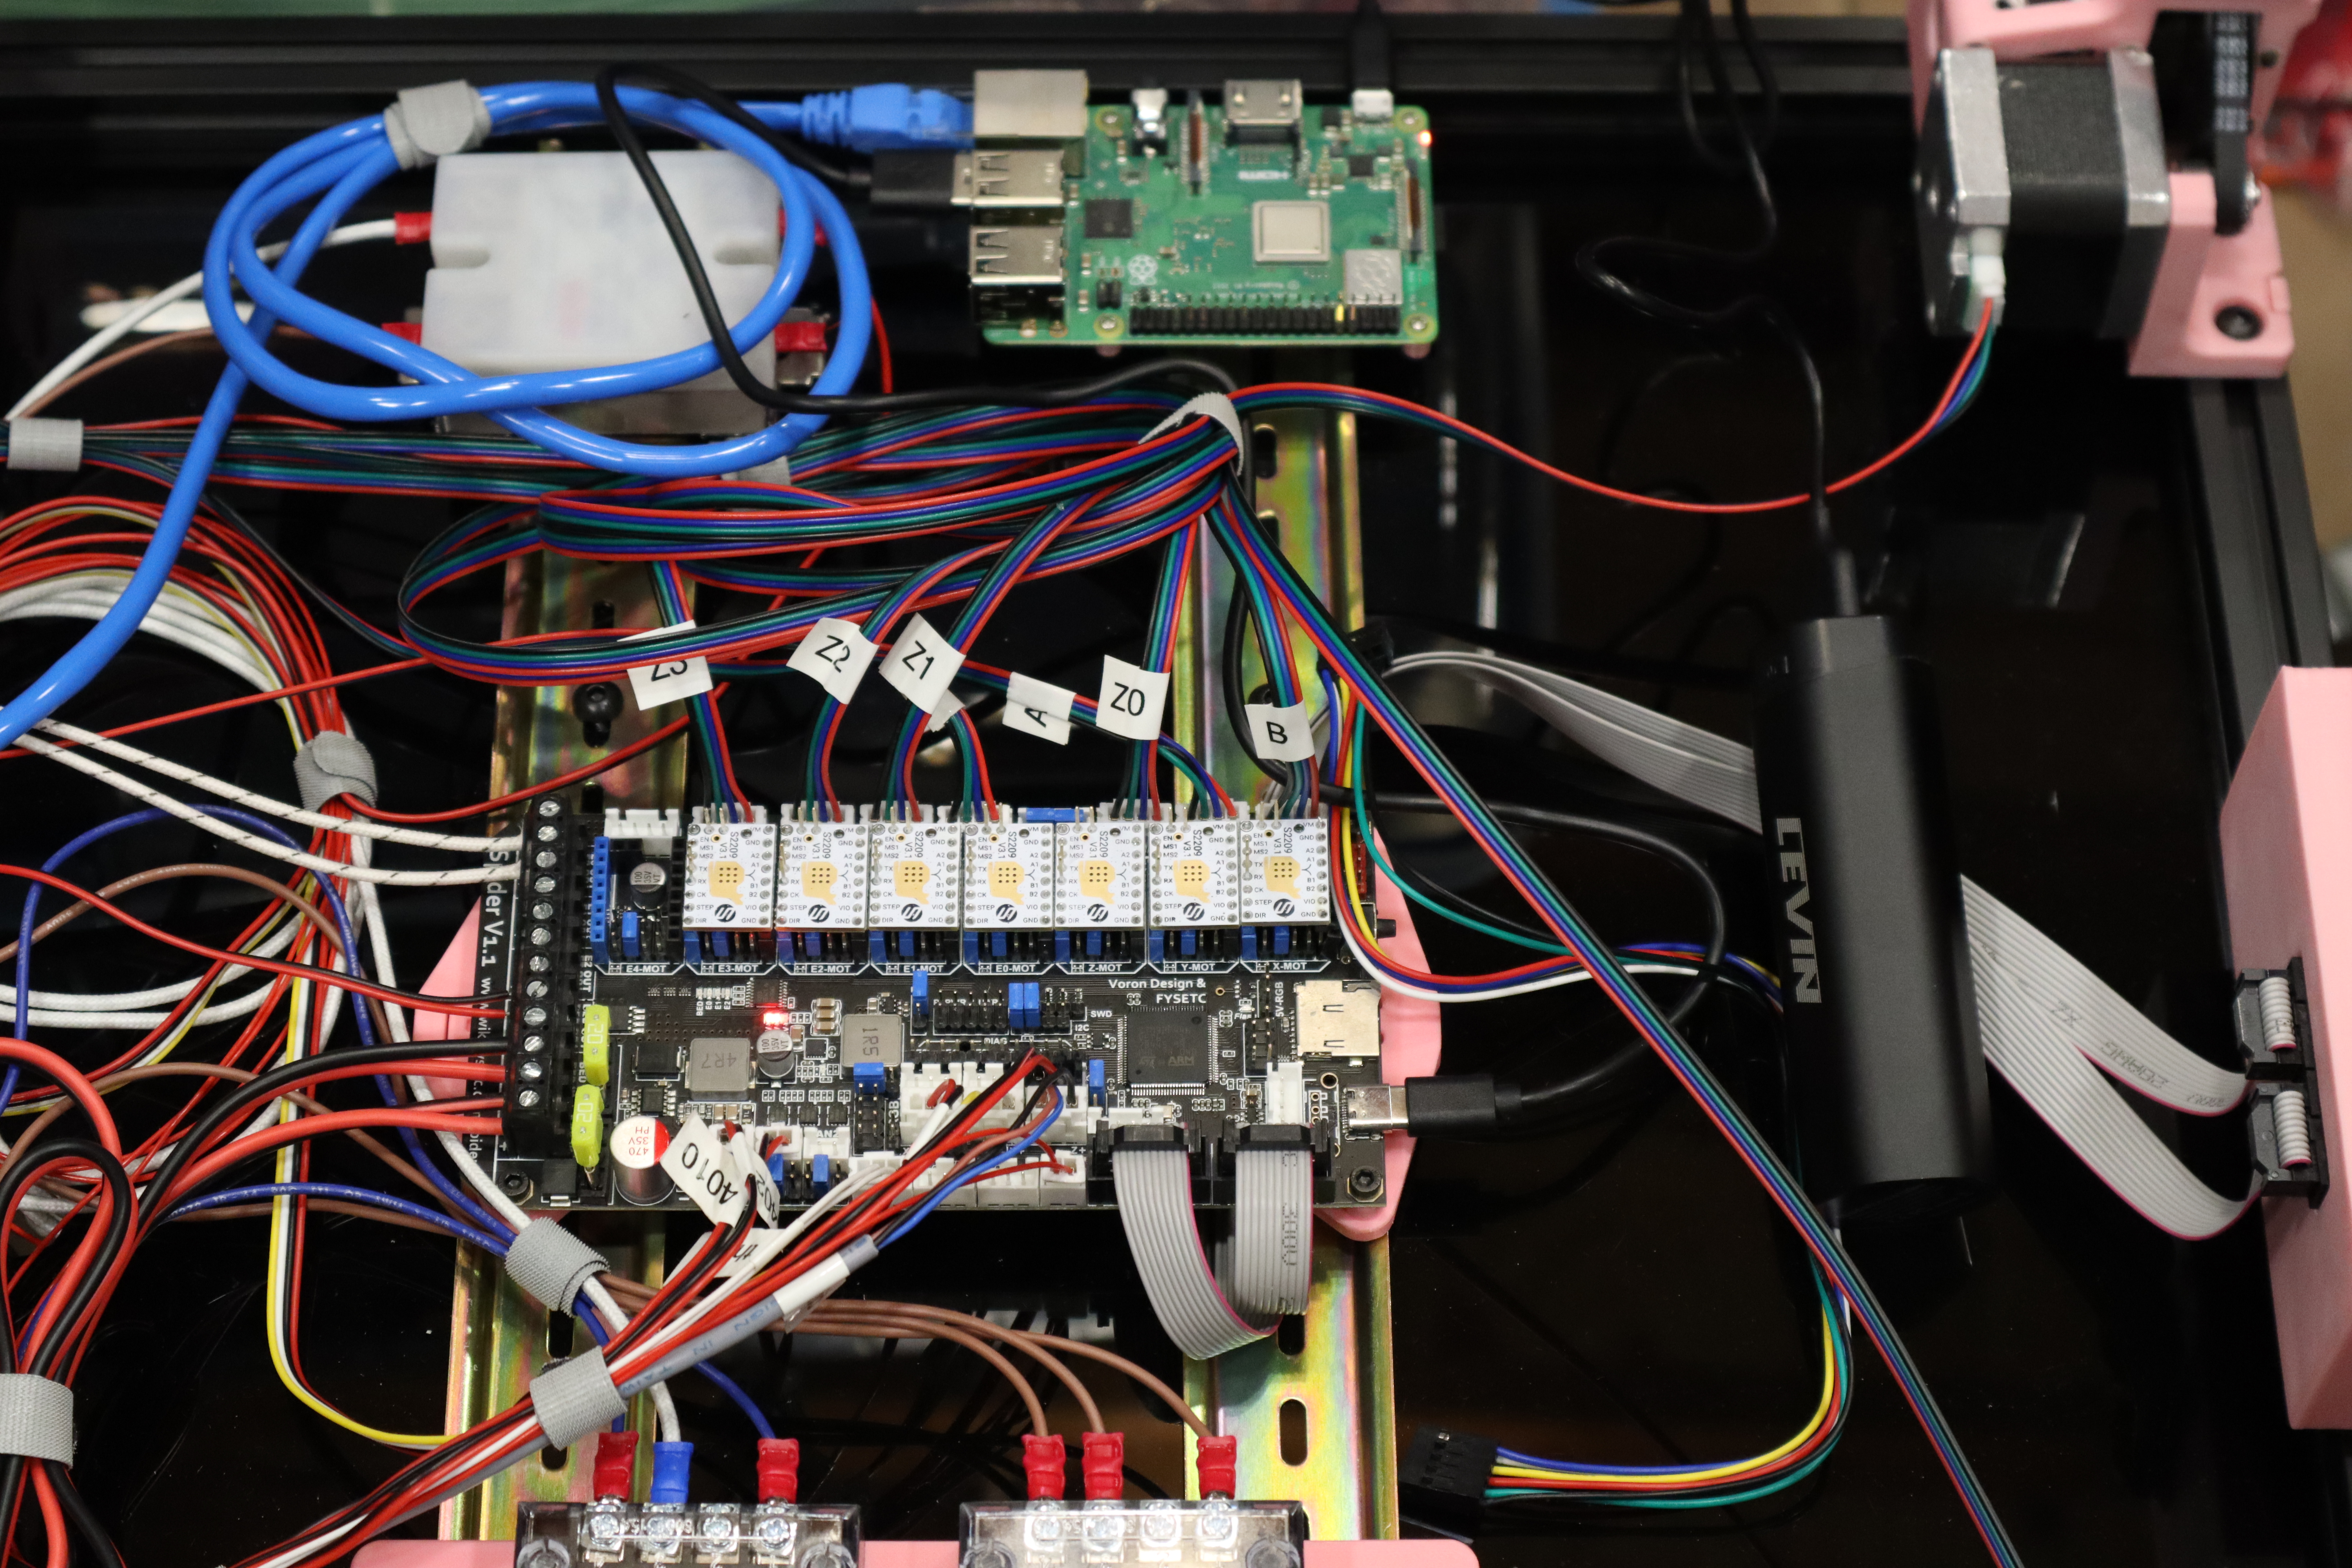
- Connect a Pi USB A port to the Spider micro-USB port. I think that cable is always supposed to be there in this system (the Voron team recommends running Klipper over USB rather than UART), but it definitely needs to be there for, y’know, USB programming.
- Remove the Spider to Pi multi-wire serial and power cable that will power the Pi from the Spider’s 5V converter later. I don’t actually know whether this needs to come out — if you leave it in and burn up your Spider and/or Pi, as they say on the Internet, let me know in the comments.
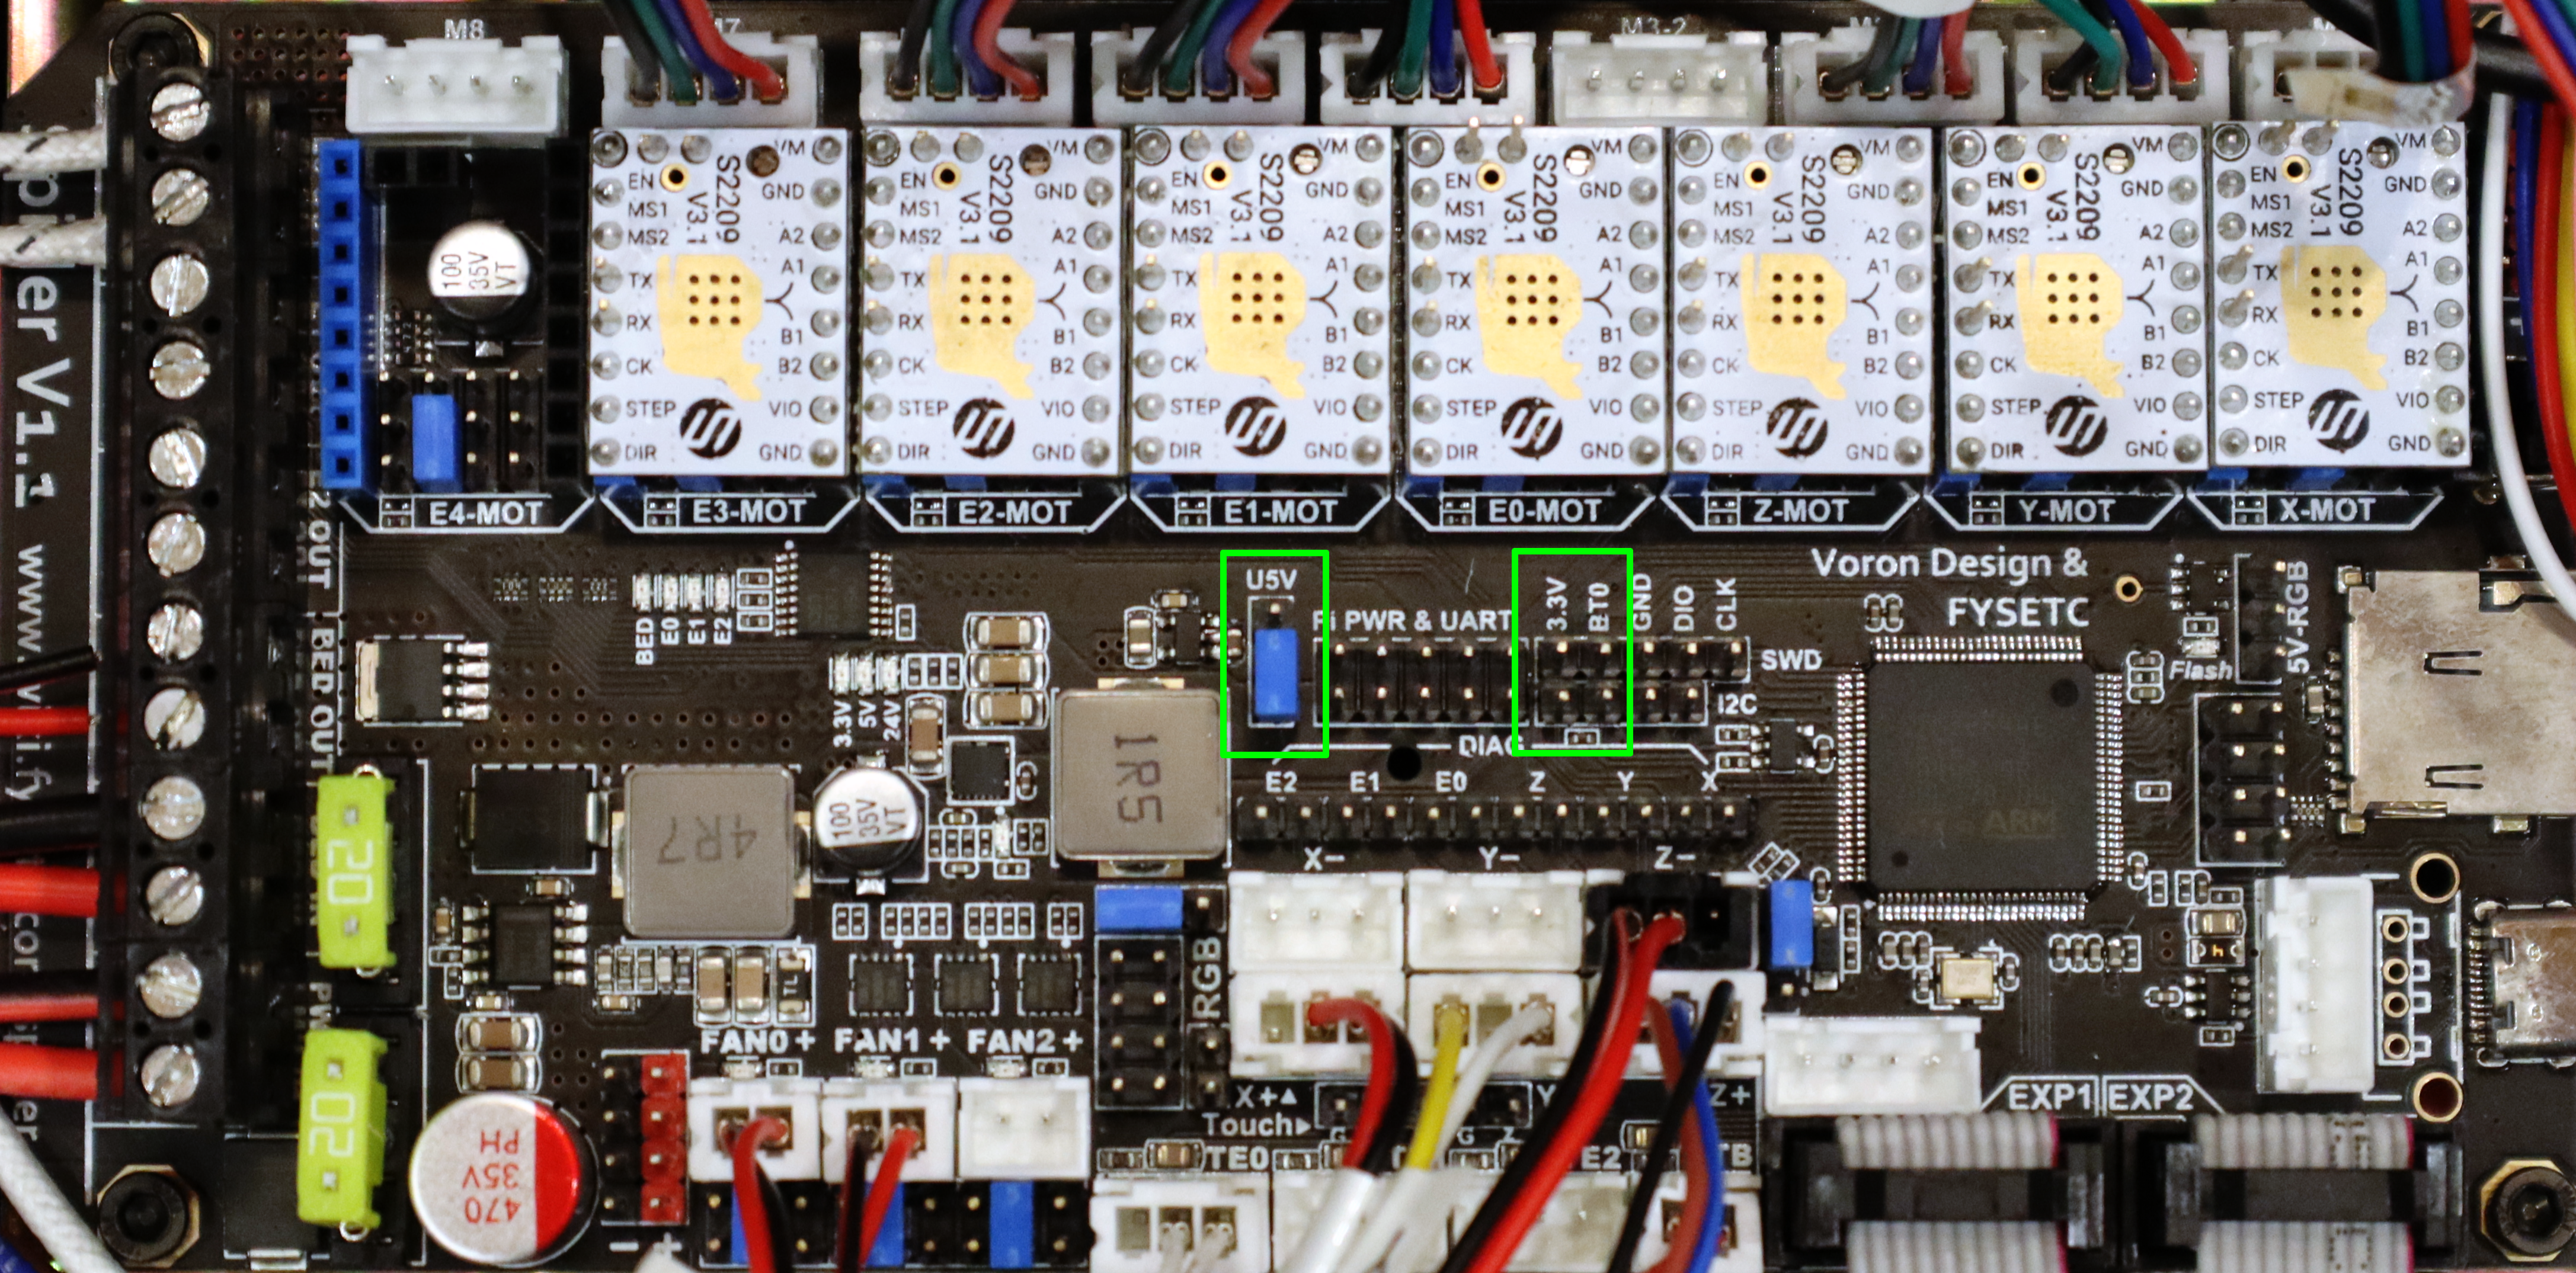
- Move the Spider U5V jumper (right below the E1-MOT driver on my v1.1 board) from its normal lower position to the upper, to take power from the Pi’s USB cable.
- Put a jumper from the upper 3.3V pin to the upper BT0 pin a bit to the right of that. (I misread the instructions so my action photo below shows two jumpers on the 3.3V and BT0 headers, which worked … why???).
Now leave the Voron chassis power disconnected and power up the Pi with the “external power source” again.
Once the Pi finishes booting, login and make sure it sees the Spider over the USB cable as a DFU target:
pi@voron24:~ $ dfu-util --list

dfu-util 0.9
Copyright 2005-2009 Weston Schmidt, Harald Welte and OpenMoko Inc.
Copyright 2010-2016 Tormod Volden and Stefan Schmidt
This program is Free Software and has ABSOLUTELY NO WARRANTY
Please report bugs to http://sourceforge.net/p/dfu-util/tickets/
Found DFU: [0483:df11] ver=2200, devnum=4, cfg=1, intf=0, path="1-1.1.2", alt=3, name="@Device Feature/0xFFFF0000/01*004 e", serial="STM32FxSTM32"
Found DFU: [0483:df11] ver=2200, devnum=4, cfg=1, intf=0, path="1-1.1.2", alt=2, name="@OTP Memory /0x1FFF7800/01*512 e,01*016 e", serial="STM32FxSTM32"
Found DFU: [0483:df11] ver=2200, devnum=4, cfg=1, intf=0, path="1-1.1.2", alt=1, name="@Option Bytes /0x1FFFC000/01*016 e", serial="STM32FxSTM32"
Found DFU: [0483:df11] ver=2200, devnum=4, cfg=1, intf=0, path="1-1.1.2", alt=0, name="@Internal Flash /0x08000000/04*016Kg,01*064Kg,03*128Kg", serial="STM32FxSTM32"
Then I merged the instructions from the bootloader and test firmware pages to download and install the test firmware:
$ mkdir Spider

$ cd Spider

$ wget -O FYSETC_SPIDER_test.hex https://raw.githubusercontent.com/FYSETC/FYSETC-SPIDER/main/firmware/Test/test.hex

$ objcopy --input-target=ihex --output-target=binary FYSETC_SPIDER_test.hex FYSETC_SPIDER_test.bin && dfu-util -a 0 -s 0x08000000:mass-erase:force -D FYSETC_SPIDER_test.bin

dfu-util 0.9
Copyright 2005-2009 Weston Schmidt, Harald Welte and OpenMoko Inc.
Copyright 2010-2016 Tormod Volden and Stefan Schmidt
This program is Free Software and has ABSOLUTELY NO WARRANTY
Please report bugs to http://sourceforge.net/p/dfu-util/tickets/
...
Performing mass erase, this can take a moment
Setting timeout to 35 seconds
Downloading to address = 0x08000000, size = 234368
Download [=========================] 100% 234368 bytes
Download done.
File downloaded successfully
Now shut down the Pi’s power source and put things back to normal:
- Move the Spider U5V jumper back to the lower position.
- Remove the 3.3V and BT0 jumper … or jumpers.
- I noted the Spider v1.1 instructions to jumper through the M3-2 stepper connector because the two M3 steppers are wired in series, so I did that now.
- Reconnect the Spider to Pi power/serial cable.
And that’s it.
Spider Mainboard Test Firmware
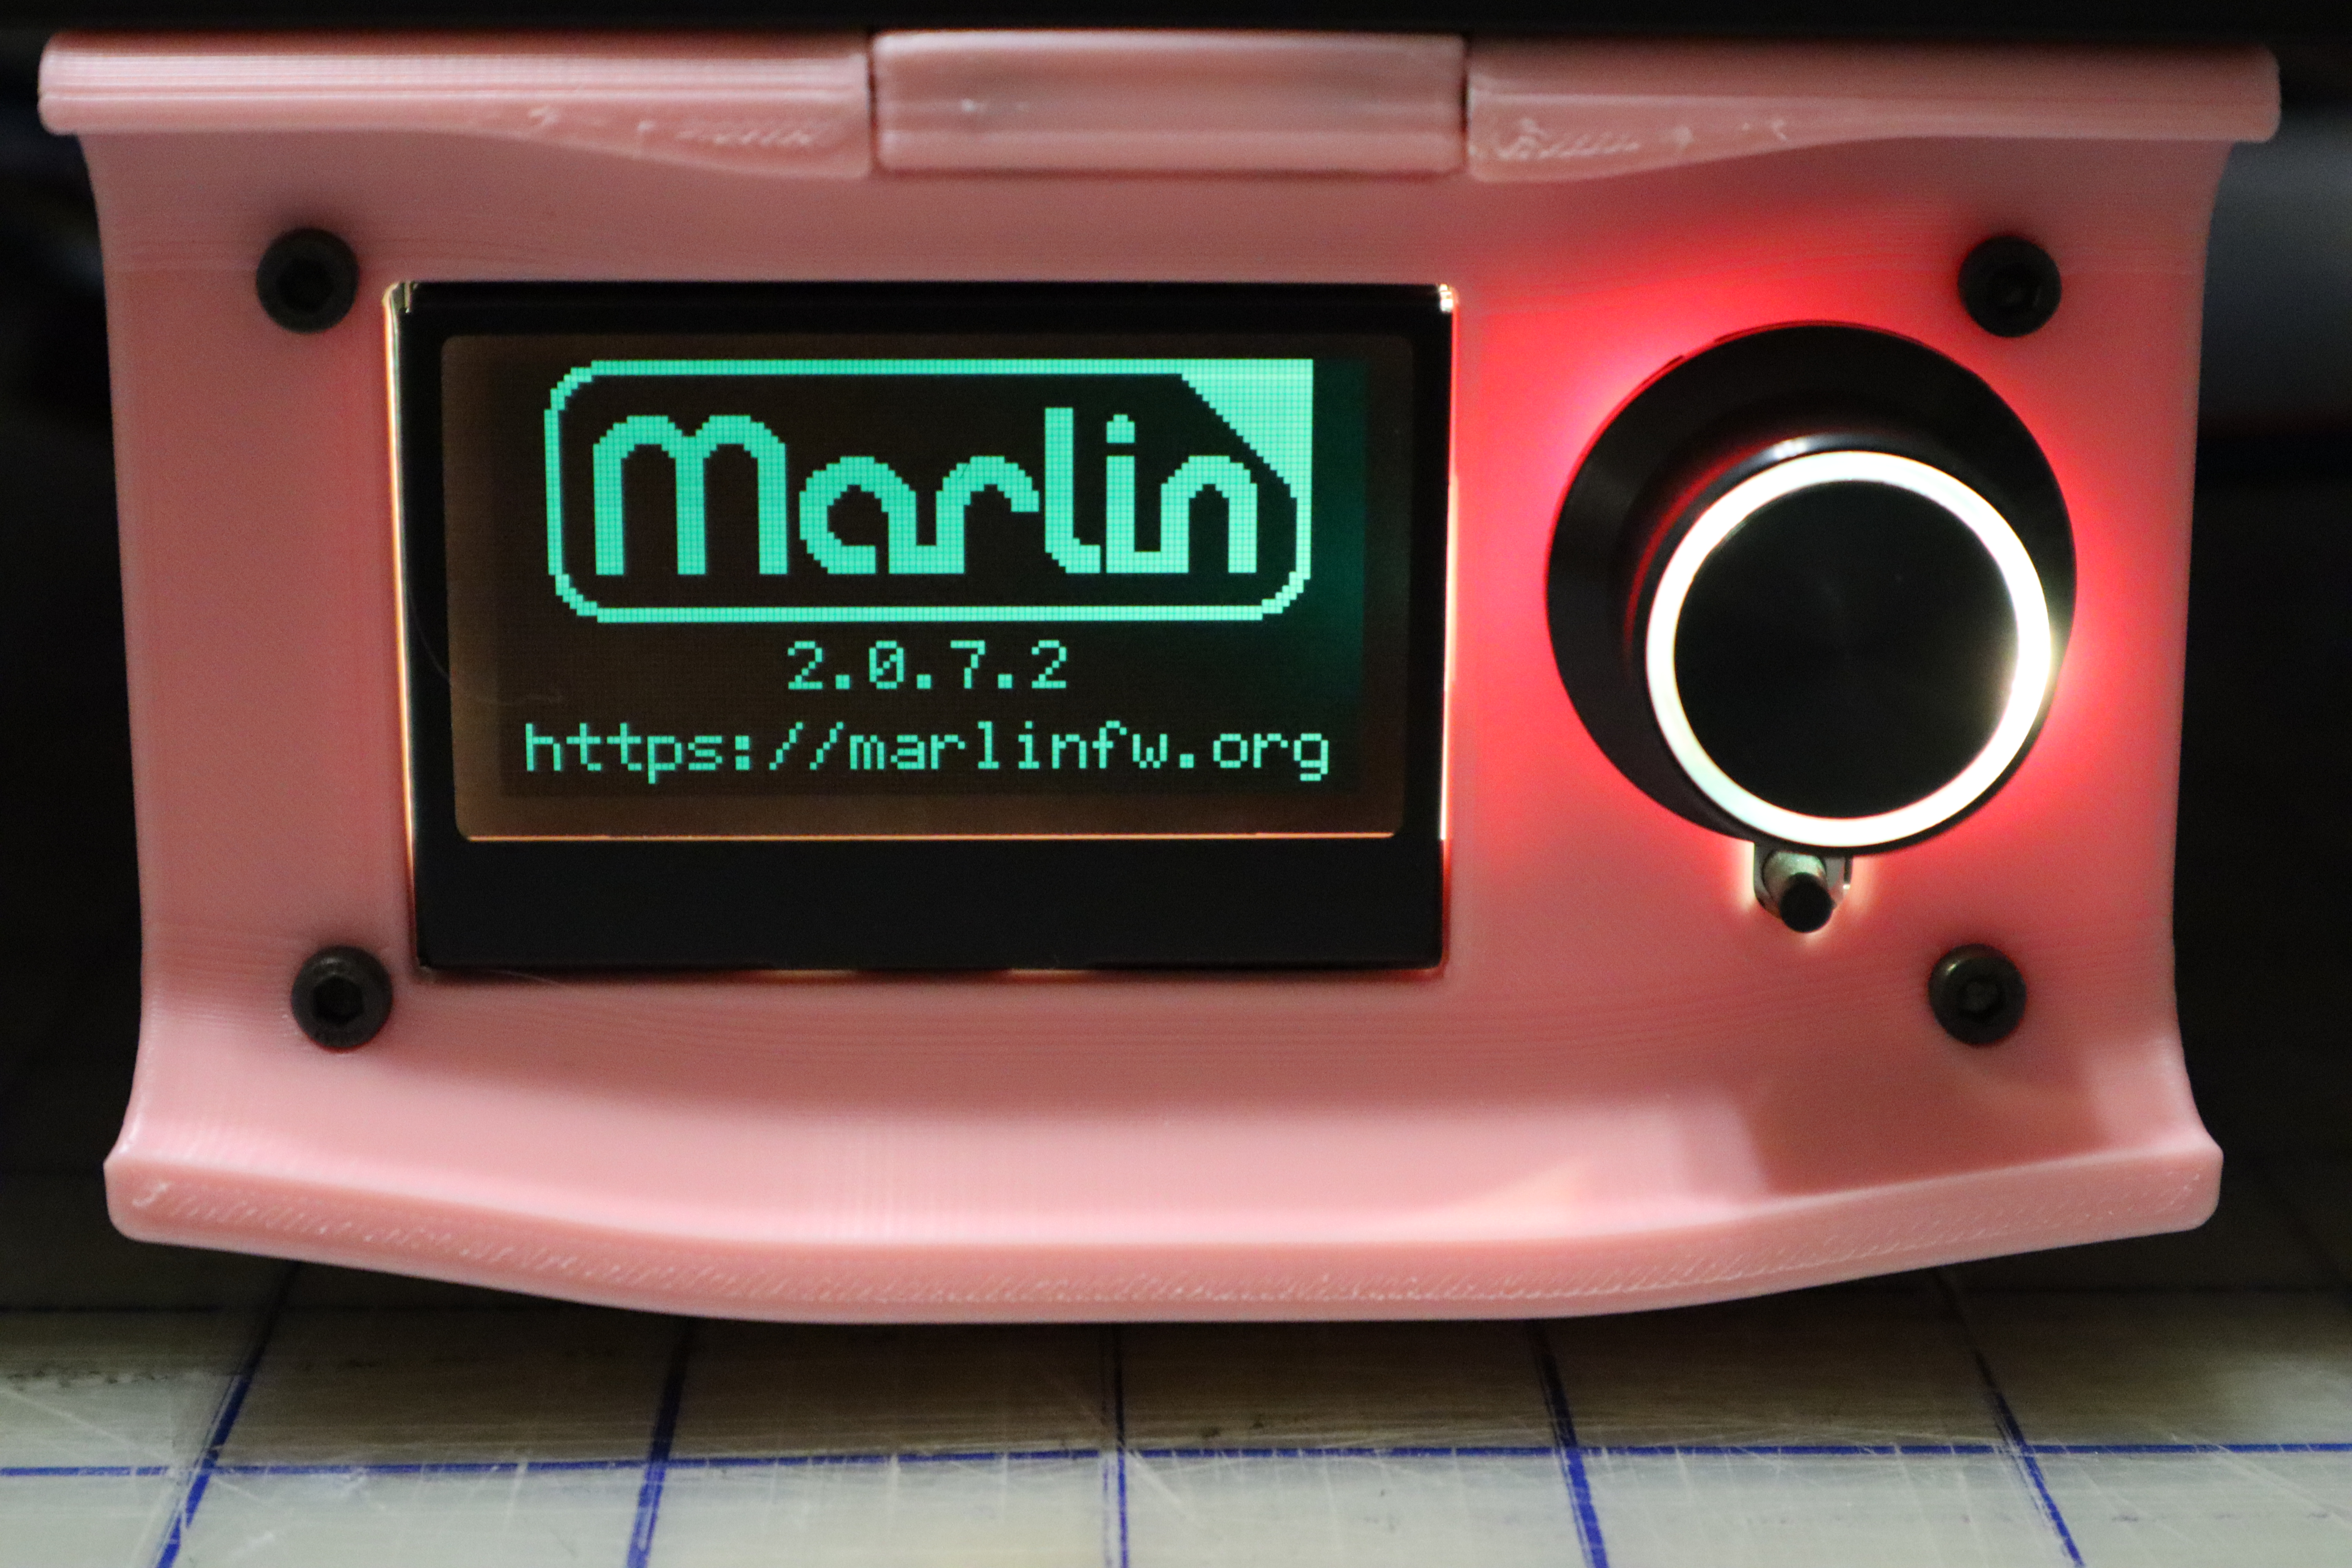
I powered up the Voron chassis and after a brief delay for the mainboard to start up, my LCD panel got backlit. And nothing else happened.
I powered down and swapped the LCD ribbon cables (which are for LCD and SD card), booted up again, and got the Marlin welcome screen. And then this:
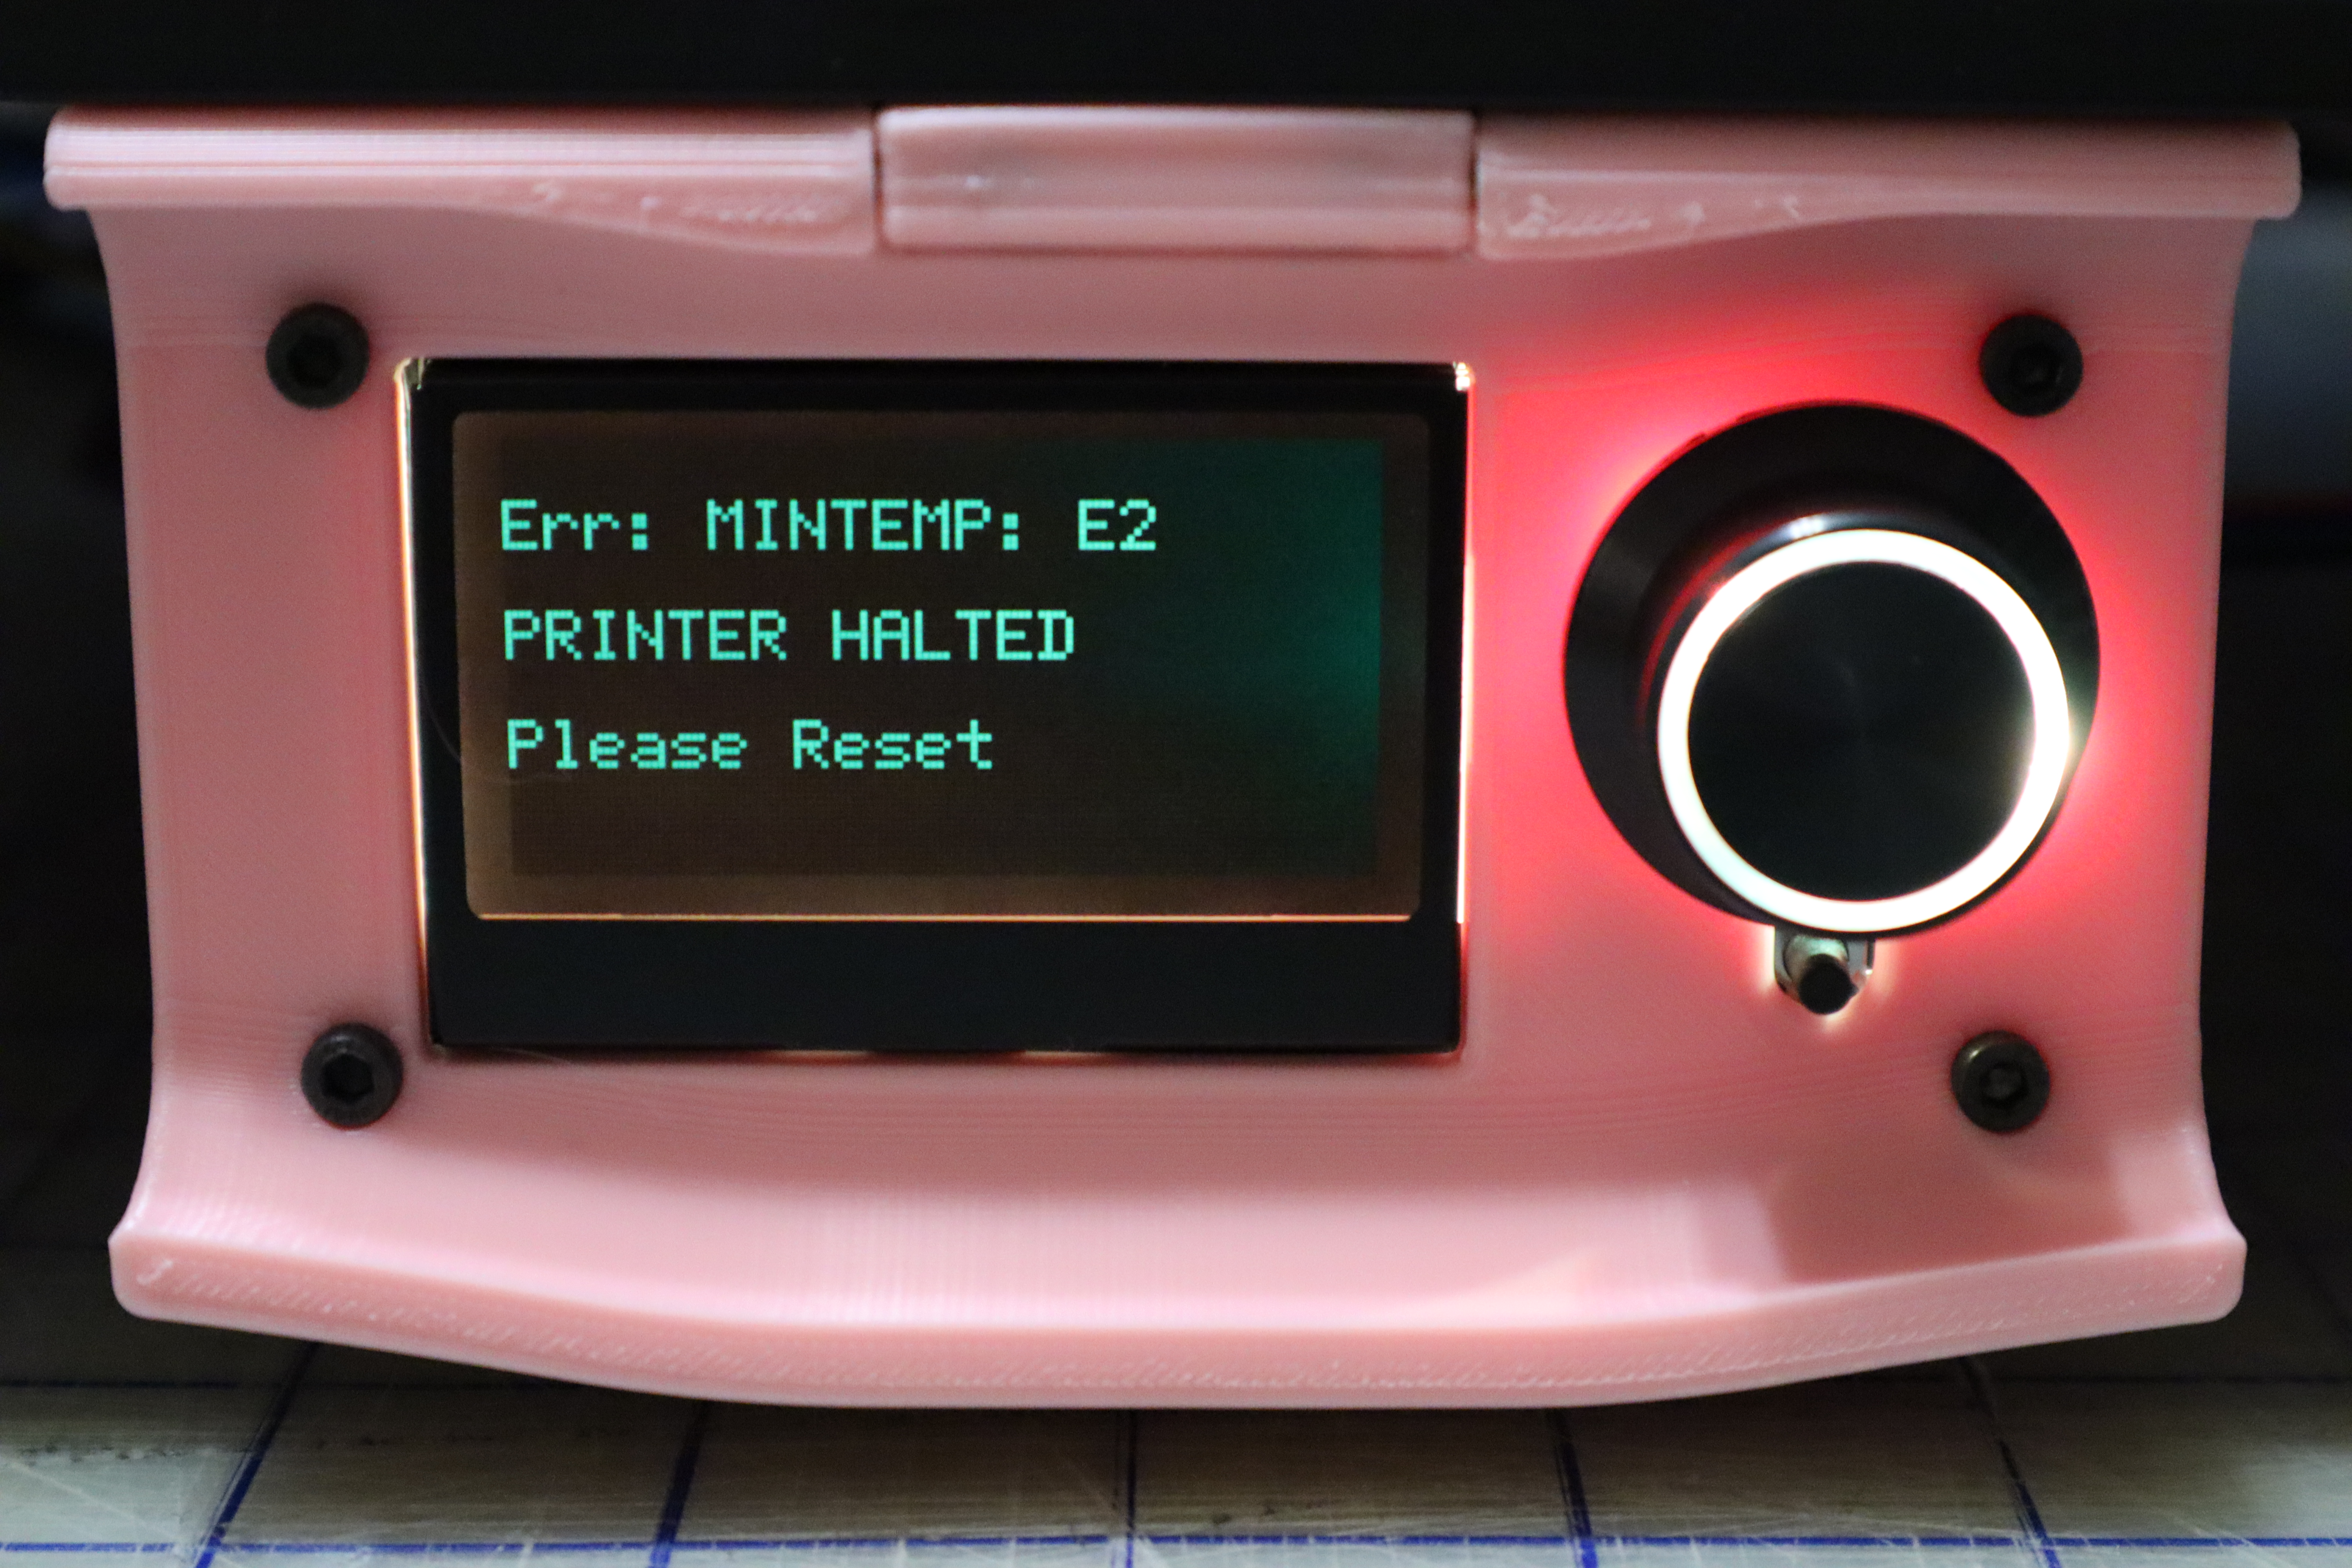
So … y’all made a test firmware that requires a thermistor on every extruder temperature port or it won’t run the test? Umkay, at least I know my Spider boots and talks to my LCD. I’ll take that as a successful test and move on.