After running the Spider mainboard test firmware as a sanity check of the Spider’s operation and LCD cabling, several paths are available to get Klipper installed onto the Spider. My factors were:
- not feeling like continuing to power the Pi from an external source, even during the firmware process
- not feeling like continuing to re-jumper the Spider board for DFU programming
- my Spider should now have a working 32K bootloader installed
That led me directly to SD-card firmware installation, which was easy-peasey since I have another *nix-ey computer available for one step.
The Voron instructions for installing Klipper onto a Spider board are clear and thorough; I’m first noting the short path I took through their branching options, then adding some build-specific details not in the instructions.
Build the Firmware
The OctoKlipperPi image I chose had the Klipper source code already installed, so the Pi was the obvious place to compile it; and by running type make (or which make for you BSD-snorting younguns) I could see that make was already installed as well. So it was just:
cd klipper

make clean

make menuconfig
Then pick all the Spider-related options listed on the Voron documentation page, then:
make
to build the Klipper firmware. According to my Pi, compilation took 1m1.830s . The first network newsreader I used took about 26 hours to compile on my NCR Tower computer a little larger than a box fan.
Flash the Spider
That firmware needs to go onto an SD card as a plain file (not as a card image), which is tricky to do on a Pi that’s using its SD card socket to hold the OS it’s running on. From my Linux workstation, copy the firmware file from the Pi to a local SD card, renaming it to be recognized by the Spider bootloader’s firmware updater:
scp voron24:klipper/out/klipper.bin /run/media/neufeld/0403-0201/firmware.bin
Then power off the Spider (I powered off the entire Voron power supply), insert the SD card into the Spider, power on, and it flashes new firmware. After that, confirm that the Pi sees the Spider’s USB connection:
$ ls /dev/serial/by-id

usb-Klipper_stm32f446xx_25004E000B50563046363120-if00
Configure Octoprint
OctoPrint was already installed thanks to the Pi image I used, so all of the action steps in the Voron OctoPrint installation instructions were already done for me.

OctoPrint did politely prompt me to let it update itself — in spite of my already having run apt-get upgrade — which I allowed it to do and which occurred seamlessly.
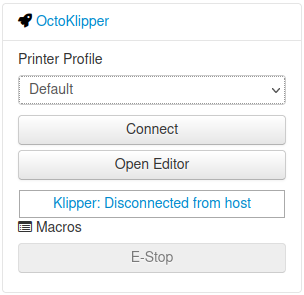
With the update done, pressing OctoPrint’s Connect button successfully connects to the Klipper host software running on the Pi, which I understand is called Klippy. We’re not yet talking to the Klipper firmware installed on the Spider mainboard.
Configure Klipper
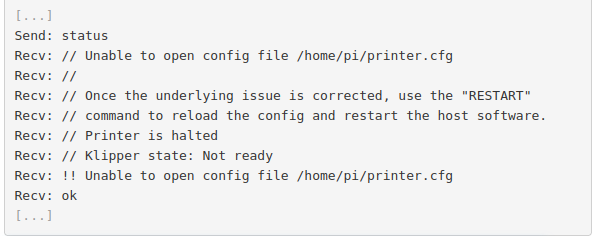
Going to OctoPrint’s Terminal tab and sending a status command to Klippy tells us that we don’t have a Klipper printer.cfg file yet.
The Voron software configuration instructions walk through configuring printer.cfg for whatever board and wiring you may have, and the first step is downloading a sample printer.cfg file as a starting point.
Voron provides a sample printer.cfg configuration file for the Fysetc Spider mainboard and Fysetc provides a sample printer.cfg configuration file for the Voron 2.4 printer. Um, which to choose? Well, let’s put them both on the Pi for easy comparison, and then … pick the Fysetc sample file, since Fysetc provided the only documentation recommending how to wire your components to your Spider … wait, what’s this I see? Looks like Voron has provided Spider wiring instructions since the time I started planning my wiring. The stepper connections are definitely different between the Fysetc and Voron diagrams, so I’ll start with the Fysetc sample file that hopefully matches my Fysetc wiring diagram.
wget -O printer.cfg-voron https://raw.githubusercontent.com/VoronDesign/Voron-2/Voron2.4/firmware/klipper_configurations/Spider/Voron2_Spider_Config.cfg

wget -O printer.cfg-fysetc https://raw.githubusercontent.com/FYSETC/FYSETC-SPIDER/main/firmware/Klipper/printer.cfg
cp printer.cfg-fysetc printer.cfg
With a printer.cfg file present, the OctoKlipper Klipper tab Restart Host button or typing restart into the terminal will make Klippy have another look for a configuration file.
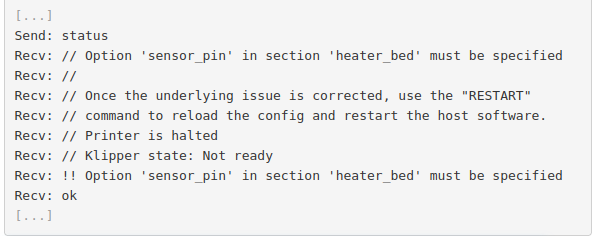
Then checking status again shows that Klippy is unhappy because we haven’t defined some required pins, so I edited printer.cfg and uncommented lines pertaining to my build configuration:
[heater_bed]

...

##  Uncomment below for SpiderVersion 1.x

sensor_pin: PC3 # TB Position
[heater_fan hotend_fan]
## Hotend Fan - FAN0 Connector
## Uncomment below for SpiderVersion 1.x
pin: PB0
[fan]
## Print Cooling Fan - FAN1 Connector
## Uncomment below for SpiderVersion 1.x
pin: PB1
[stepper_x]
...
## Uncomment for 350mm build
position_endstop: 350
position_max: 350
[stepper_y]
...
## Uncomment for 350mm build
position_endstop: 350
position_max: 350
[stepper_z]
...
## Uncomment below for 350mm build
position_max: 340
[quad_gantry_level]
...
## Gantry Corners for 350mm Build
## Uncomment for 350mm build
gantry_corners:
-60,-10
410,420
## Probe points
points:
50,25
50,275
300,275
300,25
[gcode_macro G32]
gcode:
...
## Uncomment for 350mm build
G0 X175 Y175 Z30 F3600
Restarting Klippy and checking status again:
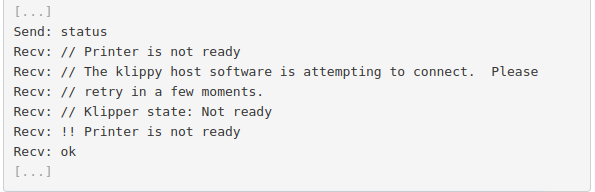
Now it doesn’t hang up on configuration but the Klippy host software on the Pi is unable to connect to the Klipper firmware on the Spider. So I paste in the USB serial device ID obtained earlier:
serial: /dev/serial/by-id/usb-Klipper_stm32f446xx_25004E000B50563046363120-if00

Restart Klippy, check status, and we’re connected.

Even more exciting, Klippy is now able to send Klipper its first text to display on the LCD! This is starting to look like it might be a real thing.