Looking back at my notes, I see I got parts 2 and 3 out of sequence; I actually sent off to have an acrylic insulating plate manufactured before Scott milled me the aluminum bed. No matter; I didn’t receive the package of insulators until well after Scott had sent the aluminum. ![]()
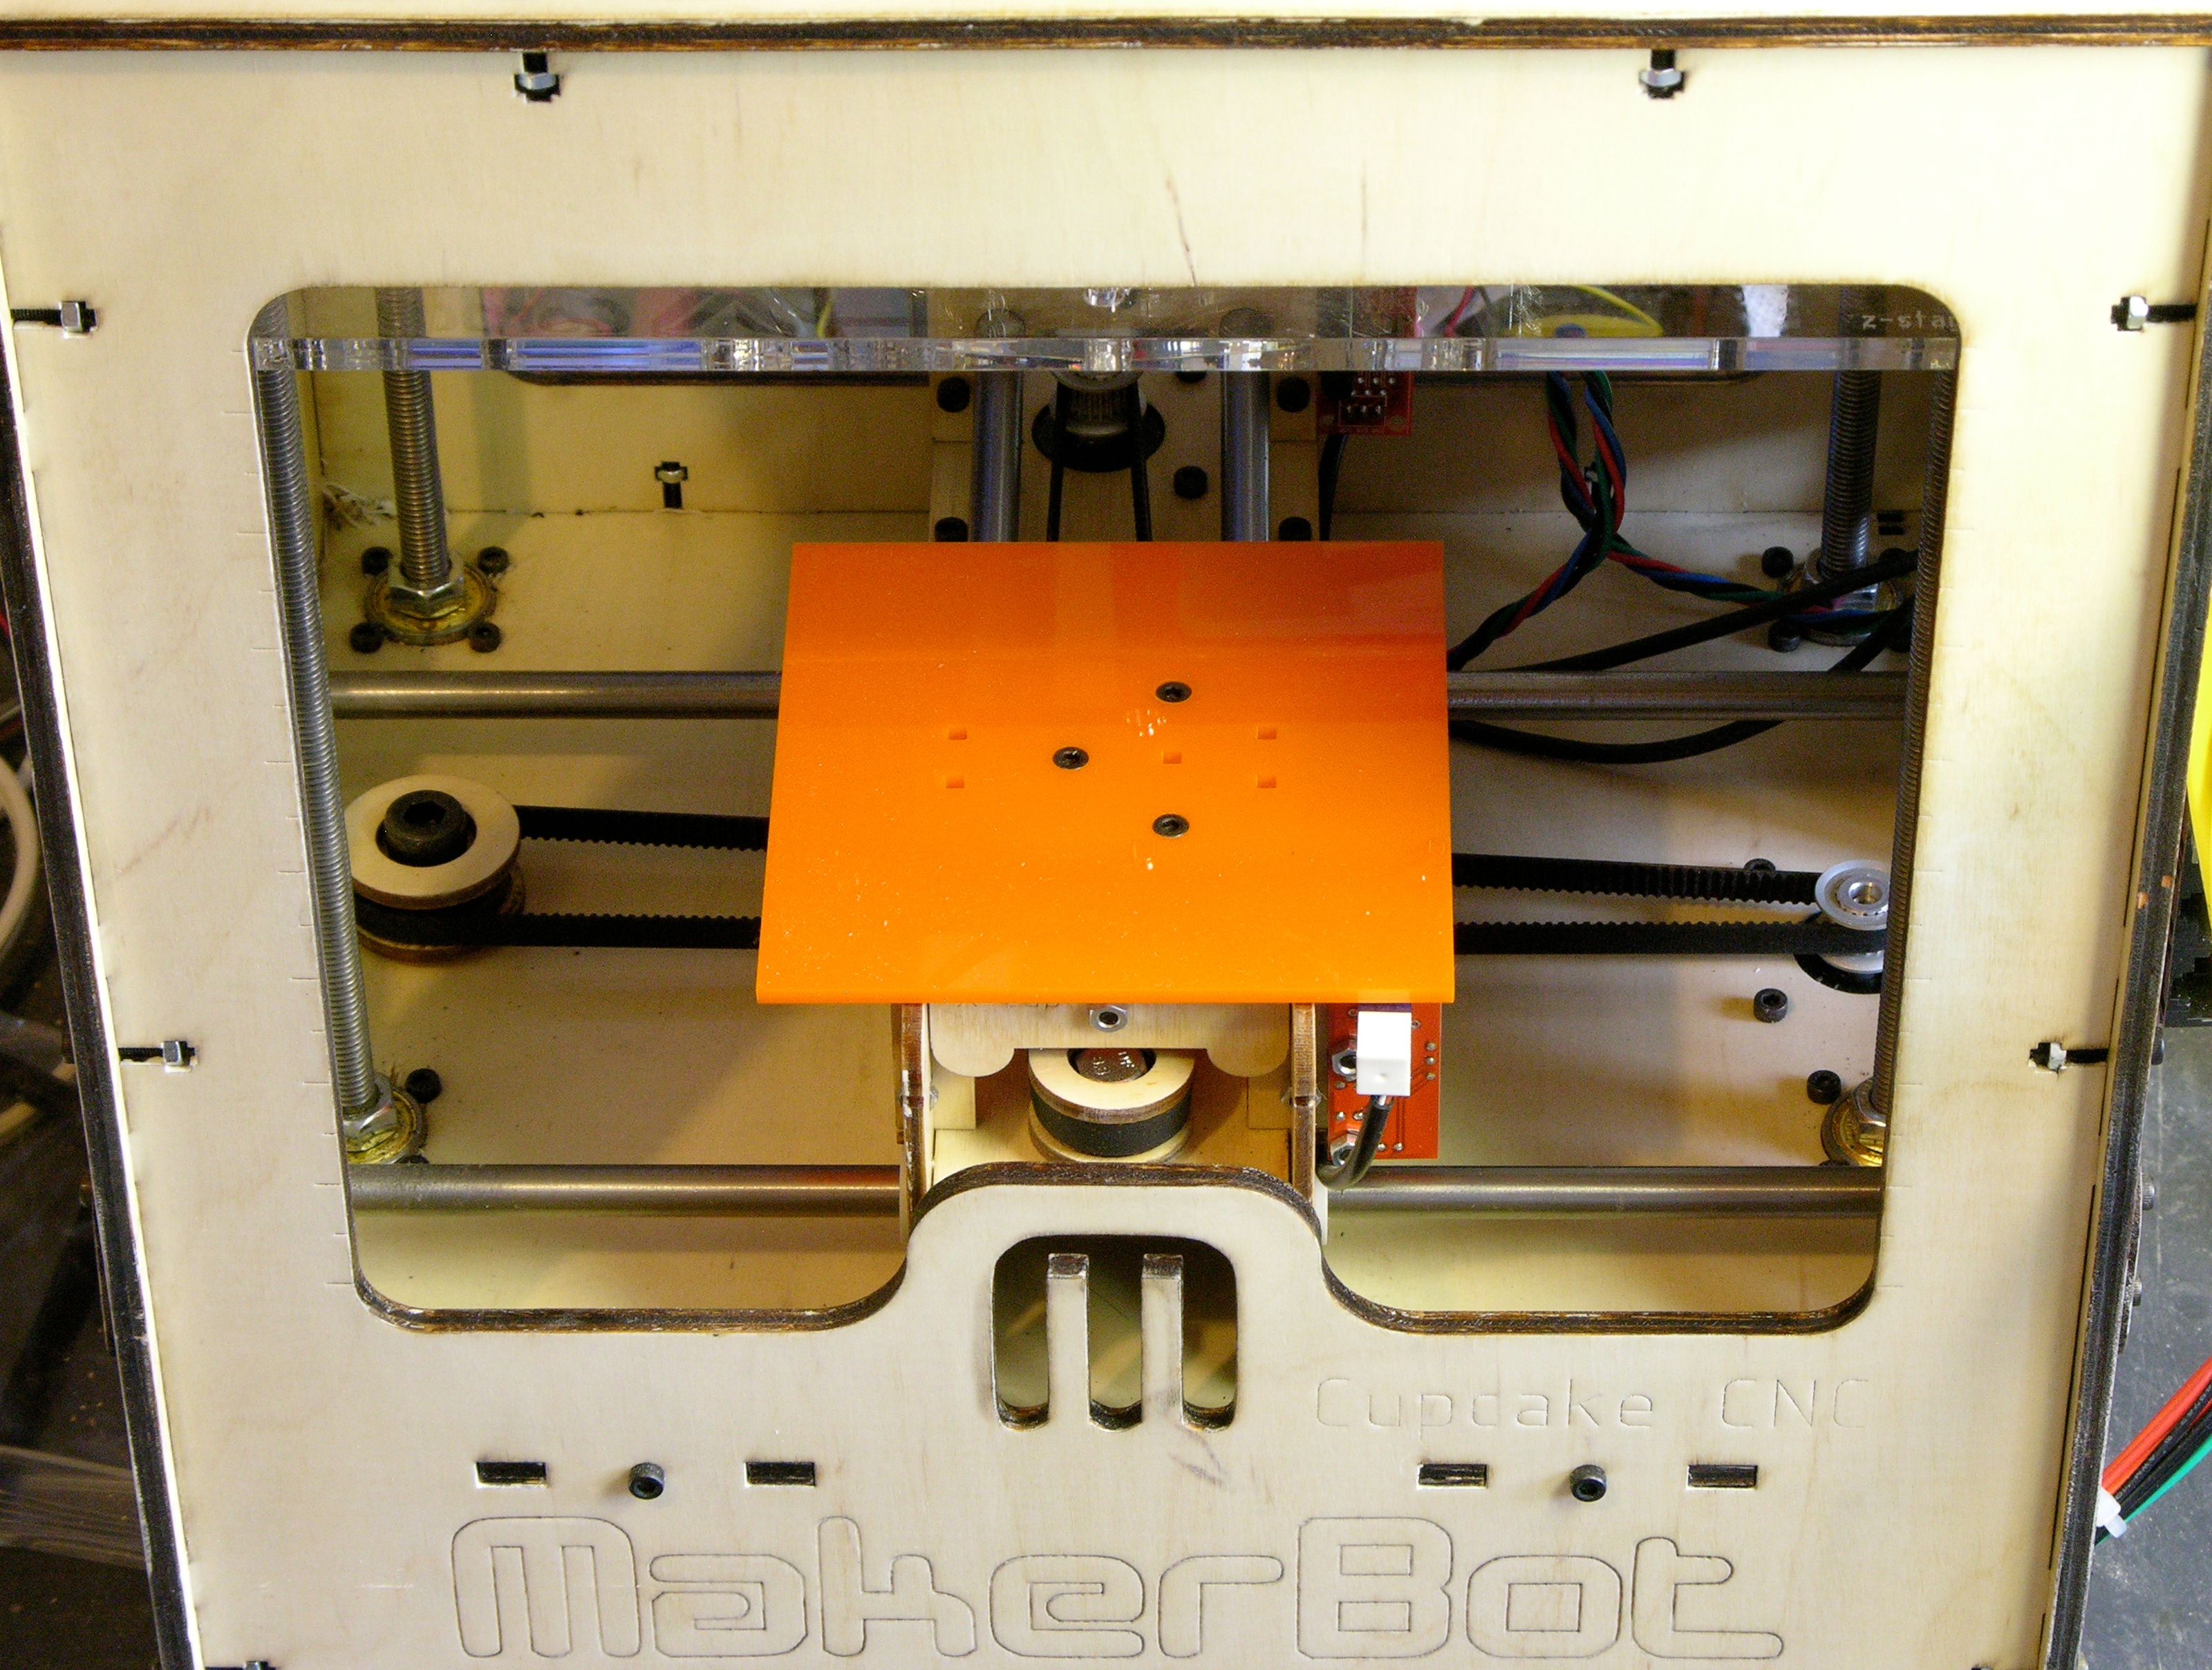
After Tom offered and built me the McWire PCB heater, I was thinking about how best to attach it to the CupCake’s Y stage. The Y stage has M3 machine screw heads poking out the top, which are actually nice for maintaining registration of the build platform; and it has five magnets embedded in it to keep the platform securely attached to the stage.
Although Tom left clearance in the heater PCB for all of these things, I wasn’t sure I really wanted to have to drill through the PCB and into the aluminum plate to fit the PCB/plate sandwich onto the Y stage. I also didn’t think I really wanted to put a heater directly onto the Y stage. Even at temperatures not intended to melt the extruded plastic but only to keep it warm, I wasn’t sure whether the heater would scorch the wood, cause it to warp, or do something else undesirable.
While puzzling over how to attach magnets to the heated build platform, it occurred to me that I should simply do what MakerBot did in the first place — press-fit the magnets into lasercut holes. And the rest was obvious.
Ponoko is an online service billing itself as “the world’s easiest making system.” You upload drawings in your choice of a couple of different vector formats, select materials, and confirm what you want done. They laser-cut your drawings and ship you the results.
Out of the wide range of materials they offer, I settled on acrylic. Its melting point is close to that of ABS and the heater isn’t supposed to melt the ABS, just slow its rate of cooling. The heater PCB’s heating traces are on the top side, so there’s a thin layer of fiberglass substrate between the heating element and the lower surface. Acrylic is supposed to be a fairly good insulator, which not only helps protect my wooden Y-stage but also should make handling the heated platform easier. And they had it in 3mm sheets, which turned out to be exactly the dimensions of the magnets. (In retrospect, I’d probably use 5mm next time and let the magnets “disappear” into the interior of the sheet’s thickness.)
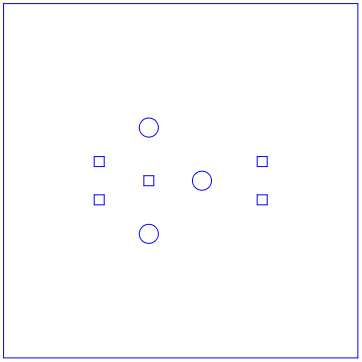
To prepare for Ponoko, I downloaded the same CupCake Y-stage DXF file from Thingiverse that I had sent Tom to find the hole spacing for the heater PCB. I installed a demo copy of QCAD and in a single one of the 10-minute sessions its demo allows opened the DXF, deleted everything from the Y-stage file but the build platform, moved the platform to the origin, deleted the lettering from it (because it’s no longer a build platform), and saved it as an SVG. (Whew!)
Rambling sidebar: By the way, I interpret the CupCake’s CAD files’ CC-GPL license as indicating that I may legally copy the CAD files and make derivative works. CC-GPL refers throughout to programs and it’s not clear how it applies to designs for physical objects; but also it takes effect not when you modify but when you distribute modified works. The original MakerBot build platform does not contain a copy of the GPL as it would be required to were it a program being distributed under the GPL, thus I don’t think that my insulators need to contain a copy of the GPL even if I distribute them, as they would if they were programs. However, I want to be true to the spirit of the license attached by the creators; and if this works out, I’m glad to make available the SVG files I created and used.
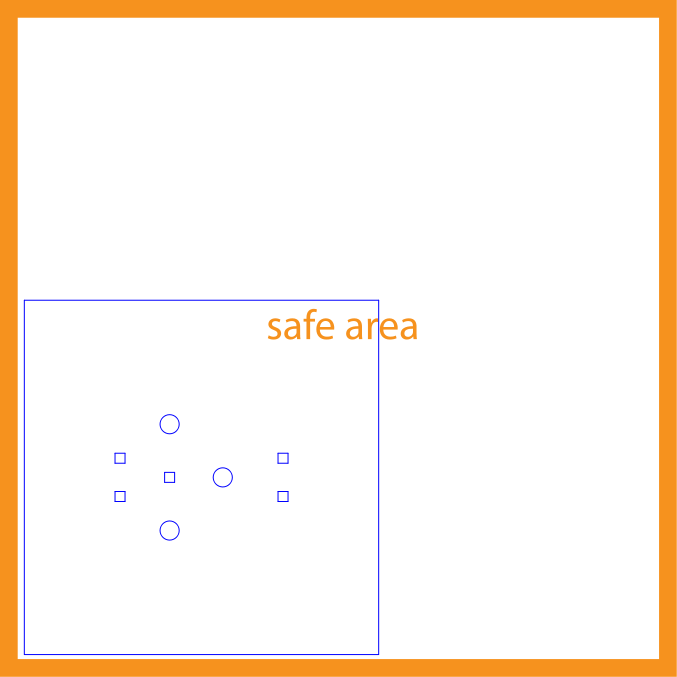
I loaded Ponoko’s “P1″-sized template into Inkscape, imported the modified platform SVG I had saved from QCAD, changed its line color and width to the settings Ponoko uses to indicate cutting (versus etching), and saved a copy. I uploaded it to Ponoko, selected 3mm acrylic as the material, and ran through a shipping quote — which due to an incorrect default setting on my Ponoko account was going to make the part in New Zealand and ship it to me at a cost of about $80.
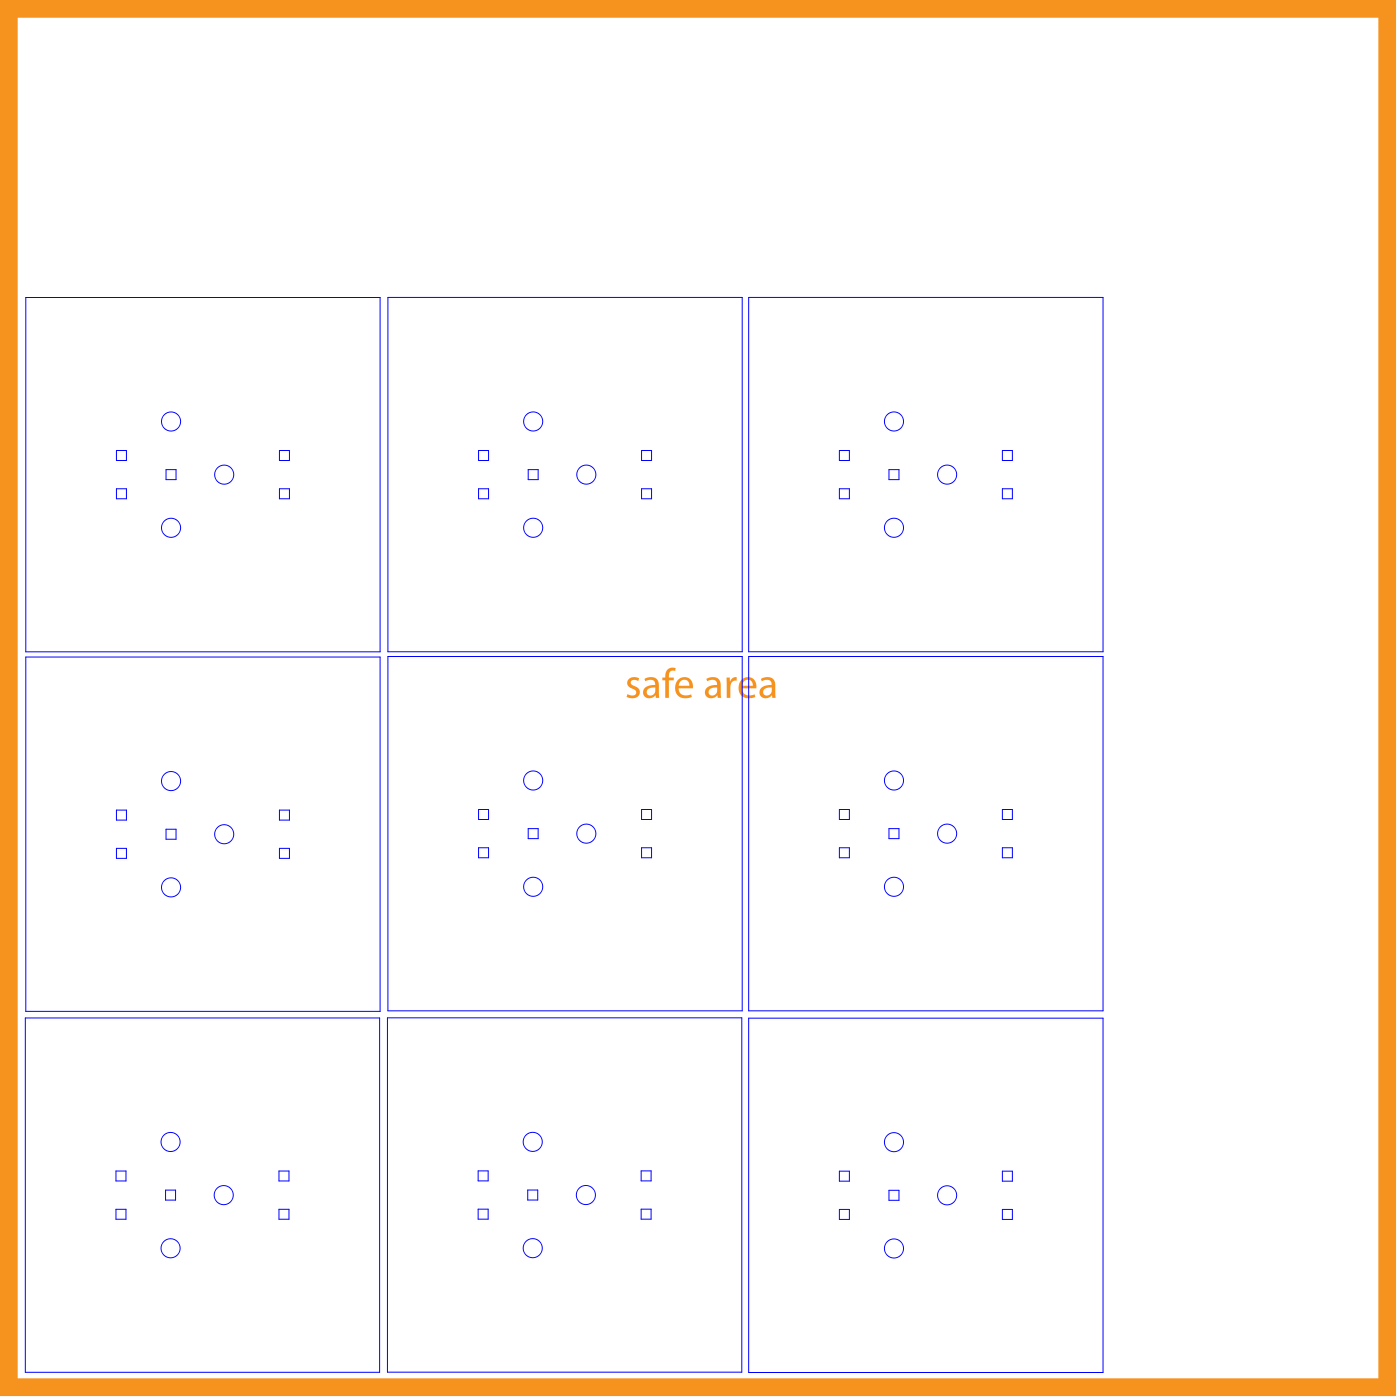
While I was straightening that out, I loaded a “P2″ template and placed nine insulators on it. (Although I left more space between copies than I needed, there was definitely not enough room to get four copies along either edge.) I got my “manufacturing country” set correctly and ran an estimate on the 3×3 P2 version.
| size | make | material | shipping | total | yield | each |
|---|---|---|---|---|---|---|
| P1 | $.83 | $2.50 | $5? | $8.33? | 1 | $8.33? |
| P2 | $7.73 | $8.66 | $9.88 | $26.27 | 9 | $2.92 |
I don’t think I reran shipping on the exact P1 shown above, but I had run another P1 and got shipping in the $5 range. So I could get one insulator for ~$8 or nine for $26.27 ($2.92 each). I submitted my P2 order for nine insulators.
I was shocked to see an estimated delivery time of four weeks — it didn’t seem like it should take that long to slip a sheet of plastic into a laser cutter, run my design, and throw it in the mail. But I think Ponoko is doing well and has a lot of business, so it makes sense that they’d have a backlog.
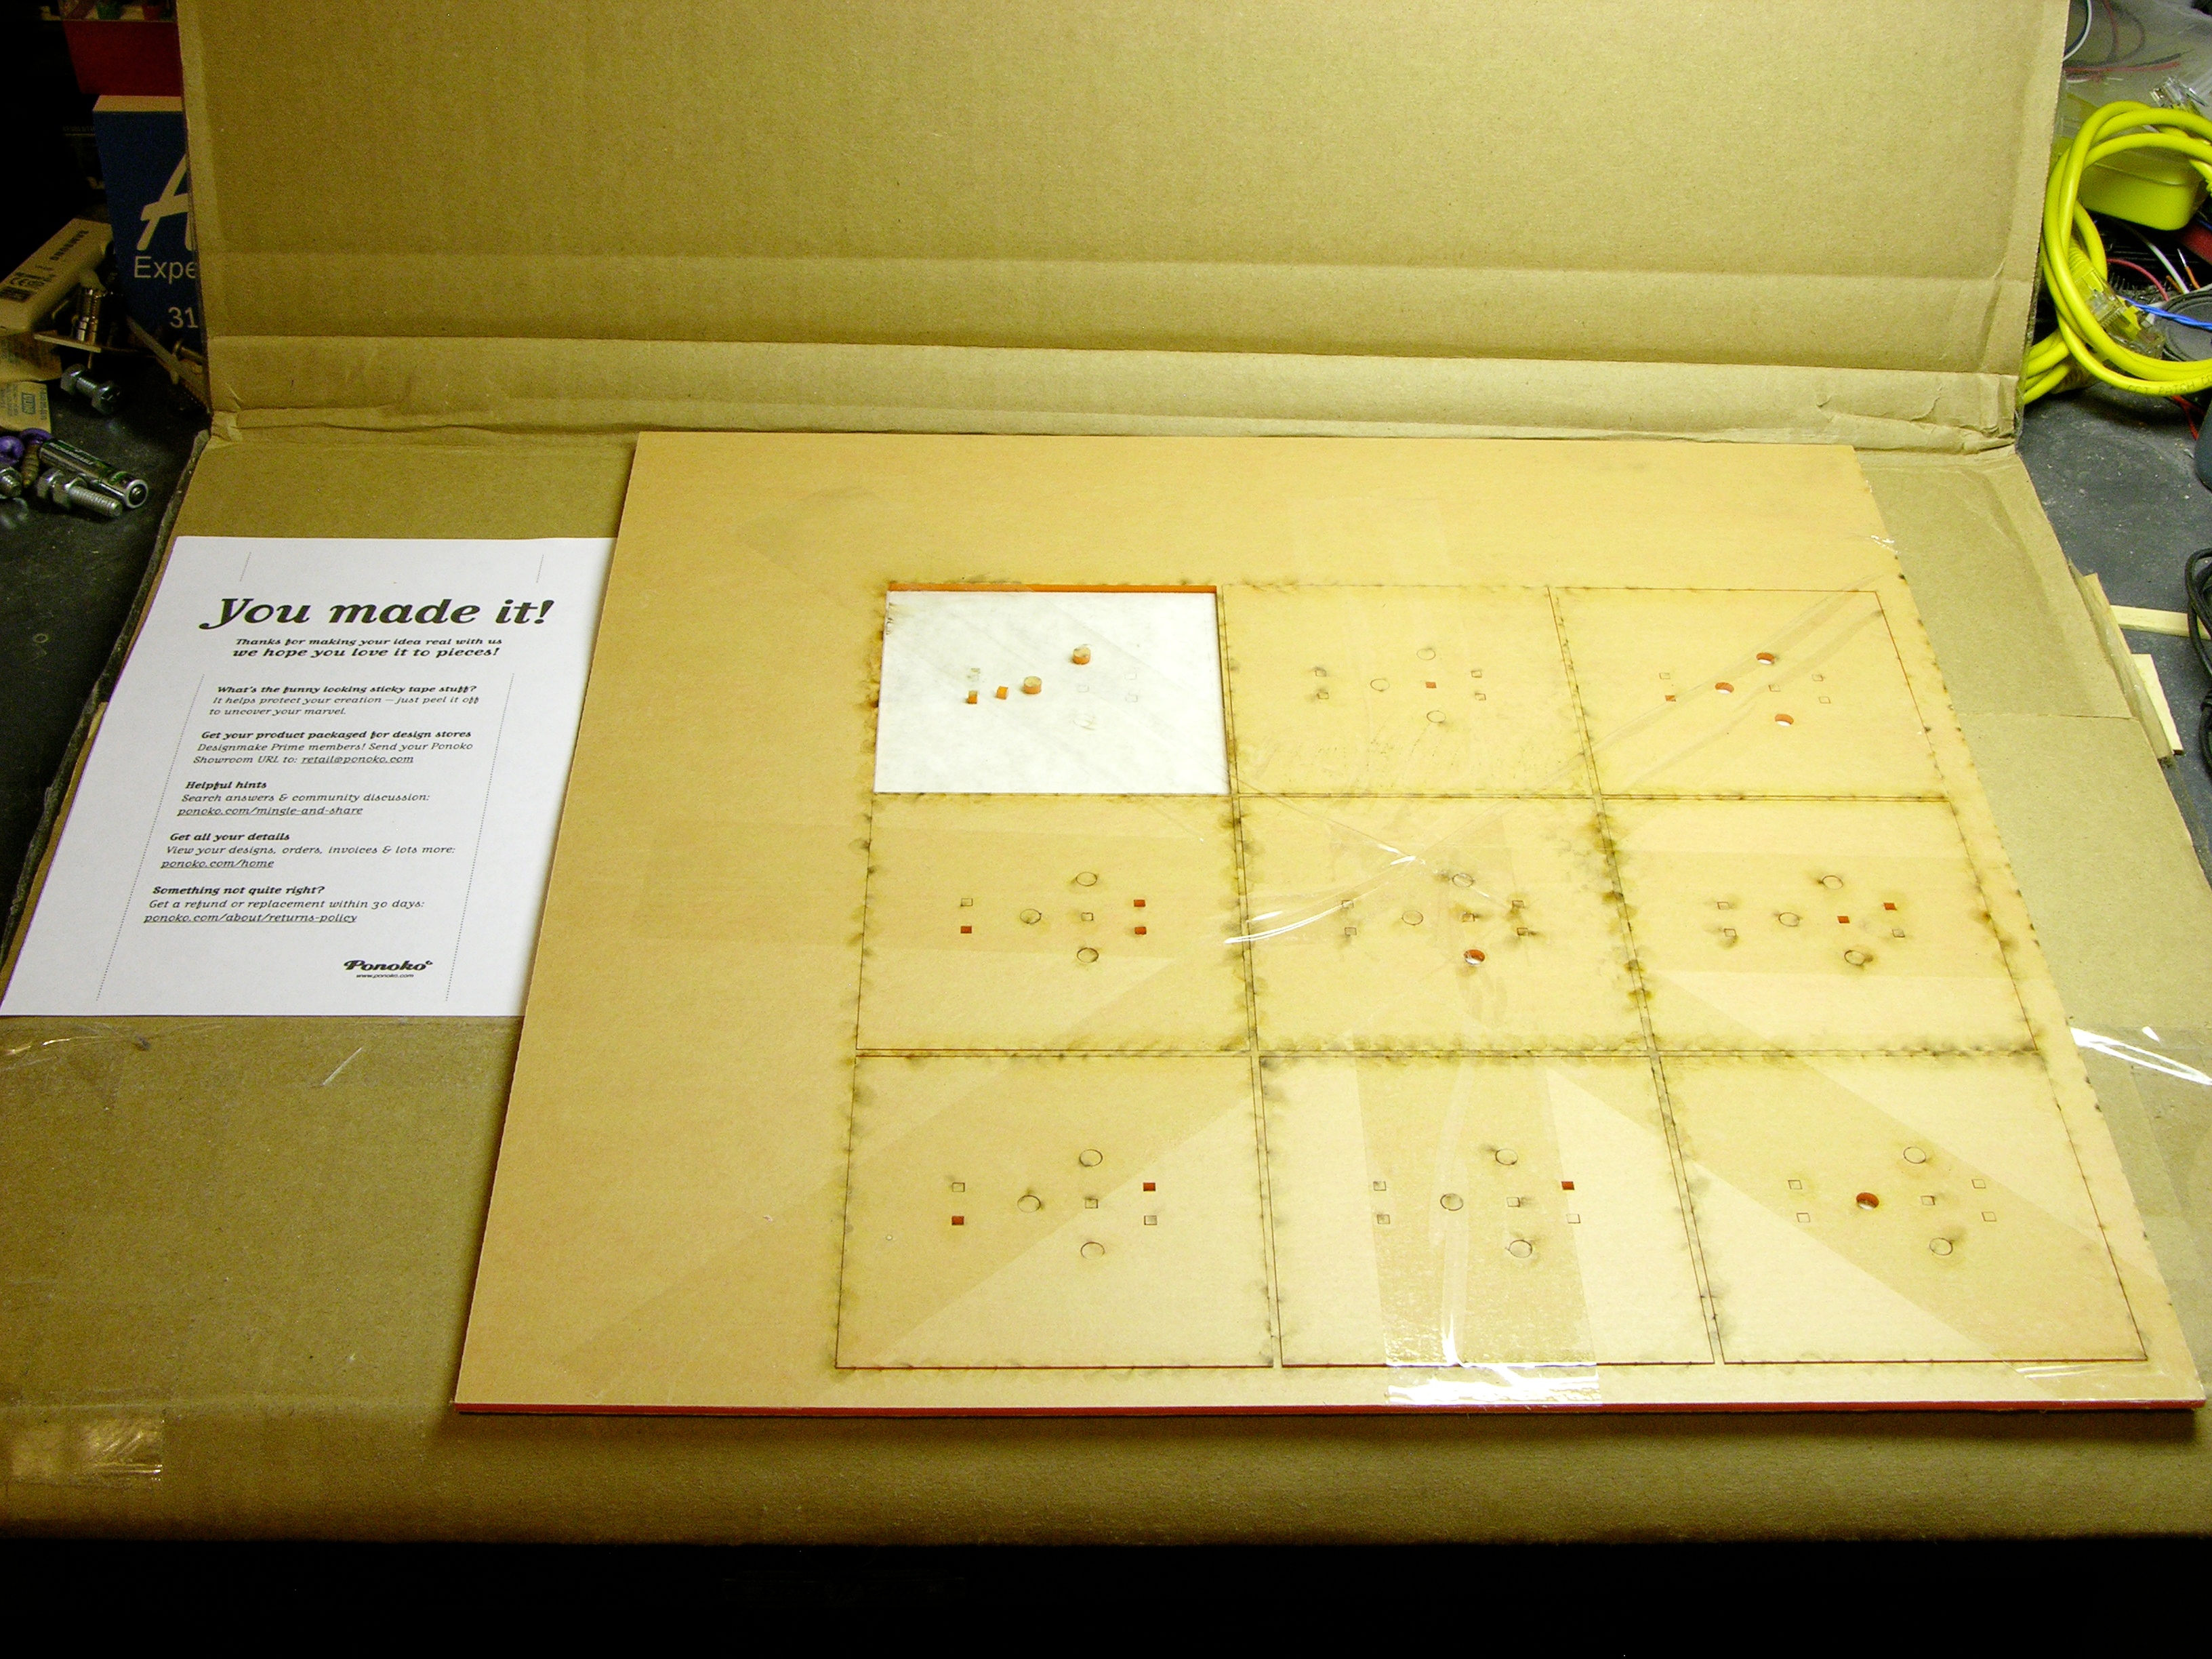
Ponoko sent me updates as my order was being validated, prepared, cut, and packaged. It shipped two weeks after I uploaded my file and arrived about a week after that. Opening the package was a bit anticlimactic — the protective paper on both sides of the plastic is rather boring to look at and visually disappears into the shipping cardboard. But I had lovely orange parts inside!
I had originally thought that the kapton tape I intended to use on top of the aluminum plate would look oranger than it ended up, so I had tried to find an orange translucent acrylic to match it, but it was out of stock. I picked the orange opaque, which I find rather striking, and probably like better than the yellow translucent I would have picked had I had my tape on hand already.
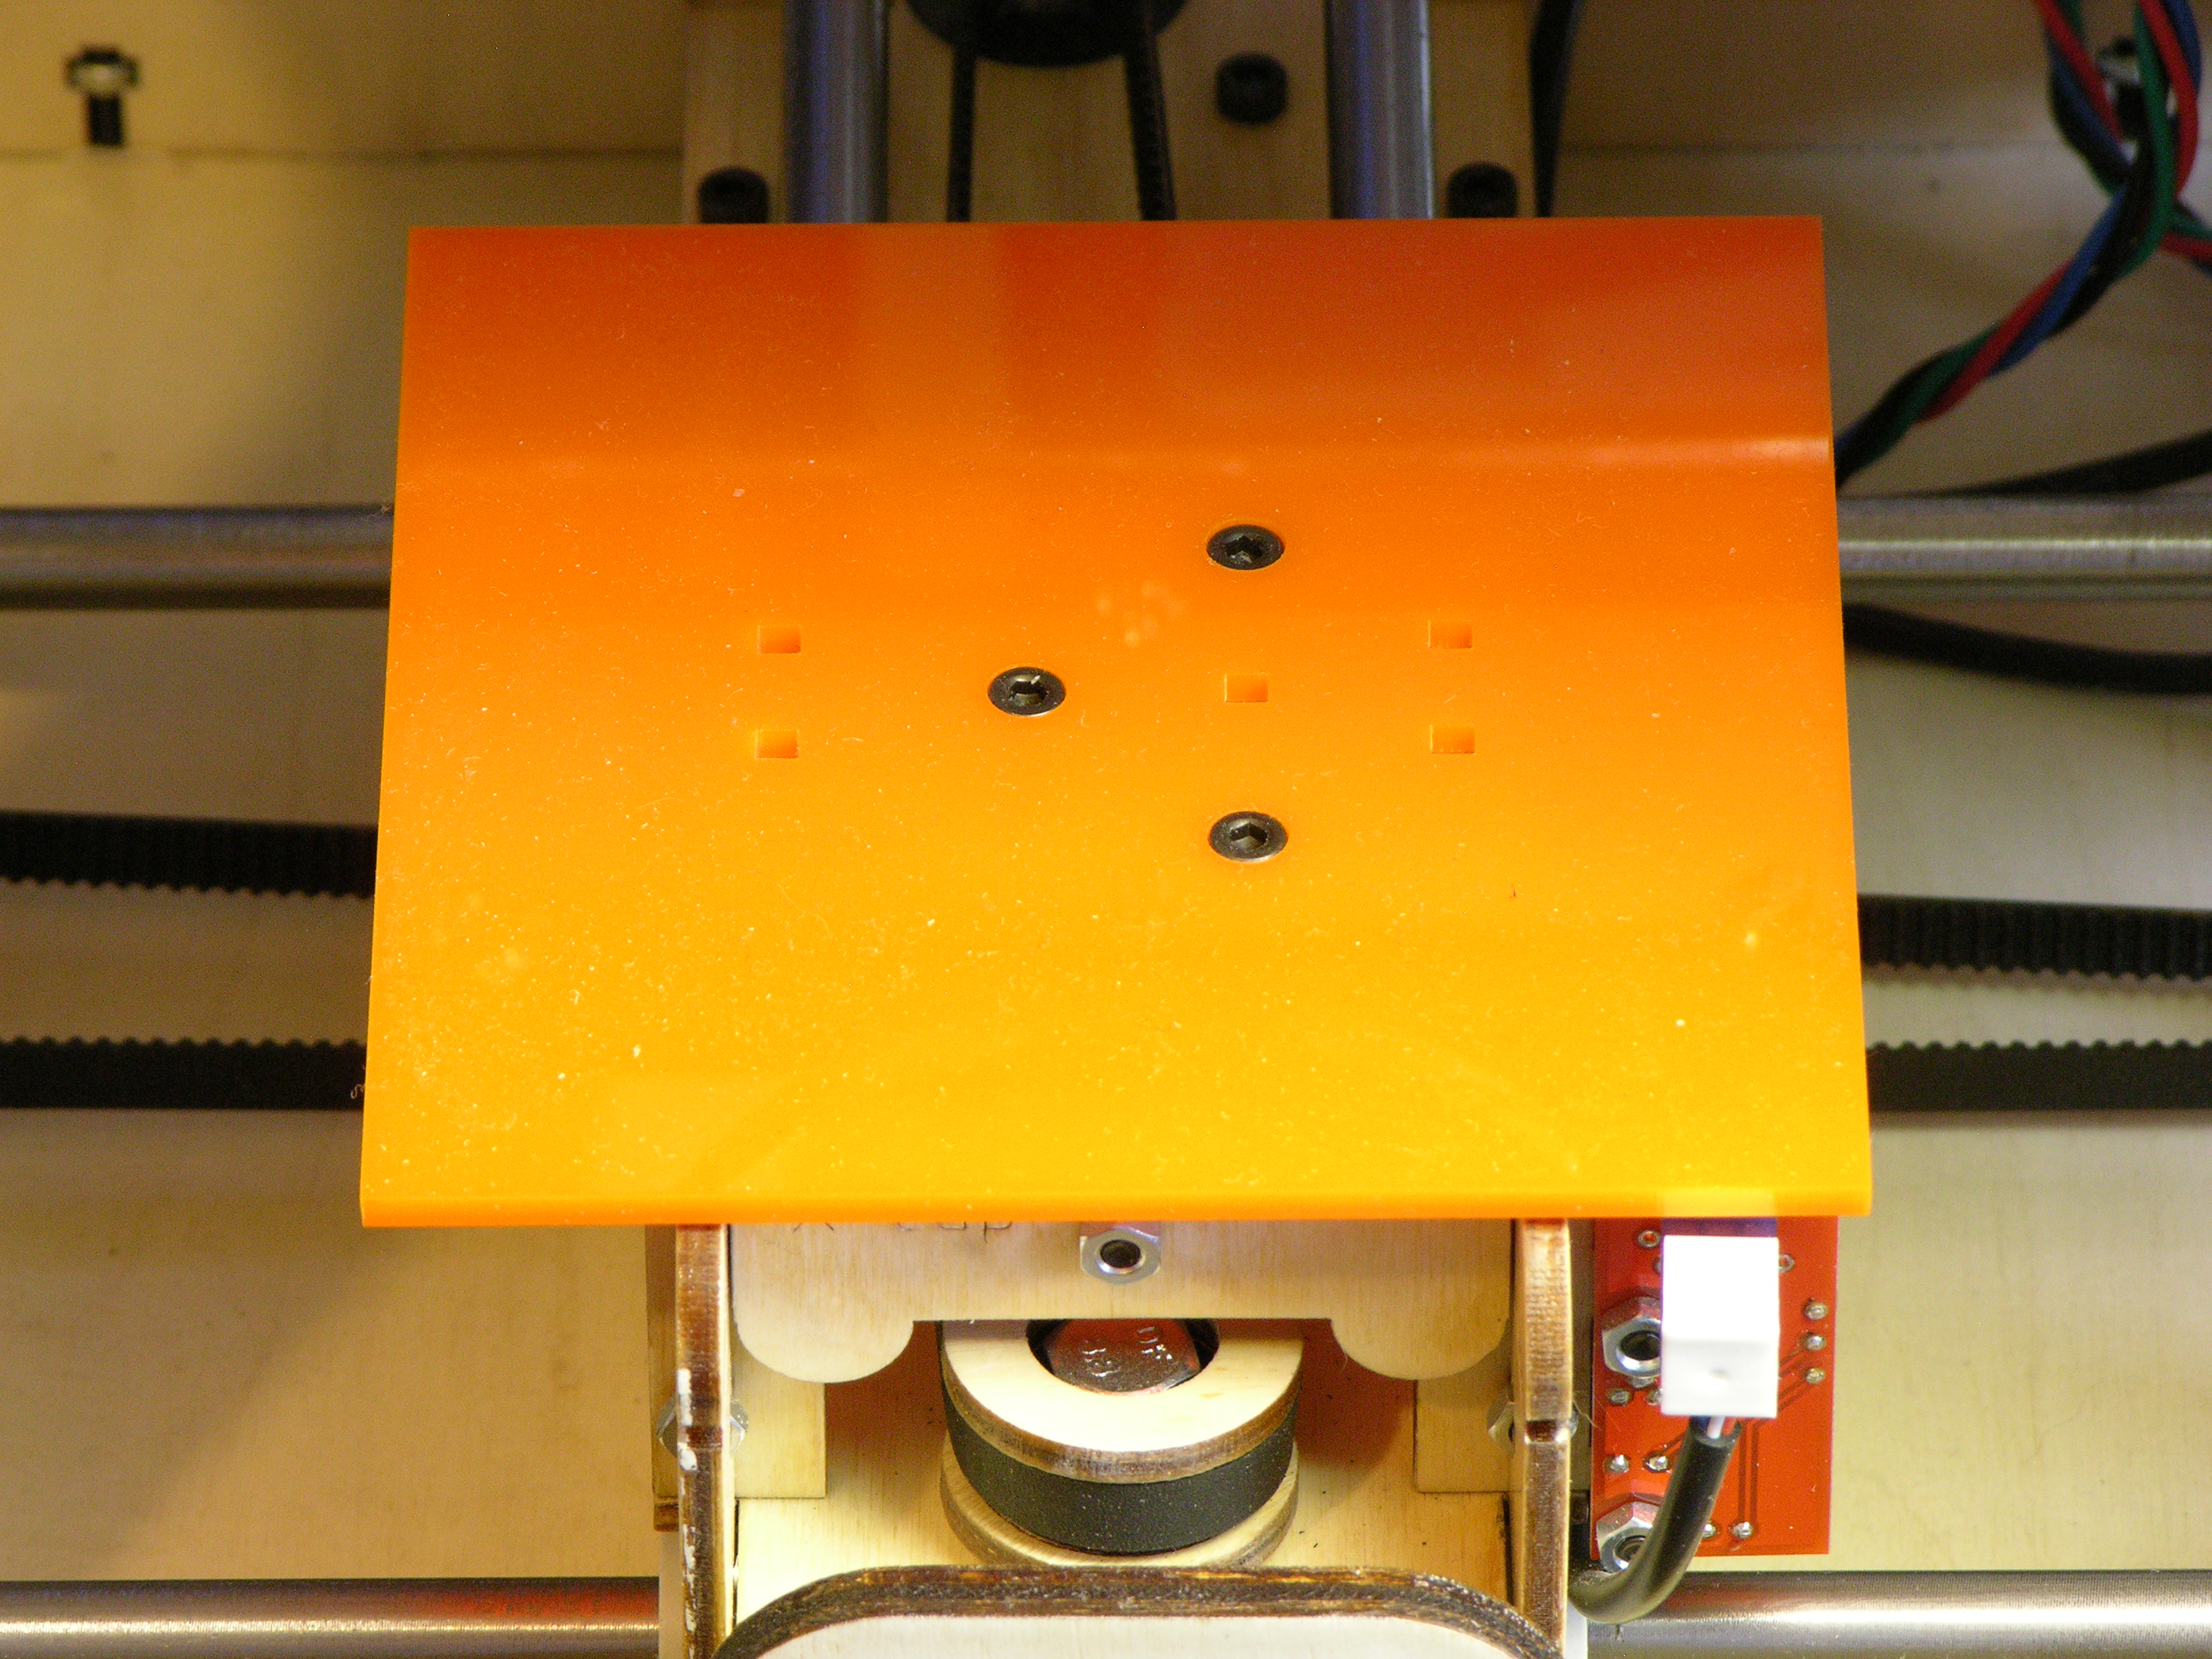
The acrylic insulator press-fits perfectly onto the machine screw heads — it feels like I wouldn’t even need the magnets to hold it in place!