Software
Even before I had installed all the LEDs in the prototype board, I couldn’t resist turning the thing on and lighting them up. I started by pushing a 1 and two 0s into the thing, to make it cycle like the lights around the edge of a marquee:
loop [ a6276-bit 1 a6276-latch wait 5 a6276-bit 0 a6276-latch wait 5 a6276-bit 0 a6276-latch wait 5 ]
That’s one lighted dot, half a second delay, one dark dot, half a second delay, another dark dot, and another half second. The effect is every third light marching around the loops in half-second steps. Then I finished assembling the board and wrote a routine to send a single dot around the loops:
to a6276-demo-onedot :delay
    a6276-off
    a6276-off

    loop [
        a6276-bit 1
        a6276-latch
        mwait :delay

        repeat 31 [
            a6276-bit 0
            a6276-latch
            mwait :delay
        ]
    ]
end
Of course, I started speeding it up so the dot was spinning around the loops instead of marching. I was pleased to see that it can run fast enough that the flickering of the dots disappears and the whole display just looks like it’s on but dim.
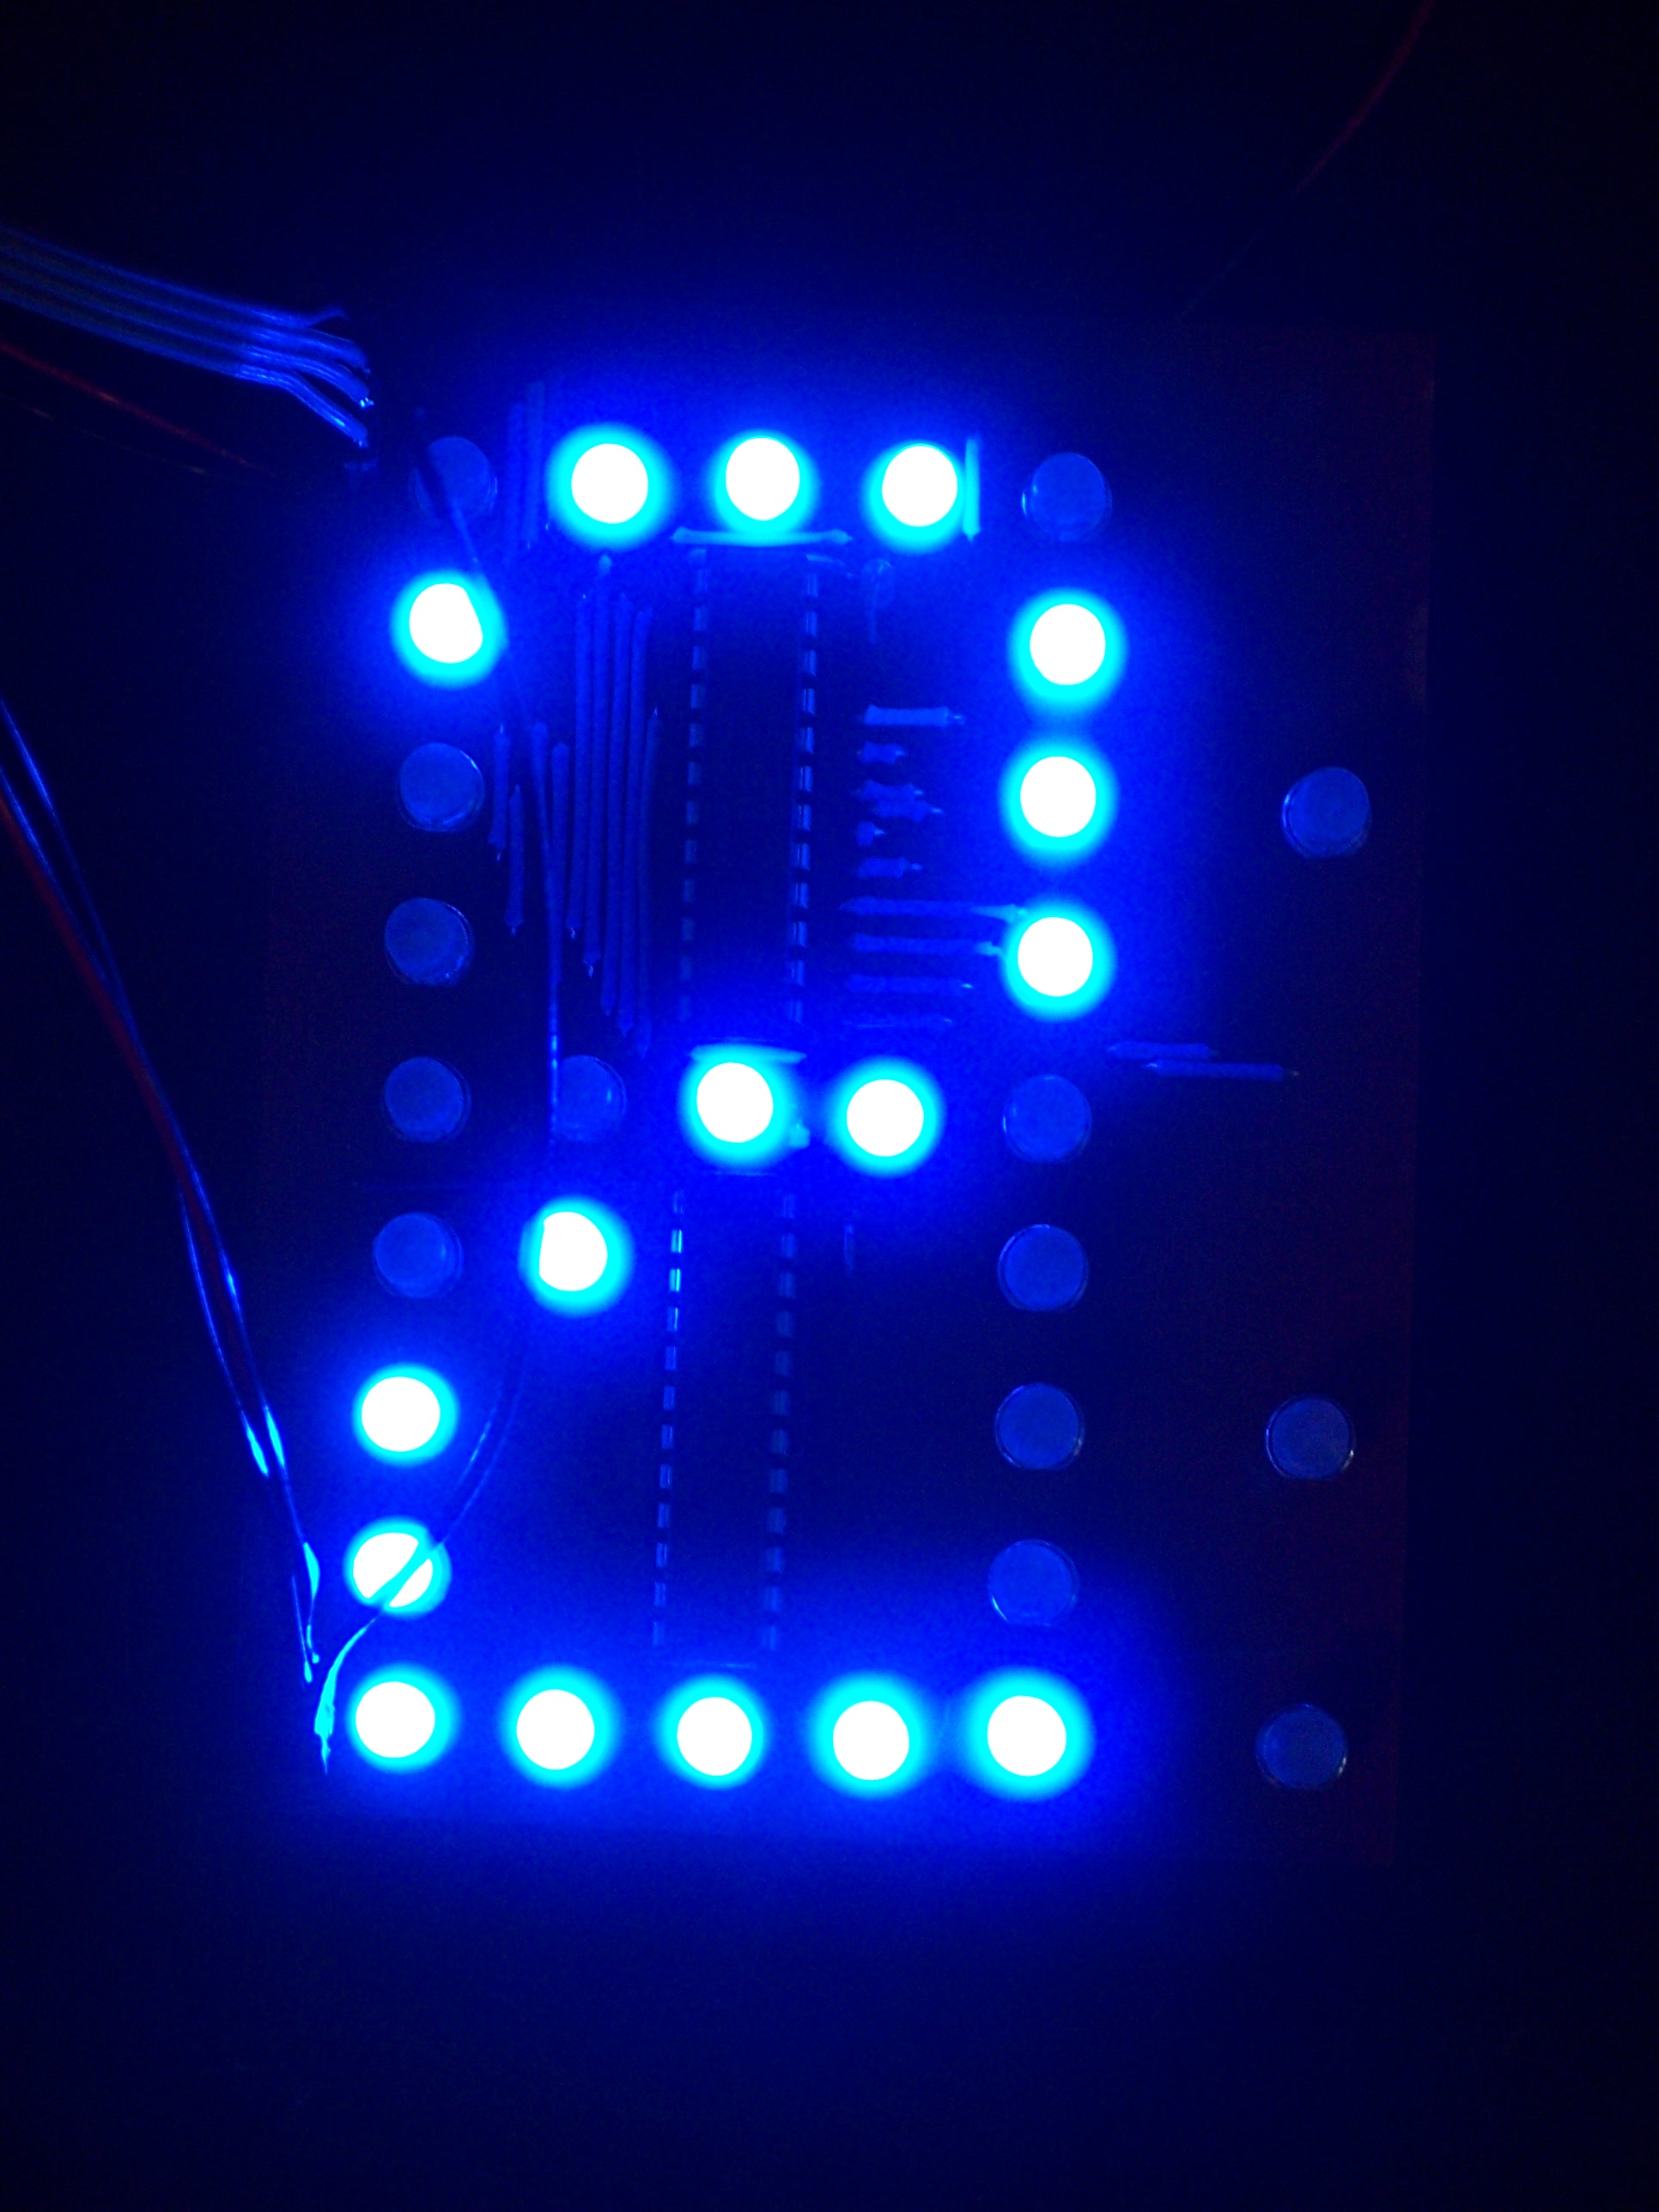
Next, I had to display a 2, since making the 2 look good has become the epitome of the whole project. I had already written code to pump 16 bits into one 6276, and LogoChip Logo uses 16-bit words, so I sent the pixel data two words at a time:
global [ a6276-temp-data ]
to a6276-shift16 :data
    seta6276-temp-data :data

    repeat 16 [
        ifelse (#1 and a6276-temp-data) [
            a6276-bit 1
        ] [
            a6276-bit 0
        ]
        seta6276-temp-data leftshift a6276-temp-data -1
    ]
end

to a6276-display-2
    a6276-shift-16 #0001011101111101
    a6276-shift-16 #0111111100000000
    a6276-latch
end
And here’s how it looks.
I followed that up by constructing the rest of the digits in separate subroutines, then adding parameters for whether to light the colon and the decimal point, then creating a loop to flash the colon on and off each second while counting the seconds on the display. Which leads into the next point . . .
Power Supply
I’m using my Curiously Strong LogoChip to control the display board, and it runs on a (rechargeable) 9V battery. I connected my bench power supply to the display itself, ’cause it draws a little more current; but all indications are that the LogoChip doesn’t use that much.
After getting the seconds-counter working, I left it running all evening while doing other things around the house. When I went back out to the utility later, it seemed like it was running slower, and comparing it to the second-hand on the kitchen wall clock showed that it definitely was.
At first, I wondered whether I had some kind of leak in my software loops, but then I thought of the battery running down, and that’s what it turned out to be. Even though I’m using an external 10MHz crystal on the LogoChip, it must use an internal oscillator for the Logo wait command; and that internal oscillator must be supply-voltage-sensitive.
So I powered my baby off for Saturday night, and Sunday afternoon wired it up to an old PC power supply. PC supplies tend to provide very well-regulated 5V with as many amps as you could hope to throw at a little circuit like this, and they can do it forever and ever without getting bored.
There’s just one catch–they need a minimum load to turn on. Because of the way switching power supplies use feedback to correct changes in output voltage, they have to have something drawing current, or they go into protection mode and shut down. Although the tiny current draw of my LogoChip was enough to drain a 9V battery after a few hours, it’s not enough to keep a PC power supply happy.
There are articles online about converting a PC power supply to use as a general-purpose bench power supply, and most of them have you stick a large resistor inside the case to draw current. The resistor gets really hot, of course, and wastes power if you do have enough external load to keep the power supply on; so you want to size the resistor to draw the minimum current required to activate the power supply.
I couldn’t find any good data on how much current is typically required to keep a PC switching supply active, but I found people talking about half an amp. Well, 5V / 10Ω = .5A, and 5V ⋅ .5A = 2.5W. Most of the power resistors in my parts bin are good for 5W or 10W, so I just had to find one with about the right value. The closest I could come was 15Ω, which would give a third of an amp, which might be close enough.
I was getting ready to wire it in when I had an even better idea (at least for the prototype bench), spurred by trying to figure out where to salvage a four-pin Molex connector to solder the resistor to. If you’re old enough, you may remember the days when PCs wouldn’t boot if you disconnected all of their hard drives, because they needed more of a load on their power supplies than the motherboards alone provided. (I know, now that CPUs draw more current than a toaster oven, that’s a little hard to imagine; but trust me, it happened.) So . . . if a hard drive was enough to load the power supply, maybe a hard drive would be enough to load the power supply.
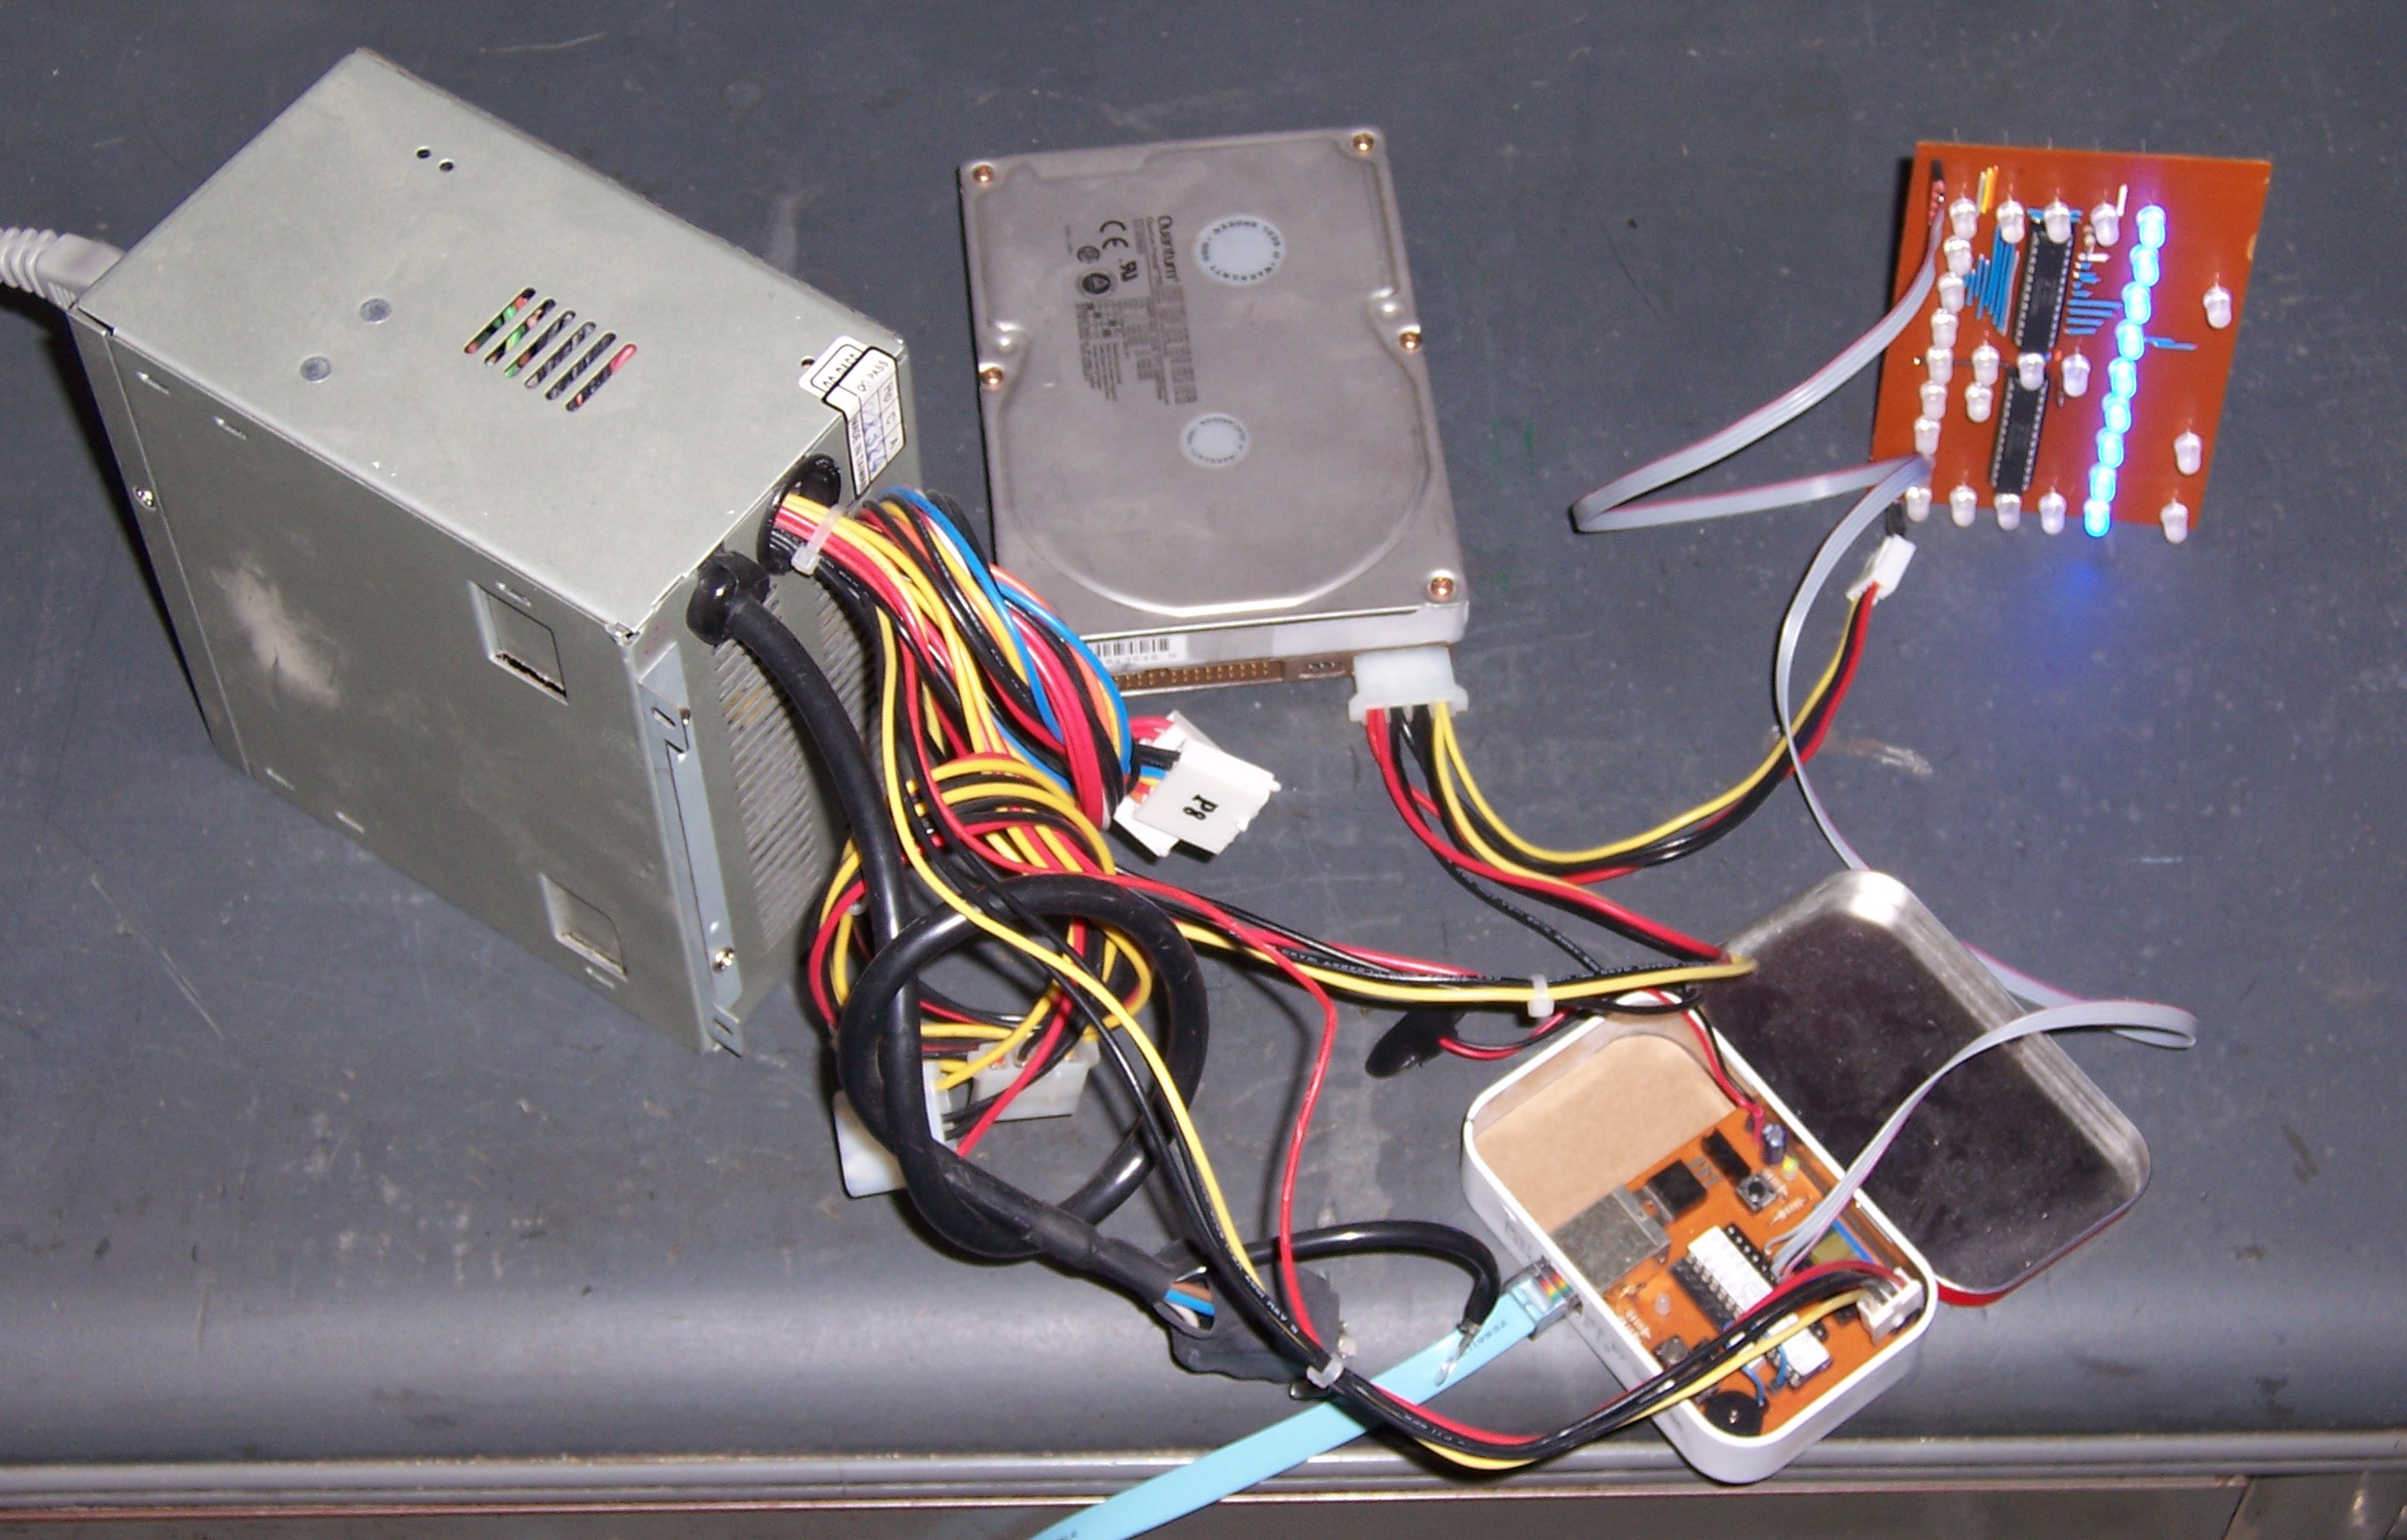
I call this “Best Use of Useless Hard Drives.” I grabbed a spare courtesy of my friend Matt at the office, and away she went! Even better, when I go a-salvagin’ for more power supplies, they’ll be out of ’386es that have like 100M drives on them. Perfect! I’m thinking of just attaching it to the side of the power supply with duct tape, so it’s always there for me. ![]() No, seriously, I’ll stick a power resistor inside eventually, but this is working great for now.
No, seriously, I’ll stick a power resistor inside eventually, but this is working great for now.
The Result
I’ve had the single-digit seconds-counter running for about a day and a half, and it’s working just fine. It’s still using internal timing rather than an external timekeeper; so it’s not perfectly accurate, but it looks good. I put 1K resistors on the 6276es for control resistors, and the graph on the datasheet suggests that means the LEDs are running about 20mA, which is very conservative for what these are able to handle. My wife says it’s insanely bright, and actually turned it around to face the other direction so she could stand to be in the same room with it.
Did I mention that the picture above (of the 2 on the display) was taken with full daylight streaming in the side window? Same as on this video, of counting through the numbers.
Hi Keith
great little project , i have a 230W PC PSU for my bench i just solderd a 22R 5W res to the end of one of the 3.3v wires to an earth wire its been runing for a year like this the res hardly gets warm, i’ve had a lot of experimenting with time circuits and i found the best way to get it accurate is to use a little chip from dallas called DS32KHZ it is a 32.768k crystal package that is accurate to +- 2ppm (1 min/year) 0 – 40 Celcius.
keep up the good work looking forward to seeing the whole clock, hope your wife has some good sun glasses hehe
pete