The chronologically next two synthesizers for my pulse sound programming demo were to be my Unique DBE (Crumar BIT 01 North American rebrand) and Roland Juno-106, but alas, both of them have problems (the Juno had been working for the last two weeks but Sunday I left it on for a couple of hours and now it doesn’t work) that I’m going to have to delay a bit before fixing.
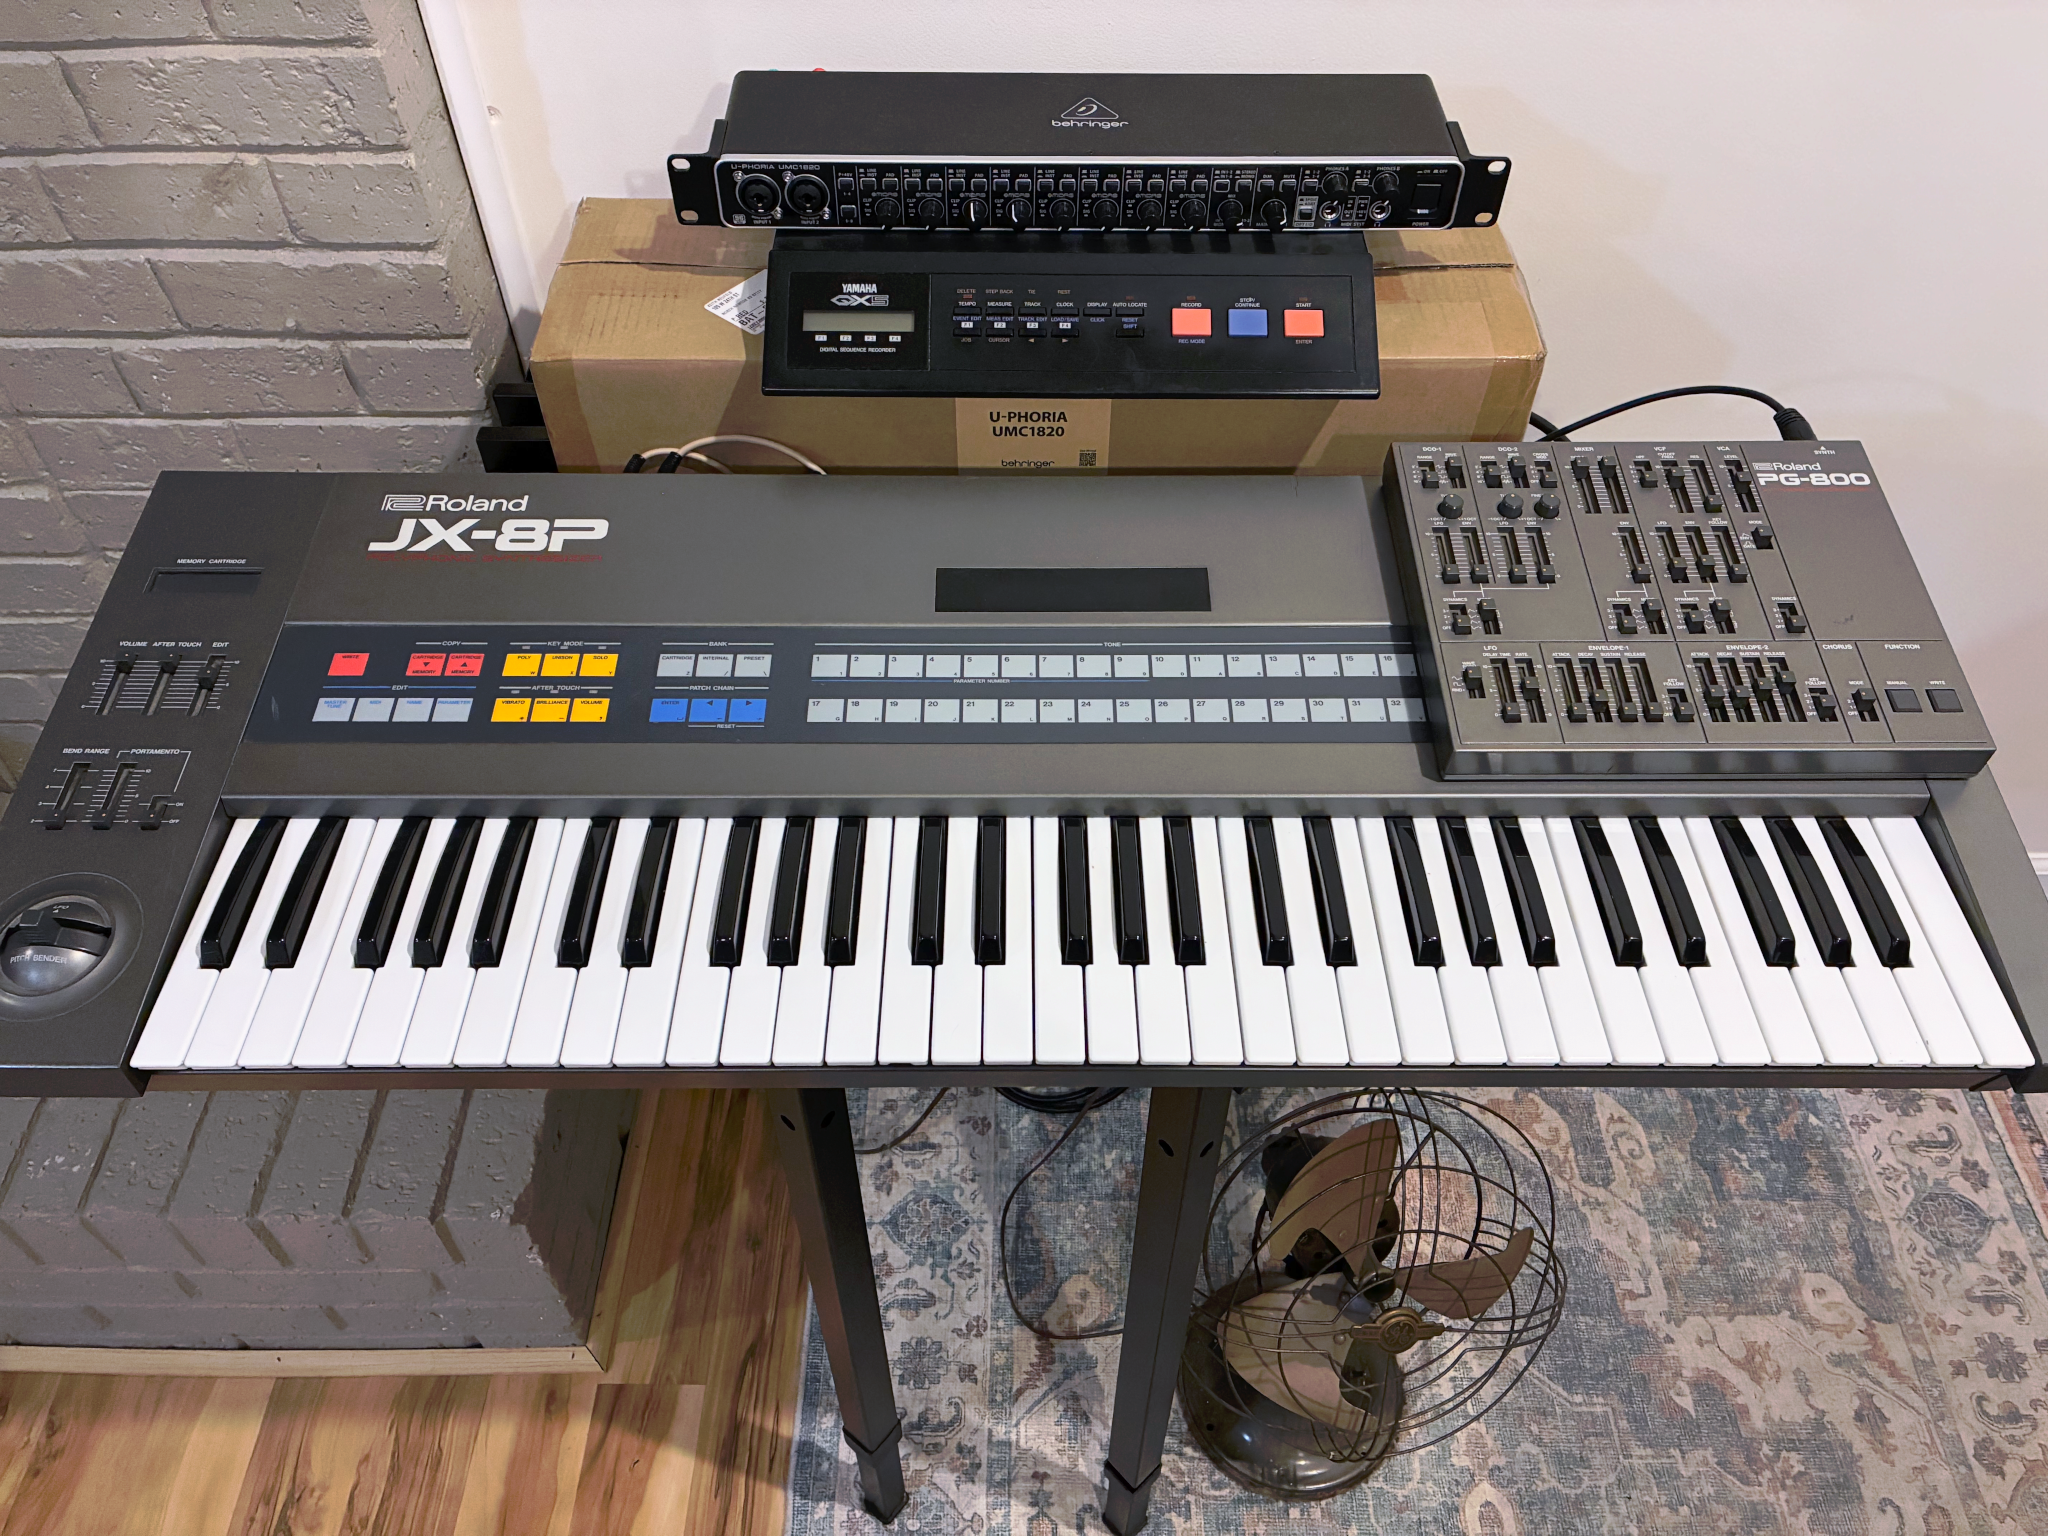
So on to the Roland JX-8P, my first and most sentimental synthesizer. Ken Janzen (the younger Ken Janzen) was a music whiz who’d occasionally bring his JX-8P (and sometimes sequencer) to church for special music during my formative years. Then in college I got access to another JX-8P thanks to the forward-thinking Don Kehrberg, which I ended up buying from the college a few years later. This one is my third — that is, I have three now — just picked up for a good price on Marketplace and noting some glitchy contacts that will require attention sooner or later. I love this synthesizer obviously for the nostalgia but also for the fat sounds it makes with detuned oscillators, a little bark from the VCF, and what I find to be a particularly lush chorus.
Features:
- 6-voice polyphony
- Stereo audio output
- 2 digitally-controlled oscillators (DCOs) — sawtooth, PWM, square, or triangle — pitch is controlled digitally and is as solid as you want it to be
- 1 low-frequency oscillator (LFO) — sine, square, or random — that can modulate pitch, PWM, and VCF (not amplitude)
- 2 ADSR envelope generators that can modulate pitch, PWM, VCF, and amplitude
- Velocity-sensing keys and performance
- Onboard chorus
Let’s get programming.
Make it Make Sound
The JX-8P has fewer controls that make it mysteriously silent than does the Odyssey, but for good measure:
- VCF Frequency to maximum (otherwise you’re low-pass filtering with a very low cutoff)
- HPF Cutoff Frequency to 0 (otherwise you’re high-pass filtering with a very high cutoff)
- Voltage Controlled Amplifier to mid (because that’s the master gain)
- Volume to mid
Note that I have the PG-800 physical control panel for programming sounds. Without it, I’d use the membrane keypad to select parameters and the edit slider to change their values … and then I’d have to use an outboard MIDI controller for the performance, as you’ll see in a bit.
Oscillators
The first stages of setup are very similar on most synthesizers, so this should initially look familiar.
Set DCO1 to a square wave and (due to the range of the keyboard) to the 16′ voicing. In the mixer section, set DCO1 mix to max. Set envelope 2 ADSR to about 3-3-5-3. You get something about like this:
To add the second oscillator, set DCO2 to a square wave and — for a more interesting sound on this synthesizer — to the 8′ voicing. In the mixer, set DCO2 mix to max. I don’t actually like this synthesizer’s sound detuning an octave apart, so leave the tuning aligned.
VCO2 sample — Sounds less dull with both oscillators.
Because I’m not using detuning here for “movement,” I’d like to add the LFO for slow amplitude modulation … but the JX-8P doesn’t route the LFO to VCA! And I don’t love the sound of pitch-modulated octaves on this synth, so we’ll leave out LFO vibrato and move on.
Filtering
The sound right now is pretty brassy or twangy and I want a dull sound. That’s changed by lowering the cutoff frequency of the low-pass VCF, which we set at maximum to get started.
VCF sample 1 — Bringing the cutoff frequency down to about 7 is fairly dull.
I need a little more life in the sound and — unlike my thoughts on the Odyssey — for this sound on the JX-8P, I like a little bit of envelope in the VCF. Set Envelope 1 ADSR to 0-3-0-0 and VCF Envelope to about 7 or 8.
VCF sample 2 — Adding a touch of brass to the pulse.
And finally, since we don’t have a sense of movement from detuning the oscillators, I’ll add a bit here with LFO on the VCF. LFO Waveform to Sine, LFO Rate to about 4, VCF LFO to 2 … and then because I don’t want that flanging effect happening on shorter notes, add LFO Delay of about 5 to make it wait to bring the LFO into the VCF until a note has been held for a little while.
VCF sample 3 — Adding movement with VCF LFO.
Envelope
Like the Odyssey, the JX-8P starts the ADSR’s Release step immediately even if you release the key before the attack-decay cycle has finished, so we need to be careful that the attack-decay cycle finishes in slightly less than an eighth note.
I’ll bring up the Release for a longer decay to hold through the gap between keypresses on repeated pulses and — because I’m playing scale notes that are discordant with each other — that gives me a muddy mess!
Release sample — Notes overlap unpleasantly.
To fix that, I’m going to change the JX-8P’s Key Mode from polyphonic to “Solo” (monophonic).
Solo key mode sample — Distinct notes again.
With that taken care of, I can now set the attack-decay rates.
Attack-decay sample — Started at 5; down to 3; back up to about 3.5 for softer pulses at my planned tempo.
Chorus
Still very blah; but the JX-8P has a nice chorus effect built in.
Chorus sample — No chorus; chorus 1; chorus 2.
Now it’s getting interesting!
Crescendo the Pulses Only
Holding a pedal tone and adding pulses of increasing amplitude on top of it has the same problem as the Odyssey — the attack always goes to maximum amplitude, so we can’t (directly) change the amplitude of the attack.
What we can do is lower the Sustain level, which increases the delta of the attack amplitude above sustain amplitude. We can then push up the VCA Level to compensate for the lower sustain level. I’m not smoov enough to crossfade the sustain and VCA level with one hand, so it’s time to let Mr. Yamaha QX8 MIDI sequencer play the score for me and I’ll just do the volume automation.
Final performance — Crossfading from Sustain to VCA Level.
There’s the whole deal:
- Set VCA to minimum.
- Set Envelope 2 Sustain to maximum so the attacks are barely perceptible above it (the opposite setting of the Odyssey’s method).
- Start recording.
- Start sequencer playback (’cause I can’t do it alone).
- Fade up the VCA Gain to a mp level.
- Sequencer starts playing quarter-note pulses on the E, barely audible (and audible mostly because of Envelope 1 on the VCF tone rather than Envelope 2 on the VCA volume).
- Fade down the Sustain to increase the amplitude of Attack above Sustain and fade up VCA Level to (try to) keep sustain level constant. Continue crossfading Sustain to VCA Level until the pulses are as distinct as desired.
- Stop on an E.
- The Release fades the E back out.
All of the effects were performed in the synth (no post-processing) with only two hands — one moving VCA Level and one moving Sustain — plus the sequencer taking the place of a third hand.
Note that although I did the crossfade using the outboard programmer, I think you could accomplish the same thing without it by using the master volume control in place of VCA Level and by preselecting Envelope 2 Sustain in the editor, then using the Edit fader to crossfade against volume.
And adding more gear, you could use an outboard MIDI expression control run into a Midihub, translating the CC messages into SysEx to reprogram the parameters in realtime, which offers the advantage of crossfading using a single hand but the disadvantage of requiring yet more extra gear. You’d also have to figure out the crossfading curves to balance the nonlinear response of a portion of VCA Level against the different nonlinear response of a different portion of Sustain.
None of that is to say it couldn’t be done — the point of this series is to show the relative ease and different methods on different synthesizers, with some having easy ways to do it, some having tricksy ways to do it, and some only being able to get close. For something that otherwise couldn’t be accomplished, I’ll cheerfully take tricksy.