Earlier this year I bought some PA speakers at auction. The auction company was cagey enough to list them all as “untested / condition unknown,” but I suspect they had a pretty good idea of the condition.

I ended up with a Yamaha SW1181VS 18″ 500W subwoofer, a Yamaha Yamaha CW218V dual 18″ 1220W subwoofer, and a spare Eminence JAY7010/7011 18″ driver. All four of the Eminence drivers were nonfunctional — some dead shorts, some open. This was a bit disappointing.
My four drivers all look the same, but are labeled JAY7010, J7010, and J7011. From what I can tell, Eminence OEMed these drivers for Yamaha and they don’t seem to be available for direct sale. I found a speakerplans.com forum post with specs sent by Yamaha listing the drivers as 600W. I also found a Google listing summarizing an expired eBay auction claiming that these are the same as the Eminence Sigma Pro, which is a 650W driver widely available at around $160.
For the prices I paid for the Yamaha speakers, new drivers at $160 each would go a long ways toward the cost of entire new speakers — the CW218V (dual) is available from Musician’s Friend for a little over $700 with free shipping.
I had never before heard of reconing drivers, but quickly ran across it in my Google searches for J(AY)7010/11s. The idea is that the basket and permanent magnet are still good, that a new voice coil and cone cost less than the whole thing, and that you can replace them yourself at home with a little time and care. Eminence offers recone kits for all their consumer drivers, but recone kits for custom and OEM drivers are available only to the OEM customer.
Although soundspeakerrepair.com has a great instructional video on the reconing process, I ended up getting my kit from reconekits.com for $69.23 + $13.95 USPS Priority Mail flat rate. Over the holiday break, I took the time to install the kit, and the results have been fantastic.
The Kit
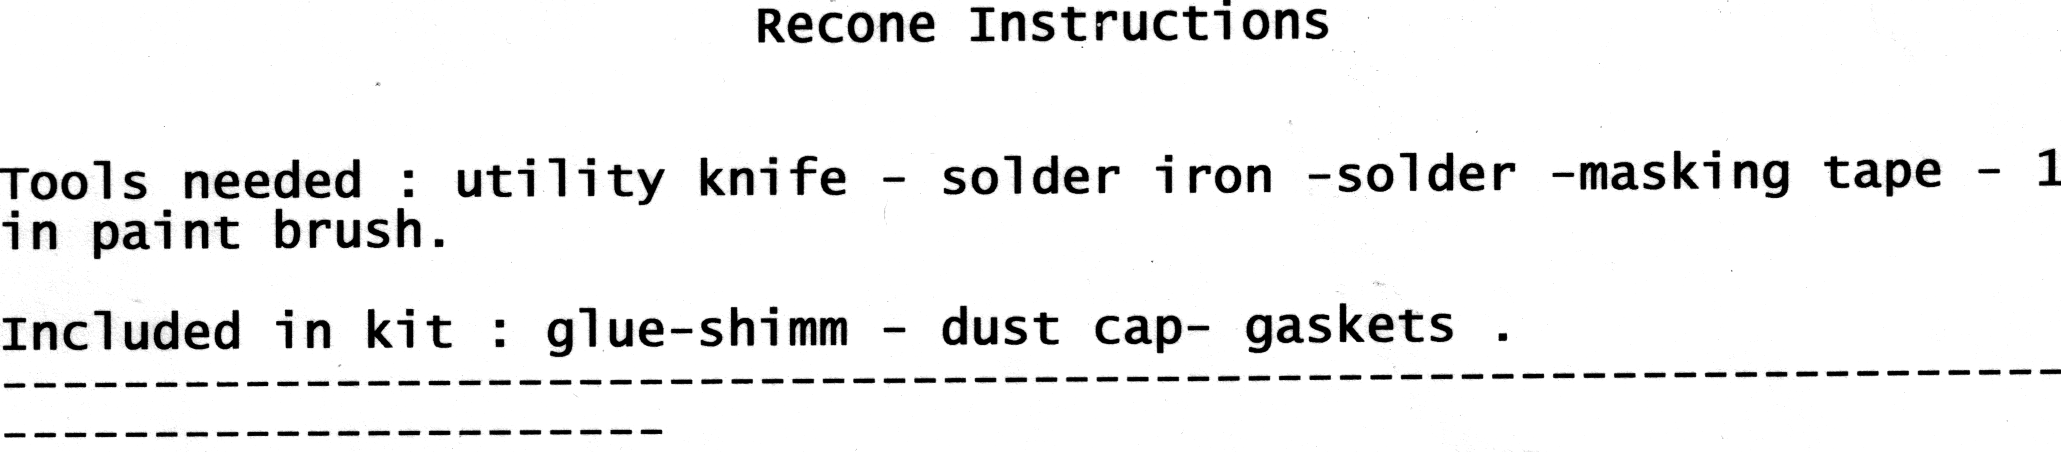
The shipping box was cleverly designed with a tube glued to the center and the new coil/cone assembly slid over it with rubber bands to keep it from rattling around.
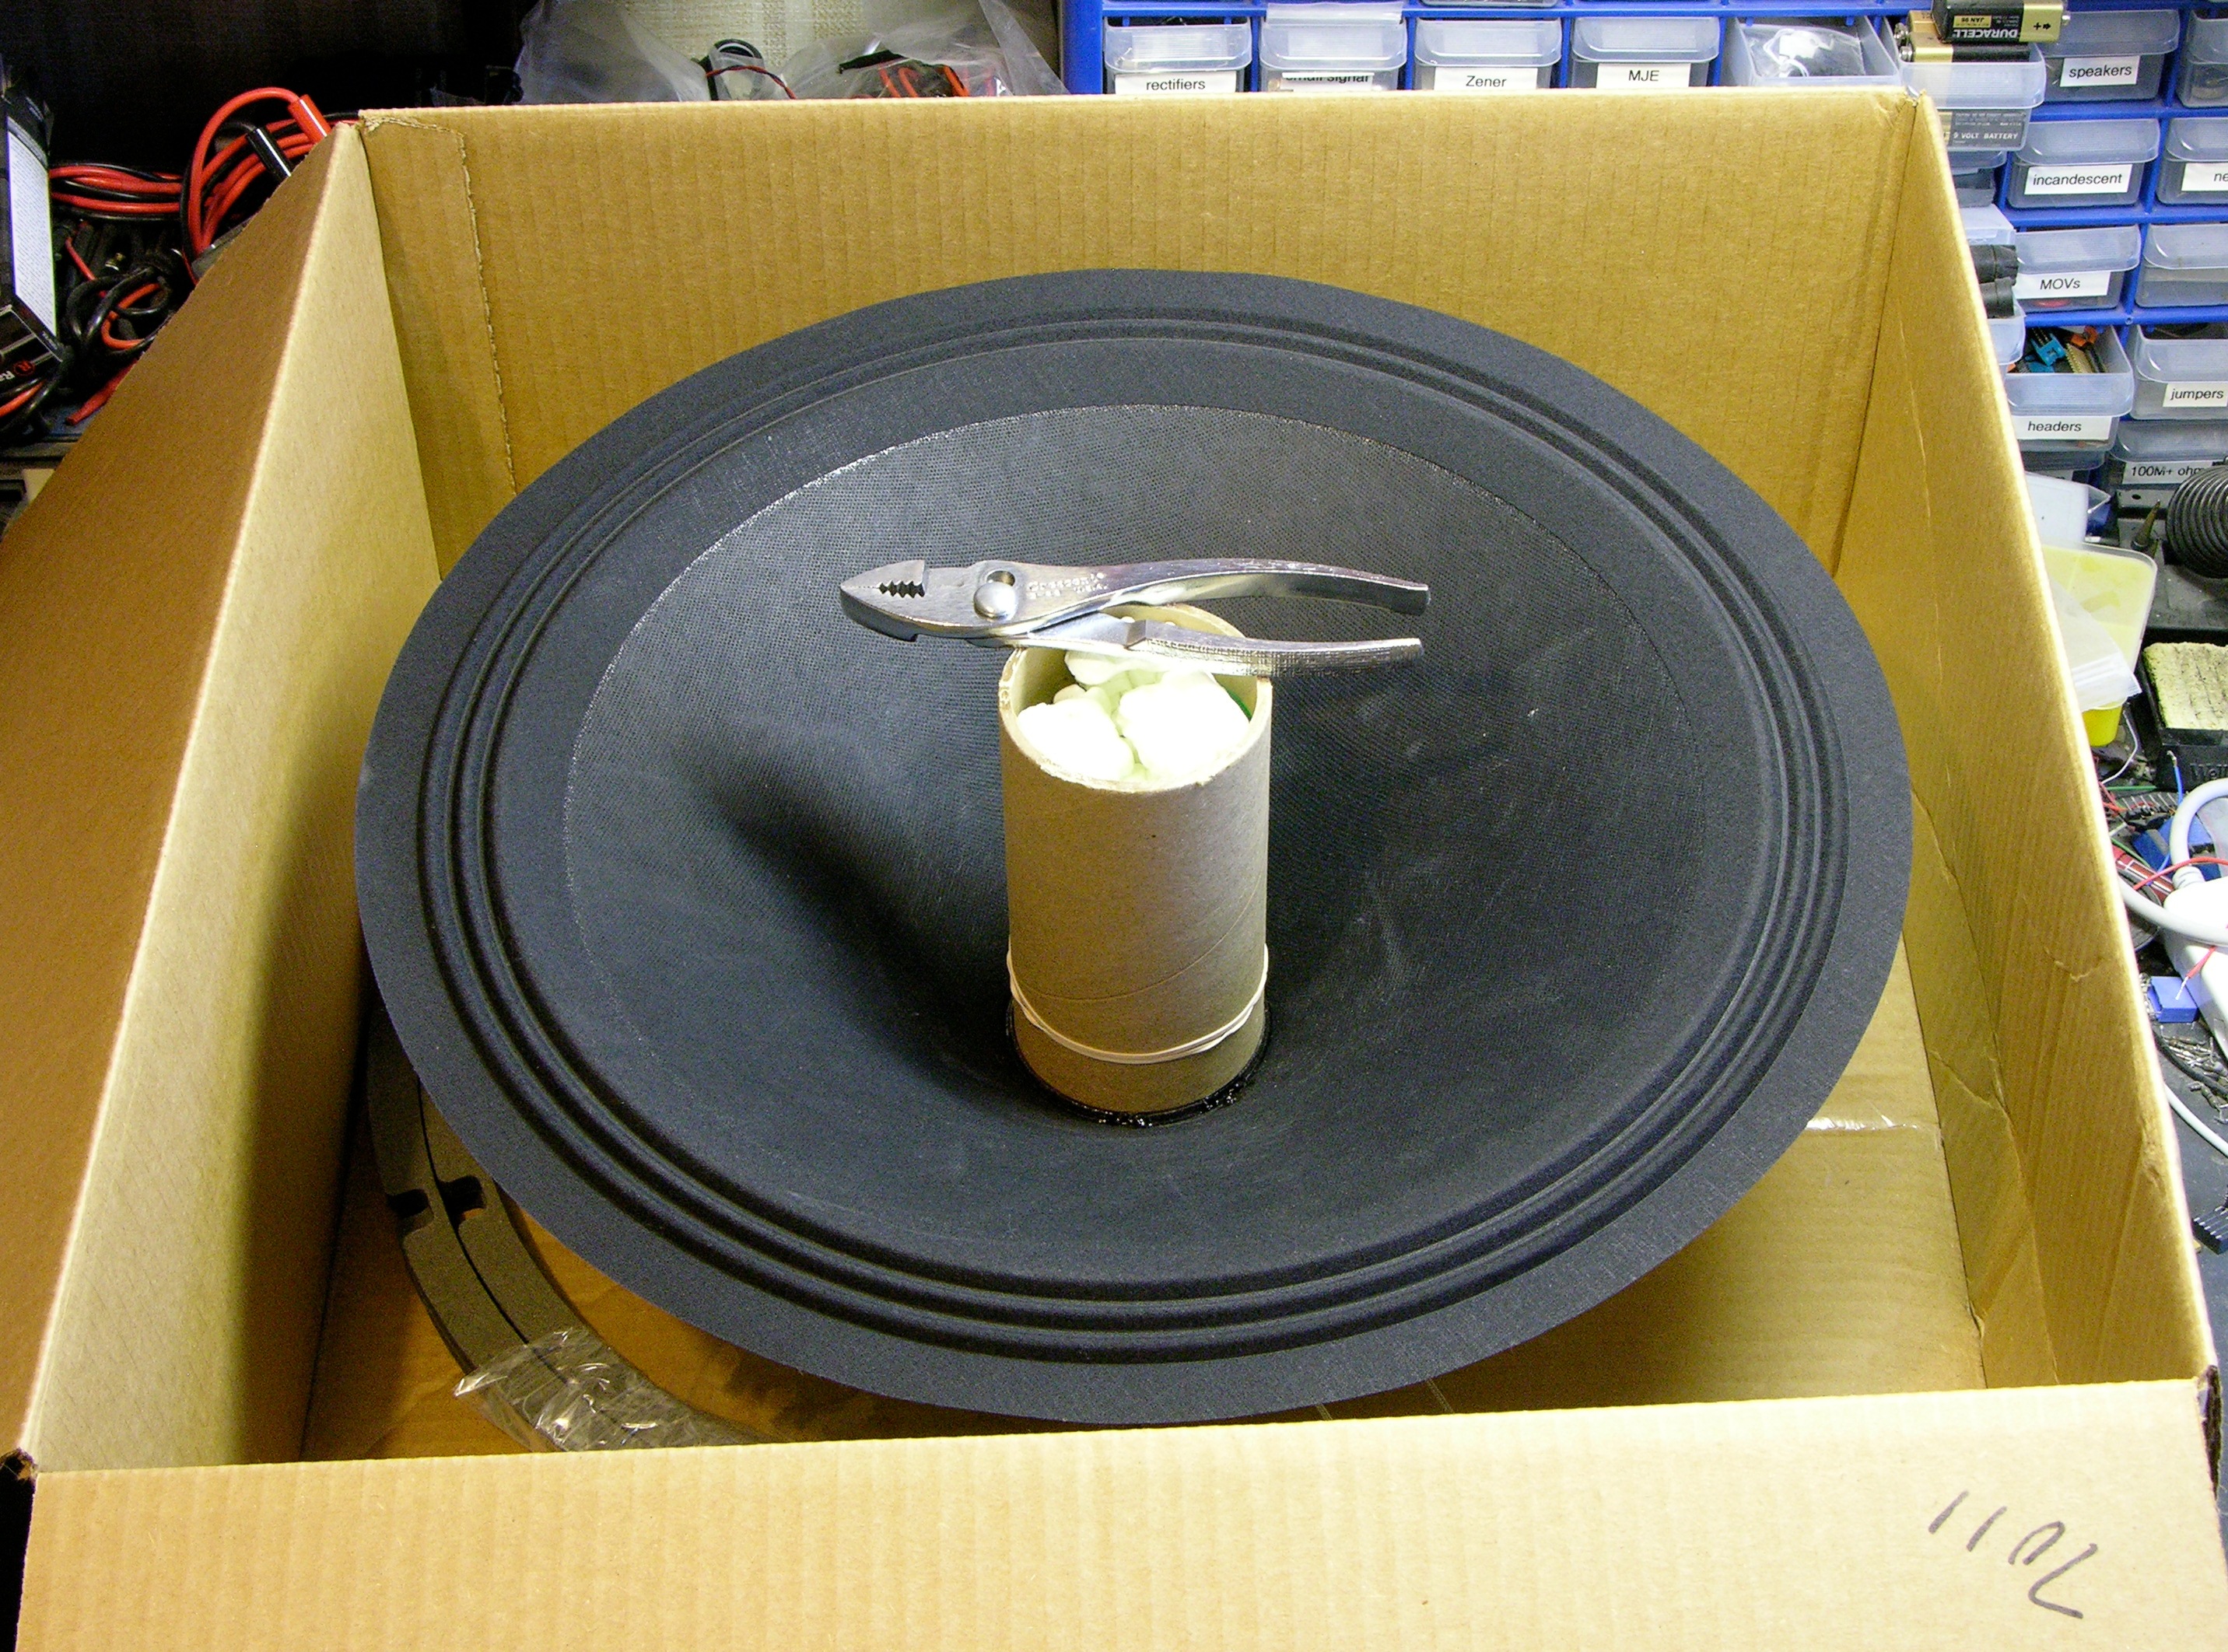
The kit comprised the new cone / voice coil assembly, a new dust cap, a shim to center the voice coil during installation, black glue for attaching the new cone and gaskets, white glue to apply to the cone for damping, and new gaskets.
Demolition

The first step of the process was heartbreaking: Take a knife and cut through the perfectly good cone to remove it and the bad voice coil from the basket. I had to take some deep breaths before starting, but I made it through without passing out.
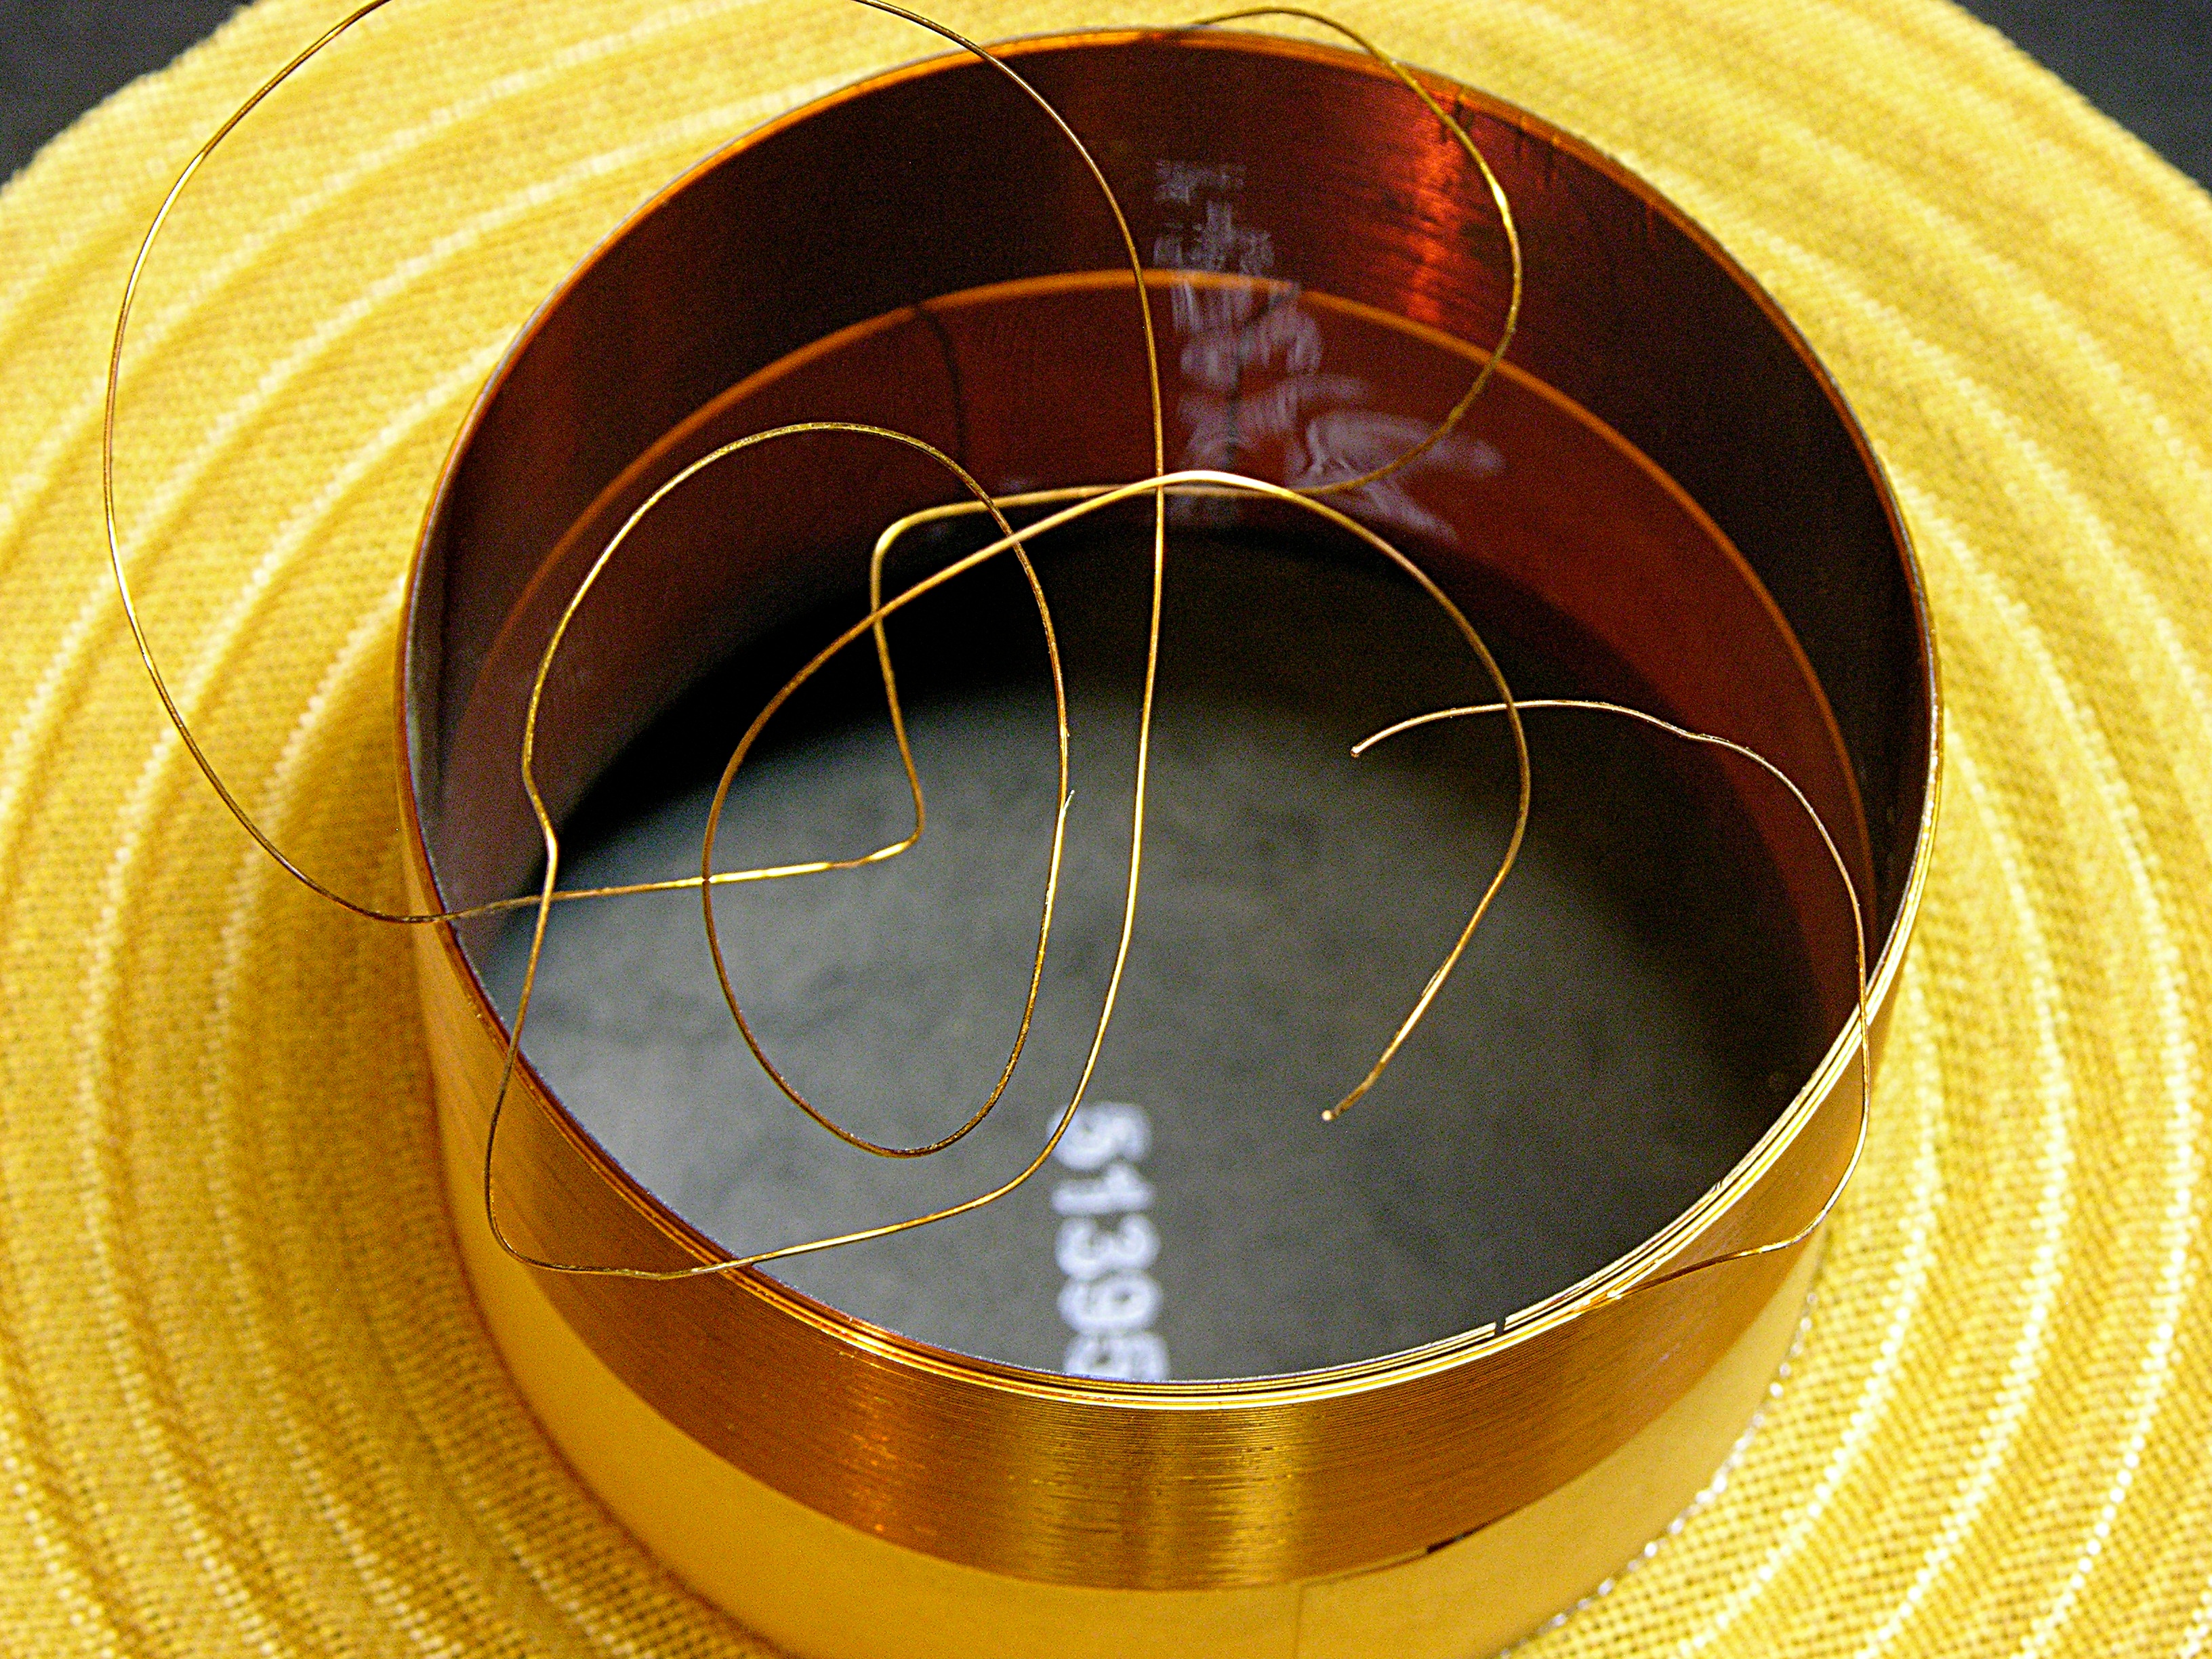
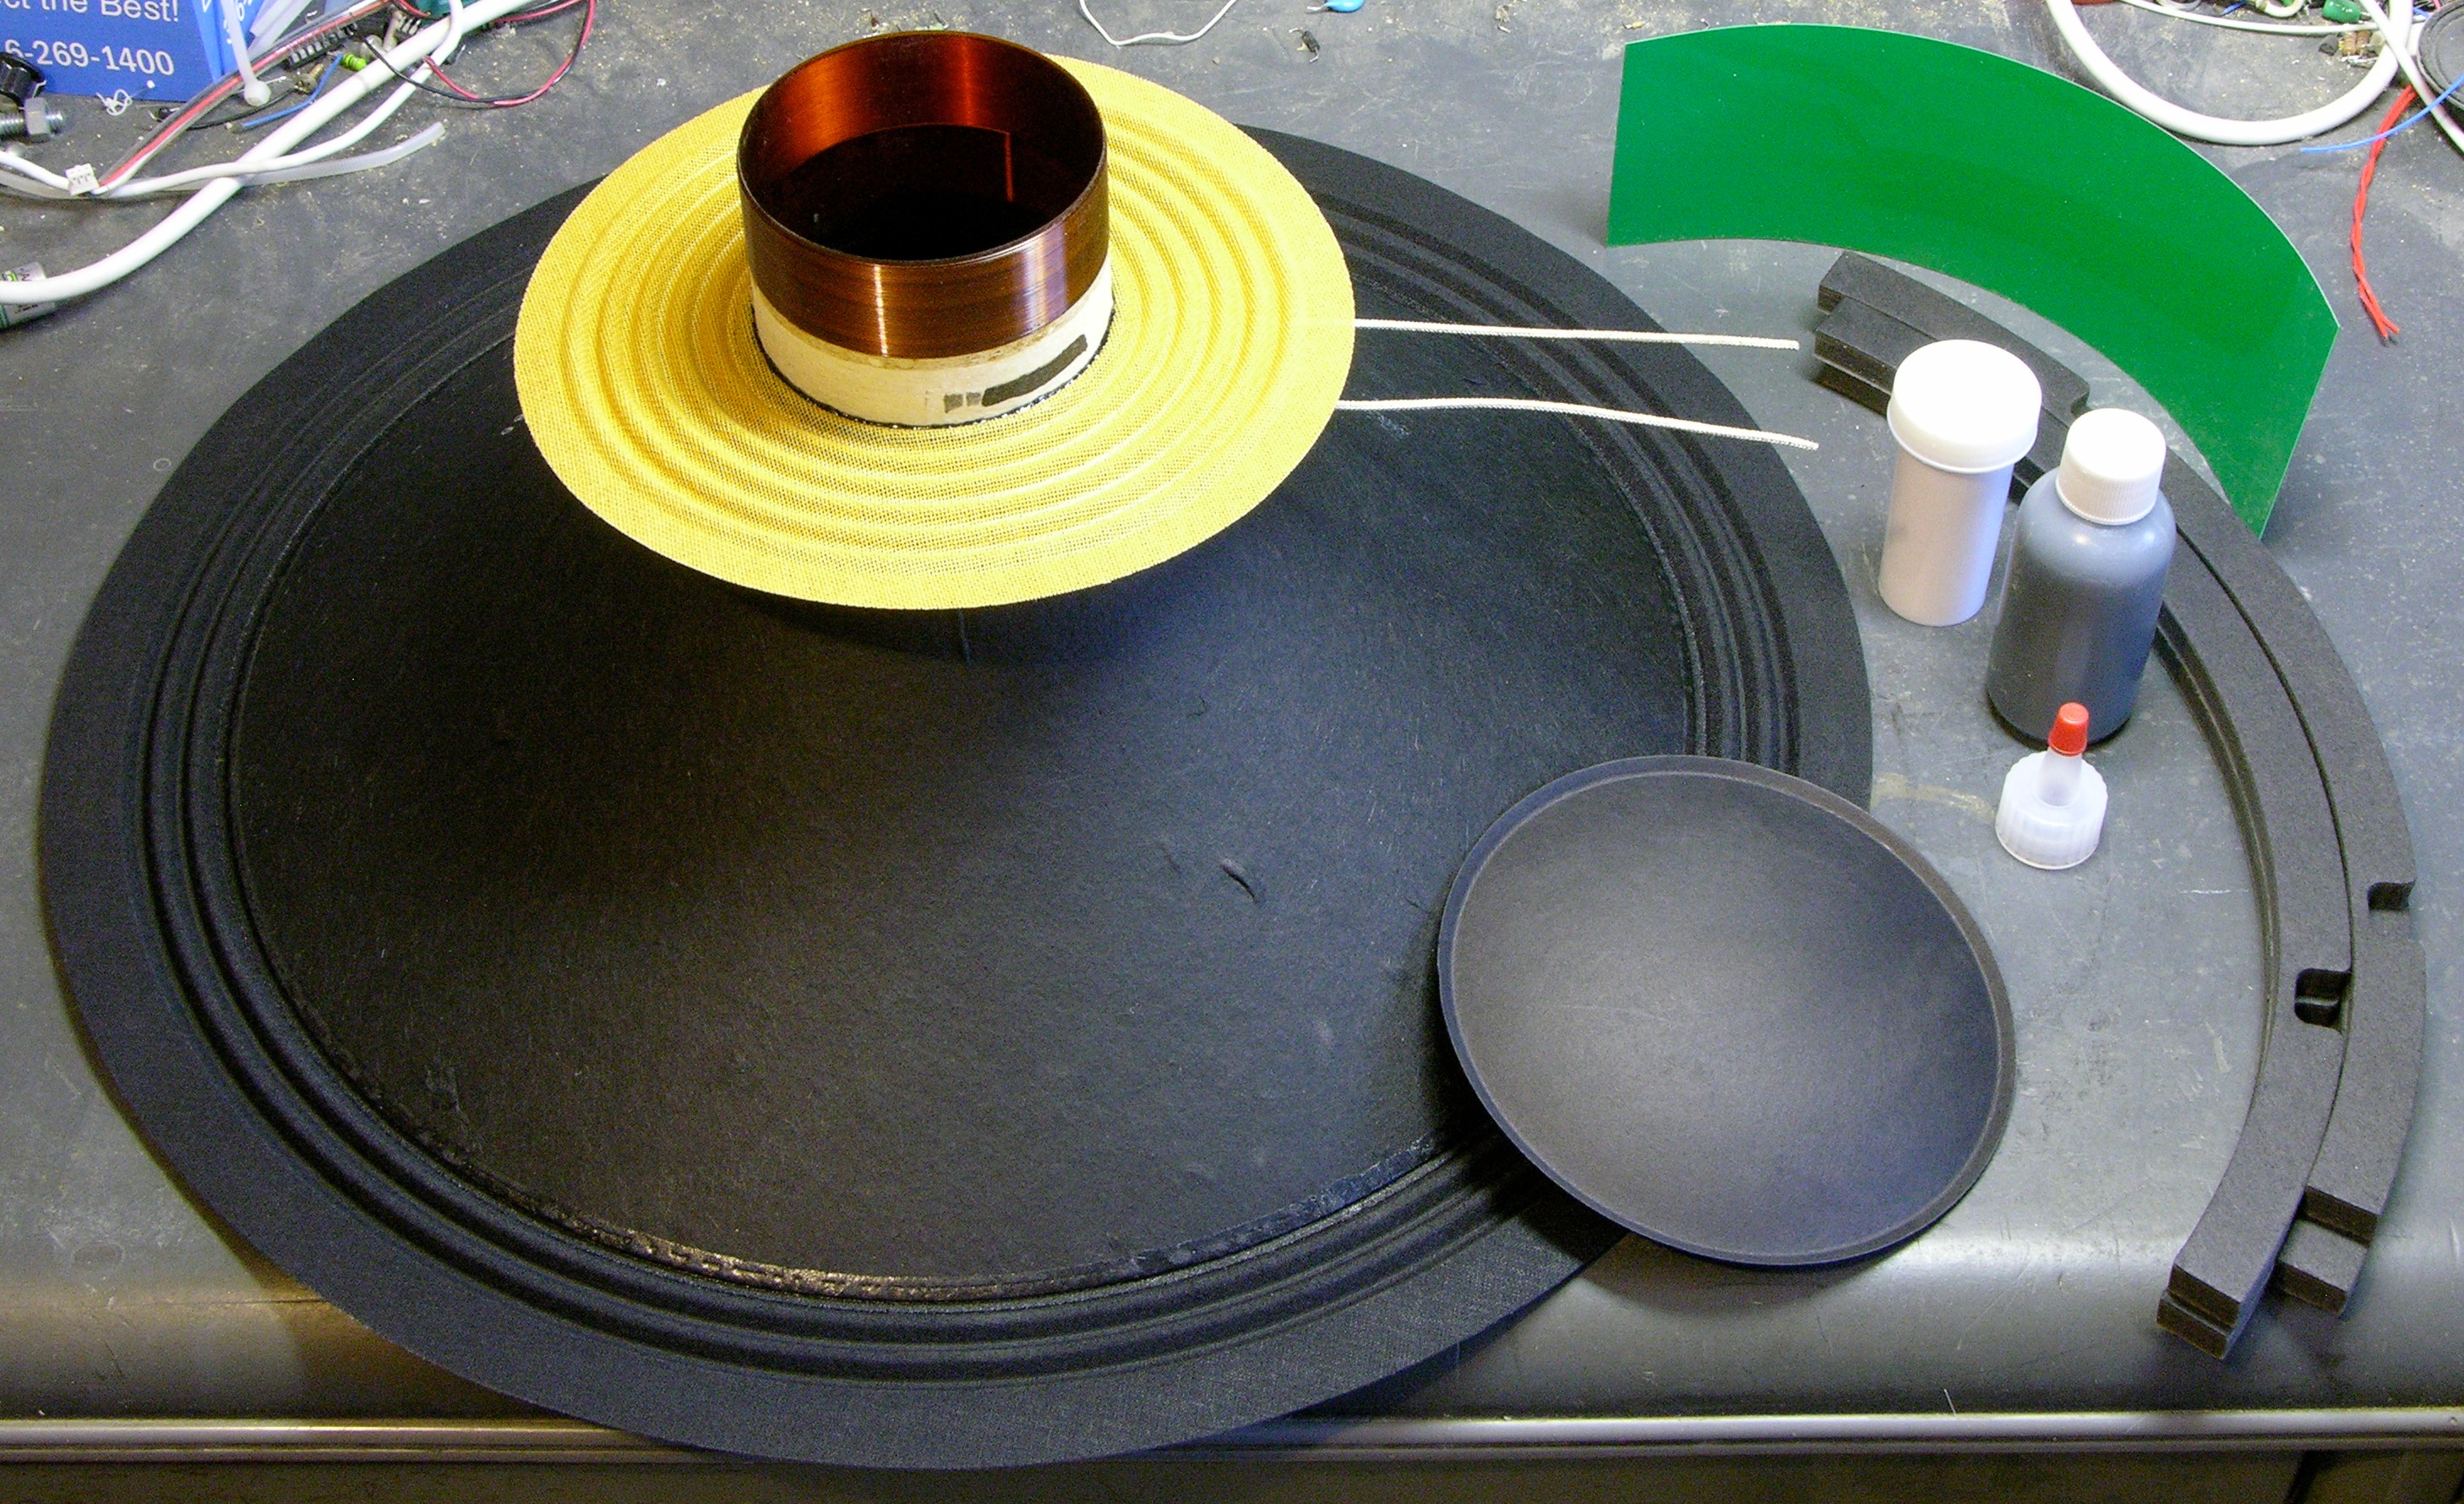
The voice coil looked exactly like this when I removed it from the voice coil gap. Obviously it had overheated and melted the coil wire, but why was it all gnarly like this? Maybe it welded itself lightly to the basket and decoiled when I pulled it out of the gap.
This was the entire problem with the driver when I got it. Had there been some way I could nondestructively get to the voice coil, I could have soldered it back together and had the all-original driver fixed and usable. Of course, my solder would be (much) more prone to melting than the copper wire, it’d create a bulge in the coil that might rub, and there are all kinds of other reasons not to do it. I’m just sayin’.

To my surprise, the leads weren’t soldered, just crimped for electrical contact and hot-glued through the terminal holes to prevent movement. I decrimped and removed the stubs I had clipped off when removing the cone.

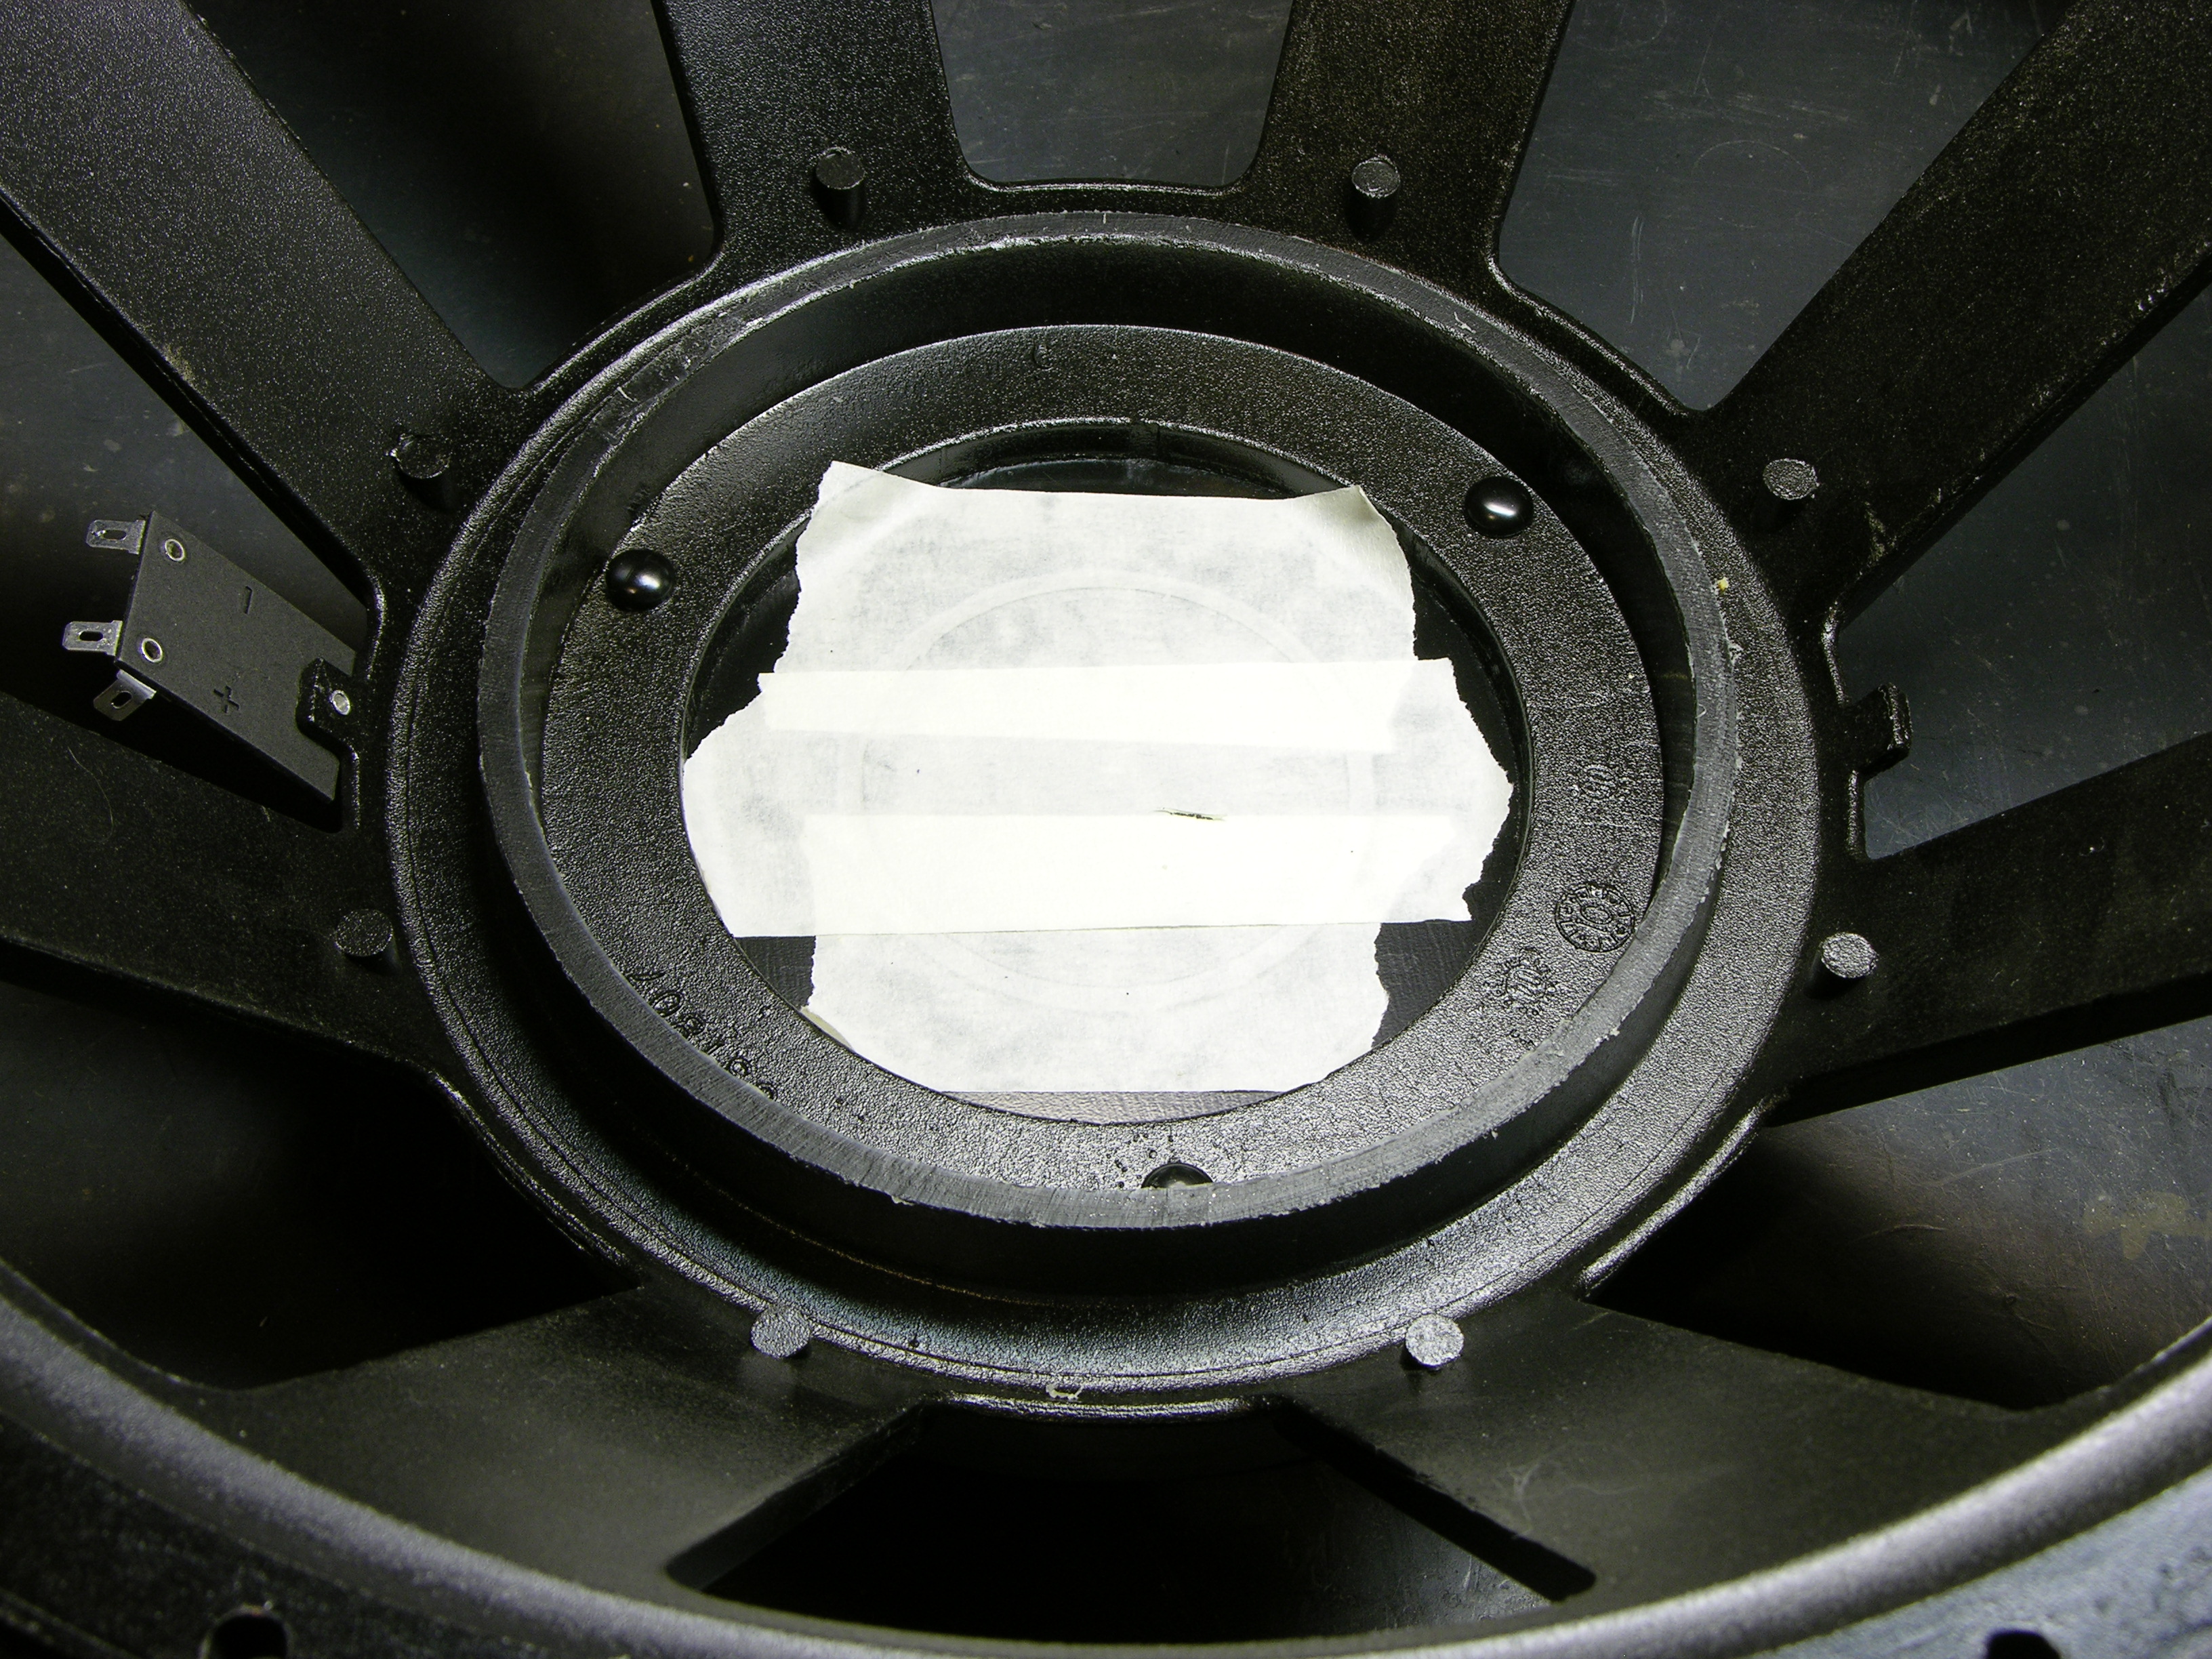
I put masking tape over the voice coil gap so gunk wouldn’t get in while I was working on the speaker. I actually cleaned it later, before reassembly.

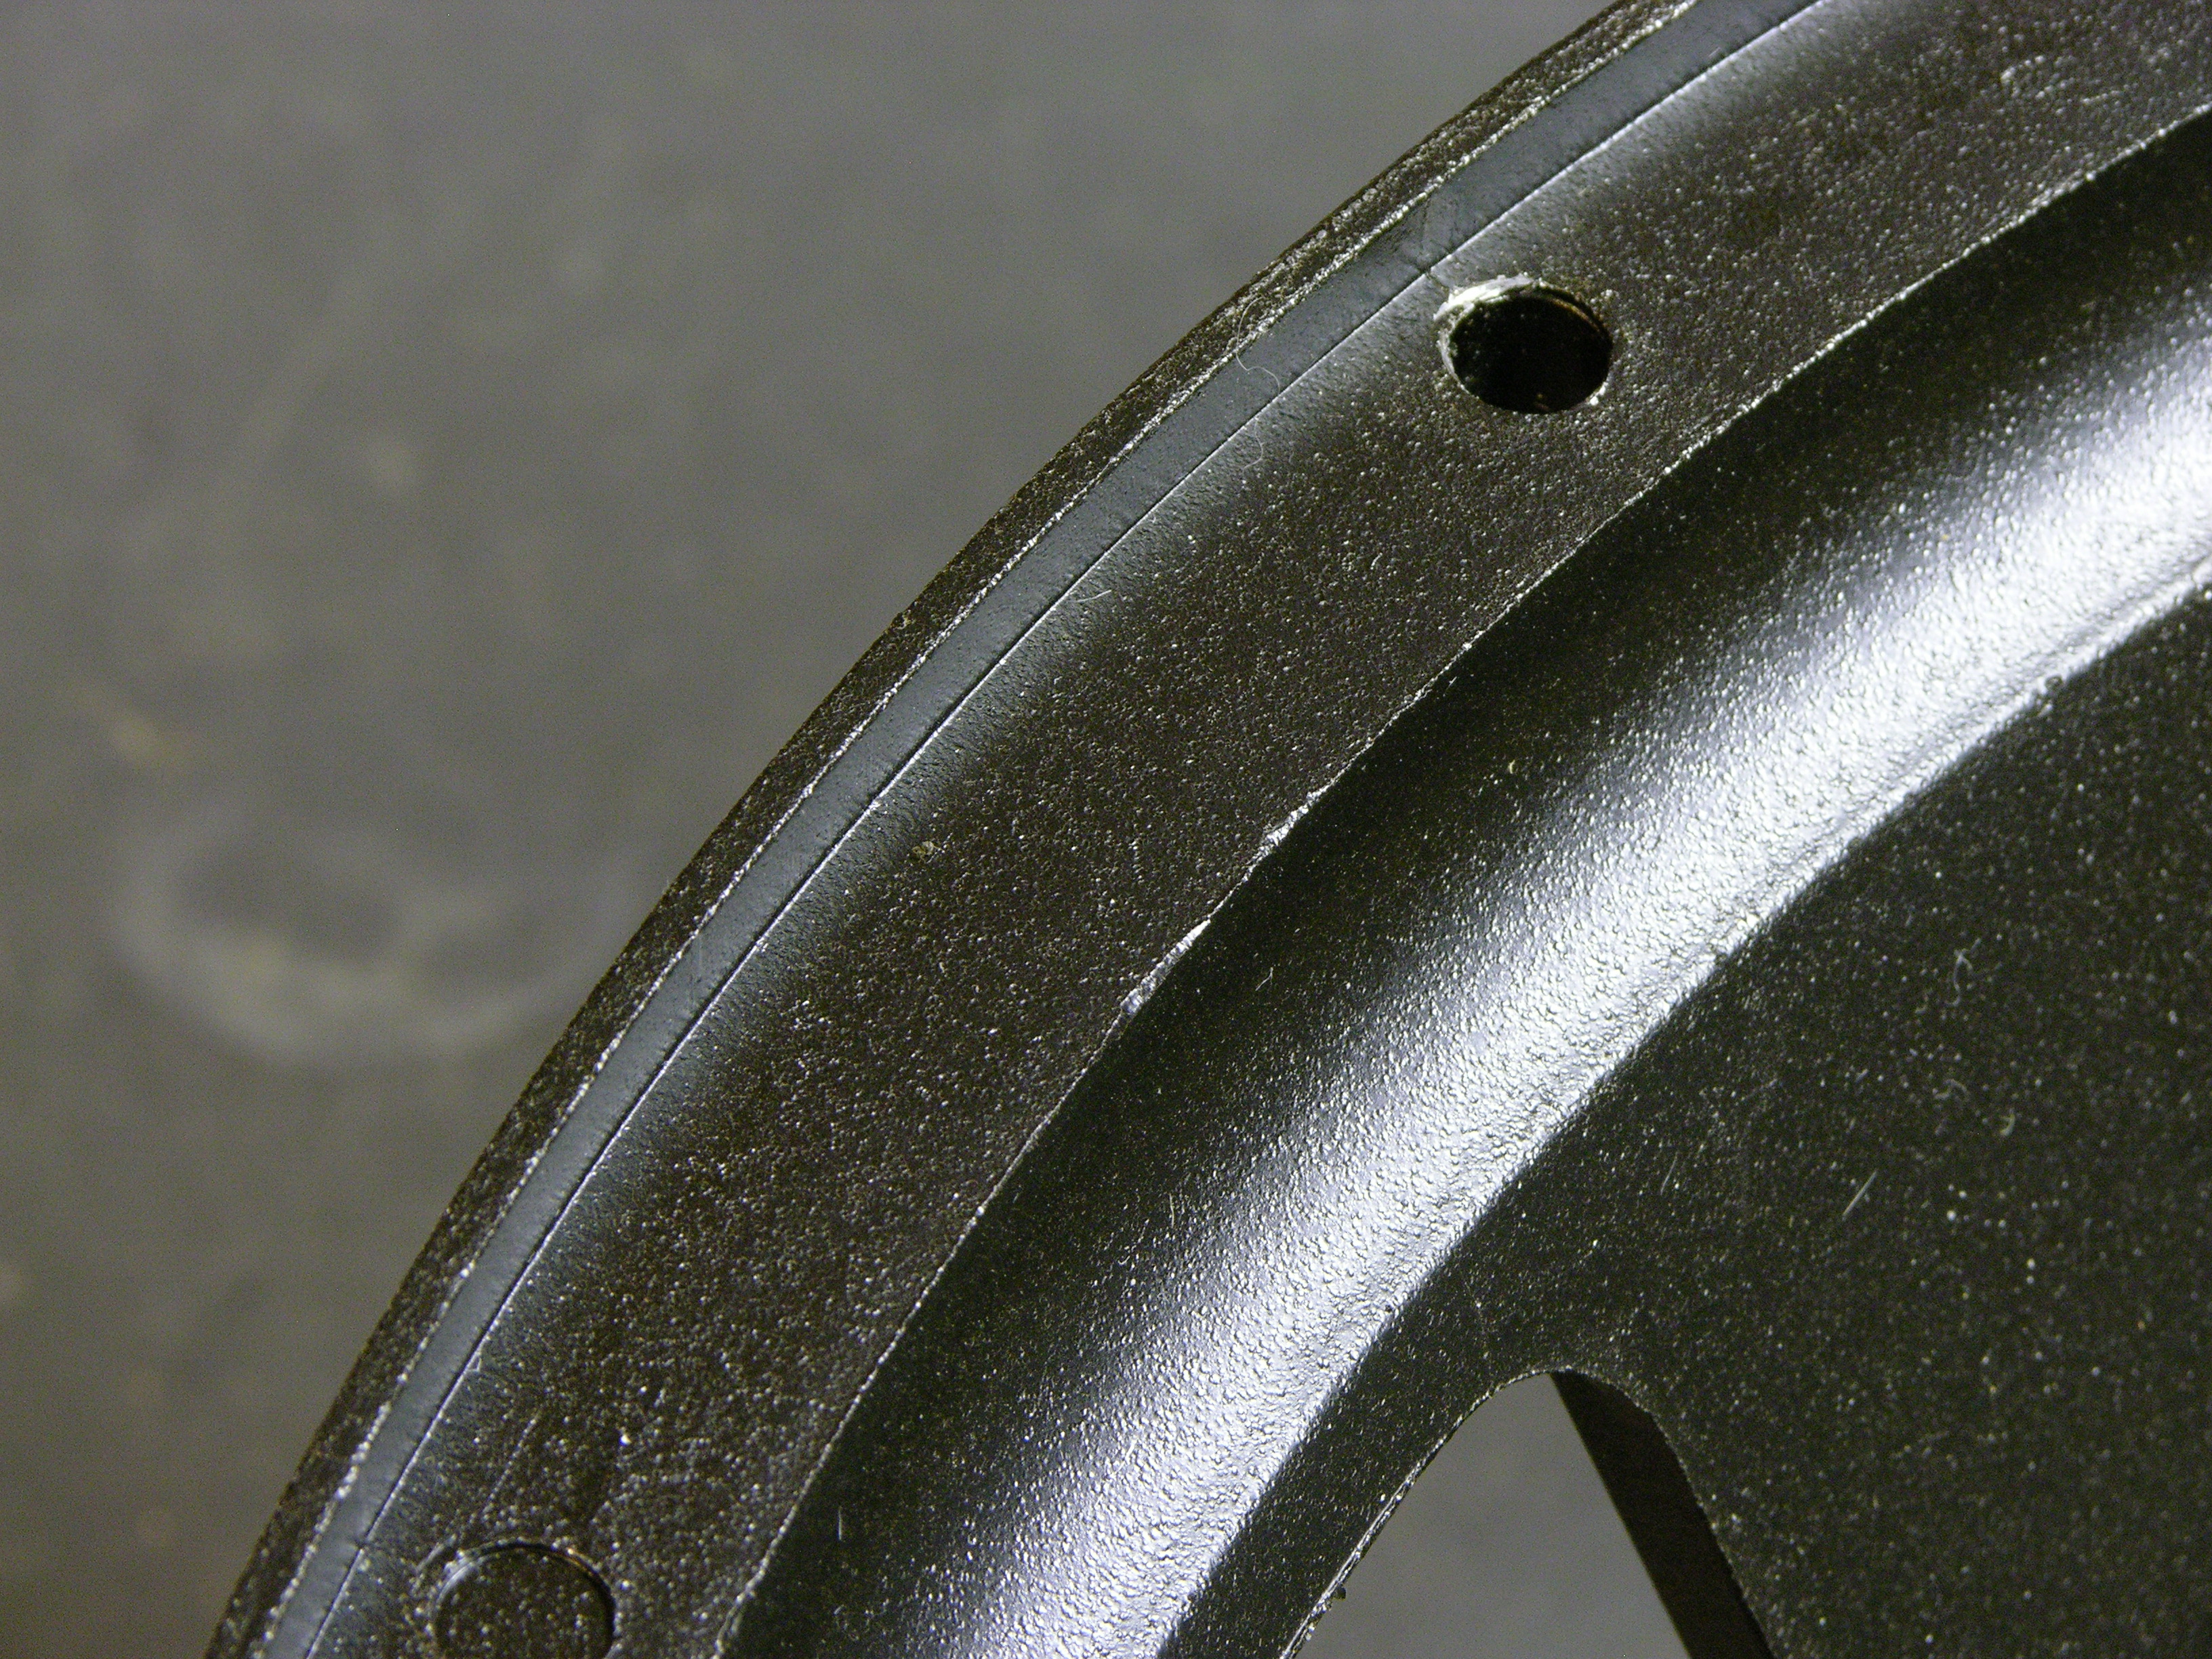
I used my $3 chisel to “shave” most of the old paper gasket off of the edge of the basket and tried using it to shave the remaining gasket, cloth cone surround, and old glue off the metal. What ended up working the best was softening the glue with the heat gun and “rolling” the cloth about half an inch at a time with a needlenose. Although it sounds tedious, it really wasn’t bad, especially once I admitted to myself that it went a lot faster when I alternated even more frequently between heat and pulling.
The basket edge ended up very clean. It was late Christmas Eve and I took a break so I’d be smart again when I started putting things back together.
Reassembly
Because I hadn’t cleaned the voice coil gap during disassembly, I did so now before starting reassembly. I folded a loop of masking tape around a business card (sticky side out), “destickied” it a few times on my jeans so it wouldn’t just stick itself to the metal, and ran it around through the voice coil gap. It came out with a small amount of brown dust on it, which may have been the varnish / lacquer / whatever from the old voice coil. Good to get that stuff out now so it doesn’t rattle and scrape against the new voice coil.
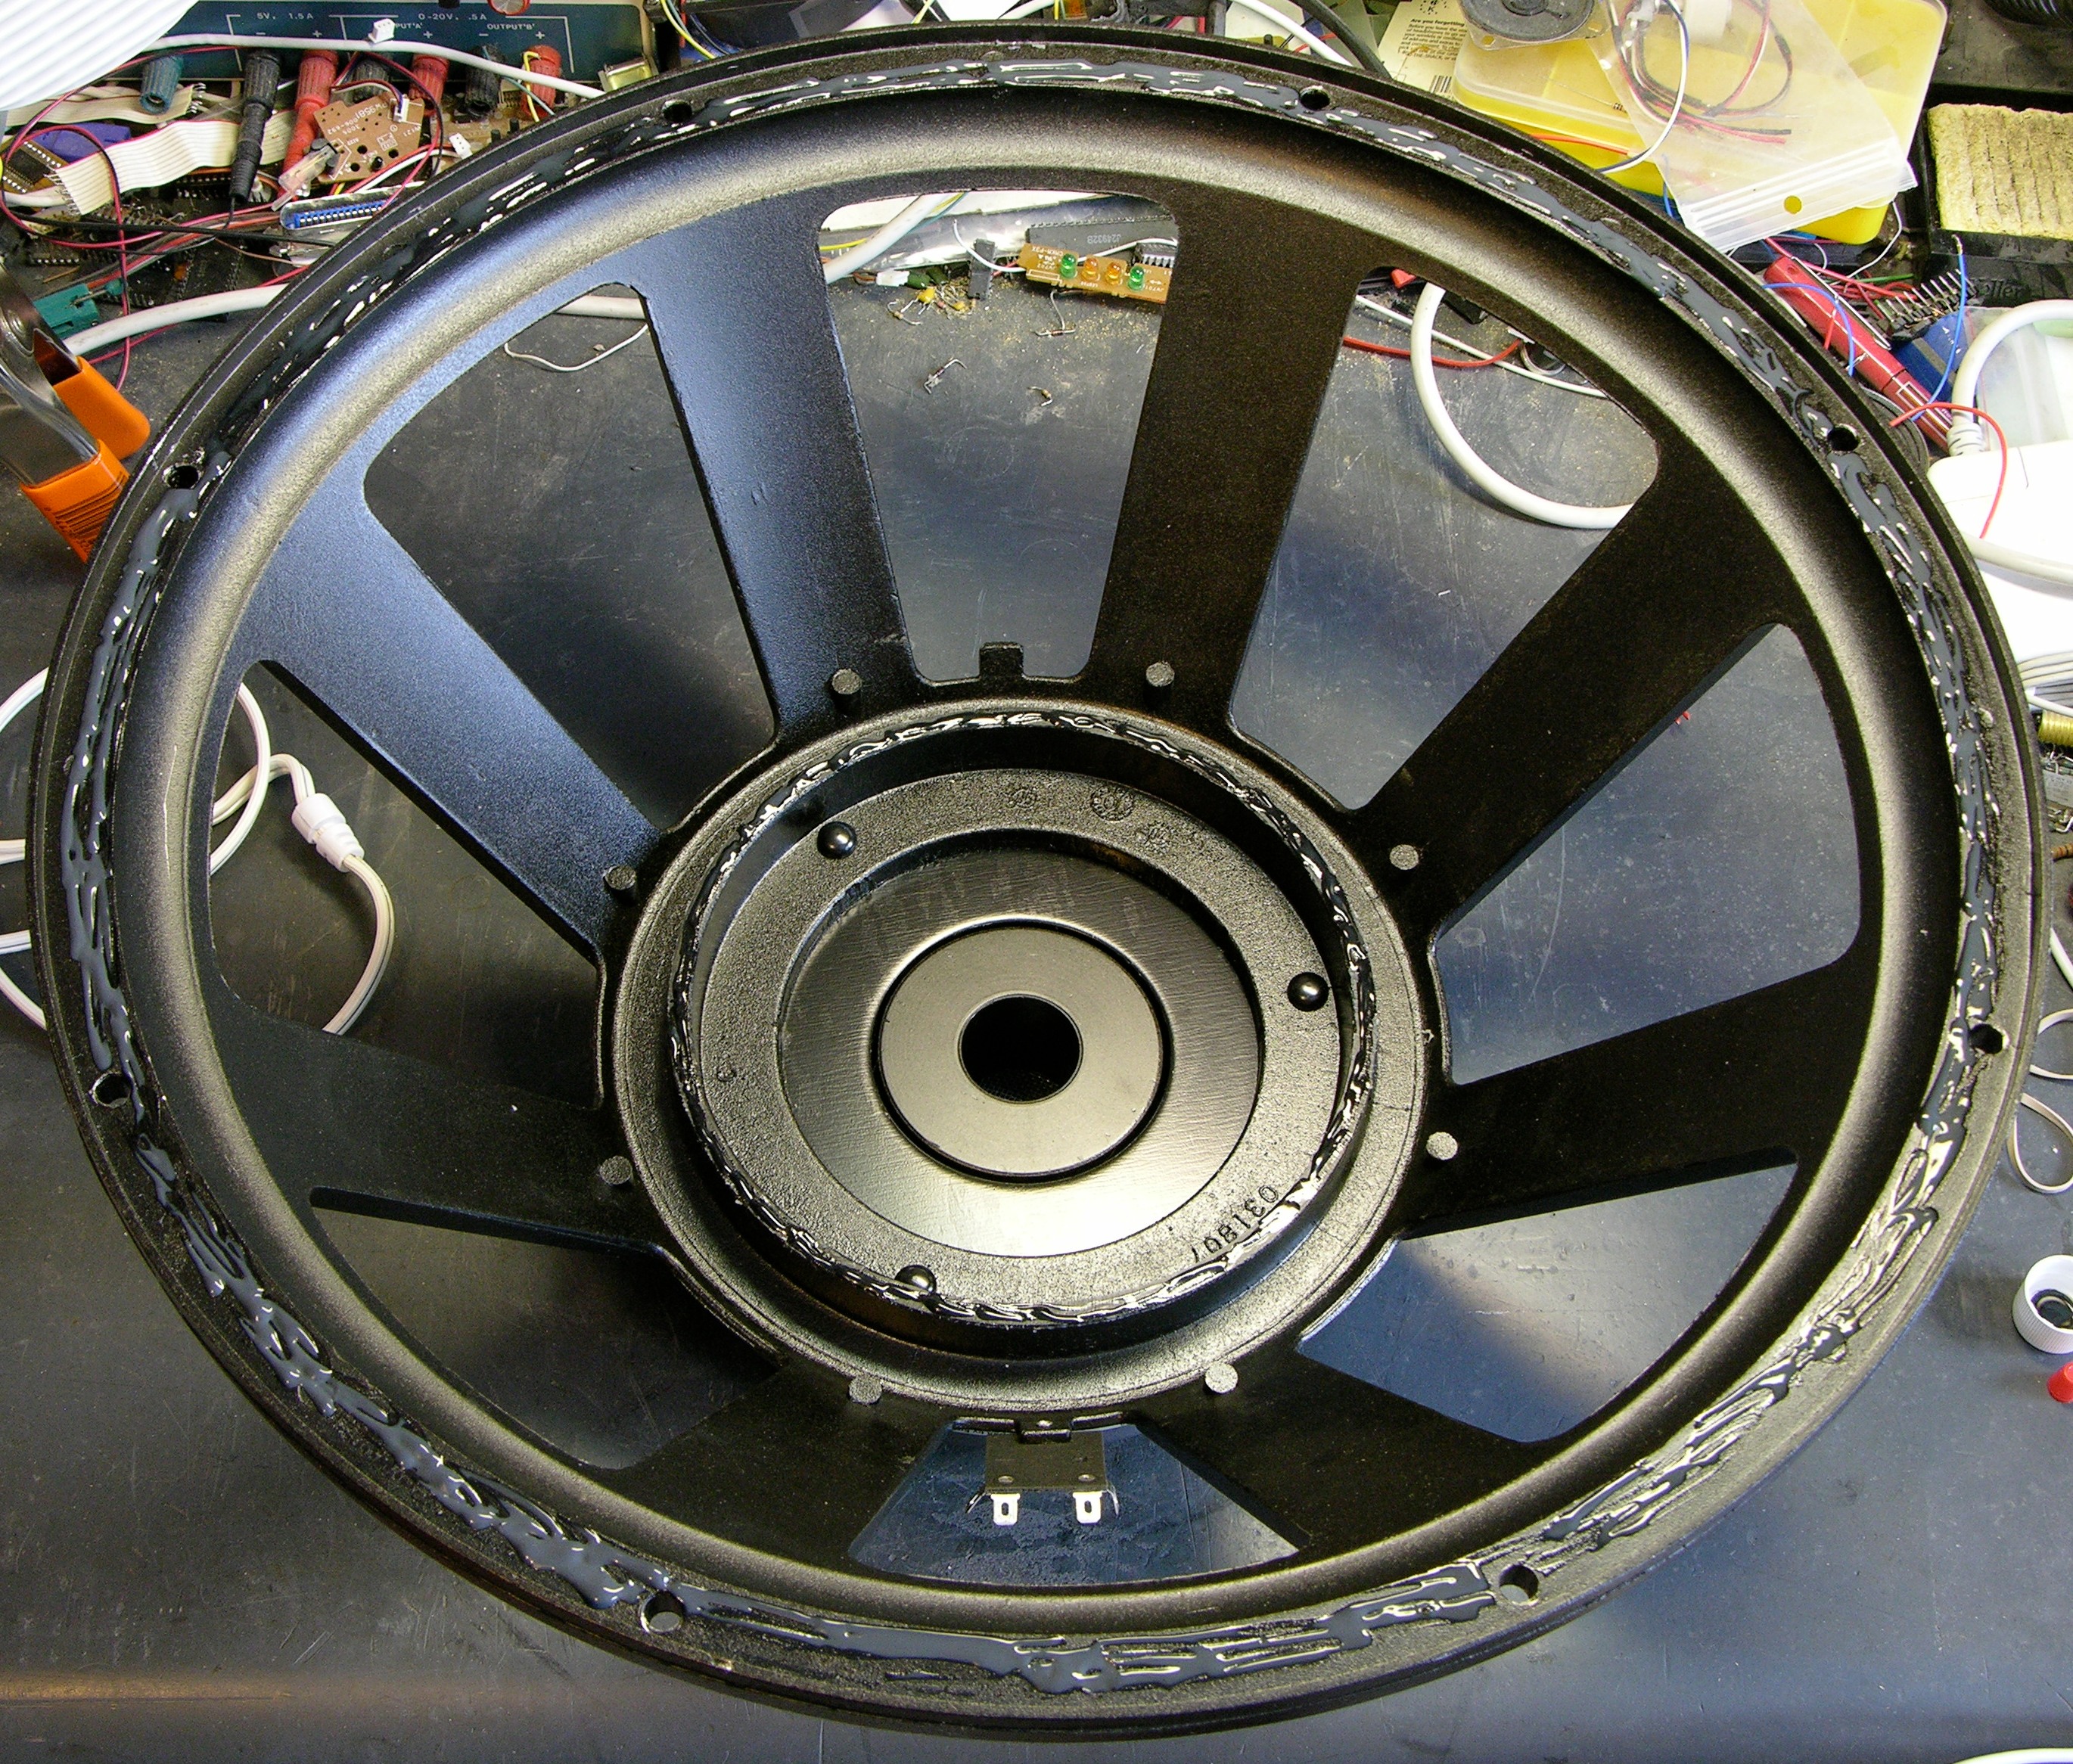
I used my workbench hairdryer to warm up the basket before applying the glue — I figured it couldn’t hurt. The glue looked graphite-grey in the jar and immediately after being applied, but quickly turned black with time and/or heat.
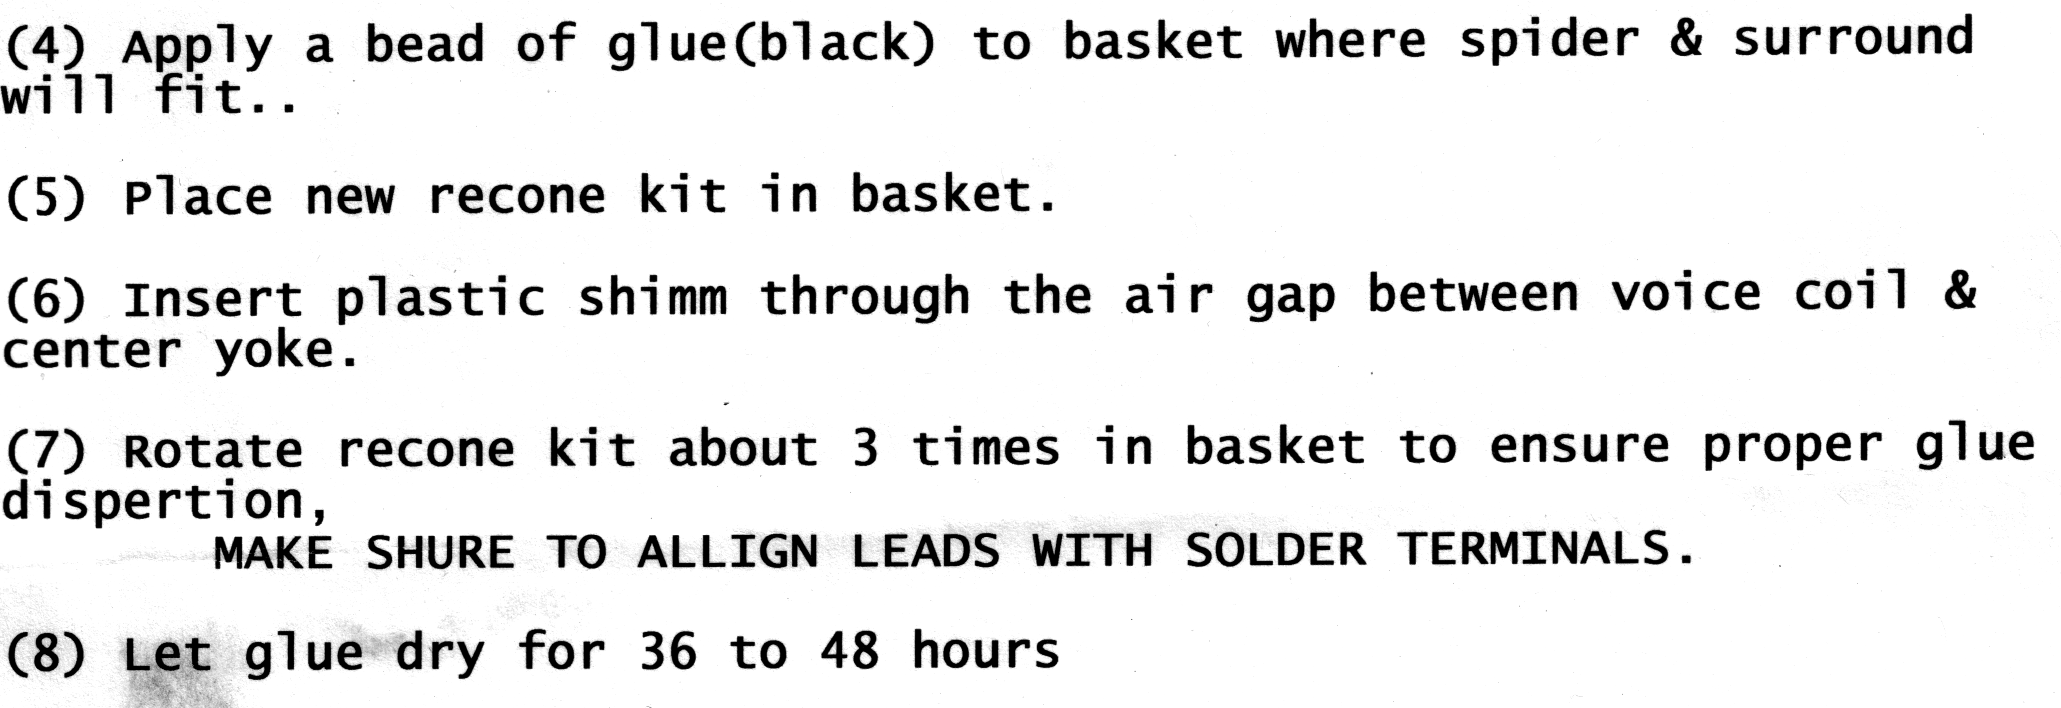
I applied a fairly generous bead around the basket surround and the center ridge where the “spider” glues down. I figured I could always clean up squeeze-out but I couldn’t easily add more glue if I left too dry a joint.
I removed the tape covering the voice coil gap, took the picture, slid the new voice coil into the voice coil gap, pressed the new cone surround and the new spider into their glue beads, rotated the new cone to distribute the glue evenly, rotated it back to get the leads aligned with the terminals, slid the voice coil shim into place to hold the coil centered within the gap while the glue dried, and pressed the surround and spider back down into their glue beads again.
I came back to check in a few minutes and the cone and spider had lifted a bit in a few places, so I pressed them back down. I found no further lifting on subsequent checks.
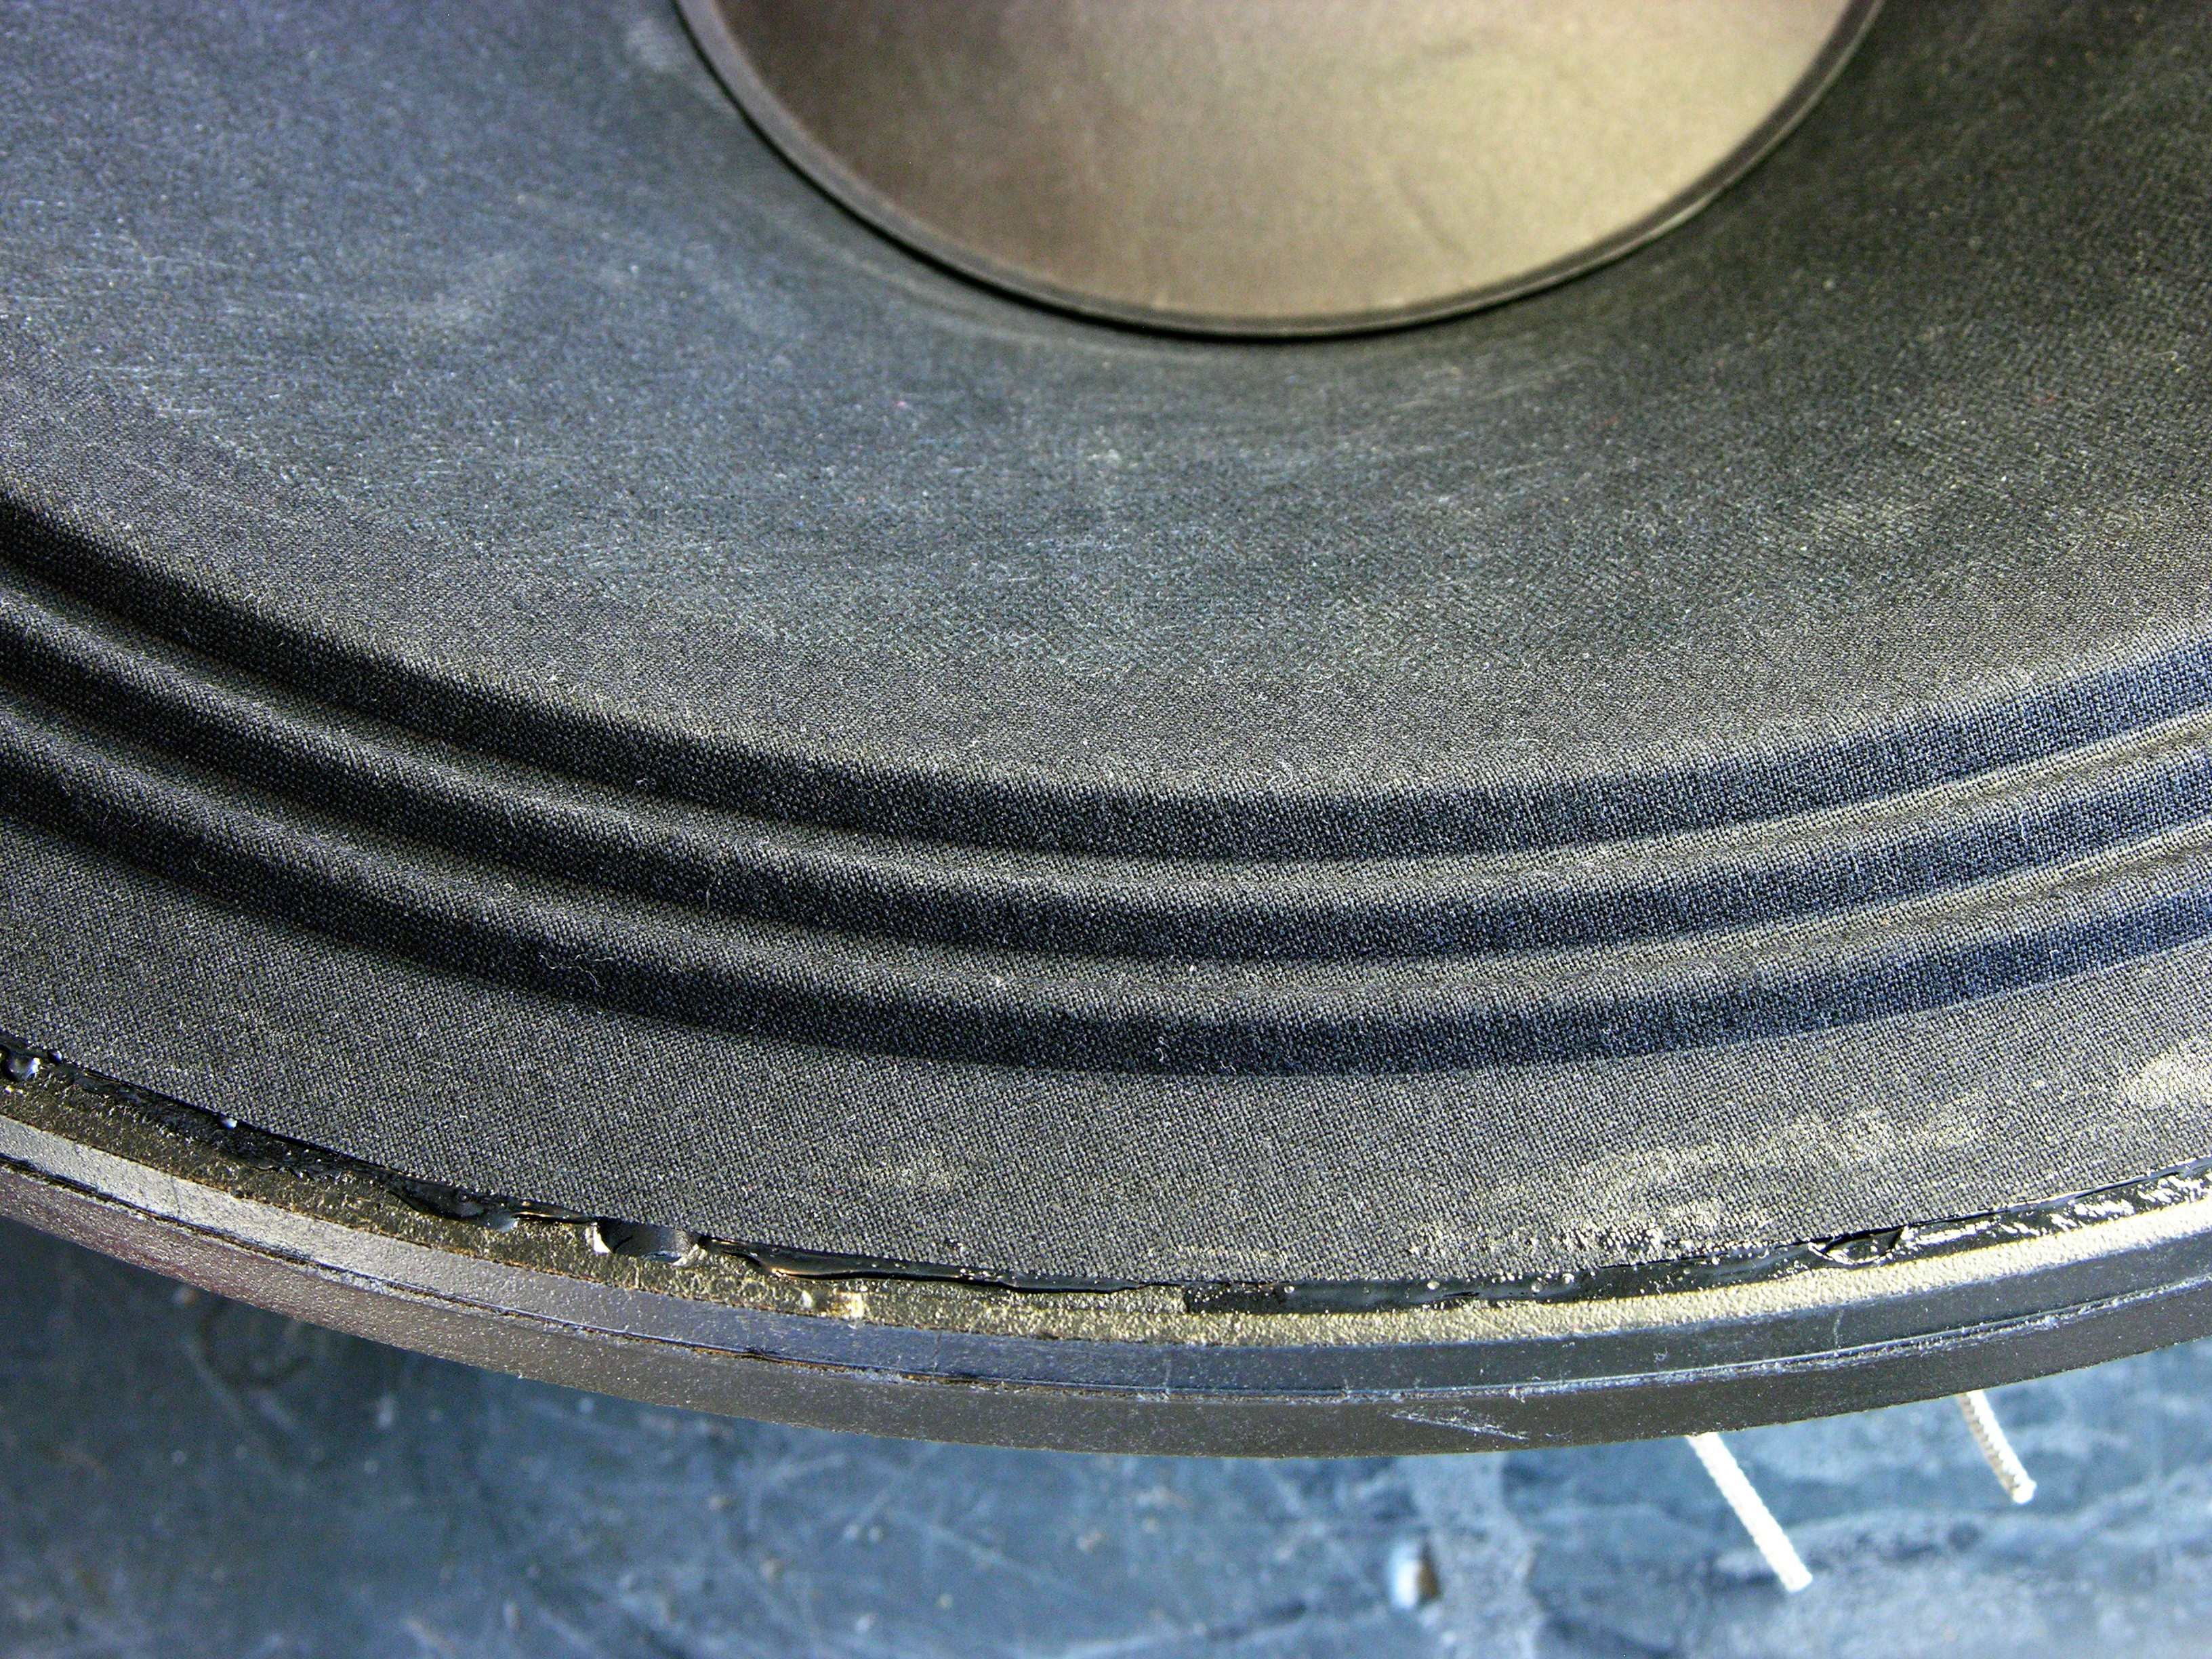
The amount of glue turns out to have been a pretty good guess — I got just a little squeeze-out all around, which from my woodworking experience indicates a joint that’s not starved but which didn’t waste a lot of glue.
I left it alone and let the glue dry for a few days.

I took Monday off of work and (among other things) glued in the new dust cap.
I removed the voice coil shim, dropped the dust cap into the cone, and measured the distance from the dust cap to the cone edge in different places to get the dust cap centered as well as I could. I don’t think it mattered that much, but you know me.
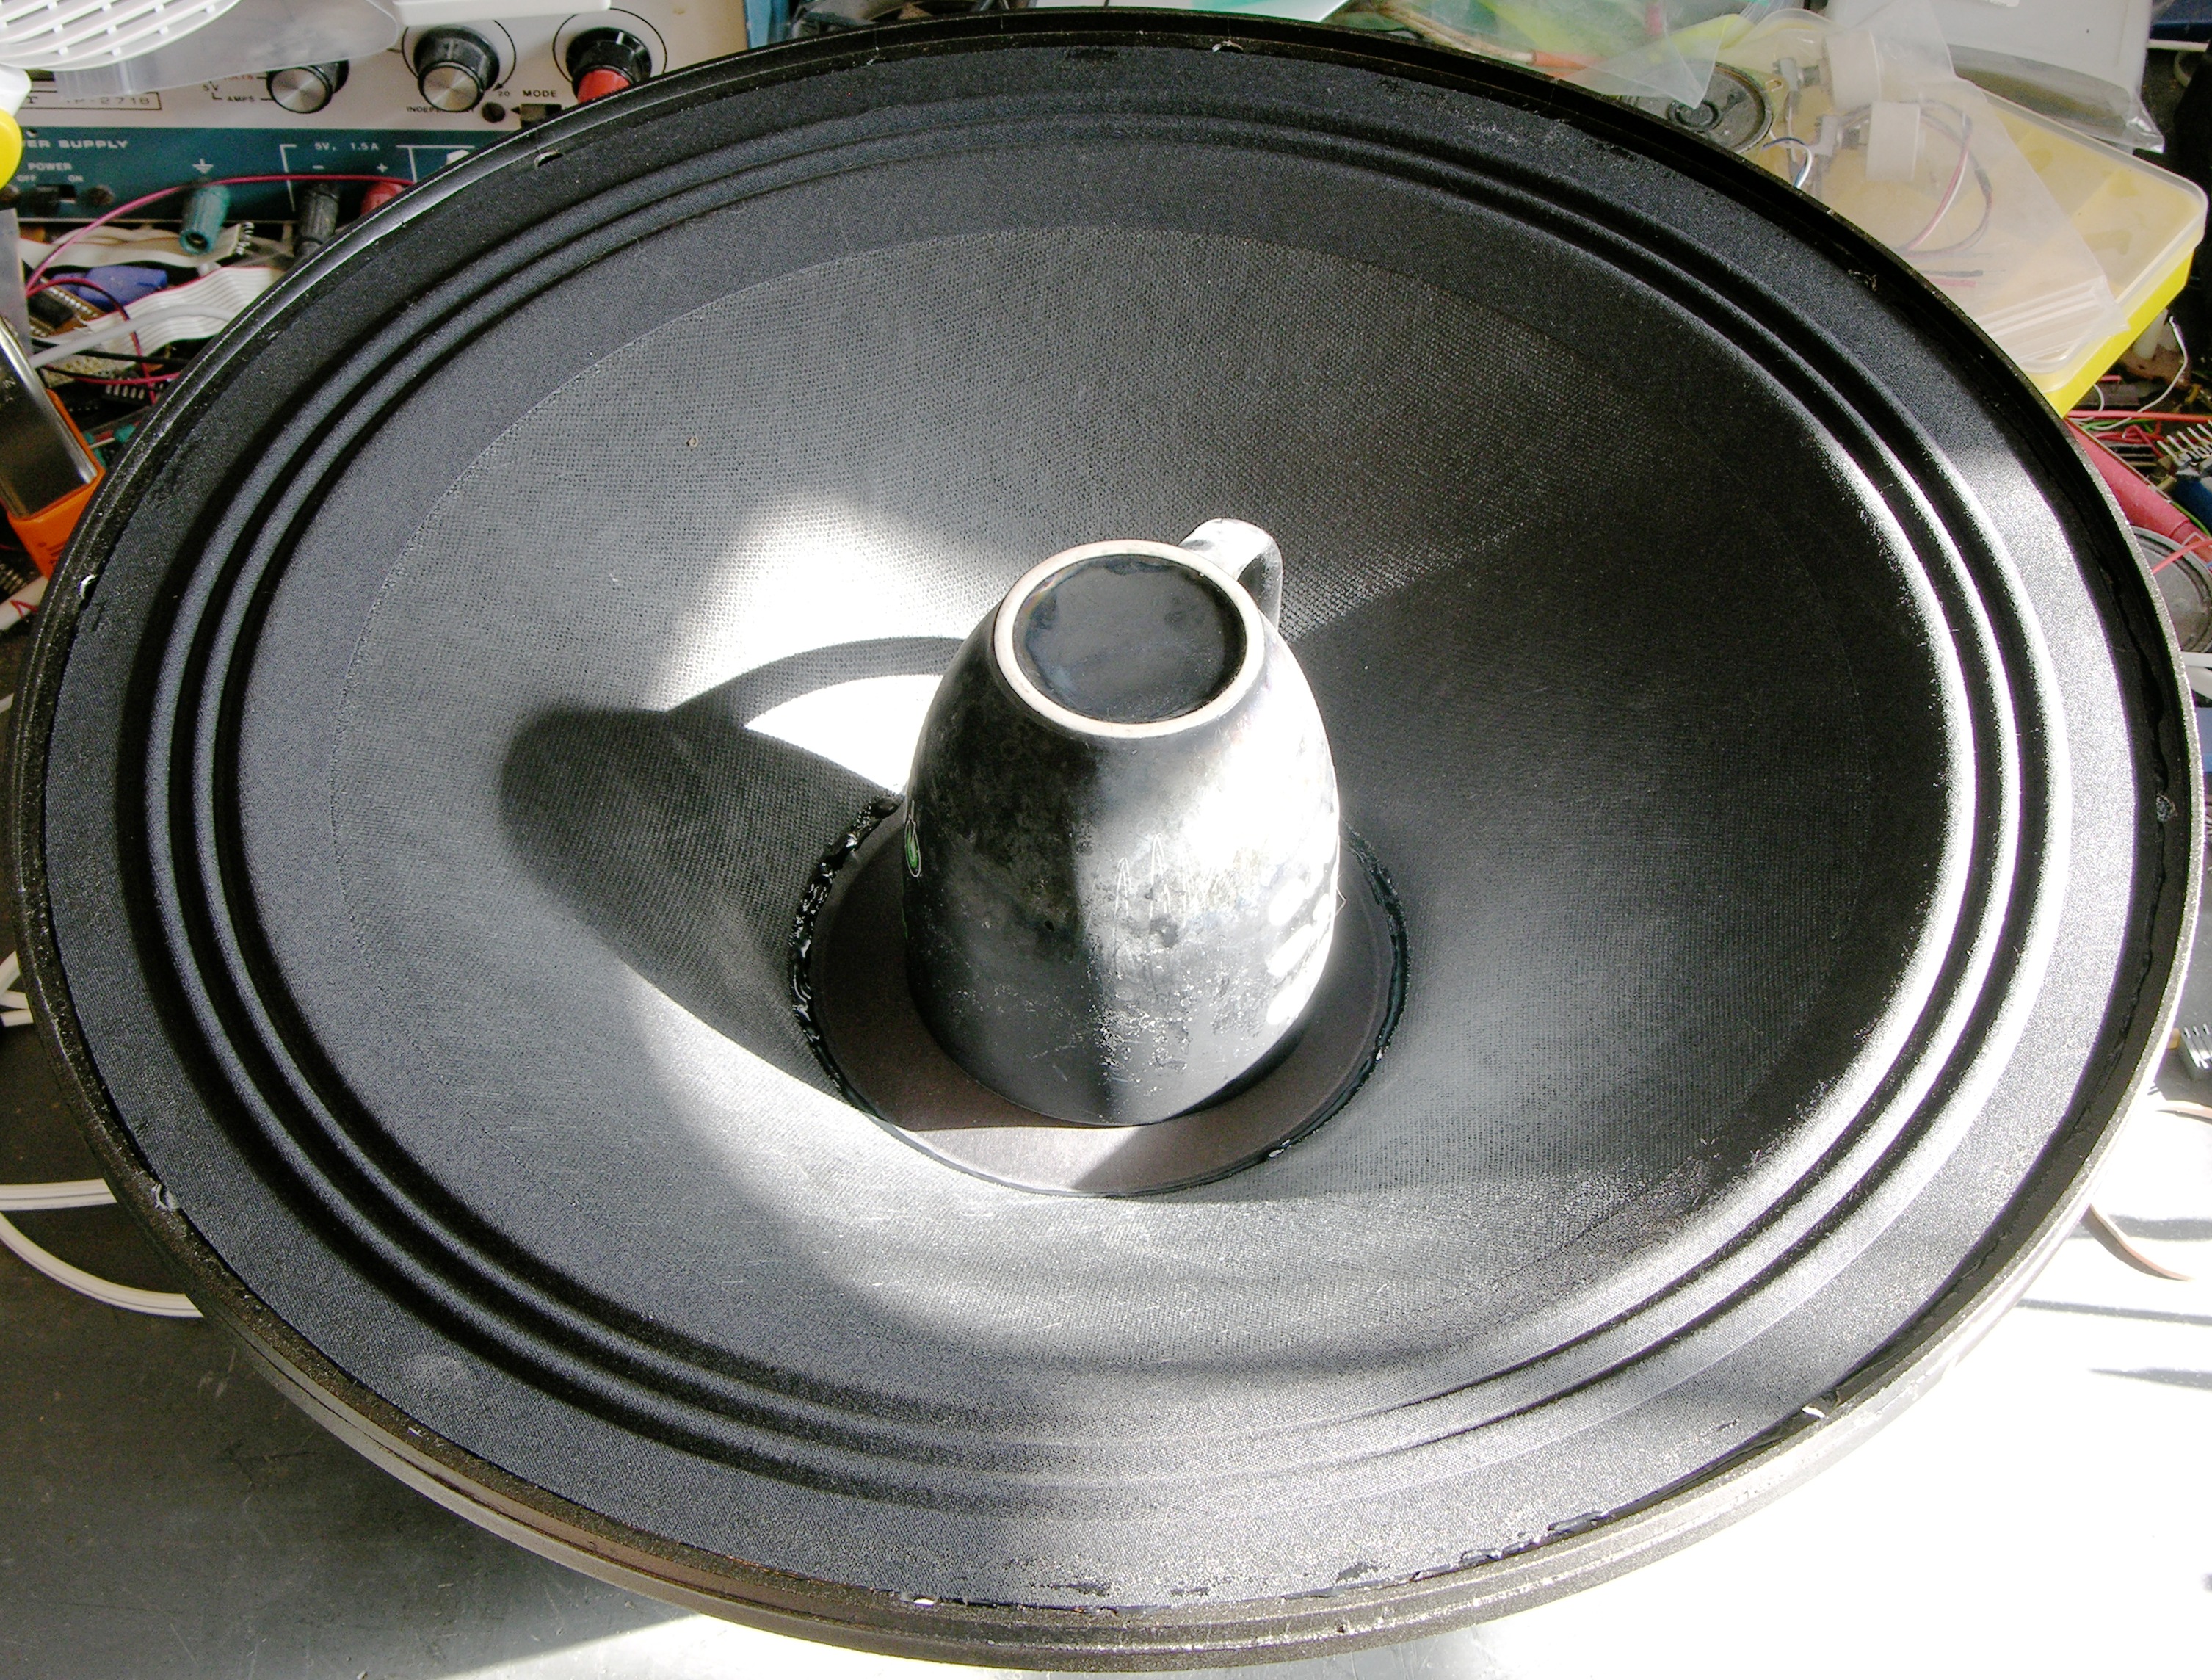
I held the new dust cap in place and traced around its edge with a pencil. I then removed the dust cap, laid a bead of black glue just below the pencil mark and covering it, squished the dust cap into the glue, and laid another bead around the top of the dust cap to cover its edge. Finally, I put a mug on it to keep it from lifting while the glue dried.
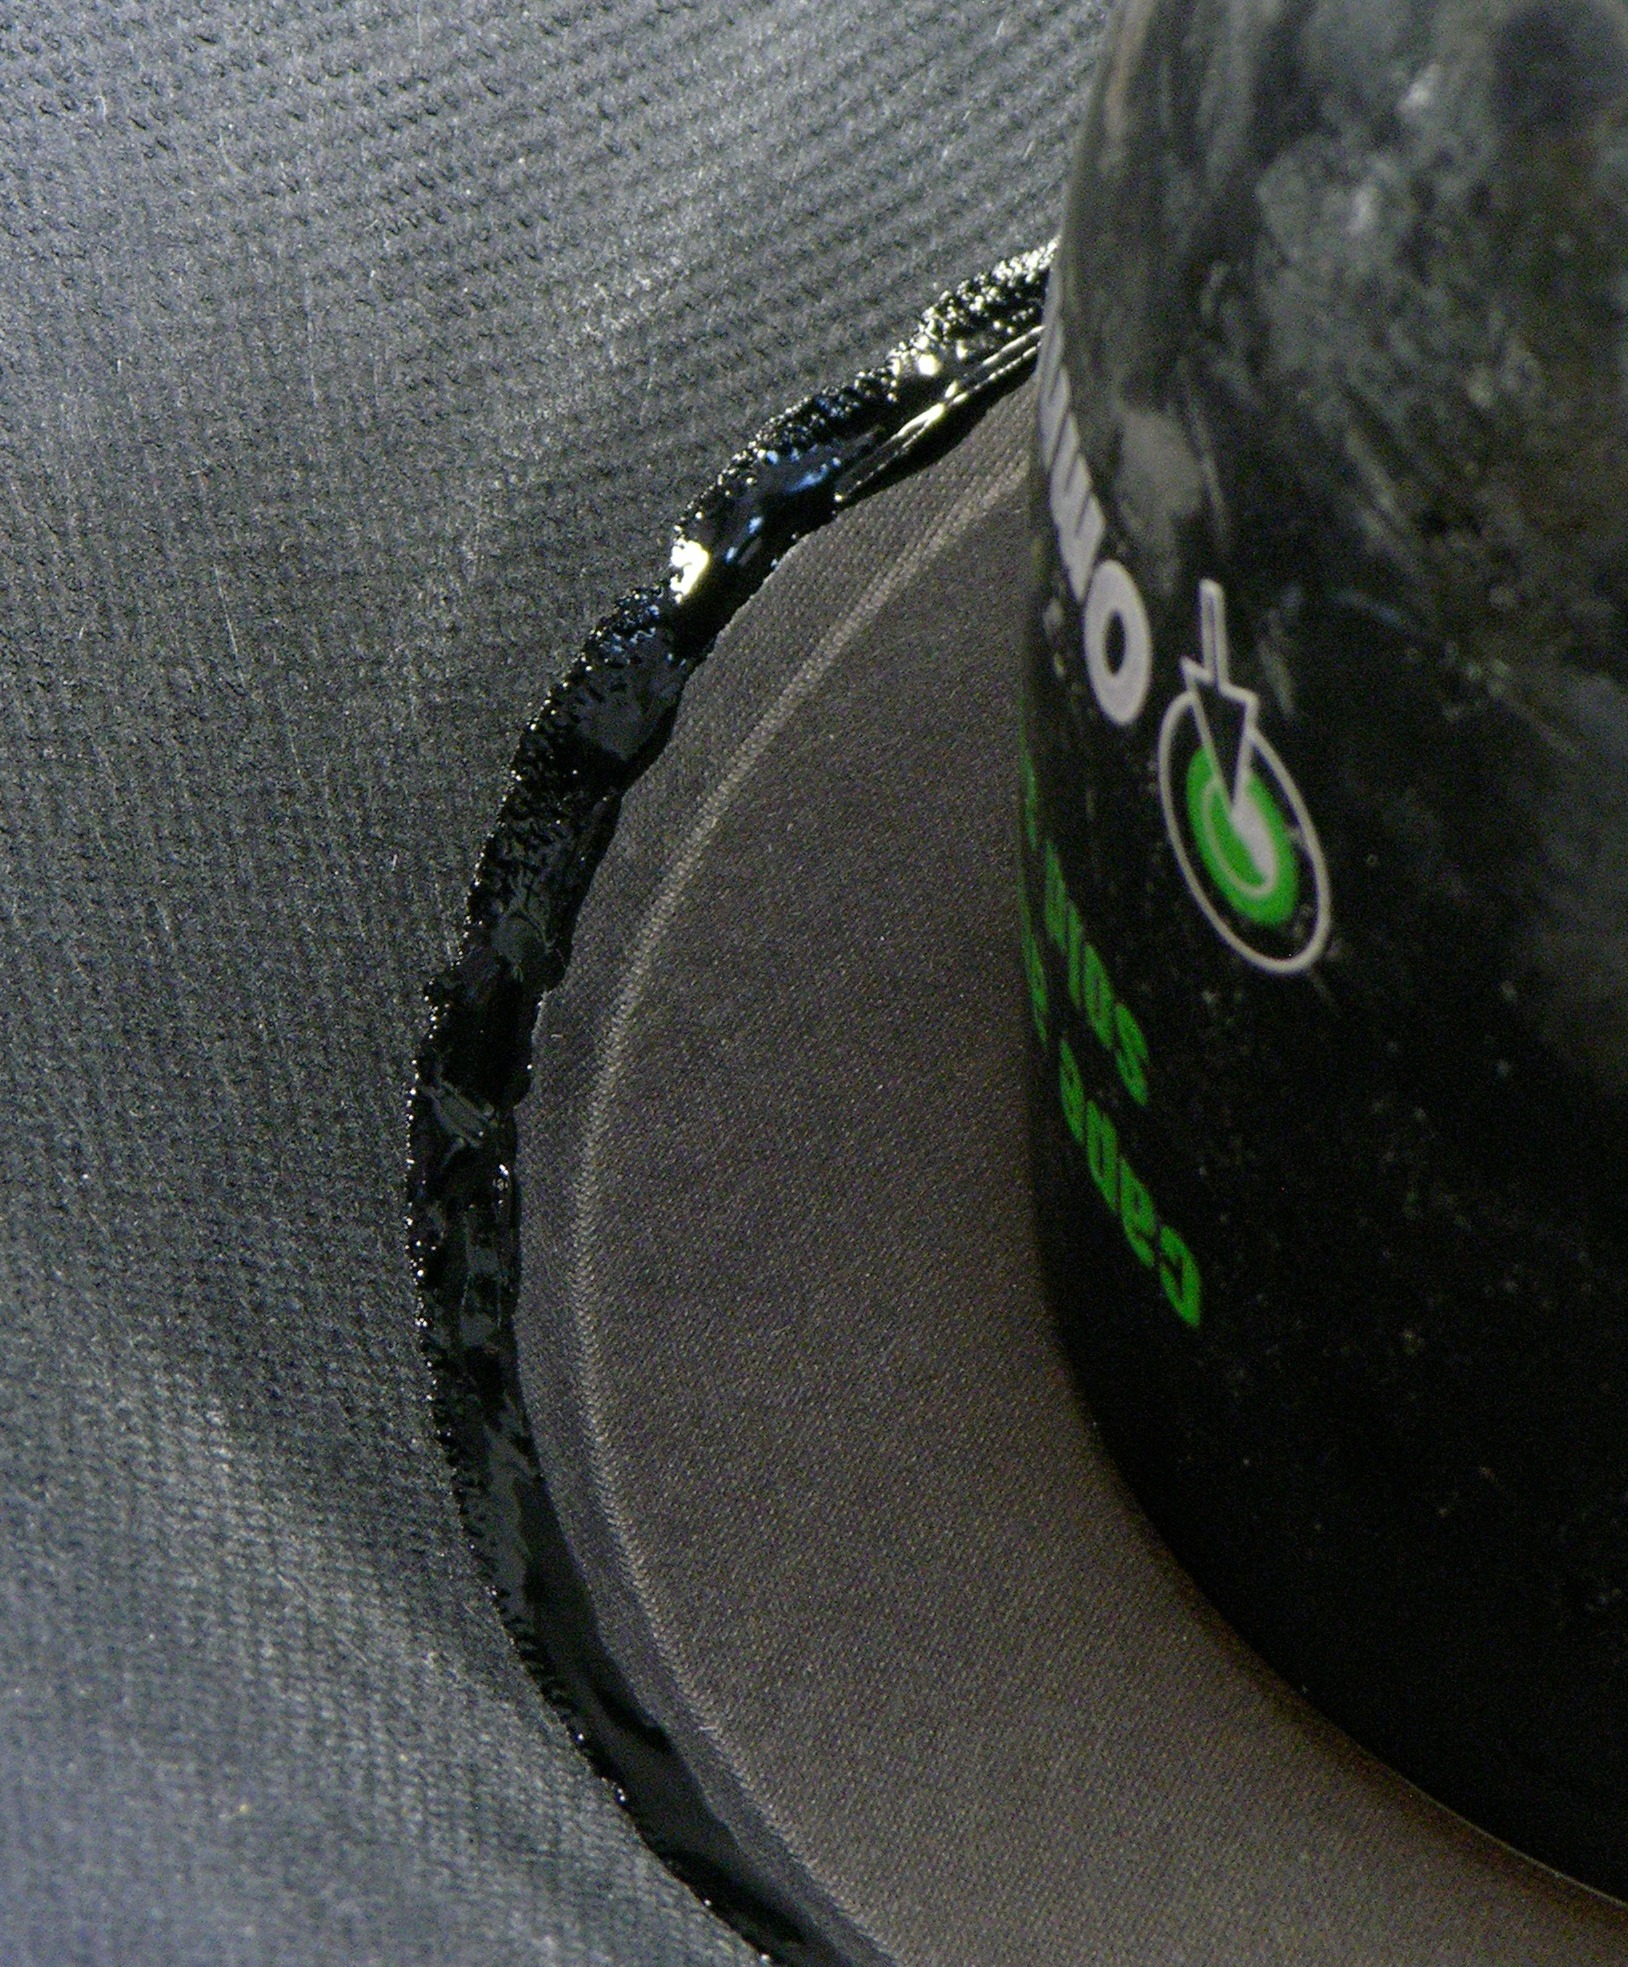
Not the most beautiful job ever, but at least the edges are sealed … and this matters because … I don’t really know why. I just did it, okay?

I was paranoid about leaving the right amount of length on the new leads. Too short and they’d restrict the cone movement and ruin the new driver; too long and they could brush rattle against the cone. I actually went to storage to look at the other drivers and see how Eminence did it originally, and the answer makes sense — the leads bend gently outward away from each other, not up nor down. Good flexibility for moving with the cone. Nice choice.
Although the leads were originally crimped and not soldered, I don’t have an appropriate crimp tool and wasn’t having much luck with pliers, so I soldered the new leads in place.
Damping Solution

I wasn’t quite sure where the damping solution was to be applied — surely not literally to the 5/1000″-thick edge of the cone? I contacted reconekits.com asking:
Are we talking about the top edge of the cone-shaped part, right inside the accordian ribs; or the flange around the very edge of the paper cone assembly that I glued to the metal housing?
Their response was a classic I-ask-an-either-or-question, you-answer-yes:
You got it paint it on the part of the cone that is fabric not on the paper
I followed up to make sure I understood:
So to be sure I have this right — the fabric part at the top of the cone, about an inch wide before the fabric turns into the accordian pleats, and don’t paint the pleats?
They never replied, so I left off the damping solution.
And waited a few more days for the dust cap glue to dry, and all the glue to cure as much as possible in my cold utility room.
Intermediate Testing
On New Year’s Eve I returned to the project and decided that the dust cap glue should be pretty dry. Although I needed to glue on the gaskets yet, I was curious about testing with a low-level signal. I put my function generator on sine-wave output and the 10-100Hz range, connected it to the terminals, cranked the output to max (which turned out to be about 7VAC making a ballpark of 7W into the 600W speaker), watched the speaker move in and out, and listened to very reverberant low rumbly noises.
It was particularly interesting to dial down to about 1Hz and watch the cone slowly and smoothly “breathe” in and out.
Cool.
Reassembly Resumed

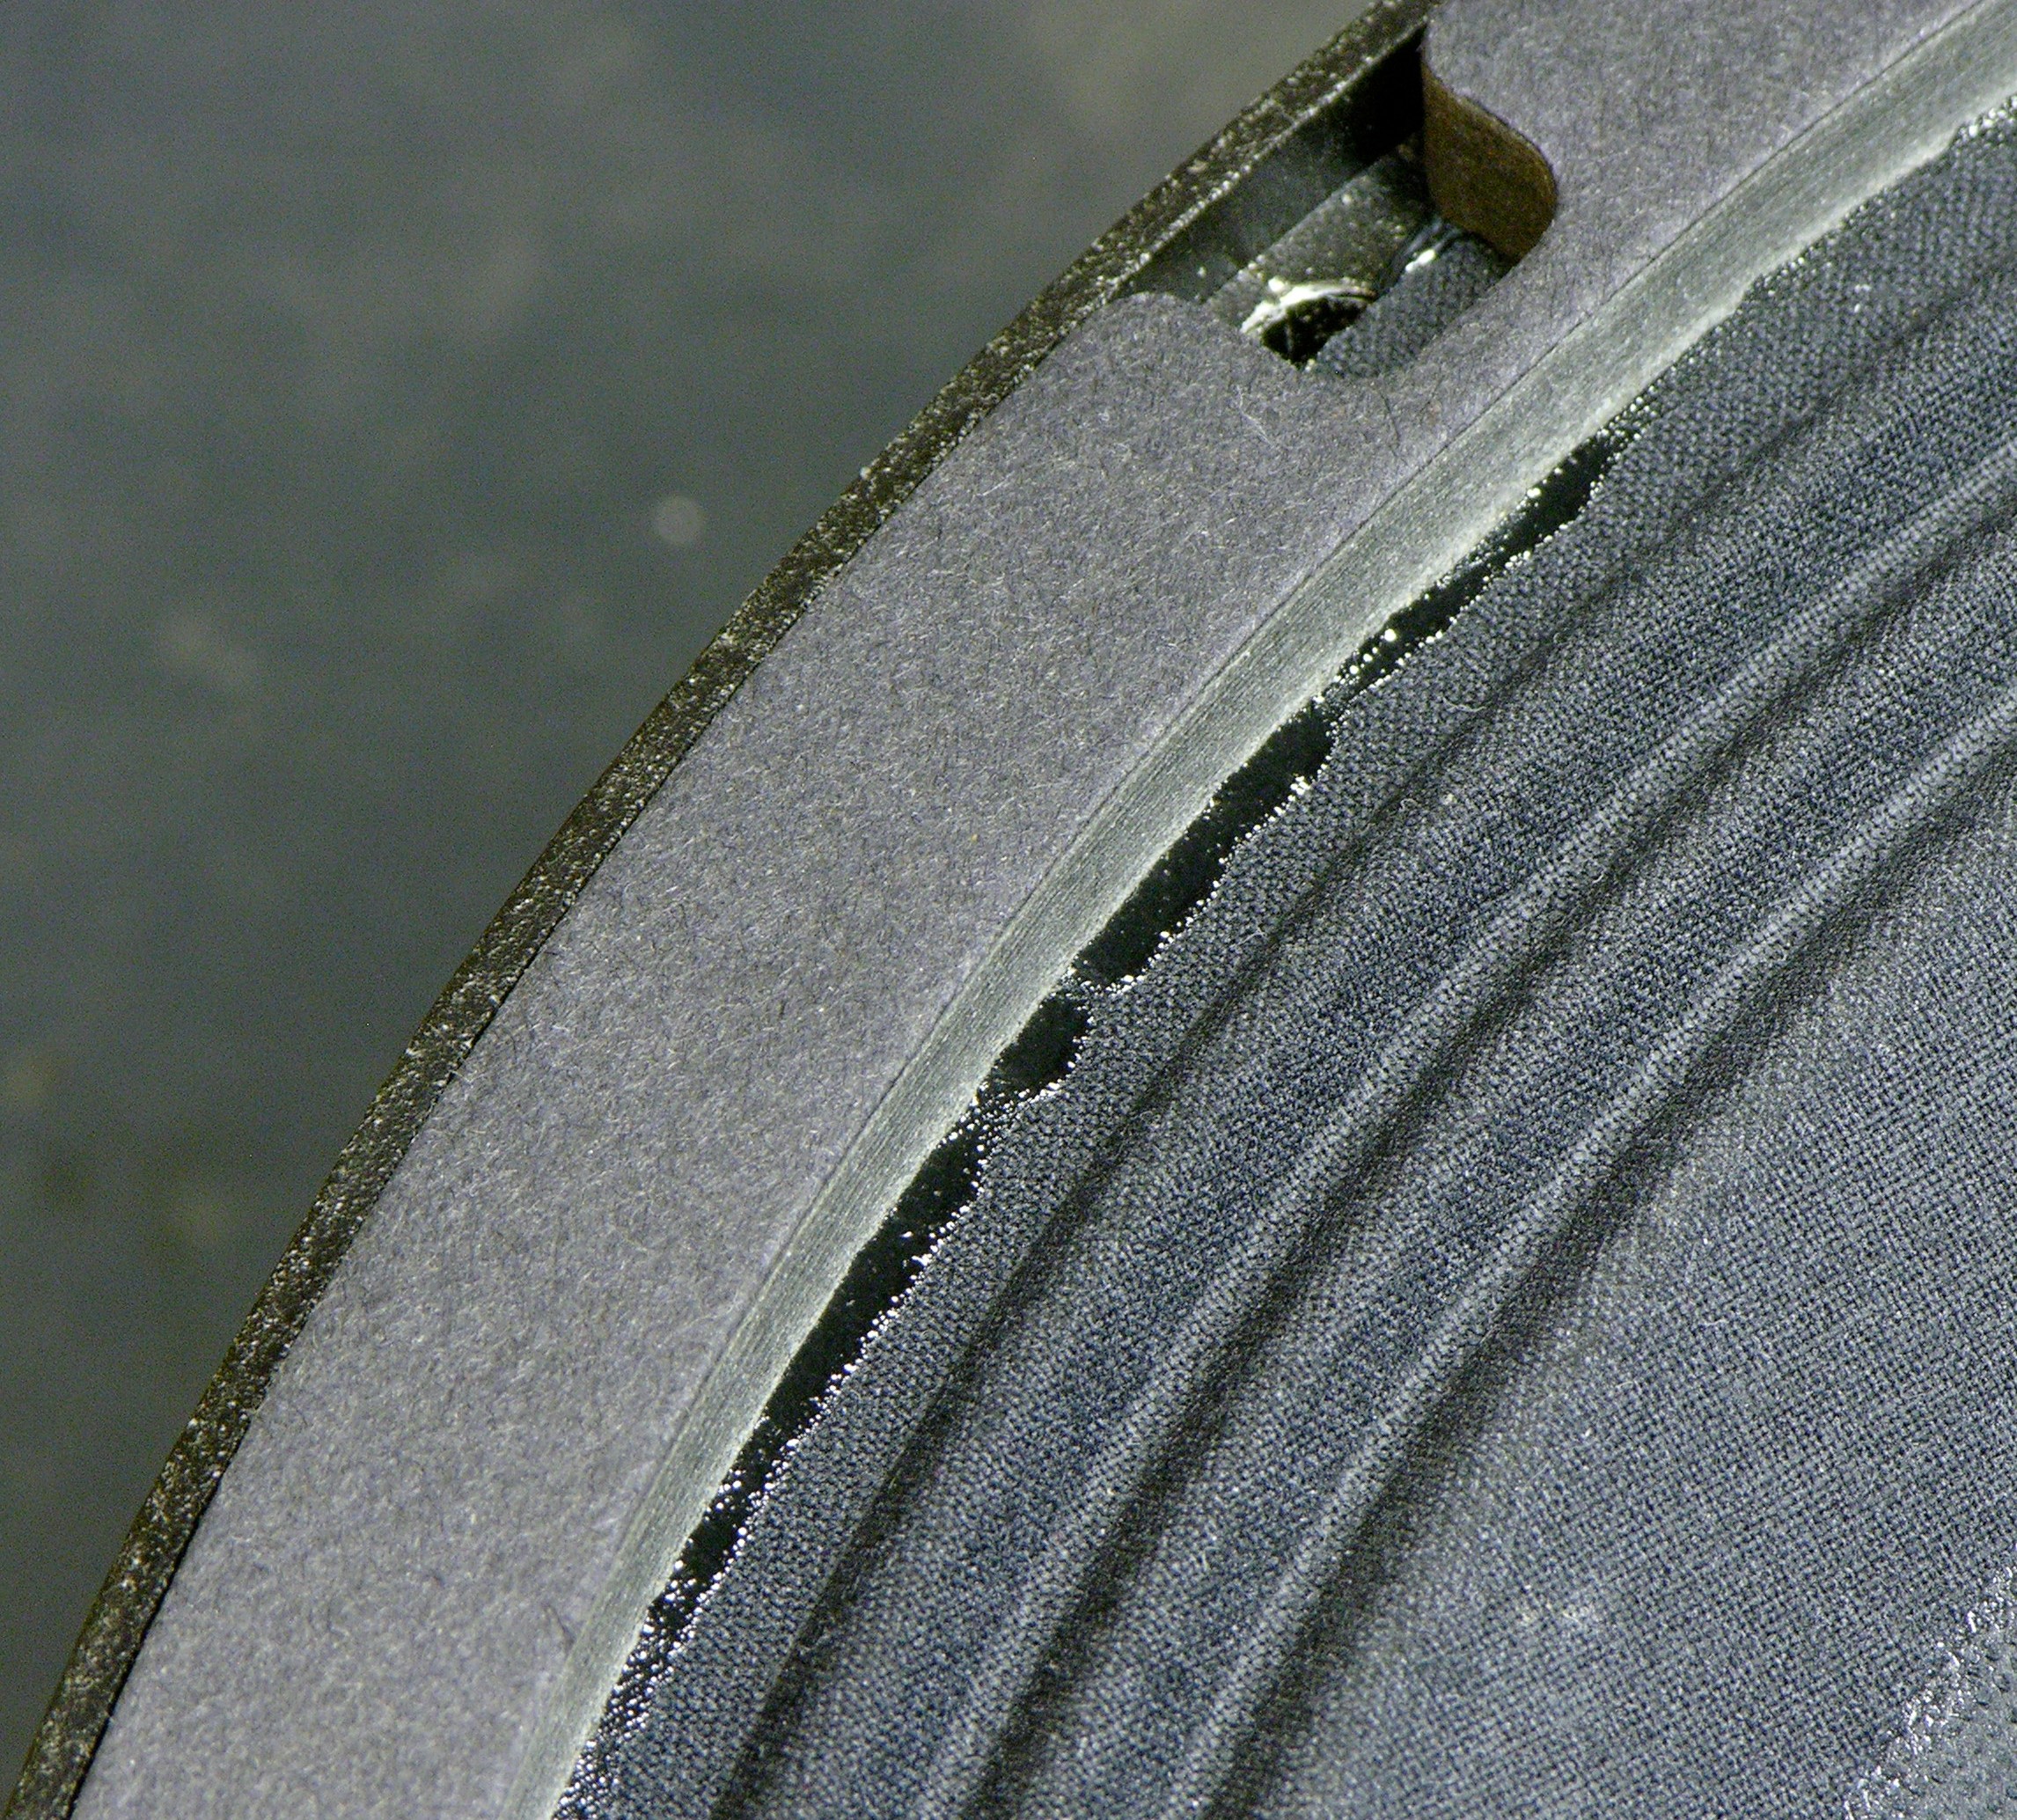
The gaskets provide a tight fit and prevent rattles when the driver is mounted against an uneven surface. Using my same plan as before, I applied plenty of glue and hoped for and accomplished a small amount of squeeze-out. I pressed the gaskets into the glue and returned a few minutes later to press them back down in case they had lifted, which they didn’t seem to have done.
I considered using spring clamps to hold the gaskets down into the glue, but I was concerned that they’d apply too much pressure and squeeze out too much of the glue, leaving a starved joint. Instead, after the glue started to get tacky and I figured its viscosity had increased enough that it wouldn’t all squeeze out, I inverted the driver and used its own weight to press the gaskets into the glue.
More Waiting
Yesterday (Saturday) I figured everything was dry enough.
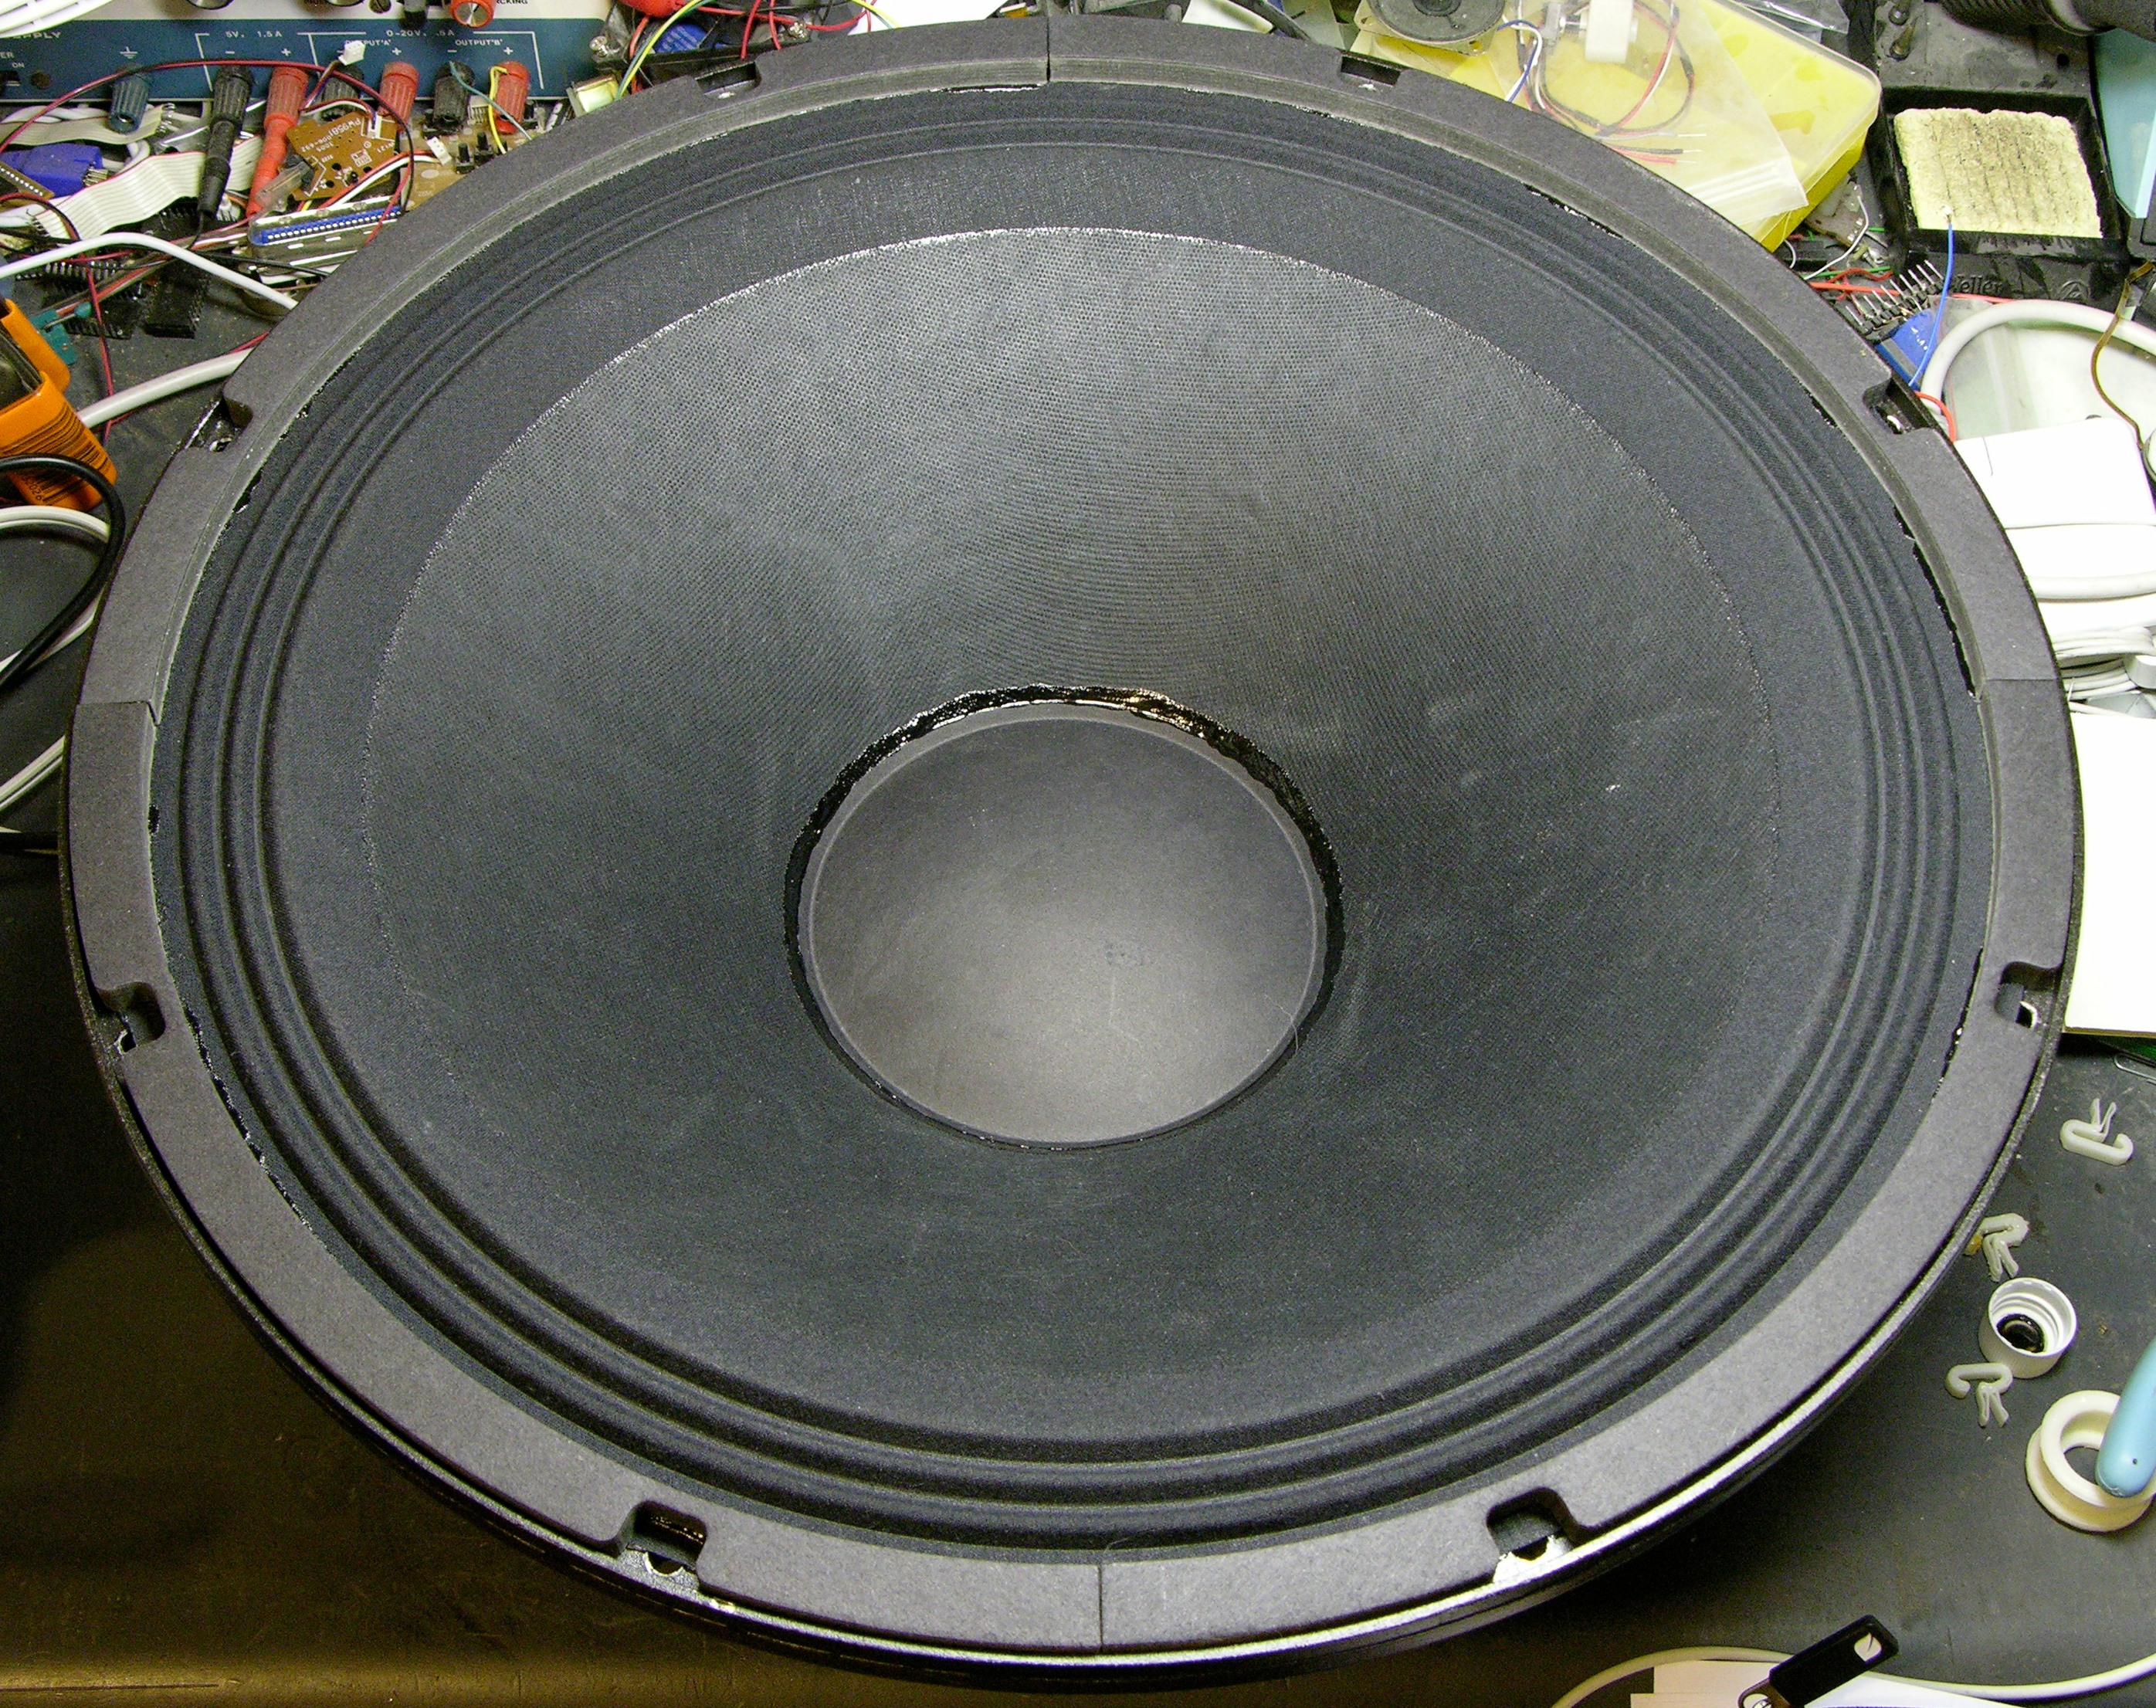
Looks like a speaker (driver)!
Reinstallation
I metered across the terminals to make sure nothing had shorted and got a reassuring 6Ω or so.
I fetched the cabinet from storage, set it on end, tightened the fit of its internal wire’s spade connectors with pliers, connected them to the reconed driver, set the driver into the recess, and noticed that the gaskets are irrelevant, as the driver mounts from the front and the gaskets don’t touch anything. Maybe they help reinforce the cone surround’s glue joint.
The metal grill had become smushed in by previous owners. When I reinstalled it, I poked bent-nose needlenose pliers through the mesh and used them as hooks to pull the grill tight underneath each screw I was tightening. It’s much flatter now.
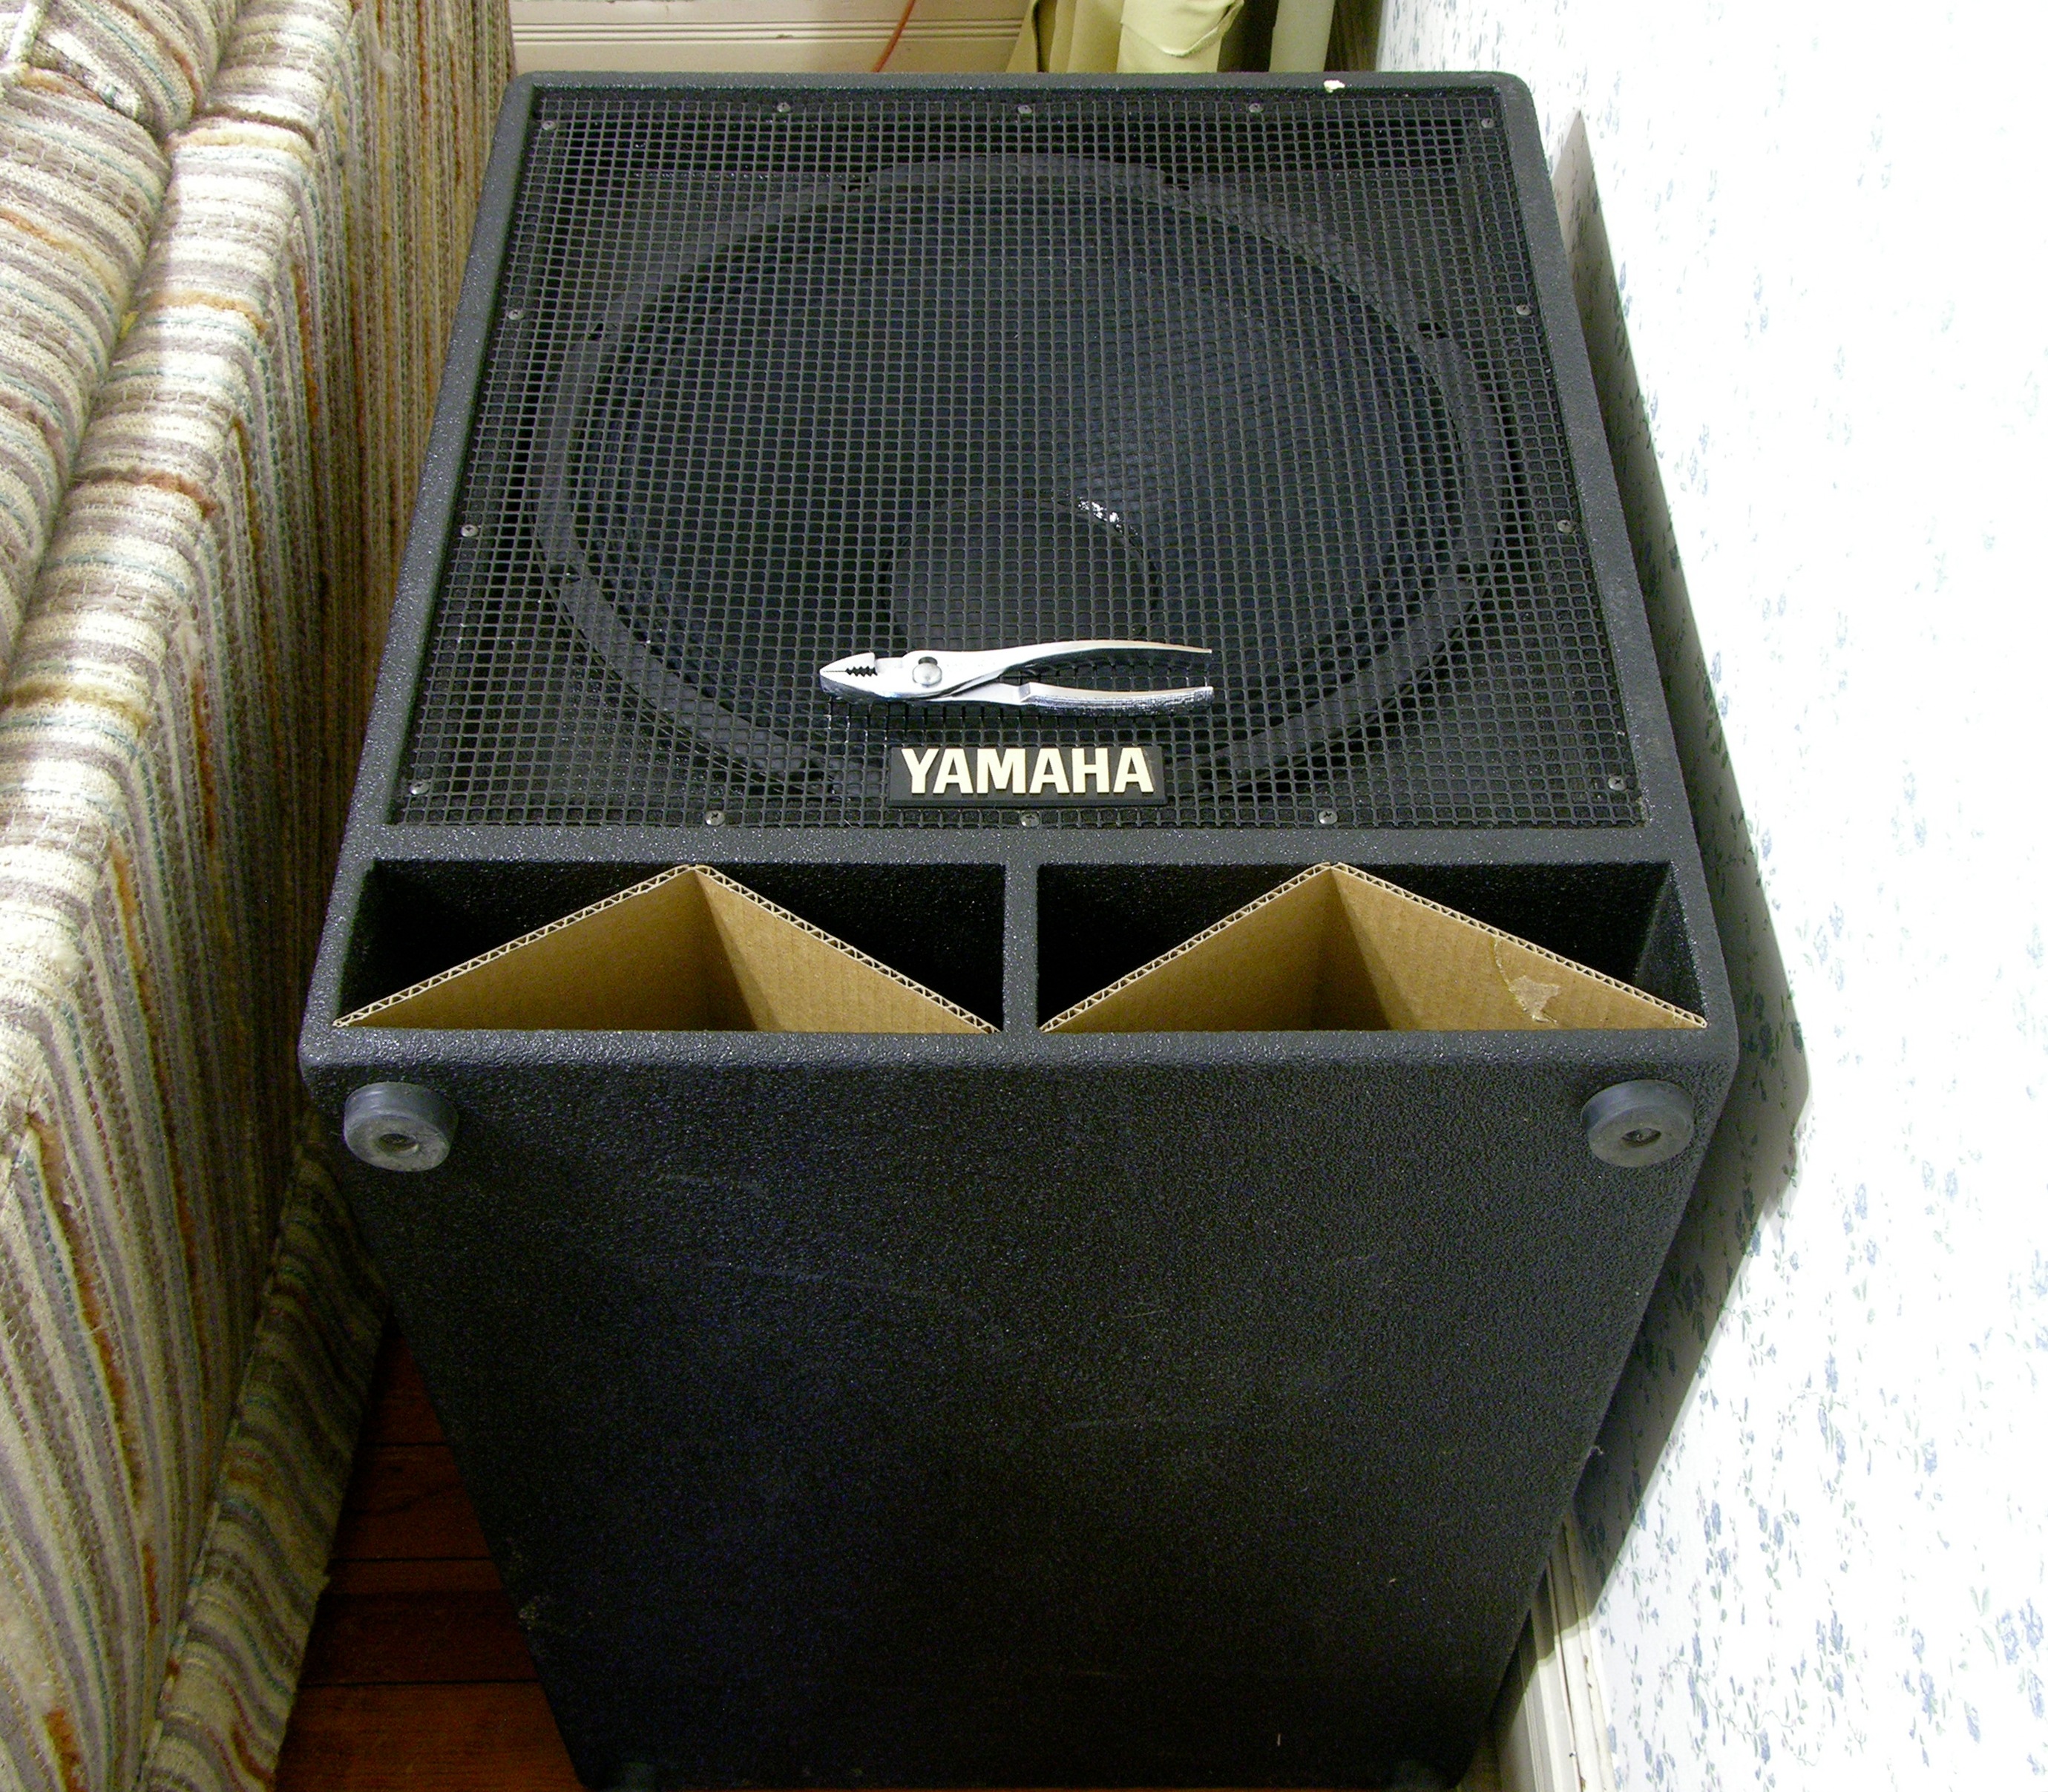
I had noticed that kitty thought the rectangular ports at the bottom of the cabinet looked inviting and needed to come up with a way to keep her from going inside the cabinet and nesting in the fiberglass. Bent cardboard seems to do the trick and certainly shouldn’t interfere with the acoustics of low frequency sounds.
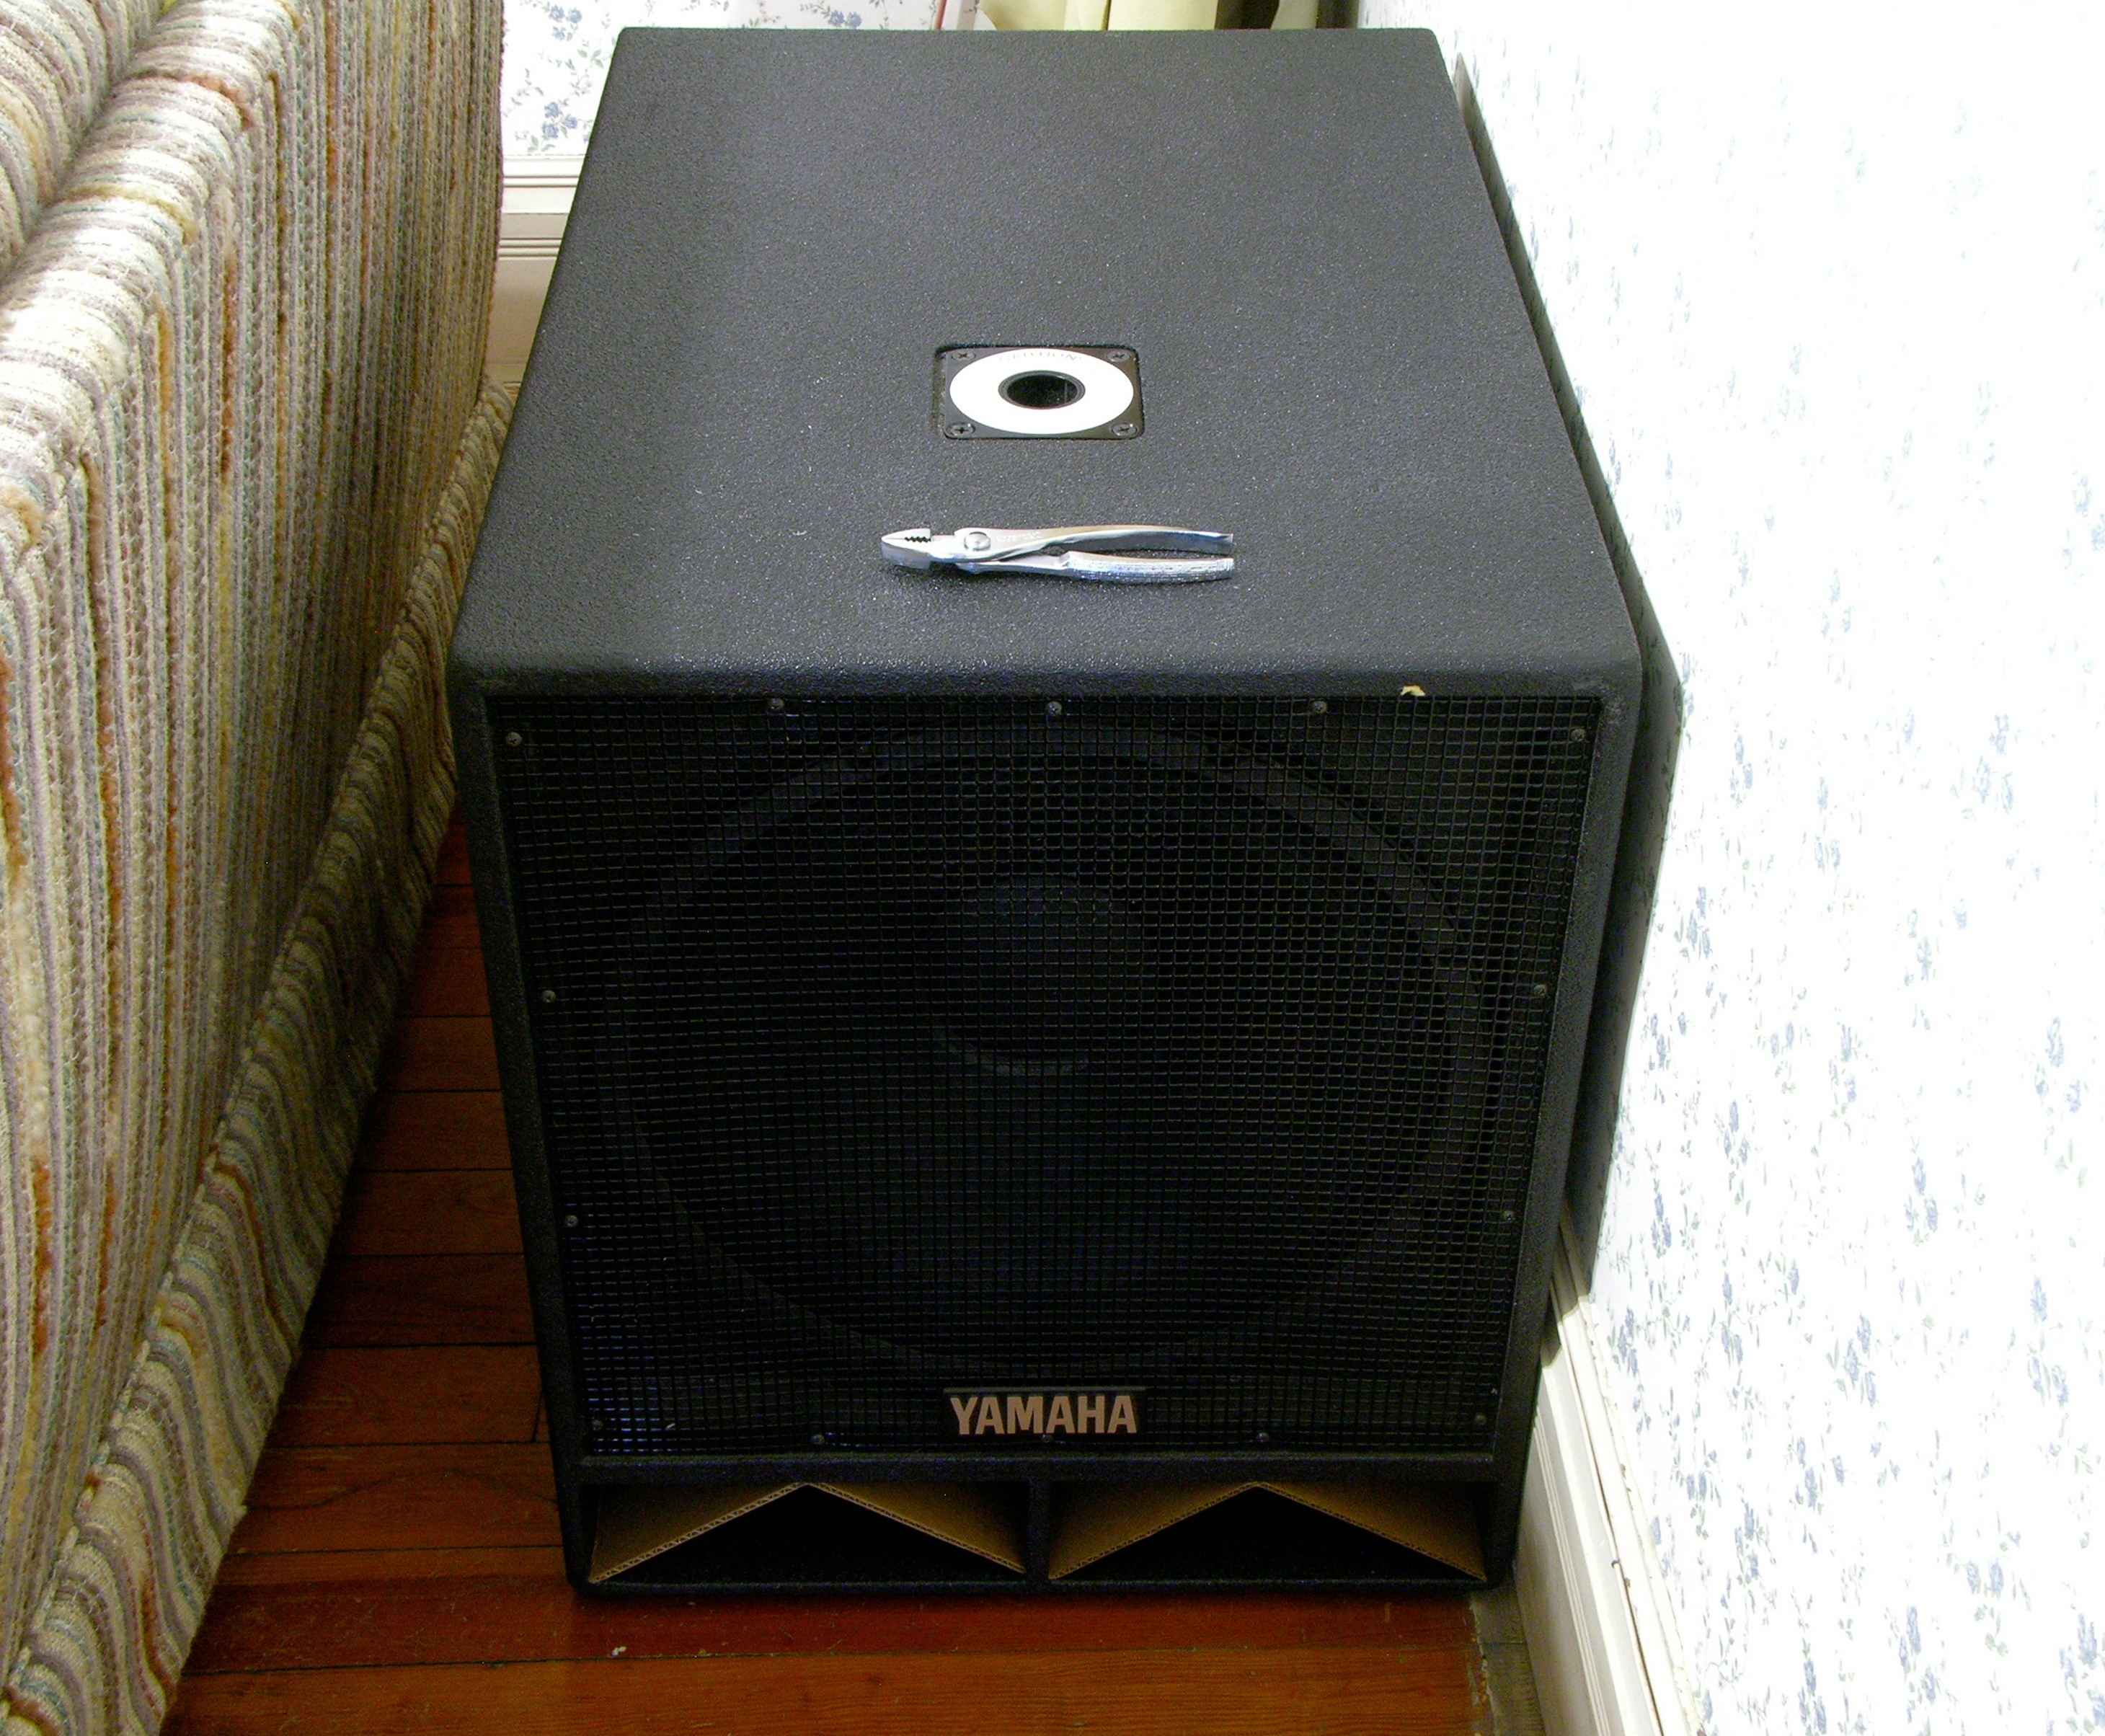
After running some tests, I put the cabinet into position behind the couch and fired up the DVD player. I’ve decided to call the speaker “Mr. Adequate.” Mr. Adequate is a massive improvement over my previous 150W 15″ subwoofer. From anywhere in the room it kicks me right in the base of the spine … which makes me eager to recone drivers for the CW218V dual subwoofer, because I really want it to kick me in the chest.
It sounds feels verra nice on
- Jurassic Park opening cage sequence
- Revenge of the Sith opening starfight
- Serenity “Earth-that-was could no longer sustain our numbers” visual
- The Fifth Element opening pyramid scene
It sounds feels amazing on Autograph. (You know what I’m talkin’ about!)
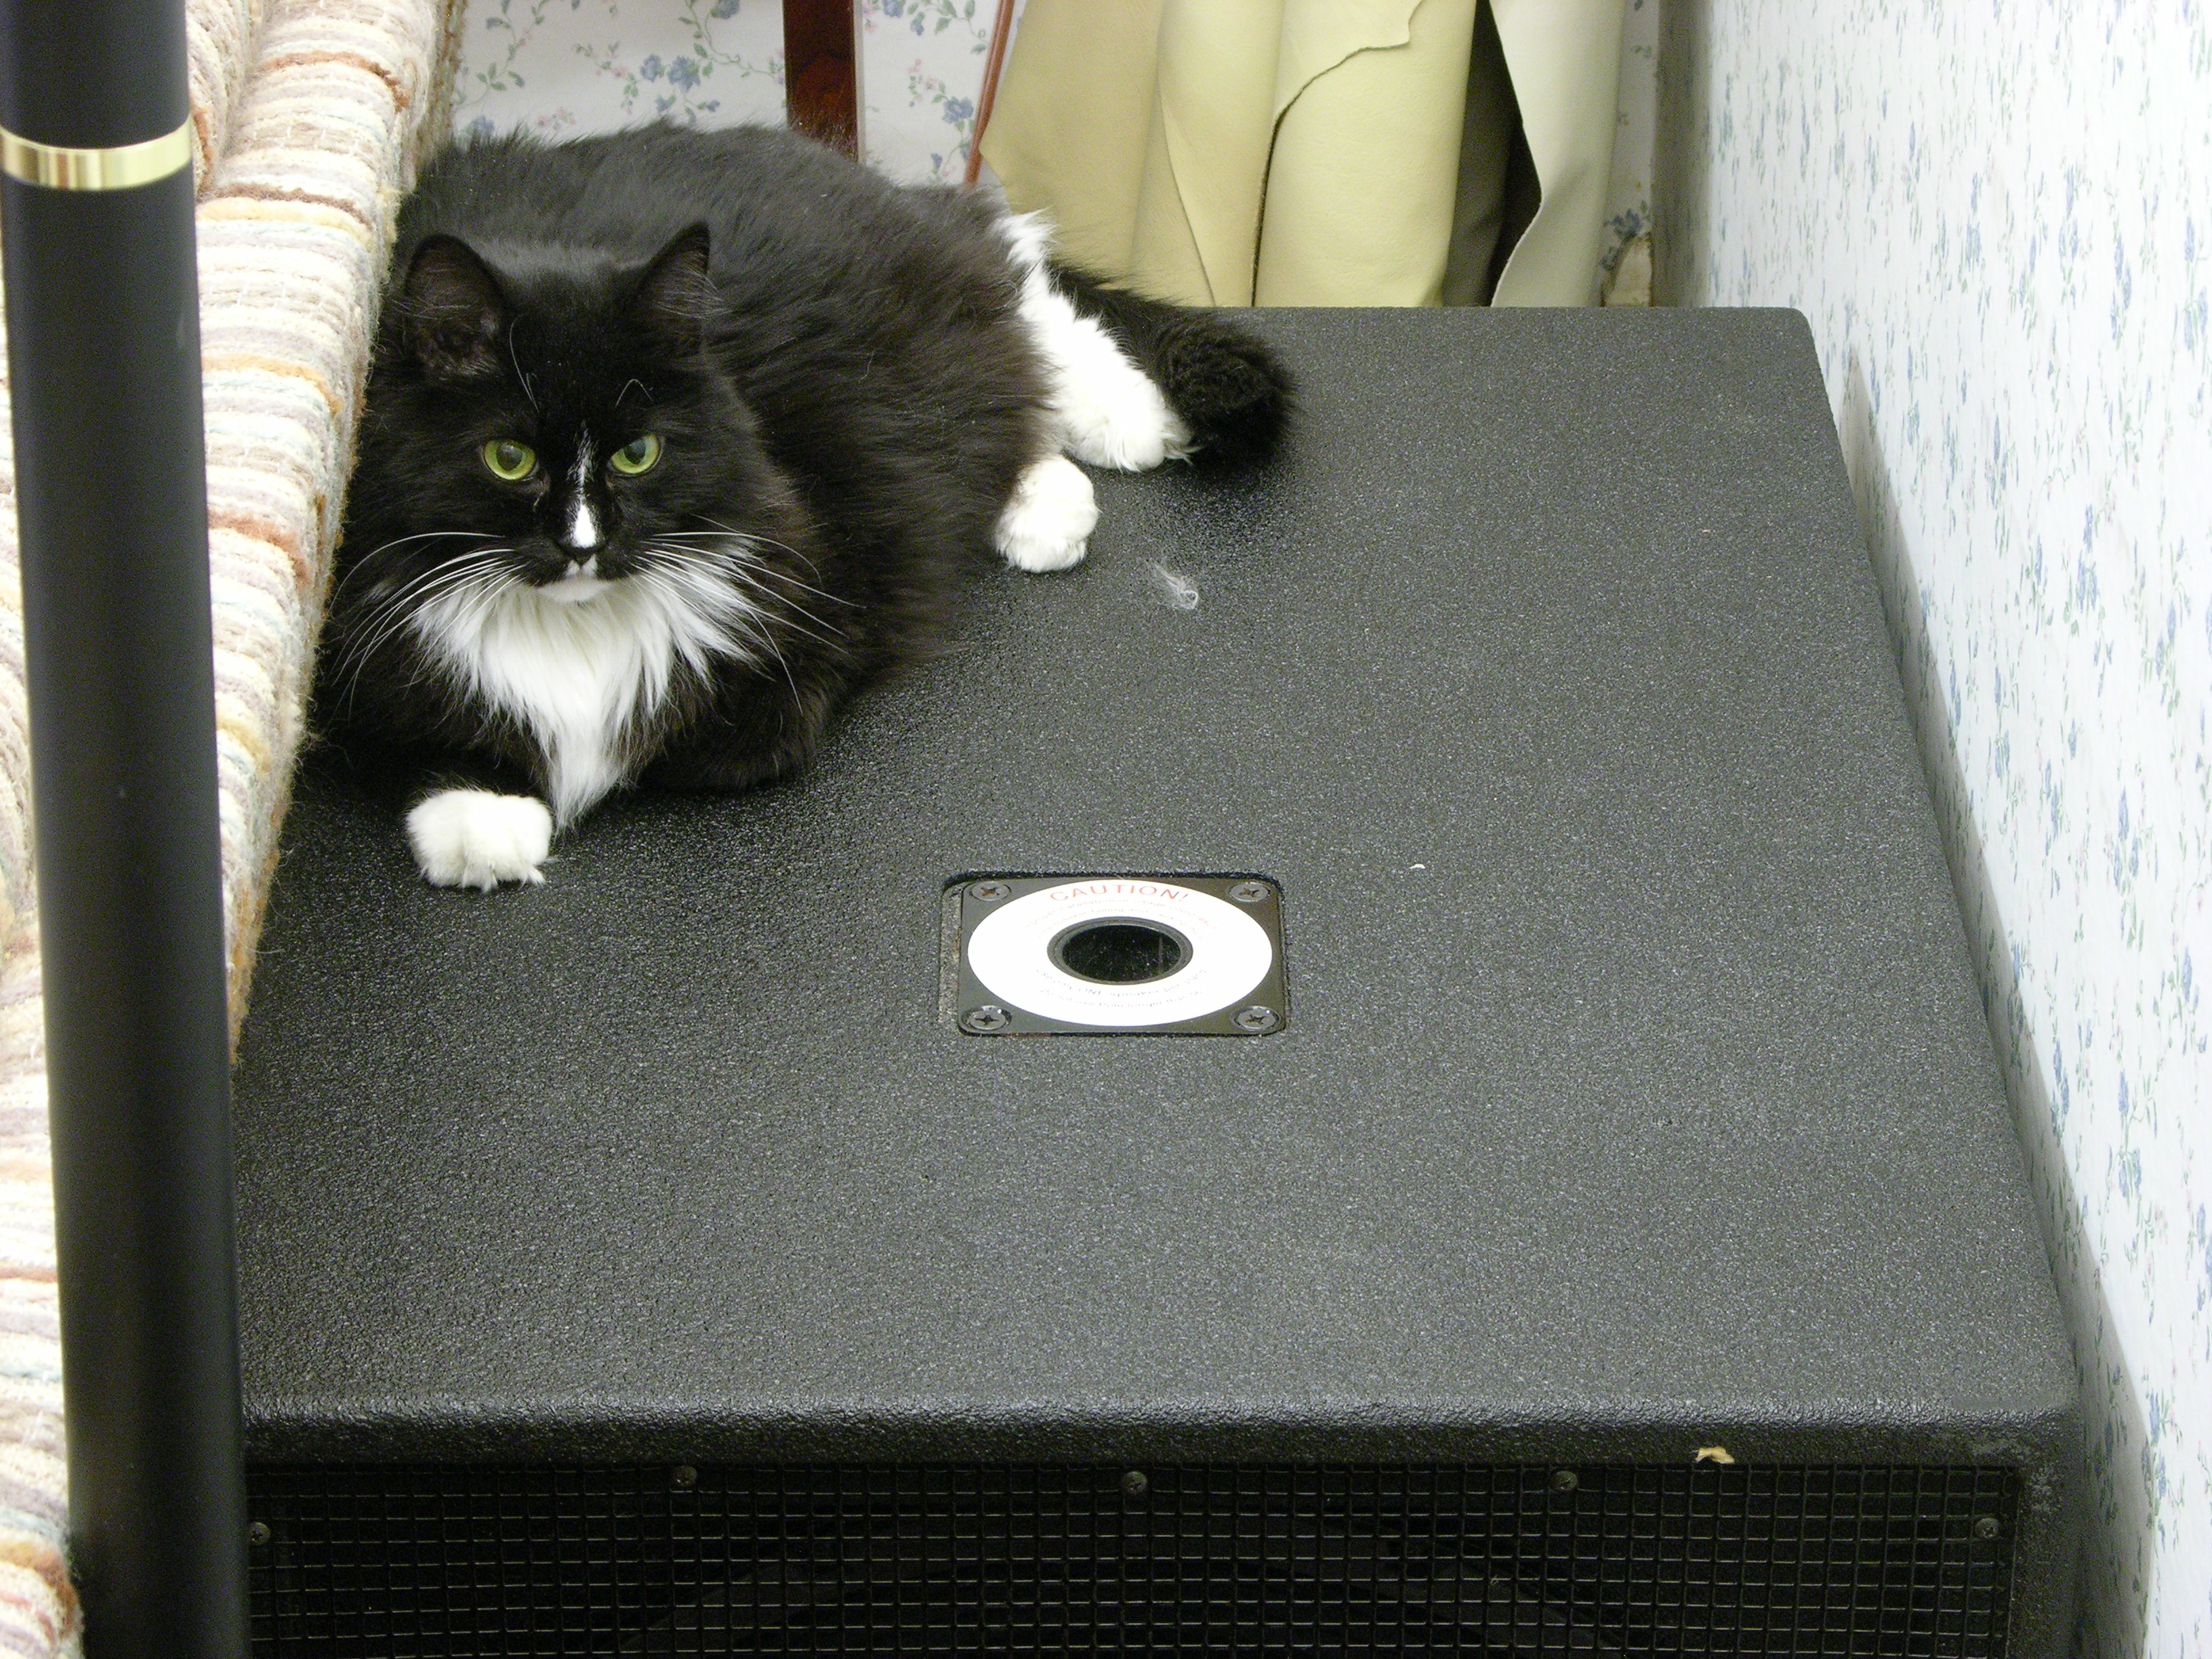
Betsy has settled for relaxing on top of the speaker instead of inside of it. All is well!
You didn’t test it on the Matrix’s Lobby scene?
Jared, I didn’t think of that scene, which probably means it’s been way too long since I saw it in the theater and my previous sub was Mr. Inadequate. I’ll give it a shot the next time my wife is out of the house.
Commence suggestions of other scenes I should have tried …
Ah, no suggestion, but a question: have you got an idea what sort of adhesive that was?
Yes you need to apply the damping solution to the pleats of the surround.
Sound Speaker Repair, it’s very thoughtful of you to comment here even though I bought this kit from your competitor! (I think you didn’t have this particular kit, or I couldn’t find it at the time.)
So the damping solution goes on the pleats??? The entire fabric section, or just the pleats? What’s it for, and why is it better for me to apply it at home than to have it applied at the factory?
We do not have kits for Yamaha speakers. We do have original kits for all Eminence brand cast frame speakers but not OEM speakers made by Eminence. We carry a very few select recone kits that we consecrate on to keep the kits we sell the very best kits available.
Yes, the damping solution goes on the pleats. The damping solution is used to seal cloth surrounds so air does not pass throw the surround. With that being said, you do not need to put the damping solution on the part of the surround that attaches to the cone or the frame but it wont hurt either. It does not matter if you do it at home or if the factory does it for you, but if the factory does it then you don’t have to saving you time. FYI, we pre-treat every surround on our kits with damping solution before they leave our shop.
“The voice coil looked exactly like this when I removed it from the voice coil gap. Obviously it had overheated and melted the coil wire, but why was it all gnarly like this? Maybe it welded itself lightly to the basket and decoiled when I pulled it out of the gap.”
Actually, I don’t think it overheated and melted the coil wire. It probably got hot enough to melt/soften the adhesive binding the coil to the tube. When you run electricity through a coil like that, the wires all sitting next to each other suddenly want to get away from each other, so there’s an ever-present force trying to “explode” the coil. Once the glue melted, the coil was able to un-coil and the wire probably caught on something and broke immediately, or it rubbed on something until it wore through.
Joe, excellent analysis; thanks!
When I recone the next, I’ll heat the coil and see whether the adhesive softens, becomes brittle, or what exactly. I suspect you’re exactly on track.
Very nice tutorial! I have two of these subs, and one recently stopped working. I have come up short when trying to find a replacement woofer, but the reconing process seems easy enough, especially with the detailed account of your experience. Thank you very much for the informative post.
Matt, before you order the recone, open the speaker and check the resistance of the driver’s coil with an ohmmeter. If it’s 0 or ∞, you probably need a recone. If it’s normal, you might have a different problem.
well i reconed a 12 inch Mackie M1275w that goes in my Mackie C300 cabinets and i applied the white damping solution from the top edge of the speaker all the way down to the dust cap in order to protect the paper cone from the rough northern New Brunswick weather that we get and i can tell you that the speaker sounds great with a good tight and clean sound that will make the paper cone last much longer since it makes it water proof.
That white solution is simply the white paper glue i use to use in school years ago and it’s just in more of a liquid form making a good shellac for paper cone that take a beating with years of transportation and ware and tare so don’t be shy to apply a good coat to the whole paper and leave it dry well and you’ll have a speaker that will last you much longer.
In 2020 the kit price is $80 + shipping or about $100. New speaker is $160. I ended up buying a 77mm ID x65mm H Alum 8 ohm coil from china for $13 including shipping. Not the same but the labor and kit is about the same as the price of a new speaker. It ended up costing me about $30 for materials per speaker. Way cheaper. I’m willing to bet the AL will not deform and conduct heat better. The stock coil wire is 2 gauges larger than the replacement. I used crimps for connections from Tinsel to coil. Playing cards cut in half for spacers. I dont know how many watts. Curve spec probably off for new speaker. Works well. These Mfgs keep coil specs and coil replacements off market to make more profit.