Dimension Elite 3D Printer
A while back, I had contacted Brian Brown, associate director of the CAD/CAM lab at the university’s National Institute for Aviation Research and a great colleague of mine, to ask whether they had any rapid-prototyping machines that could churn out a prototype LED puck case in a transparent or translucent material.
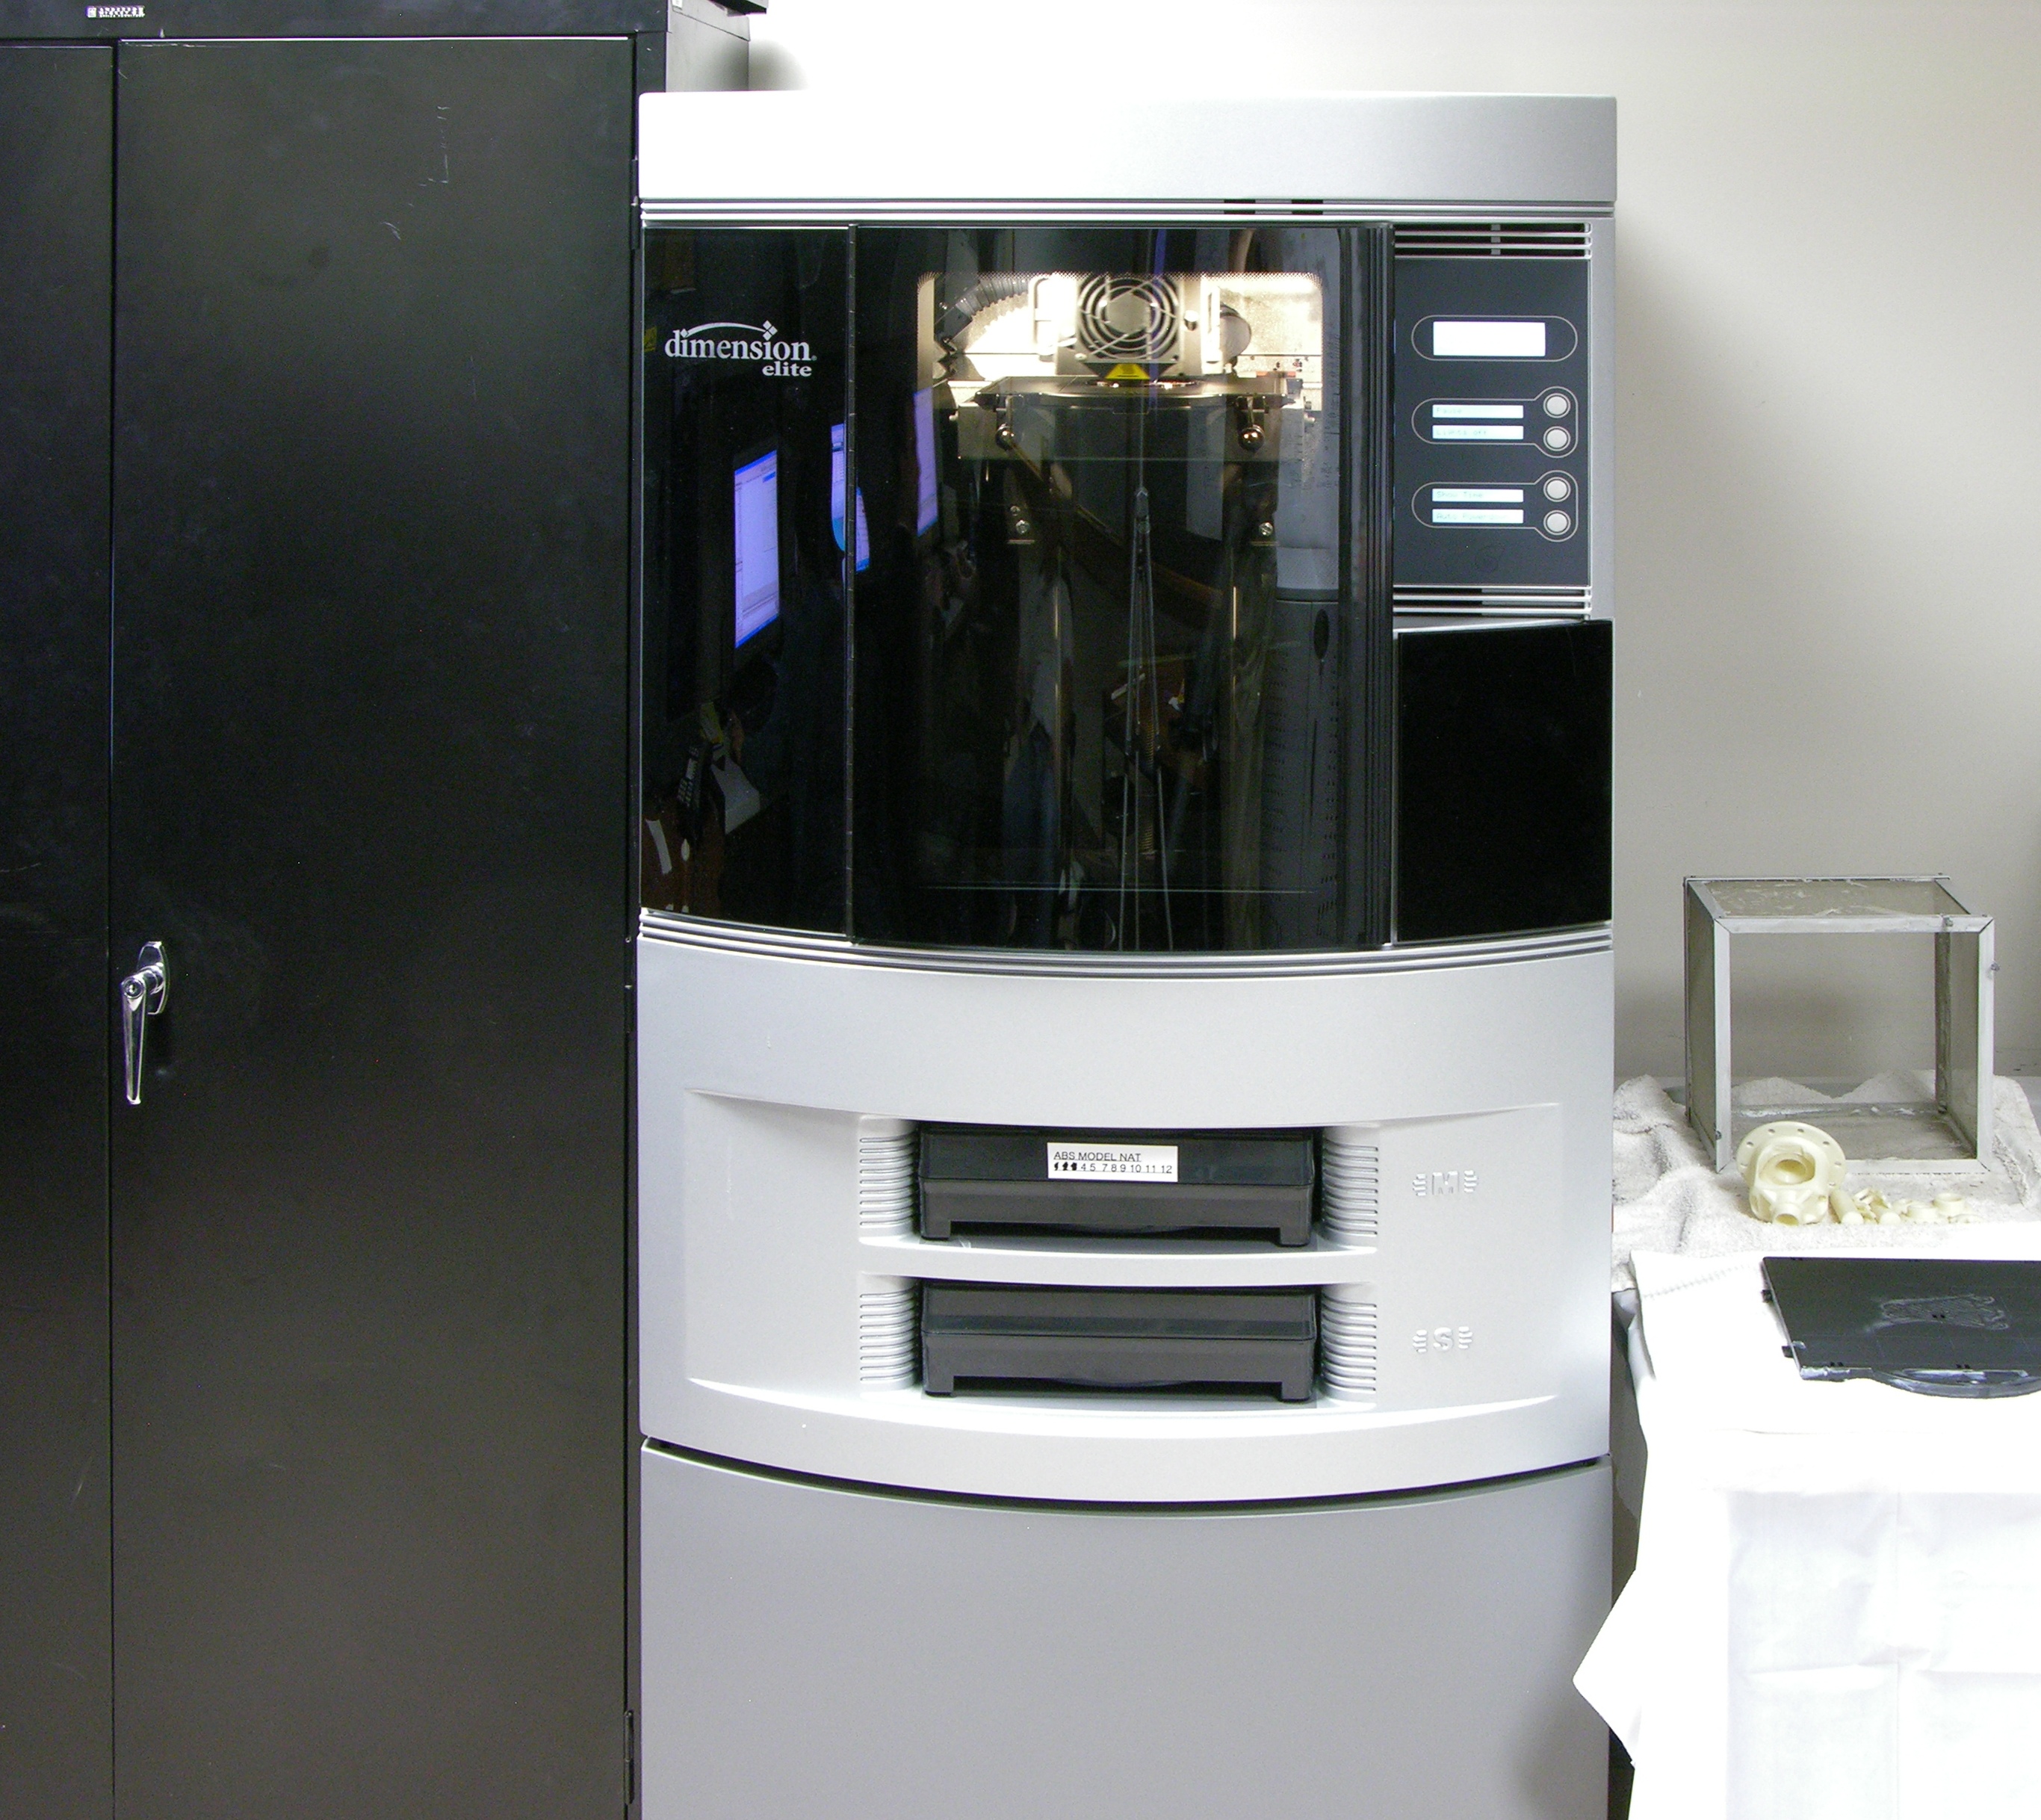
They didn’t at the time, but Brian contacted me last week to say that they had a new Dimension Elite 3D printer and they’d be happy to print me a case while they were ramping up on learning to use it. I emailed over an STL export of my Blender model, Brian put his student Jonas Fink to work, and the next day I went over to take pictures of the machine in operation.
As it turns out, the “natural” colored ABS plastic isn’t translucent enough to use as a functional test enclosure, but it makes a great physical prototype. More on that in a bit.
How It Builds
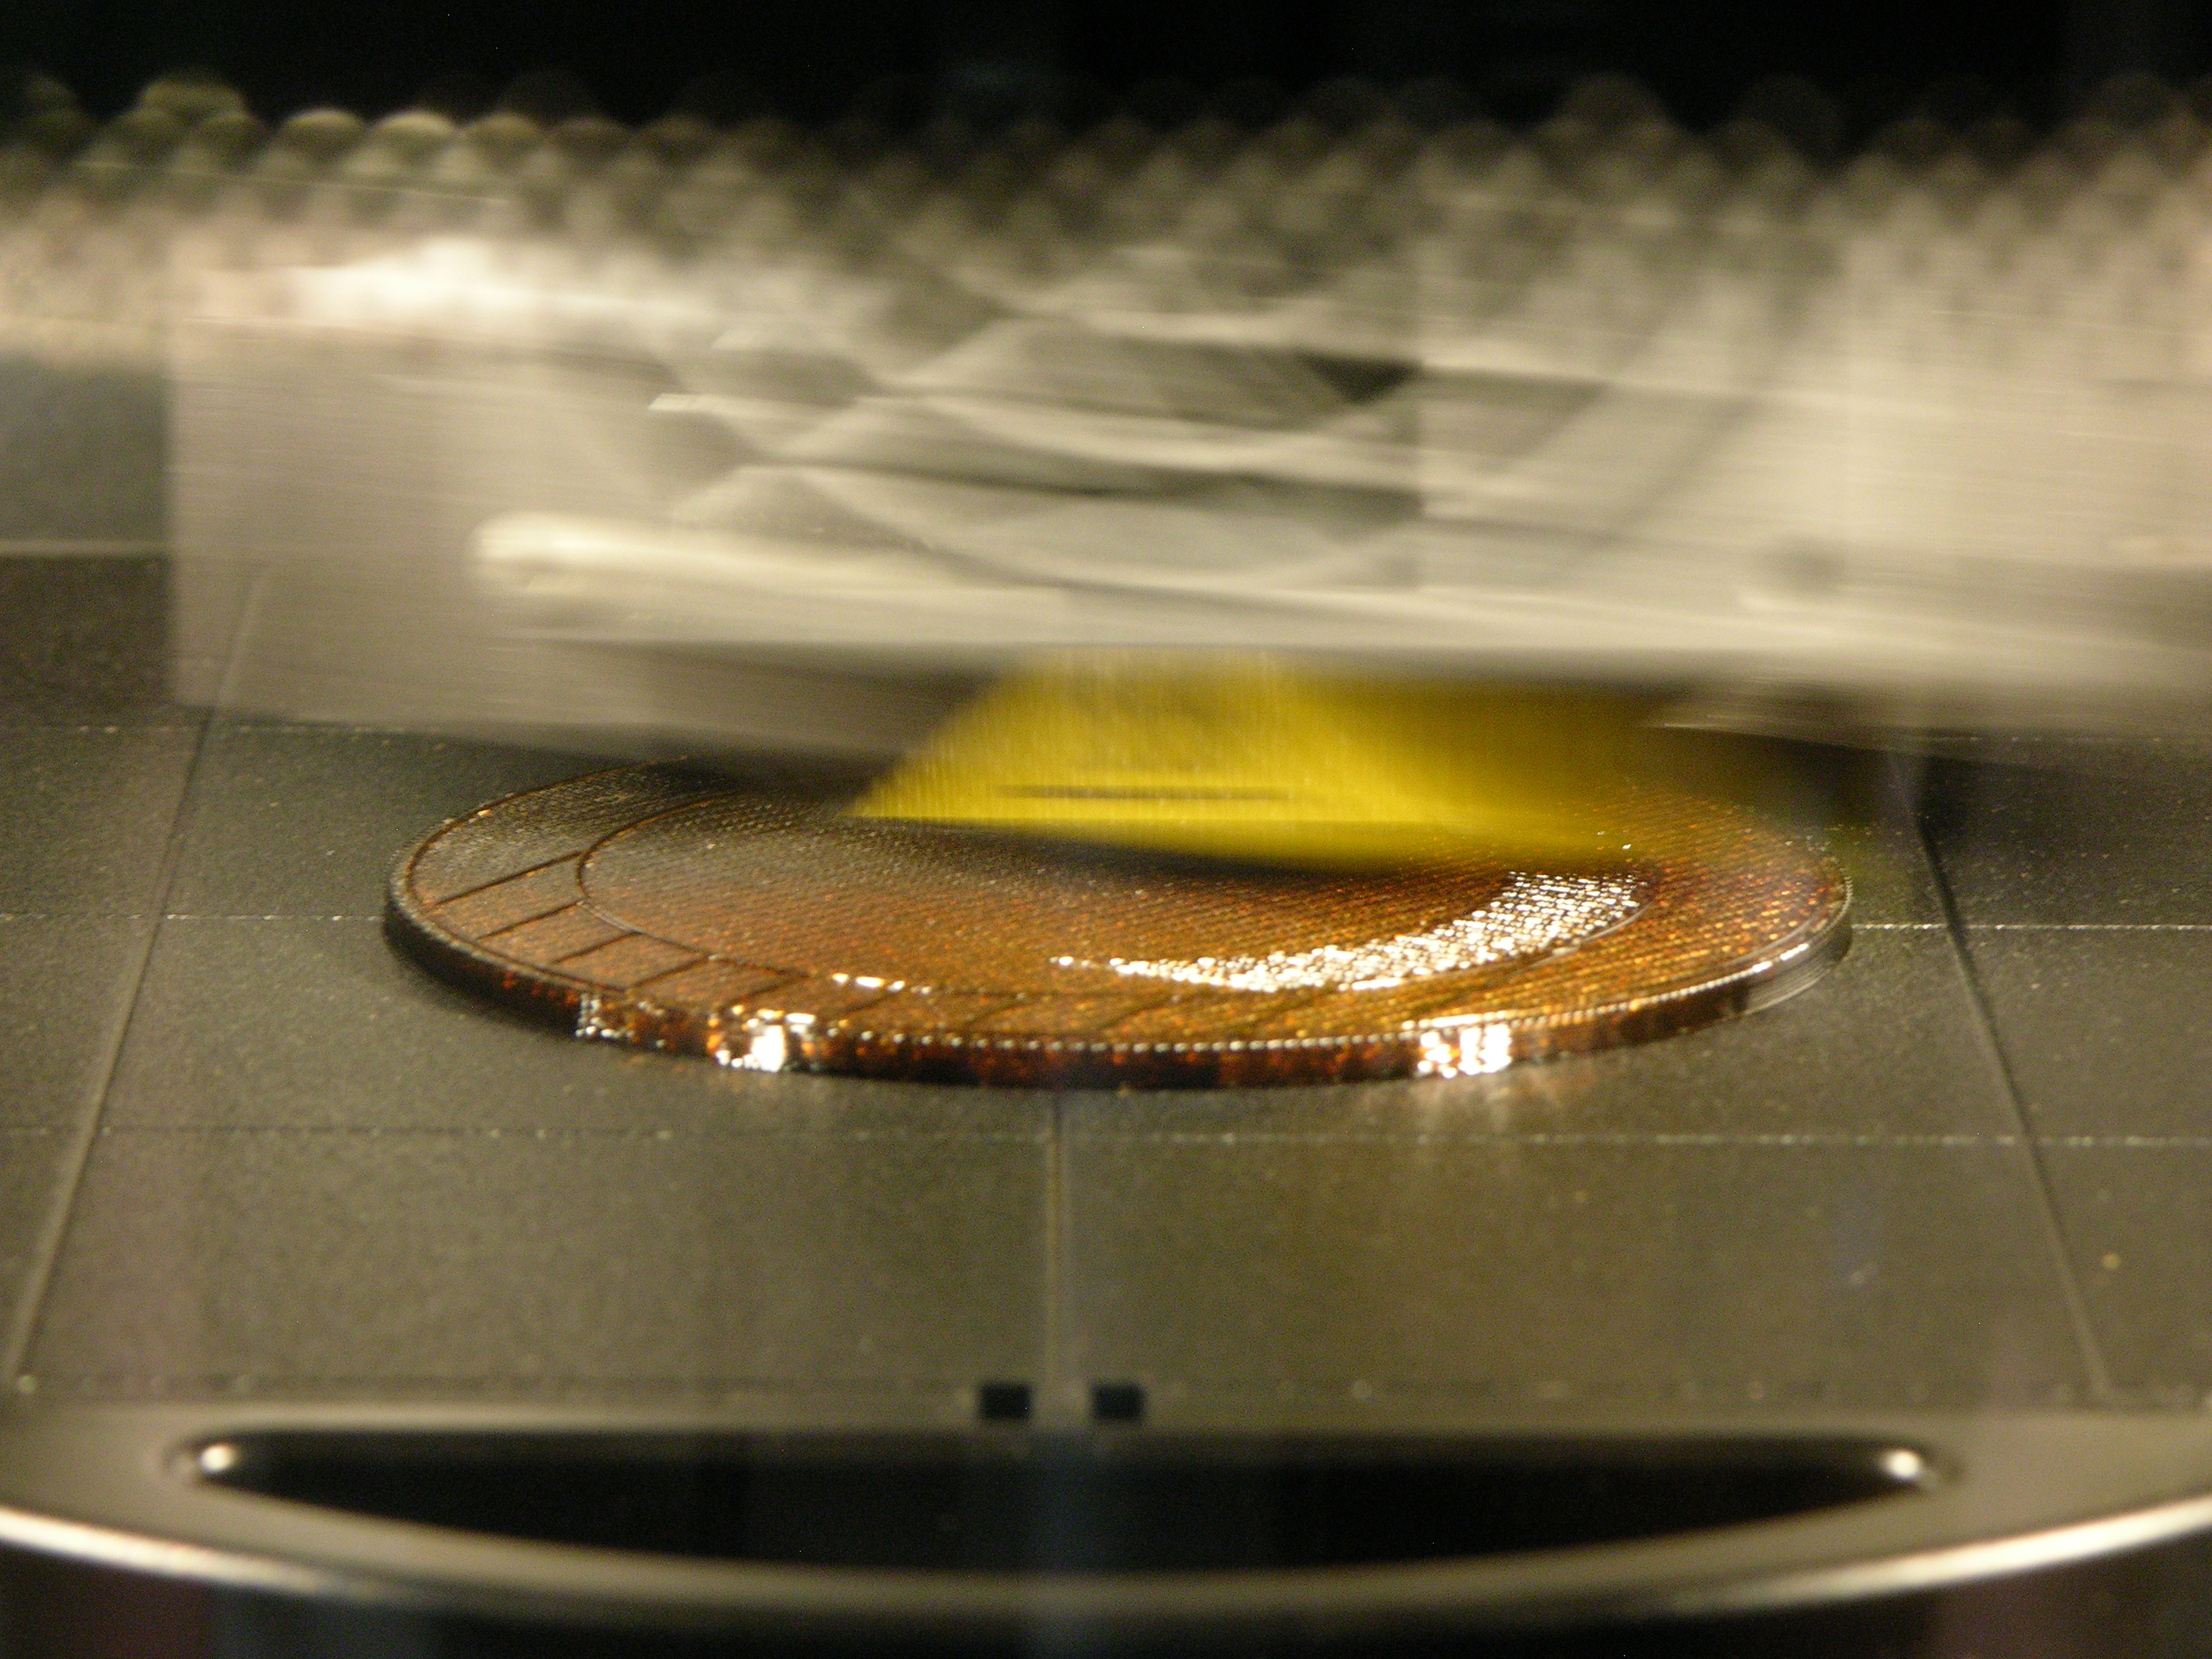
The machine extrudes a tiny “string” of ABS plastic onto a removable tray. It first lays down a brown support structure to hold up any overhanging areas, and the support material is a soluble form of ABS that’s later removed in a detergent bath. The extrusion head moves around one entire horizontal plane, “drawing” in all the material that appears there, then lowers the tray slightly and draws in the next layer.
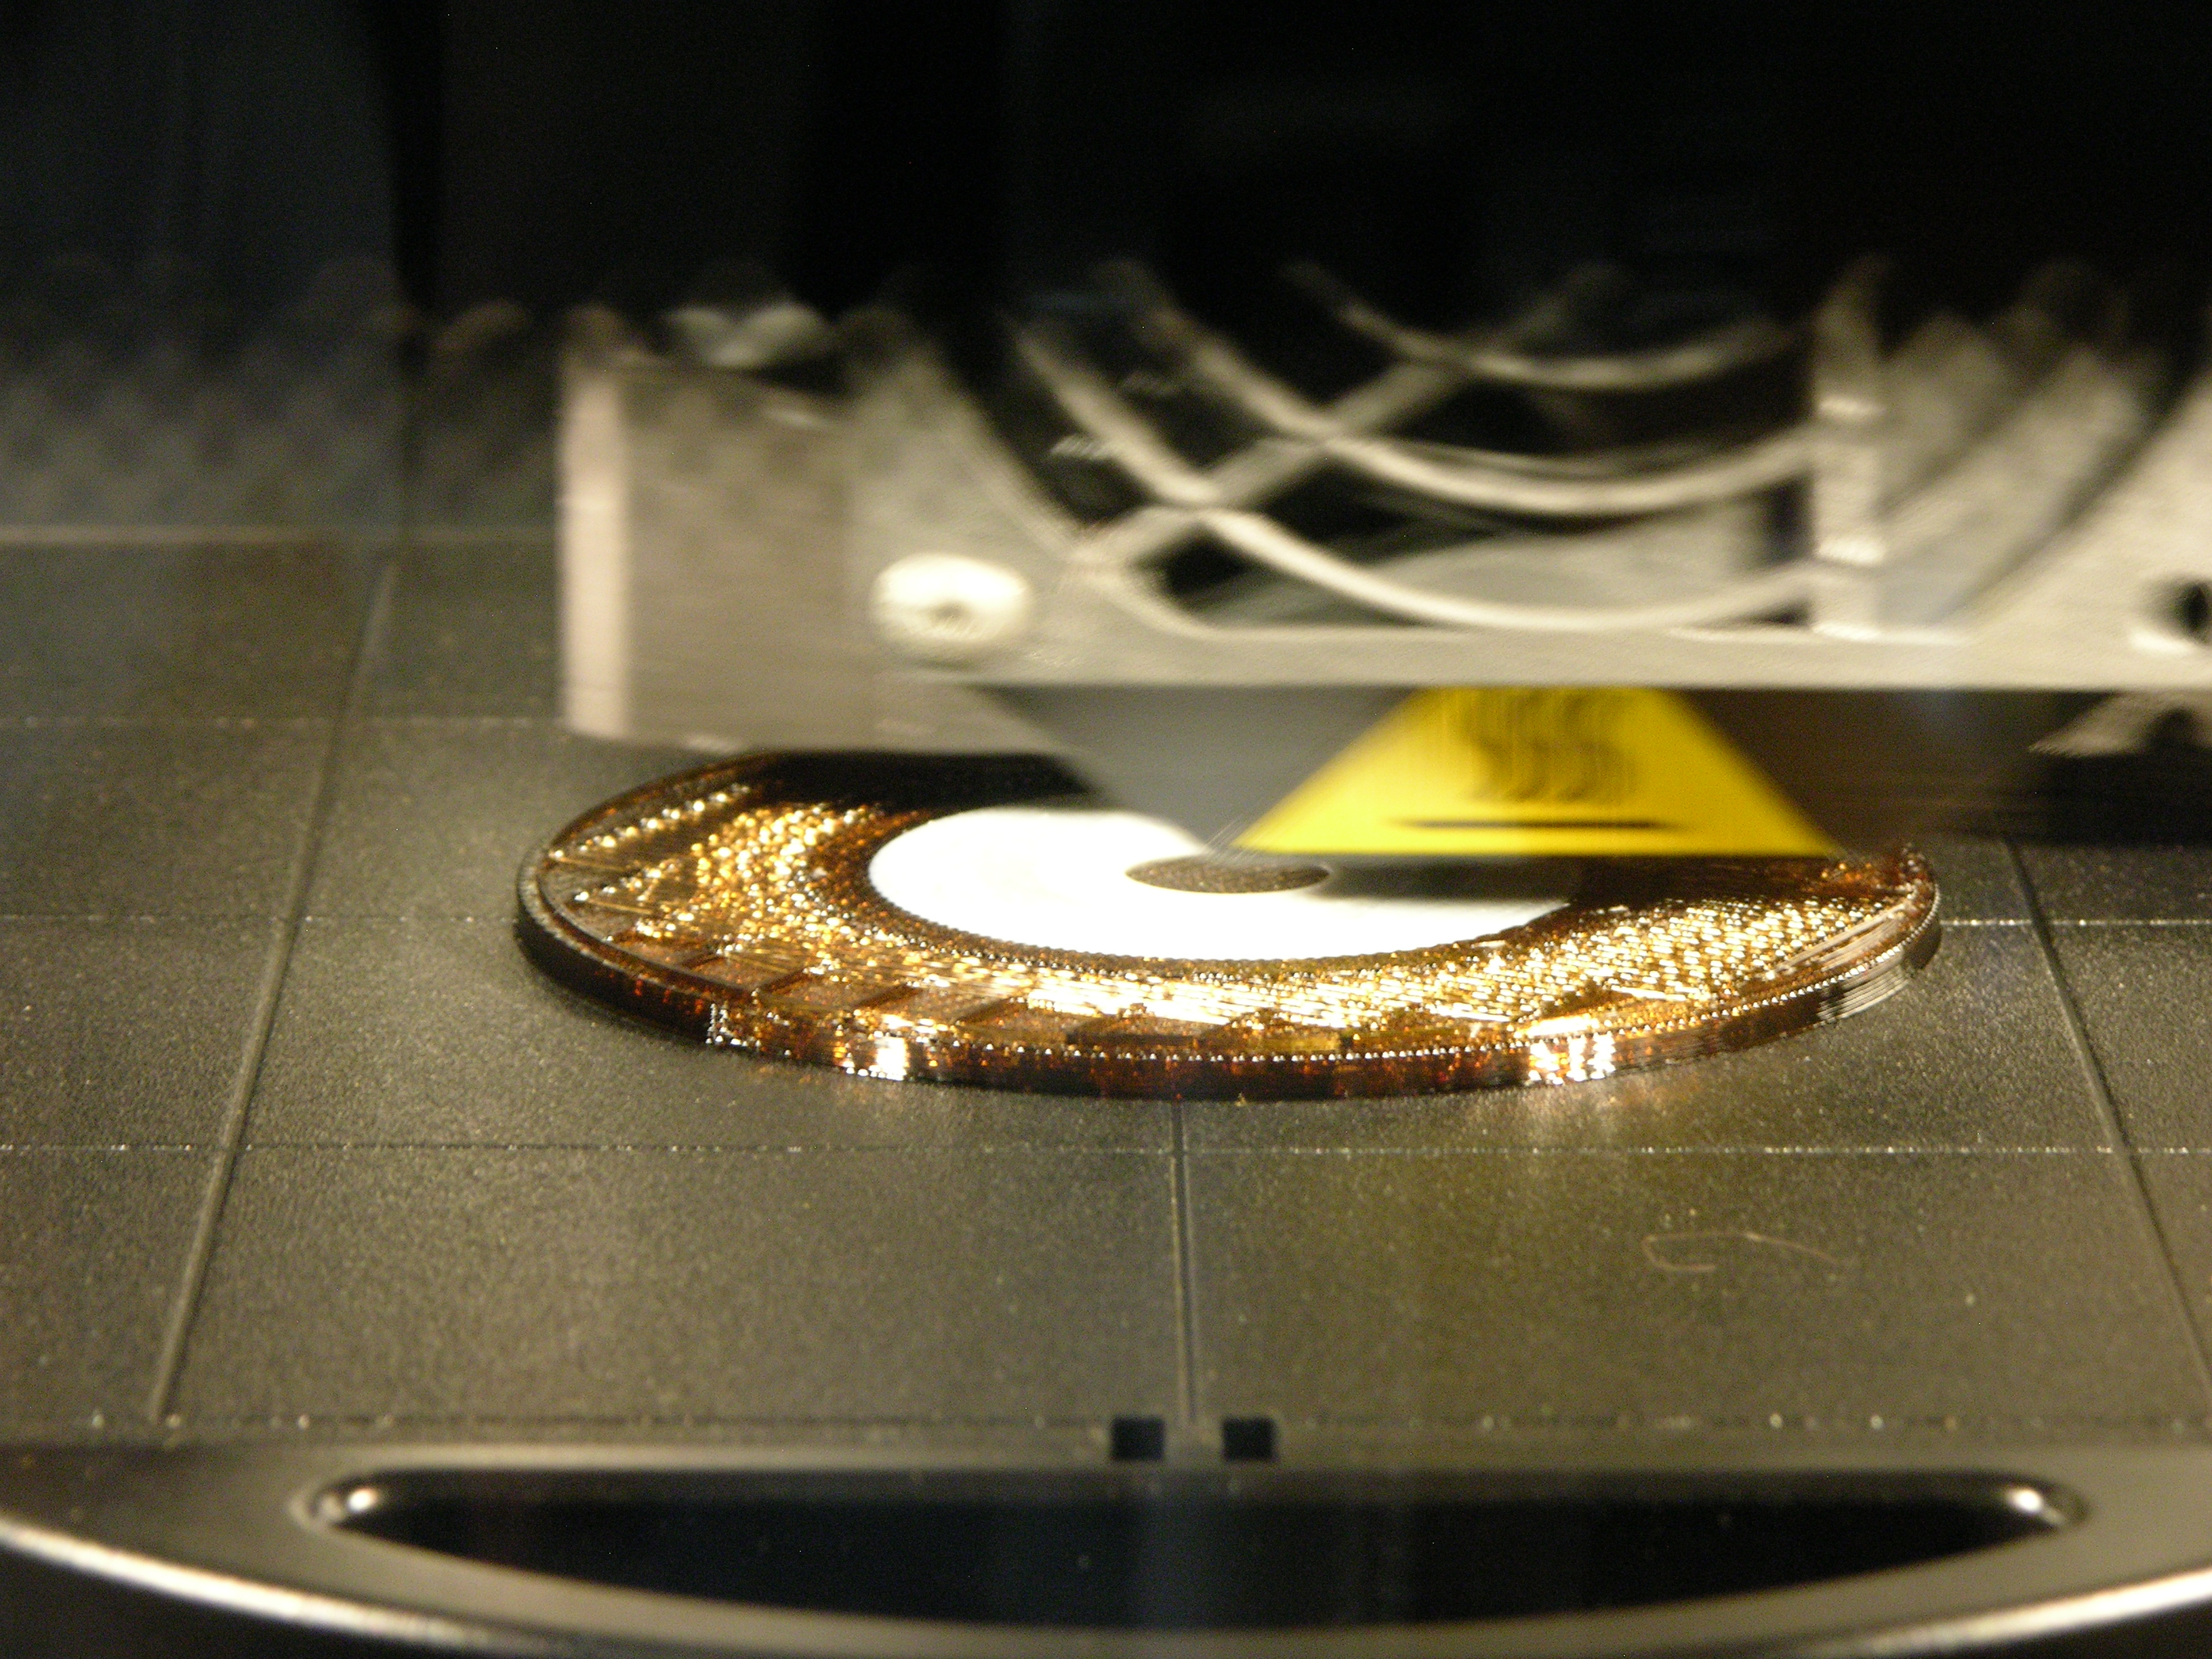
Once the support structure is in place, the machine extrudes plastic for the actual model — still continuing to build support structure for higher overhangs. My puck case was being built upside-down (as a bowl instead of a dome); so here you can see the puck material in the center as the machine works its way out from the low center of the bowl up the curved edges.
Breaking It Loose
The build ran past the end of the work day, so I went back the next morning to see the completed prototype, still attached to the tray. If you look closely, you can see the layers of “threads” that were used to built up the model, with the support structure underneath.
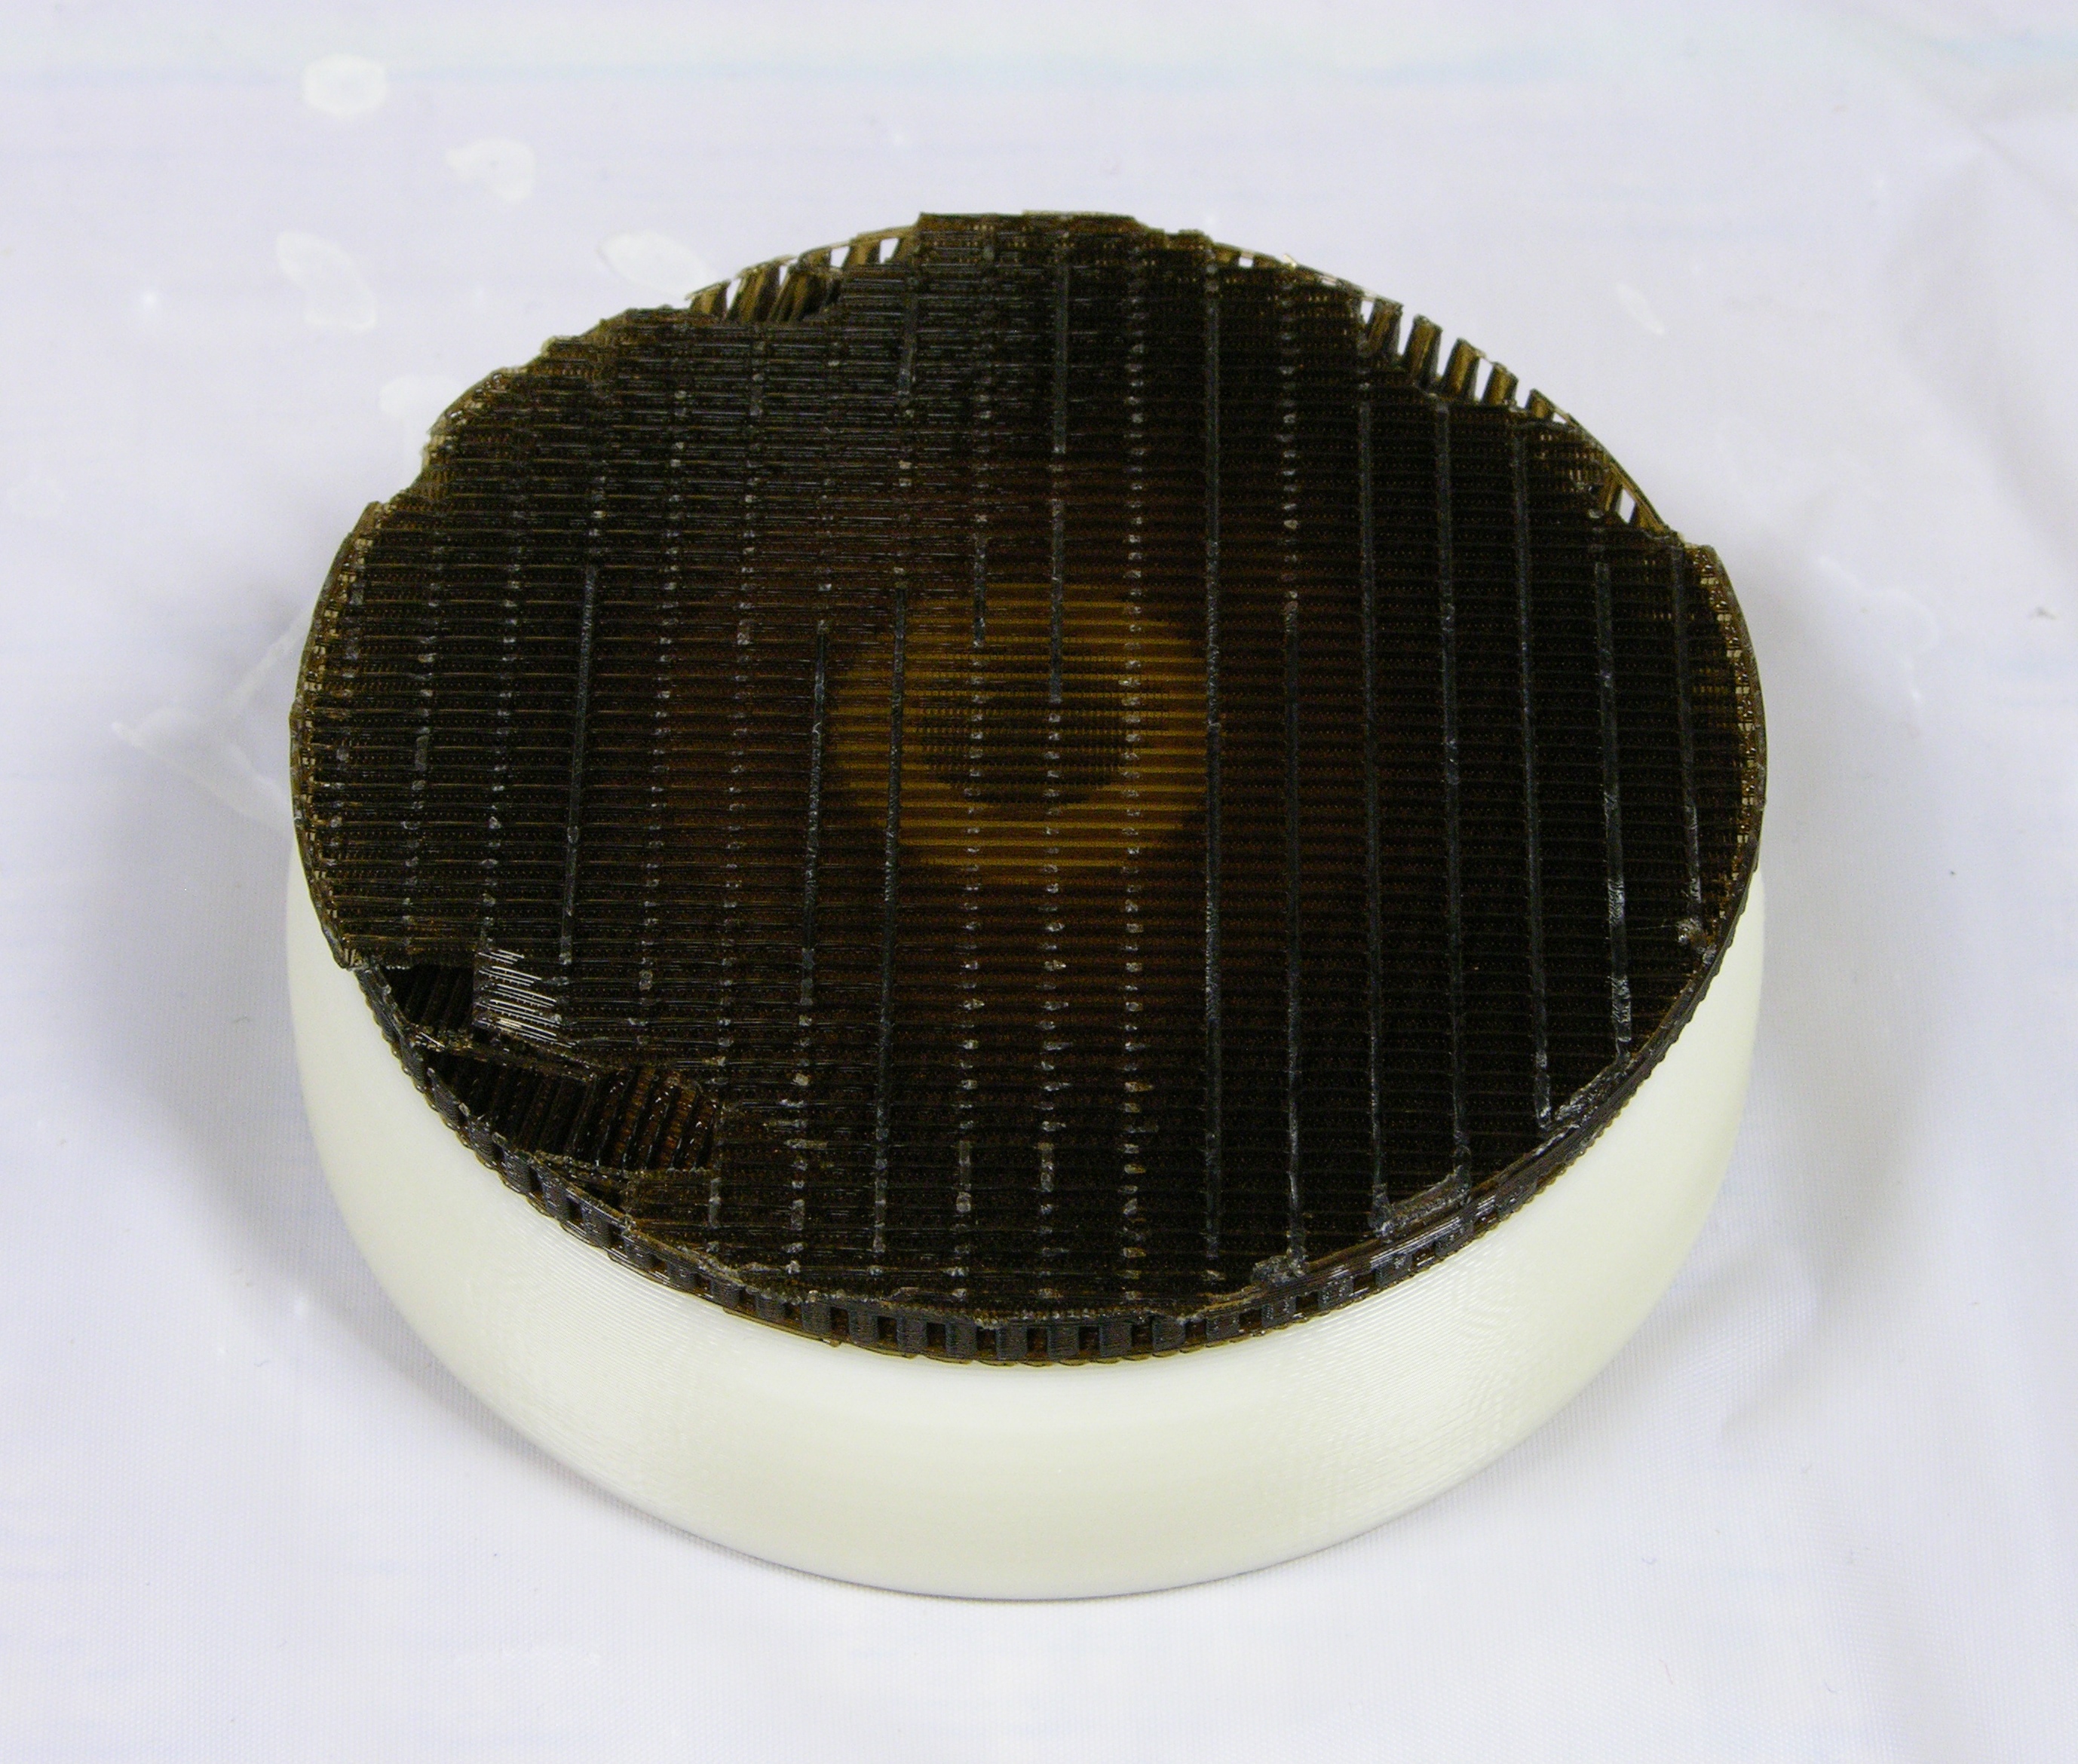
After breaking the model free of the tray, the sparse honeycomb-like nature of the support structure is even more evident. The light ring in the middle is the bottom-most layer of model plastic surrounding the hole for the pushbutton switch.
Although the suggested means of removing the support structure were to put the whole piece into the cleaning tank for a few hours and let it dissolve, I was curious how sturdy the support was and found that I could actually pry and crack it loose of my model using my pocketknife. I managed to get the whole thing cleaned off without using the tank or cutting off a finger.
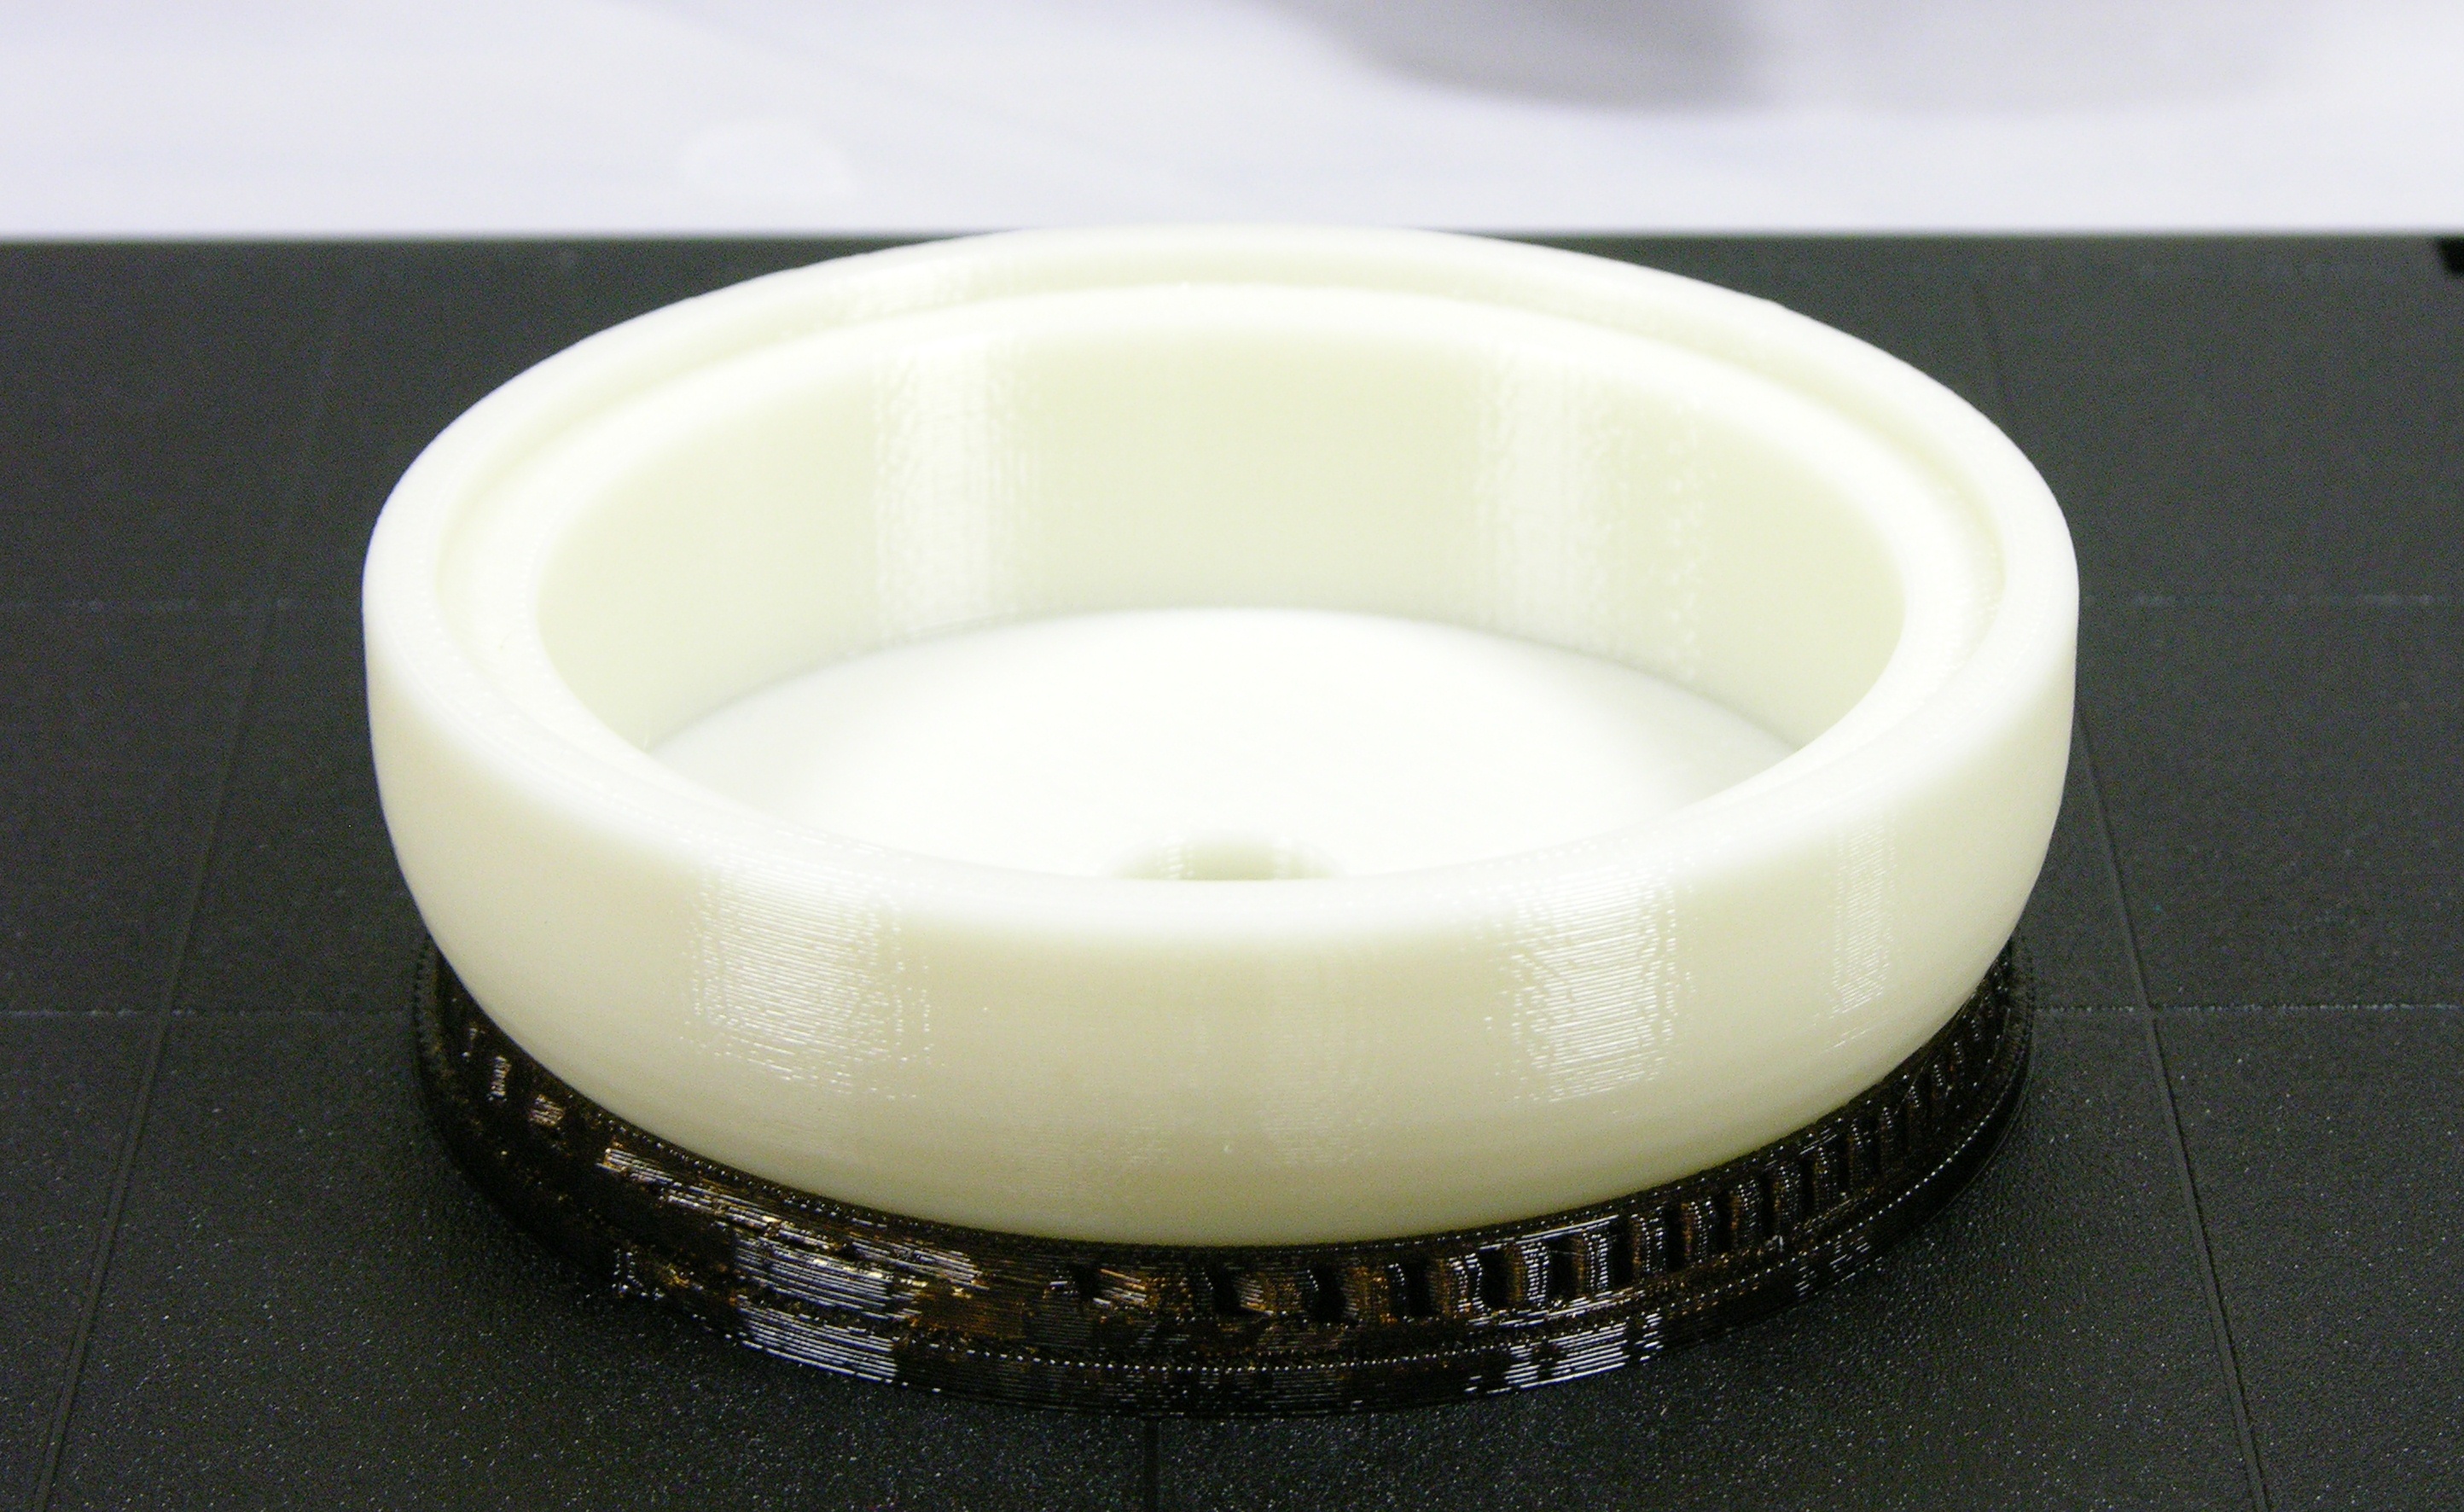
The Result
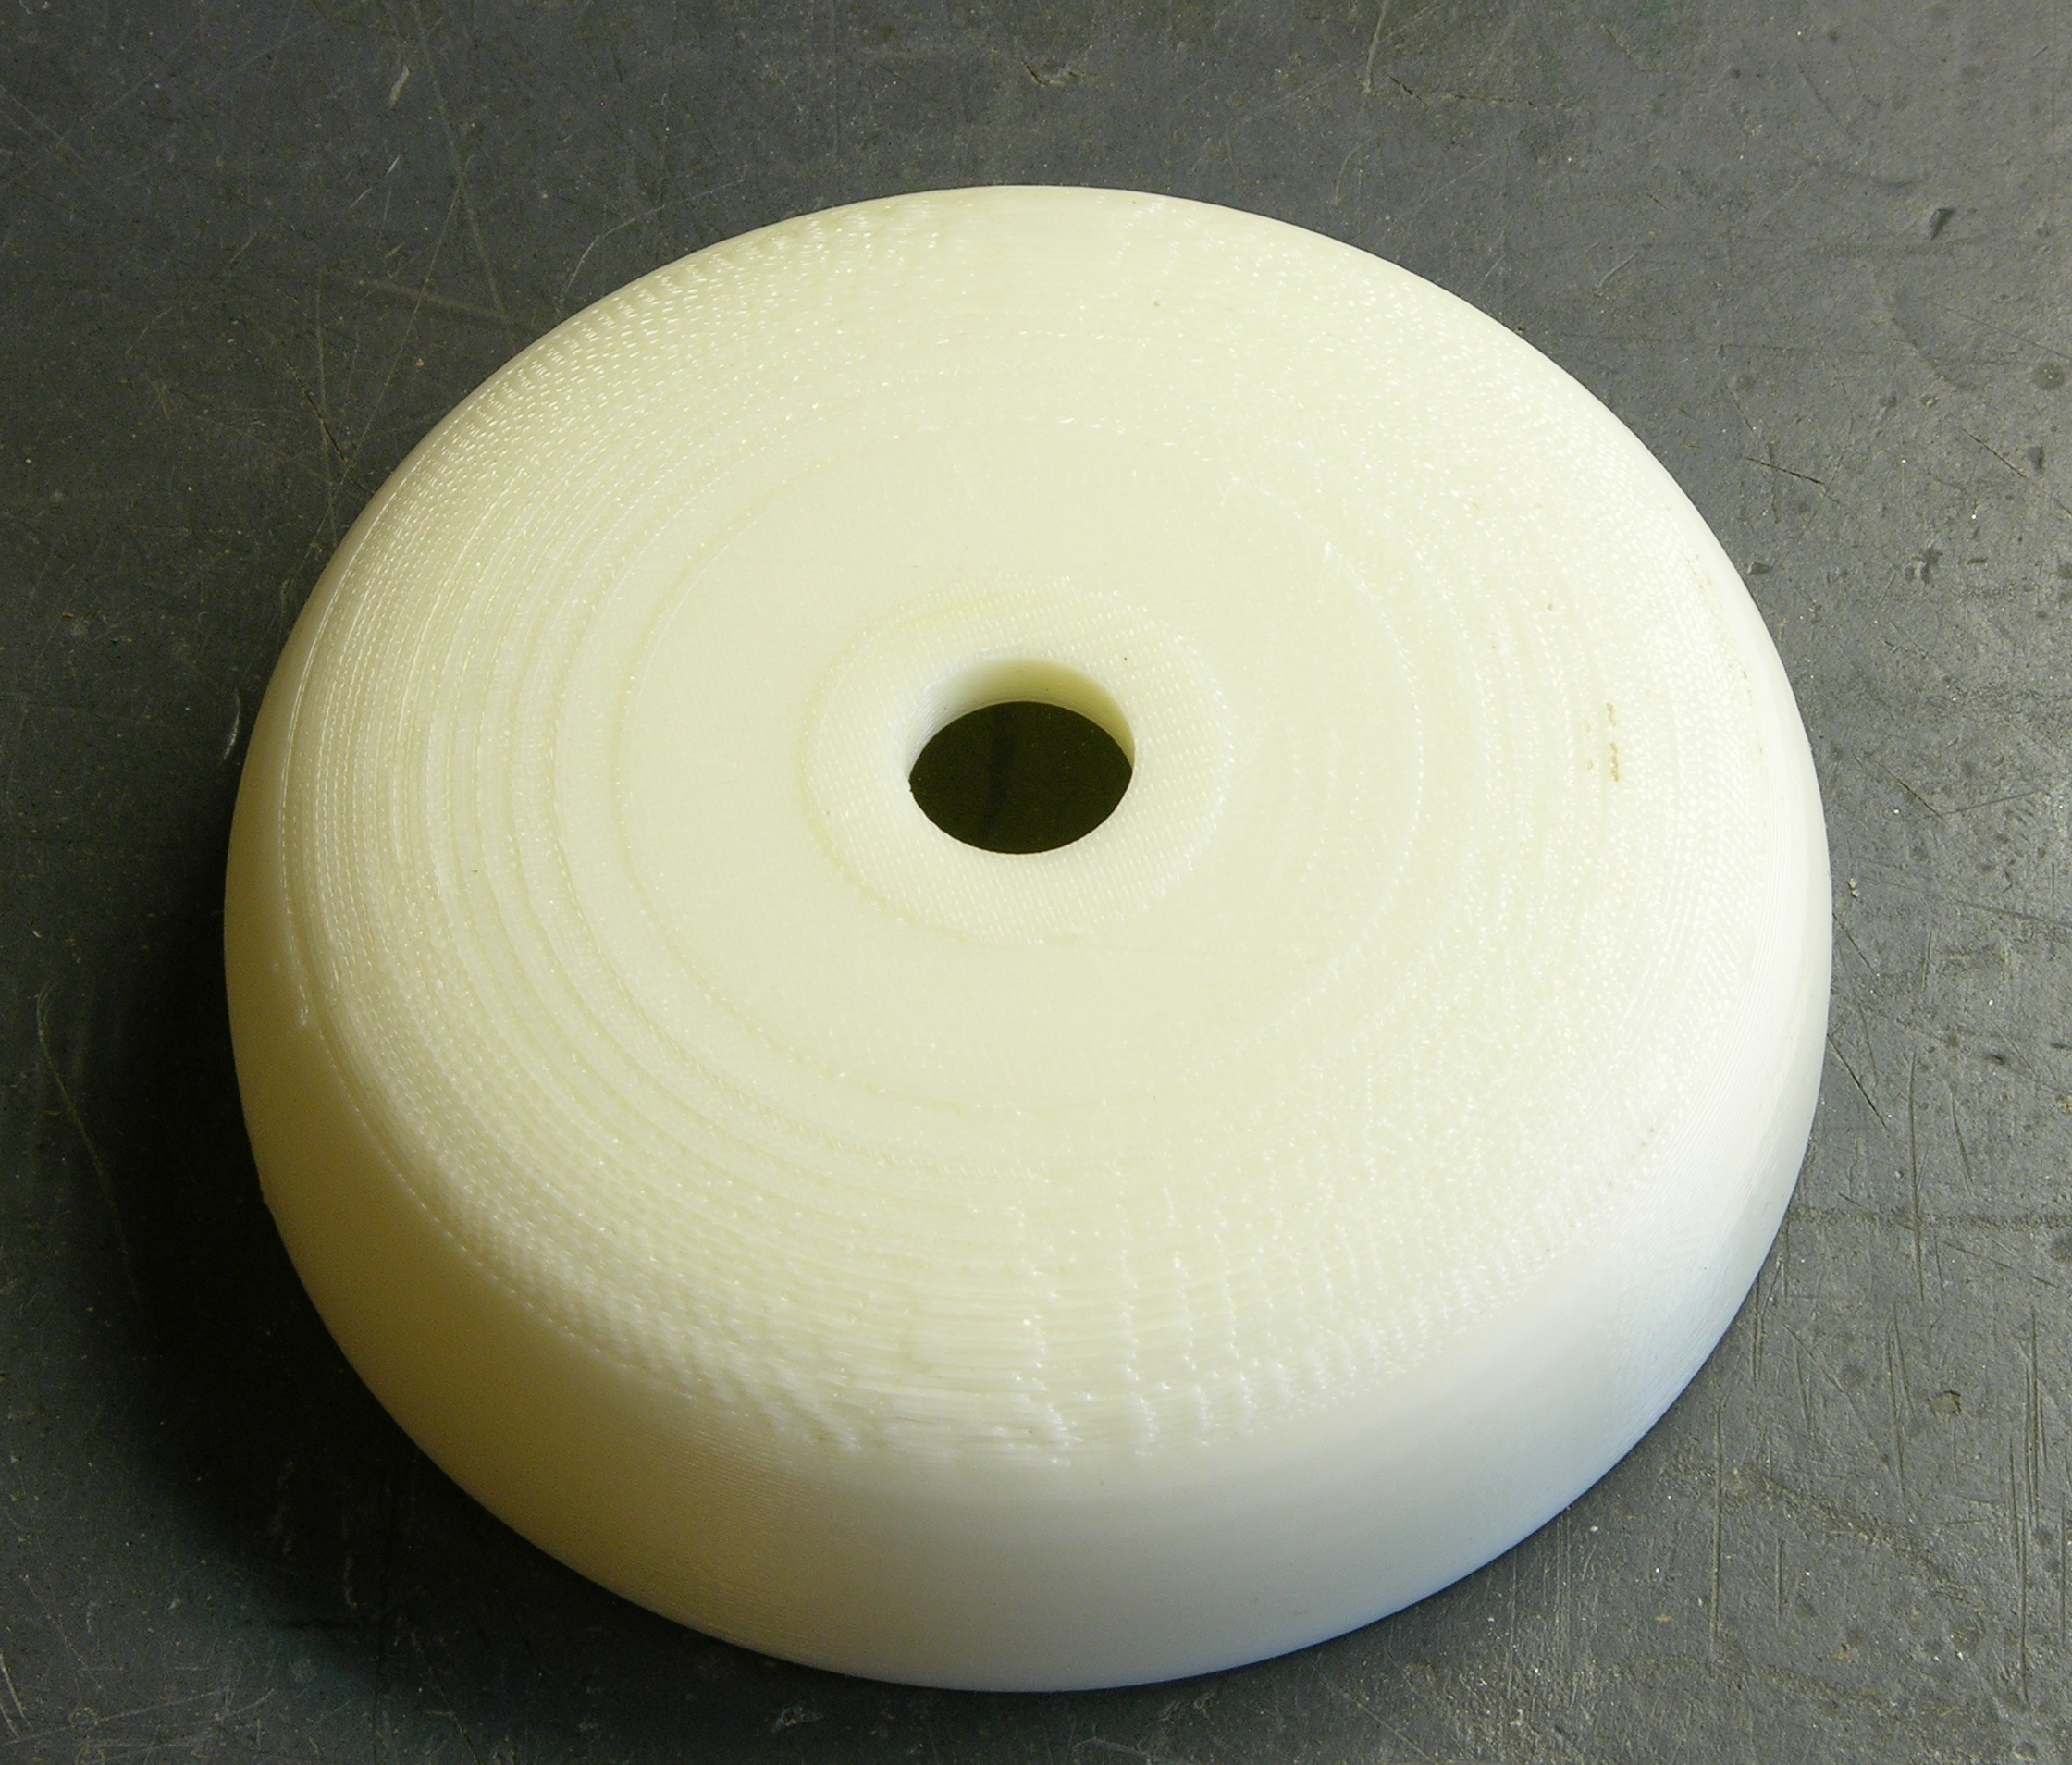
The finished prototype is rougher on the top than I expected — this machine (at least as programmed for this run) doesn’t seem to build a smooth finishing surface on the support structure before beginning to build the model, so the first surface of the model has the jaggies. You can easily see the contour become smoother around the knee of the curve, where it stopped building support because the slope of the overhang could be built directly.
I’m guessing if the machine did lay down a smooth layer of support before starting the actual model, I wouldn’t have been able to break off the support as easily, and I would have had to use the cleaning tank. That still seems like a good tradeoff for a smoother model.
As to the utility of having an opaque prototype of a clear case — pretty darn high. One of my puck design goals is that its size and shape make it comfortable to carry with me all the time, preferably in a back pocket. I’ve been doing exactly that since Tuesday with this ABS case, and I gotta tell you, it’ll work great. No complaints yet, sitting on it all day, driving, you name it.
Fitting Batteries
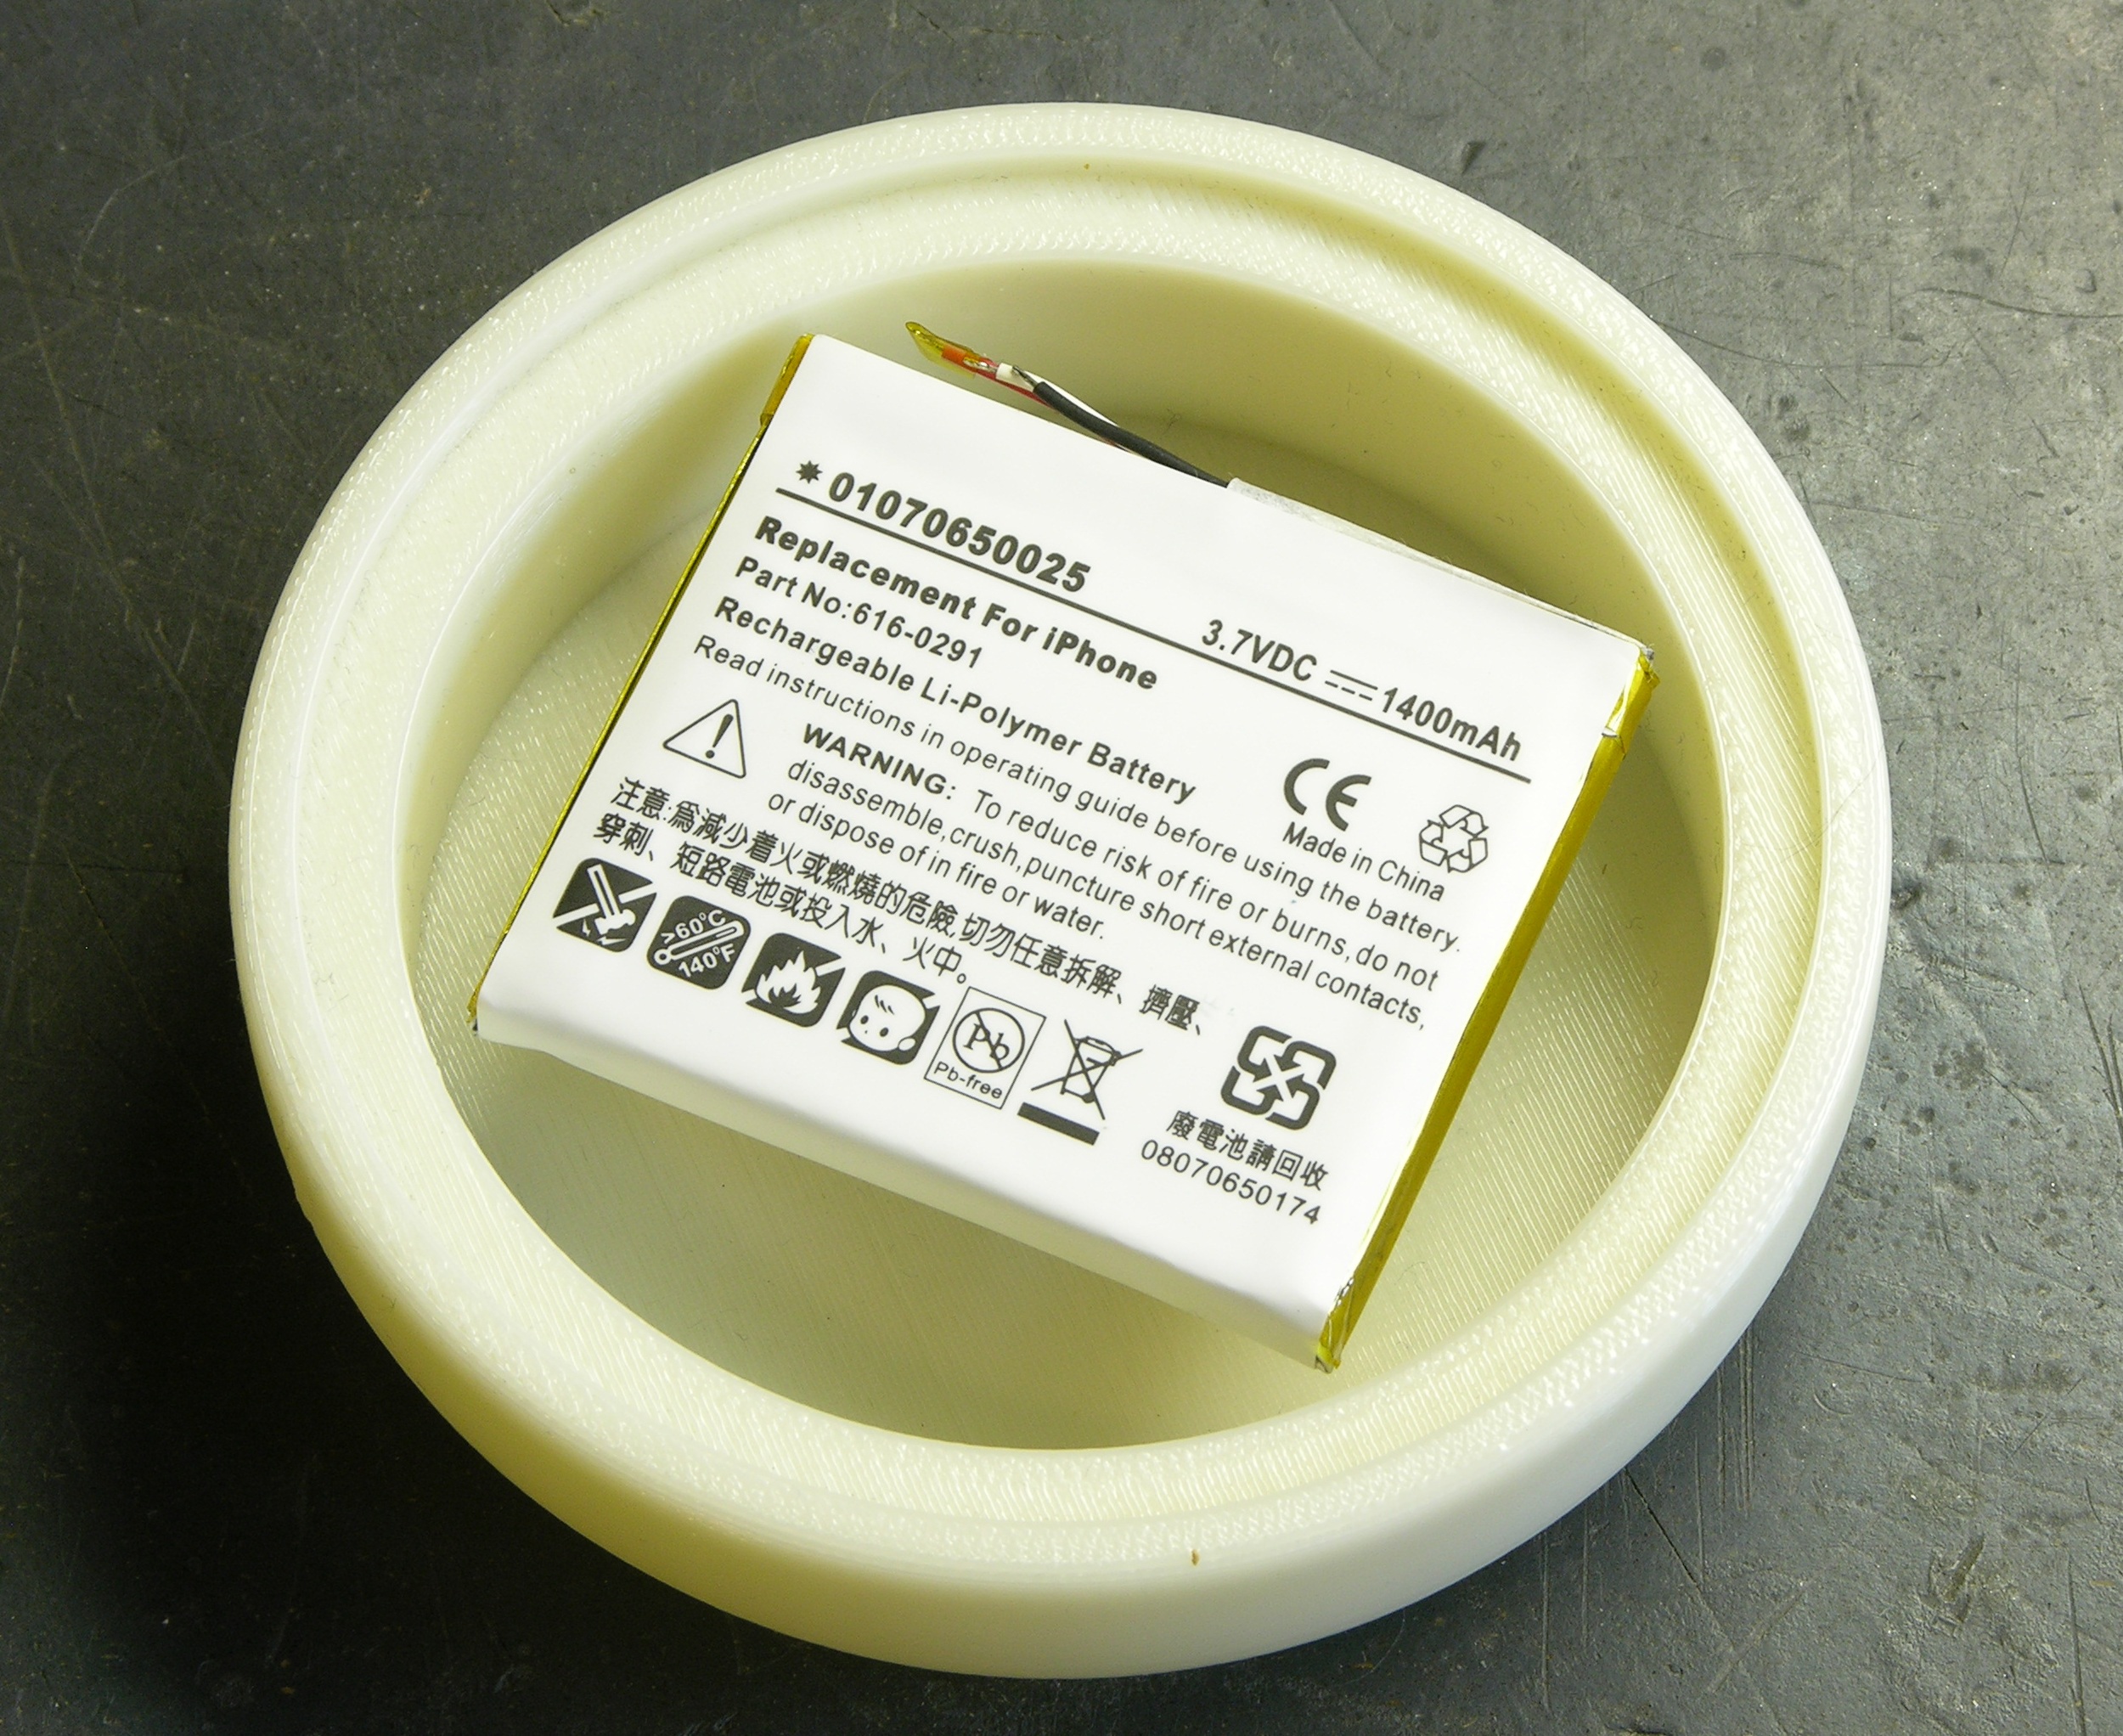
A little over a year ago, I had been really pleased with the service I got from eBay seller Digital Power Pro on a replacement battery for my Visor Prism, and contacted them to ask whether they sold any Li-Ion or Li-Po batteries with the mAh rating I was looking for and of a size that would fit inside my puck case. They were entertained by the question, and recommended an iPhone replacement battery and an HP Jornada battery.
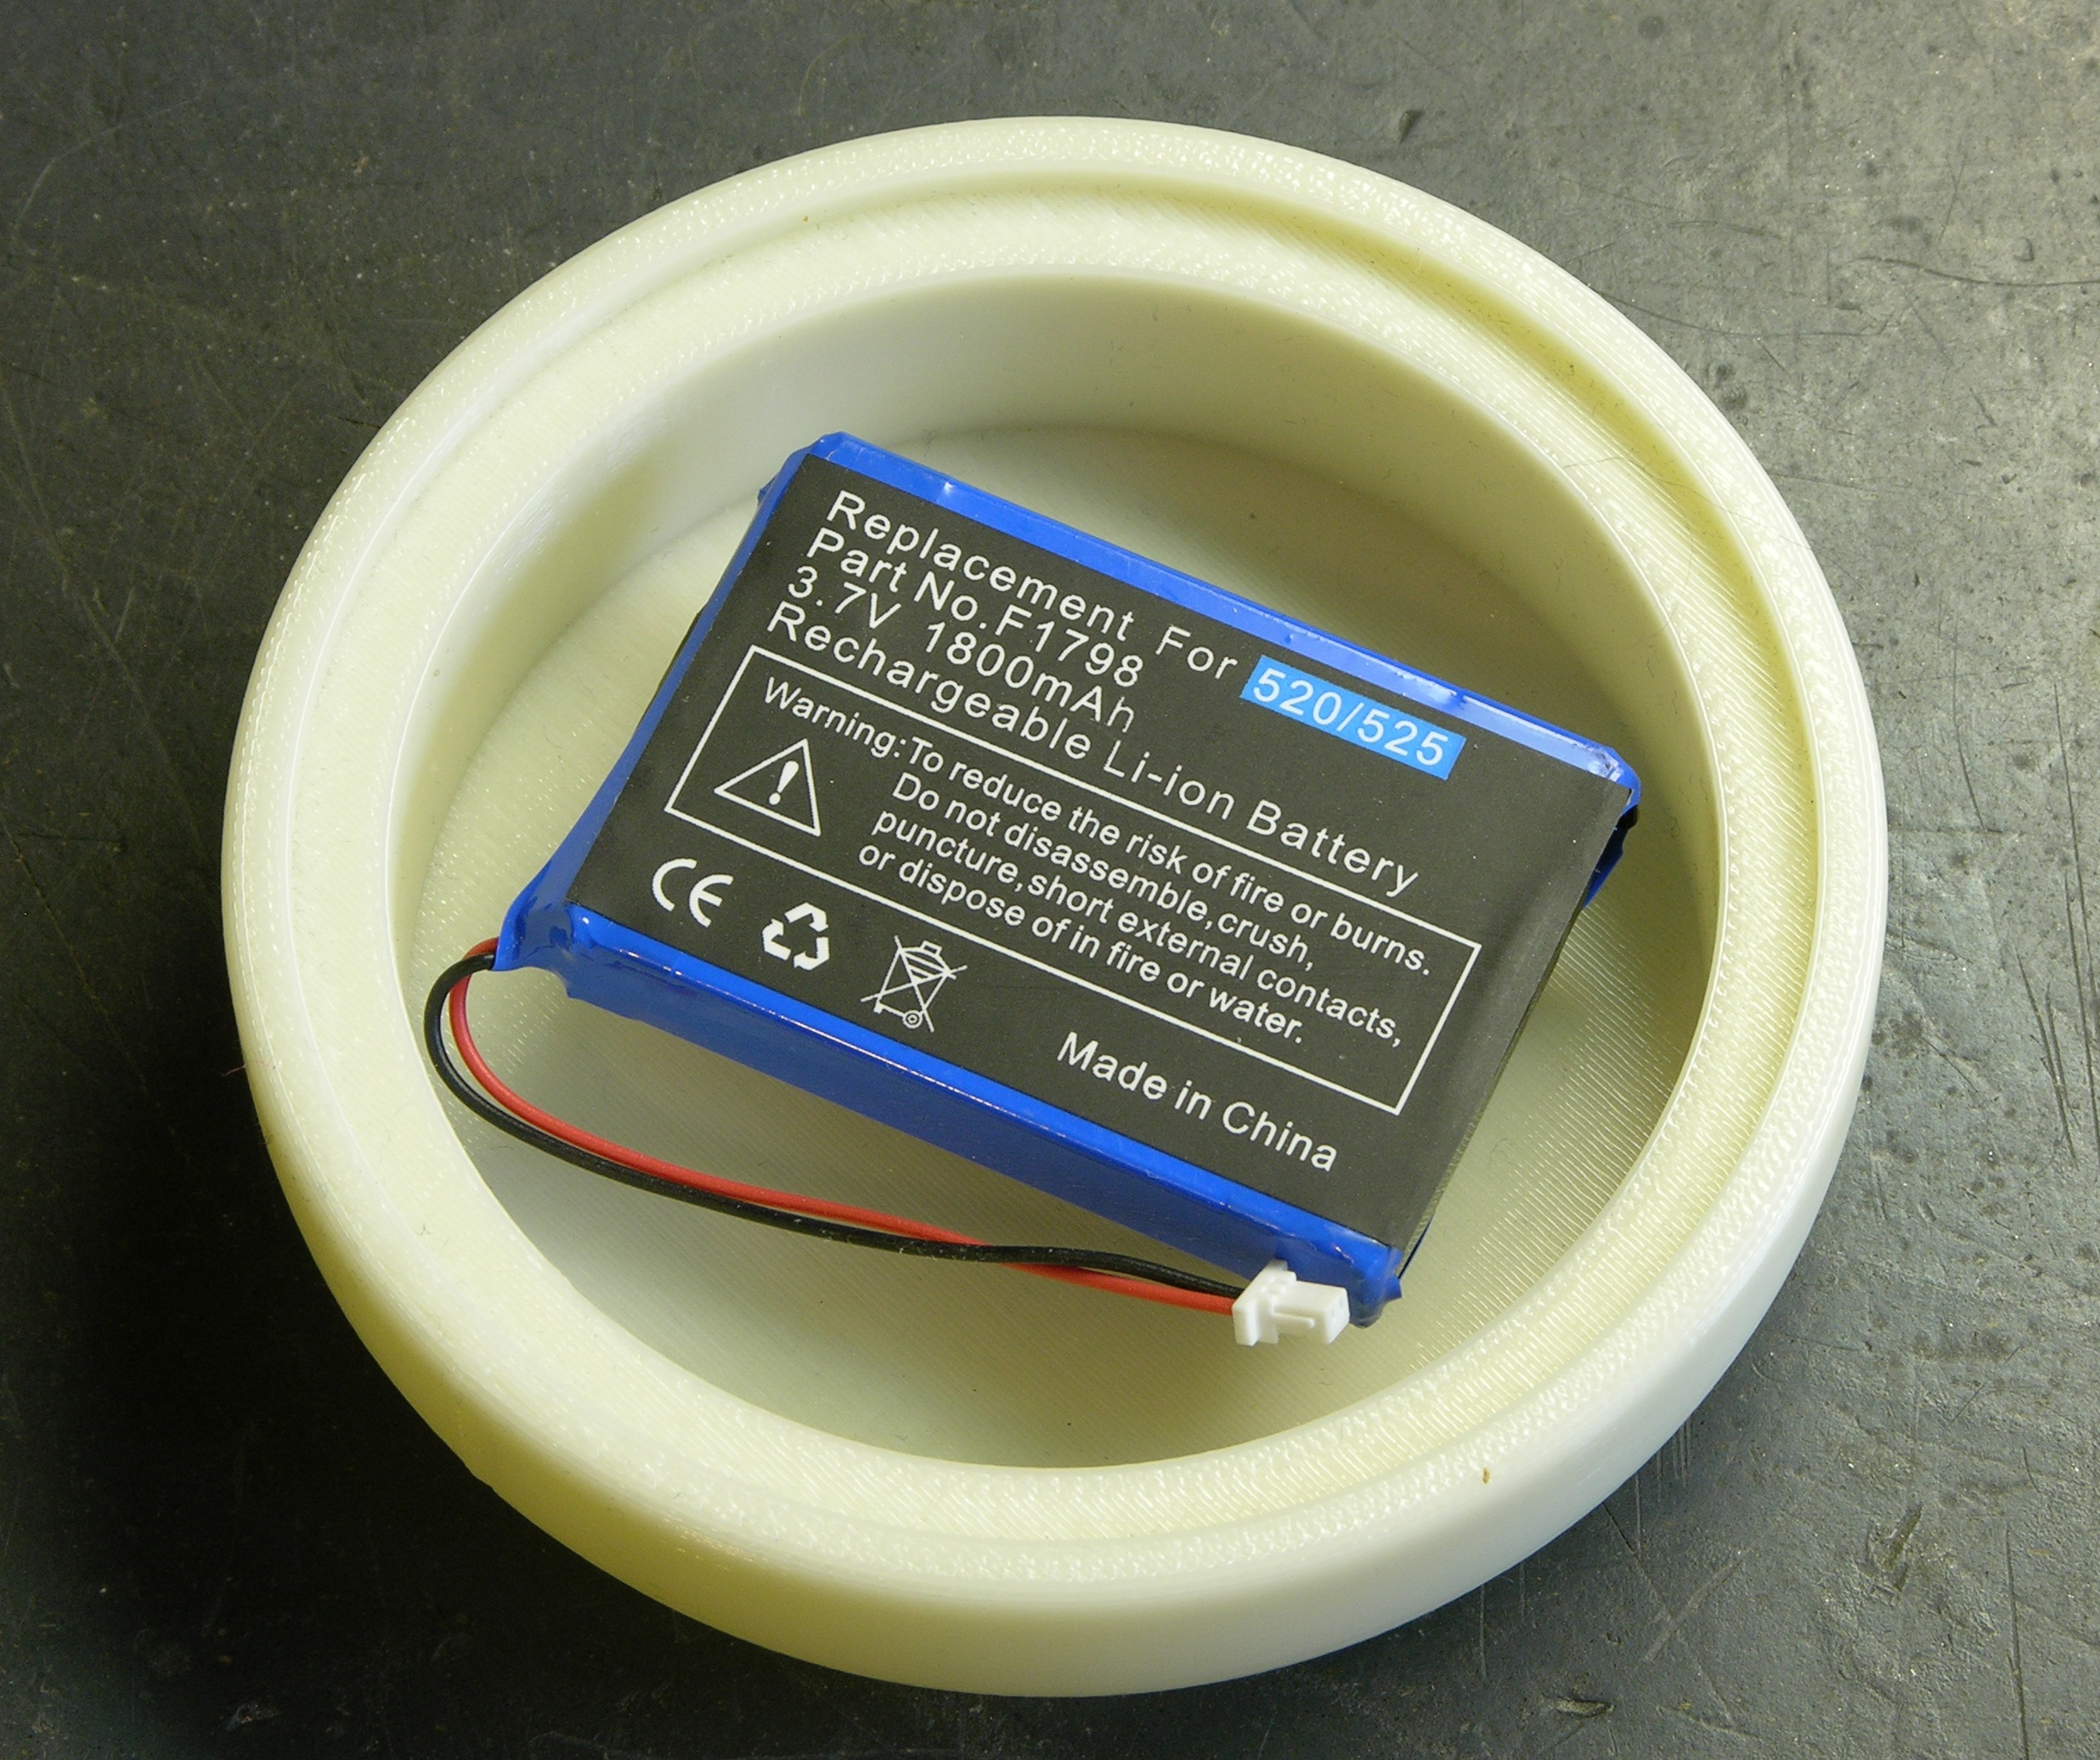
They both fit nicely into the recess, with the iPhone battery being a little slimmer in case I run out of room.
Next step: milled acrylic case.
Hey Keith,
Love your blog. I’ve been following it for a while and its good to see new work being done on the puck. Anyway, are you releasing the files for the puck design? I’d love to check it out and try to print it on my RepRap machine.
Also, if you’re into sharing, you should check out the site my friend Bre and I made: http://www.thingiverse.com. Its a place to share digital designs for physical objects.
Cheers,
Zach
Zach, great to hear from you again!
In the long term, I want to open-source everything about the puck, including the Blender source and STL files.
I’m hesitant to do that at the moment, though, for a couple of reasons.
First and foremost, the design isn’t done. The outer surface of the shell is pretty good, but the inner surface needs work for mounting the pushbutton, a groove for an O-ring for waterproofing, and screw holes.
Second, I’d prefer to release everything about the project once I have it in a usable state. I’m not sure whether it’s selfishness or hubris, but I’d really like to get it working before setting it loose to go wander about in the world and have other people contributing to it.
I’m interested in your remark about building one with a RepRap, though. If I were to get some of my needed changes made and update the Blender and STL files, would you be willing to RepRap one for me for the cost of materials and shipping, plus snap some photos of the build?
Absolutely! Just send me an STL or a Blender file and I’ll try my best.
Cheers,
Zach
After watching this a few weeks ago http://www.jaylenosgarage.com/video/video_player.shtml?vid=944641
i got this incessant urge in me to sell my car, woodworking tools etc.
There is a cheaper version for $14k
http://www.dimensionprinting.com/3d-printers/3d-printing-uprint.aspx
i have a uprint 3d printer and am making parts that i want to fully waterproof as im finding the absplus material allows water to go through do you know how to waterproof the absplus
Merrill, I haven’t tried that yet so I really don’t know. One thing that comes to mind is that acetone is said to dissolve ABS; so you might be able to “buff” the part with an acetone-dampened rag and get that to seal the gaps between layers.