A few weeks ago, my wife’s coffeemaker quit working, and this became A Problem. Not too long after that (or should I say, slightly too long after that) I opened it up, found I couldn’t easily fix what was wrong, and hacked it to bypass the broken part.
The symptom was that it wouldn’t power on anything — not even the timer display and the power LED. I suspected that something must have failed on the control PC board; but just to be thorough (and because they were easy to get to), I continuity-tested the thermal switch and the heating element first. No problems there.
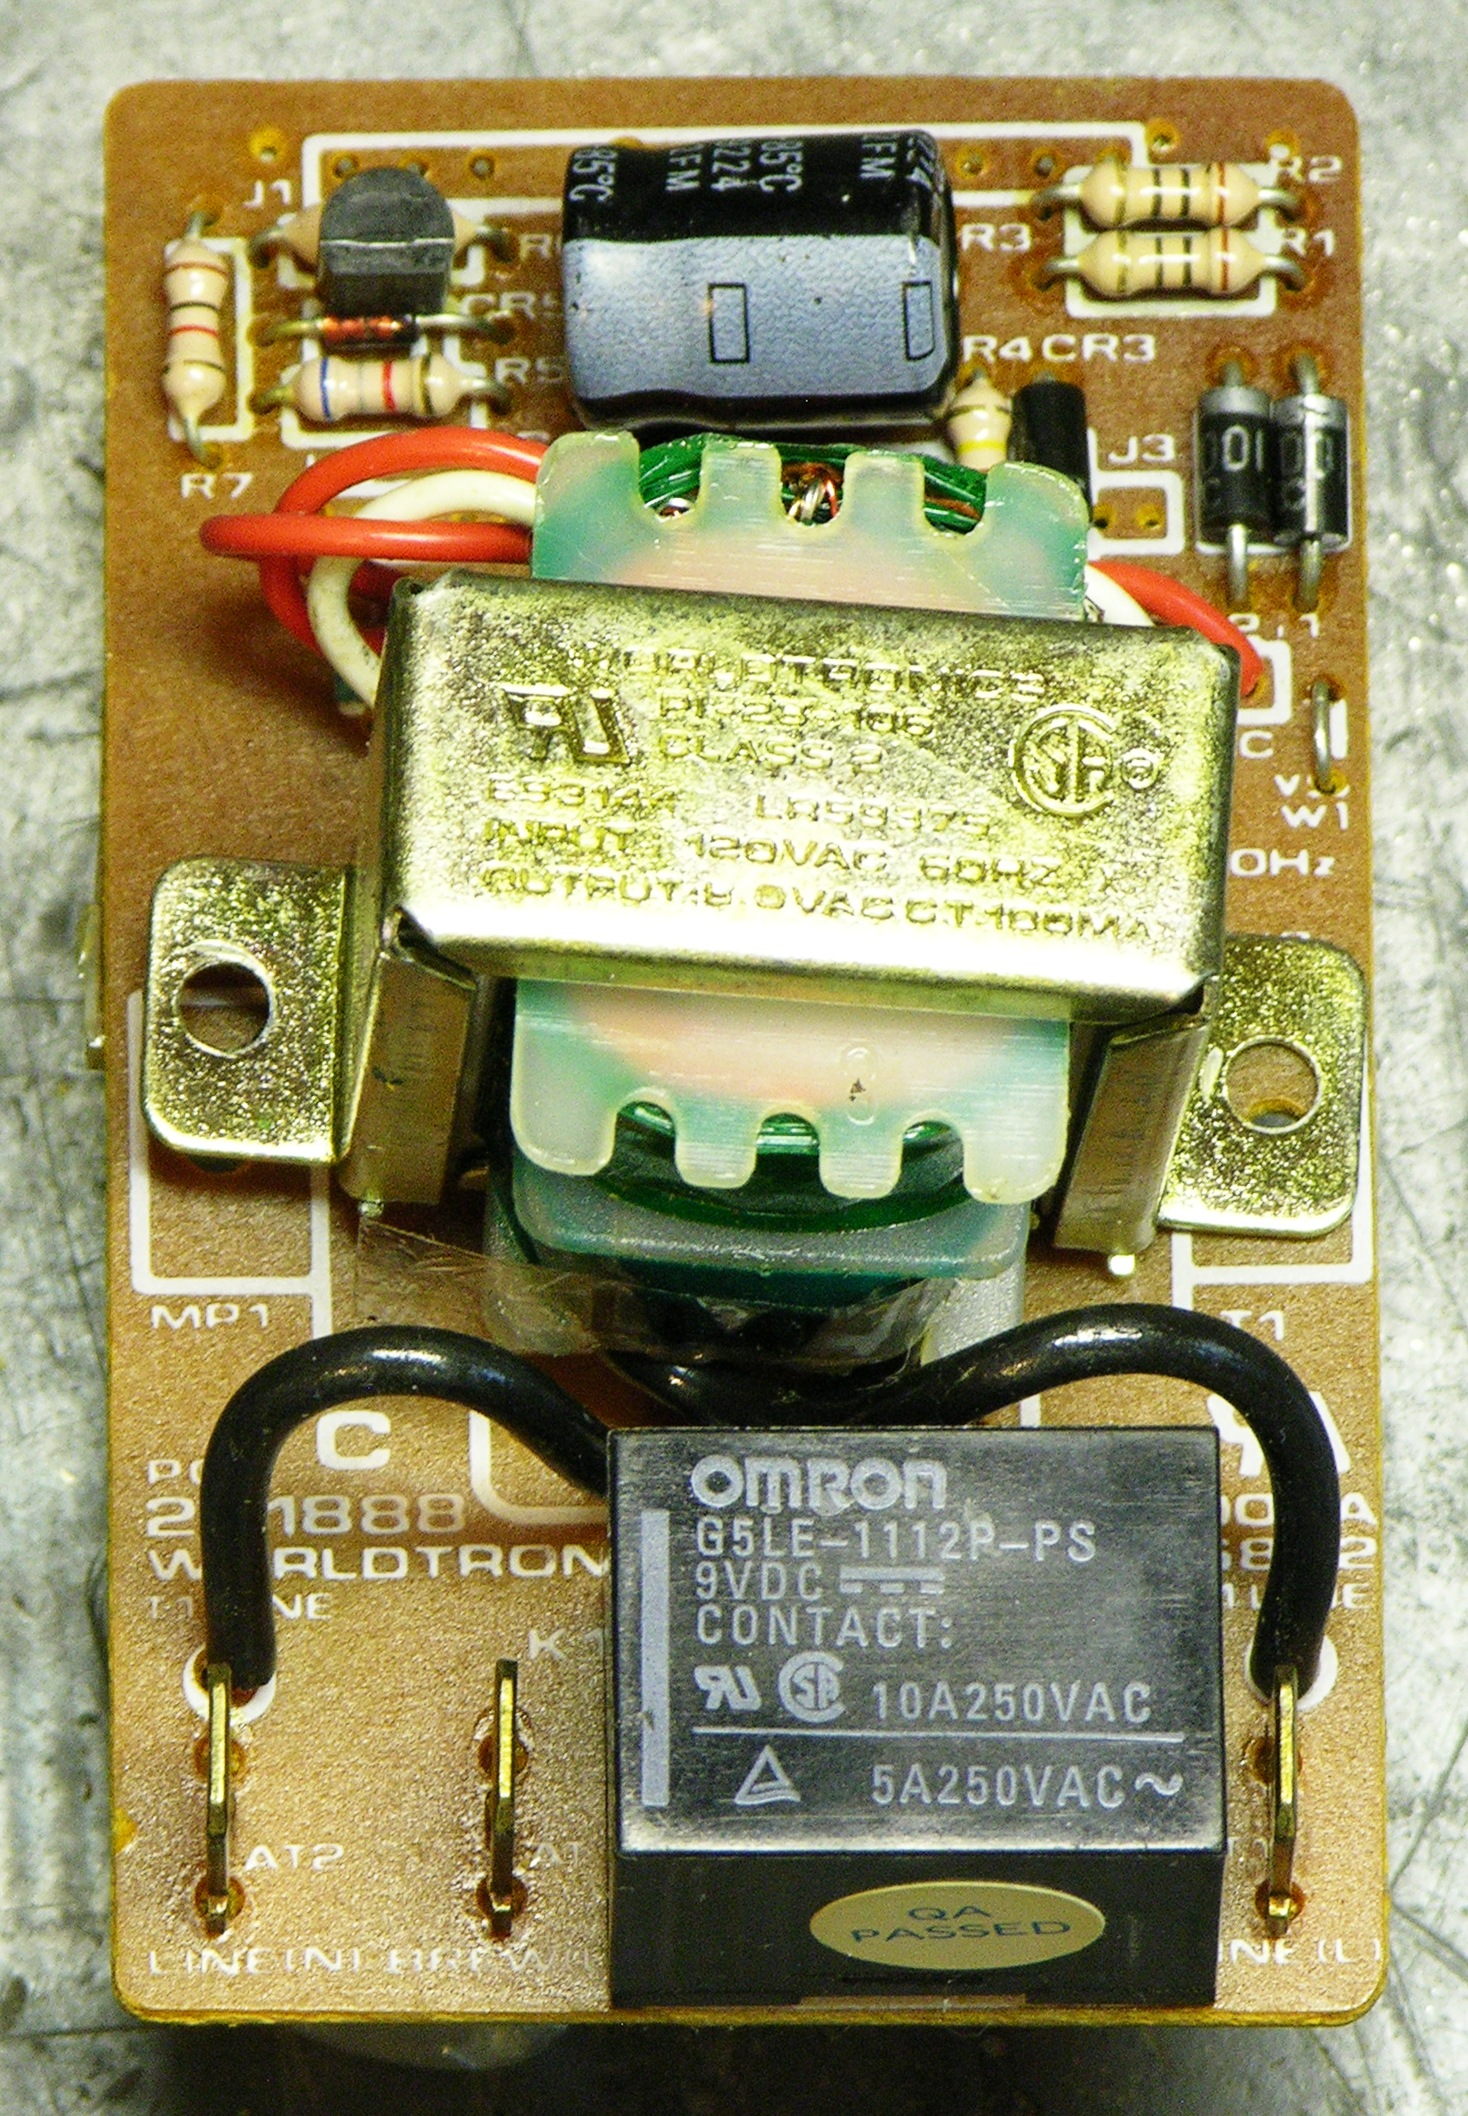
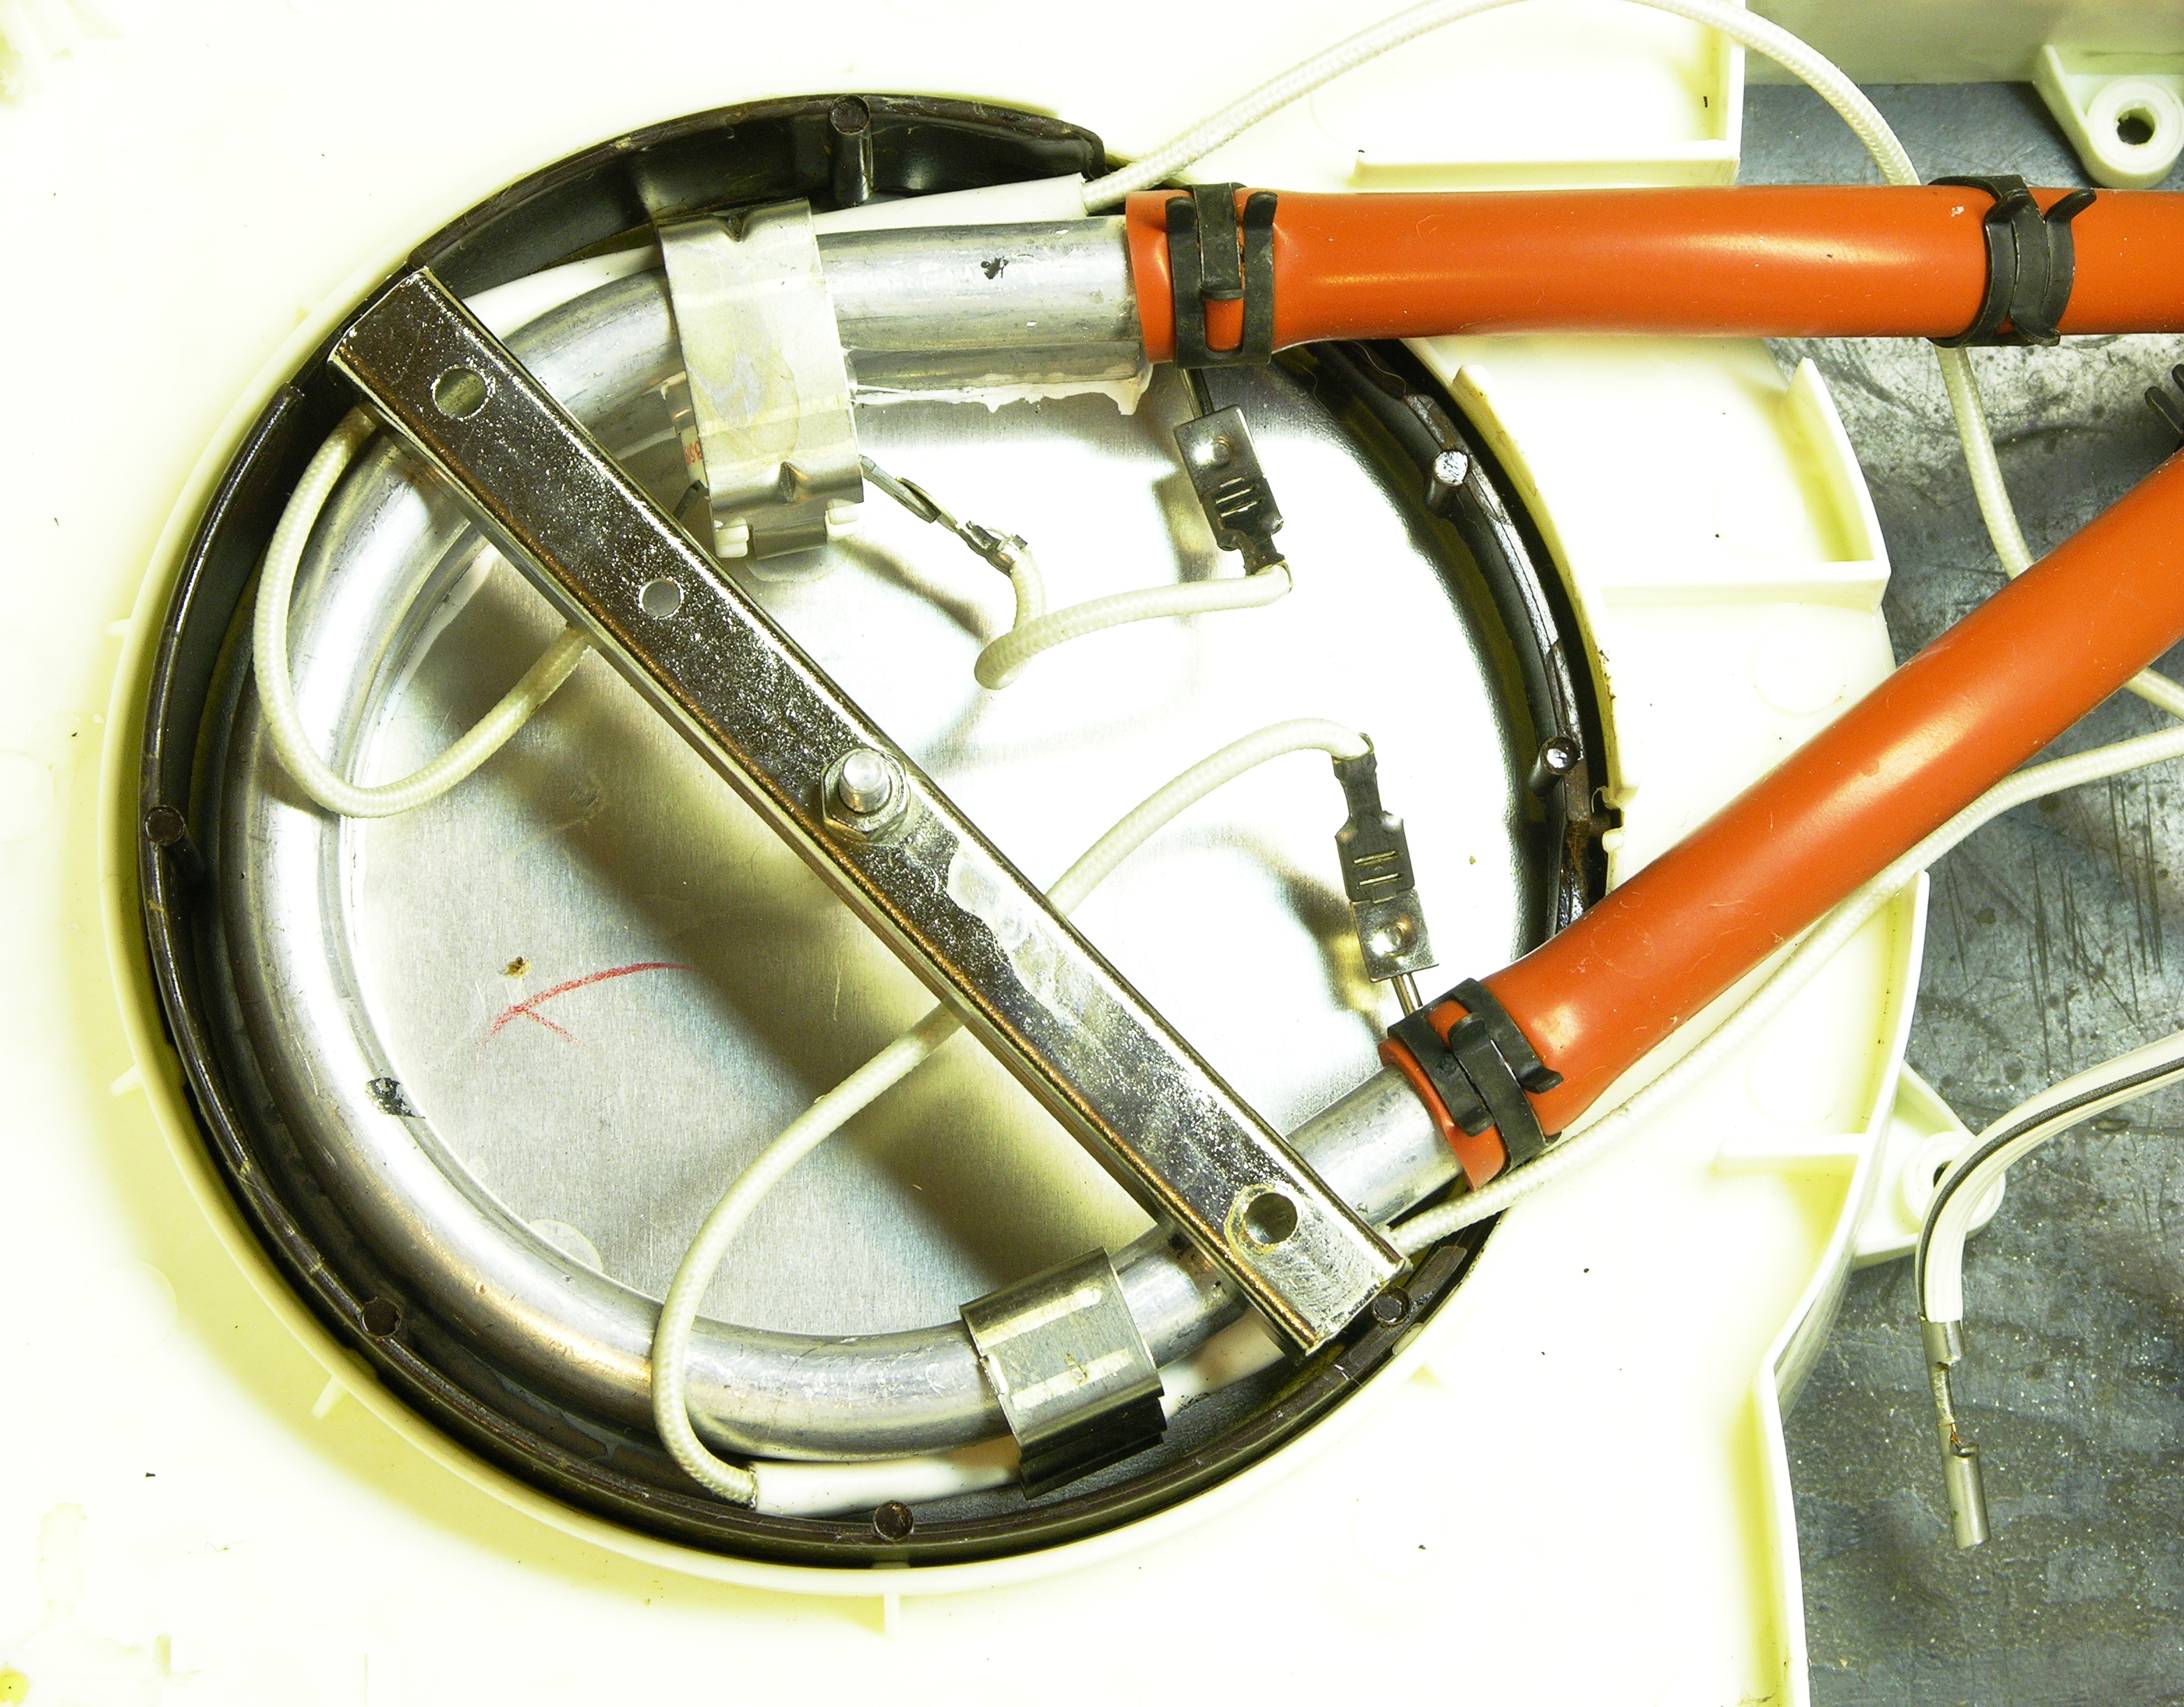
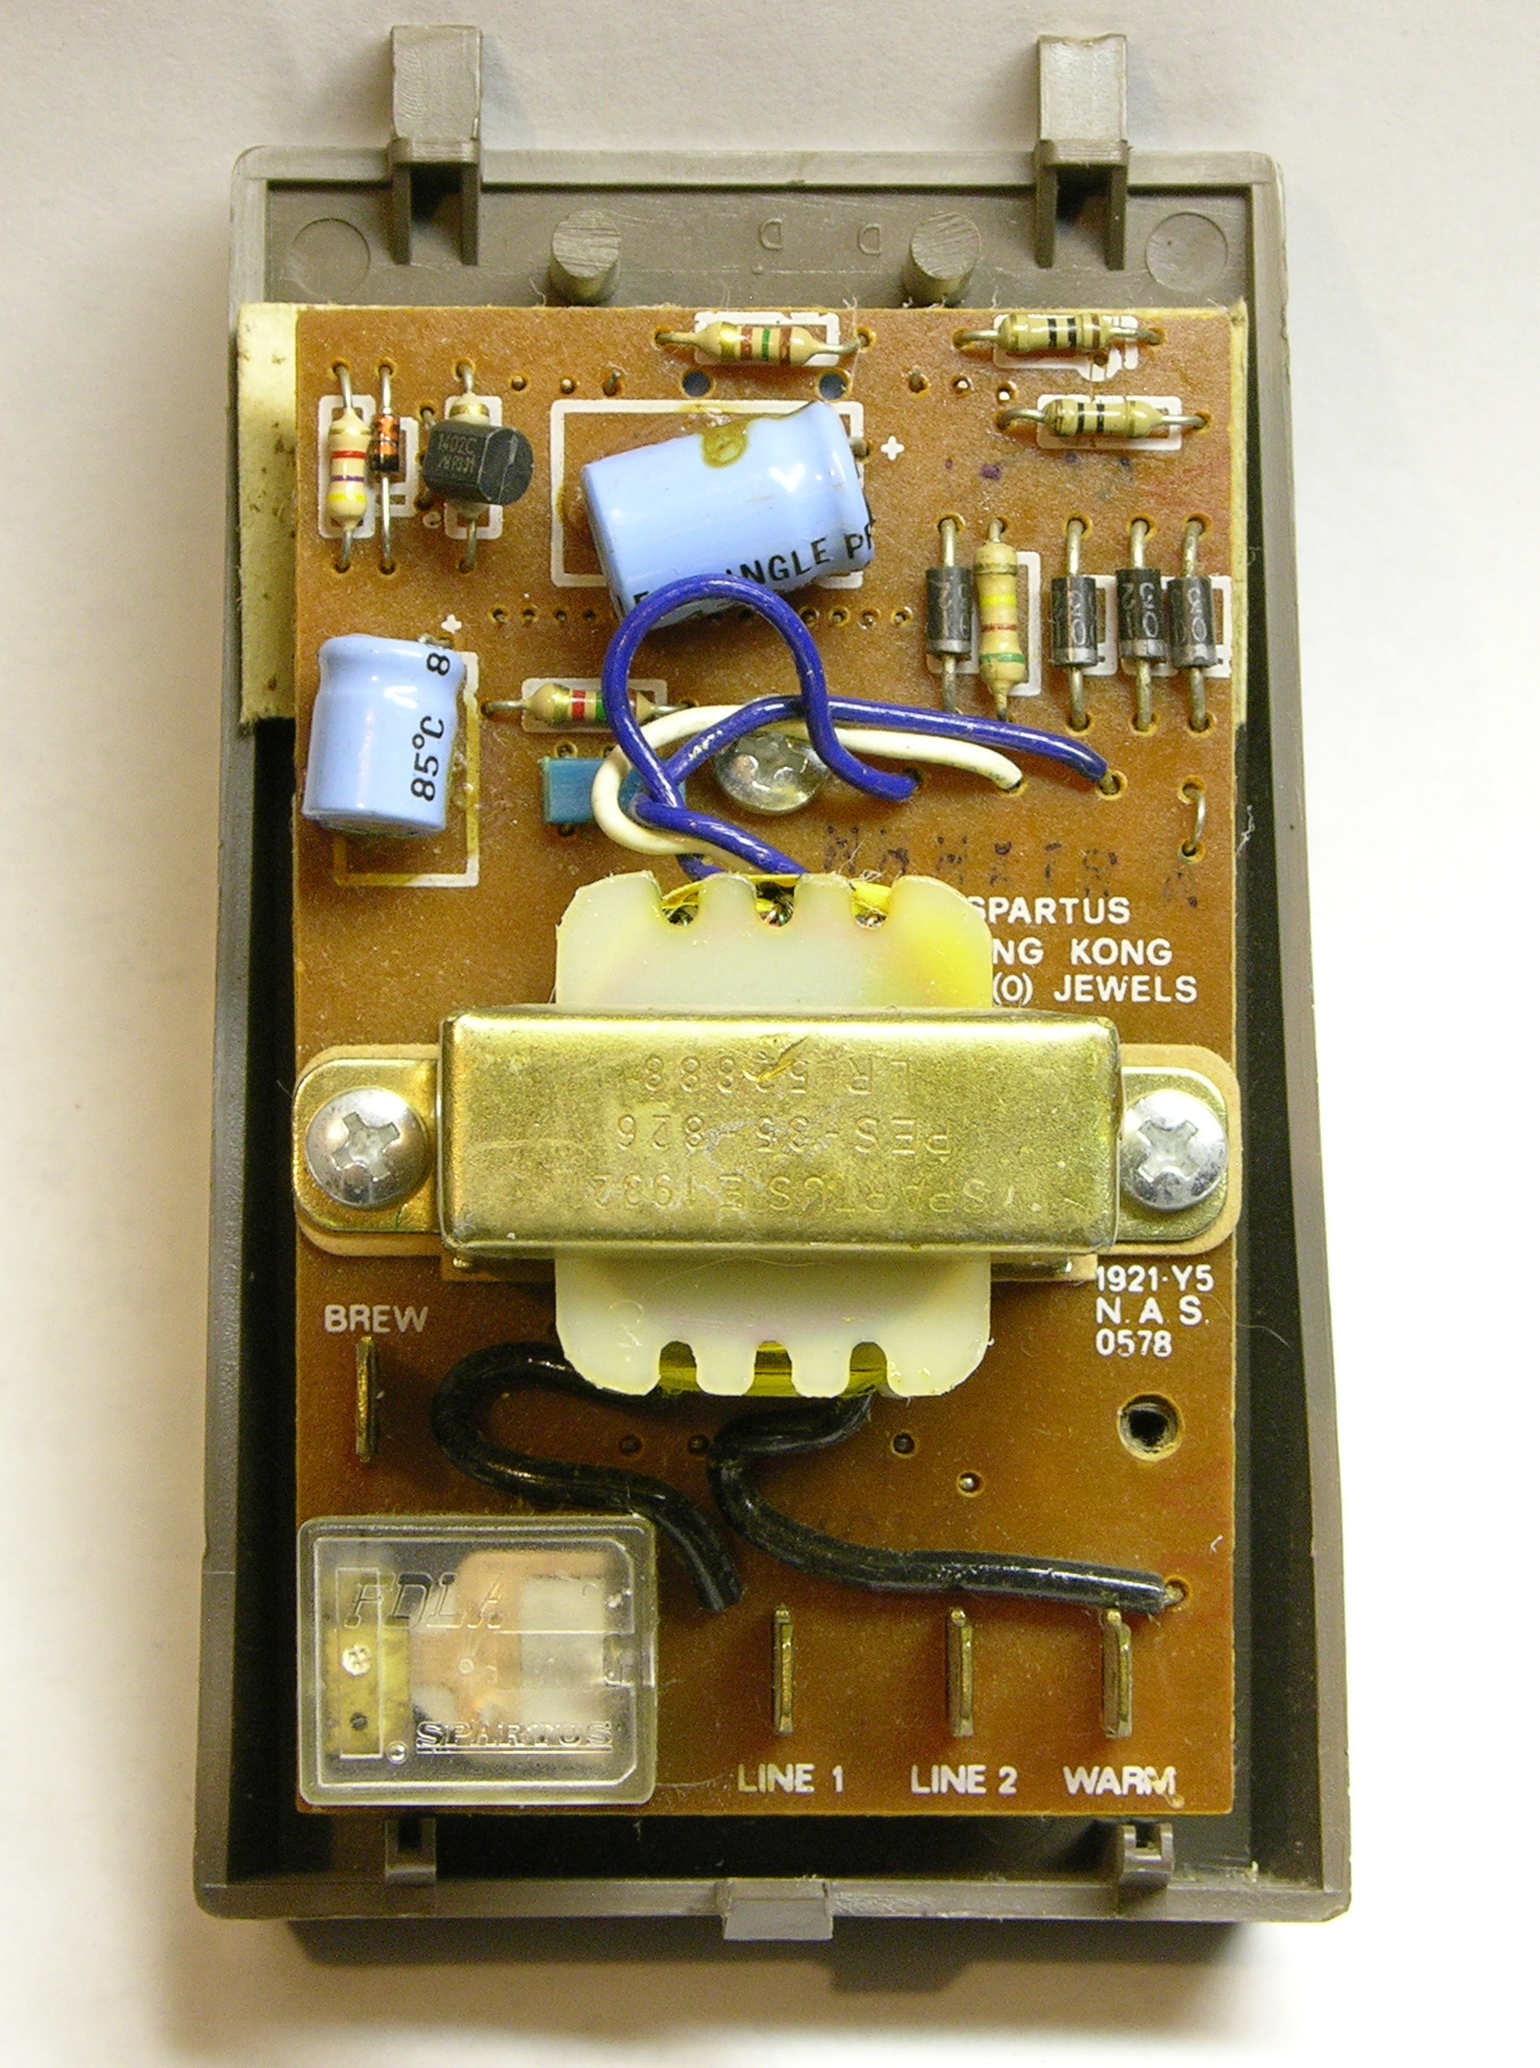
Next, the circuit board. On the back side, which is visible inside the machine, you can see where the incoming AC power’s hot leg connects on the right, the neutral on the left (the spade connector for the AC power actually has an extra tab to piggyback the spade connector to the heating element), and the switched “brew” connection to the heating element in the center just to the left of the relay.
The power transformer is wired directly across the unswitched AC line — when the coffeemaker is plugged in, the power LED and timer display are on. I should see a low resistance across the black leads of the transformer primary — and I didn’t. It’s completely open — something happened to melt or disconnect a connection or coil wire on the primary side of the transformer. I haven’t seen bad transformers often — I’d expect the electronics to go out first, and I’m using an awful lot of em dashes in this paragraph — but electrical storms do wreak havoc with equipment in this part of the country and this part of the year.

So lessee that transformer and look at getting a replacement. Looks like an E93144 LR59375 … available online? Er, nope. Okay, Digi-Key? Nope. Digi-Key technical support for a cross-reference? Ah, nope some more. Okay, just a replacement transformer with the same specifications? Well, it’s a, uh, it’s center-tapped, it’s, it has the voltage stamped on it, it’s … it’s a blob.0V 100mA center-tapped transformer. That’s it.
What. Is. That. Blob. Looks like “8″ but “9″ would be more common.
Not expecting to find a “Mr. Coffee replacement power transformer,” I did some more web searching anyway. Nope. I had a couple of Mr. Coffee timer boards that I had bought from All Electronics in the late 80s or early 90s, but I couldn’t find them. Maybe they still sell them? Nope. Alltronics? Nope. Anyone else? Nope. eBay??? Yup! For only $8 + $8 shipping I could get a whole new control panel. Yeah, that’s worth it, given the low cost of a whole new coffeemaker. Nope.
Ooooh, but one of the auction pictures has a closeup of the transformer! In lieu of my copying the seller’s picture without permission, let me direct your attention to the above link, picture #4. Looks like an 8.0V center-tapped transformer, n’est-ce pas?
Okey-day, the next time I order from Digi-Key I can scope out a replacement. Meanwhile, tick-tock, tick-tock, the caffeine clock is ticking.

How ’bout a little rewiring to bypass the whole control panel. Since my wife doesn’t use the autostart timer anyway (she believes that leaving the coffeemaker plugged in while she’s not standing there watching it will cause it to burn down the house and make the earth disappear into a black hole), it suffices perfectly to short-circuit things a bit. New rule: When it’s plugged in, it’s on.
That’s a male-to-male spade plug jumper cable sleeved in clear heatshrink to protect it from the kind of short circuits I don’t want to have happen. Easily undoable if I ever get a replacement transformer — just cut off the heatshrink and pull out the plugs.
On the other hand, caffeine wifey says she doesn’t care about having the control panel work again. When I have a little more time I may wire up a power switch and a blank control panel with a power indicator LED so we can see that it’s on.
The Guts, Man, the Guts!
In true Keith tradition, je te presente the rest of the inside of the machine (which amounts to the other side of the circuit board).
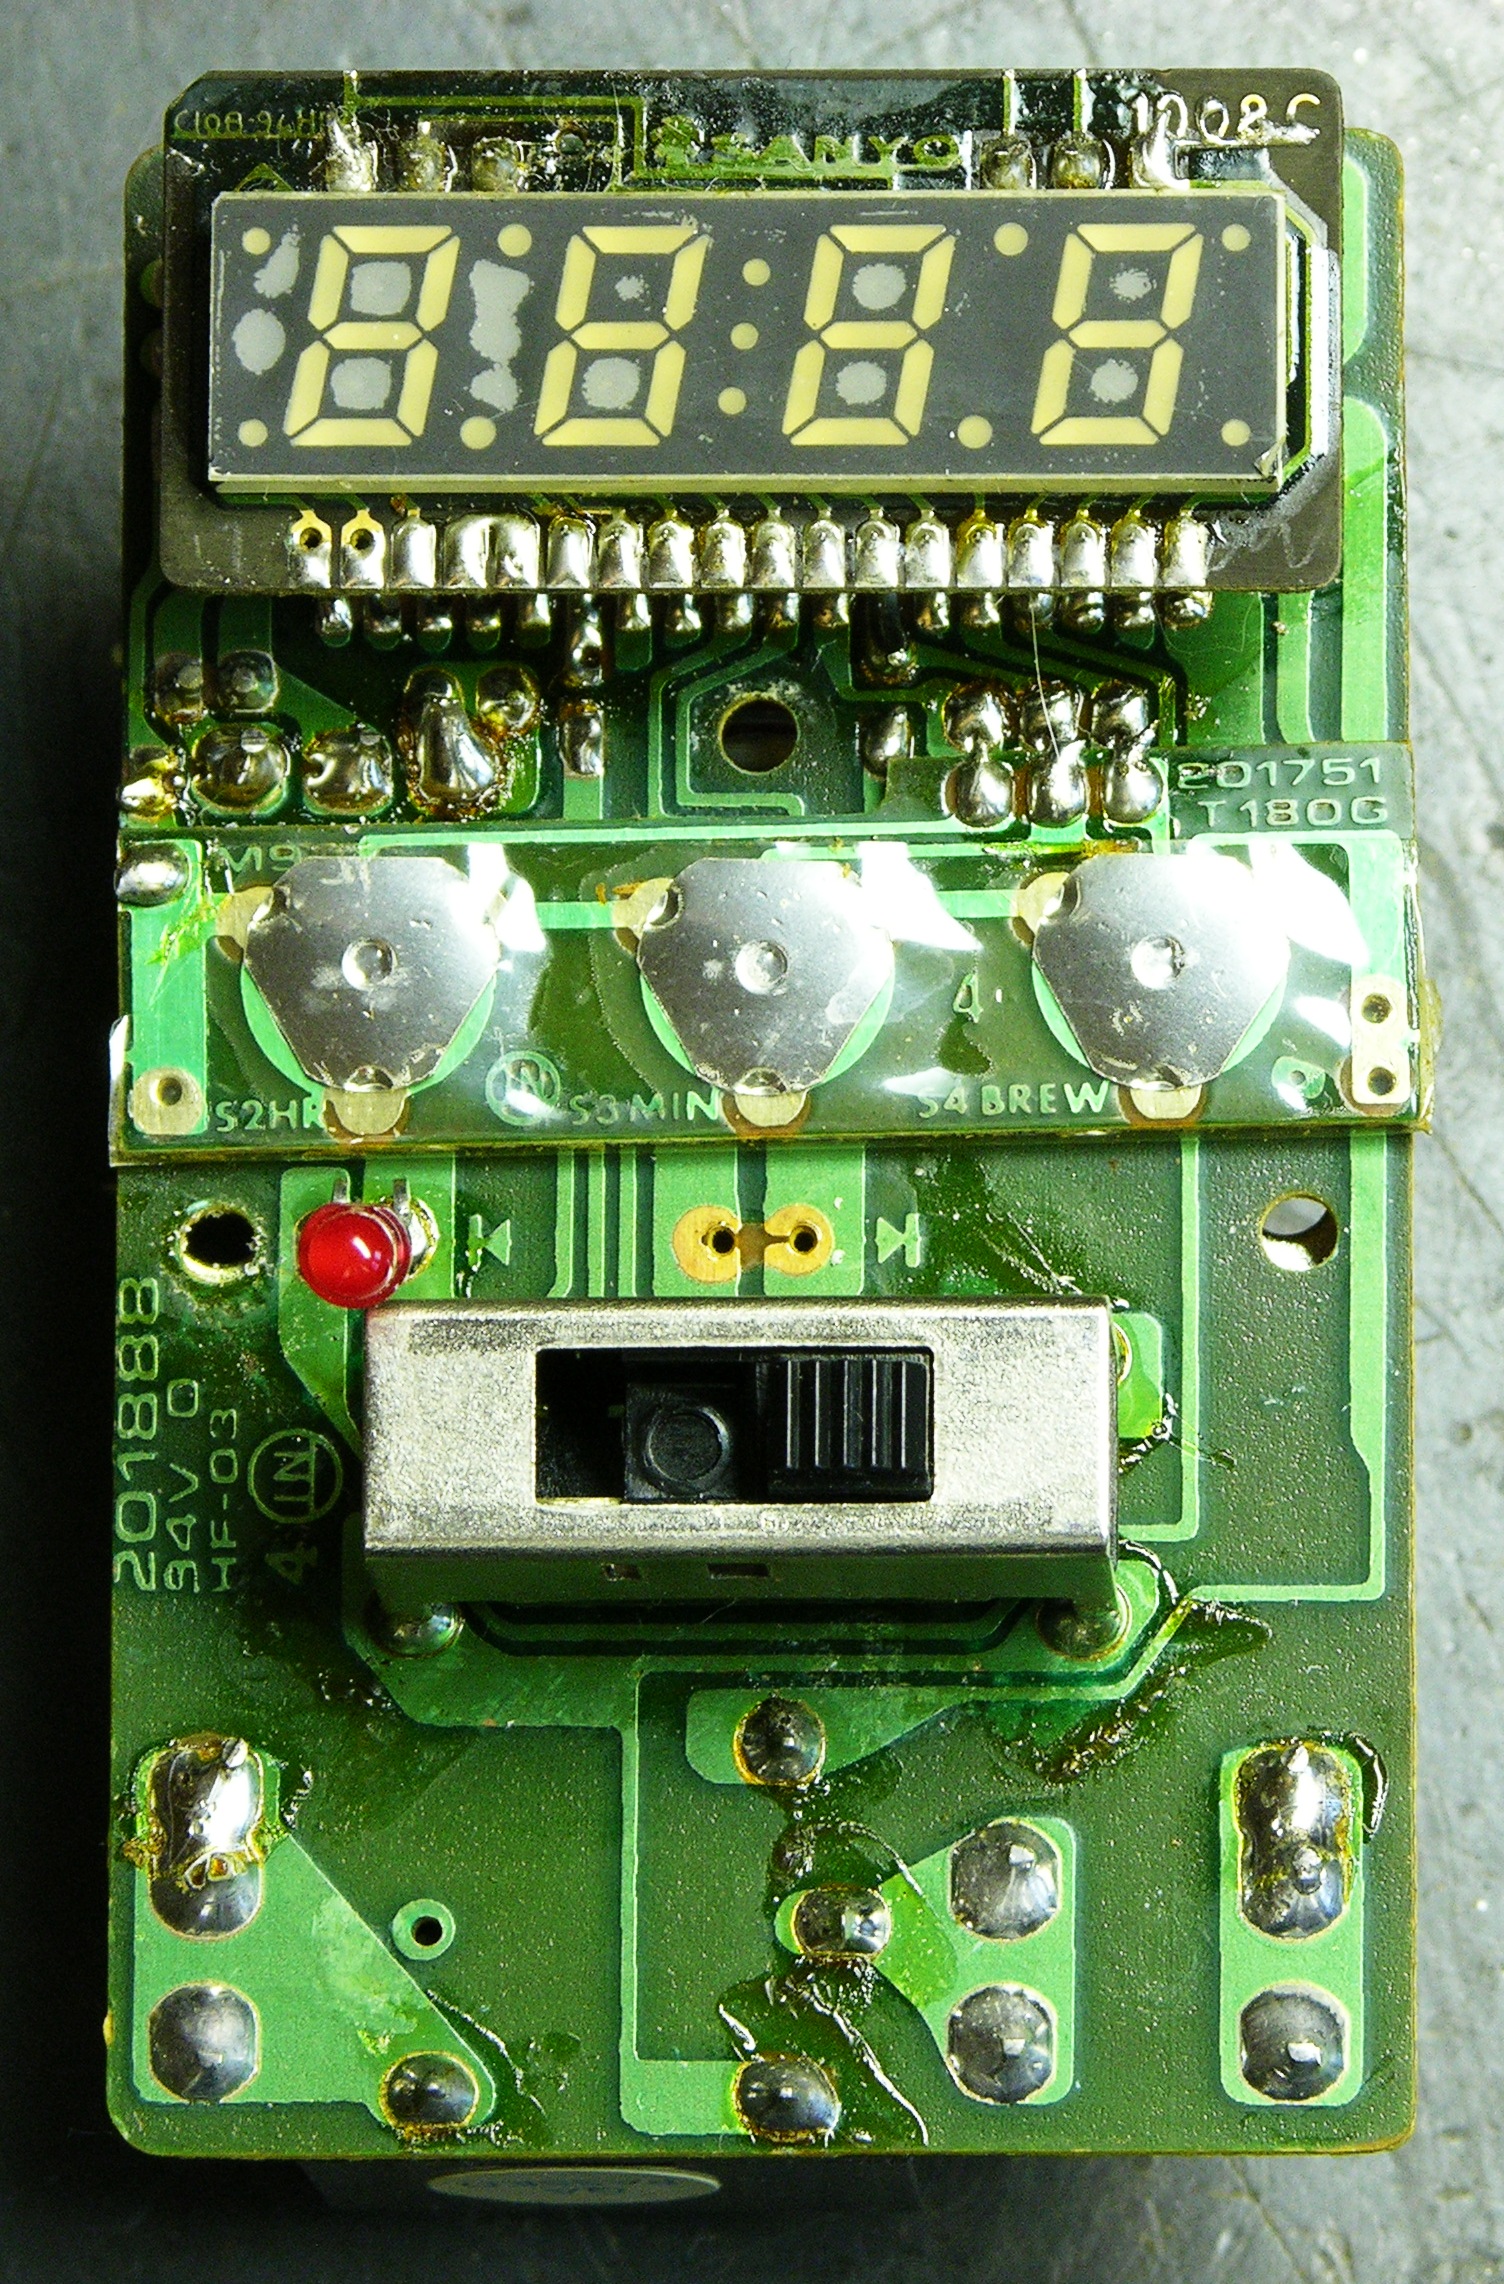
User-interface side of the control panel PCB.
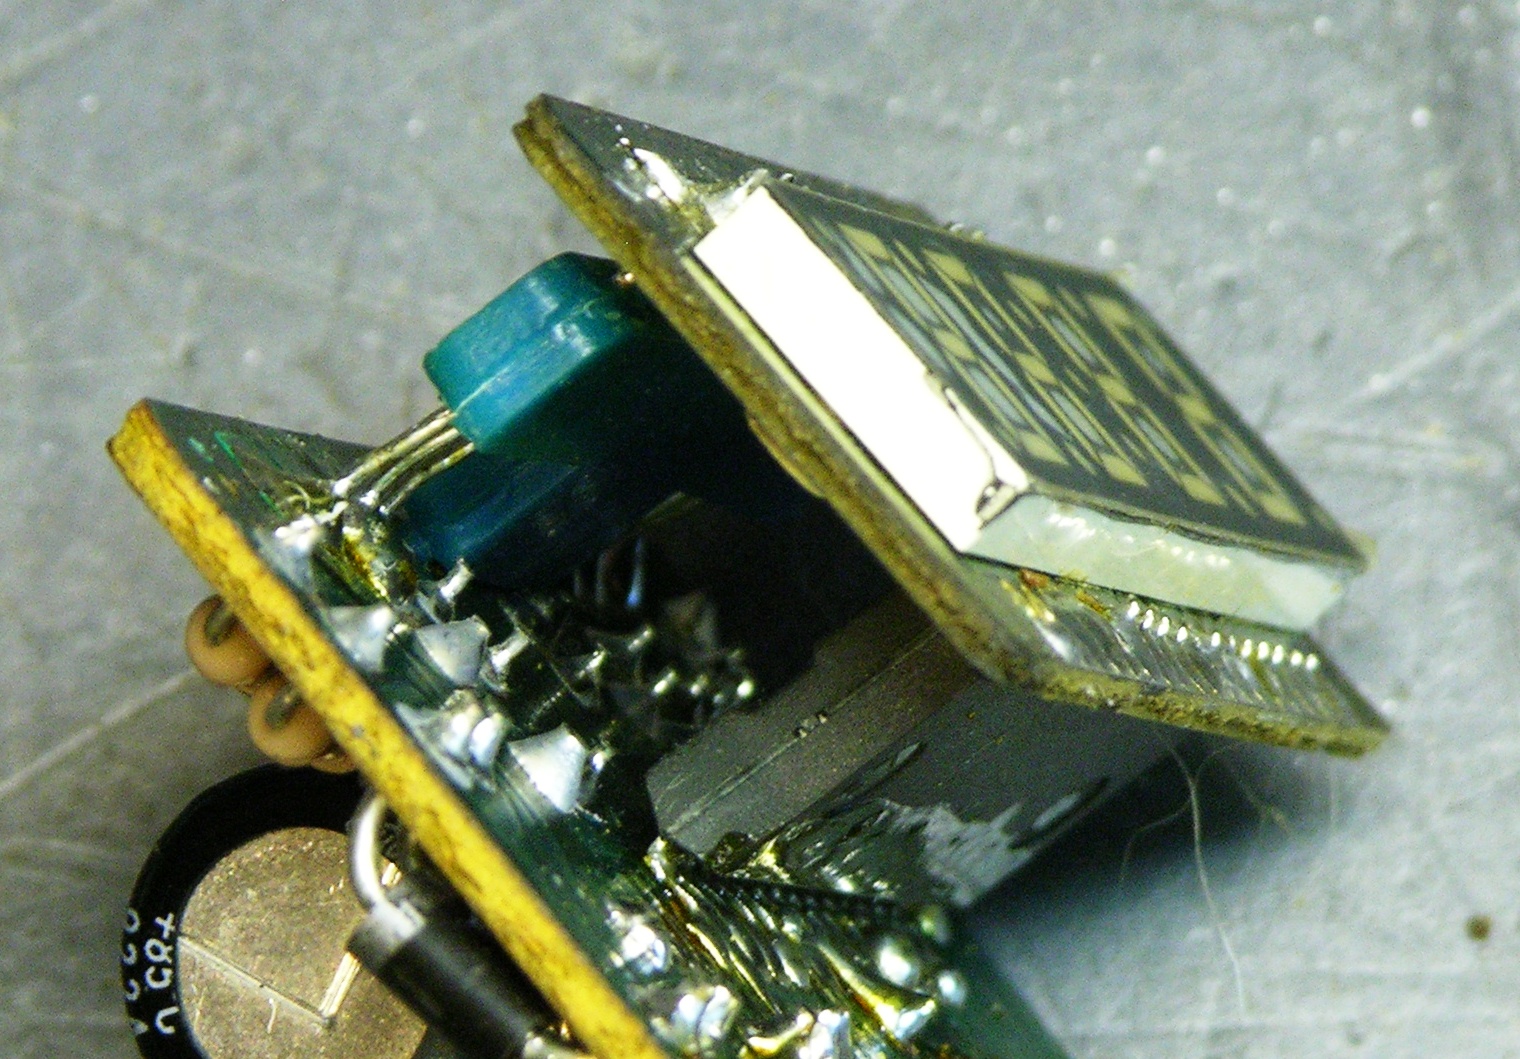
I love this — the display driver IC is used as a standoff for the display. What fun!!!
Surplus Control Panel
Found it later that day.

Larger all over. Brown instead of white. Vintage.
And otherwise very similar. I might even be able to squeeze this transformer into the modern one, if I cared.
The old one appears to have separate controls for “BREW” and “WARM,” whereas the modern one uses the same heating element for both. Mildly interesting.
LOL on the standoff IC.
Some consumer electronics have a power transformer with a single turn of smaller wire used as a fuse on the primary side. That is the cause of death in most cheap transformers. It is usually on the outside layer and can sometimes be fixed.
The standoff IC is fun stuff.
Sean, thanks for the transformer information — I definitely didn’t know that! Any ideas on sizing replacement wire? Or just do without, maybe adding a separate fuse?
A part came off from behind the coffee pot near where a tab with a spring is. There is also a flipper hanging down. The part i Have in my hand is sort of concave with 4 pins or pegs. I can’t figure out how it gets inserted given its proximity to the spring and the flipper. Thanks for your help.
Garrison, I’m not familiar with the parts you’re talking about; but if you post a picture somewhere, I expect someone could look it over and give you a hint.
I have a JWX27 Mr. Coffee, two now, that the various small indicator lights go wacky, then a few brews later it stops brewing. Both after about a year. Funny we have old ones small and ugly that work after 20 years! would like to get these working. Has a removable PC board, and leads are detachable. I do not have the electronics experience or tools to check it. would like to get a replacement part and try a bit of process of elimination. Not soure I can safely just by pass the board all together. Any ideas? Bill
What I’d really like to find is a hack that would extend or eliminate the 2 hour warmer timer on newer Mr Coffees. I have developed a reflex to hit the power button twice when I pour a cup of coffee so the shutdown timer resets. A pot of coffee frequently lasts me 4 hours and sometimes up to 6. Unfortunately that power reflex also sometimes kicks in for the last cup of the day, resulting in a somewhat scorched carafe.
Oh and Garrison, that part sounds like the filter basket shut off actuator lever that snaps into holes in the bottom of the basket with only two of the pegs so that it pivots. When the coffee is brewing and the carafe is on the warmer it pushes the spring up unseating the valve to let coffee flow and when you remove the carafe while it is brewing it halts the flow of brewing coffee until you replace the carafe on the warmer.
mr coffee bvmc-sjx33gt electrical wiring diagrams is what I am looking for. On the inlet side of heater assemble is a round disc with a blue and brown wire going to it. A good amount of white power has come out of disc. Can I replace it?.
Easy peezy! I connected a yellow wire to the spot where I removed a blown thermister and reconnected that circuit. I connected a black wire to the black wire on the themocouple, removing the thermocouple and replacing with a switch. I ran those out the input hole and hooked a female socket; I cut a rectangular hole for the switch in the lower housing. Now I push make coffee and hear 3 beeps indicating that the keep warm circuit is on; 2 hours later the outlet timer goes off, and the batteries are full at 40 volts! The switch seems to be needed to be on before the make function is available, so I switch it on momentarily.
And in answer to Priebe: there is a big brown object on my circuit board that is likely a capacitor for the RC time constant; soldering another capacitor onto the back of the circuit board attaching to that one will double the time constant of that circuit.
Male to Male Spade plug hack ! Can you send more detail Photo with Hack ? I have same type Mr. coffee with Delay Brew ! Everything went dead after an electrical storm but outlet plug was not effected just The Coffee Maker – I do not care about this either ! I need to know how you removed the Spade plug on the Power cord and exactly what you wired it to directly ! Can you use something other than heatshrink to hold the Spades together ? Need close up wiring if what exactly you did hack to Positive Cord ? Thanks ,
Mary Ann, this happened 11 years ago and I no longer have the coffeemaker; but I can tell from looking at the picture that I crimped a male spade plug onto each end of a short piece of wire, connected it between the female spades on the two leads, and insulated the whole thing. It could be insulated in electrical tape instead of heatshrink, if you know what you’re doing.
Ed w: I just today got the notification of your post after Mary Ann’s and Keith’s!
The capacitor hack would have been great at the time, but my wife and I quit drinking coffee seven years ago due to her health issues. thanks anyway, it might come in handy for something else down the road.