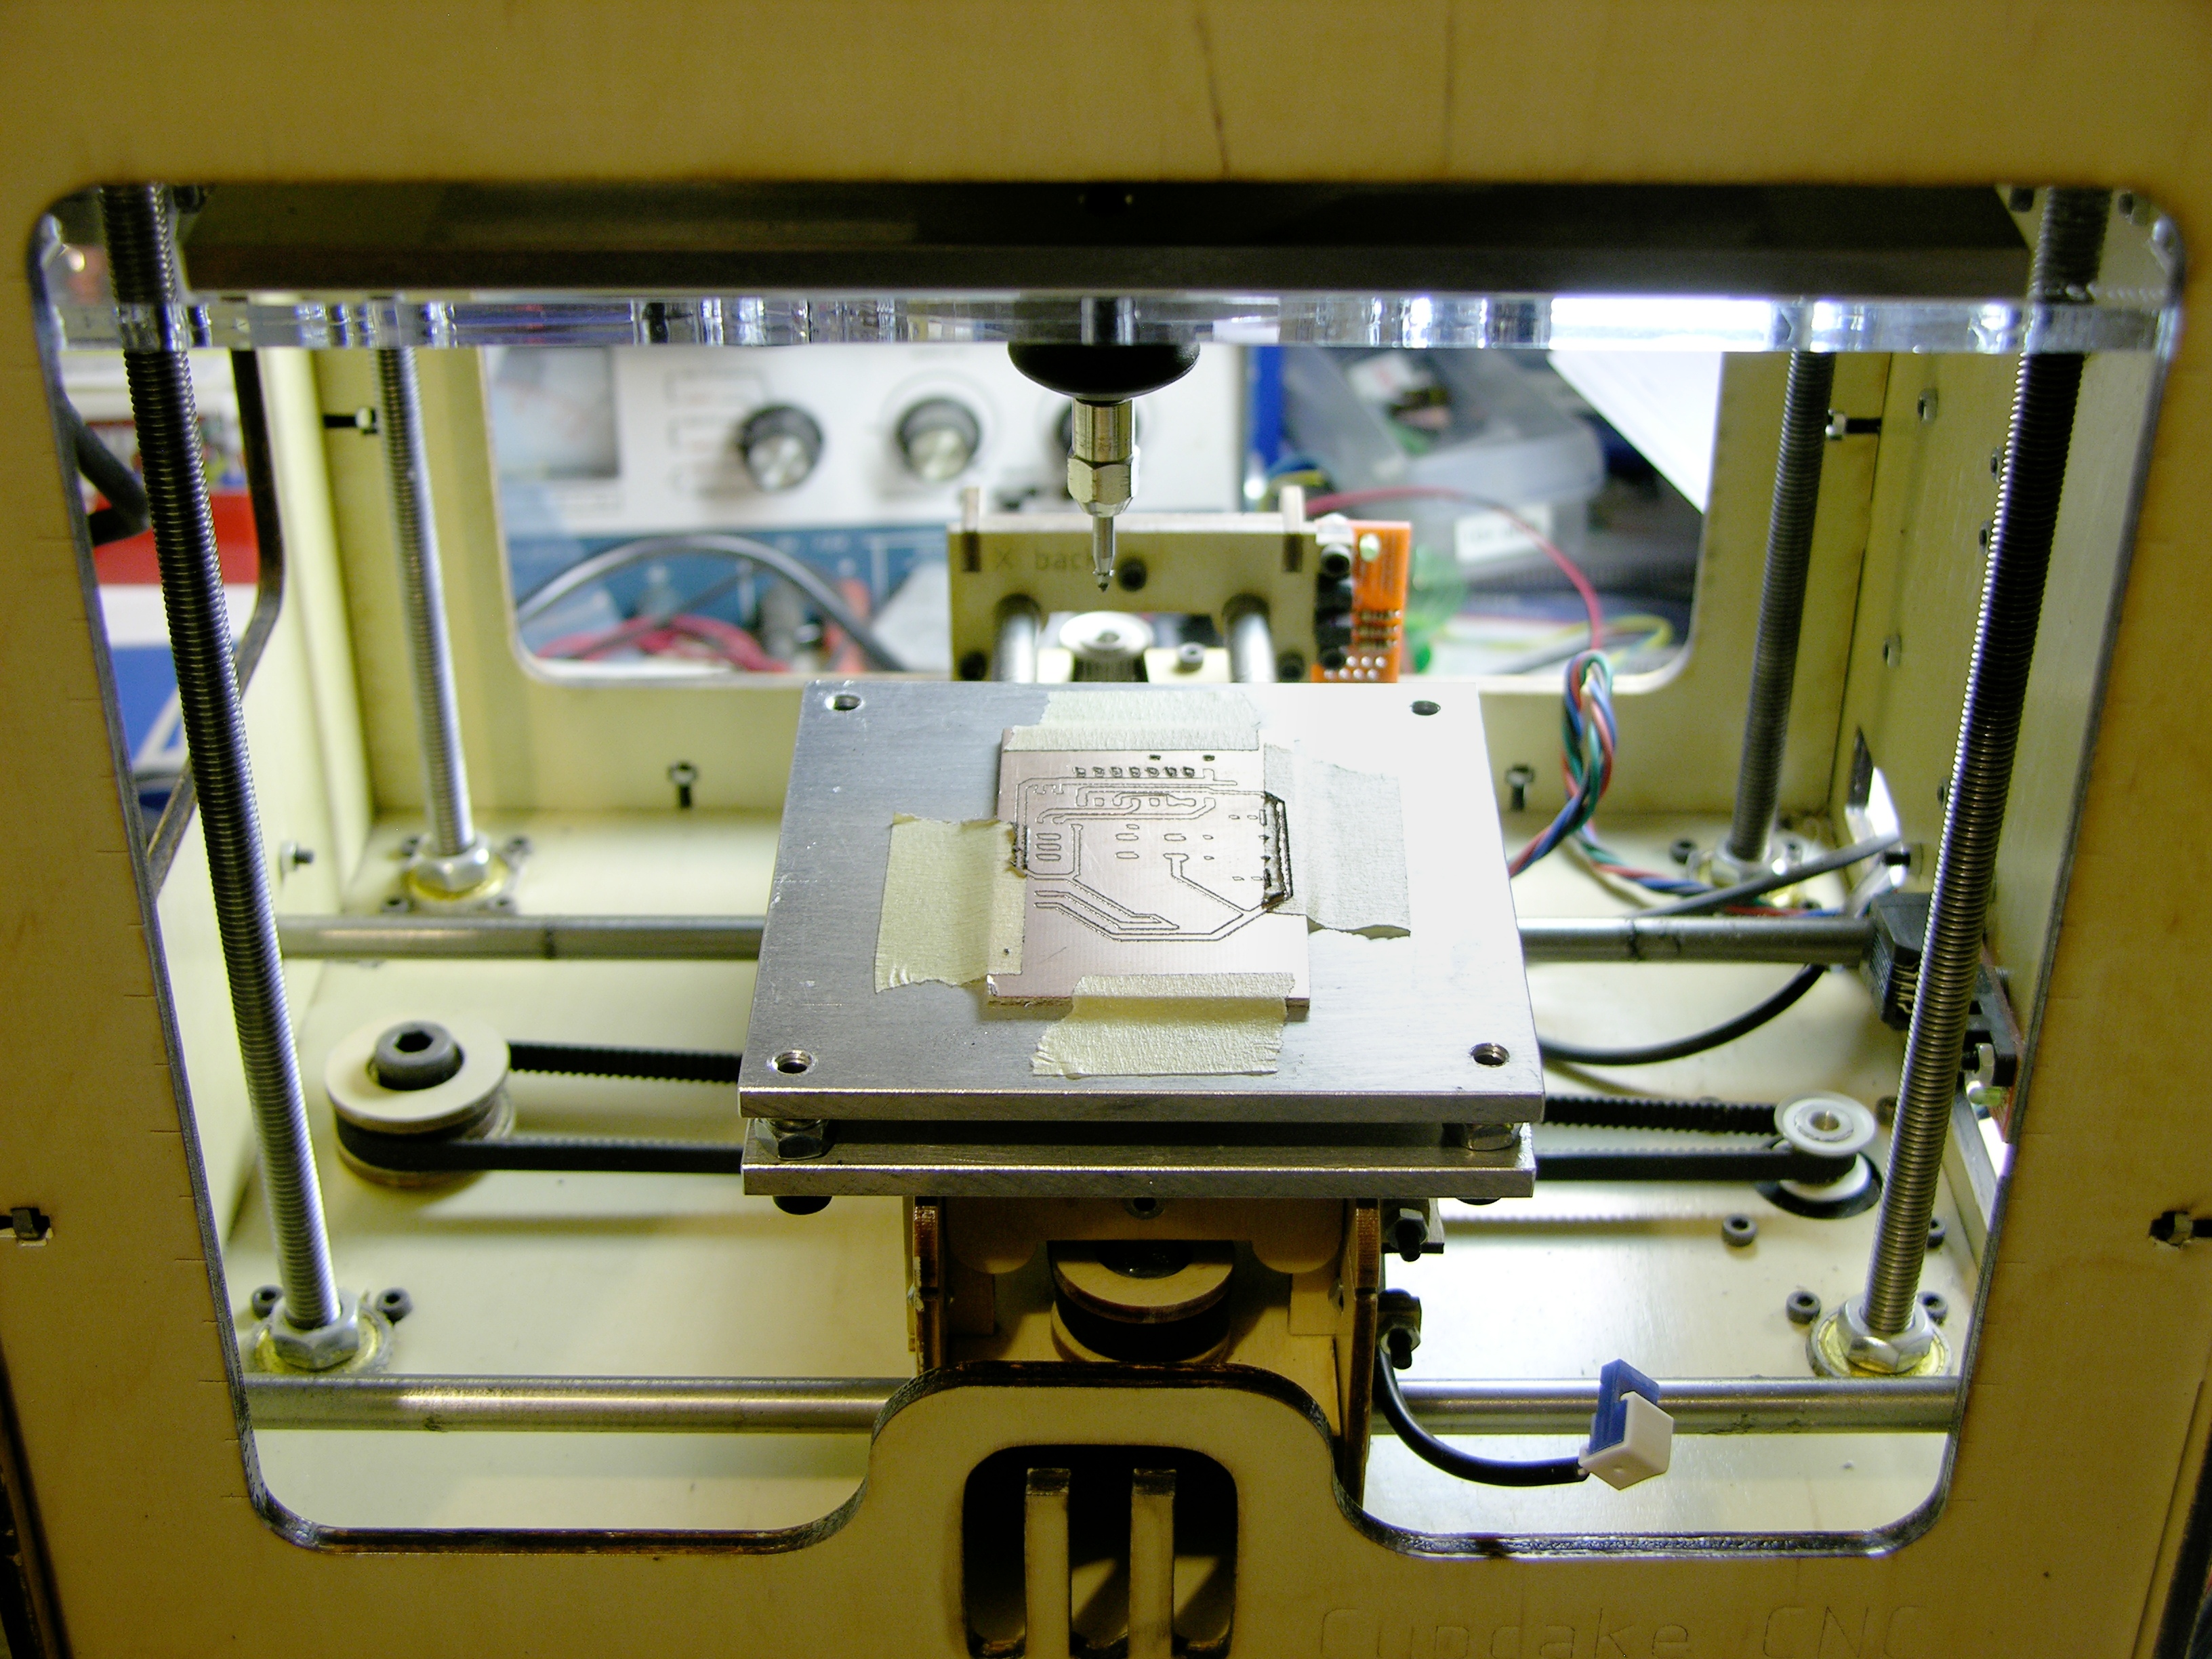
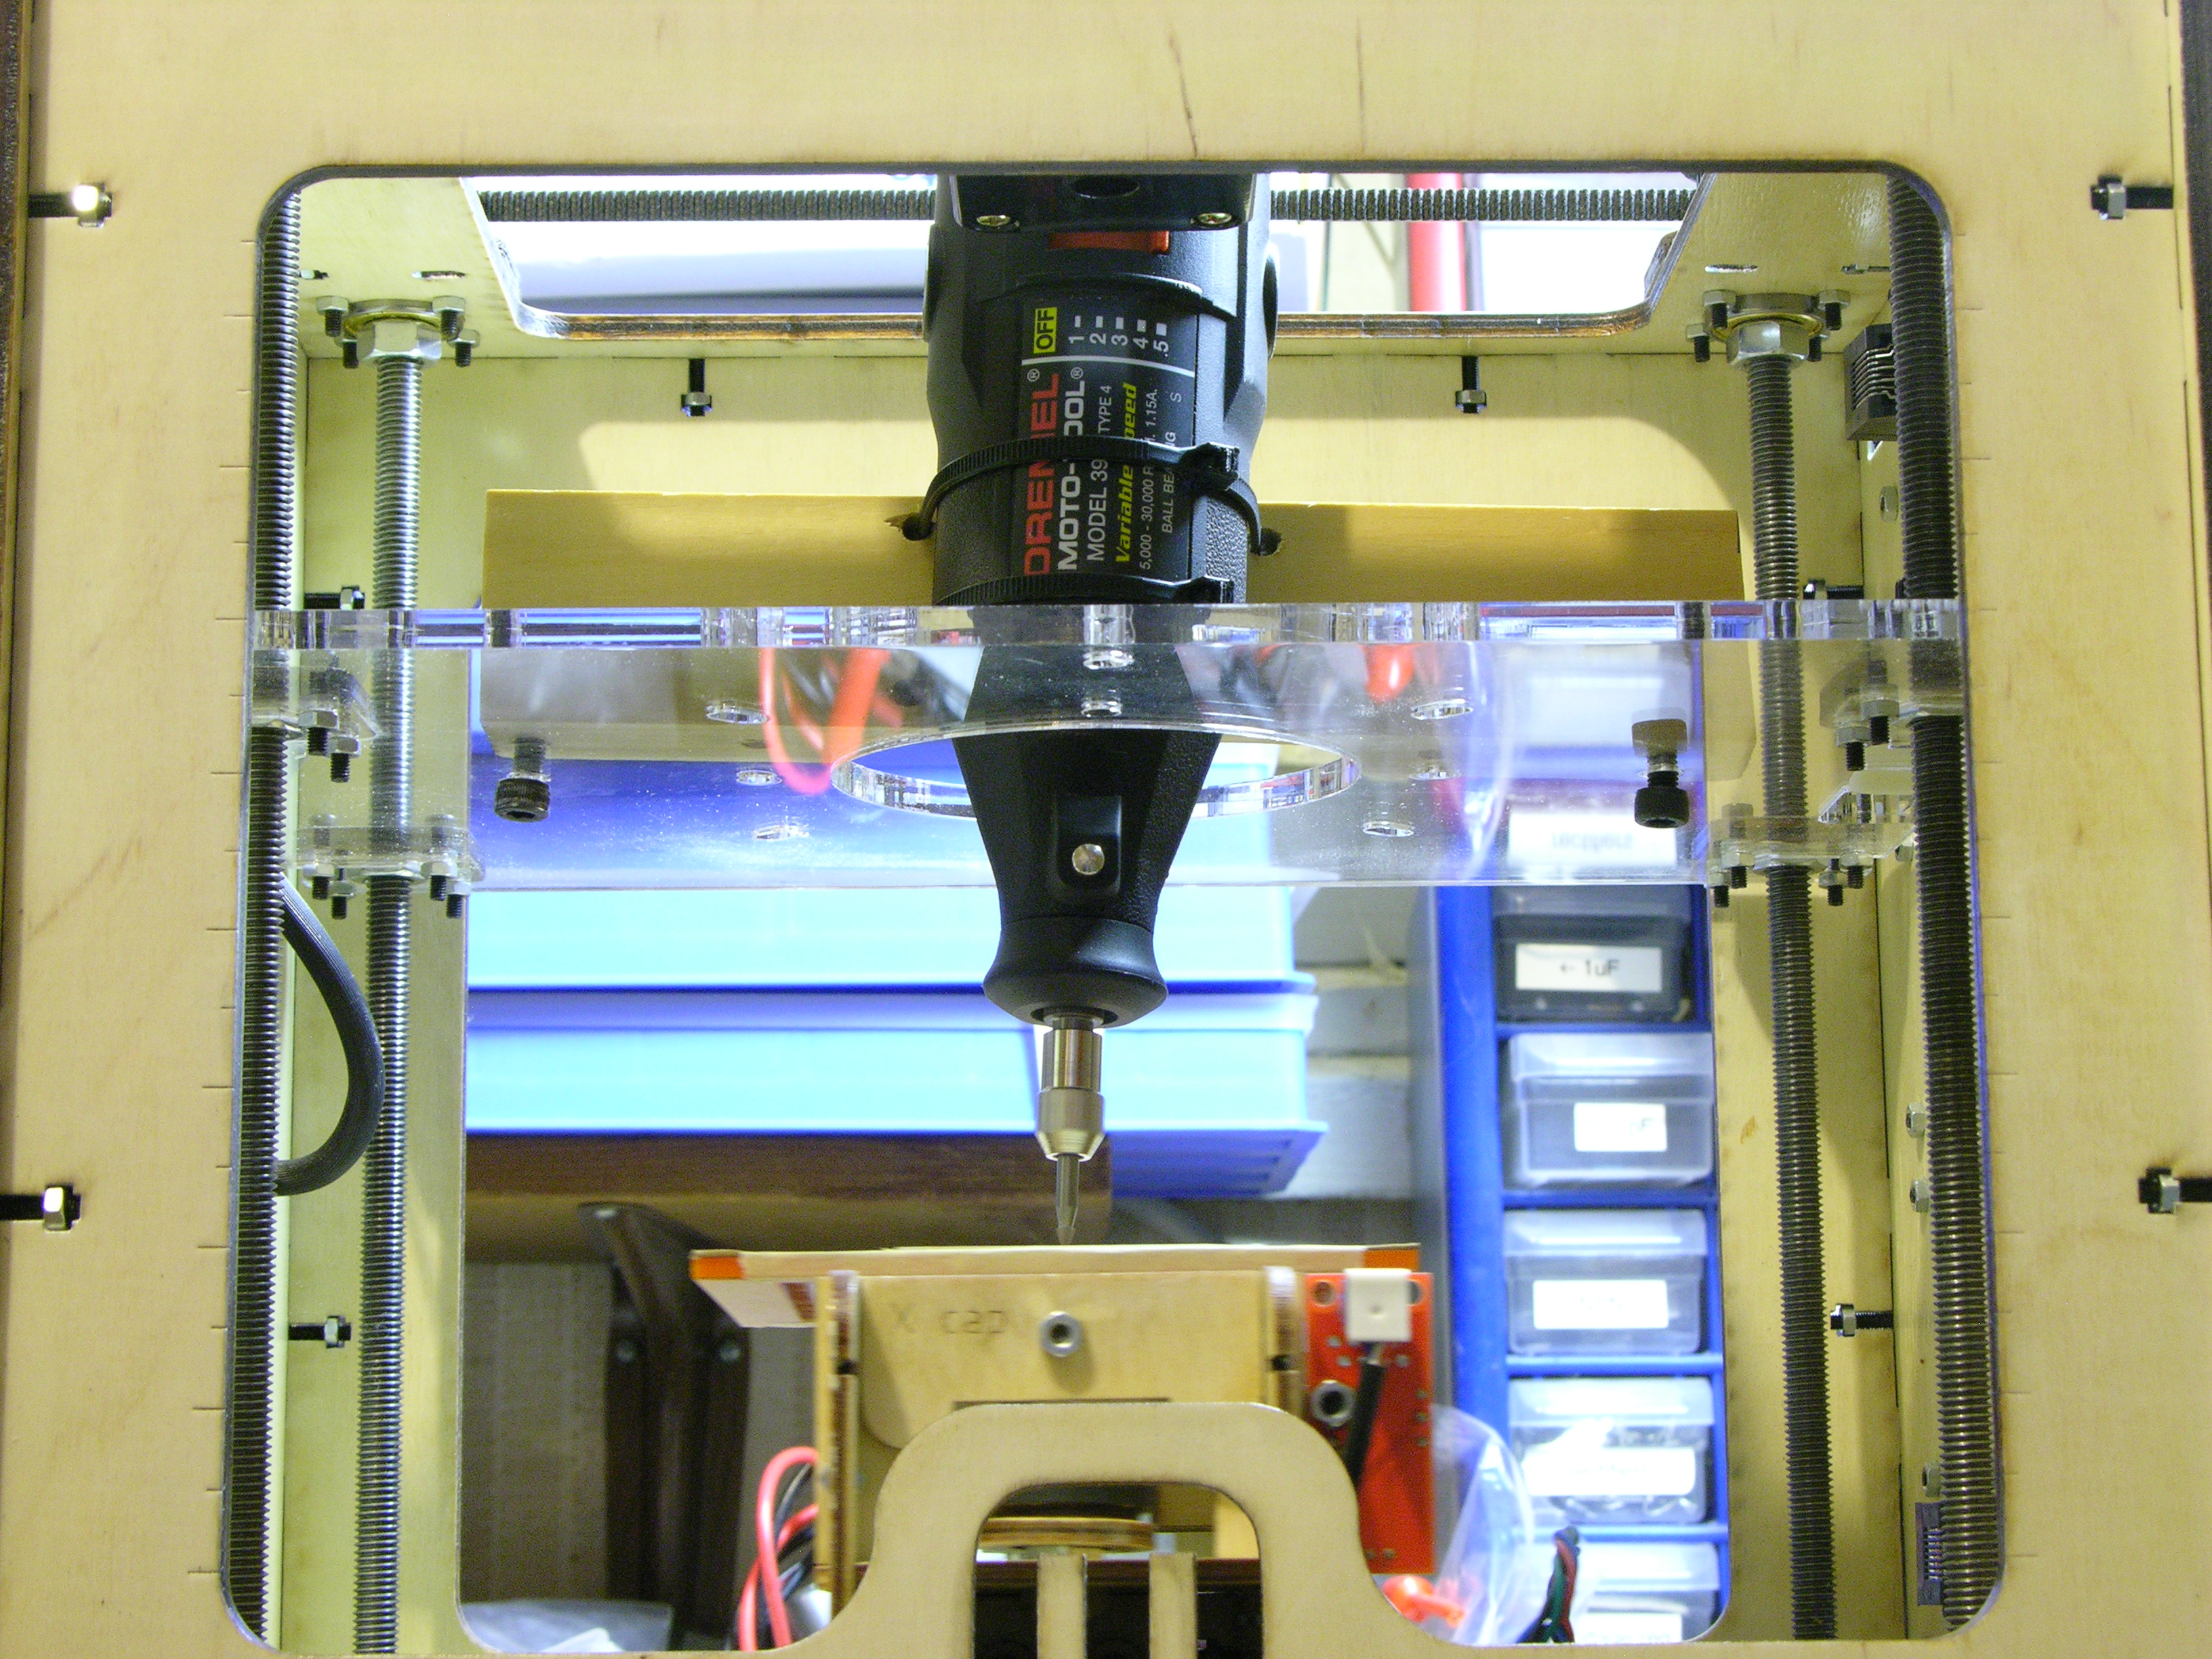
Last weekend I got my Dremel rigidly mounted in my CupCake for PCB milling, but the platform holding the PCB was attached with double-stick foam and was being deflected by the milling bit cutting the copper, causing considerable deviation from the intended milling path.

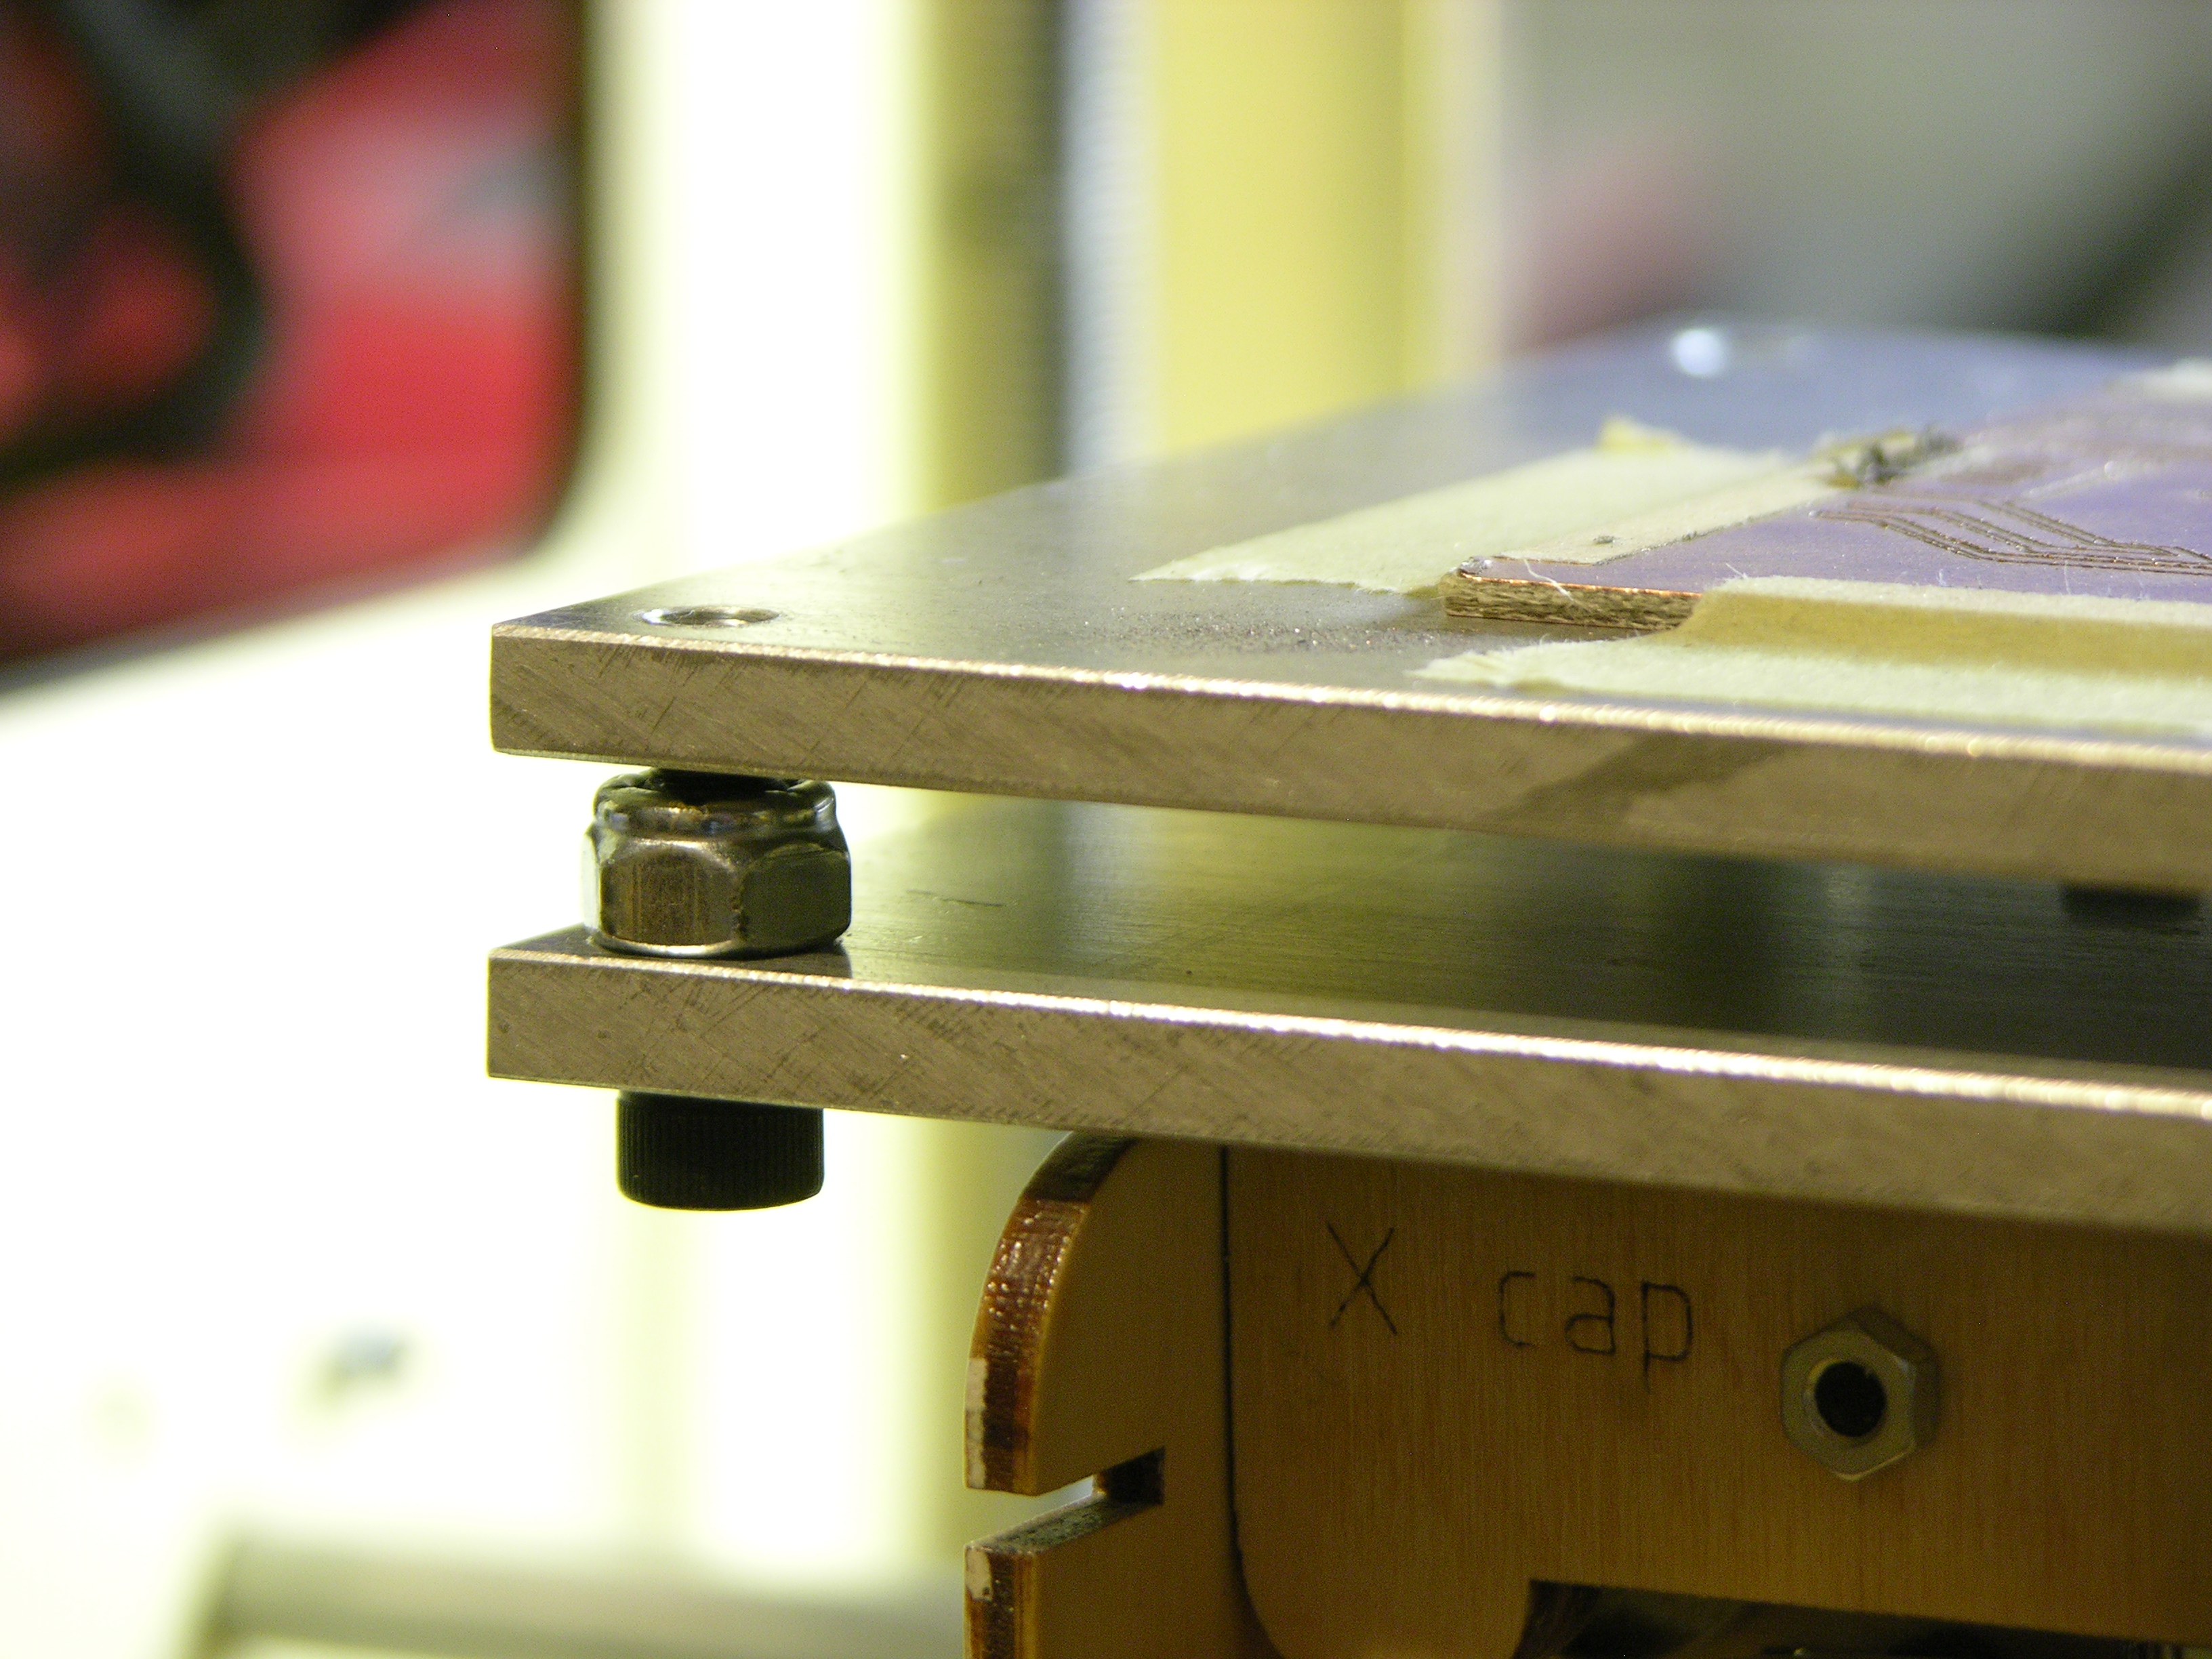
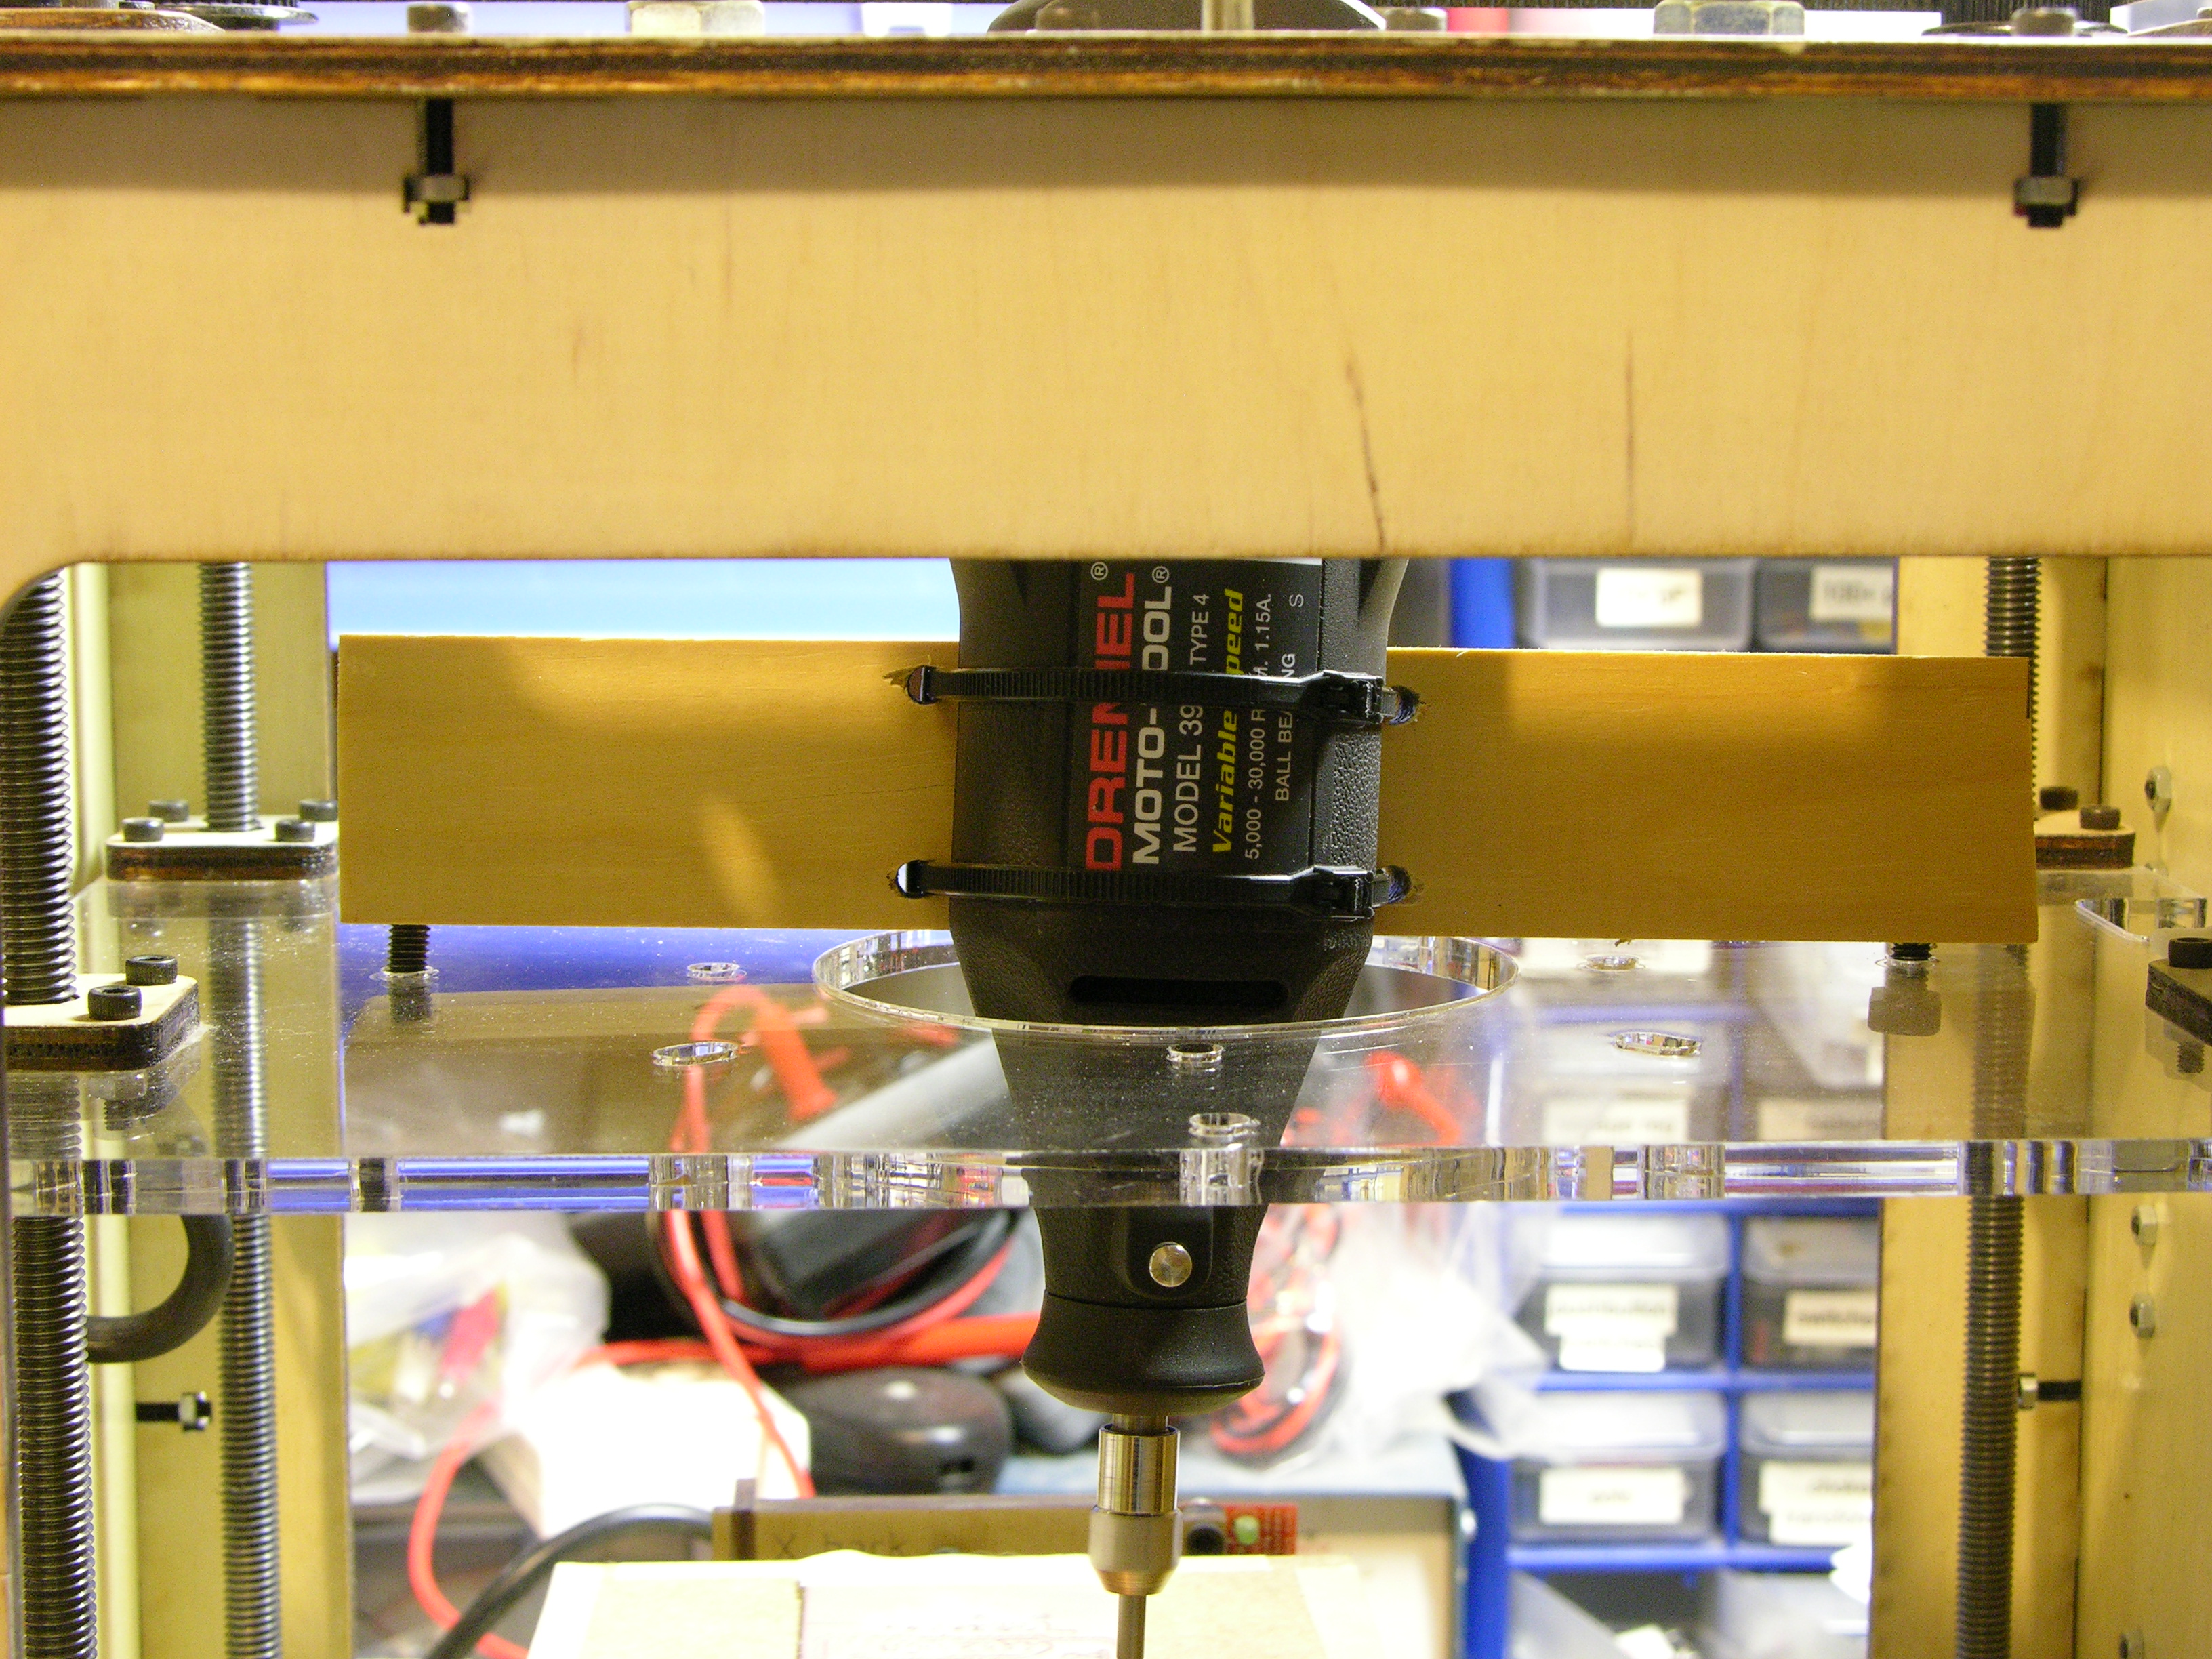
Last night Steve cut some more aluminum plate for me and today I assembled a rigidly-mounted leveling platform to replace the stock build platform. The lower plate has holes matching the machine screws attaching the top of the Y stage, and I used slightly longer screws to bolt through both the aluminum plate and the original wood top into the Y carriage.

I drilled holes in the corners, tapped the upper plate, and enlarged the holes in the lower plate. The socket-head cap screws spin freely in the lower plate while adjusting the upper plate’s height (I used a continuity meter to check when the milling bit was just barely touching the plate in each corner); then the nylon-insert nuts lock the screws in position. The whole assembly is quite rigid once tightened.
A number of designs for leveling build platforms use only springs between the two plates. I was concerned that without a nut, the machine screws might back out under vibration. Also, when extruding, having a platform with some give reduces the damage if you miscalculate the Z position and gouge the platform; but for milling, the whole point of this replacement is to remove any play in the platform.

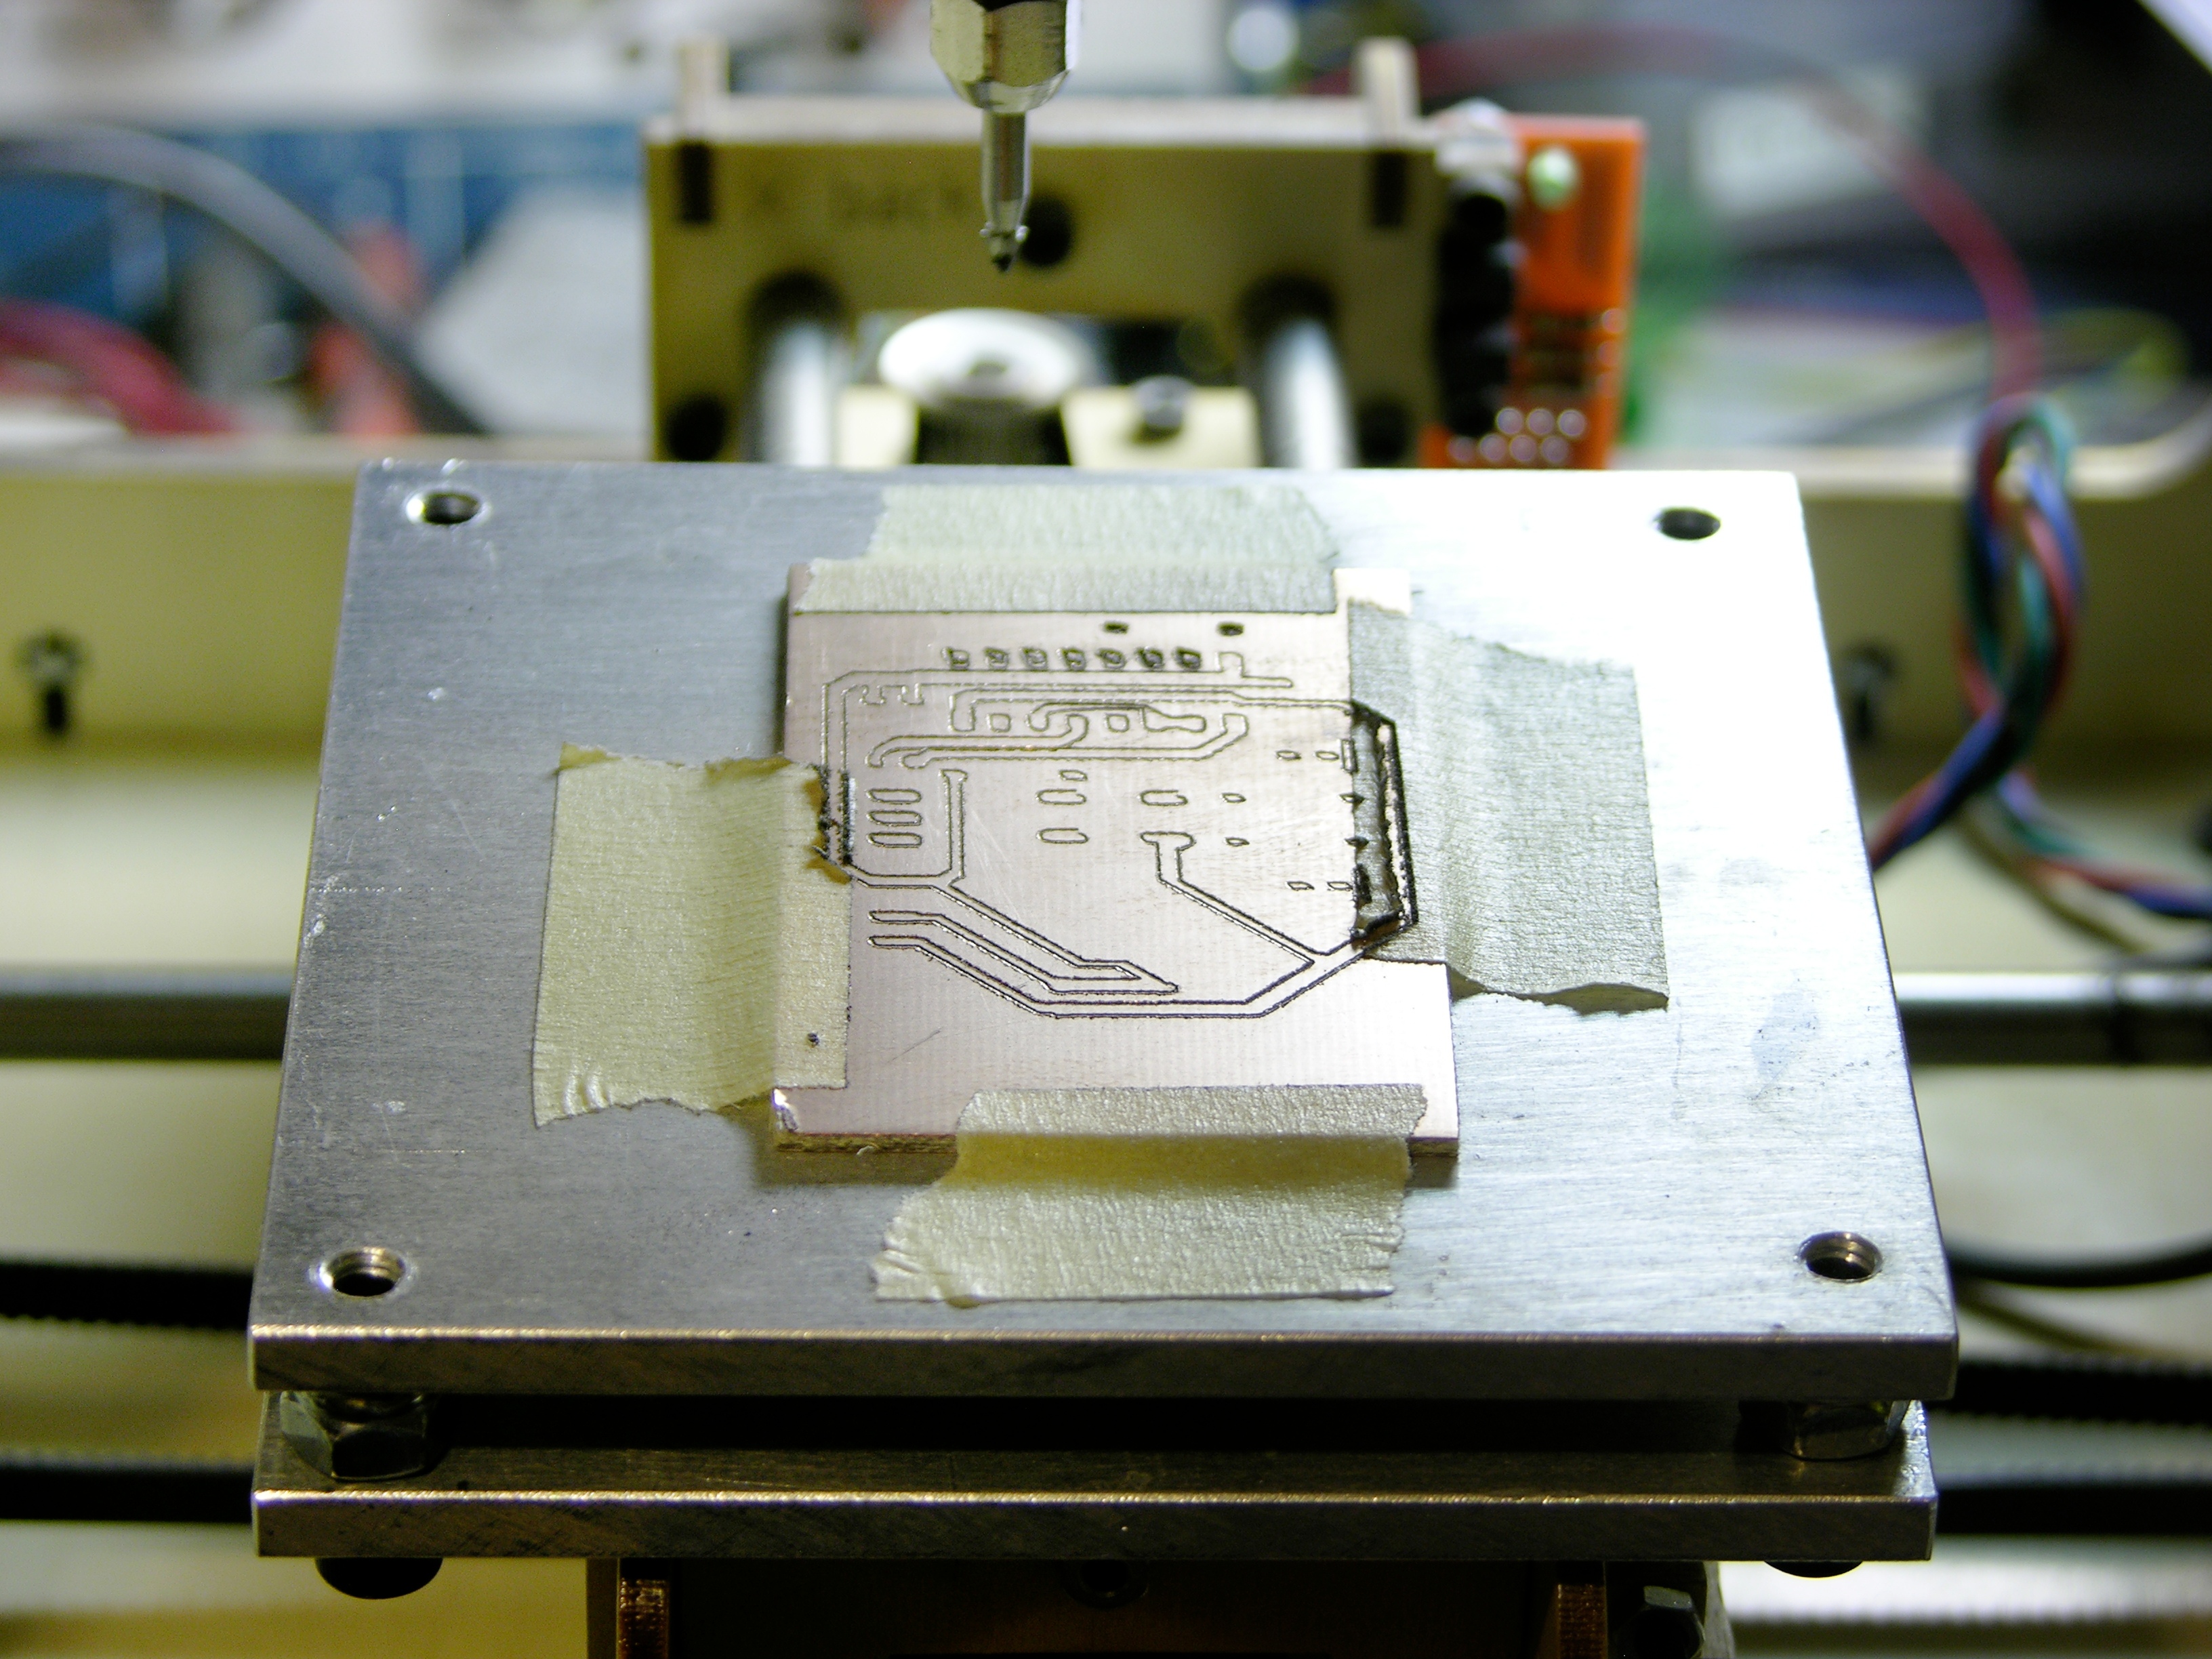
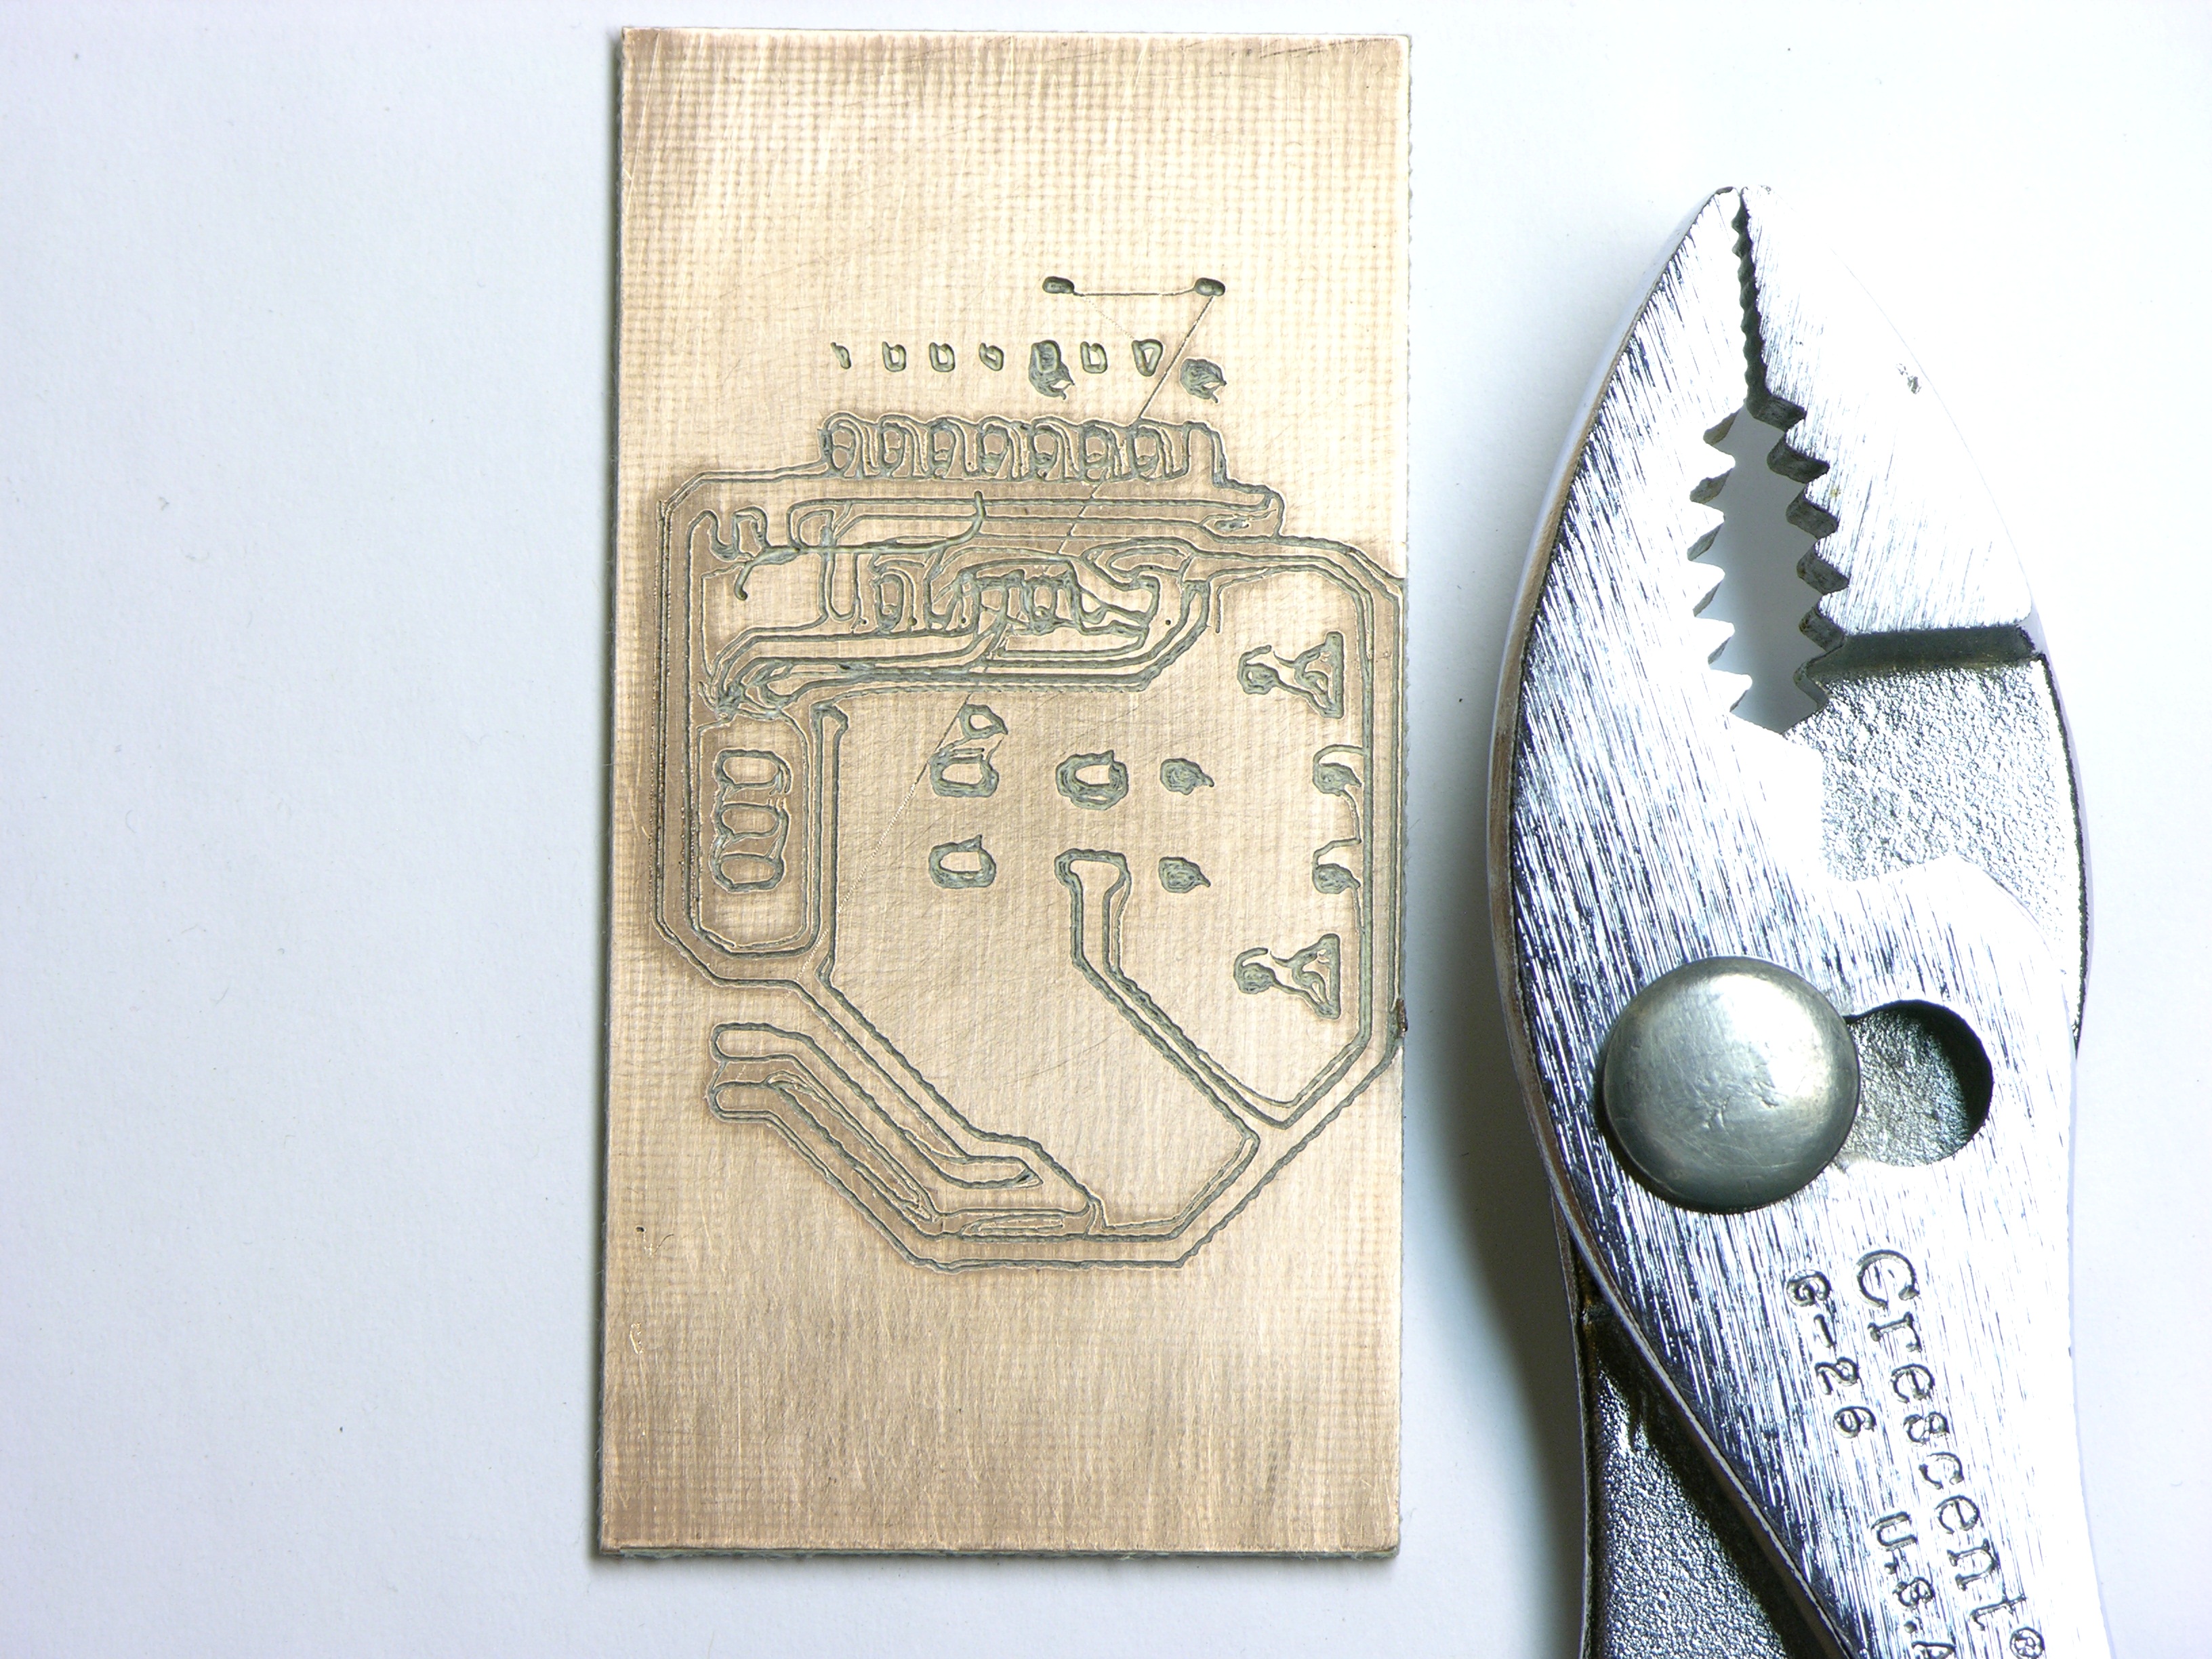
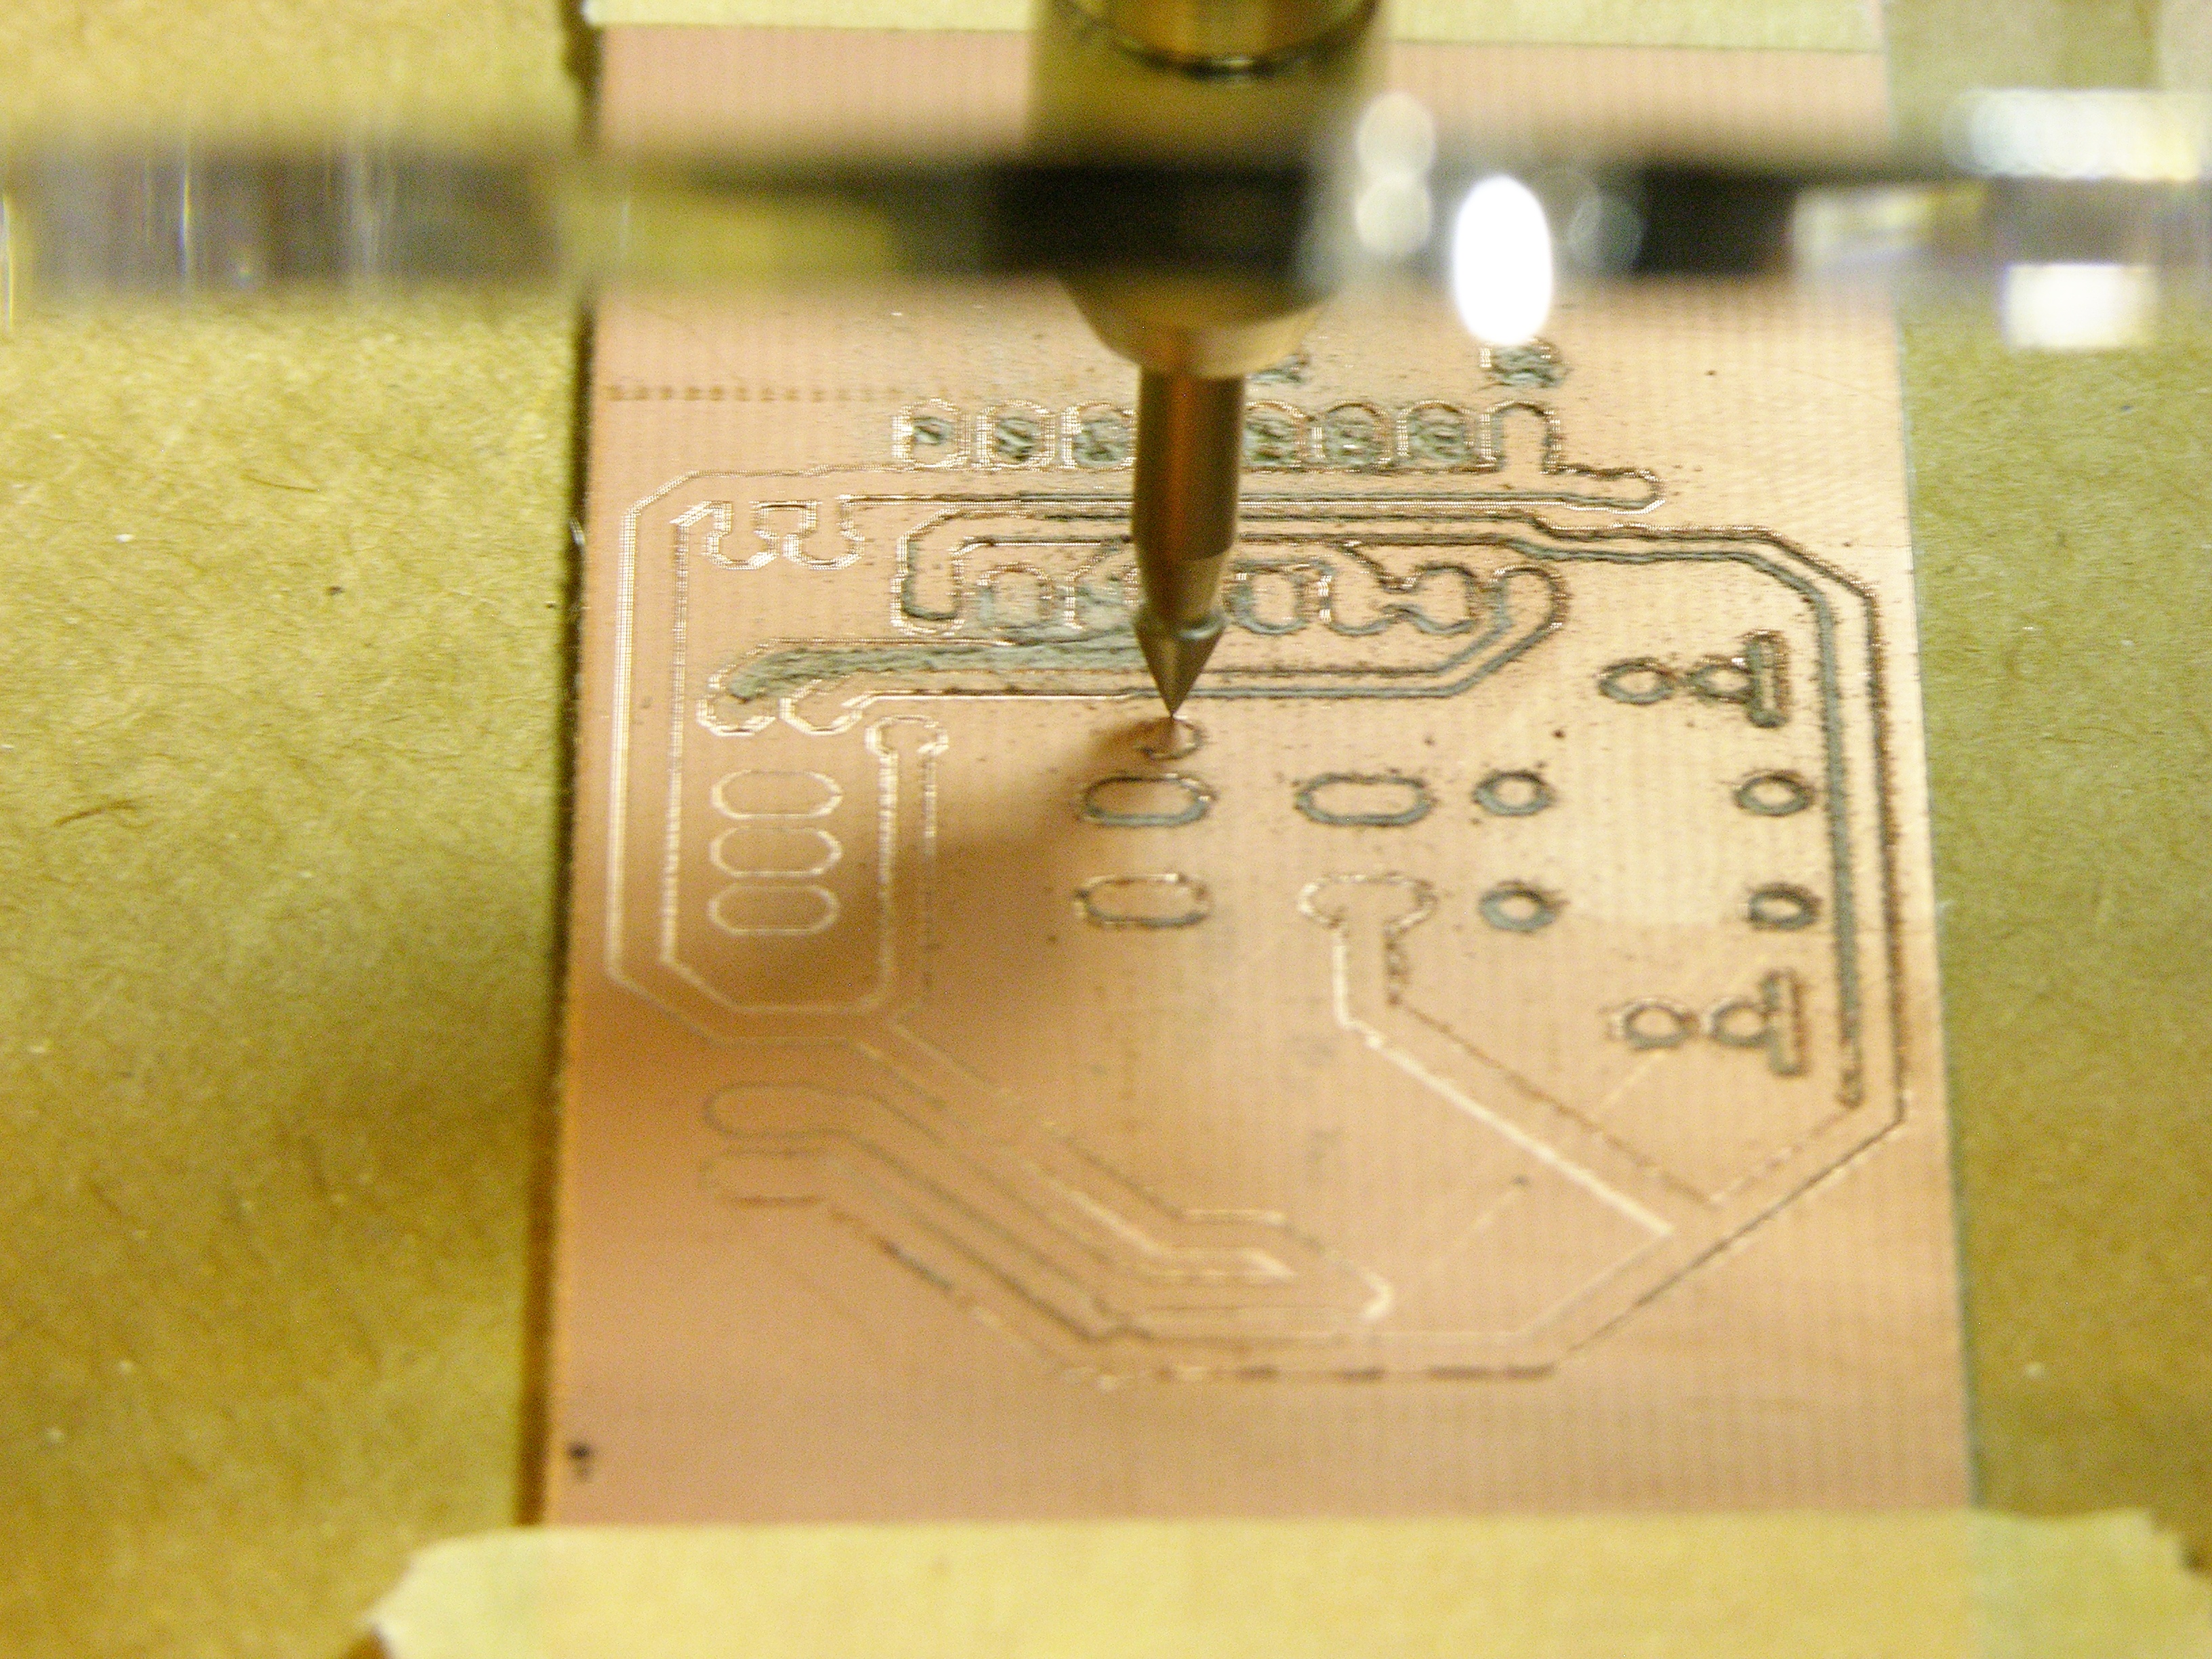
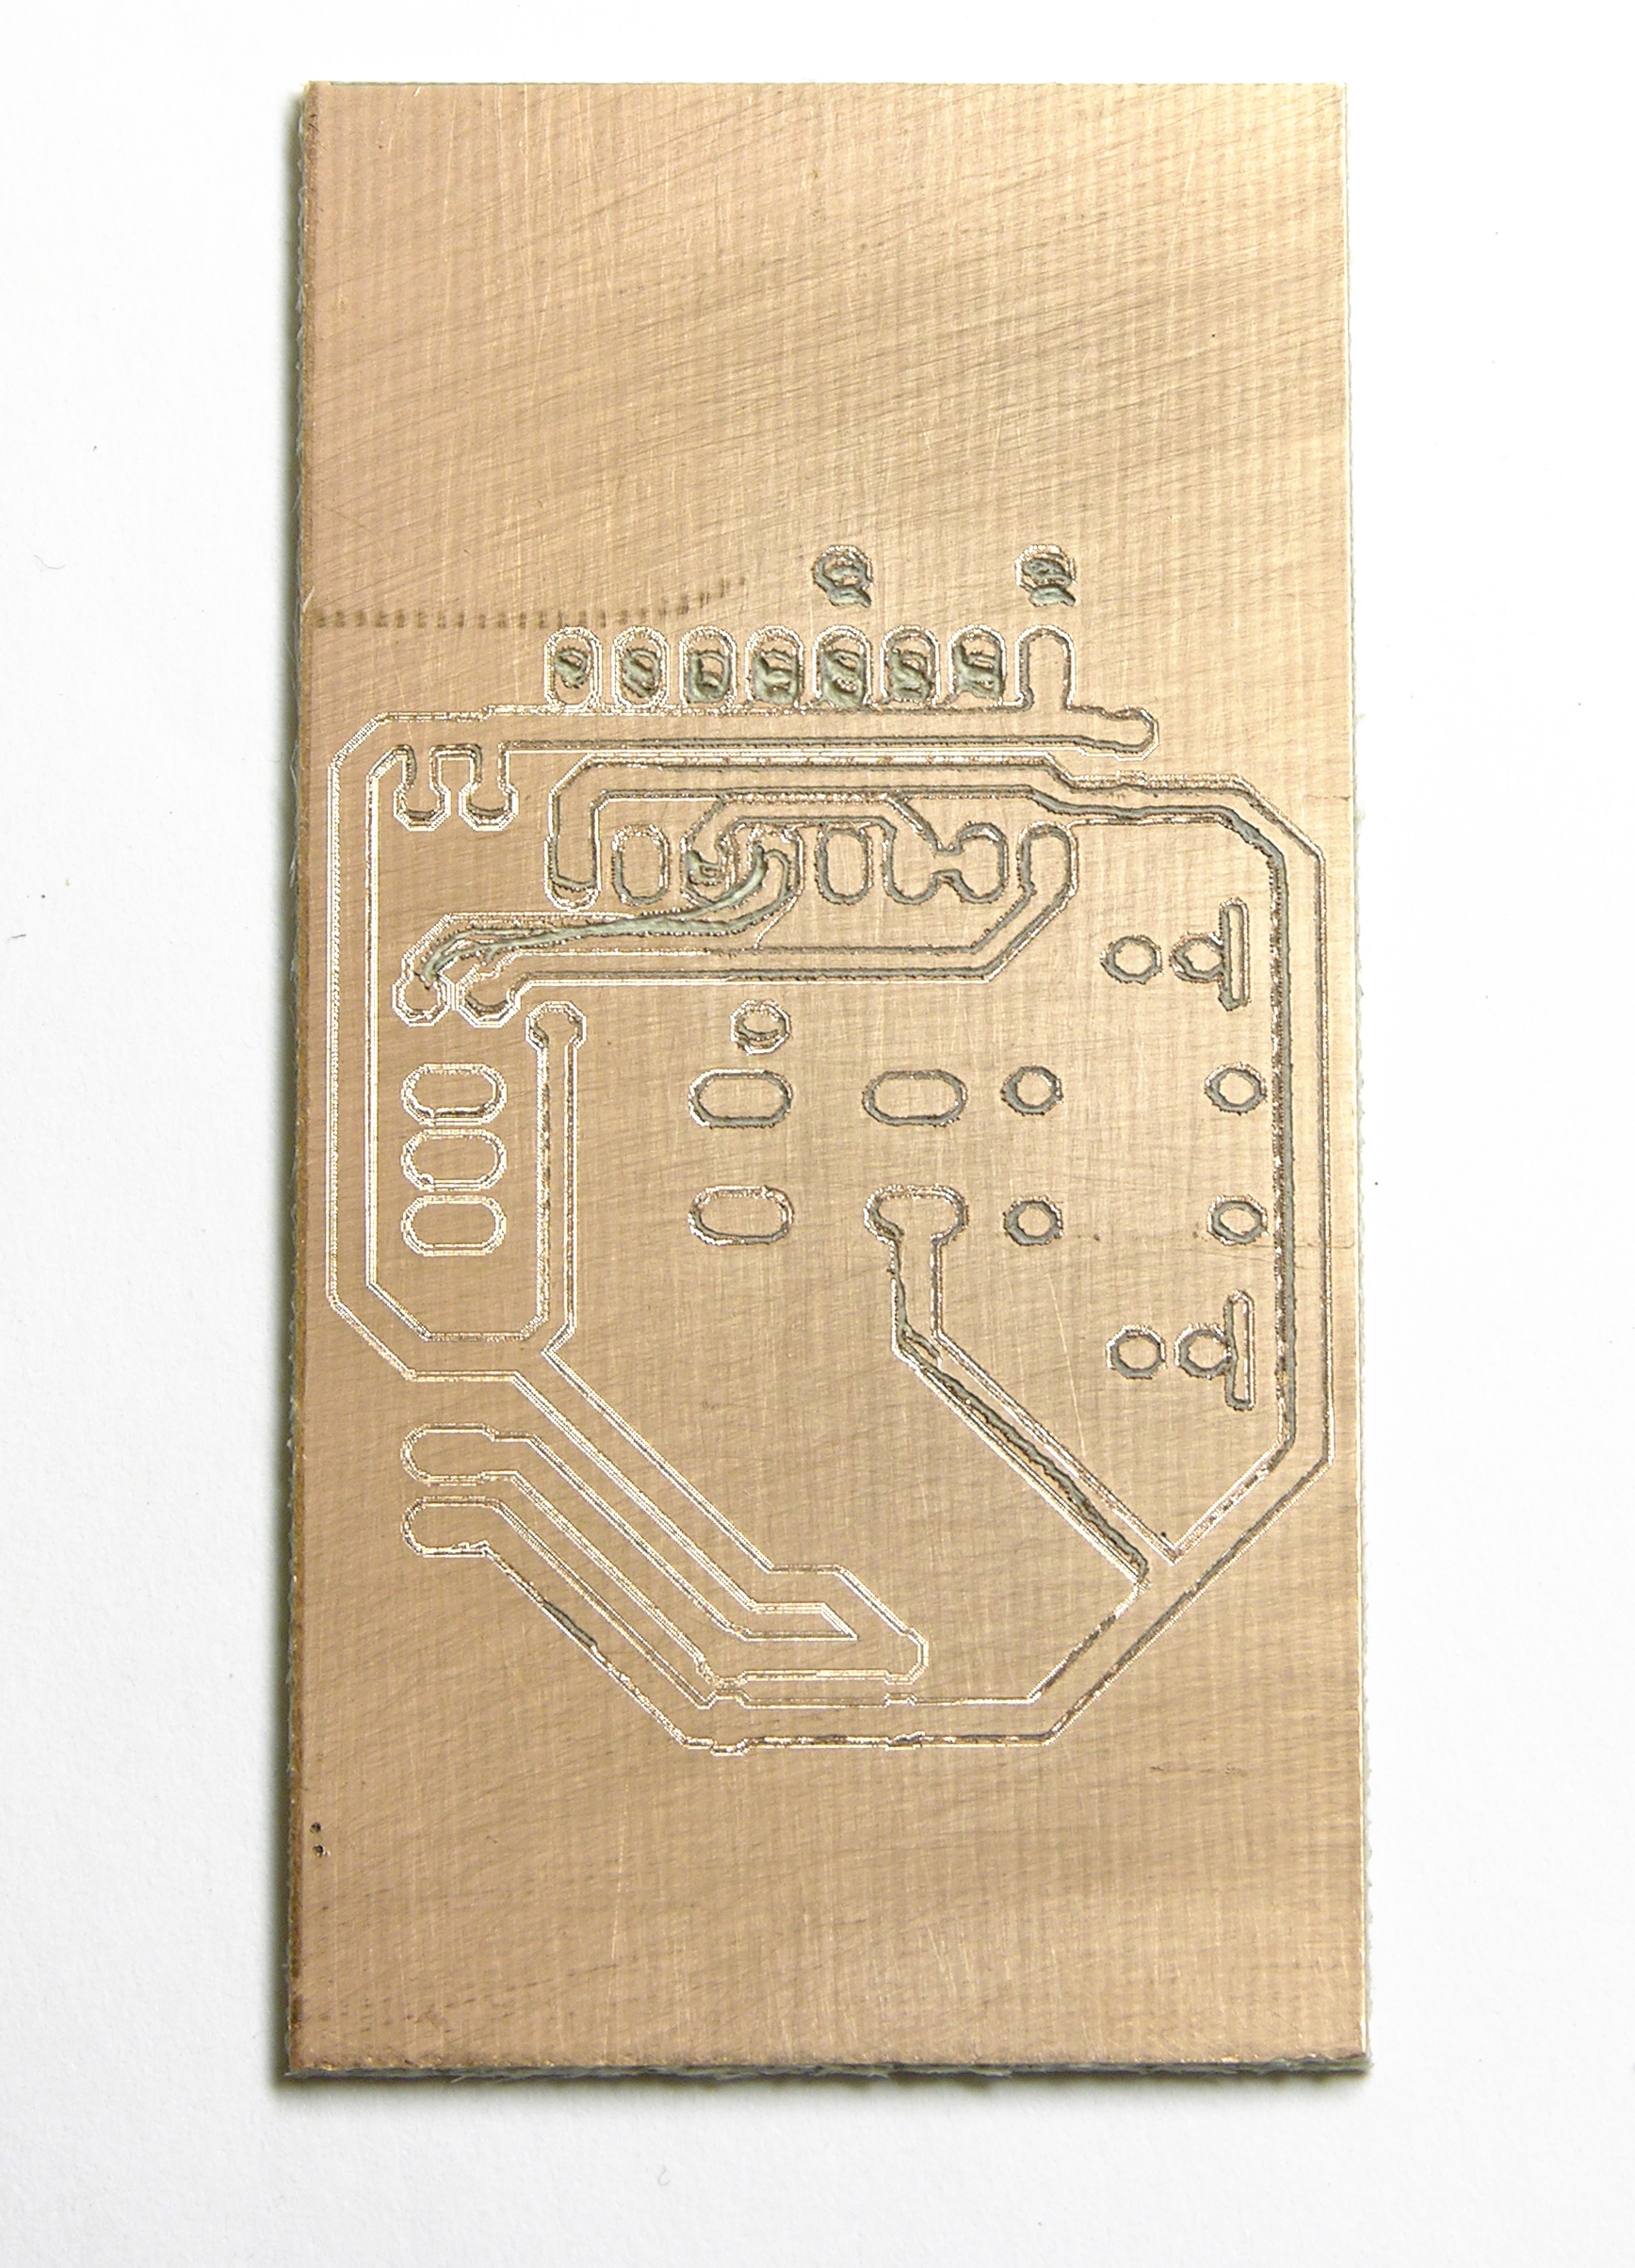
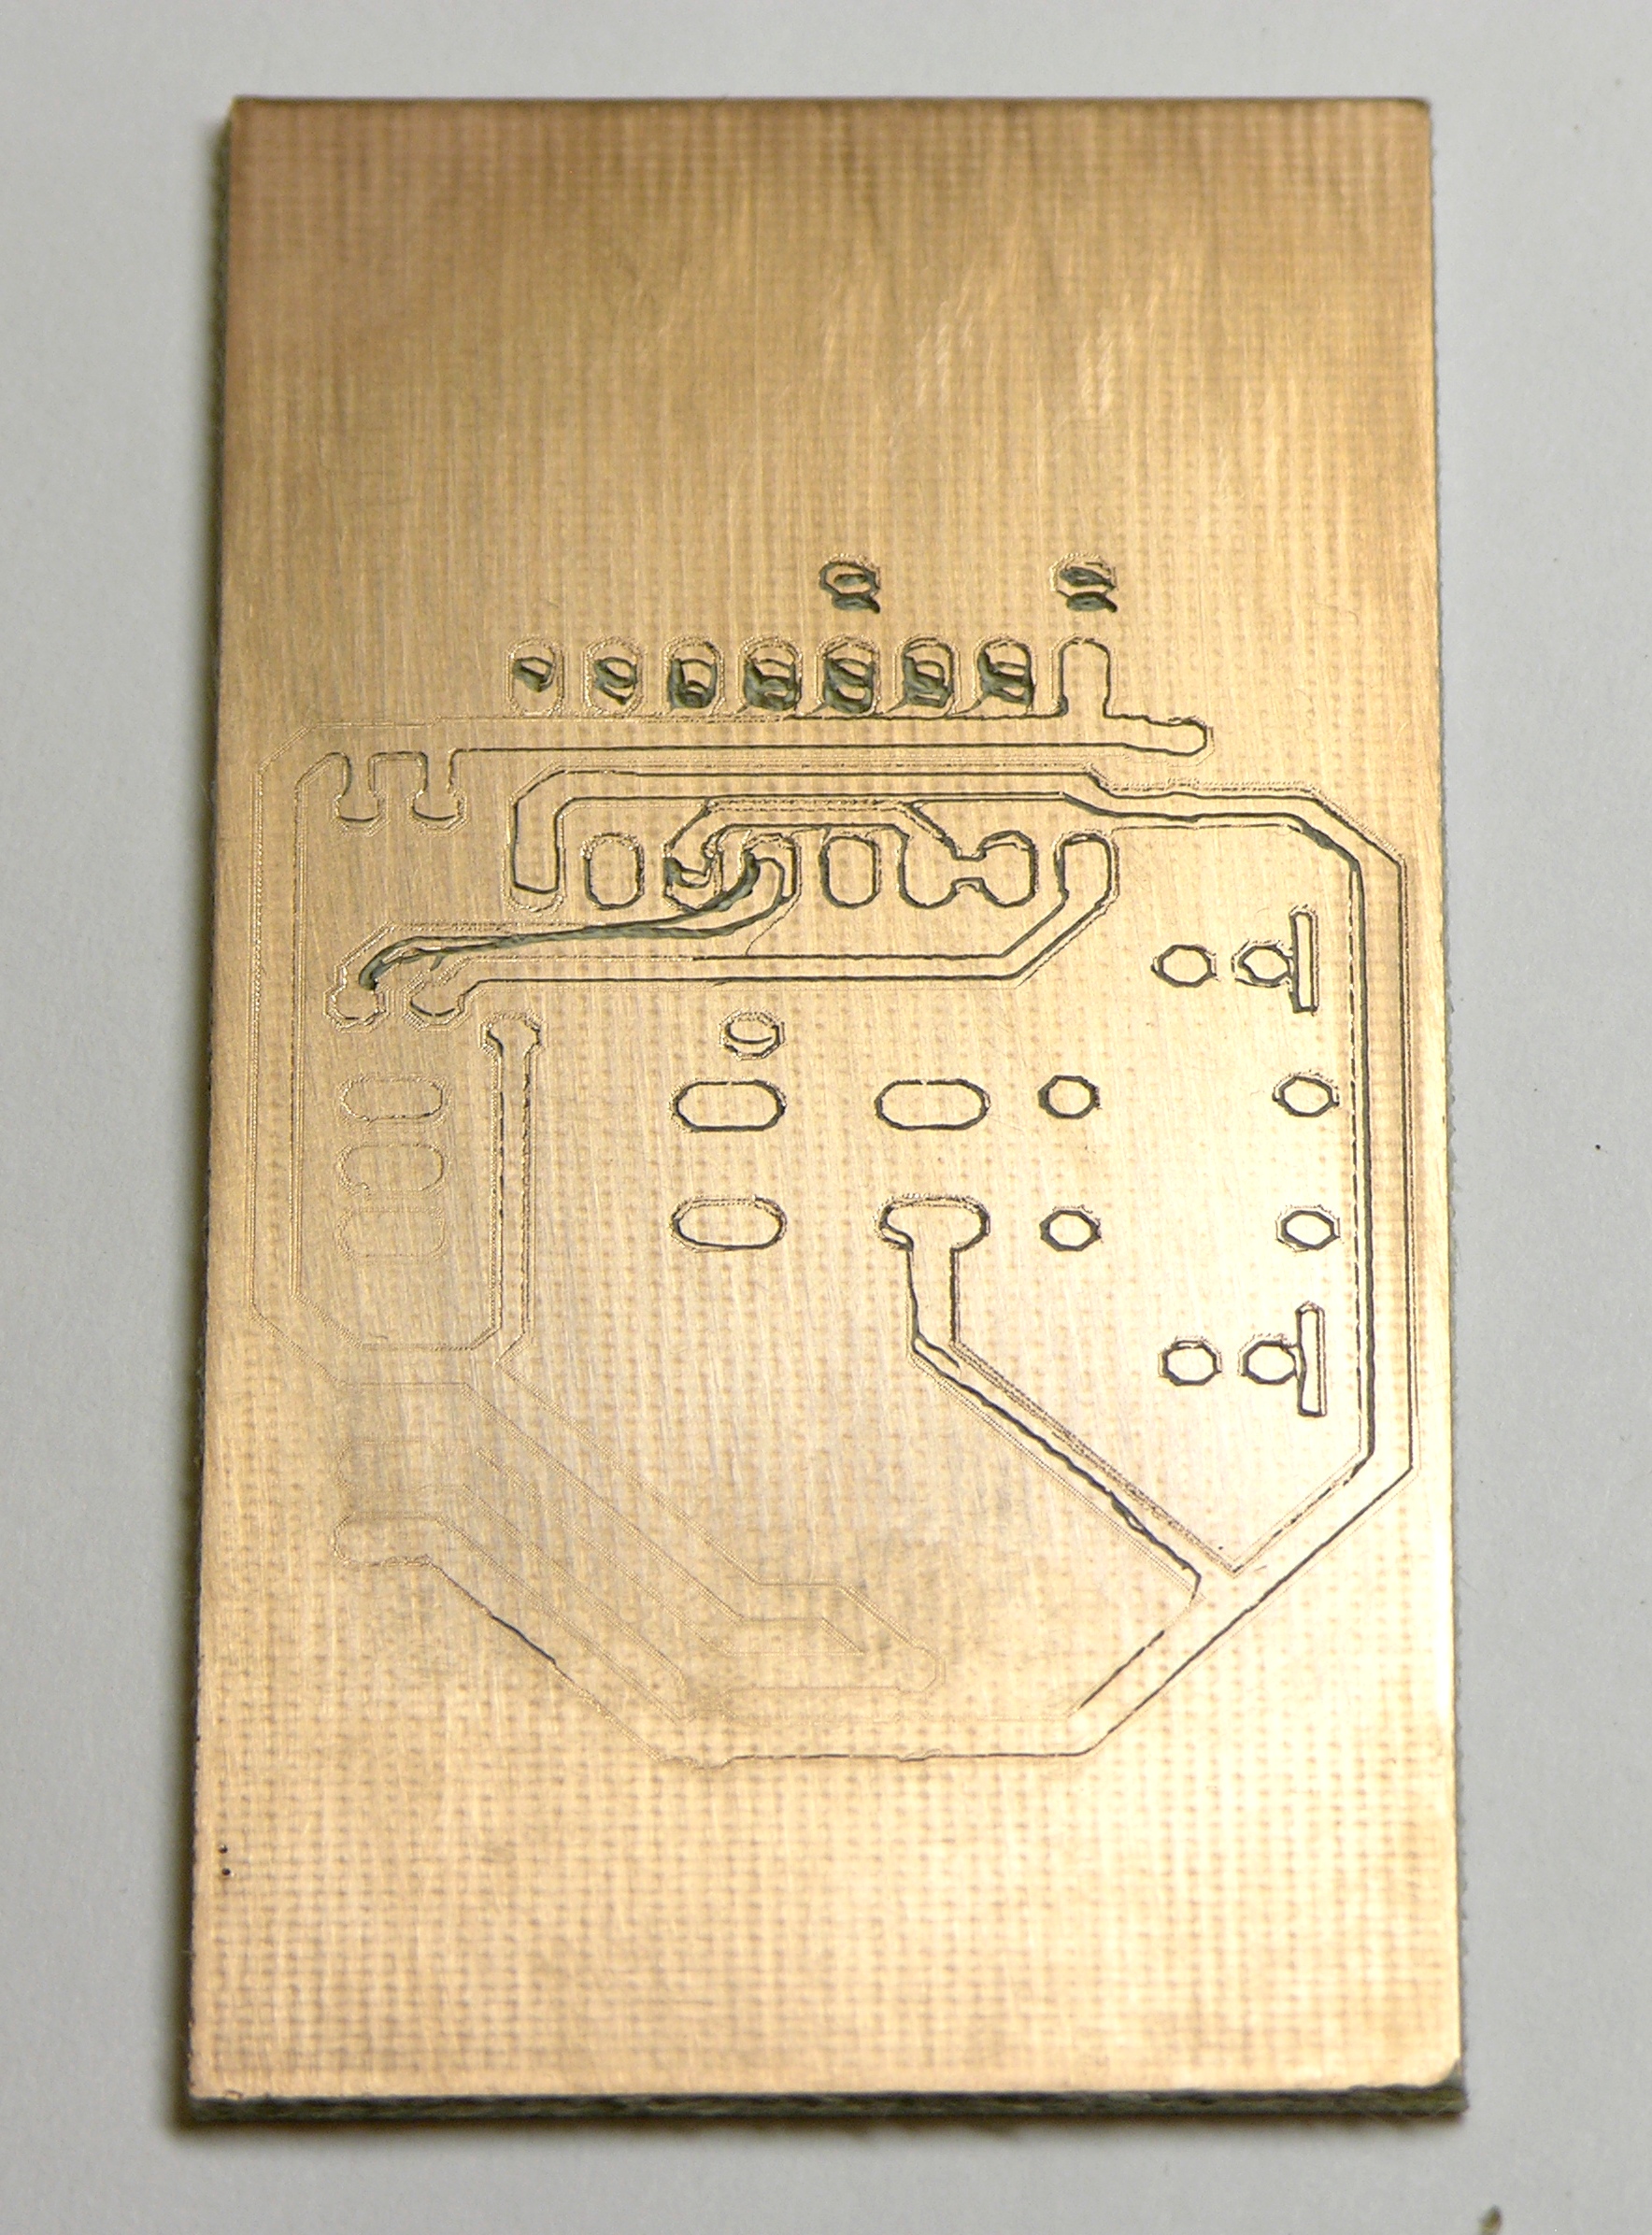
The results were not tremendously better than before (left board, top row of pads; right board from commercial mill for comparison), so I slowed the feed rate to .1″ per minute and let the mill finish the rest of the board for five hours, just to see whether I could produce usable traces. The traces cut at an outrageously slow feed rate are much better than previous results, but still a bit, shall we say, interpretive for my taste.
Having watched the Dremel bit trying to cut the copper and having tested it handheld out of the machine, I do recognize that it’s not the right bit for this job. I have some carbide engraving bits recommended by Pierre (exuinoxefr) on the way from Hong Kong, and I think they’ll make a significant difference. In April.
Meanwhile, note the three pads in the center of the board. Even at only one stepper motor step per second, the board took a very consistently incorrect path under the toolhead. Also note that the diagonal lines look like they were drawn with a left-handed quill pen — NE/SW lines are thicker than NW/SE.
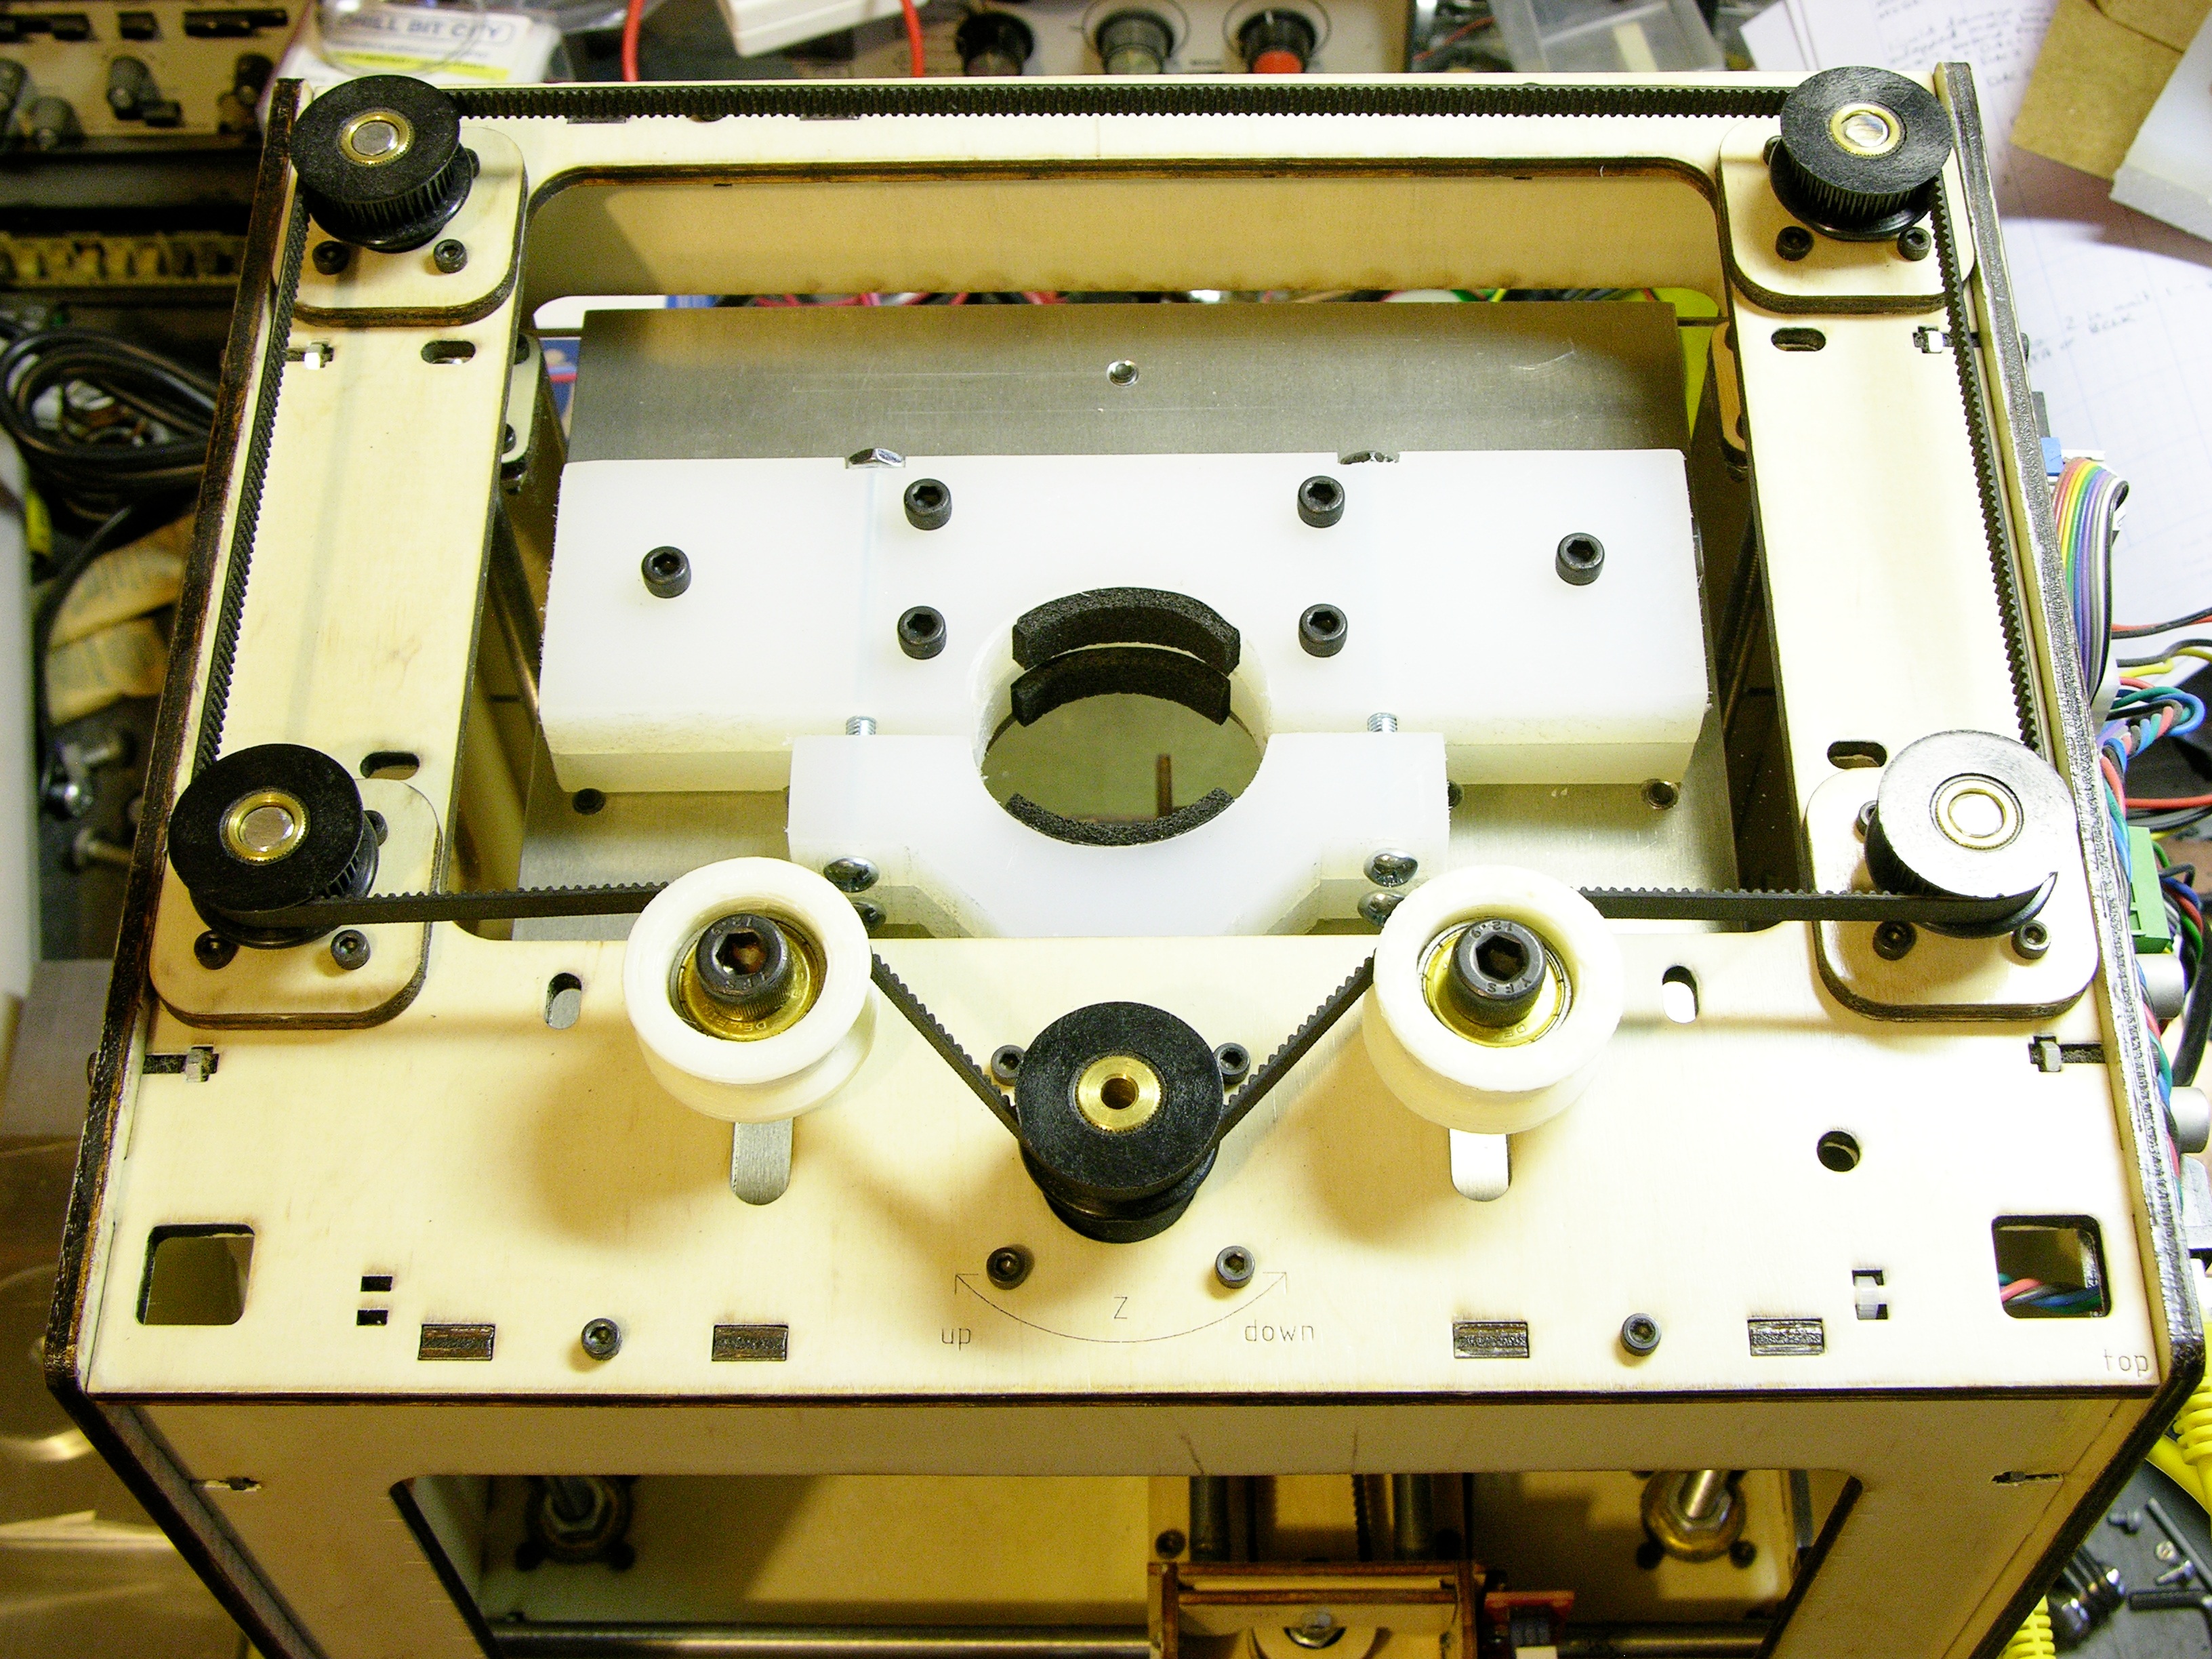
I believe this is caused by the considerable play between the original CupCake bushings and the guide rods. Tighter bushings would cause more friction, so they were chosen for a bit of a loose fit. Even though the platform is now rigidly mounted on the Y carriage, the Y carriage wiggles on the Y guide rods and the X-Y carriage wiggles on the X guide rods.
I’m extremely interested in the Mendel-inspired replacement X-Y assembly by Thingiverse contributor “twotimes.” It replaces the bushings with sets of roller bearings spaced around the guide rods; the bearings can be tightened against the rods and still roll smoothly. I intend to get in touch and ask whether it successfully removes the play from the carriages.

Although my immediate interest is whether I can use the CupCake that I already own as a PCB milling machine, the enhancements I’m making will improve it as a filament deposition machine as well. The lack of leveling in my heated build platform prevented me from printing larger models; I’ve already drilled my heated platform to fit interchangeably into this new system. Smoother X-Y action from a replacement carriage can only help, too.