Archive for January, 2007

LogoBoard

Monday, January 29th, 2007

Well, it’s time for another round of John Harrison’s Technology: Art and Sound by Design class–and oh by the way, this time I’m co-teaching. John’s doing the hard parts (course vision, blogs, wikis, etc.), and I’m doing the technology lessons for a while.

We’re calling them “Thing a Week,” sort of like another Thing a Week series you might have heard of, only different. On Monday and/or Wednesday, we introduce a technical topic, Friday we build it in the lab, and then next Monday we show it off.

So here’s the first one–me soldering up a LogoBoard, a carrier board for the LogoChip, designed by Tom McGuire.

Thing 1: LogoBoard Assembly (may move to here)

LogoBoard

Funny how a 15-minute soldering job turns into two and a half hours when you stop after every part to take pictures. :-)

Theremax, Part I: Circuit Board

Monday, January 22nd, 2007

A Theremin is an electronic instrument played by waving your hands in the air near a couple of antennae. It has matched pairs of high-frequency oscillators, and the change in capacitance due to the proximity of your hand changes the frequency one oscillator in the pair, causing “beats” (heterodyning) between the pair that form audible wavelengths. The Theremin was invented early in the 20th century by Leon Theremin, a Russian physicist. It’s the spooky sound you hear in the Beach Boy’s “Good Vibrations”–although that was actually recorded with an electro-theremin, a different instrument designed to mimic the Theremin’s sound.

I don’t know when I first became aware of Theremins, but I know I’ve wanted one at least since February of 1996, when Electronics Now published “Build this Theremin,” by John Simonton of PAiA Corporation. The full PCB layout and parts were published in the magazine, and PAiA has also sold their “Theremax” kit continuously since then.

And I finally ordered one.

Two, actually; my friend Cort wants one as well.

They arrived about a week later.

Board Assembly

Theremax kit parts

I bought the kit with the PCB and all components, and the separate partial case kit with the antennae and a nicely screened front panel. The full case kit was another $60, and I figured I could make a case that I’d be happy with for less than that. I think it says a lot about PAiA and their understanding of the hobbyist marketplace that they offer so many options, instead of forcing everyone into the same cookie cutter package.

The first thing I did was sort out all of the components. There are dozens of resistors and capacitors, a handful of transistors, four tunable inductors for the oscillators, pots and jacks for the panel (included in the parts kit, even if you don’t buy the panel), and miscellaneous bits like LEDs and ICs. They even threw in hookup wire to connect the PCB to the control panel, and a gator jumper for bypassing the volume control during one stage of hookup–literally every part you need to get up and going, except solder.

Theremax PC board, component side

Theremax PC board, solder side

Next, I took a look at the PCB. It’s a nicely-made single-sided board, with silk-screening on the top side for component identification only. I have only two small complaints:

  • The identifying marks for resistors and capacitors are under the component, so they’re no longer visible once the component is installed. I know there’s not a lot of extra room on the board for labels outside of the component footprint, but having to refer to a separate parts placement diagram really makes troubleshooting more difficult.
  • The resistors and capacitors are roughly numbered from upper left to lower right; but some of the numbers stray across the board, making it hard to locate the correct part. Maybe I’m too picky, but I really like an orderly numbering system during the assembly and troubleshooting stages.

Theremax PC board, resistors installed

The assembly instructions give a reasonable order for soldering in the components, which I mostly followed–jumper wires and resistors first,

Theremax PC board, diodes installed

then diodes. Note the blue diodes near the center of the board–germanium, with a lower voltage drop for increased sensitivity. I’ve read a nice description of how that aids the Theremin circuit, although I don’t recall it at the moment.

Theremax PC board, inductors and ICs installed

Here I deviated slightly from the instructions’ assembly order, and installed the ICs and inductors next. Because I don’t have a cool PCB holder, I solder with the board upside down on my workbench; and because of that, I prefer to install the shortest components first and work up to the tallest,

Theremax PC board, ceramic capacitors installed

which means doing the inductors before the ceramic capacitors,

Theremax PC board, electrolytic capacitors installed

and the electrolytic capacitors last.

Theremax PC board, transistors installed

The transistors are actually shorter than the electrolytics, but they cling to the board pretty well, thanks to the hole spacing being considerably wider than their lead spacing.

Control Panel

Theremax control panel

PAiA’s professionalism really shines here, and my photo doesn’t do it justice. This is a very nicely lettered control panel, as good as those on most of the equipment I own. I like the retro feel of the white paint on black brushed aluminum, rather than some glitzy decals on colored plastic that you might see these days.

Theremax control panel, back

I installed all of the potentiometers and jacks, twisting them as needed to try to get the hex nuts on the front to line up evenly. (I like to use the phrase detail-oriented.)

Theremax control panel, back with ground connections

The instructions say to run bare wire from pot to pot for the ground connection; but I’m not wild about bare wire (especially when it has to loop and could be snagged and pulled out to contact something else), so I put some clear heatshrink over it for sleeving. I also built up the LED assemblies–replacing the provided dark red LEDs with my own green LED for the power light, and a matching red LED for the gate trigger indicator.

Theremax PC board, fly wires installed

Then I soldered all the fly wires to the PCB. The assembly guide gave very specific lengths; but I think things must have shifted since that was first printed, because the wires had completely different amounts of slack once connected. I shortened some wires and should have lengthened others, and made notes about all the changes I made and further changes I should have made. Here are my notes about the colors I used and the lengths I’d recommend:

Board Panel Signal Length Modify Color
A R79-2 P trim 9 1/2 -1 blue
B R79-3 P trim + 9 1/2 -1 white
C R80-3 V trim + 5 +1 white
D R80-2 V trim 5 +1 green
E R81-3 timbre short sine 9 1/2 red
F R81-1 timbre short square 10 1/2 -1 blue
G lug GND 10 1/2 -2? green
H R82-3 pitch CV 12 1/2 blue
J R83-3 volume 9 1/2 red
K R84-3 velocity 9 1/2 +1 white
L J3-T velocity CV 11 -2 red
M J2-T gate 10 1/2 -1/2 red
N J2-R trigger 10 1/2 -1/2 green
R J1-T audio out 12 3/4 -2 1/4 blue
S J5-T volume CV 16 -6 blue
T J6-T mute 16 -5 white
+ S1-1 +12V 12 -1 red
SG J1-S SGND 5 +1 white
lug S1-3 GND 10 green

Theremax control panel, back with signal wires installed

The last thing I did in that batch of soldering was run signal wires within the back of the panel. The instructions gave this step at the same time as the ground wiring, but I wanted to wait until I had the fly wires chosen so I could maintain the same color wire everywhere a signal traveled.

Next Steps

By now, I’ve connected the fly wires to the control panel, built a case, and semi-mounted the kit in the case. I’ll post those pictures soon.

Battery Meter

Sunday, January 7th, 2007

Battery Meter Prototype

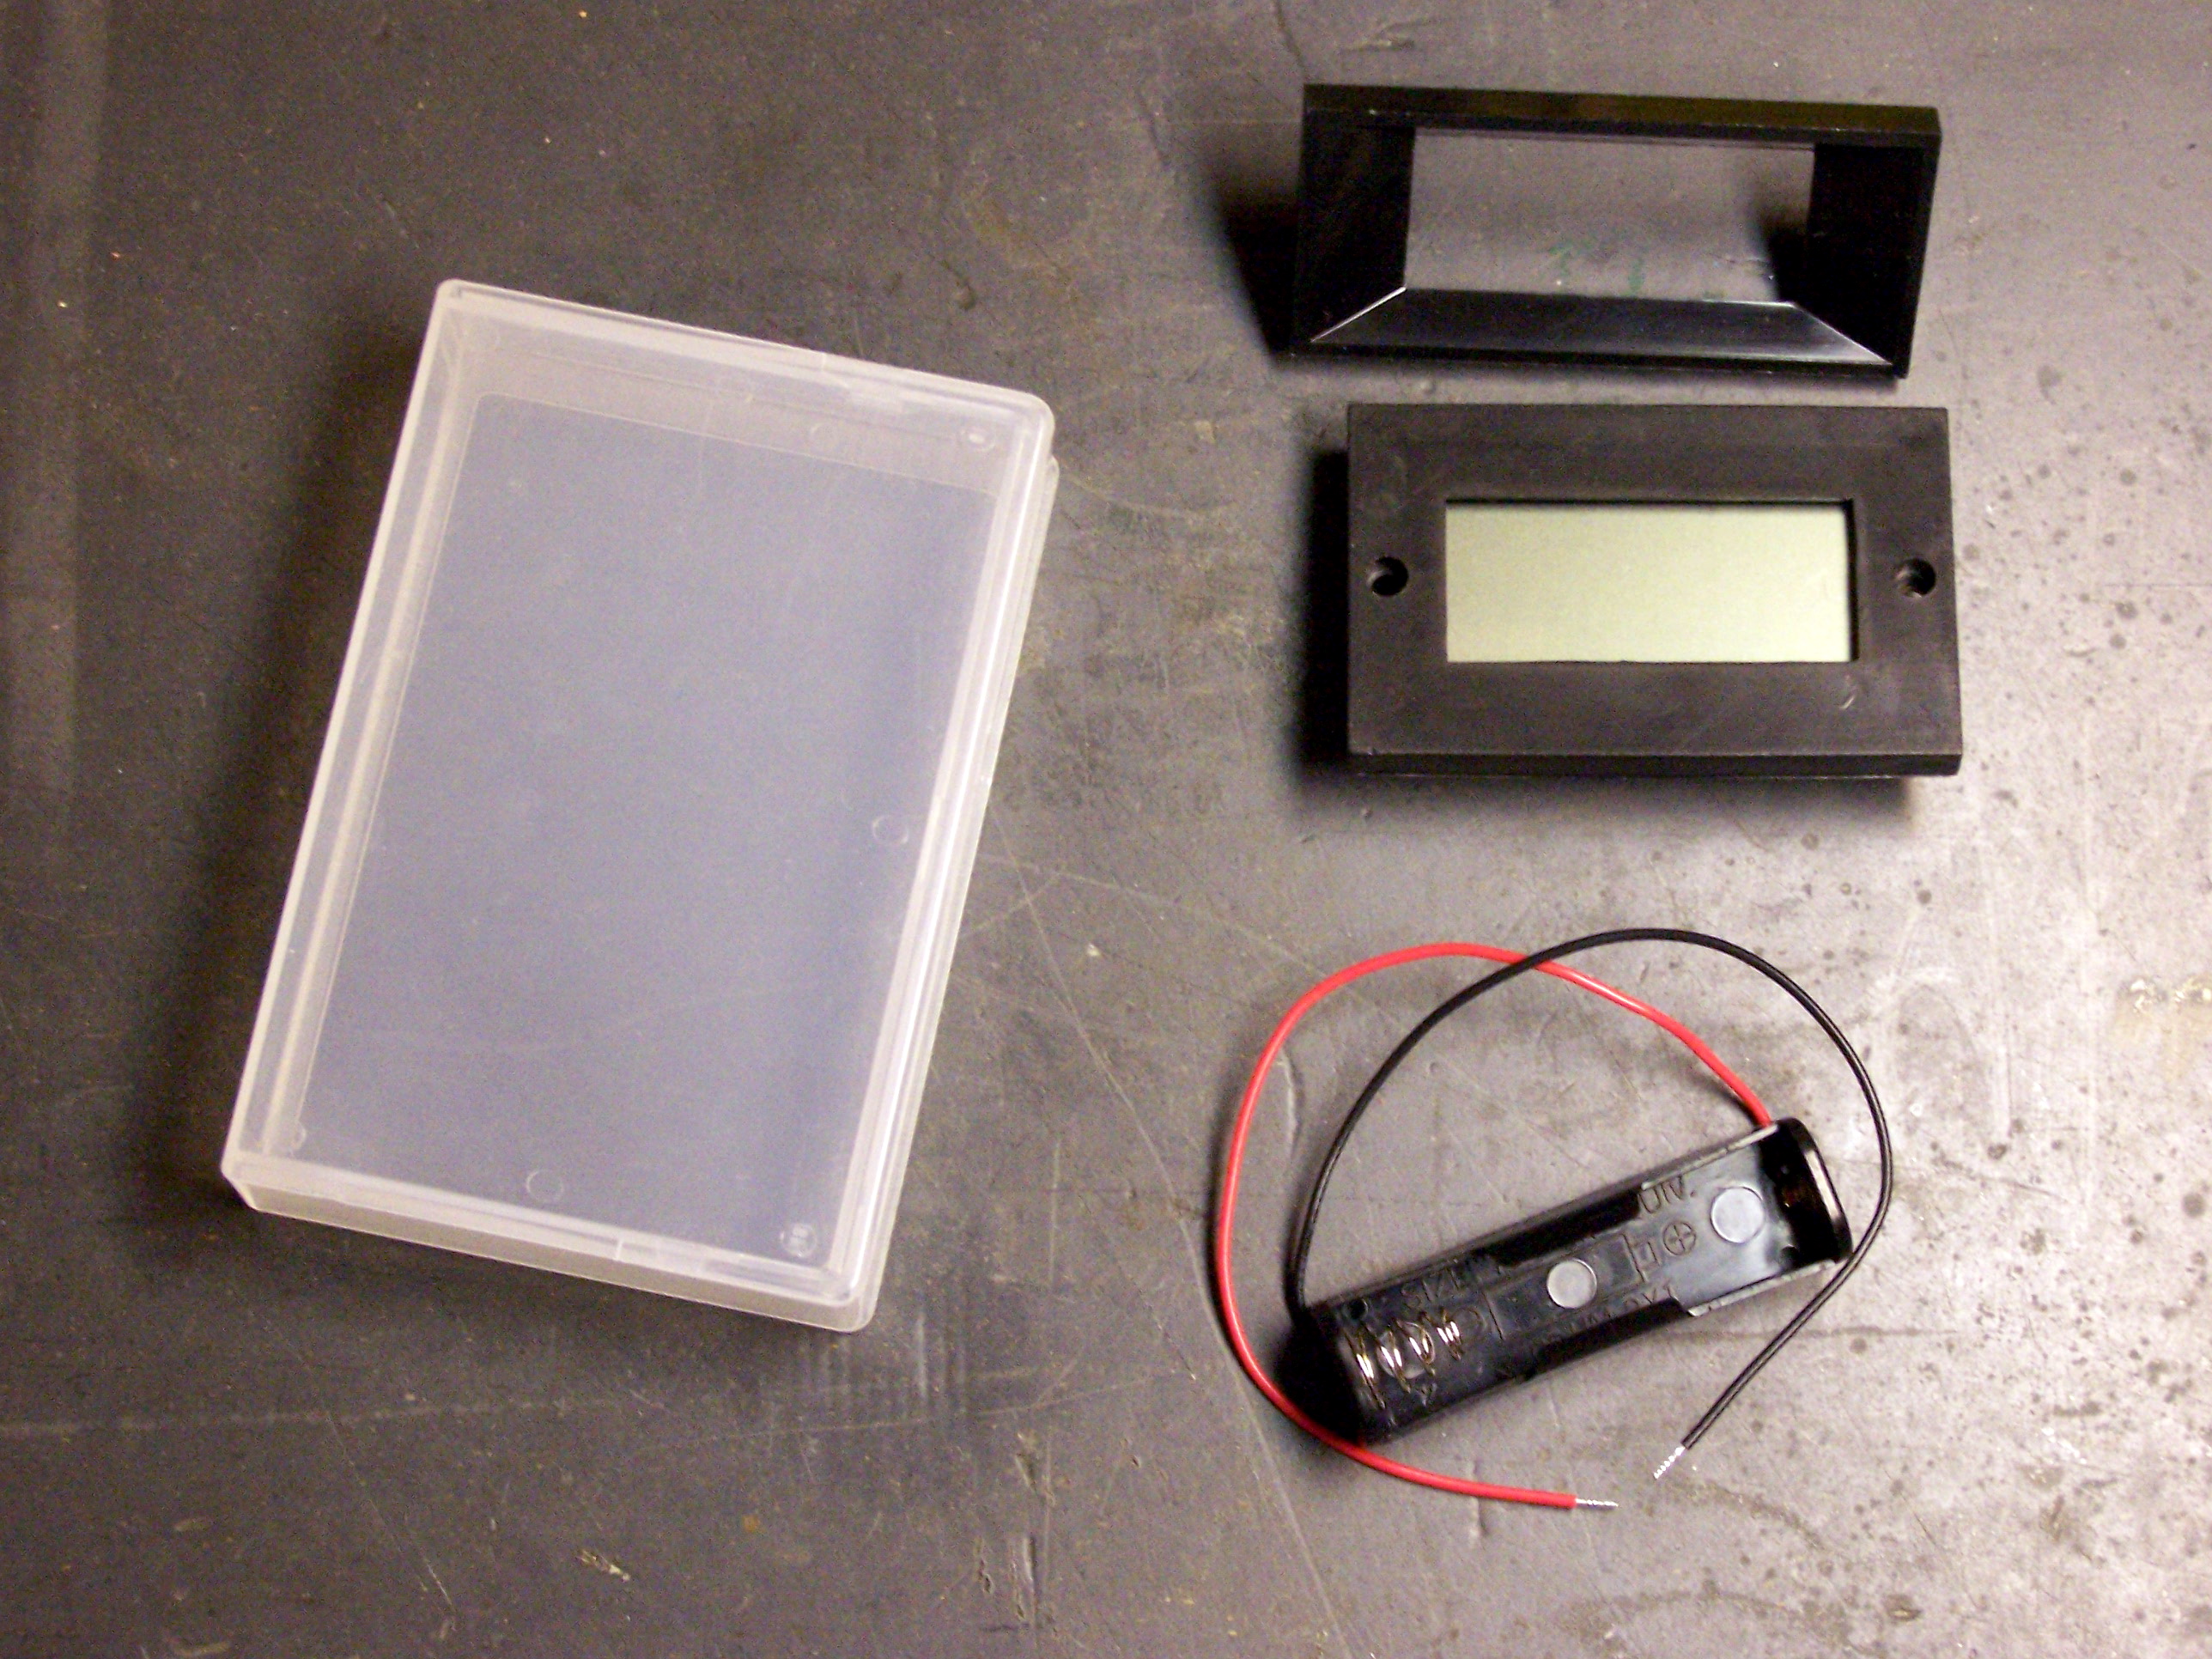
Here’s a project that I’ve been kicking around for a long time (three years–I guess that’s not so long compared to some of my projects :-| ) and finally built–a battery meter. My friend/enabler Slim Cummings in Pittsburg gave me a couple of surplus 3-1/2 digit, .2V panel meters, and I thought they’d be perfect for testing the freshness of AA and AAA cells.

Meter

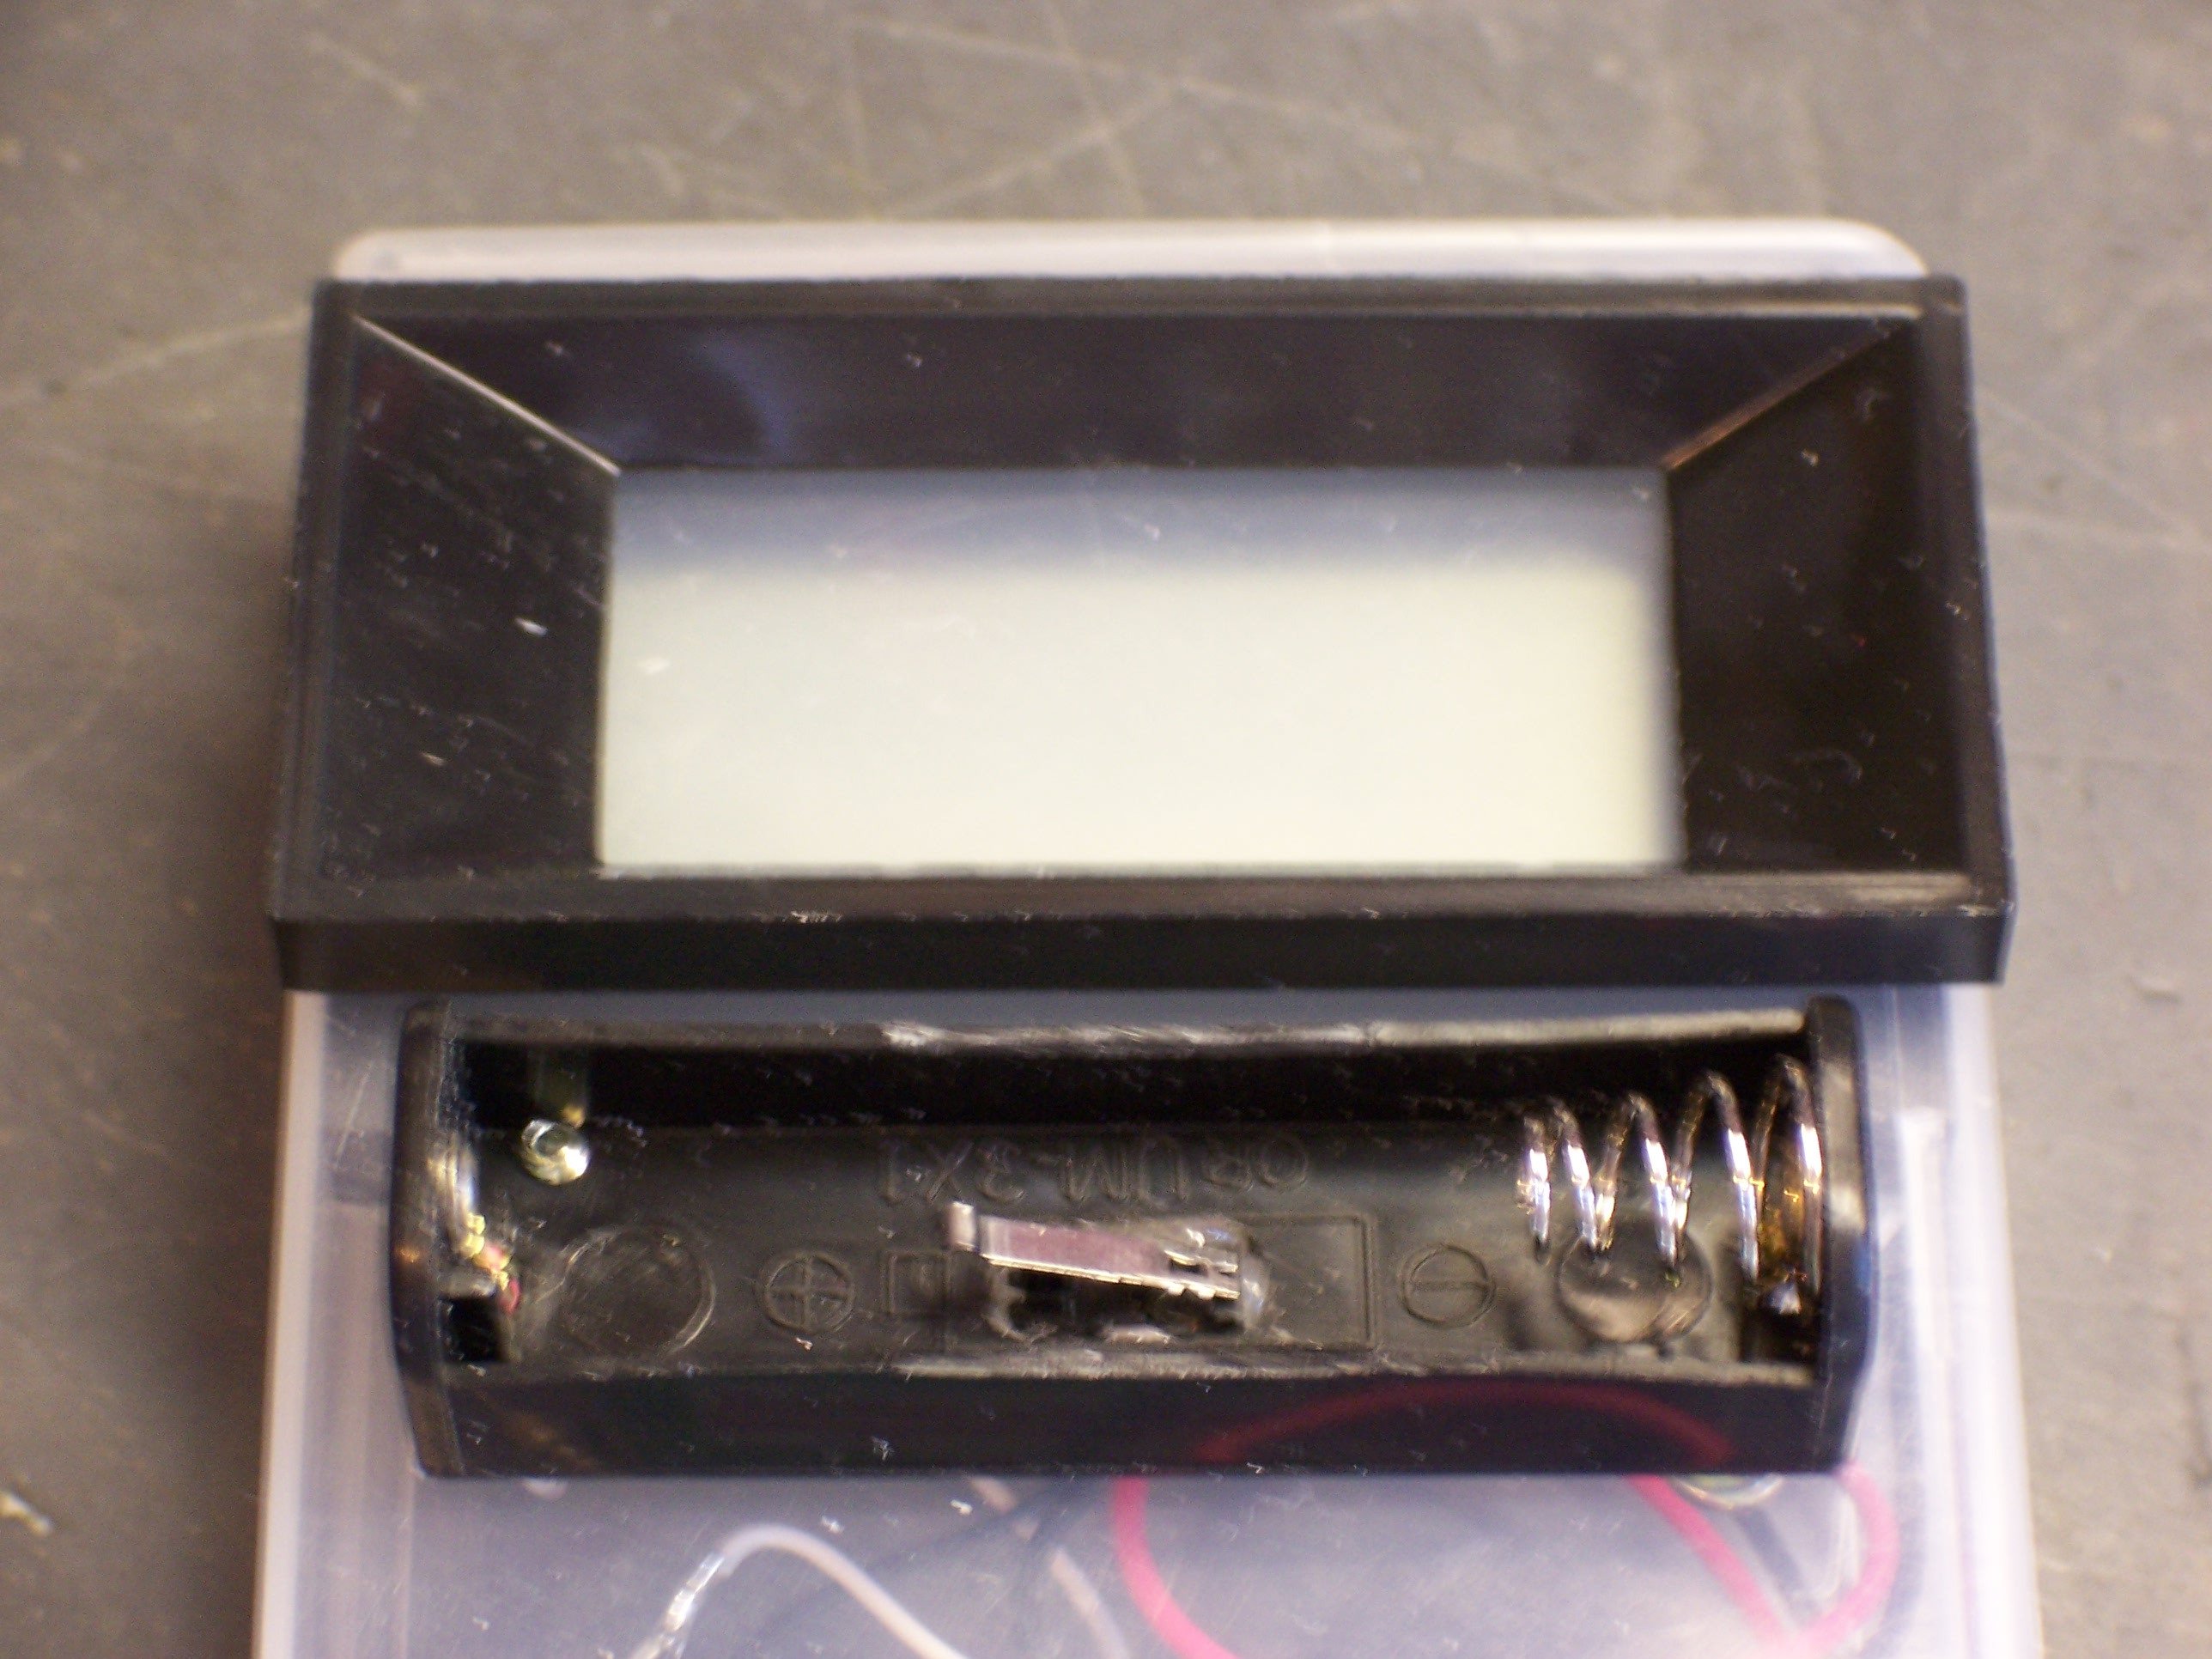
The meter was the inspiration for the project. It has a 3-1/2 digit (a 1 plus three 7-segment digits–1888) display, a configurable decimal point, and an Intersil ICL7106CPL LCD/LED Display, A/D converter chip. You give it 9V supply, a jumper for the decimal point, and a voltage input; and it samples the voltage and drives the LCD. It’s a very nice package that just begs to be used for something interesting.

Tester Case and Battery Holder

Parts to Build a Battery Meter

The physical aspects of the project actually took much longer than the electrical. First off, I wanted to find a case with the following characteristics:

  • The case would be held in portrait orientation.
  • The meter would fit across the width of the case, with the battery holder below it.
  • I could fit a 9V battery inside the case to power the meter.

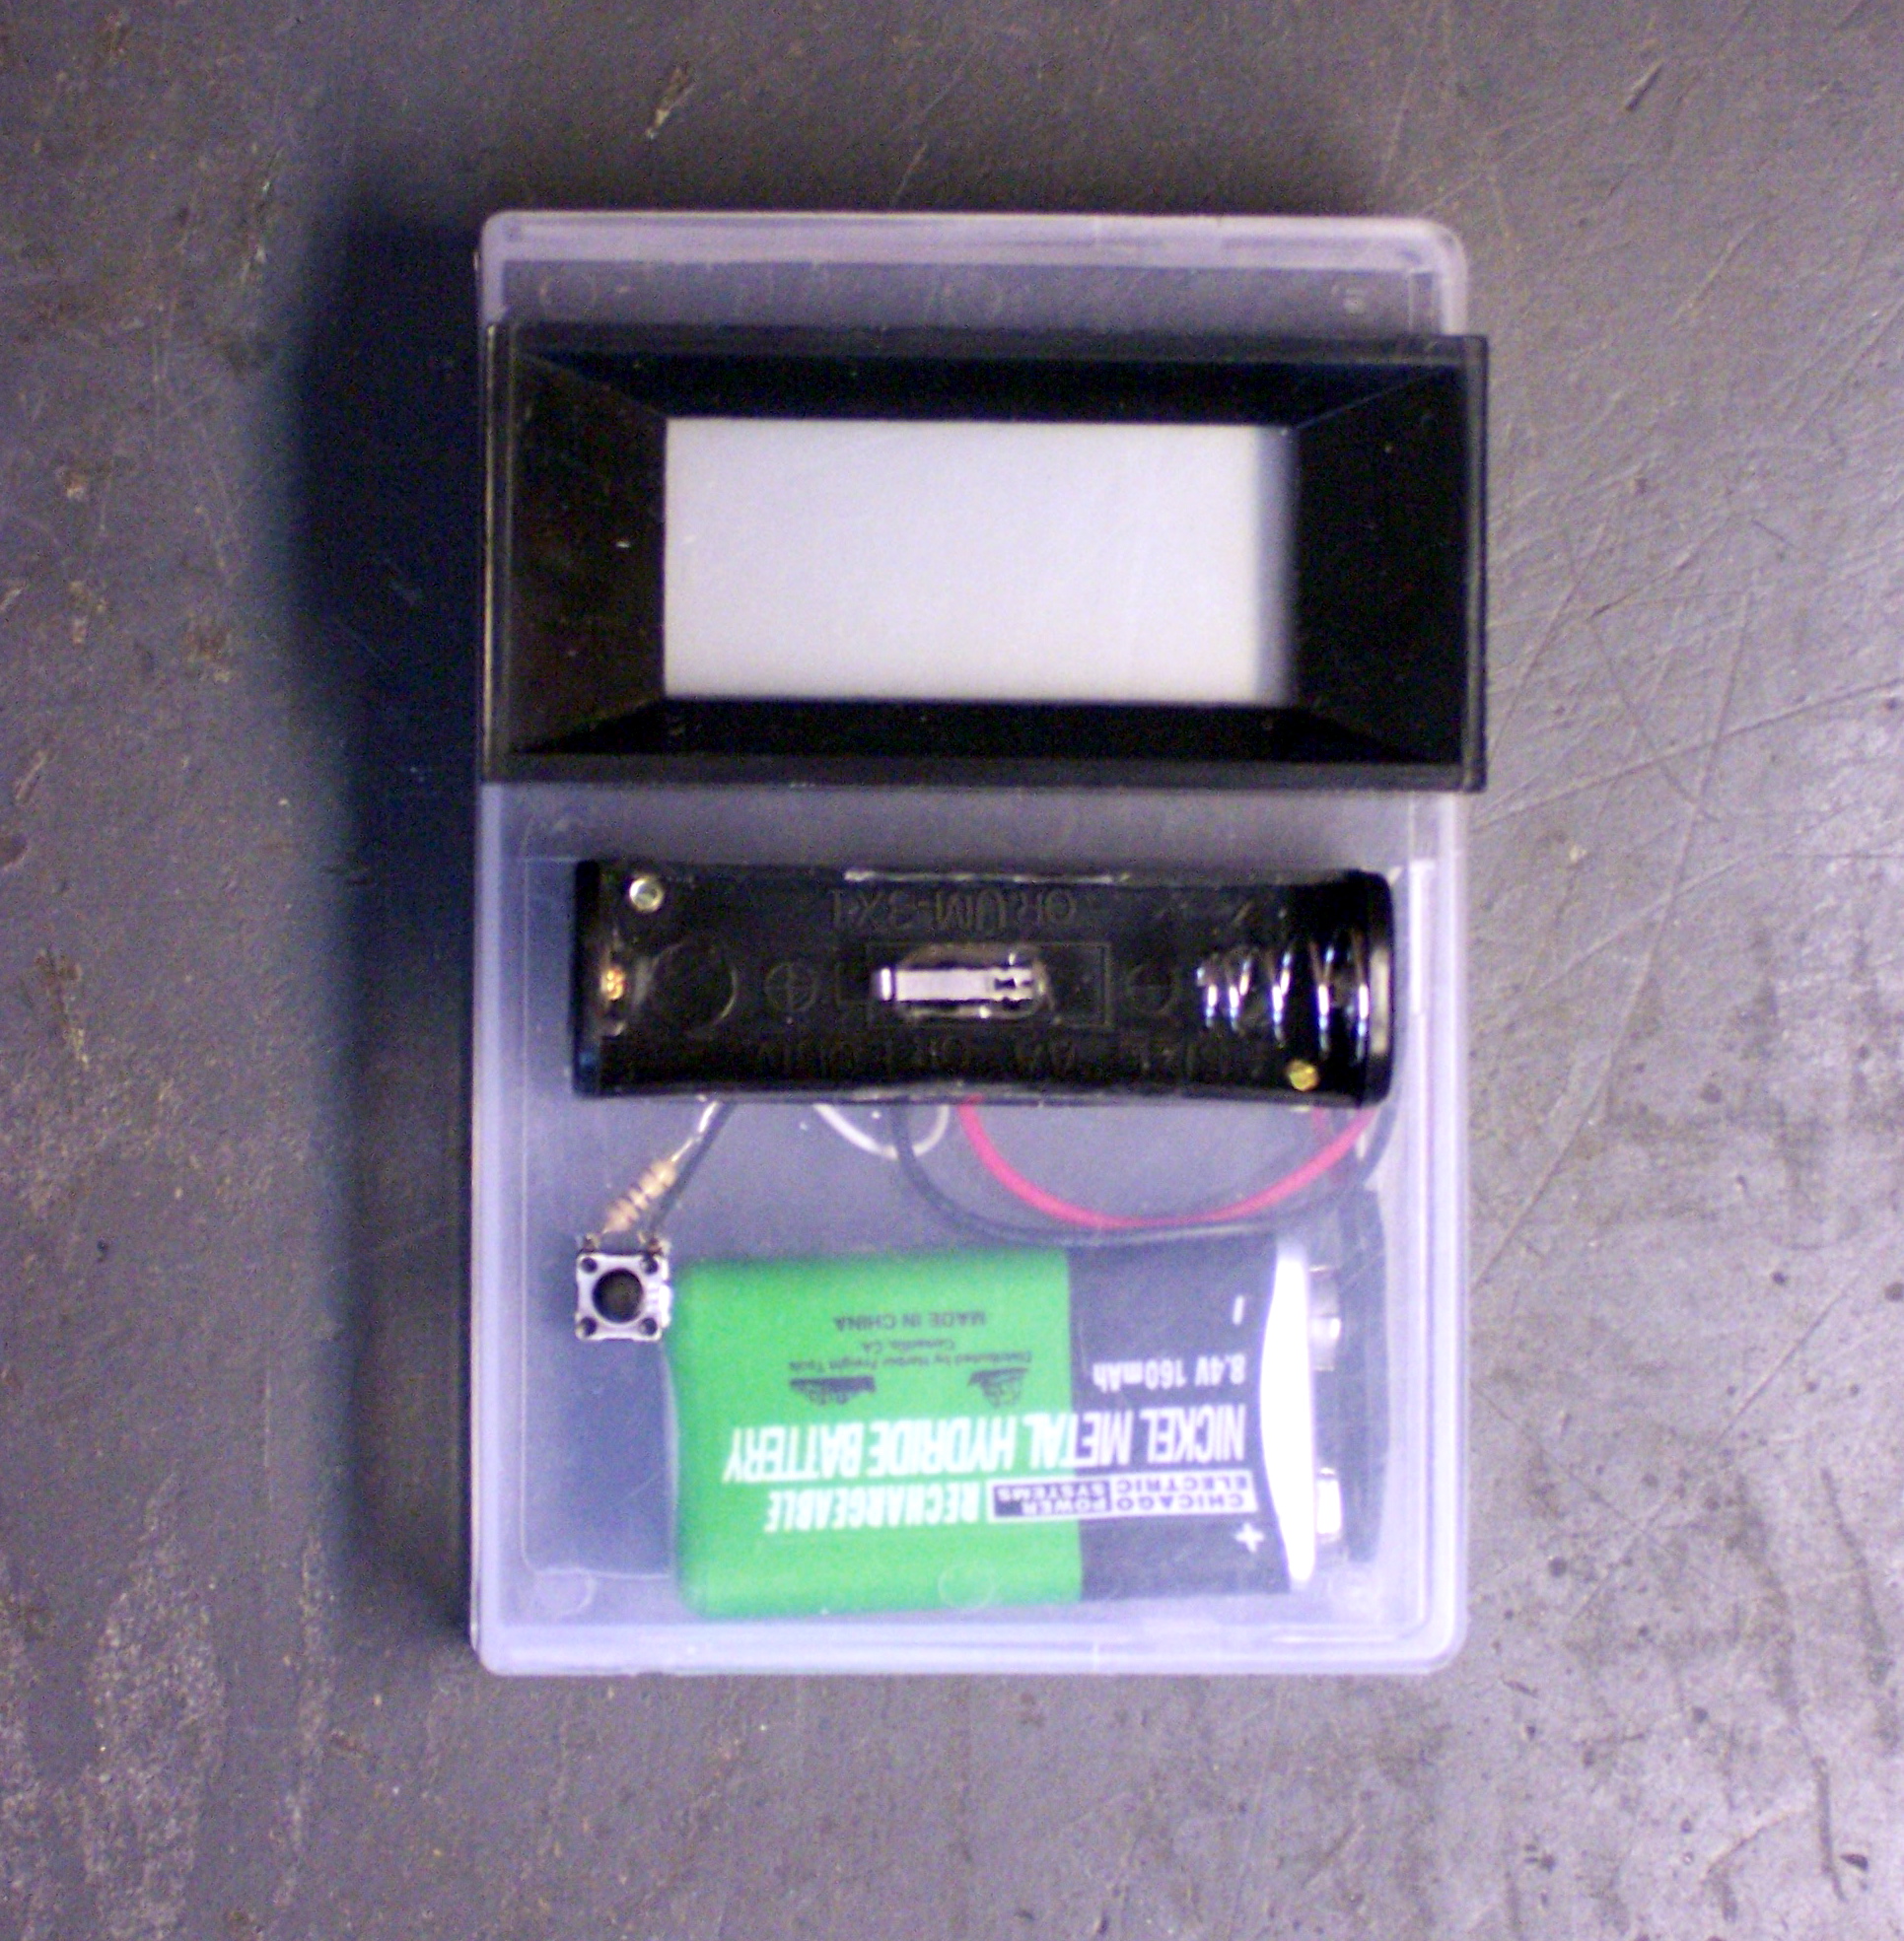
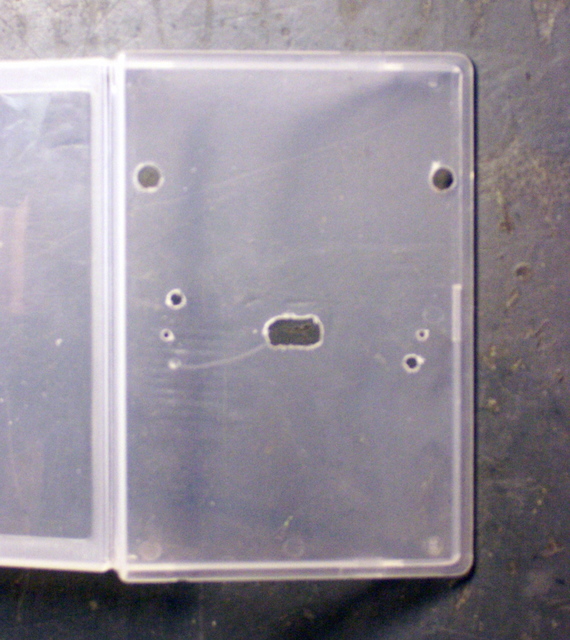
I figured I’d find a plastic project case from Radio Shack with a 9V holder in one end and enough room for everything else to fit . . . no such luck. I figured I’d find something in my junk bin that I could reuse–I was coming close with some old and broken copper-to-fiber media adapters, but they weren’t quite right. Finally I stumbled across the idea of using the plastic case from a data backup tape, and I rummaged around until I found this KAO 8mm data cartridge case.

I’m not wild that it’s translucent–I don’t like seeing the guts of things when I’m using them–but it’s the perfect size. The meter exactly fits across the width, the 9V battery exactly fits in the thickness, and it’s in portrait format. Plus I guess it’s kind of cute opening the case like a cassette case to change the 9V battery.

Single AA Cell Holder

I picked up a single AA battery holder at Radio Shack a couple of weeks ago, and had to mod it a bit to fit it onto the case the way I wanted. The leads originally routed out holes in the ends of the holder, but I wanted them to go straight down through the case. Fortunately, there was already a hole underneath the terminal at each end (you can see the one at the right end of the above picture), and I was able to fish the wires through and tug them into position to make it work.

The holder also had tabs curving slightly around the front, to help hold the AA cell inside. Since I want to be able to insert and remove cells quickly, I removed the tabs by scoring the plastic flush with the rest of the front of the holder, then snapping them off. I also confirmed at this point that a AAA cell would make contact with both ends of the holder, even though it wouldn’t be held as securely. (AAA cells are shorter than AA cells, as well as thinner.)

Project/Tape Case with Mounting Holes

I drilled mounting holes in the case for the meter and battery holder, as well as holes for the wires to go through. The plastic was so soft, I didn’t even bother chucking the bits into my drill for most of the holes–I just turned the bits a few rounds with my fingers and I was through the case.

Stepped Drill Bit Set

I did get to use my stepped drill bit set to enlarge the meter’s mounting holes–the bezel’s posts have larger-diameter plastic shoulders at the base, my mini-drill doesn’t have bits that large, and the stepped drill bits do an excellent job of enlarging while remaining concentric with the pilot hole.

The last tricky bit of work with the drill was the big ugly hole in the center of the picture of the drilled case. I needed a power switch for the meter, but I was loath to have to have to slide a switch or press a button every time I wanted to use it–I wanted it to spring to life when a cell was inserted to test. Plus for reasons to be described a bit later, I planned for a pushbutton on the front already, and I didn’t want to have two.

The solution was simple enough–a pushbutton switch inside the battery holder, actuated by the insertion of the cell itself. I salvaged a tiny microswitch (“nanoswitch???”) from a dead CD-ROM drive (a limit switch from the optical sled), reamed much too large a hole in the case and battery holder, poked the switch in from underneath, and hot-glued it in place.

Meter Wiring

Digital Panel Meter, Component Side

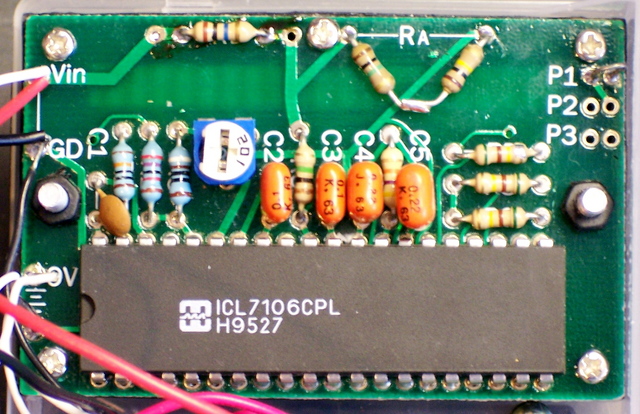
The meter board is built for a range of 0 – .1999 (.2) V, but has pads to set the placement of the decimal point and to provide your own voltage divider to adapt for other ranges. The documentation gave the resistor values to adapt for 20V and 200V, from which it was easy enough extrapolate the nominal values for 2V operation: 9MΩ and 1MΩ. Well, I have 1MΩ resistors on hand, but not 9MΩ, and certainly not precision.

Fortunately, 9:1 ≅ 10:1.1, so I put a 10MΩ resistor into the pads for RB (upper left) and chained a 1MΩ and a 100kΩ in series between the pads for RA. (Those lap-soldering skills from a summer of module assembly at IFR Systems do come in handy.) Also fortunately, the calibration potentiometer had a generous range, so I was able to work around the 1% difference from the nominal ratio.

I also guessed (correctly) that the proper position for the decimal-select jumper was P1, which was missing from the voltage range chart.

Assembly

I had one more set of components to add, but I couldn’t resist wiring it up to see how it worked so far.

Battery Meter, Component Side

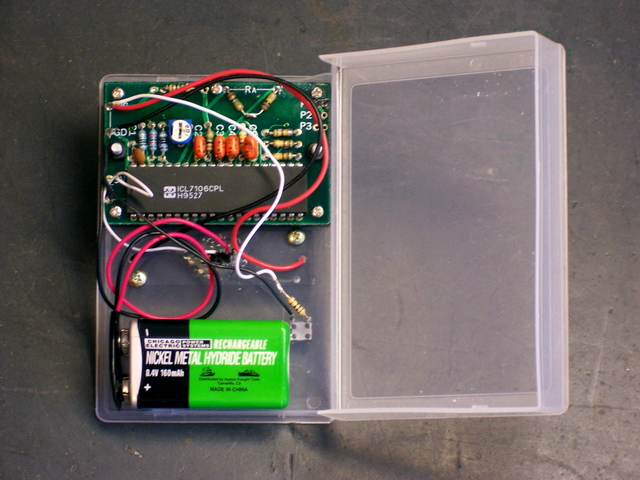
I soldered the 9V battery clip’s ground lead to the ground connection at the lower left of the meter board, the positive lead to the microswitch glued into the AA holder, and the normally open (NO) lead from the microswitch to the supply connection on the meter. I also soldered the AA battery holder’s leads to the Vin connections at the upper left. If you look closely enough, you may see that I just tack-soldered them in place with a lot of exposed wire a the end; I plan to come back and organize the wiring more carefully, and didn’t take a lot of extra effort at this point.

Meter in Action

Battery Meter in Action

And it works as planned! Not that there was much surprise, but it’s still nice when a project comes together. I was also pleased that the (undocumented) position of the decimal point was correct. Further, I was hoping to avoid cutting a large hole in the box for the panel meter; and I find it adequately legible reading through the nearly transparent case, without a hole.

I put a AA cell into the holder, the switch activated beautifully, the meter sprang to life, and I had a reading of the AA cell’s voltage. I measured the cell’s voltage in situ with my best voltmeter, calibrated the panel meter’s reading via the potentiometer on the back, and measured with my good meter once more to make sure the voltage hadn’t drifted while I was adjusting. Good enough!

Load Testing

Finally, I drilled two more small holes in the case, poked a pushbutton switch through (in the lower left of the above photograph), and wired a 10Ω resistor in series with the switch, and the switched resistor in parallel with the AA holder. From my first inspiration for this project, I’ve wanted to be able to test cells under load as well as unloaded. I find that some cells I’ve owned–particularly, I believe, when they’ve lost capacity due to age rather than use–will show a relatively high unloaded voltage even though they have very few mAh left. I very specifically wanted to be able to test under load to identify this condition.

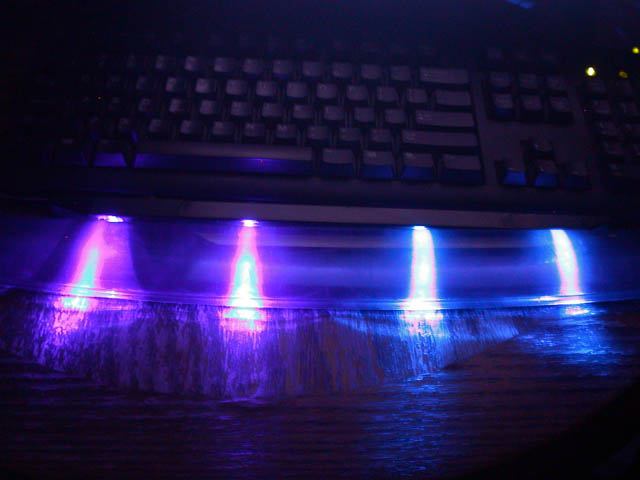
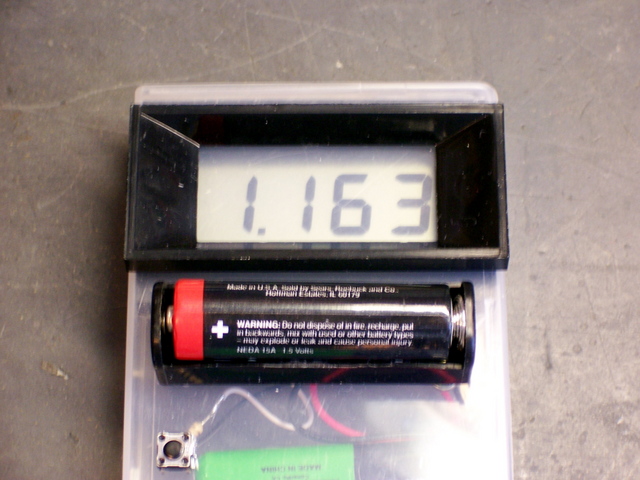
And it’s proved itself already. The cell shown under test reads 1.163V, which is by no means new, but might still appear to be usable in some types of devices. But when tested with a load, it drops immediately to ∼.8V and continues to fall toward .7V–not nearly as promising. In contrast, another cell I’ve tested measured ∼1.2V unloaded, but still ∼1.1V under load–very likely quite usable yet.

Sorting Batteries

I’ve already switched to using NiMH cells for all my projects and consumer hardware, but I have a number of alkaline AA and AAA cells around the house from the old digital camera and the Visor PDA, with no good idea which are fresh and which need to be discarded. (Y’know, it’s such a pain to test cells with a voltmeter and only two hands.) I can finally conveniently test and sort them into four categories:

  • Unused: Save for when I don’t have any rechargeables ready, or give with battery-powered gifts to nieces and nephews who don’t do the whole “rechargeable thing.”
  • Still strong: Save for my LED flashlight, which seems to get quite a bit more life out of used cells than do incandescent lights.
  • Weak: An interesting problem. They still have some energy stored, but not enough to use in traditional portable devices.

    I’m planning to build a “Joule thief,” a clever and tiny transformer feedback single transistor inverter that claims to be able to “provide a week of continuous low level light from a battery that would normally be considered dead.” Maybe I’ll end up with a bunch of “electronic candles” sitting around for the next ice storm; who knows.

    Update: Here’s another Joule thief project.

  • Dead: Take to work and toss into the battery recycling bin. (And scrounge “weak” cells out of the bin to take home and make more “candles,” har har! Just don’t tell my wife that I’m stealing other people’s dead batteries now . . .)

Credit

A huge thank-you to my friend Slim, who gave me the panel meters that started this all; and who’s always generous with his vast experience and equally vast stores of electronics surplus.

LED Wrist Rest

Wednesday, January 3rd, 2007

Last fall, my friend Jeremy and I were killing time at Best Buy when we ran across this blue gel keyboard wrist rest. He was looking for a wrist rest anyway; and since we’re obsessed with blue LEDs, I offered that I could rig it up to glow. He loved the idea, and his wrist rest has been sitting at my house begging for attention ever since.

I’ve been tinkering around with ideas for a month or two, but finally yesterday I cleared some space on my workbench and got at it. There were four main components to the project:

  • The translucent blue wrist rest, which I hoped would have enough internal reflection to glow nicely
  • Blue LEDs, which I harvested from a string of Phillips Christmas lights
  • A USB cable, to supply power to the LEDs (Jeremy preferred USB so the lights would power on and off with the computer)
  • Some means of holding the LEDs in place

Glow Test

I’d been thinking I’d drill some holes into the wrist rest to embed the LEDs, but I wasn’t sure quite what the effect would be. I started testing by putting a couple of LEDs in my LED tester and shining them into the gel pad from different locations and angles, with disappointing results–they didn’t make any part of the pad glow like the edges of plexiglas (high internal reflections from the parallel surfaces) or milky plastic (high diffusion of the light beam).

So they kinda shine through instead of making the whole thing glow, and I just have to deal with that. On the other hand, that meant I didn’t need to bother drilling holes into the gel–I could butt the LEDs up against it and they’d work just as well. So I started thinking about etching a long, skinny circuit board to go across the back . . .

USB Cable

And meanwhile, tried to figure out where to get a USB cable to sacrifice. USB cables cost more than it seems like they ought to, so I was asking around for a dead USB mouse that I could salvage. I really wanted a black cable, to disappear on a dark desktop; and I really wanted a skinny and supple cable, to route well.

Then a couple of guys at work gave me a USB hot plate, I kid you not. It was from a trade show and was supposed to keep a coffee mug warm–which, no surprise, didn’t work out so well, given the limited current USB can supply. It had a skinny cable with silver foil inside–not black, but it still sorta fit with the theme. Perfect. Well, good enough.

Light Bar

Since it would have taken me a while to rig up a PC board for the LEDs, I was thinking about other ways to hold them in place and wire them together. I have some black plastic U-channel pieces about a foot long, which were supposed to be magazine or books supports for some wire cube shelves I bought, but which I’ve never used. Yesterday I cut the brackets off one, drilled holes in the back to poke leads through, and stuck four LEDs into it.

Several of the LEDs in the Christmas tree lights had 250Ω resistors already soldered to one leg, and that turned out to be a nice current-limiting value for a 5V supply, so I just left them in place. I daisy-chain soldered wires to the leads, connecting the LED/resistor assemblies in parallel, and attached the USB cable to one end. [Side note: In the USB cable, the black wire was positive and the white wire was ground. Good thing I checked first.]

Yup, I was soldering wires onto leads that were poking through (and touching) plastic. Surprisingly, I didn’t have much trouble with it–the wires were pretty clean, so they all soldered quickly, and apparently didn’t heat up much. I didn’t notice any melting plastic at all.

I used some big heatshrink to anchor the end of the USB cable in place and provide some strain relief (lower right end of the above pic), and the light bar was ready to go.

The LEDs are on the inside of the bar pointing out. That does a reasonable job of shielding the (annoyingly bright) light sources from direct line of sight, and plenty of light still makes it into the gel pad when the light bar is placed up against it.

This isn’t just a trick of the camera–it really does look like four beams of light aimed through the wrist rest. It’s not quite what I was aiming for, but isn’t a bad effect in itself.

The digital pic exaggerates the effect, but the four LEDs really are two different colors–two slightly more aqua, two slightly more violet. They’re all from the same string of LEDs, and I’d never noticed the effect before–I assume they’re from different manufacturing batches, with not particularly high quality control.

Credits

It wasn’t much of a project, but (1) it provided motivation to get some things cleaned off of my workbench; (2) it was itself part of the clutter on my workbench; and (3) it helped build momentum to get me back into tinkering. I’ve already started on my next project, which should appear here in a few more days.

Thanks to Jeremy Burkey for the photos. I forgot to take pics as I was working on it; and his camera did a much better job with the dark shot than mine would have anyway.