Archive for August, 2009

Repairing a Vintage Electromechanical Metronome

Sunday, August 23rd, 2009

Passing behind a church-operated thrift store a month or two ago, I saw a black bakelite box in the area where they discard stuff they don’t want, about to get rained on. After seeing that it was a metronome, I rescued it and made it mine. This weekend I tried it out for the first time and ended up repairing the motor. The motor’s workings were unfamiliar to me, but its repair was self-evident.

Vintage electromechanical metronome

Oh, and I cleaned it up a bit, too.

(more…)

VGA Dongles for Mac Mini Headless Booting

Sunday, August 23rd, 2009

At work we’re placing Mac Minis as network appliances into backbone wiring closets, in part to decentralize DHCP and DNS services so they survive partial failures (or scheduled outages) of the network any time the local backbone drop also survives, in part to run local proxy service for WCCP because our backbone doesn’t support GRE.

We reinstall the Minis with OpenBSD; and whether this would be true with OS X on them or not, at least with OBSD, they don’t like to boot without a monitor connected. A few weeks ago I made a batch of VGA “dongles” to trick the Minis into thinking a monitor was present.

VGA dongles, sloped pyramid

(more…)

SparkFun Tour

Sunday, August 23rd, 2009

At the end of July, I was traveling in the Boulder area and had the privilege of getting a tour of the SparkFun headquarters. I got my first Arduino from them; and although I’m not a terribly frequent shopper, I follow their blog assiduously and I love what they do, so it was a pretty thrilling experience.

SparkFun headquarters, exterior

SparkFun posts a lot of pictures on their site and they’re not shy about showing off their facility, but the online photos don’t give quite the same perspective on their operation that an outsider gets when coming through for the first time. They told me there was nothing I couldn’t photograph and post, so I wanted to share a bit from my tour.

(more…)

Assembling the CupCake

Monday, August 17th, 2009

After leaving the case parts outside in the van for a week to cure, by Saturday they were nice and dry and didn’t feel squooshy when I was putting together tight-fitting pieces. Saturday evening I got the case assembled and the Z stage installed:

MakerBot CupCake with Z stage and some electronics installed

And more yesterday afternoon and evening.

(more…)

Finishing CupCake Case

Sunday, August 9th, 2009

I received my CupCake kit around the end of April; it’s now August and I haven’t completed it yet. What’s up with that??? Well, I’ve been finishing the case.

That’s a pun. Here, let me spell it out: I’ve been completing the case by applying wood finish to it.

White “Stain”

I decided early on that I wanted the case to be as light-colored as possible so the interior would illuminate well to watch and photograph builds; but that I wanted to honor the fact that it’s made of plywood and let the wood grain show through.

Back side of plywood from MakerBot CupCake case

That said, the back sides of some of the plywood pieces are a bit rough. (The fronts are all very nice, and both sides of the 1/8″ pieces are nice.) Although the rough sides all face the interior, the interior is where I’m going to be looking and photographing a lot. So a lightening agent with a bit of opacity –but not too much — seemed like a good idea.

Vicki the Paint Lady at Graber’s Ace Hardware led me to a Zar “country white” oil-based wood stain that she had used before and which very closely resembles an oil-based paint. It applies like a stain, but the color particles are white and more opaque than I’m used to from regular wood stain. I had to be a bit careful in the application not to leave it on so thick as to completely hide the wood grain; but I was pleased with the result.

Unfinished plywood against plywood with one coat of white stain

The smaller, upper piece is untreated; the lower background piece has one coat.

(more…)

External Filter Capacitor for Cisco Physical Access Gateway

Monday, August 3rd, 2009

At work, we’re upgrading our sixteen-year-old physical access control (keycard) system. We went with a newish Cisco solution in part because our reseller promised the whole works could run from Power over Ethernet (PoE), so we wouldn’t need separate power supplies.

It turns out the subcontracted hardware installer had never seen this done before, the Cisco documentation doesn’t even reference powering door strikes from the access gateways, the contractor and subcontractor couldn’t stop the gateways from locking up when the door strikes open and/or close, and migration to the new system didn’t happen last week while I was on vacation like it was scheduled to.

I came in yesterday afternoon to have some quiet time to apply a little rigor to the testing. In a couple of hours, I had a bench system broken in the same way as the installed systems, and then the bench system fixed.

Probably the most annoying part of the process is the 70 seconds it takes from powering up the gateway until the gateway powers up the card reader, and another 60 seconds until the gateway is ready for the reader to read. That’s a long wait when you’re frequently rebooting the gateway to try different things.

Basic Wiring

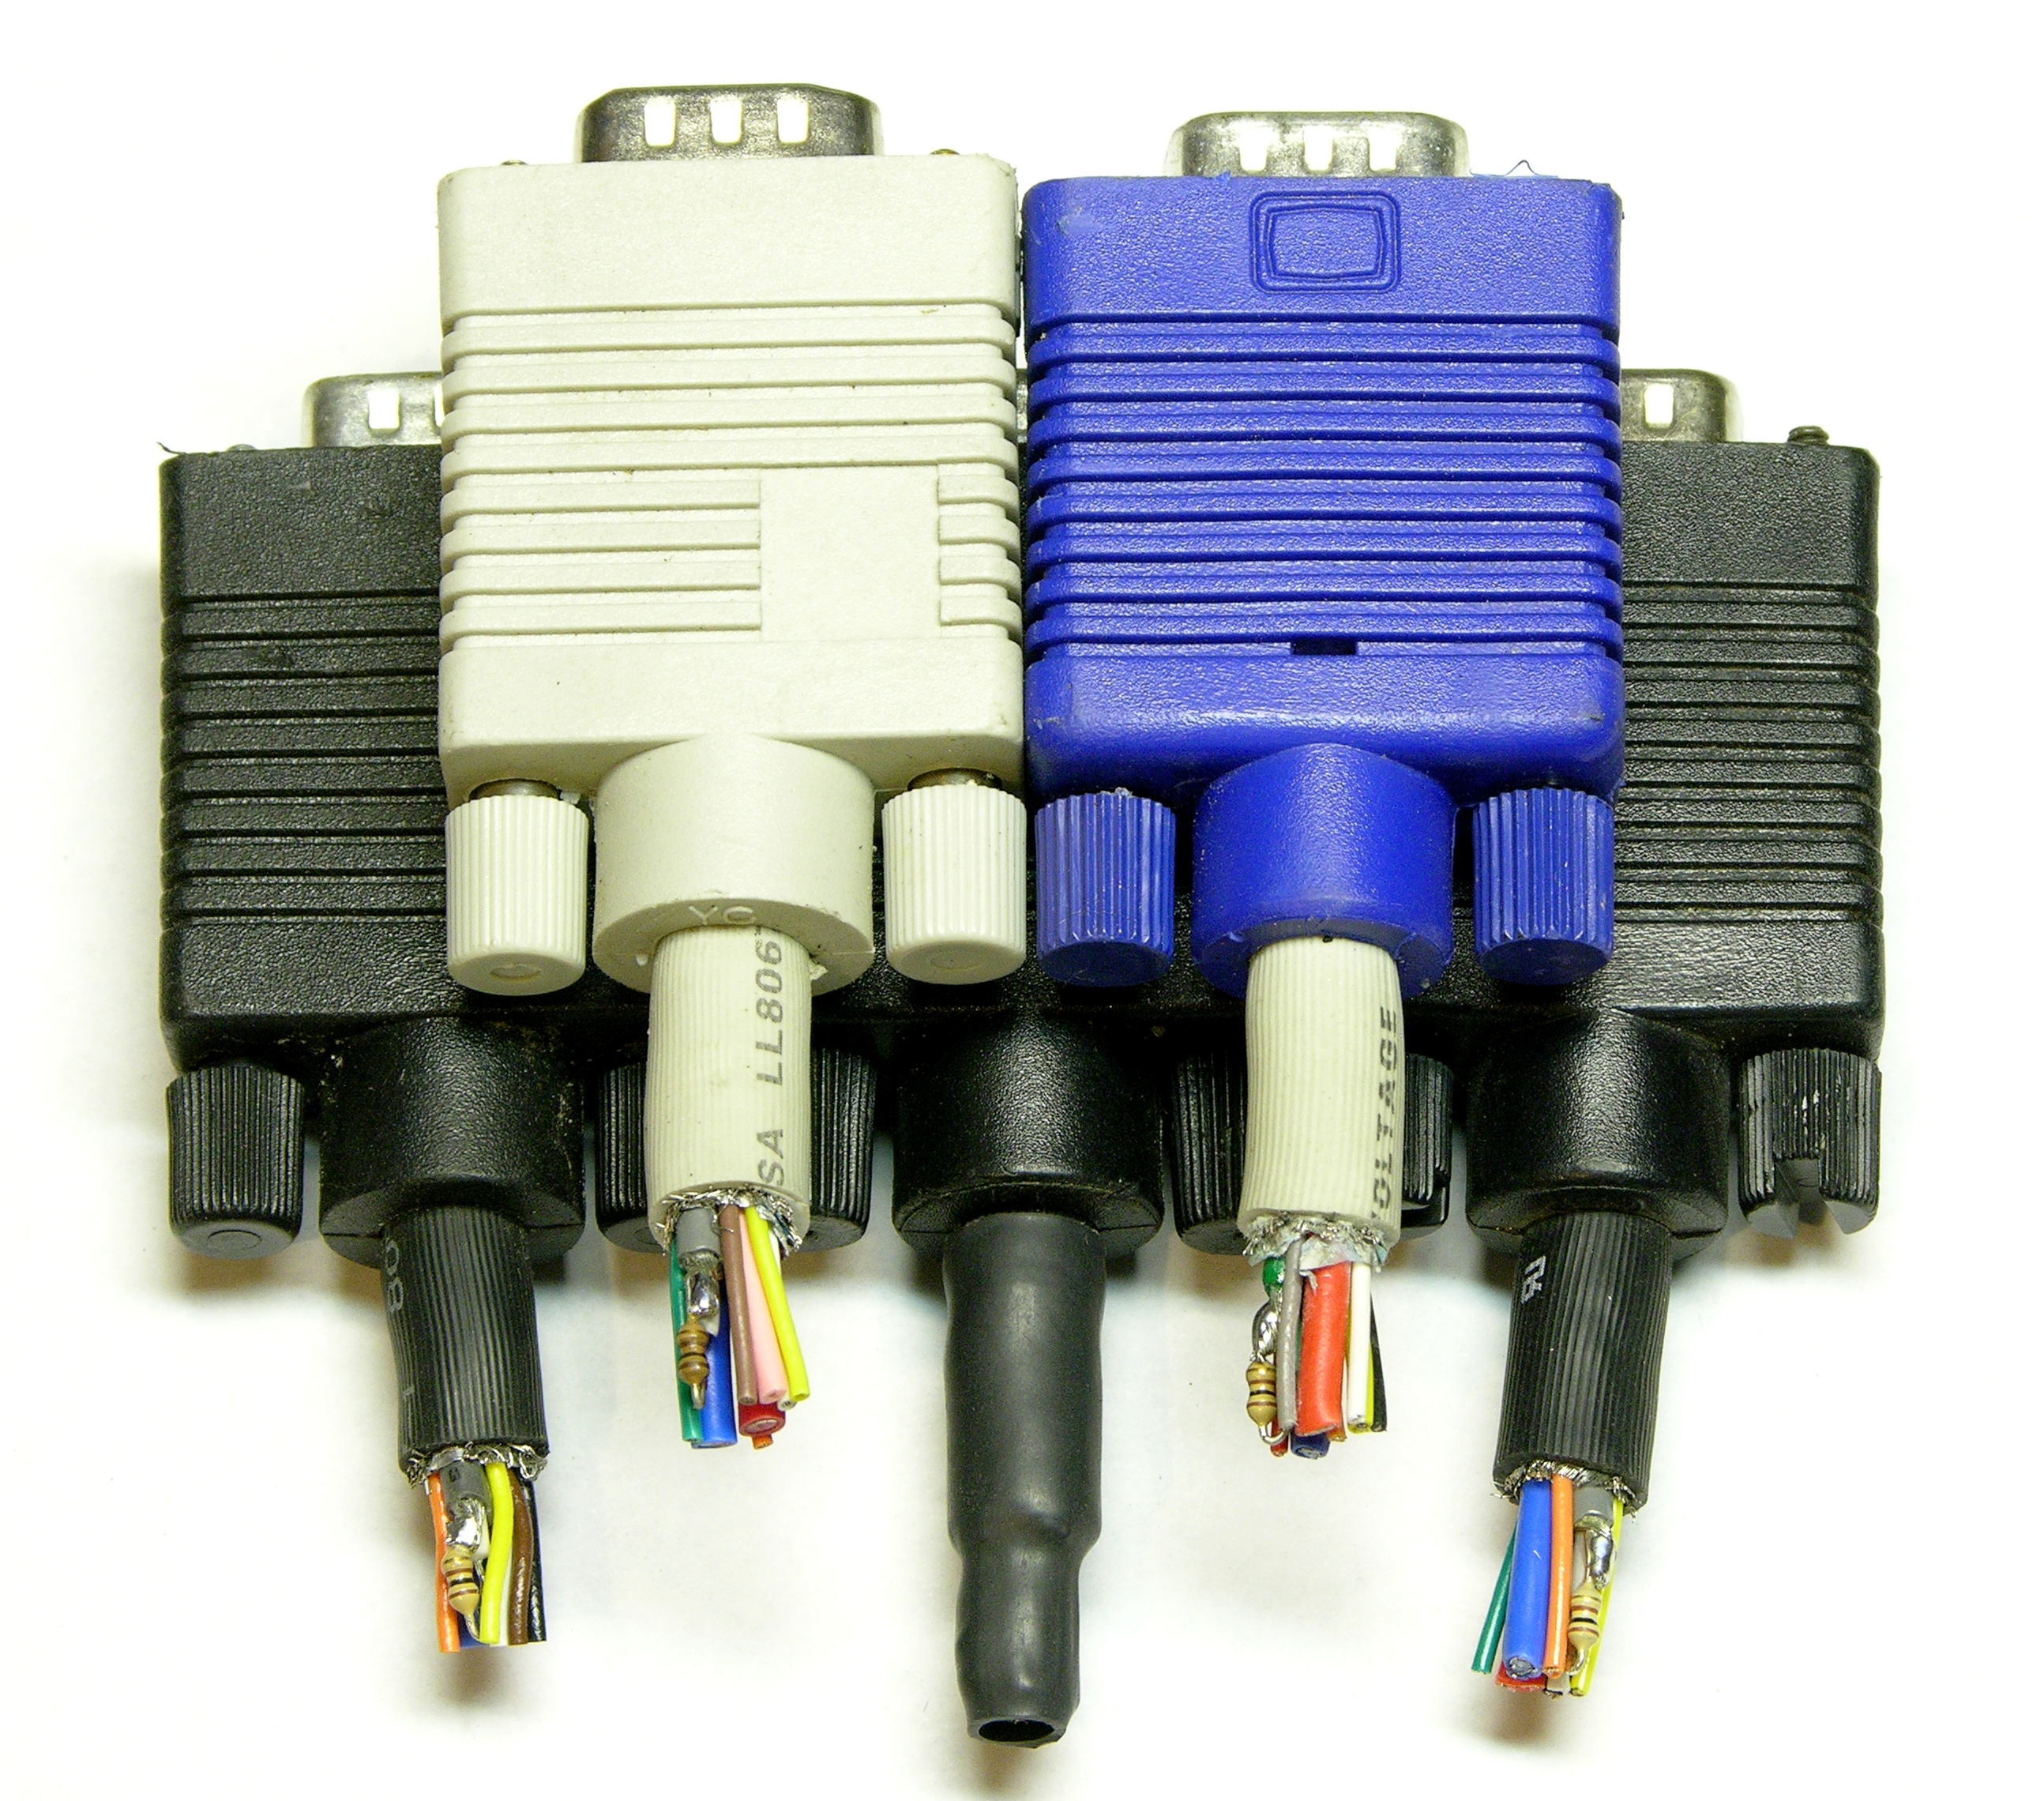
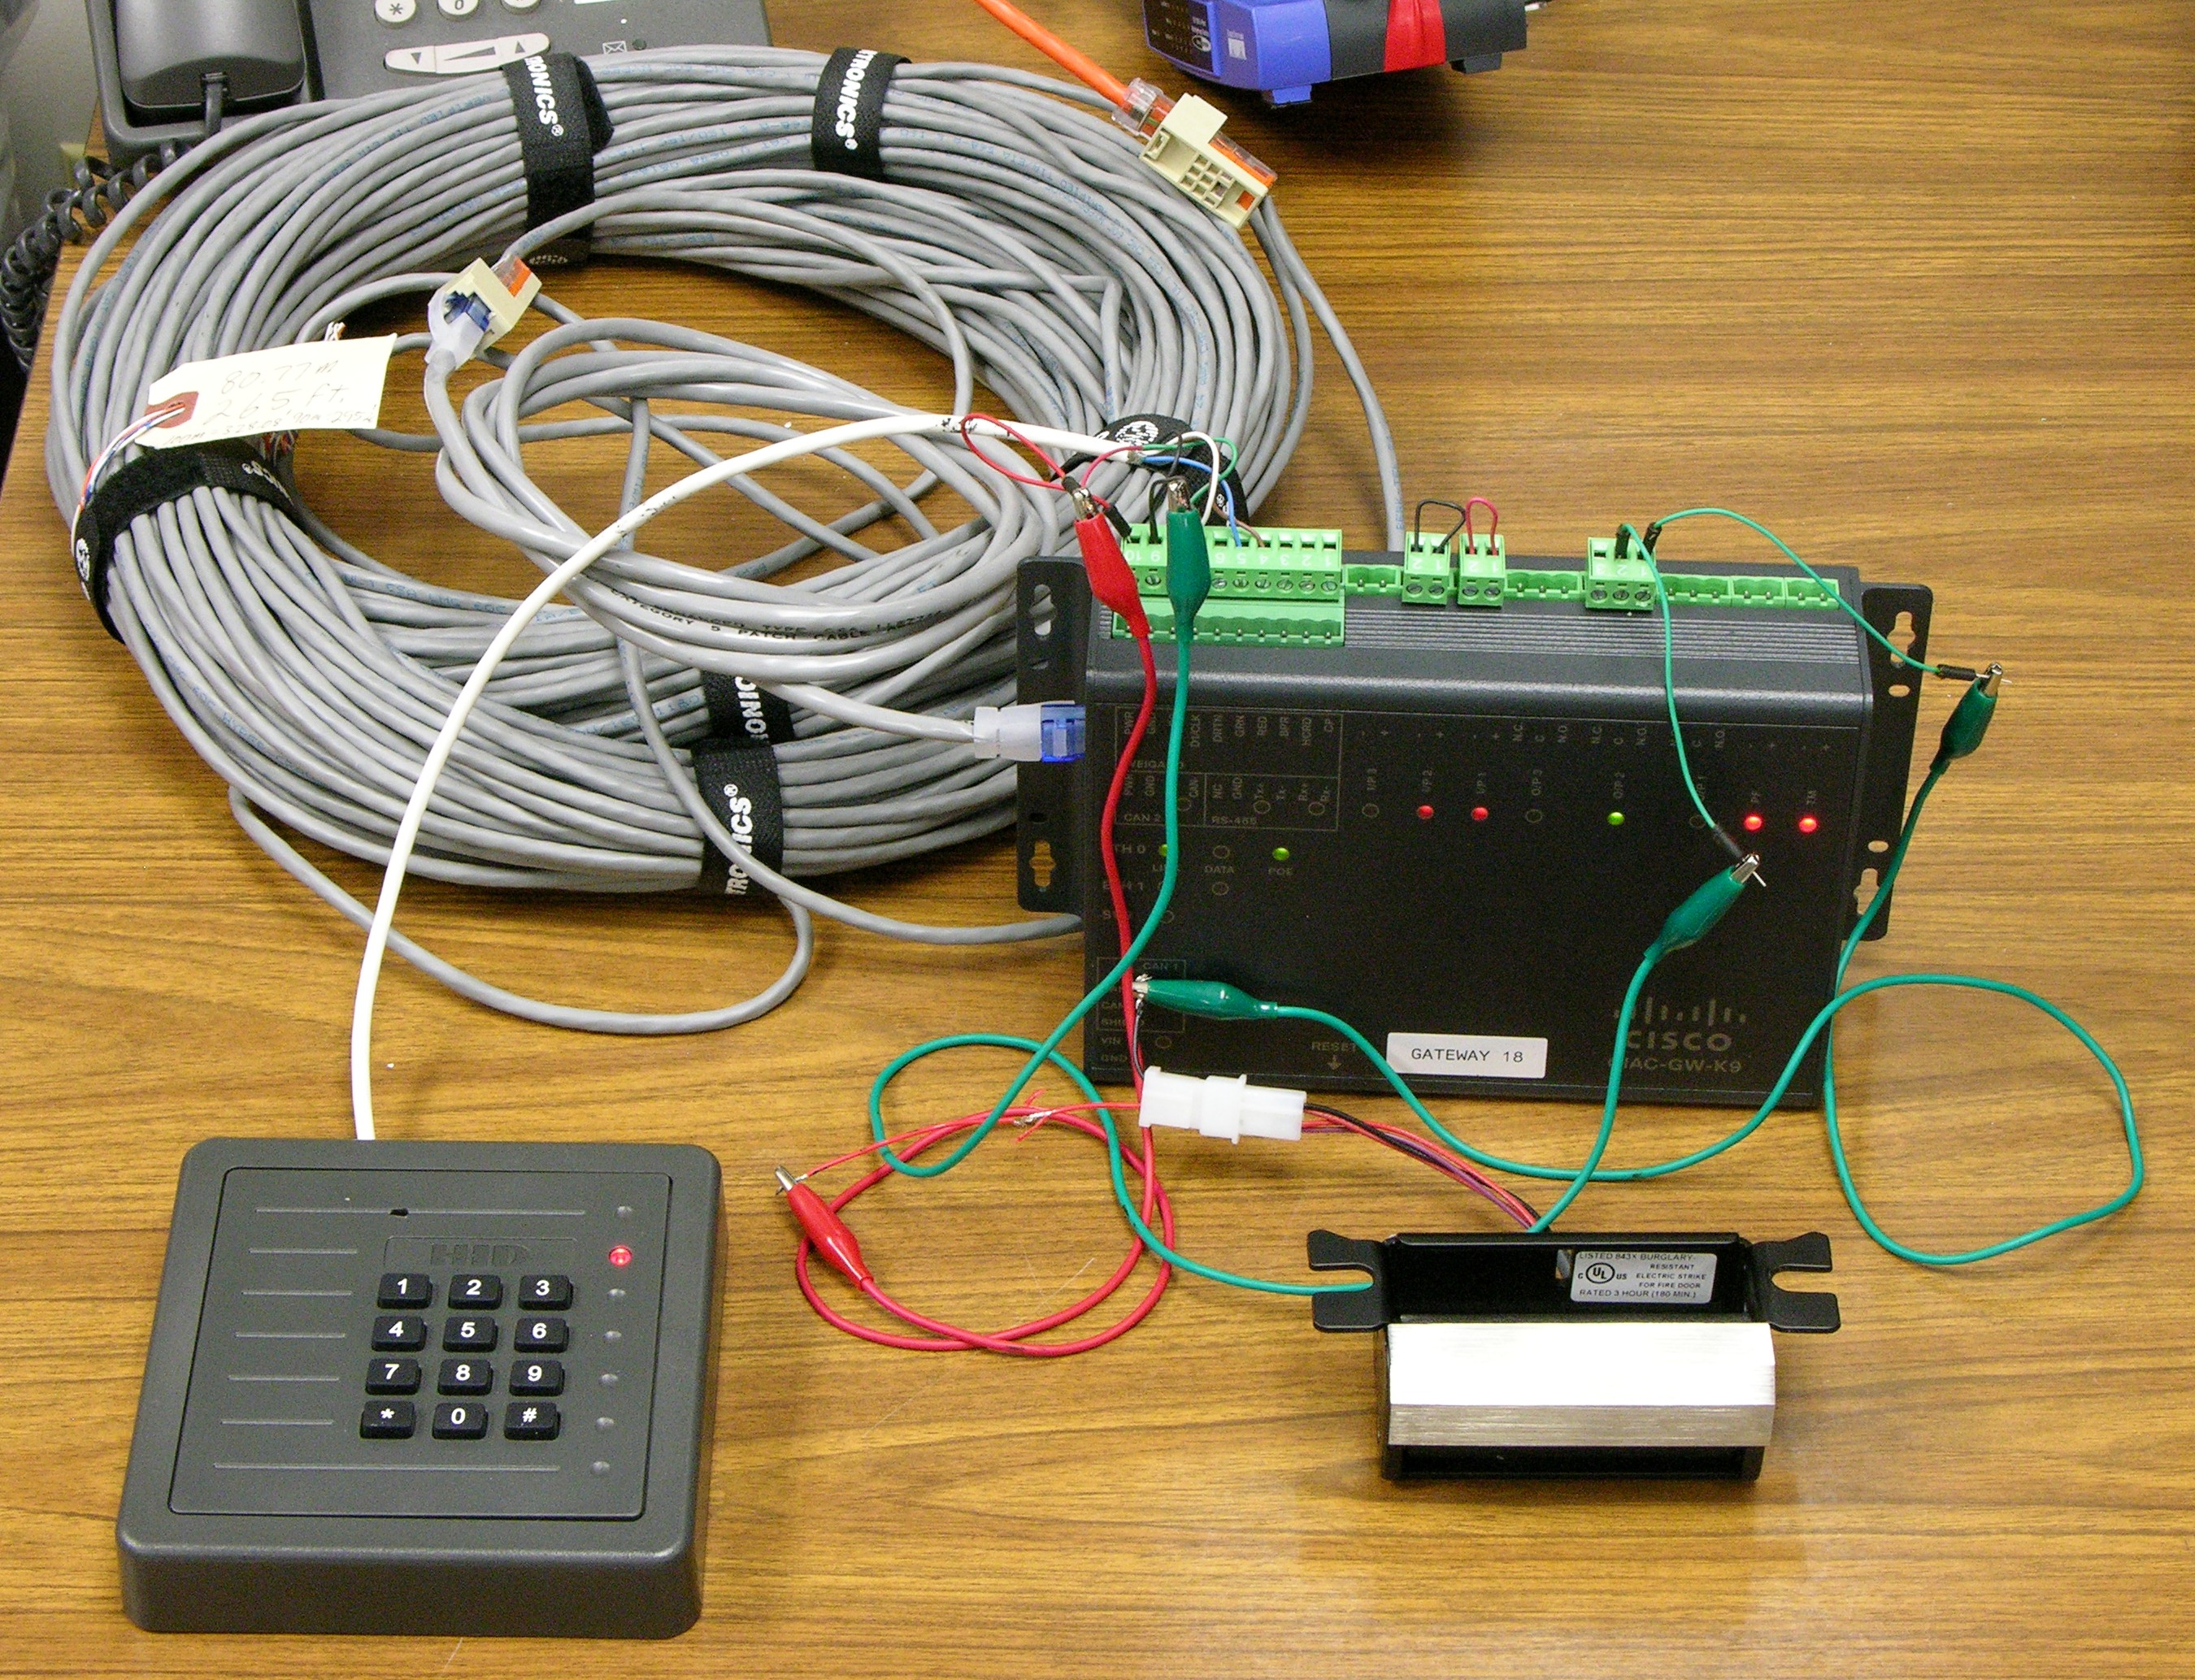
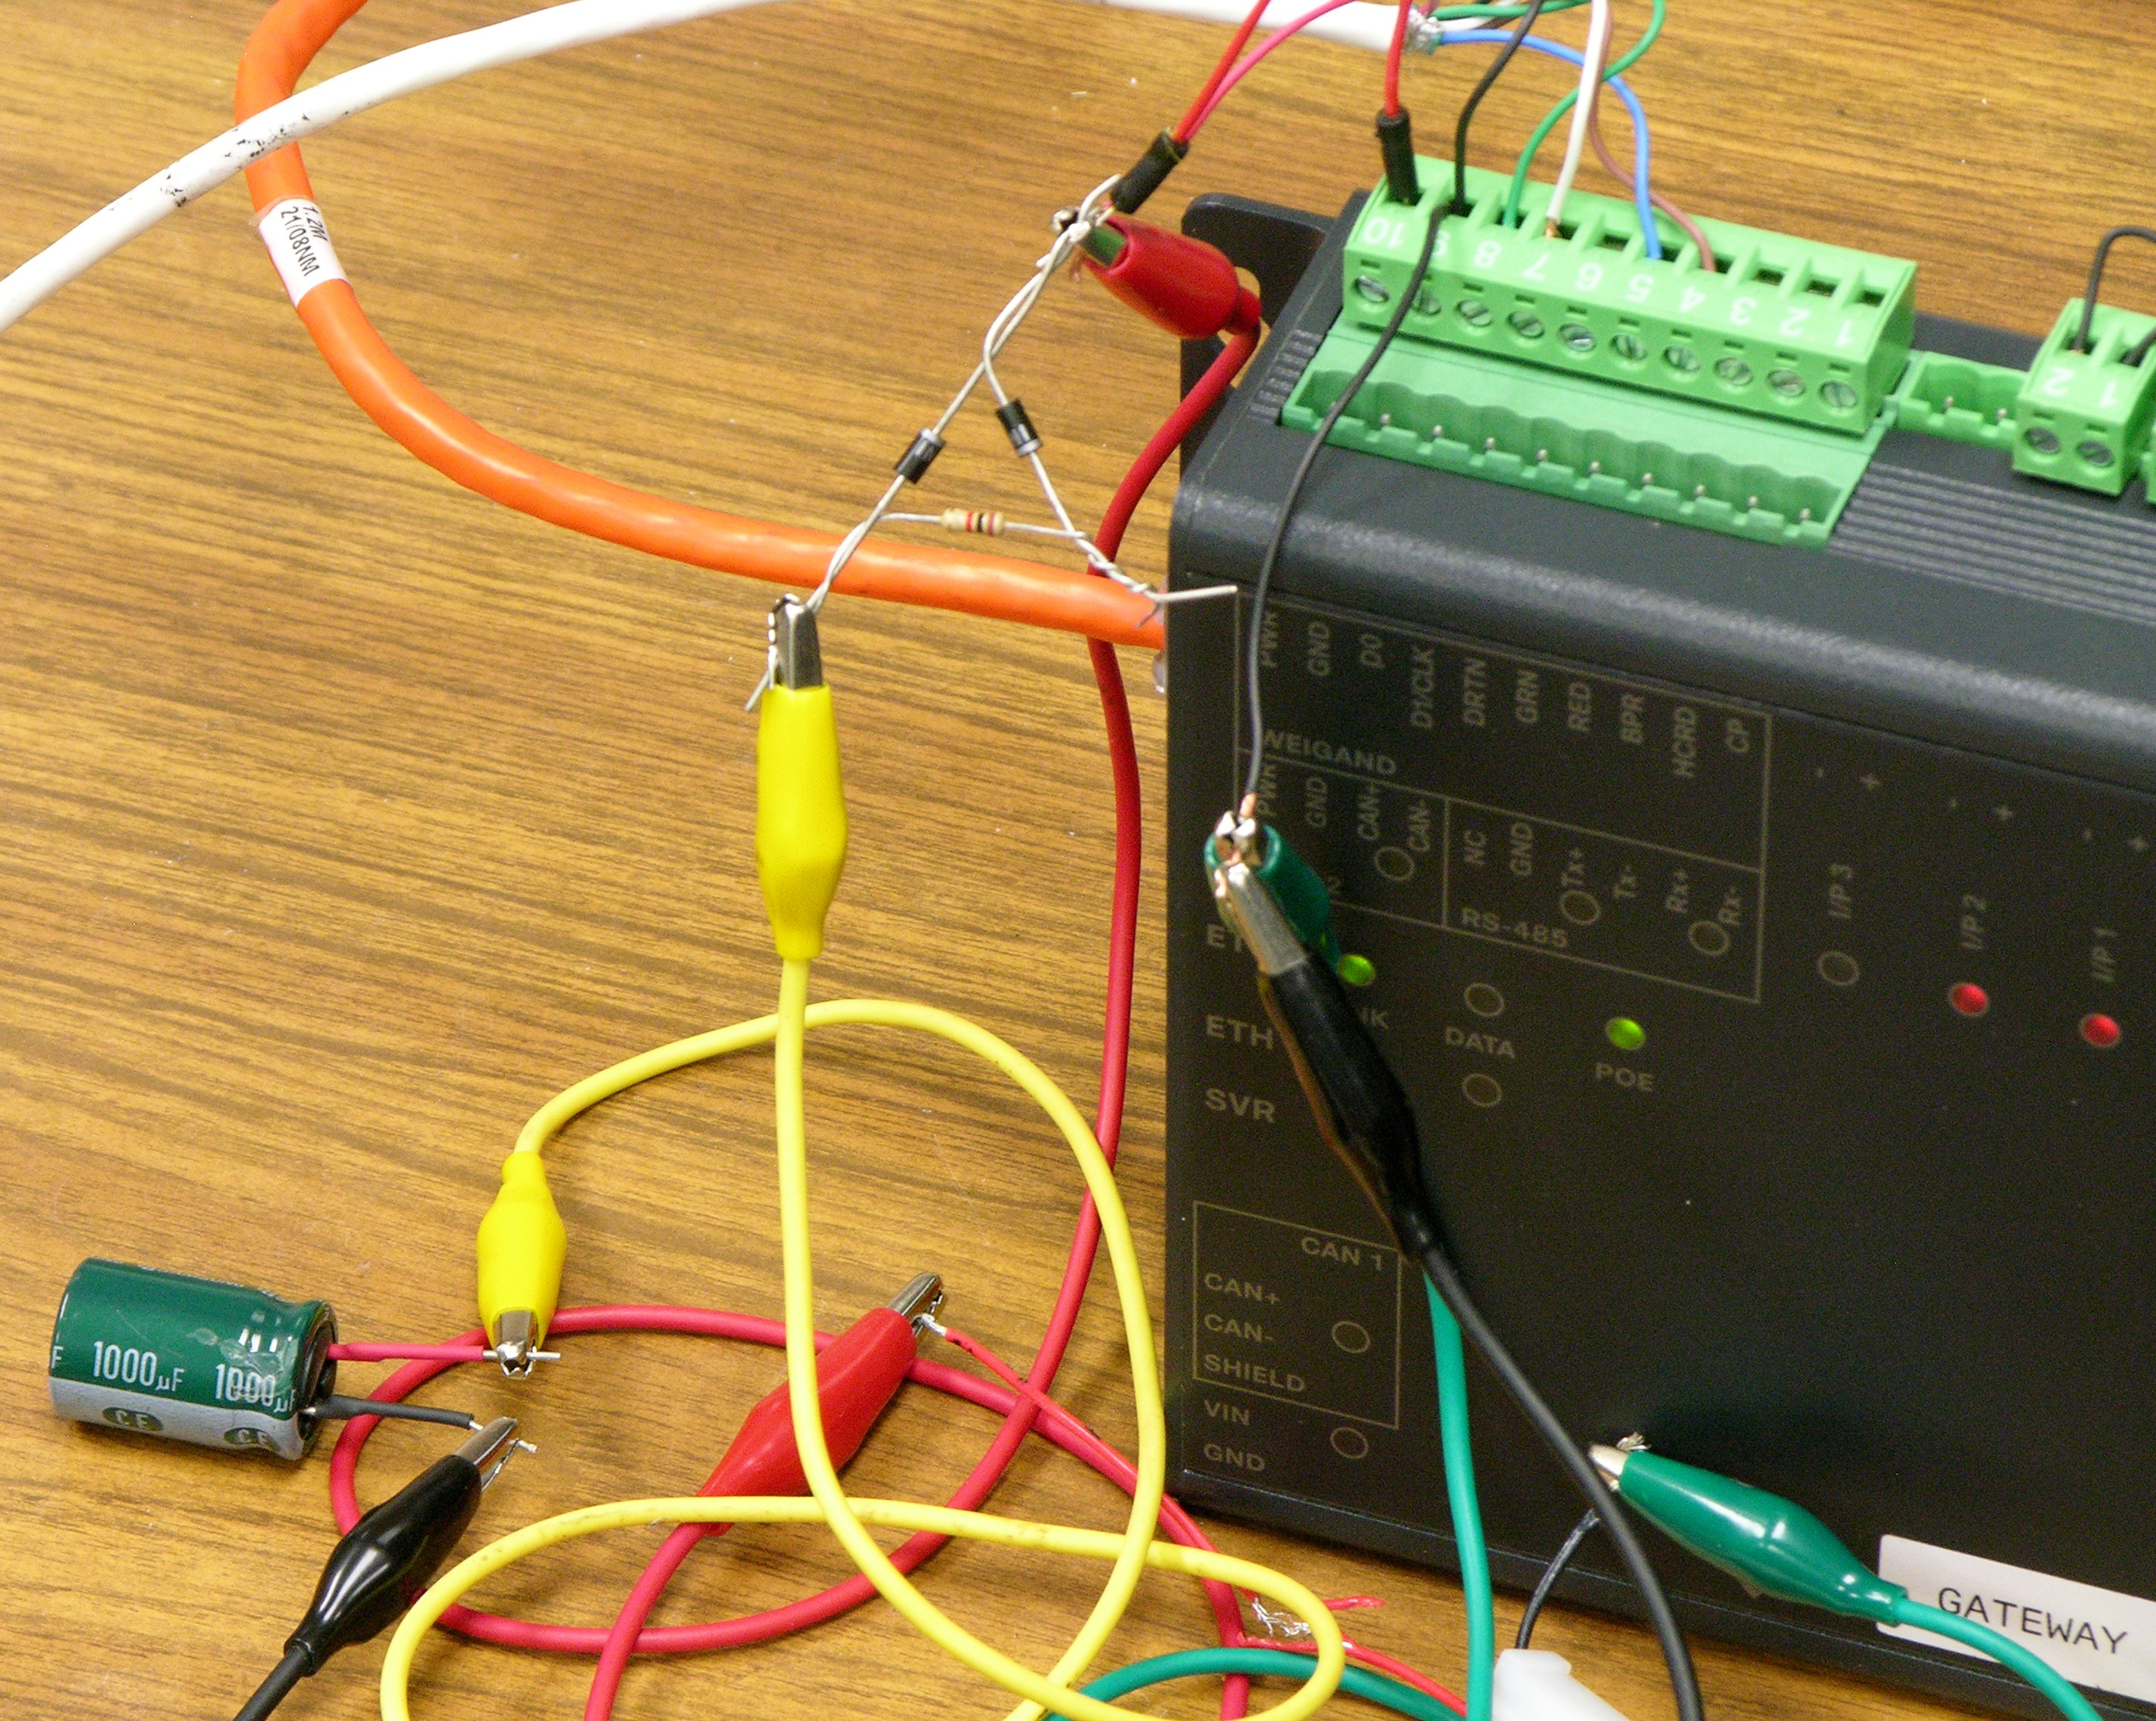
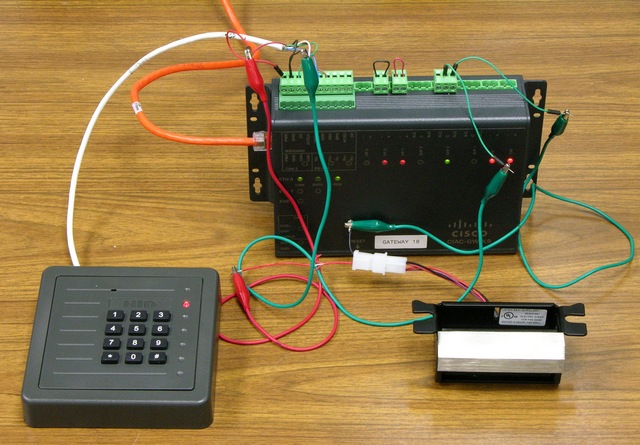
The Cisco physical access gateway has a PoE input for network plus power. It breaks out the power and provides 12V nominal to power the card reader. The subcontractor used these same pins to provide door strike power, with the ground connection interrupted by the gateway’s NO relay output.

I removed all of the electrical tape and twisted wires and provided gator wires for my own testing.

Cisco Power Injector, Short Patch Cord

Cisco physical access gateway running from local power injector on short patch cord

Works fine with a Cisco power injector and a 1.2m patch cord.

Cisco Power Injector, Long Patch Cord

Cisco physical access gateway running from local power injector on 265' cable plus two patch cords

Works fine with the Cisco power injector, 265′ of cable, and two patch cords.

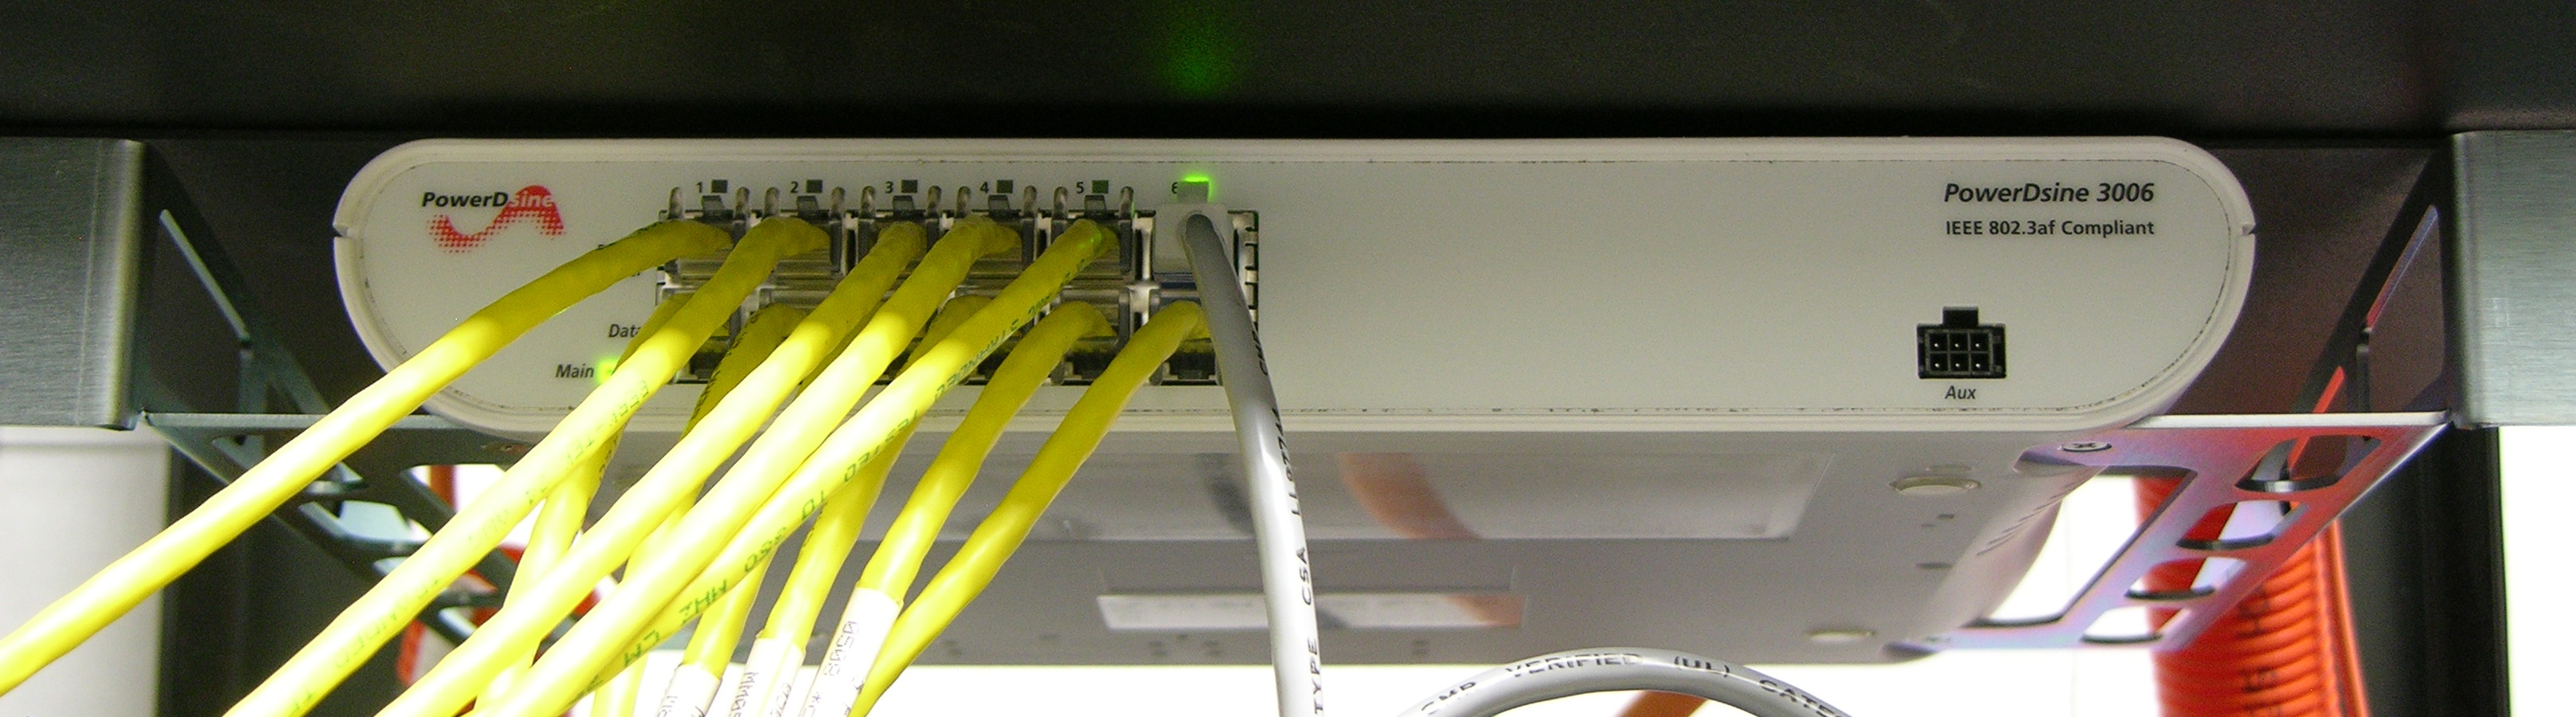
Rack Power Injector, Long Patch Cord

rackmount power injector

It fails with the same setup but powered from our regular PowerDsine rackmount power injectors in the wiring closet. The moment the door strike energizes to unlock (it’s fail-secure), the whole gateway loses power and reboots.

Okay; now we’re getting somewhere — now we have the same problem on the bench that we have in the wild, so I can fix it and it’s meaningful. (As far as I can tell, in all of their searching for solutions, the contractor never recreated the same problem on the bench that was occurring at the installed doors, so their solutions probably weren’t likely to translate well to the real world.)
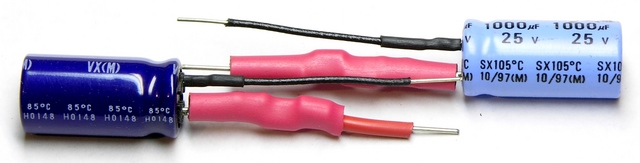
Capacitor

I installed a 1000μF capacitor across the reader/strike power terminals … and the reader went dead. Whaaaaa?

Further experimentation with the voltmeter, the capacitor, and numerous 130-second reboots suggests that the gateway internally switches the power feed to the reader port (and doesn’t turn it on until 70 seconds after booting), monitors the load, and disables it if it exceeds a threshold. And the inrush current to charge the capacitor is enough to trip the disable.

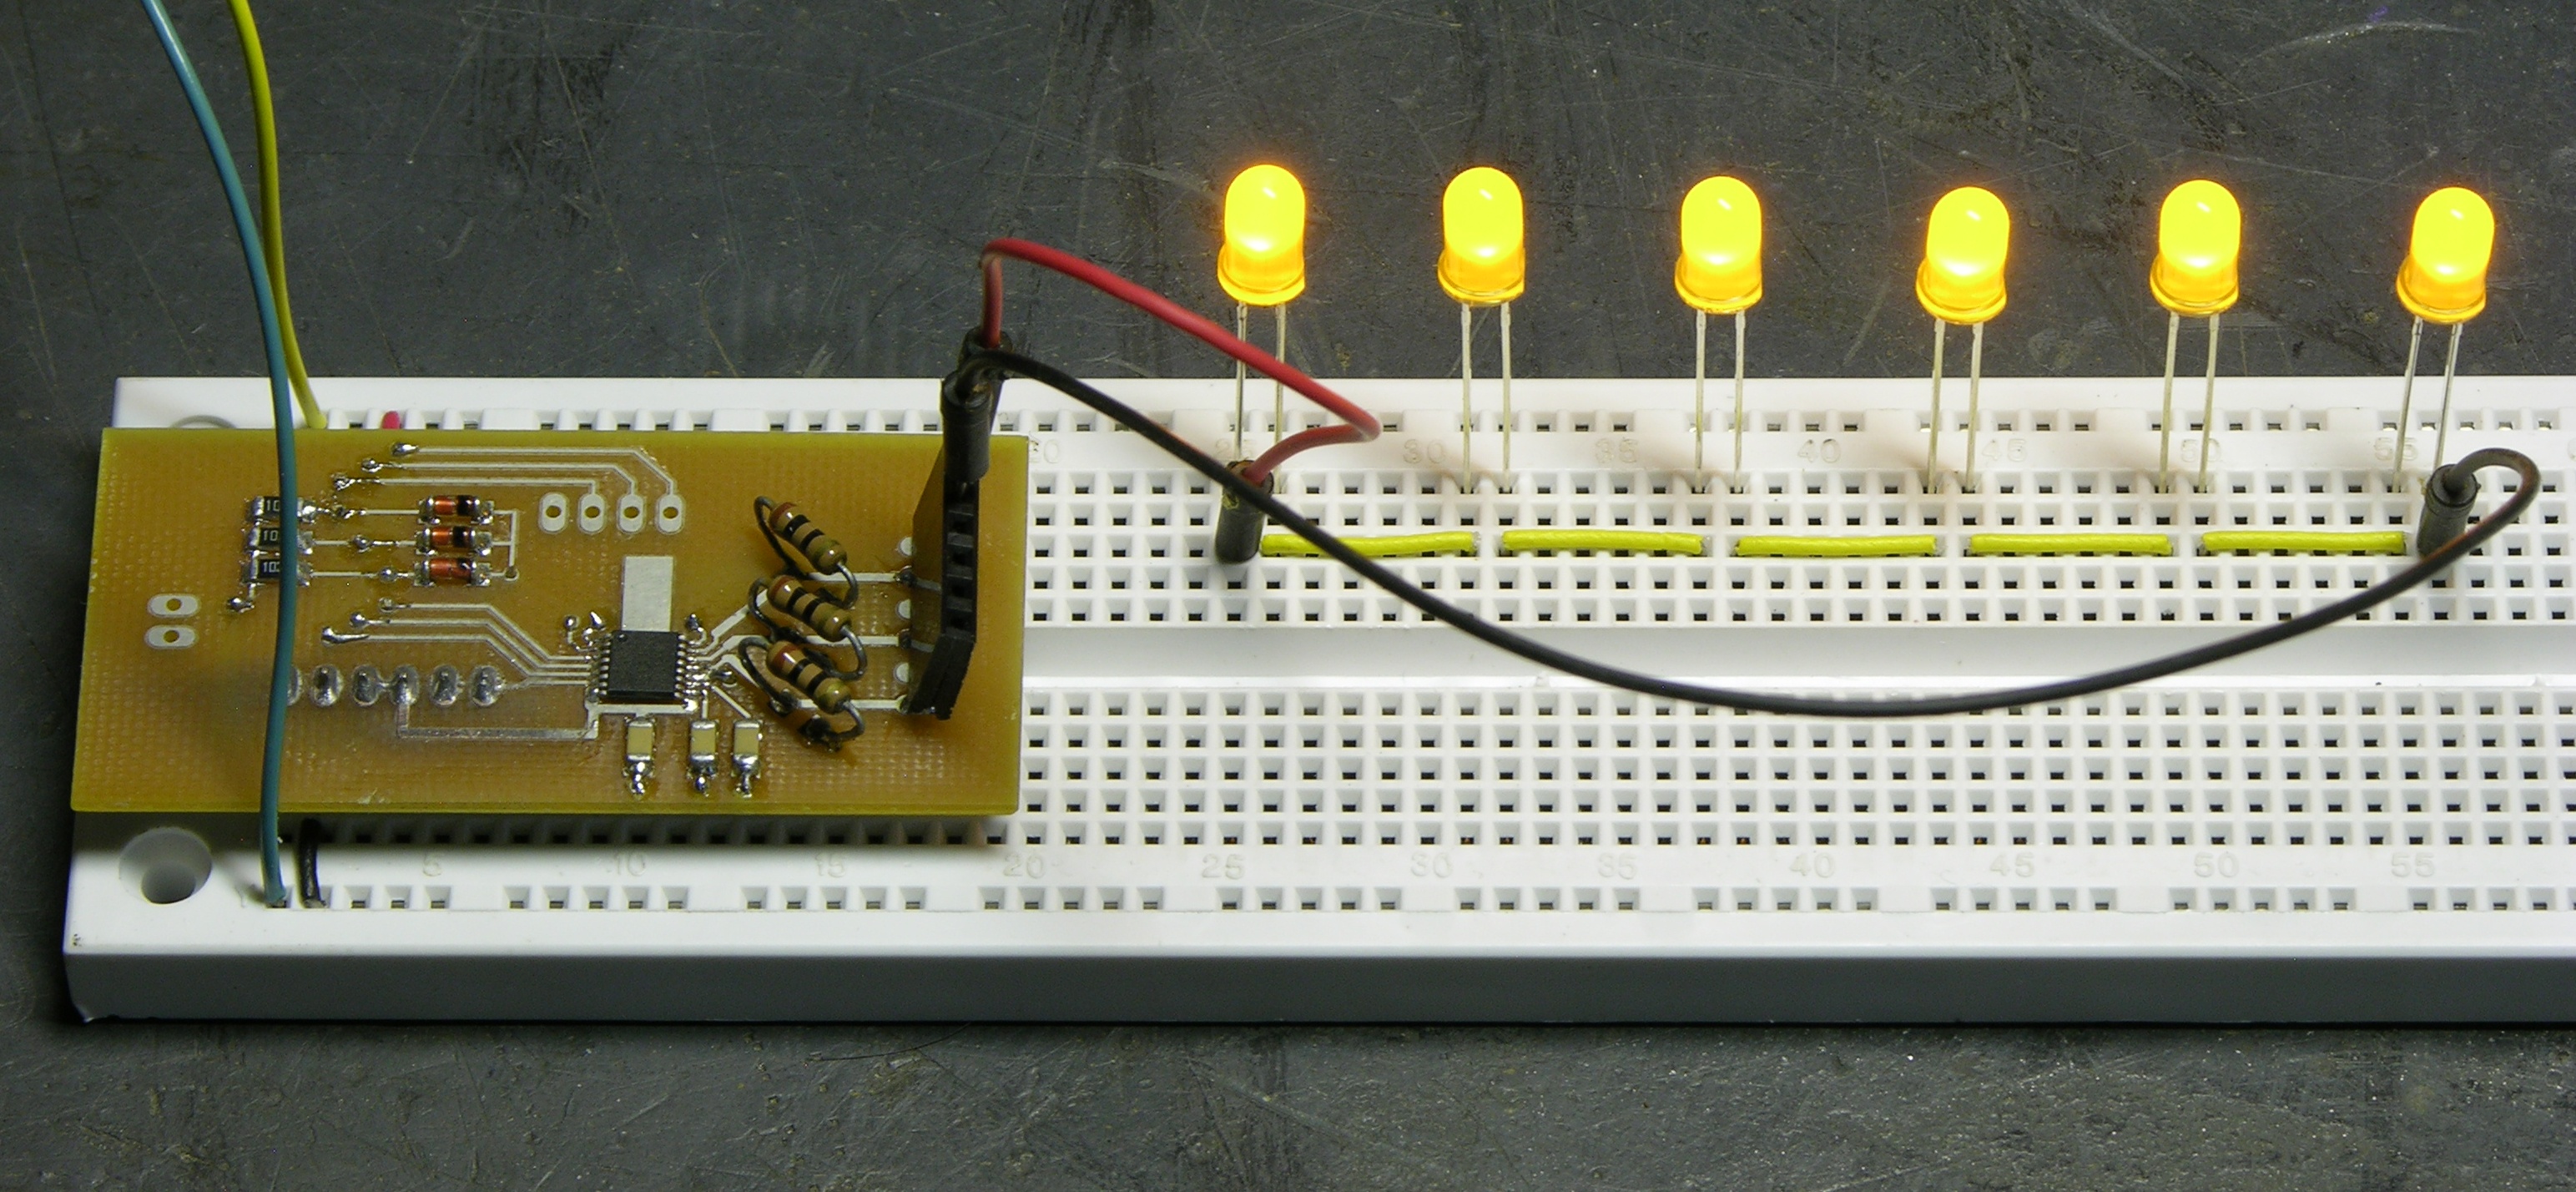
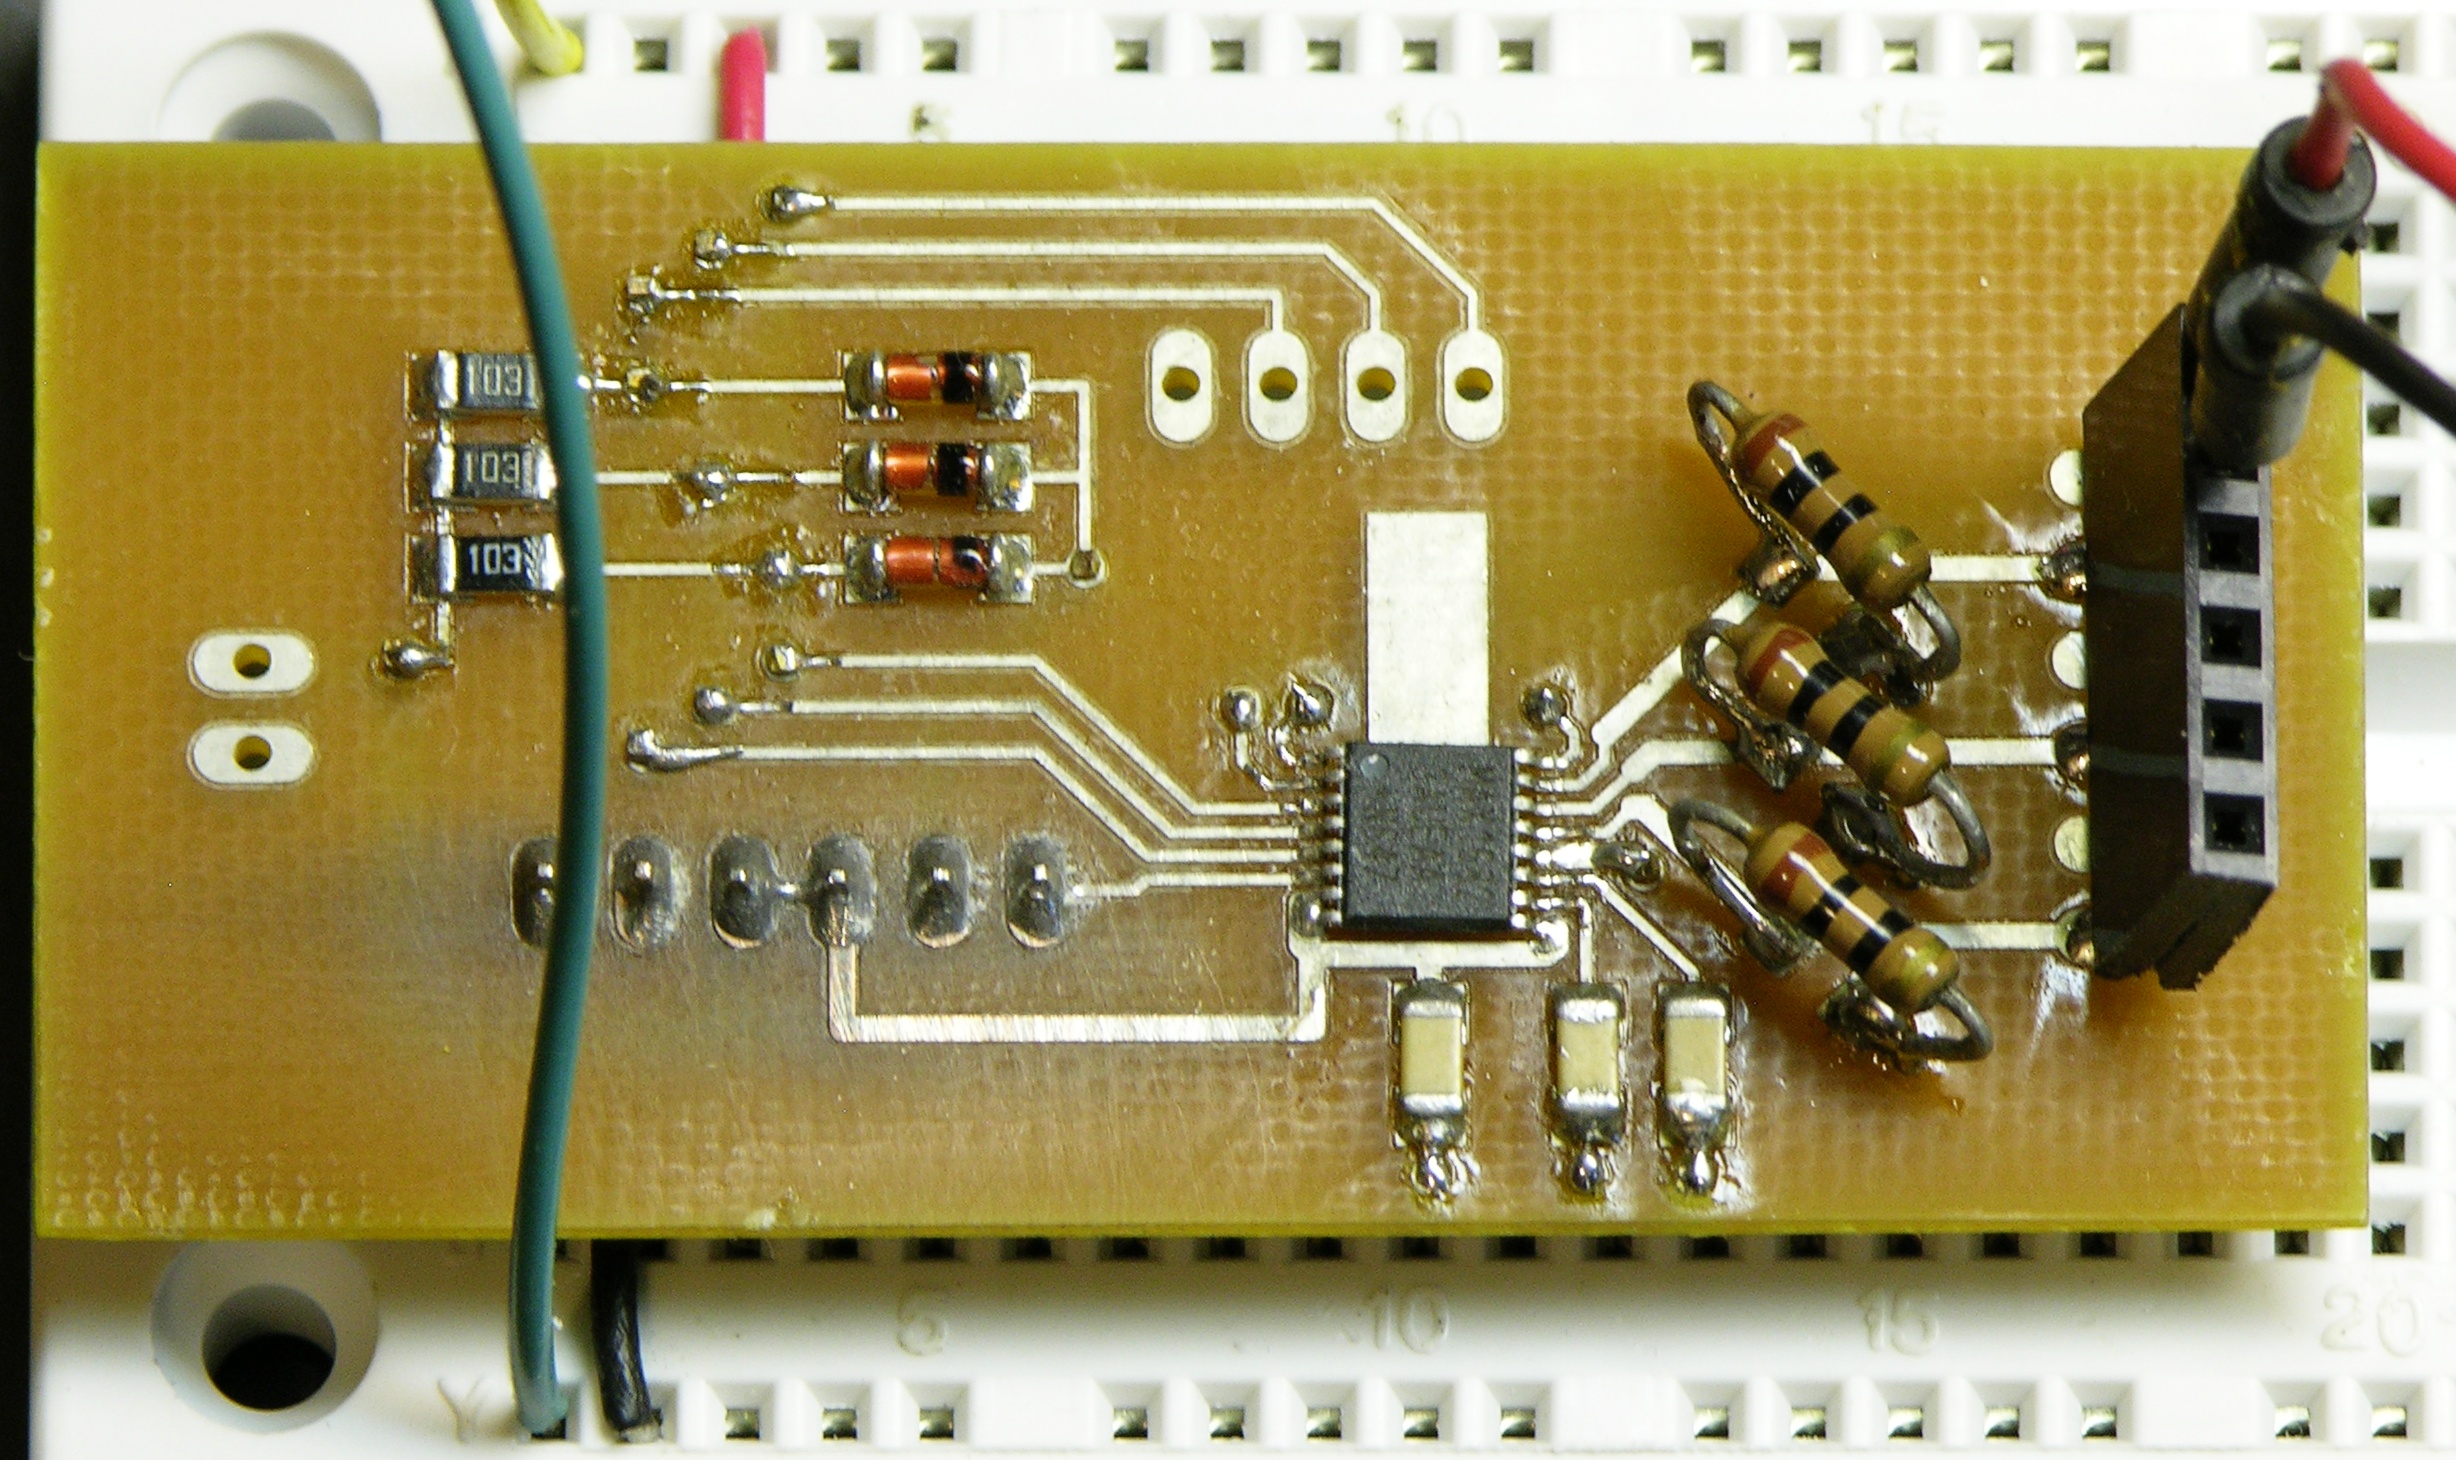
Capacitor, Resistor, and Diodes

Capacitor/diode assembly for power dips

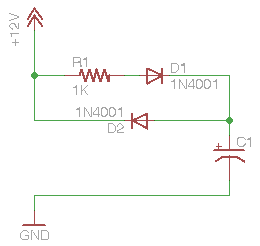
Mmmokay, need to limit the current into the capacitor to charge it, sounds like a series resistor. But need instantaneous power from the capacitor, sounds like a couple of diodes.

Diode / diode-resistor arrangement for slow filter capacitor charge

Diode / diode-resistor arrangement for slow filter capacitor charge, closeup

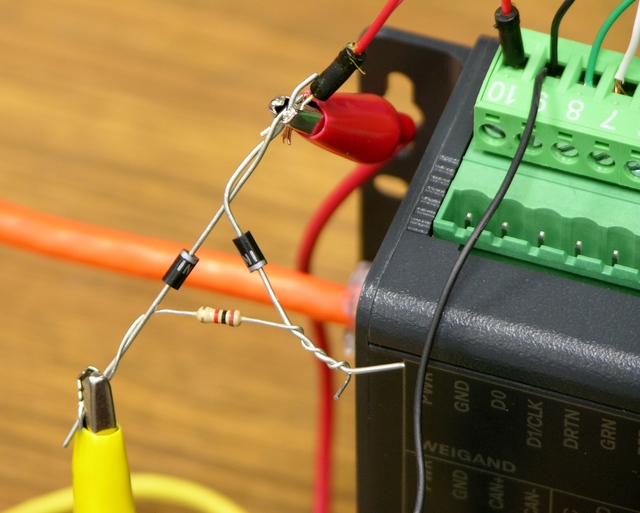
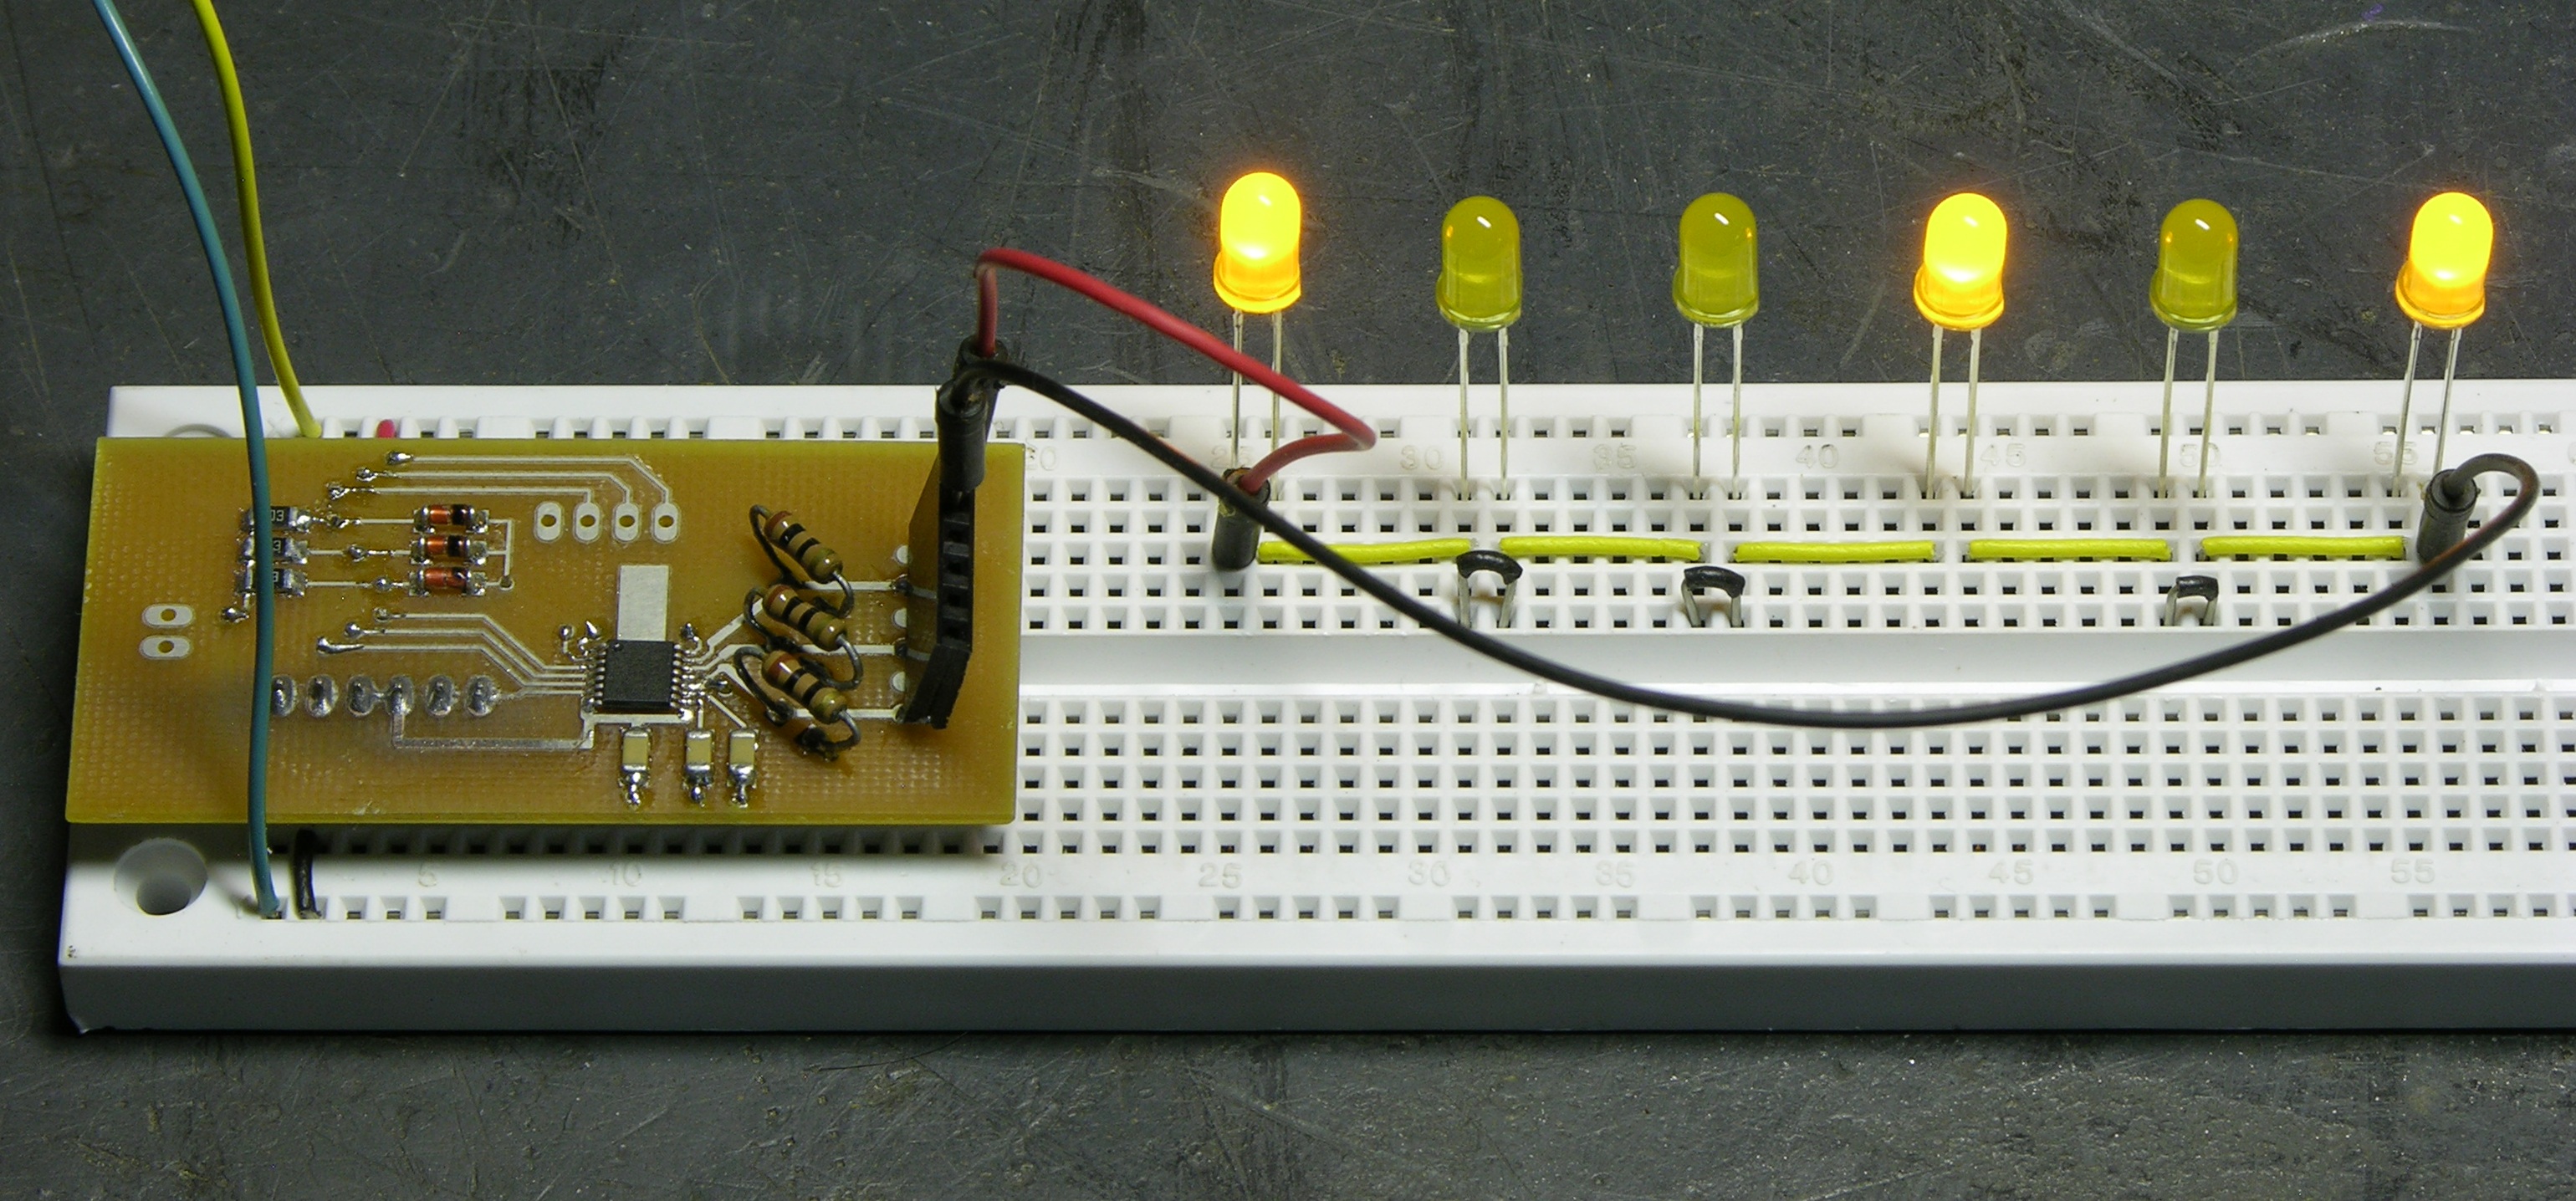
Worked great! I ran a bunch of successful “entries” yesterday afternoon with no more glitches.
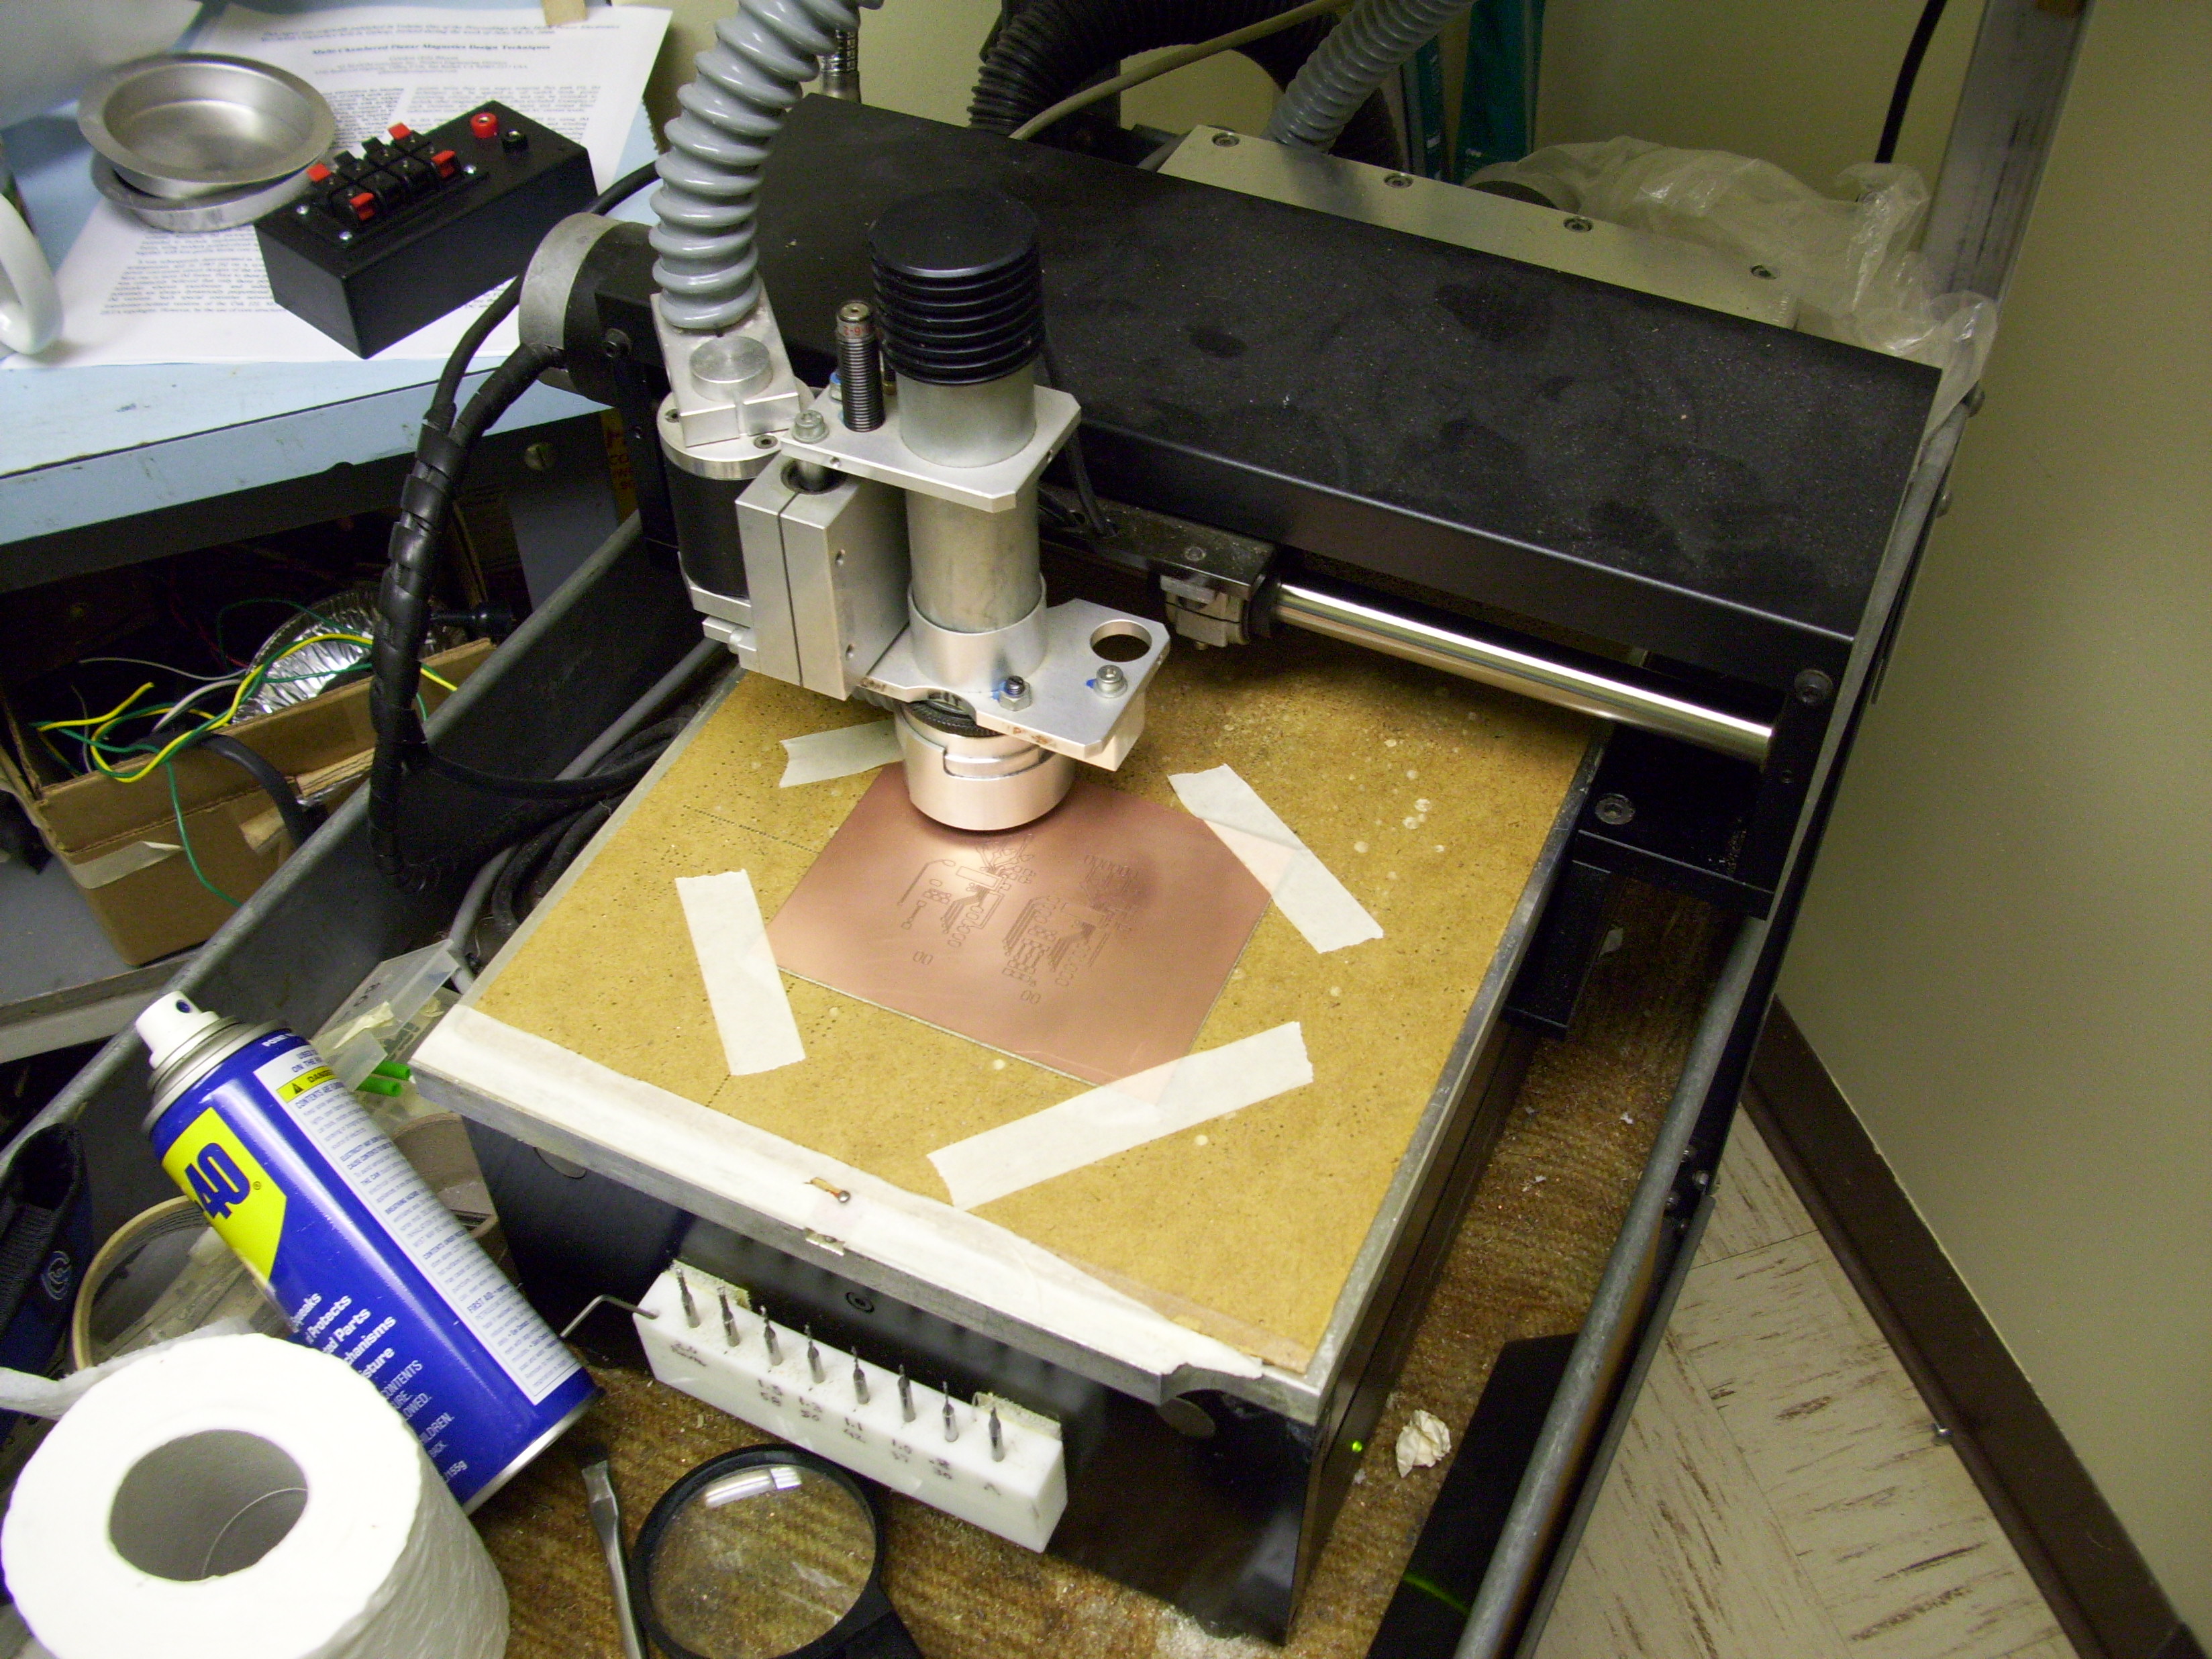
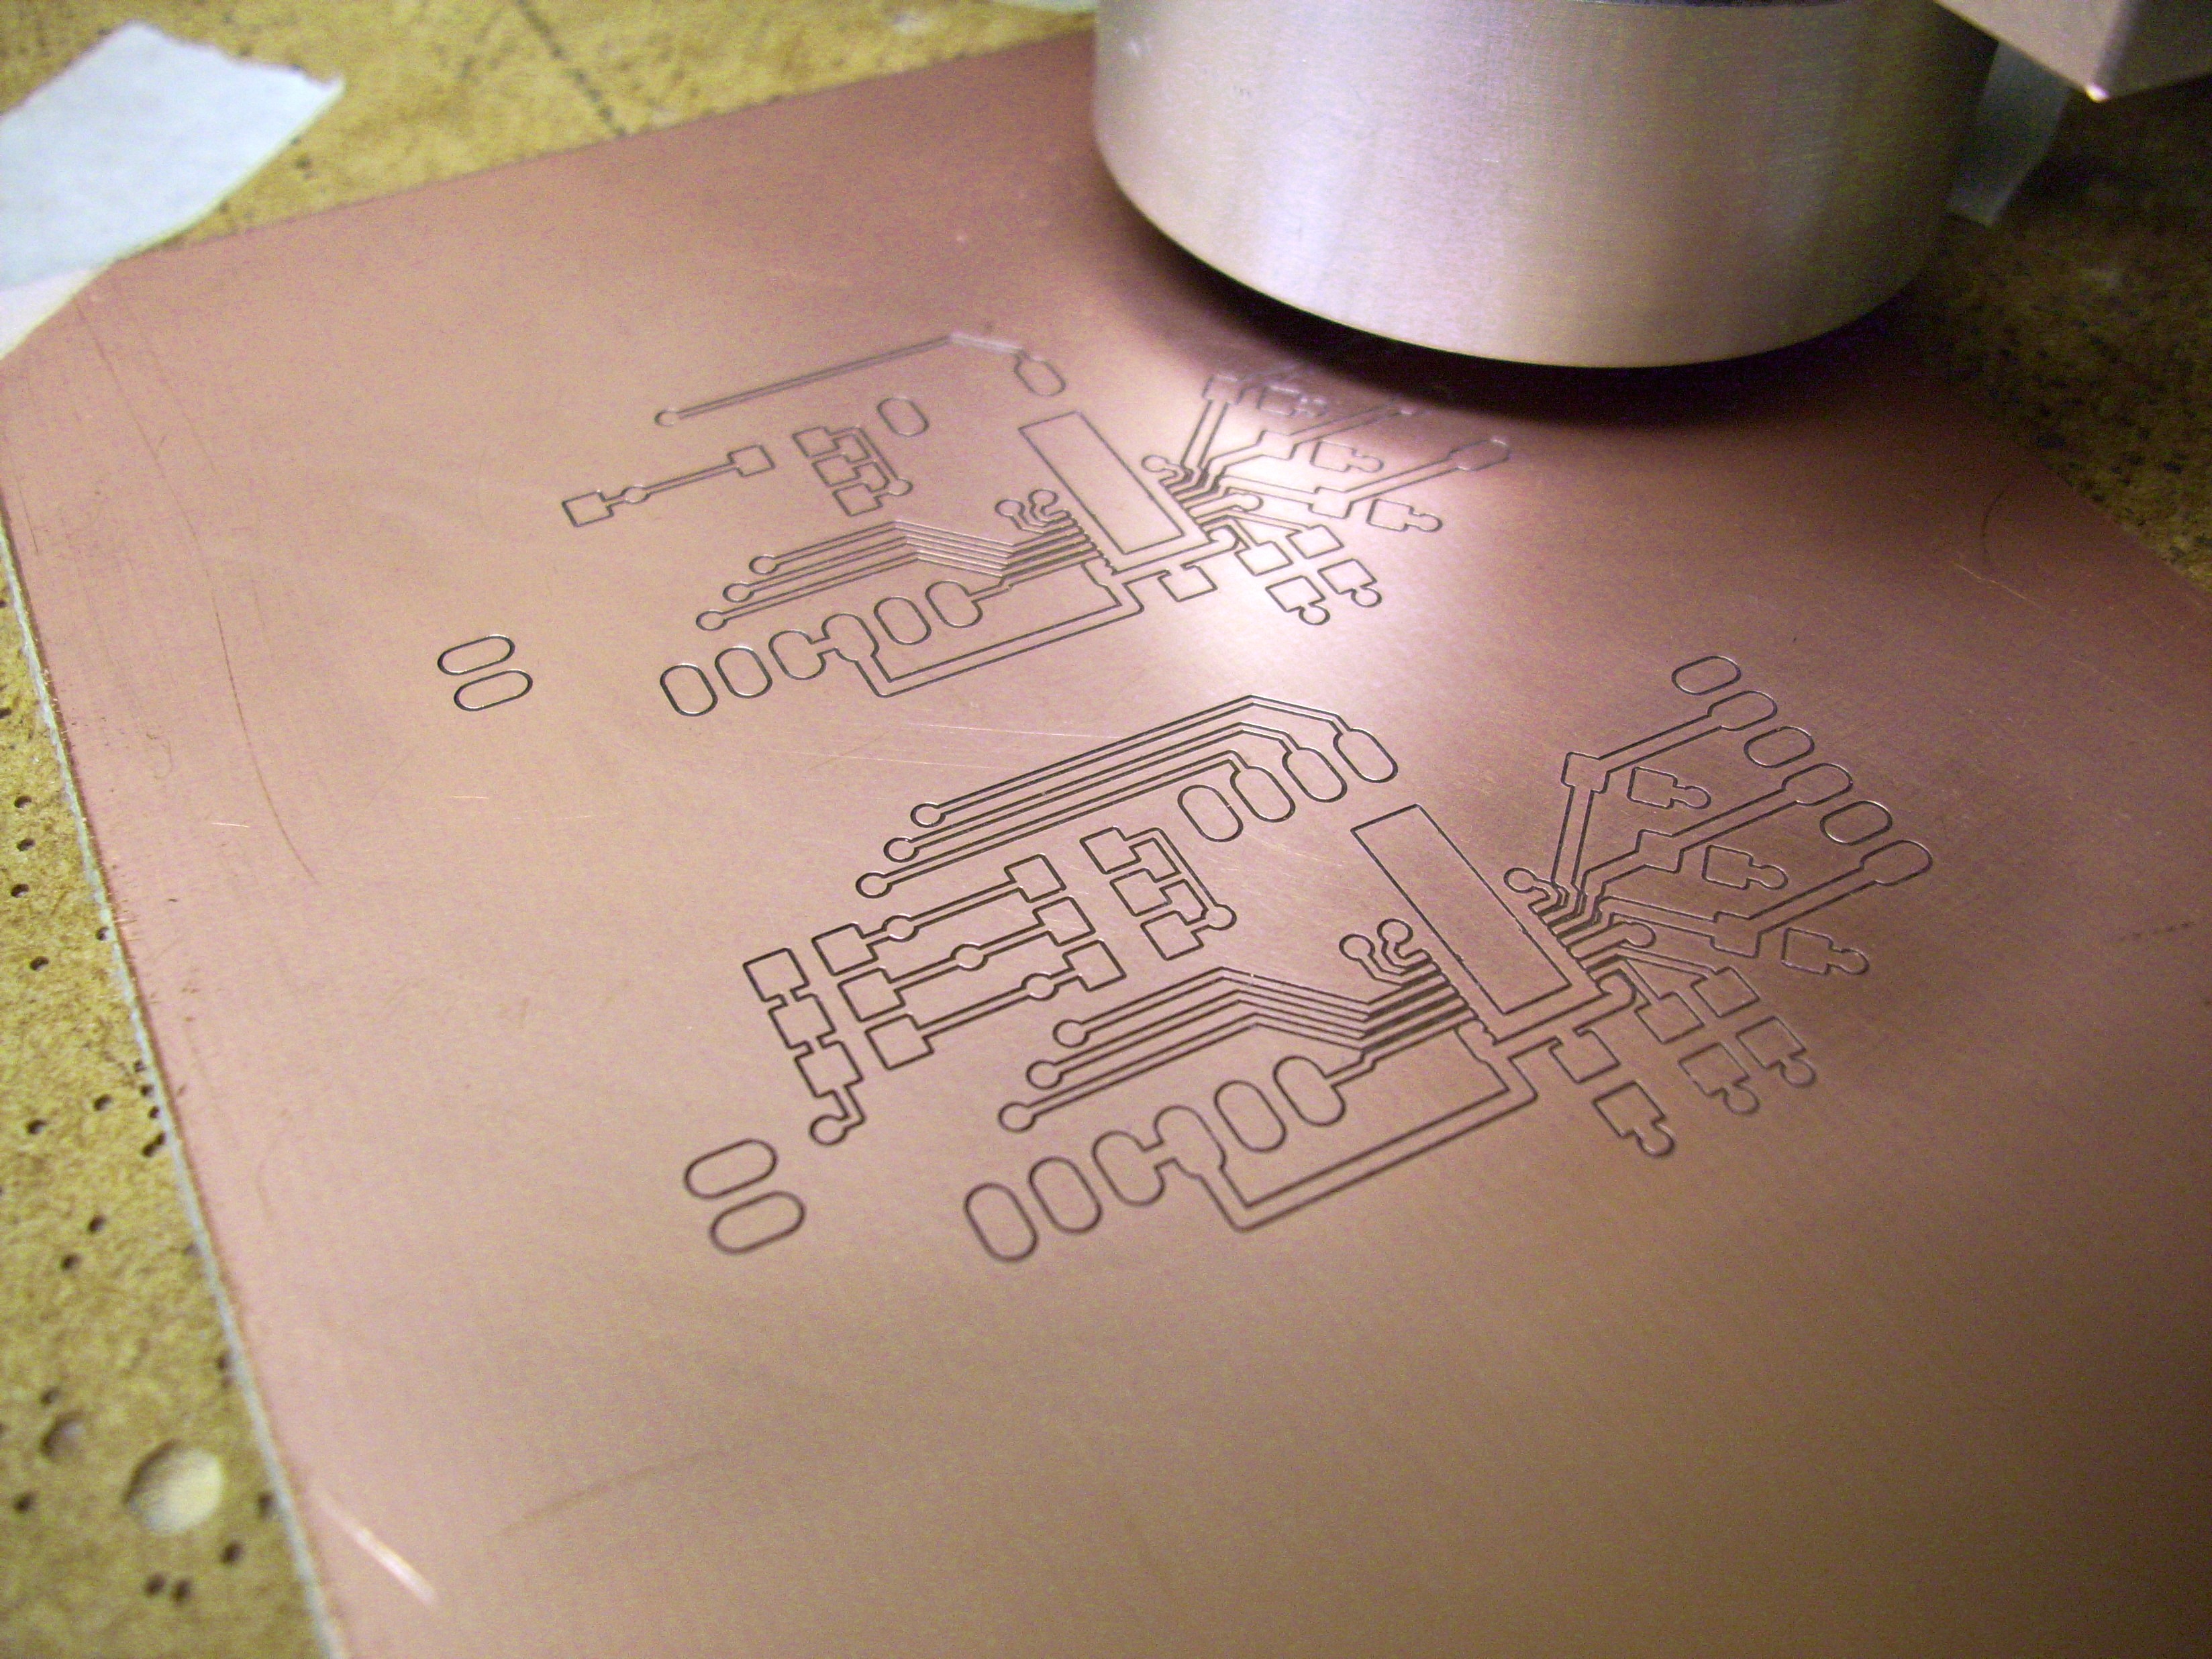
Making More

Filter capacitor with diode / diode-resistor arrangement for slow charge

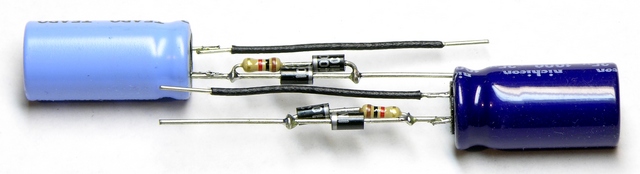
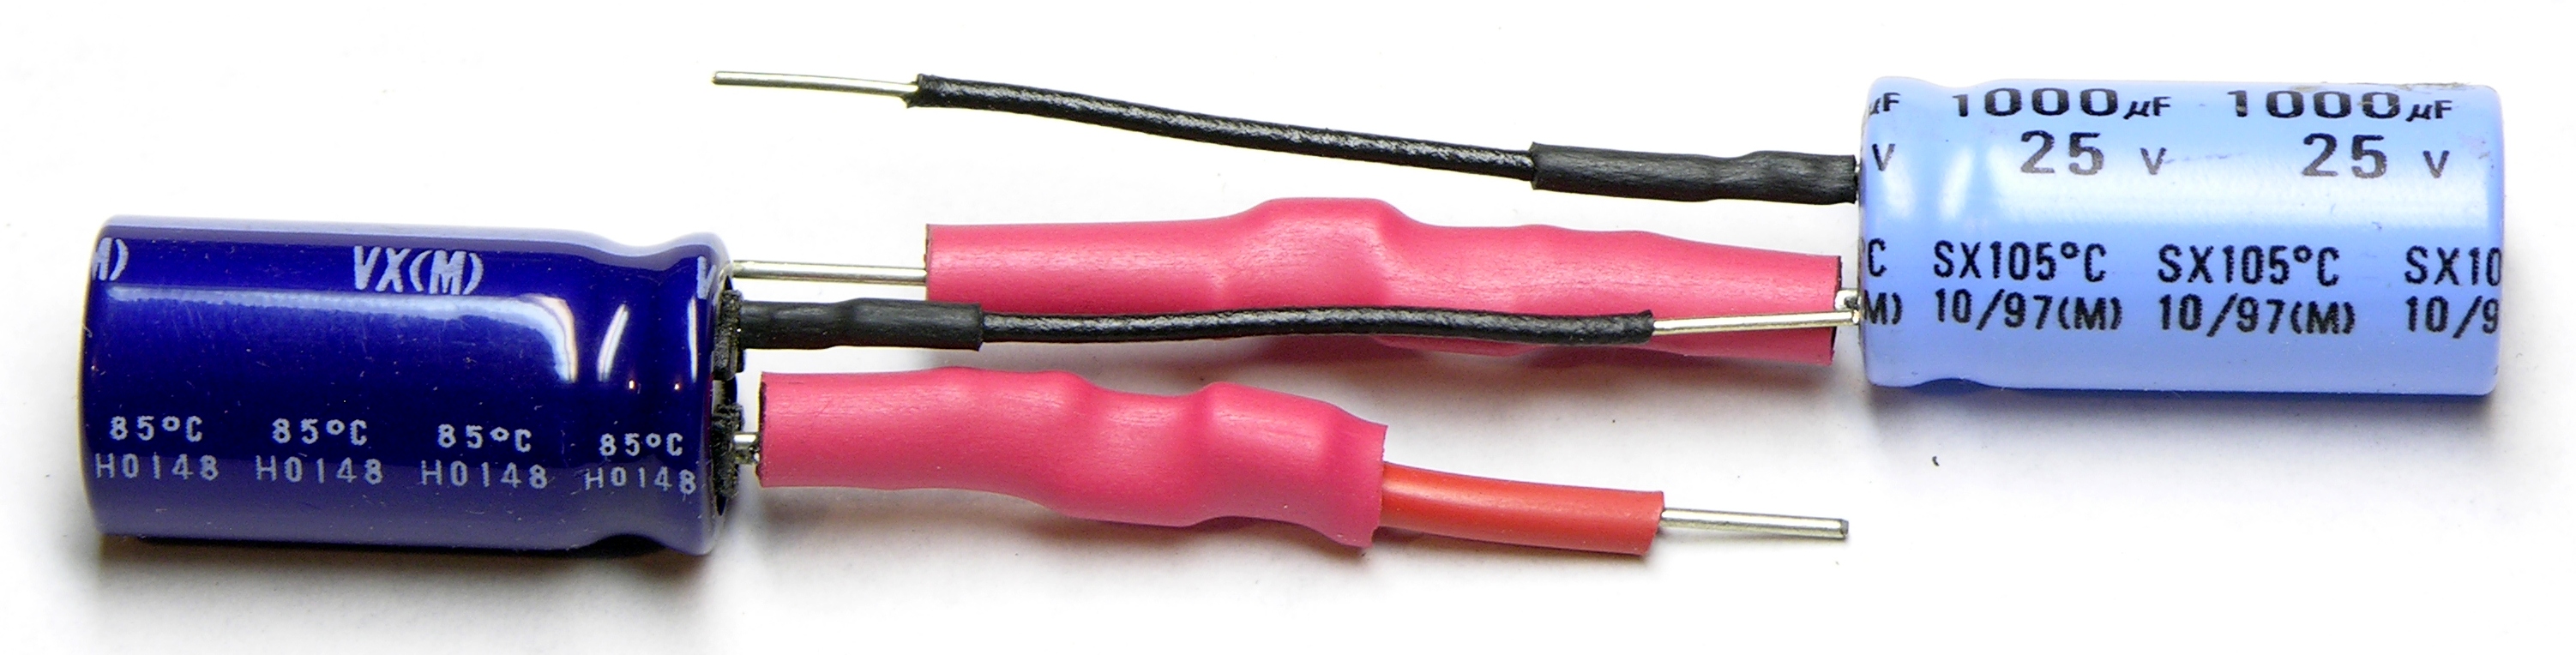
Last night I soldered up a couple to try on some real doors today.

Filter capacitor with diode / diode-resistor arrangement for slow charge, heatshrinked

Heatshrinked and ready to go.

Catch Diode

This morning I put one into the bench test setup in place of the loose components I had used yesterday and it worked several times in a row — but one time when the door strike relocked, the whole gateway rebooted.

All righty, we’ll put a catch diode in there yet to shunt the back EMF from the strike coil. Ran a few dozen consecutive simulated entries with no problems. Looks like we’re good.

The contractor is back on site and testing with different strike hold-open times. I’ve explained how to use my capacitor assemblies with extra 1N4001s (reversed), and he’s just added the capacitor and diode to one of the troublesome pilot doors to test in situ. After that we’ll regroup and figure out whether and how to deploy this widely.

As Jeremy would say (approximately), “Science. It works.

Is This Even Reasonable?

Power over Ethernet is supposed to give you 12.95W to use at the device. The only power specification I can find for the gateway says to budget 1.5A for the gateway, which would be at least 18W and already more than PoE delivers.

HES electric door strike, power sticker

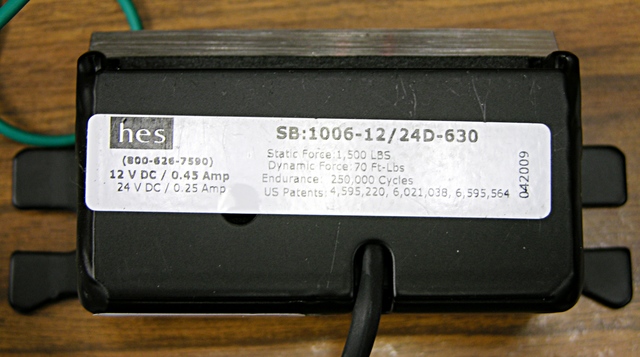
The gateway is supplying about 13V to the reader (and strike). The reader’s datasheet says 90mA maximum average current at 12V, so let’s say 100mA, thus 1.3W. The strike says .45A at 12V, so figure about 5.9W. I don’t have figures for the motion sensor and closure contact, but I expect they’re pretty minimal.

Component Power
gateway 18W
reader 1.3W
strike 5.9W
total 25.2W

And that’s well over the 15W nominal, ~13W delivered that PoE promises — but we already were with just the conservative figures from the gateway.

Going the other way, the reader and strike require 7.2W of the ~13W available, leaving only 5.8W for the gateway at the end of a long cable, or maybe 7.8W for the gateway right next to a power injector on a short cable.

Kind of sounds like it’s not a reasonable expectation and it just happens to work right now, which is a little disappointing. Cutting the strike power in half would make a significant difference — but it’s hard to know whether it would truly be enough to fall within spec without knowing the actual power consumption of the gateway, and these are already brand new, low-power strikes.

I don’t want to install the system and have it work intermittently, nor fail quickly. Sounds like a call to Cisco is in order to see what they think of all this.

Disabling Wireless Transmission on a VR3 Automotive Backup Camera

Sunday, August 2nd, 2009

After backing my bus into my neighbor’s mailbox, I ordered a backup camera from Amazon. The camera touts wired and wireless operation, and I already knew I’d want to use the wired connection for best picture quality.

VR3 backup camera with LCD

Since the Amazon product description for the related VR3 backup camera with 2.5″ LCD says the wireless connection is 2.4GHz and that’s the same frequency band as 802.11b/g, I also knew I’d want to be sure the wireless transmission was inactive so it didn’t interfere with wi-fi reception in the bus. The support document says:

Some of our cameras have the ability to be hardwired to the monitor. This will eliminate interference by completely shutting down the wireless reception.

Which sounded pretty good. All you need is their $20 extension cable … well, no. Their cable is only 25′, and I’ll need about 50′ to get from the back of the bus to the front. Plus I don’t feel like paying $20 each for cables I’d have to chain together when I can just as well build a cable customized to my own liking.

Testing Wired Operation

I was visiting Cort in July anyway, so I took my new camera along for him to help me try out wiring it up and disabling the wireless transmission. As an avid amateur radio operator and repeater maintainer, he’s even better equipped for this than I, and his spectrum analyzer sure came in handy.

(more…)

Constant-Current LED String Driver

Saturday, August 1st, 2009

As mentioned previously, I was contacted this spring by Amanda McClellan of Coordinate It about an LED design project. Amanda is a civil engineer turned wedding planner and needs about a hundred lighted paper lanterns for a large reception on Labor Day weekend.

There don’t seem to be (m)any LED lighting solutions for paper lanterns, and Amanda was interested in the lower power consumption of LEDs without having to go around to each lantern to e.g. hook up LED throwies. She also indicated a willingness to advise me on packaging the system/solution to sell to other event planners out there, which sounds pretty good to me.

LED string driver, all LEDs on

Between distractions, I’ve been working on a design for her. The prototype looks okay, and I think it’s about ready to send out to have boards manufactured.

Specifications

  • Make LED drivers to power 10 lanterns with 2-3 white or warm white LEDs each, with some combination of parallel-series wiring.
  • Cost should be not more than $2.50 per lantern, or possibly somewhat more if the system is completely reusable.
  • Use constant-current drive, for the initial application in the 20mA range but ideally expandable to as high as 100mA.
  • Ideally make the string(s) dimmable through optional analog and/or PWM input — but full-brightness when no dimming input is present.
  • For Amanda’s use, pack 100 lanterns’ worth of drivers into a monolithic case for the sake of aesthetics and convenience.
  • If easily done, make the same driver boards fit into fob-sized cases for smaller applications — Jeremy’s basement, interior lighting for CNC plastic-extrusion machines, etc.
  • LEDs supplied separately. I don’t want to be in the business of soldering and testing LED strings that are going to get used by other people. It’s up to the customer to determine and meet their own LED requirements.
  • If possible, run from 48VDC source, as I have several hundred 48VDC .38A power supplies I’d love to get rid of for the right price.

Driver Selection

I looked over a lot of LED string drivers before making my selection. Here are some drivers I considered and application notes I looked through:

Given that Amanda wants 100 lanterns with 2 or 3 LEDs each, the 3-channel MAX16823 really leaped out at me. Even though some of the other drivers could support higher drive voltages hence more LEDs per string, the 16823′s three strings trump the higher voltages in the “power more LEDs per driver” category, hence providing a lower overall cost to drive large numbers of LEDs.

Because so many of the drivers have a maximum input of 40V, I gave up on using my 48V power supplies and looked for power supplies in the 24-36V range. I’m having a hard time finding power supplies in that voltage range whose price I consider reasonable, and it’s much worse for anything other than 24V, so it looks like that’s what it’ll be. I’d welcome suggestions on sources for inexpensive 24-40V ~1A power supplies, if you know of any.

With a white LED forward voltage drop at 3.4-3.6V and the MAX16823′s dropout voltage of .3-.7V, a 24V power supply could comfortably run 6 LEDs per string or 18 LEDs per driver. With 2 LEDs per lantern, that’s 9 lanterns; with 3 per lantern, it’s 6 lanterns per driver. It’d be nice to have an even 10 lanterns per driver, but I can live with this.

One nice thing about the MAX16823′s circuit is that it doesn’t require a fixed supply voltage or number of LEDs. Just leave a little headroom between your LED string series forward voltage and your supply voltage and you’re good to go. This means I can set it up for Amanda on 24V with 6 white LEDs per string, but Jeremy could use 12V with 3 LEDs per string, and someone with a 40V source wanting to power red LEDs at ~2V each could connect about 20 LEDs per string. That indifference to the details — as long as you don’t make the linear current controller sink way too much current — is really handy.

Circuit Design

MAX16823 LED driver board schematic

The schematic is pretty straightforward — some decoupling capacitors, current-sense resistors for the LED strings, and inputs for PWM dimming. Because I’d like the same board to work in a fob or plugged into a backplane in a larger case, I included dual power supply and PWM dimming inputs.

I figure if you have a large case of these (at least one I make), you’re more likely to want to dim all of the LEDs at the same time than to dim individual strings, so I used resistor-diode logic to tie the three dimming inputs together to a single dimming input pin on the backplane connector.

I also ran the “LEDGOOD” indicator output to the backplane, to invert and provide “LEDBAD” indicators on the monolithic case to show which strings are disconnected or having trouble. Having discussed it extensively with Jeremy (my first fob presale), I didn’t bother to provide LEDGOOD/LEDBAD indication on the board itself for the fob version — if you’re using the fob to power one to three strings, you can just look to see whether the LED strings are working or not.

Circuit Board

After laying out the circuit board, I tried my usual iron-on toner transfer to set up PCB etch resist, but I had much worse luck than usual and gave up. Tom McGuire graciously agreed to mill me a couple of boards at work and even provided pictures of their awesome commercial PCB mill doing its thing.

PCB mill, wide

PCB mill, table

PCB mill, cutterhead

Here are my sad iron-on attempts shown next to Tom’s awesome milled boards.

Circuit boards: Iron-on transfer attempts, milled

Tom “peeled” the waste copper from the top side of one of the boards, because he’s CRAZY.
Two milled circuit boards, one peeled

With Tinnit, verra nice.

Completed Prototype

LED string driver

I assembled this a while back and actually don’t remember for sure whether I used the hotplate or hand-soldered and used braid to soak up solder bridges. Given the lack of waste flux around the driver IC, I think I did it on the hotplate.

I intend to use standard 1206 (or smaller) SMT diodes; but these cute round SMT diodes were on hand (salvaged from something) and they fit well enough. Sadly, I couldn’t find any .203V sense voltage / 20mA target current ≈ 10Ω current-sense SMT resistors in my bin; so as you can see, I improvised.

For now, I’ve populated only the connectors I need to test the prototype, and not even with the type of connectors to be used in the production versions. I bodged this together to work on a breadboard; but the real thing will have right-angle male headers for all the connectors.

LED string driver, all LEDs on

The LEDs stay exactly the same brightness with a supply of 12-19V (as high as my slightly broken bench power supply will go),

LED string driver with LEDs shorted

and also stay the same brightness with several of the LEDs shorted out to simulate a string of fewer LEDs. Looks like pretty good current regulation to me.

Next Steps

Right now I need to get boards built quickly for Amanda, so I’ll probably order a batch of 20 boards (enough for 120 or 180 lanterns) just like this, plus silkscreen labels for the connectors. But for the fob version, I want to include a power switch; so I already know there’ll be revisions coming.

I think when the time comes, I’ll print the fob cases using my CupCake.

Availability

I’d like to sell these to anyone who wants them, and I think they’re going to come to $20-25 each by the time I have the PCB, driver, passives, and connectors. (That feels like a lot to me; but in batches of 100, I think that’s about what it’s going to be.) I’m by no means ready to take orders, but I’d take a straw poll. If you think you might be interested, drop me a comment indicating

  • likely quantity
  • PC board only, fob version, or case with lots of boards
  • configured for 20mA drive, something else, or you want to supply your own current-sense resistor
  • or “$20-25 is just way too darn much for an LED string driver”

I promise I won’t hold you to it, unless you give me answer #4. :-)