Replacing My PowerBook Screen
Quick Links
Background
Part 1: G4 500 Disassembly, Bottom Side
Part 2: G4 500 Disassembly, Top Side
Part 3: G4 500 Disassembly, Back Edge Screws
Part 4: G4 500 Disassembly, Removing the MB and Screen
Part 5: G4 550 Disassembly, Bottom Side
Part 6: G4 550 Disassembly, Top Side
Part 7: G4 550 Disassembly, Back Edge
Part 8: G4 550 Disassembly, Removing the MB and Screen
Part 9: G4 550 Reassembly, Screen
Part 10: G4 550 Reassembly, Motherboard
Part 11: G4 550 Reassembly, Top Side
Part 12: G4 550 Reassembly, Bottom Side
Aftereffects
Background: Two PowerBook G4s
About a year ago, a friend gave me two PowerBook G4s, a 500MHz and a 550MHz. The 550 was in worse cosmetic condition; but it was faster, so it’s what I’ve been using ever since. I use it at work when I need a serial console on a network device; I use it on the road when I travel; I use it at home when I program the LogoChip and blog about electronics.
The hinges had been stiff for a while, and I had wondered whether I should try to open and lubricate them. I was nevertheless surprised when a week and a half ago, I was adjusting the screen angle and the hinges tore out of the lid, one after the other.
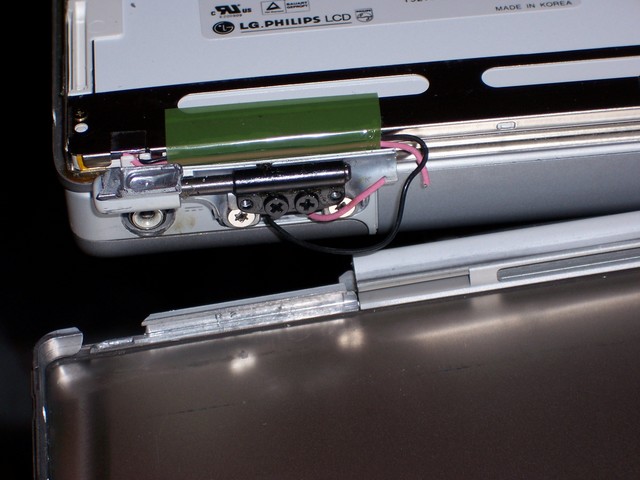
Since the aluminum anchor was actually broken, I didn’t have much hope for fixing it. I did find a web page on opening the PowerBook LCD (which I’ve misplaced, or I’d link it here), and opened mine. Since they’re held together by epoxy, opening them is a fairly destructive event–and the result didn’t give me any reason for optimism. As can be seen above, the anchor is (was) part of a thin band around the entire perimeter. I suppose the right person could do four perfect, tiny welds to put it back together; but for me, it was out of the question.
My second thought was to transplant the hard drive into the 500MHz machine; but for whatever reason, it wouldn’t boot, beep, or even charge the battery. My third thought was to get back the PowerBook G3 450MHz that I had used before getting the G4s, which I did. I had reinstalled the OS on the G3 before loaning it out, though, so it was missing not only the data from the G4 but all of my applications, data, and configurations.
About a week passed in which I was busy enough that I got by without really needing a notebook computer in the evening. But last night, I had some time to dedicate to the situation, and I needed to get the G4 550 working again at least enough to boot blind in target mode and run the Migration Assistant to recover my data. Since the only thing wrong with it functionally was the pink wire that tore when the lid ripped off, I soldered the wire back together.
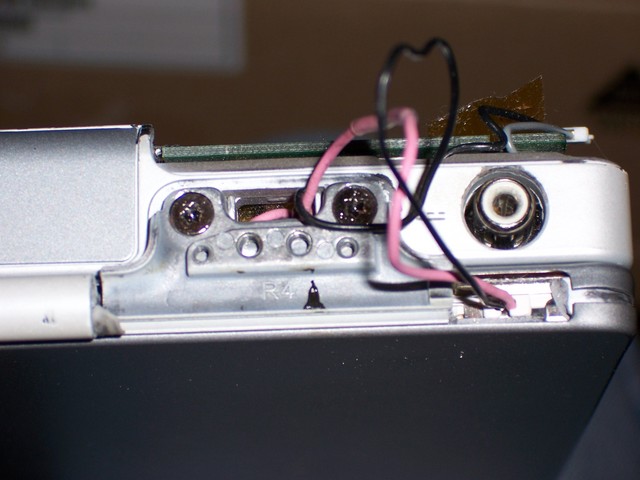
To my delight, the computer now worked perfectly–albeit with a thin LCD monitor attached tenuously to the rest of the case by myriad tiny, fragile wires. I ran it that way long enough to apply some OS updates, and then shut it down again.
Dreaming up Bad Ideas
Inspired by my success at–wow, soldering a wire back together!–I started getting grander ideas. The lid/LCD on the 500MHz machine looks identical to the one on the 550MHz machine (except for being not broken), so maybe it could be a donor. I had opened both computers already anyway, and the connectors looked identical as well, adding credence to the idea. So I started by removing the good screen from the bad computer and ultimately got it transplanted to replace the bad screen on the good computer, which I’m now using to write this overview of the process.
Maybe this information will provide useful to someone else who needs to disassemble an old PowerBook. I’m not terribly familiar with the product line, but I have the impression that both of my computers are considered “Titanium” models. Their motherboards are completely different, but their screens are almost identical, and their dissassembly and reassembly is very similar as well.
Next: G4 500 Disassembly, Bottom Side
Sections
Background
Part 1: G4 500 Disassembly, Bottom Side
Part 2: G4 500 Disassembly, Top Side
Part 3: G4 500 Disassembly, Back Edge Screws
Part 4: G4 500 Disassembly, Removing the MB and Screen
Part 5: G4 550 Disassembly, Bottom Side
Part 6: G4 550 Disassembly, Top Side
Part 7: G4 550 Disassembly, Back Edge
Part 8: G4 550 Disassembly, Removing the MB and Screen
Part 9: G4 550 Reassembly, Screen
Part 10: G4 550 Reassembly, Motherboard
Part 11: G4 550 Reassembly, Top Side
Part 12: G4 550 Reassembly, Bottom Side
Aftereffects