Replacing My PowerBook Screen, Part 04: G4 500 Disassembly, Removing the MB and Screen
Quick Links
Background
Part 1: G4 500 Disassembly, Bottom Side
Part 2: G4 500 Disassembly, Top Side
Part 3: G4 500 Disassembly, Back Edge Screws
Part 4: G4 500 Disassembly, Removing the MB and Screen
Part 5: G4 550 Disassembly, Bottom Side
Part 6: G4 550 Disassembly, Top Side
Part 7: G4 550 Disassembly, Back Edge
Part 8: G4 550 Disassembly, Removing the MB and Screen
Part 9: G4 550 Reassembly, Screen
Part 10: G4 550 Reassembly, Motherboard
Part 11: G4 550 Reassembly, Top Side
Part 12: G4 550 Reassembly, Bottom Side
Aftereffects
Lifting the Motherboard
Close the lid as well as you can with the hinges disconnected, and set the computer down so its back is up and the battery compartment away from you. Slowly tip the motherboard up and toward you, alternately lifting by the top edge and folding the hard drive and DVD connectors back out of the way. Don’t try to lift the back edge of the board yet–just tip it up at an angle.
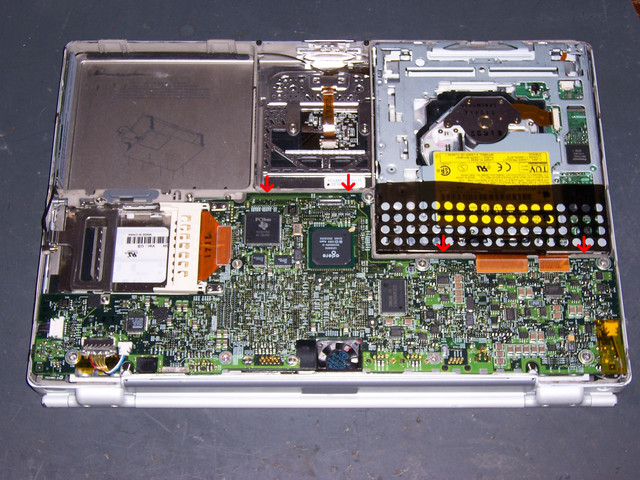
Now lift the board up and forward, to slip the peripheral connectors out of the back panel and slide the board forward in the case. Don’t try to remove it completely–the modem still has wires connecting to the RJ-11 jack near the left corner. Just set it forward on top of the case and out of the way.
Detaching the Screen
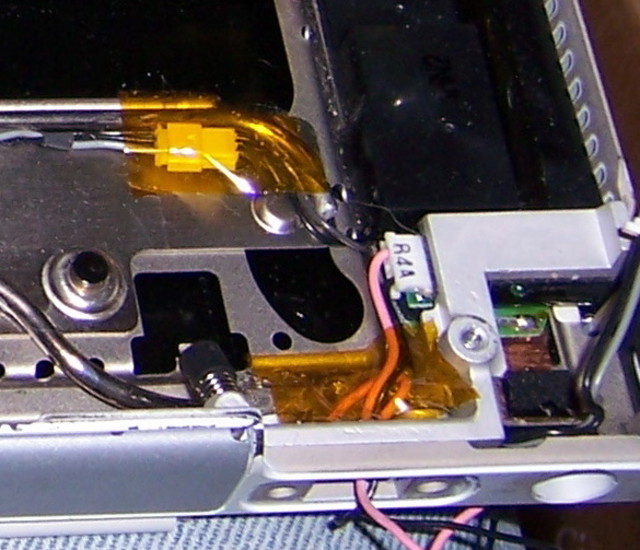
Finally, you can detach the screen. In the back right corner, pull the pink and white wire’s plug out of its socket and thread it carefully back out through the opening on the back of the case. I didn’t get a picture of that on the G4 500, but it looks fairly similar to this shot from the 550. (In the 550, the other wire is black instead of white, and there are a couple of other connections in the vicinity that the 500 doesn’t have.)
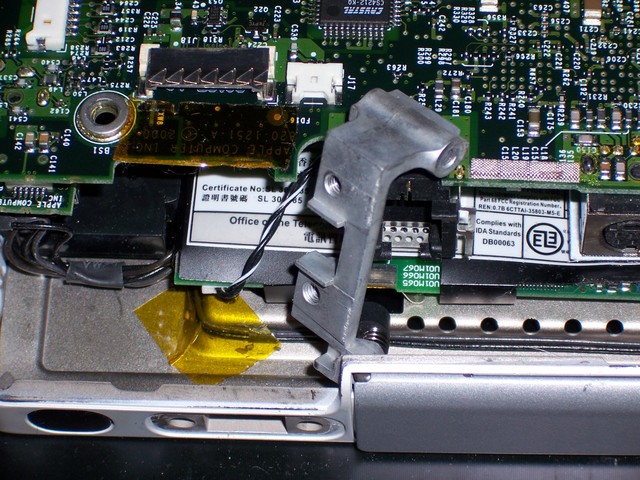
In the back left corner, things are a bit tricker. There’s a metal piece that backs up the case frame to strengthen the hinge mount, and it also captures the video and backlight cables. It swivels on the spring-post connection for the back flap, so lift/maneuver it out of the way, and you can fish out the cables. I threaded out the backlight cable first, to leave as much room as possible to manipulate the larger video connector through the case hole.
Milestone #1: Replacement Screen Removed!
Congratulations! The easy part is over now!
I’d suggest taking a break at this point, because you’re about to go through all of the same steps again–and once the other screen is loose, you won’t want to stop before transplanting the good screen and getting things working again. When I was repairing mine, I called it an evening and went to bed, so I’d be fresh and alert the next day to finish the project.
Next: G4 550 Disassembly, Bottom Side
Sections
Background
Part 1: G4 500 Disassembly, Bottom Side
Part 2: G4 500 Disassembly, Top Side
Part 3: G4 500 Disassembly, Back Edge Screws
Part 4: G4 500 Disassembly, Removing the MB and Screen
Part 5: G4 550 Disassembly, Bottom Side
Part 6: G4 550 Disassembly, Top Side
Part 7: G4 550 Disassembly, Back Edge
Part 8: G4 550 Disassembly, Removing the MB and Screen
Part 9: G4 550 Reassembly, Screen
Part 10: G4 550 Reassembly, Motherboard
Part 11: G4 550 Reassembly, Top Side
Part 12: G4 550 Reassembly, Bottom Side
Aftereffects