Replacing My PowerBook Screen, Part 03: G4 500 Disassembly, Back Edge Screws
Quick Links
Background
Part 1: G4 500 Disassembly, Bottom Side
Part 2: G4 500 Disassembly, Top Side
Part 3: G4 500 Disassembly, Back Edge Screws
Part 4: G4 500 Disassembly, Removing the MB and Screen
Part 5: G4 550 Disassembly, Bottom Side
Part 6: G4 550 Disassembly, Top Side
Part 7: G4 550 Disassembly, Back Edge
Part 8: G4 550 Disassembly, Removing the MB and Screen
Part 9: G4 550 Reassembly, Screen
Part 10: G4 550 Reassembly, Motherboard
Part 11: G4 550 Reassembly, Top Side
Part 12: G4 550 Reassembly, Bottom Side
Aftereffects
Hinge Covers and Hinges
If you haven’t already, remove the hinge covers. Close the lid and orient the case with the hinges facing you, remove the four T8 screws that hold the hinge covers in place, then take the hinge covers off. They fit tightly enough, I had to pry a bit to pop them loose.
Next, remove the four shiny Phillips #1 screws that hold the two molded hinge standoffs to the body. Don’t bother removing the black screws that hold the hinges to the standoffs–the hinges and standoffs can stay with the lid when it’s removed.
Back Edge Screws
After looking at the case from the inside, I think this step is unnecessary. It felt as though the motherboard wasn’t loose yet, but I don’t see any evidence that these screws hold it in place. I think I just needed the confidence that it was ready to come out–so give it a try. If it doesn’t go, then continue with this step.
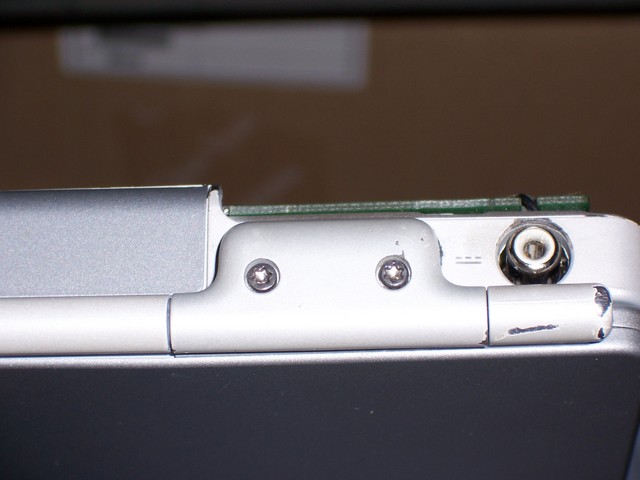
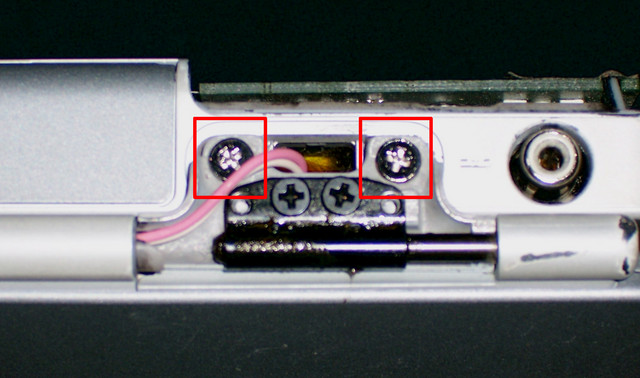
Detach the back edge of the computer from the back edge of the case. Orient the computer on edge with the latch down, the hinges up, and the bottom of the computer away from you. Hold open the flap that covers the peripheral connectors on the back edge, and remove the four tiny Torx screws that hold the motherboard to the back edge of the case. Note that I didn’t have a Torx screwdriver small enough for these screws, so I got by with a .05″ hex wrench.

After removing the last screws, the motherboard should start to feel pretty loose in the case.
Next: G4 500 Disassembly, Removing the MB and Screen
Sections
Background
Part 1: G4 500 Disassembly, Bottom Side
Part 2: G4 500 Disassembly, Top Side
Part 3: G4 500 Disassembly, Back Edge Screws
Part 4: G4 500 Disassembly, Removing the MB and Screen
Part 5: G4 550 Disassembly, Bottom Side
Part 6: G4 550 Disassembly, Top Side
Part 7: G4 550 Disassembly, Back Edge
Part 8: G4 550 Disassembly, Removing the MB and Screen
Part 9: G4 550 Reassembly, Screen
Part 10: G4 550 Reassembly, Motherboard
Part 11: G4 550 Reassembly, Top Side
Part 12: G4 550 Reassembly, Bottom Side
Aftereffects