Replacing My PowerBook Screen, Part 08: G4 550 Disassembly, Removing the MB and Screen
Quick Links
Background
Part 1: G4 500 Disassembly, Bottom Side
Part 2: G4 500 Disassembly, Top Side
Part 3: G4 500 Disassembly, Back Edge Screws
Part 4: G4 500 Disassembly, Removing the MB and Screen
Part 5: G4 550 Disassembly, Bottom Side
Part 6: G4 550 Disassembly, Top Side
Part 7: G4 550 Disassembly, Back Edge
Part 8: G4 550 Disassembly, Removing the MB and Screen
Part 9: G4 550 Reassembly, Screen
Part 10: G4 550 Reassembly, Motherboard
Part 11: G4 550 Reassembly, Top Side
Part 12: G4 550 Reassembly, Bottom Side
Aftereffects
Lifting the Motherboard
Set the computer on its lid and tilt out the motherboard by the top edge, the same as on the 500, folding the hard drive and DVD connectors back out of the way as you go.
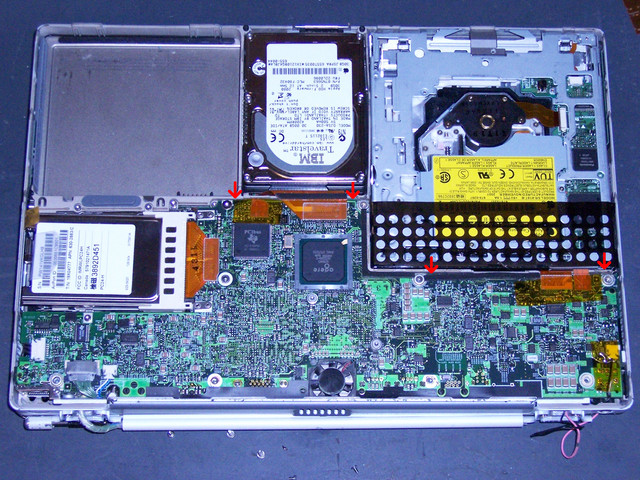
Lift the board up and forward and slide it forward in the case. Again, don’t try to remove it completely–the modem still has wires connecting to the RJ-11 jack near the left corner; just set it forward out of the way.
Detaching the Screen
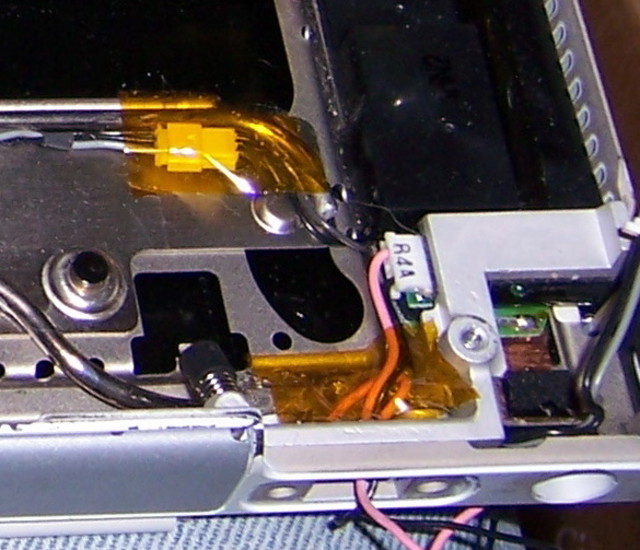
In the back right corner, pull the pink and black wire’s plug out of its socket and thread it carefully back out through the opening on the back of the case.
In the back left corner, things are even worse than on the 500: Not only is there a molded piece that swings down over the cables, but there’s a metal bar immediately behind that as well.
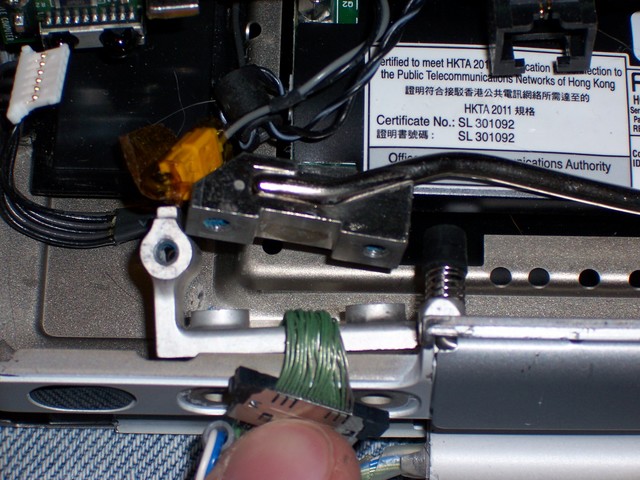
Gently lift the bar out of the way, bending its rod just enough to clear the molded piece.
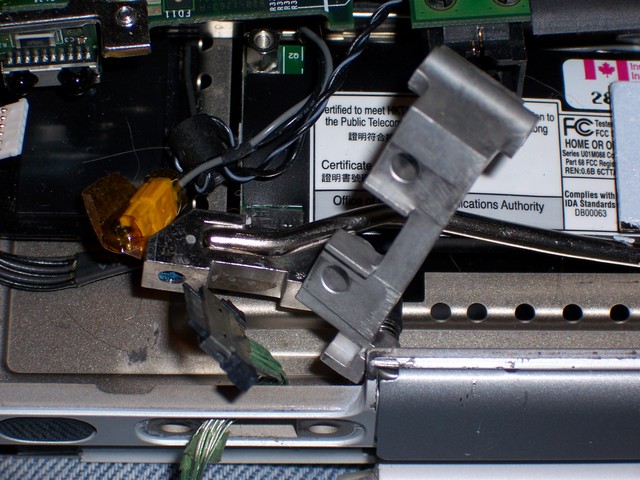
Now swivel up the molded backing, as on the 500, and you should be able to extract the video and backlight cables.
Milestone #2: Broken Screen Removed!
Congratulations! The medium part is over! Now the rewarding part begins: reassembling the pieces into a working computer.
Next: G4 550 Reassembly, Screen
Sections
Background
Part 1: G4 500 Disassembly, Bottom Side
Part 2: G4 500 Disassembly, Top Side
Part 3: G4 500 Disassembly, Back Edge Screws
Part 4: G4 500 Disassembly, Removing the MB and Screen
Part 5: G4 550 Disassembly, Bottom Side
Part 6: G4 550 Disassembly, Top Side
Part 7: G4 550 Disassembly, Back Edge
Part 8: G4 550 Disassembly, Removing the MB and Screen
Part 9: G4 550 Reassembly, Screen
Part 10: G4 550 Reassembly, Motherboard
Part 11: G4 550 Reassembly, Top Side
Part 12: G4 550 Reassembly, Bottom Side
Aftereffects