A week-long vacation without the Arduino? The horror . . . the horror . . .
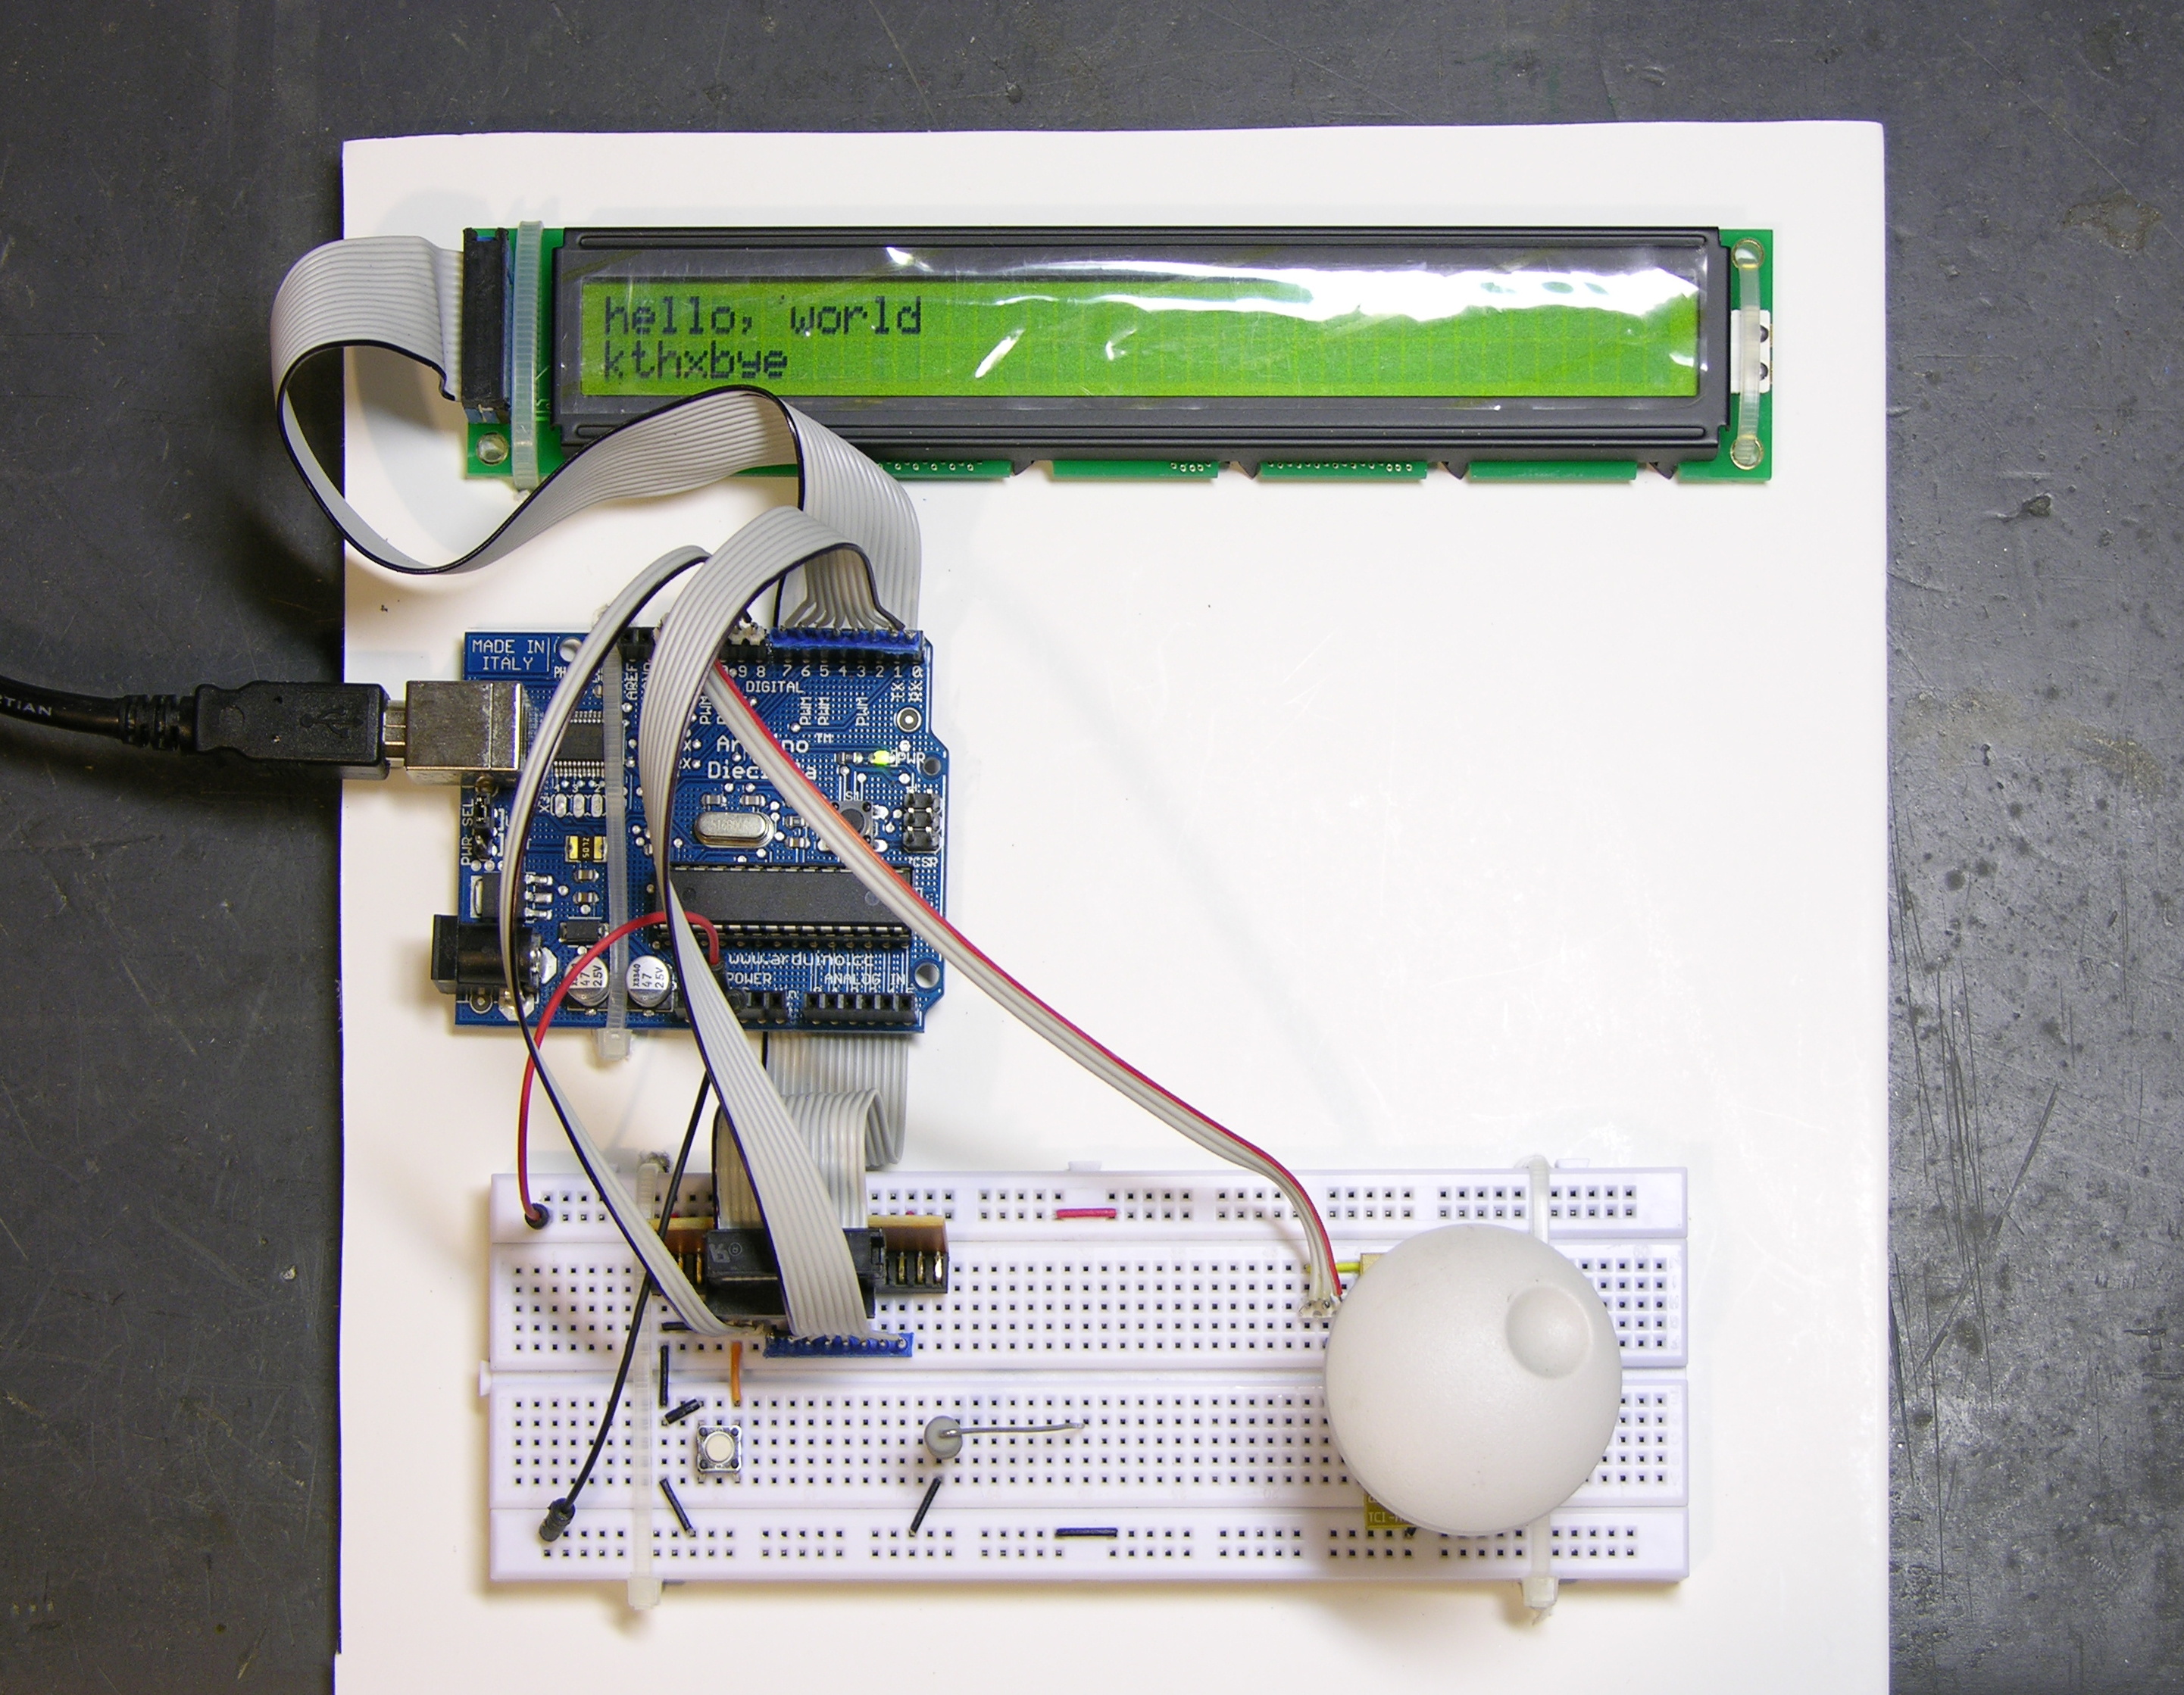
Arduino, LCD, and breadboard strapped down on foam-core sheet, for travel.
A week-long vacation without the Arduino? The horror . . . the horror . . .
Arduino, LCD, and breadboard strapped down on foam-core sheet, for travel.
My dad had a break in the power cord of his hair clipper, right next to the strain relief. That should be ironic, except I already know most strain reliefs are too stiff and just move the site of cable stress rather than relieve it. I guess that makes it ironic but expected.
At any rate, the strain relief was molded onto the cable, so the cord wouldn’t just slip out for repair; and the break was so close he didn’t know quite how to splice it back together; and he asked me to fix it for him.
At first all I could think of was hideous things like replace the strain relief with a grommet and a huge wad of hot glue. But I let it sit for a day, and realized that the much easier solution would also be both cosmetically and functionally superior.
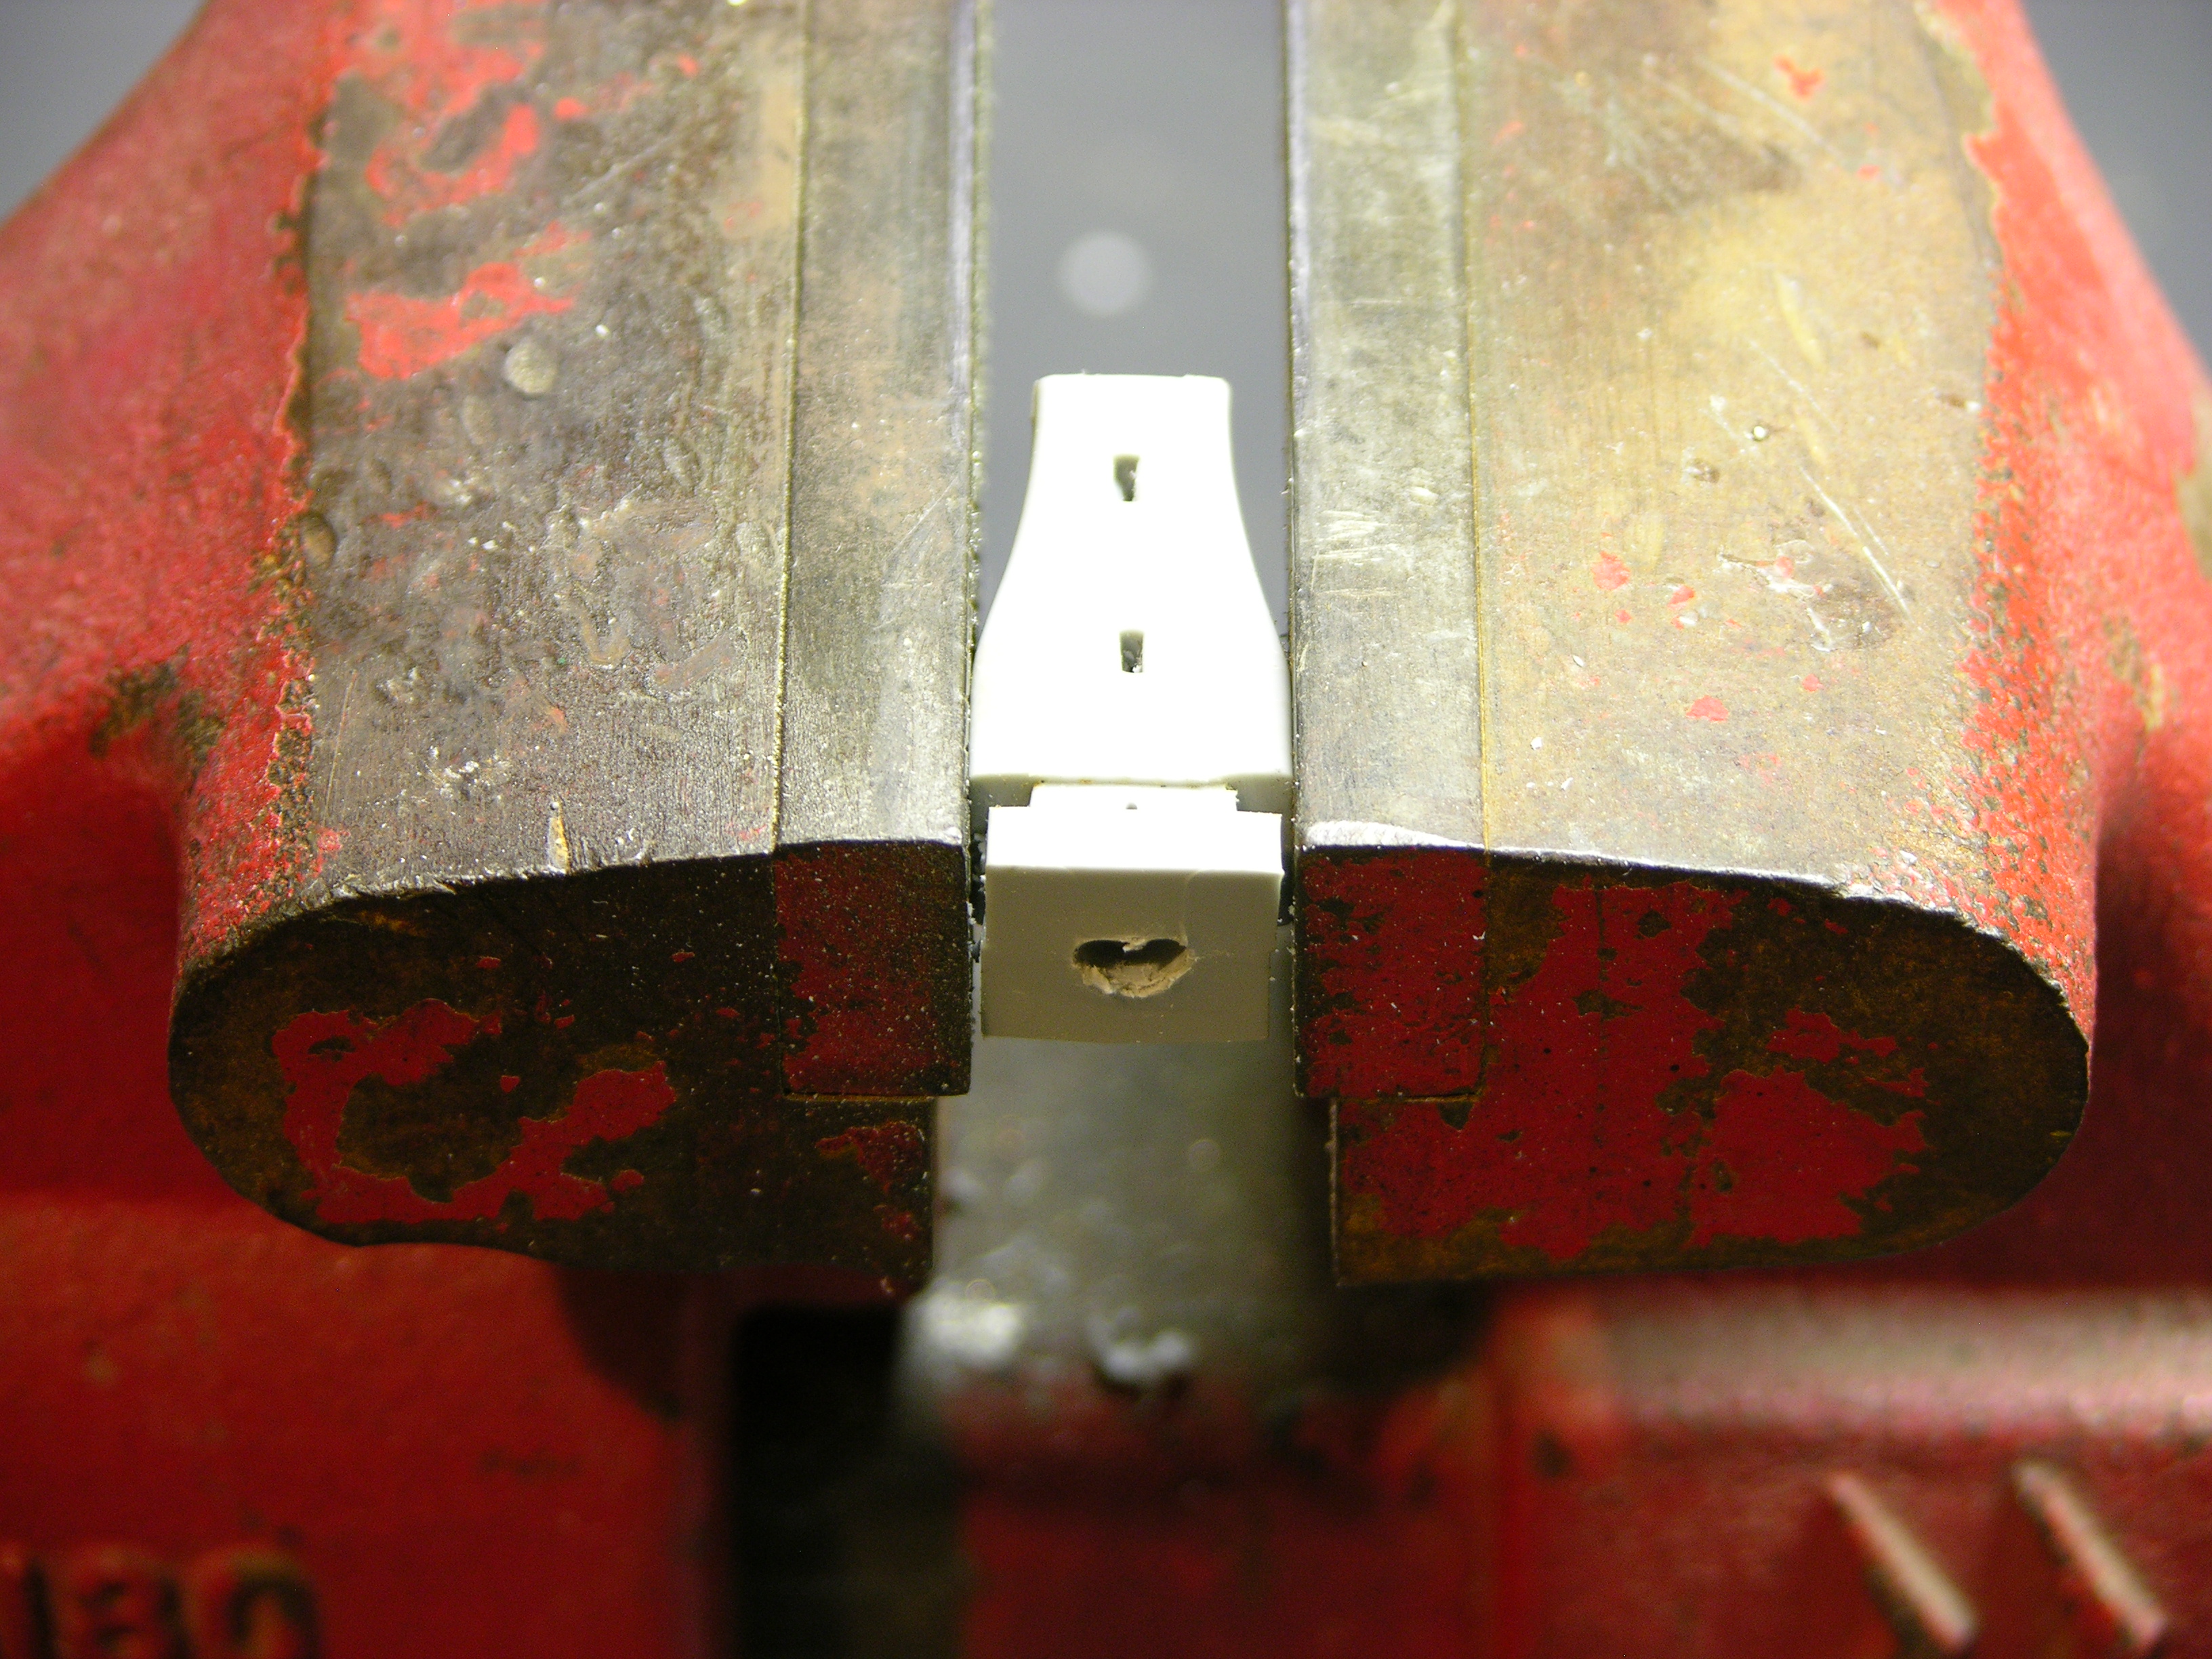
I cut off the power cord flush against the inner and outer ends of the strain relief, then drilled the power cord out of the center of the strain relief with progressively larger bits until the hole was large enough to push the cord through again. Super simple, and it leaves a very finished appearance — you can only tell it was repaired if you look closely.
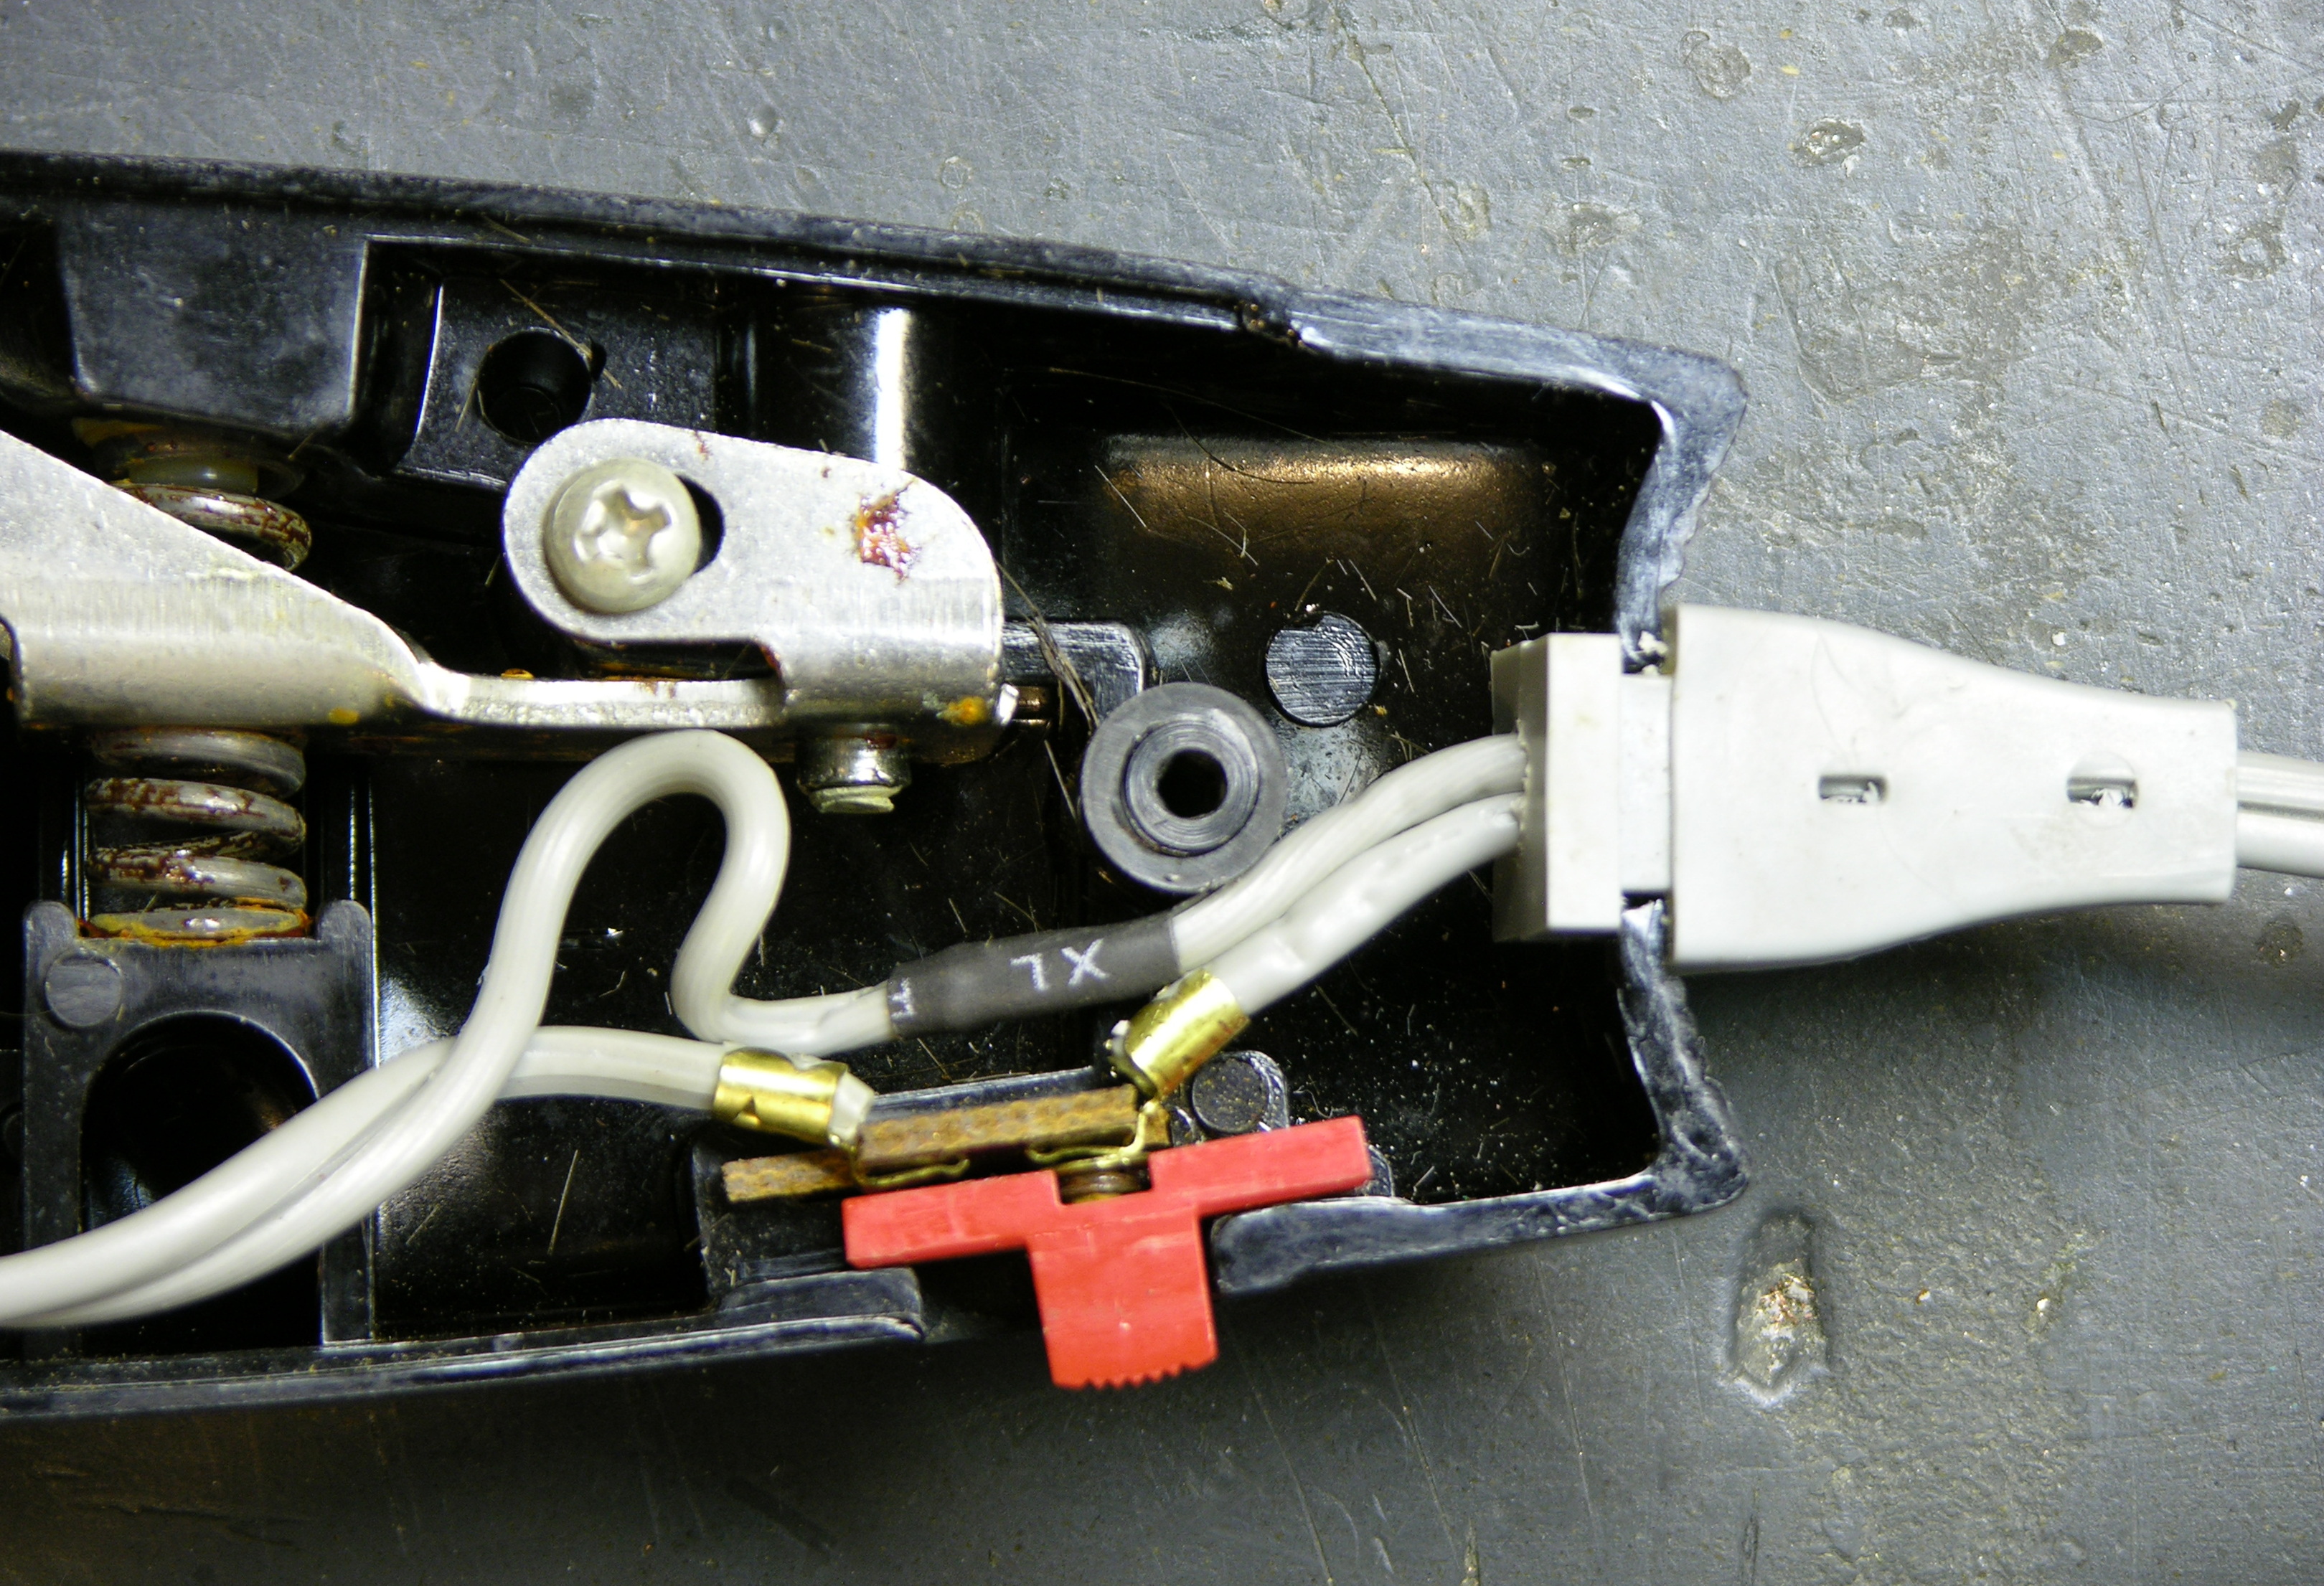
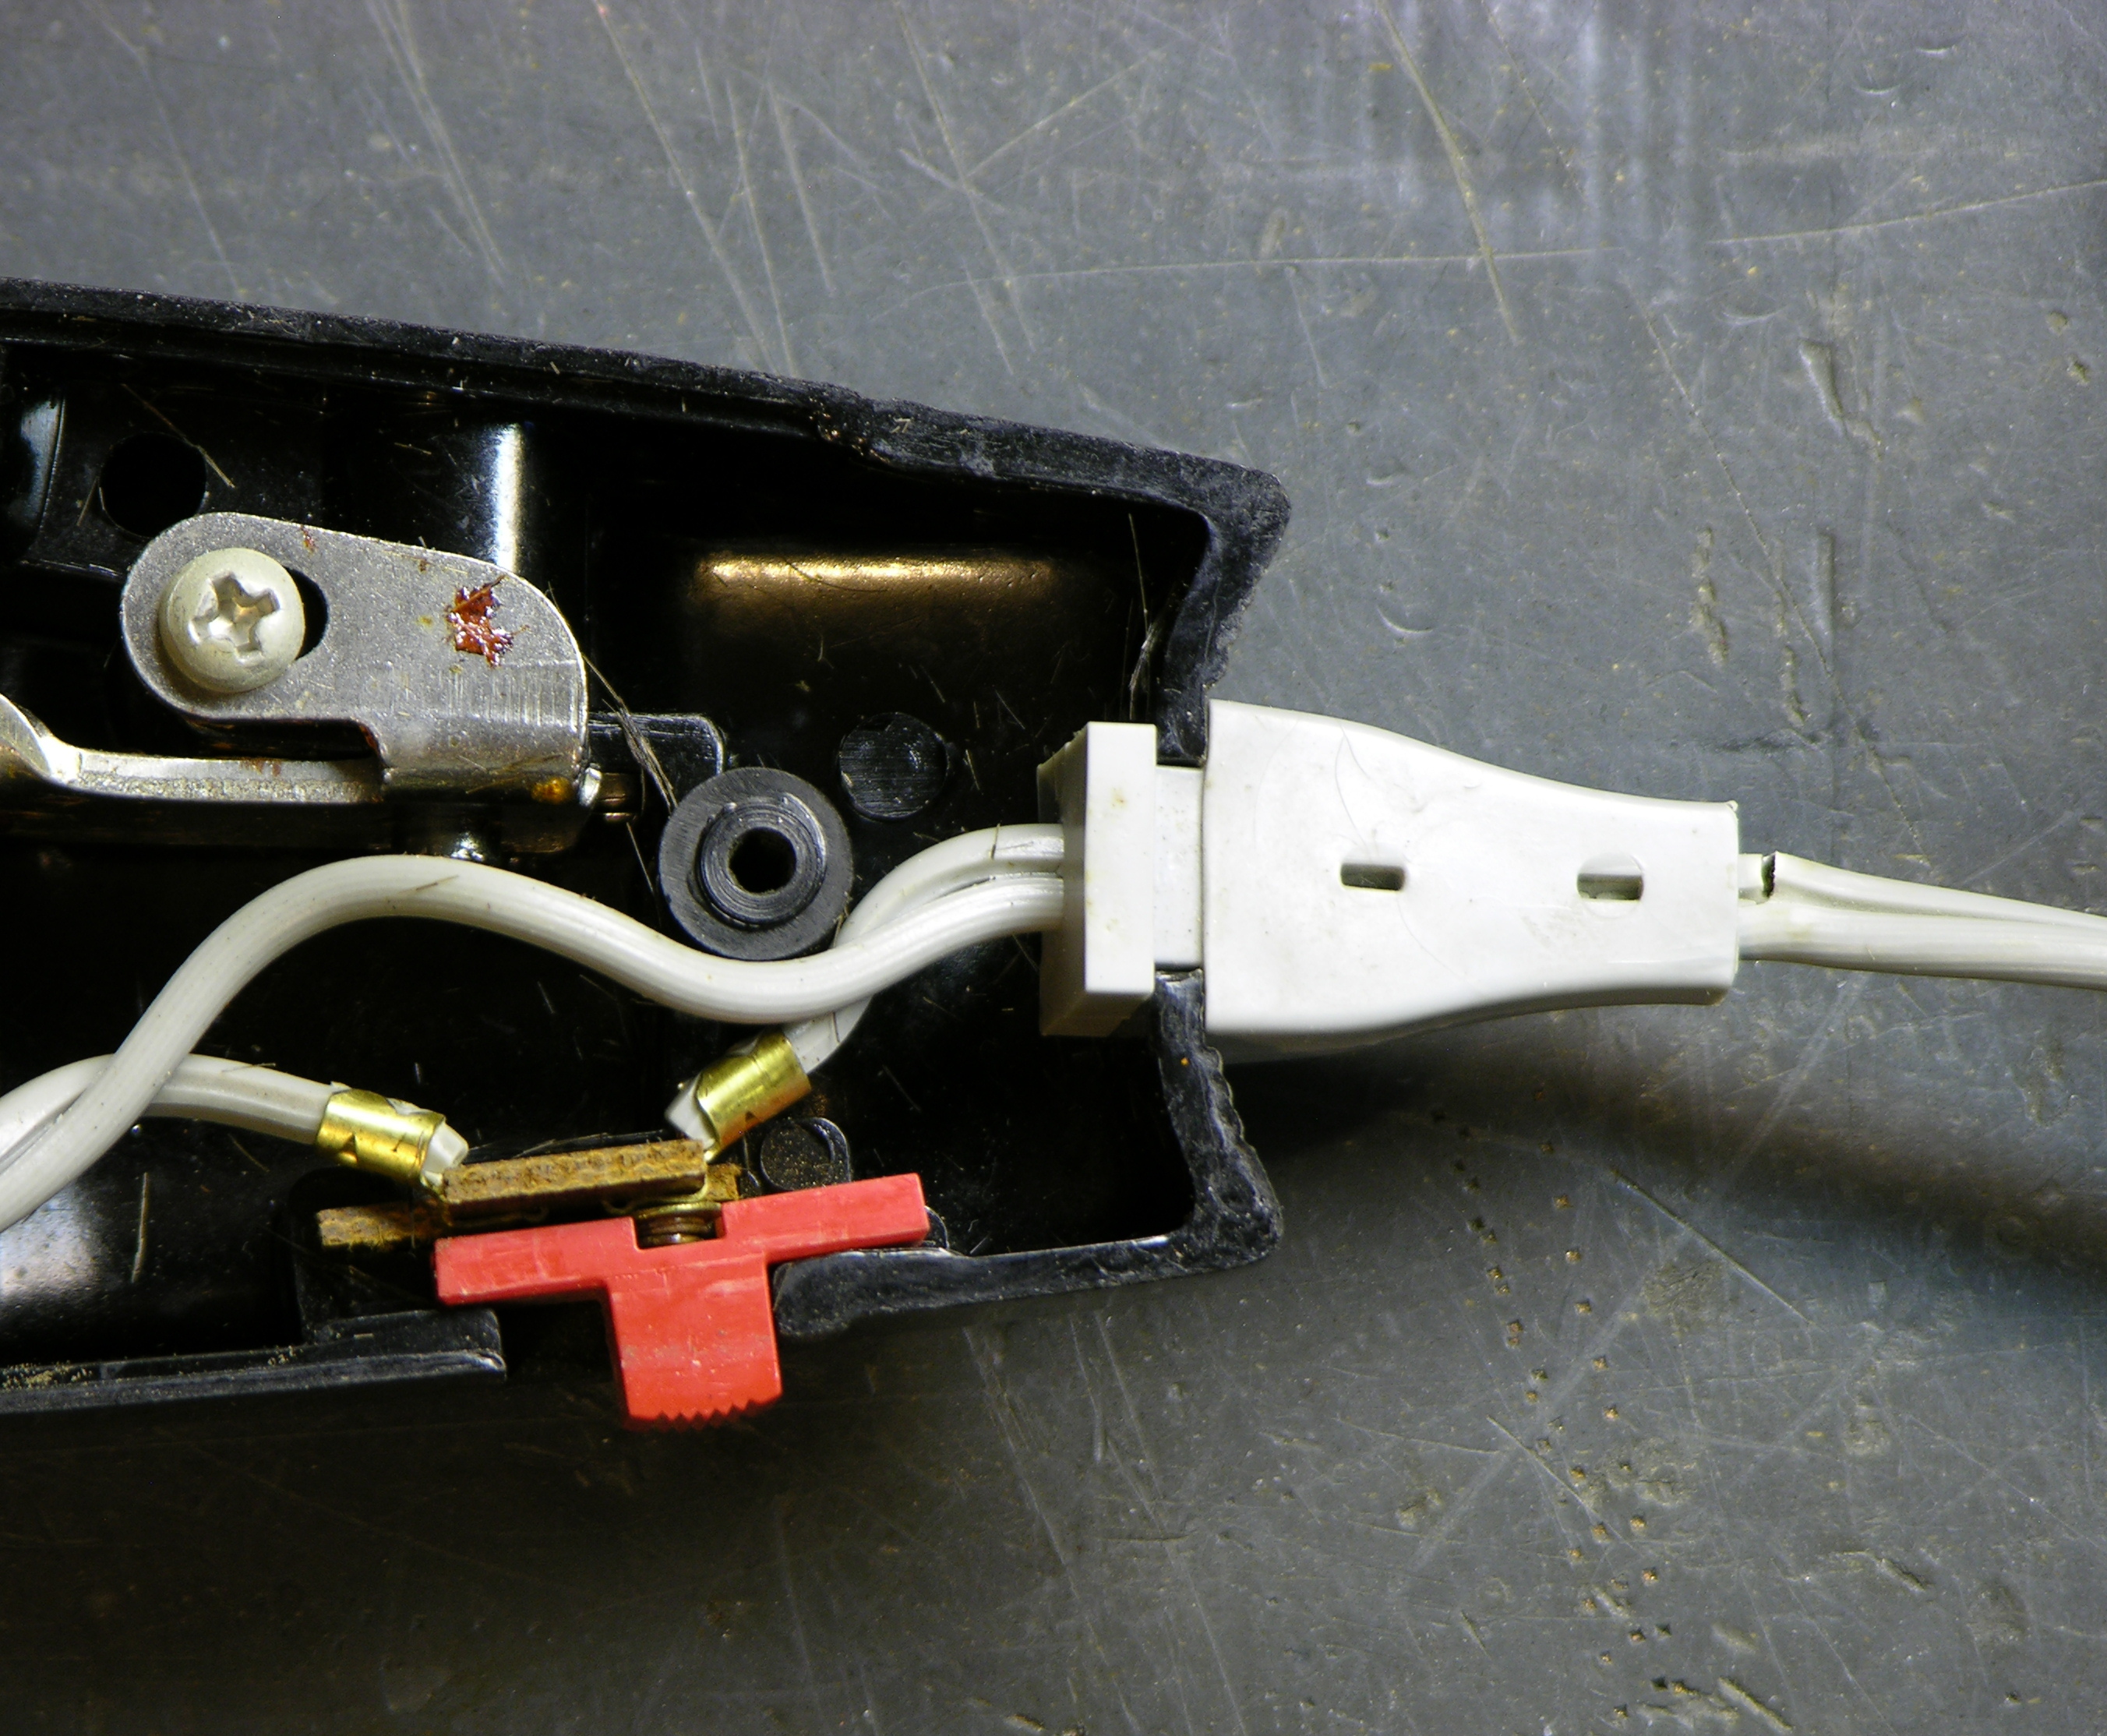
It’s more obvious if you look inside, of course. The extra loop on the long wire really shouldn’t be there. I had both wires cut to the same length and spliced, and then the original short leg popped loose of the switch’s crimp connection and it seemed more practical to cut off the splice and fit the new end straight into the crimp. By then I didn’t feel like reopening and resoldering the long connection, so I just mushed it in and let it be.
Good enough.
I’m playing keyboards this fall in another rock concert to benefit the high school robotics team, and for some of the tunes I need to be able to fade an organ in and out over a period of a measure or two. My keyboards are velocity-sensitive, so if you hit the keys harder they play louder (like a piano); and they have aftertouch, so if you press down extra-hard on the keys you can get special effects. But there’s no good way to change the volume of their organ sounds dynamically, and these synths don’t have inputs for volume pedals.
This is the MIDI volume pedal project I was starting to work on when I took apart a Baldwin organ swell pedal and decided to leave it intact based on what I found inside. I got another analog volume pedal from a pile of unknown origin at the school lab and finished the job.
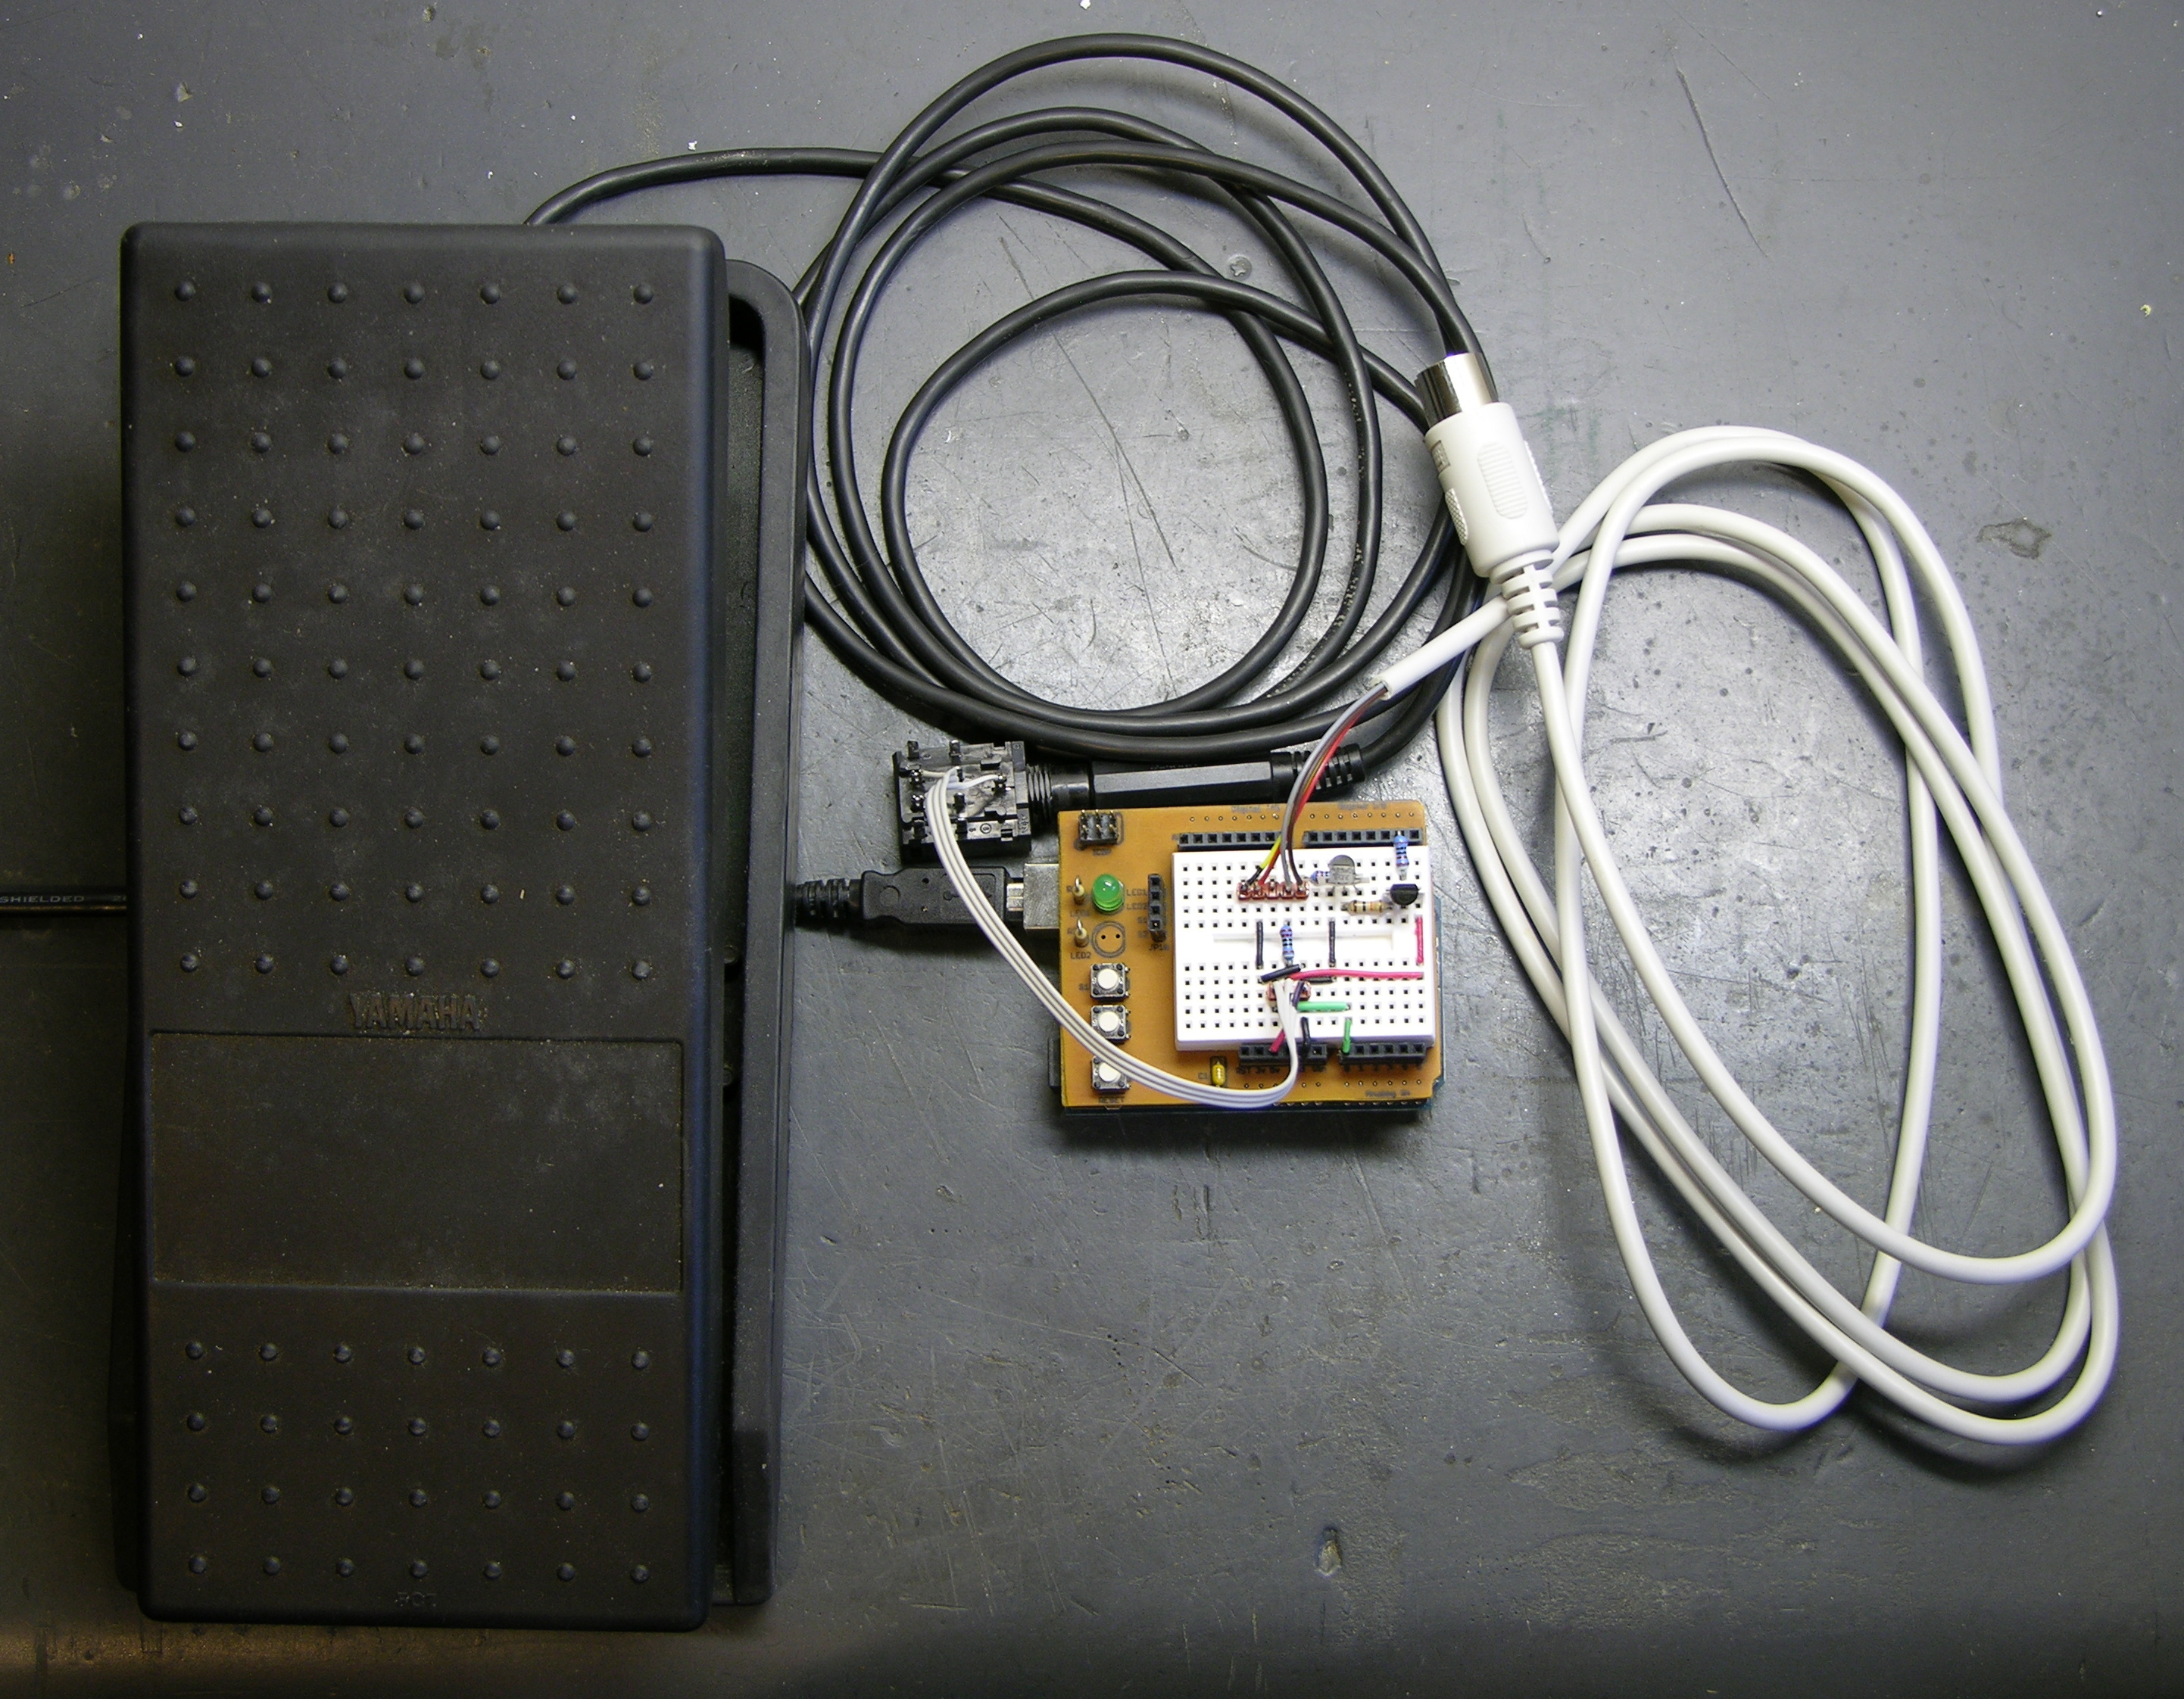
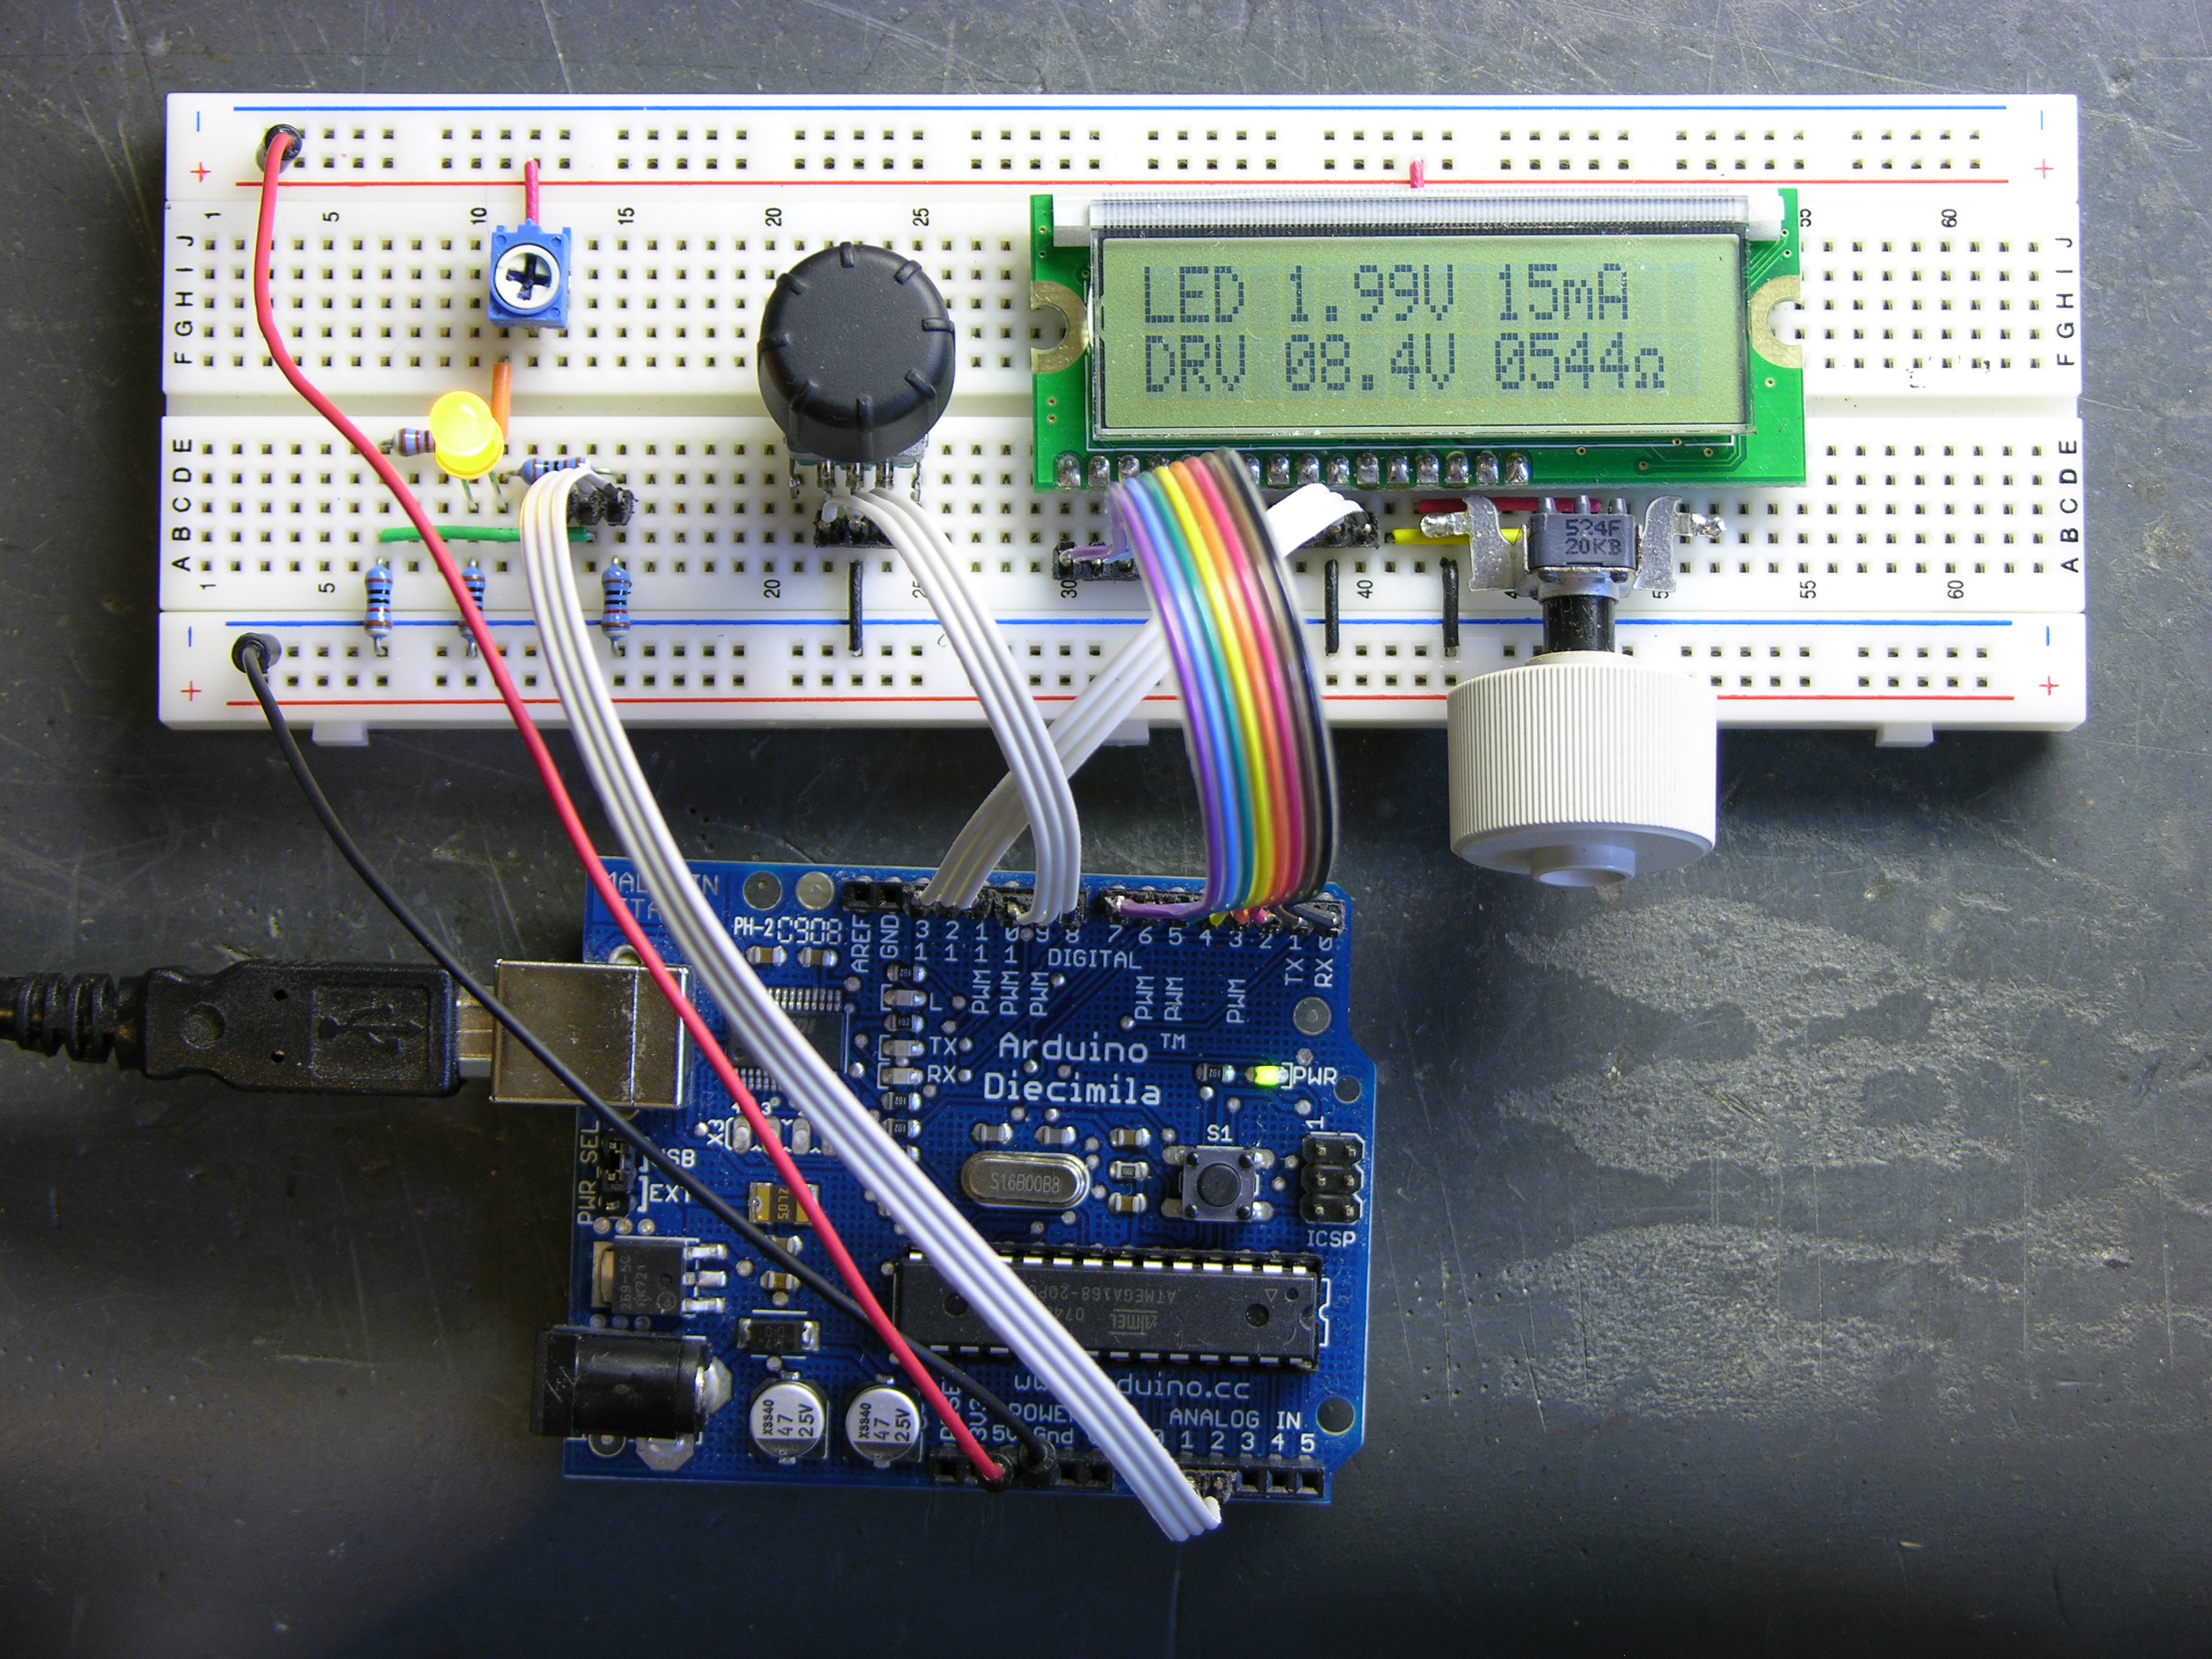
I’m still working on the LED calculator (original idea and most recent work) — I’ve finally got ’round to adding a rotary encoder to set the target system voltage. Now you can turn the potentiometer to set the LED brightness, turn the rotary encoder to set what voltage will be used in the ultimate LED circuit, and read the LED voltage, current, and current-limiting resistor values off the screen.
I also found the Ω in my LCD’s character matrix, so I tidied up the display a little.
And most significantly, I wrote an Arduino library for reading (multiple) quadrature encoders. The simple approach of polling them inside loop() was causing me to lose a lot of steps from the encoders; and the code to read them using hardware external interrupts (lower on the same page) only works on digital pins 2 and 3, so only supports one encoder if both pins are wired to interrupts for the highest resolution, or two if interrupting on a single pin and polling the other.
My Quadrature library uses the TIMER2 overflow interrupt service routine to poll multiple encoders rapidly and track the results, supporting as many encoders as you have room for on the digital pins. It also encapsulates all the dirty work into the library code, so using it is as simple as
#include "Quadrature.h"

Quadrature myencoder1(9, 10);  //  Connected to pins 9 and 10

loop() {
  x = myencoder1.position();
}
It still has some rough edges and it’s by no means perfect (more on that below), but it sure makes it easy to use rotary quadrature encoders. It’s available on a new Downloads page for anyone interested.
July 7, 2008
Welcome, MAKE: Blog readers!
Whoever posted this to the MAKE: Blog jumped the gun a bit — I haven’t interfaced anything to a synthesizer yet. What I found in the Baldwin pedal isn’t suitable for interfacing and is (in my opinion) worthy of preservation, so this post is just a teardown of the Baldwin pedal showing the intriguing mechanism inside.
I have since gathered all the parts I’m going to use to build the MIDI volume/expression pedal and expect to do that within a few days; so if you’re interested, please check back!
I want to build a volume pedal for my synthesizer(s), and I figured it’d be easier to do if I started with . . a volume pedal. So last night I went to storage and pulled the swell pedal out of Jacob’s most recently discarded electric organ, a Baldwin Model 5.
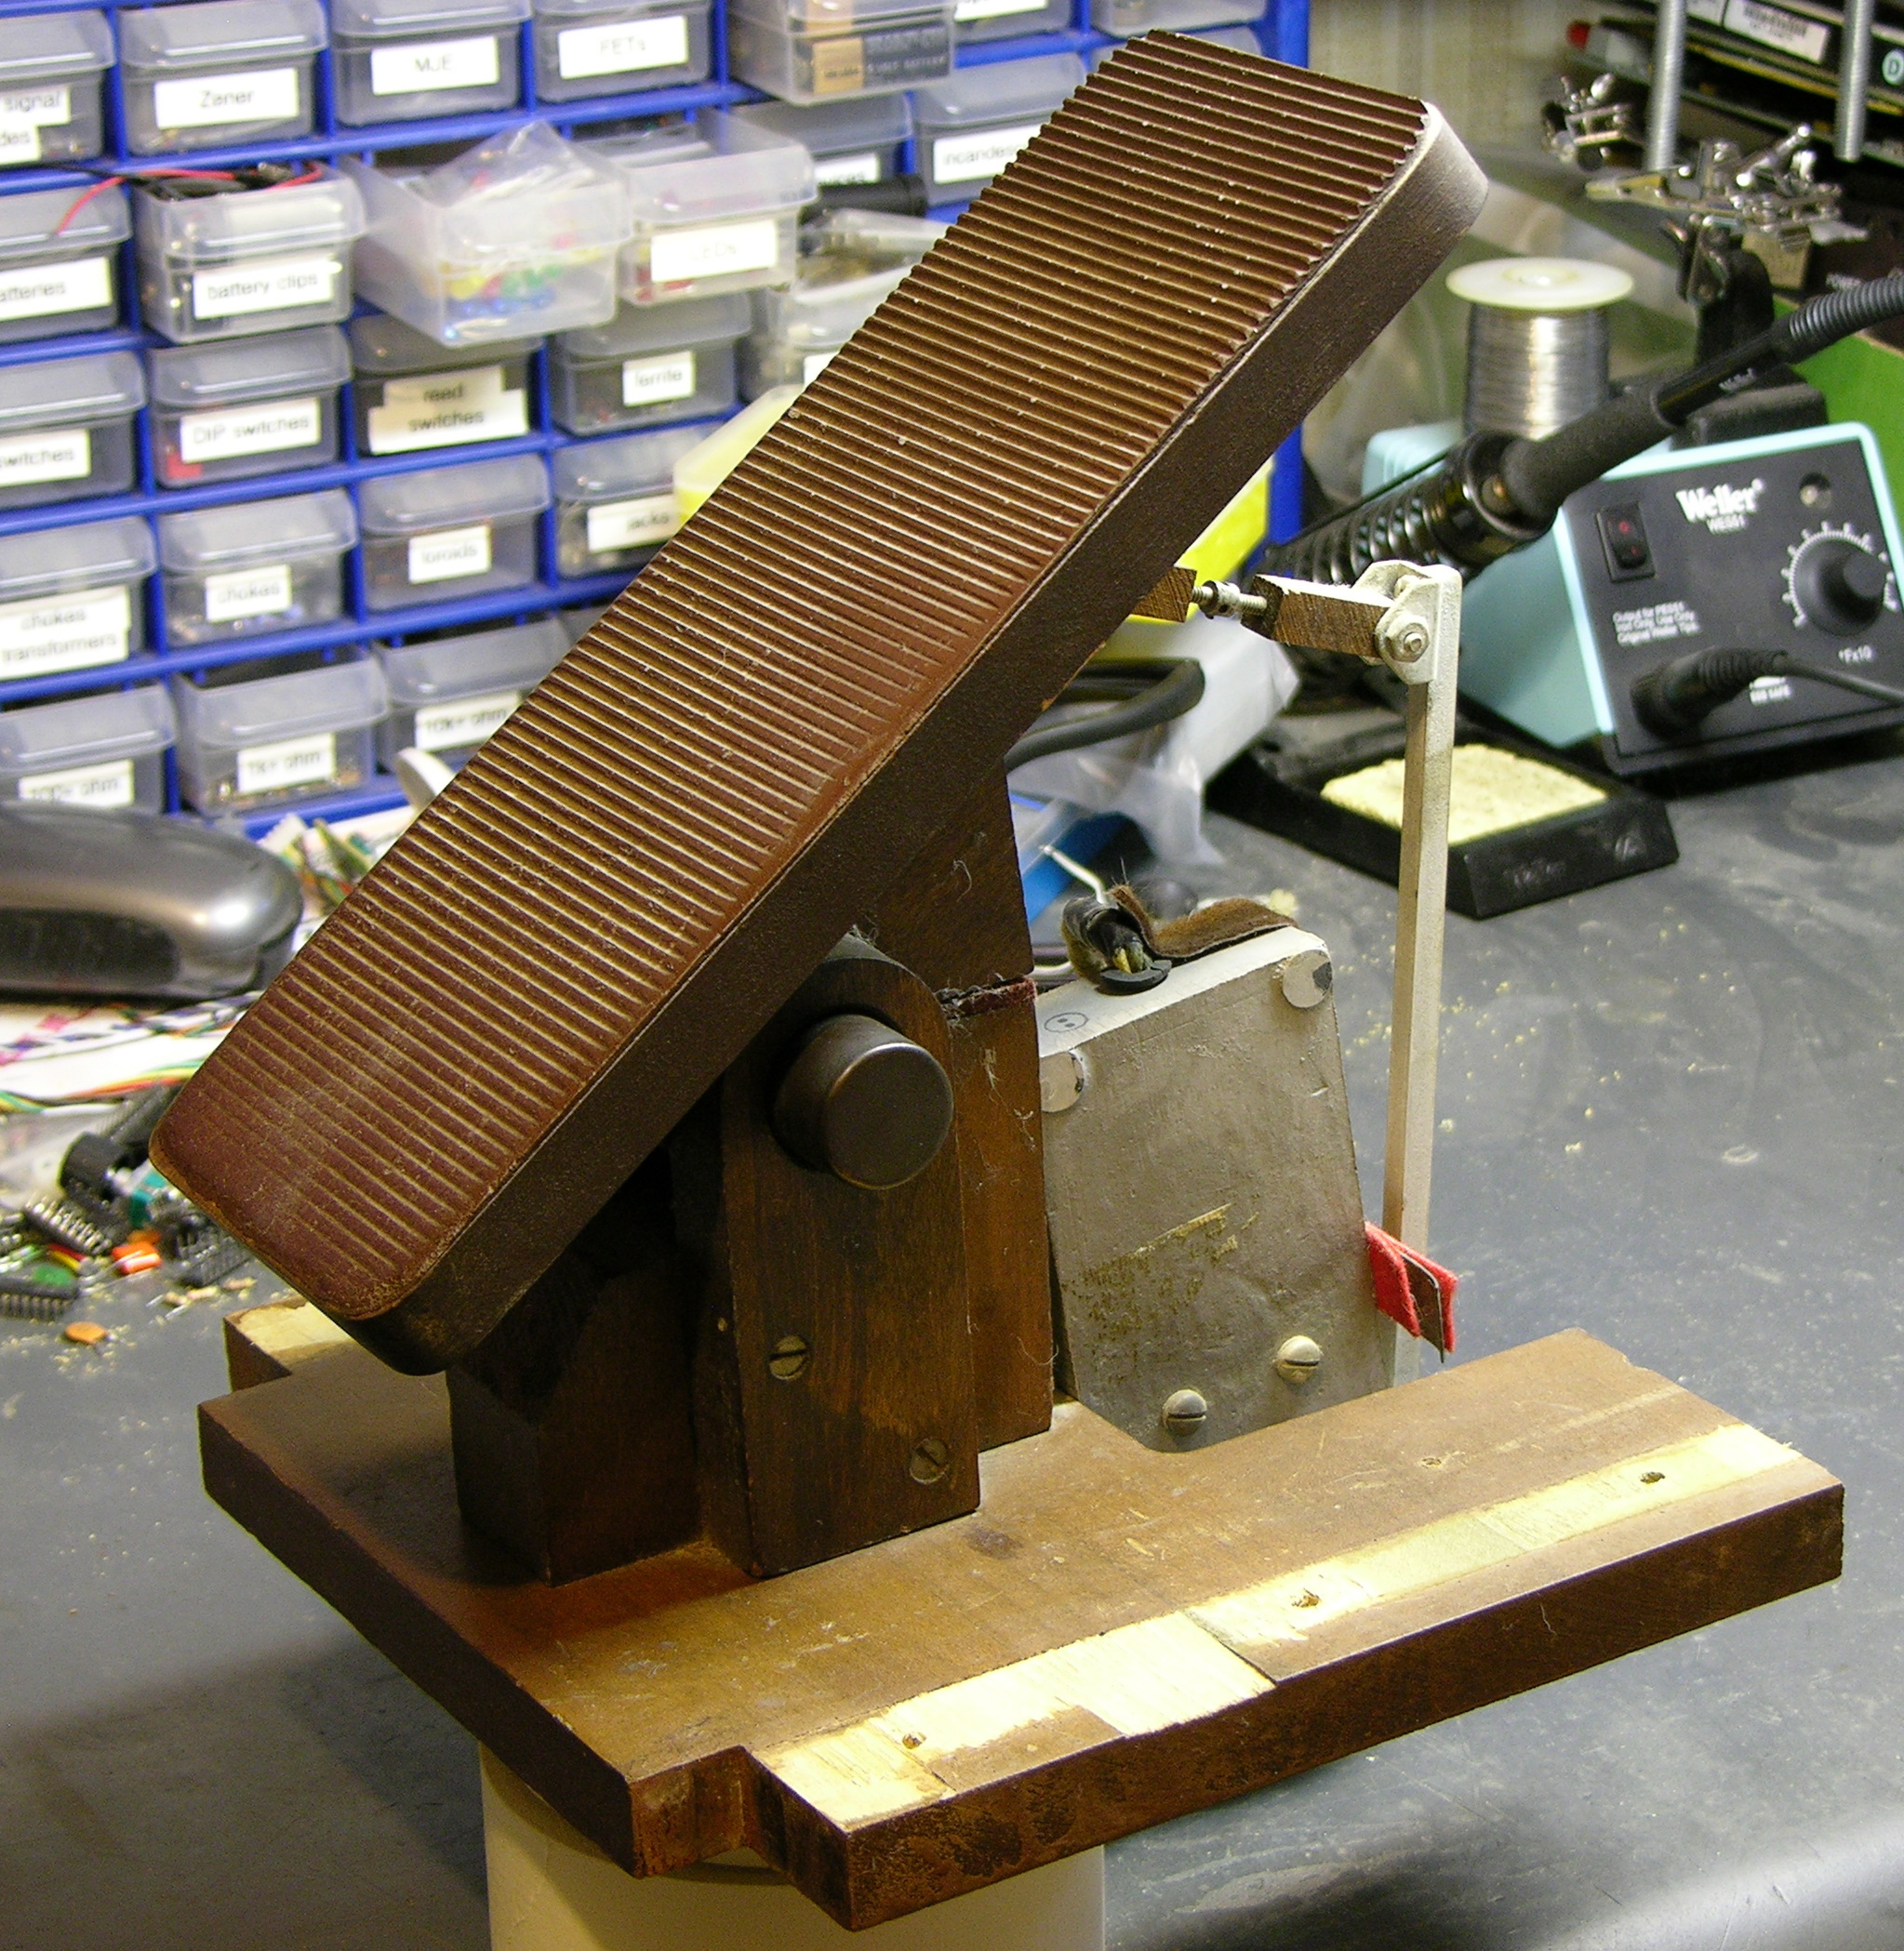
It’s actually quite a bit higher off the floor and more steeply angled than would really suit me; but I had it on hand and figured I might as well start working with it. As it turns out, I’m not going to retrofit this, and I’ll show you why in a little bit.
Rocking the pedal forward pushes the square lever away from the box, and rocking it back pushes the lever toward the box and presses a pin at the base of the lever into the box.
The lever and box assembly looks kind of like a giant microswitch. Or a bird with a long neck.
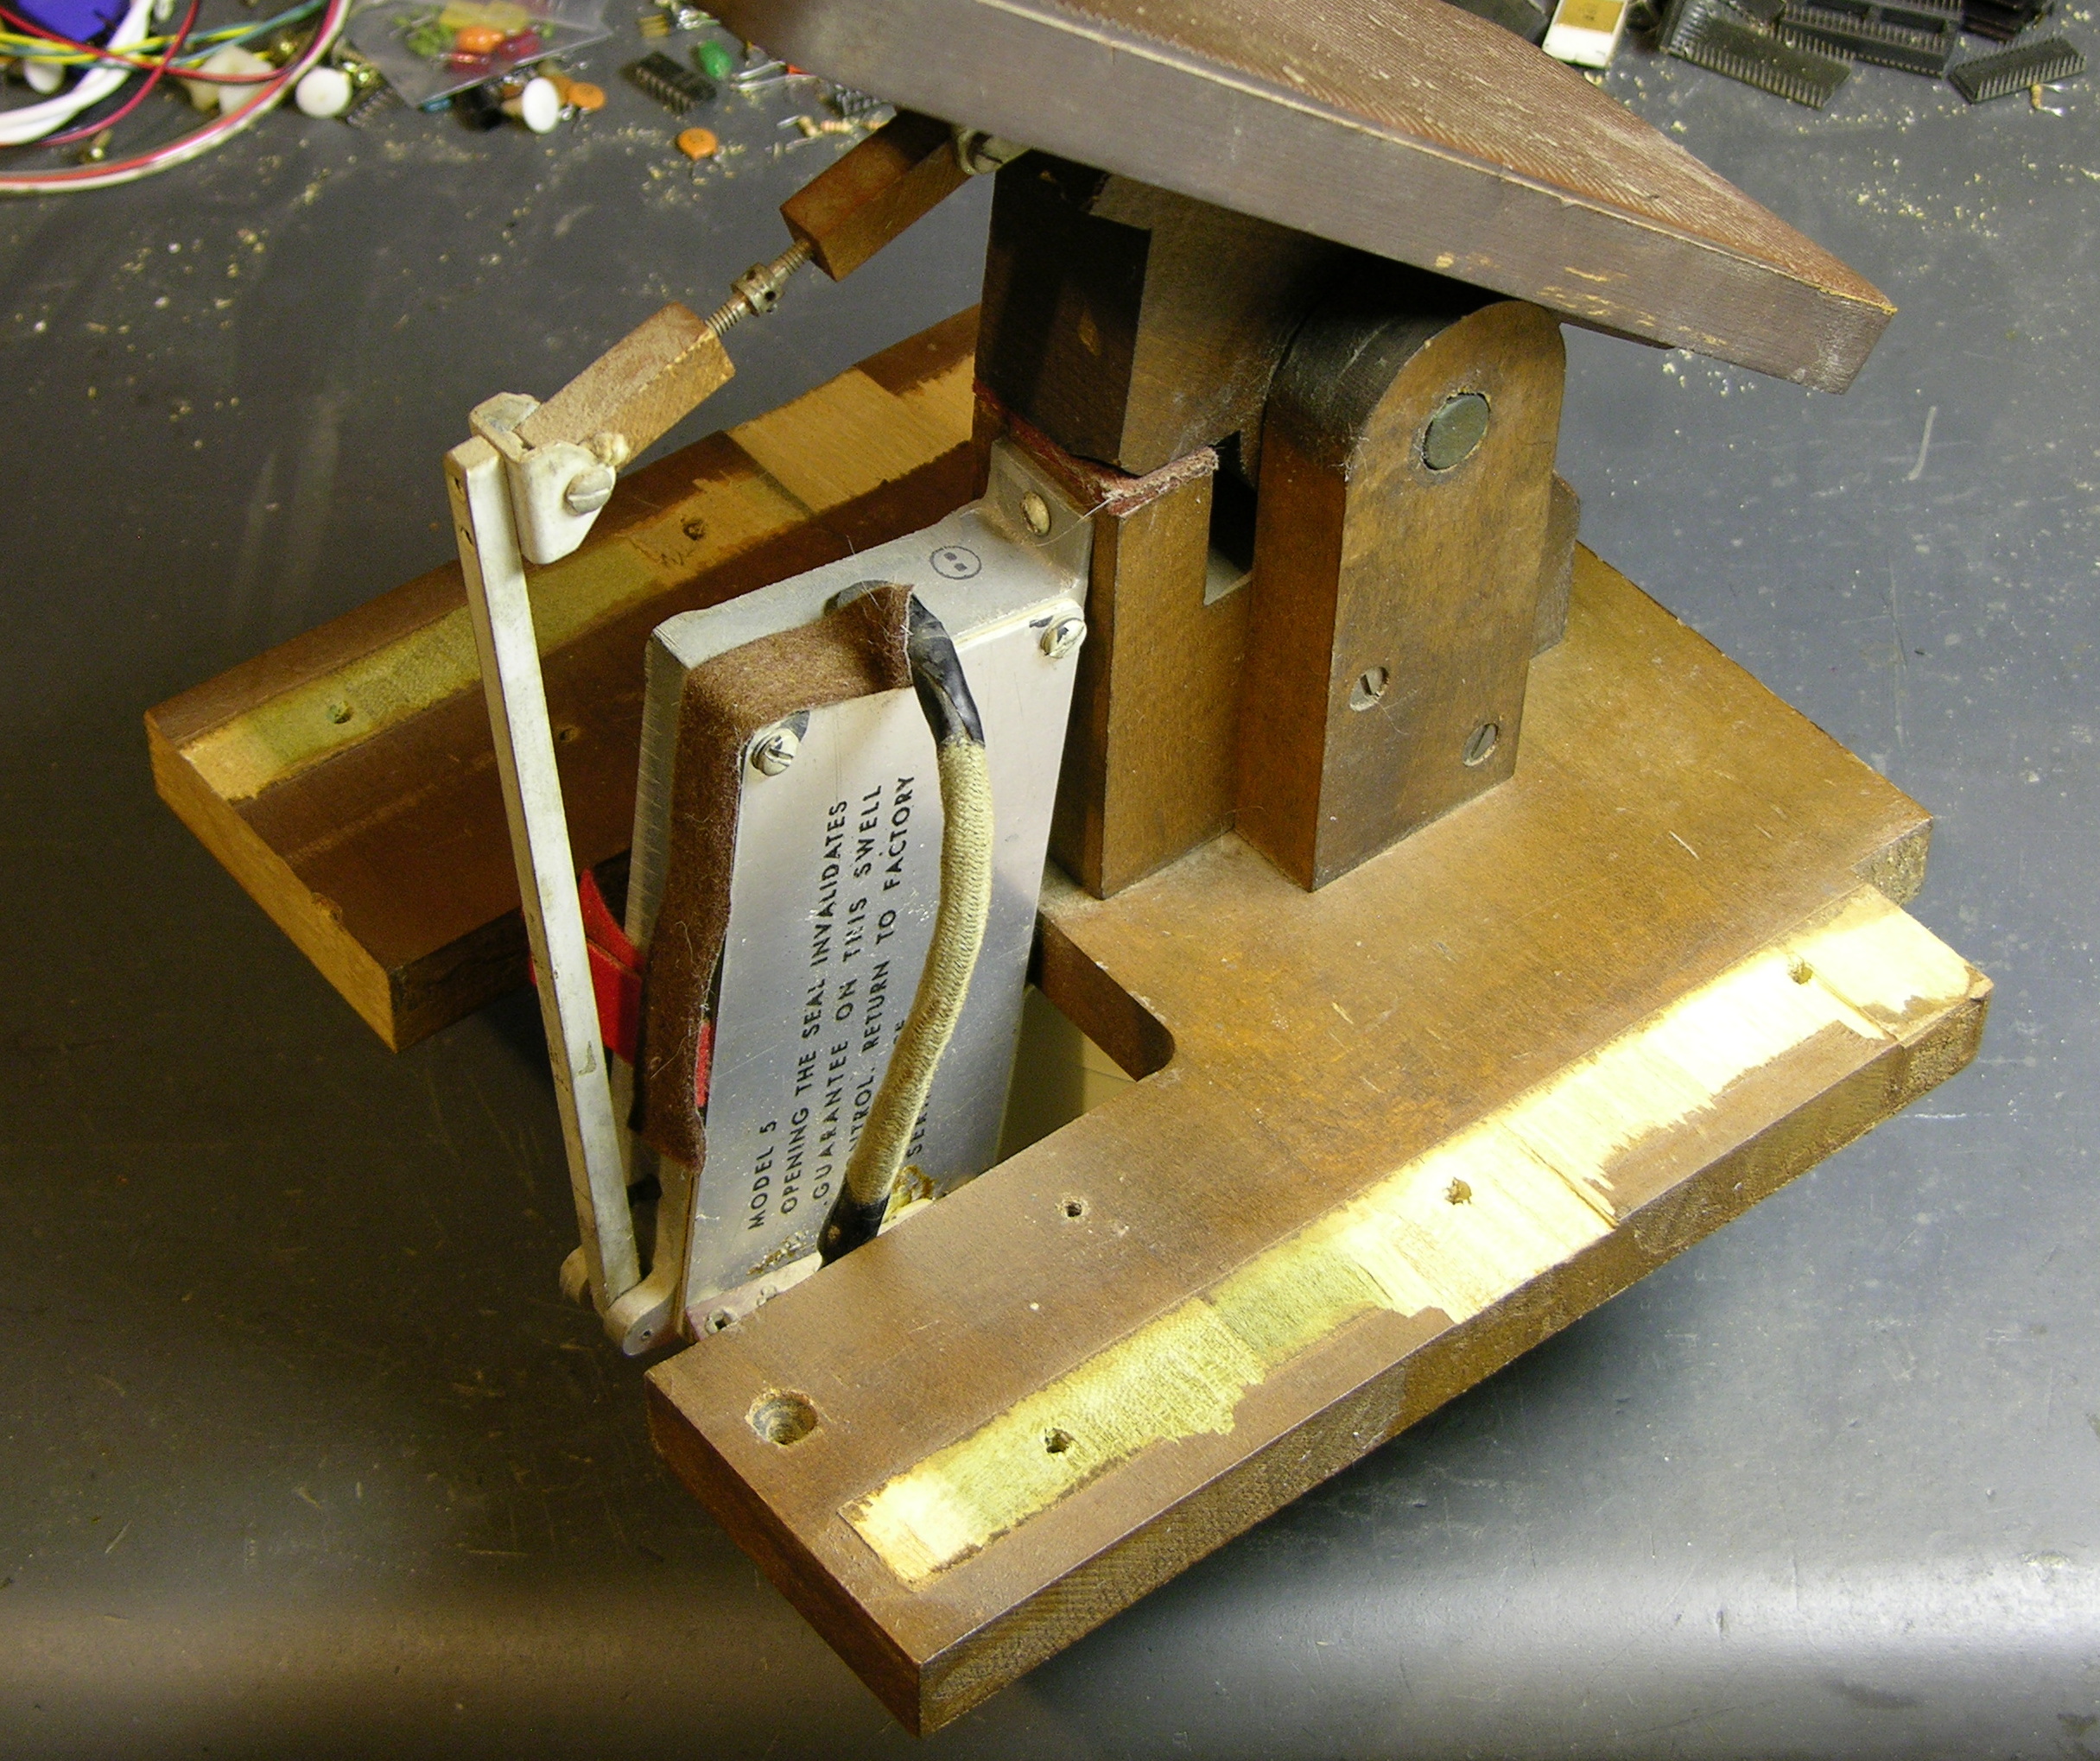
Here’s the part that makes me say, “Wow.” Apparently potentiometers hadn’t been invented yet (I think I’m joking), or weren’t available with a high enough power rating to use in this volume control circuit.
The volume pedal’s lever presses against a ladder of leaf switches (it’s hard to see, but all the contacts at the left end of the leaves are normally open, but only barely) wired to a resistor ladder. Pressing the pedal connects together increasing numbers of leaves and shorts across increasing numbers of resistors. Wow, wow, wow.
I just don’t feel right about dismantling this to stick in a potentiometer (nor are the mechanics of it really built to make that easy).
So now I’m looking for another swell pedal (with a pot) to repurpose, ideally a twin swell pedal like what’s on Jacob’s current organ. I don’t find much on eBay, and I’m not sure where else to look.