Archive for December, 2008

Fixing a Buzzing Clock Radio

Wednesday, December 31st, 2008

I’ve been using this clock radio for at least twenty-three years, and I love being able to read its huge 2″ digits when I wake up during the night and my eyes are blurry and unfocused. It’s having a little trouble here competing with the sunlight streaming in the side window, but it’s nice and bright at night when I need it.

Spartus clock radio

Lately it’s picked up an annoying habit of buzzing at, you guessed it, 60Hz. The intensity and timbre of the buzz vary, sometimes coming and going at the same time I can hear the furnace fan starting up and shutting down, sometimes apparently at random.

Listening carefully has led me to believe that the buzz isn’t coming from the speaker end of the clock, but rather from the power supply end. Speaker buzz would suggest bad filter capacitors (and one could certainly forgive twenty-five-year-old electrolytics for needing to be replaced); but power supply buzz makes me think of transformer windings coming loose and needing to be re-epoxied, metal brackets near the transformer working loose and needing to be tightened, and that sort of thing.

Today I had time to open it up and — I think — fix the problem.

Spartus clock radio, interior

Most of that is radio circuitry, and I don’t even use the radio. The clock part appears to be two ICs underneath the raised pushbutton circuit board. The transformer is in the “basement level” between the two posts to the left of the display’s ribbon cable.

Transformer with loose mounting screw

Right away I could see something I suspected was at least part of the problem. The transformer’s forward mounting tab was bent at other than the proper 90° angle from the body, only one edge of the mounting screw’s head was in contact with the tab, and there was a lot of slack between the tab and the mounting boss.

After removing the main PCB to make room to get a screwdriver in there and straightening the mounting tab with pliers, I got the screw tightened down properly. I could tell that the screw hadn’t worked loose over time but had been assembled this way at the factory: I could feel that I was tapping new threads into the mounting boss as I turned. Expecting the plastic to be fairly brittle after twenty-plus years, I worked gingerly, and successfully tightened the screw without breaking the plastic.

Transformer with loose crimped tab

While turning the screw, the entire end of the transformer’s cover was rocking from side to side, and a different angle revealed the reason and a second likely suspect for the buzzing sound (of which I carefully took this out-of-focus picture). The mounting cover had an edge bent out away from the laminated core and a loose tab.

After a little work tightening things with pliers and pressure, the cover seemed to be pretty well fastened. I checked the power supply electrolytics with my Capacitor Wizard since I had the clock open anyway, and they all tested good. I reassembled the clock, retesting for buzz several times along the way, and so far the buzz appears to have been banished.

The transformer problem was clearly a manufacturing defect; and it’s interesting to think that it took over twenty years to manifest itself. Here’s to the next twenty!

Cleaning (and Cleaning . . . and Cleaning) Akai Headrush E2

Wednesday, December 31st, 2008

I just bought an Akai Headrush E2 delay and looping effects pedal. It’s the box that the amazing KT Tunstall uses in her solo performances of “Black Horse and the Cherry Tree” to lay down her own rhythm and backing vocals before playing guitar and singing, all by herself. It’s a really slick setup.

Filthy Akai Headrush E2 Delay/Loop controller

I got a great deal on eBay — they retail for ~$200 and typically run about $150 on eBay, but I picked mine up for $76 missing the 9V power supply. It turned out to be an even better deal than I imagined, because the seller forgot to mention that the pedal came with a generous helping of organic matter, lovingly applied all over the pedal. This picture is after a preliminary 3x cleaning with Goo-Gone.

Not only was the case unsightly, but the foot switch action was dodgy as well, and that’s not easily cleaned from the outside. To really get the case clean, I wanted to get the panel loose of the controls so I could give it a good soak; to fix the buttons, I wanted to spray them with contact cleaner. I figured I may as well show off the inside while I had it open anyway.

Akai Headrush E2 Delay/Loop controller upper PC board

There’s the upper PC board. Note the filth that crept down onto the mode select pushbutton, and even the potentiometers:

Filthy Akai Headrush E2 Delay/Loop controller pushbutton

I had already got the outside of the lower case fairly clean, but wanted to clean the inside as well, so I went ahead and took both boards out. Here’s the lower PCB, where all the magic happens:

Akai Headrush E2 Delay/Loop controller lower PC board

I actually had a plan for dealing with the filth. Goo-Gone is great at softening and removing sticky adhesives like the remains of the world’s largest velcro strip the former owner had attached to the bottom of the pedal; but there’s no cleaner like Fantastik for removing the evils that men have done from arcade game control panels and (apparently) guitar/keyboard effects boxes.

I gave the top case about a ten-minute soak in Fantastik — I had already soaked and scrubbed in Goo-Gone three times, mind — and after the soak it literally rinsed completely clean under the faucet, with the tiny exception of a little bit of gunk still in one of the potentiometer mounting recesses. The foot switches left behind a pool of brown liquid (and I had only sprayed the mounting threads), the potentiometer knobs had white inset lines again, and the washers that I’d had to pry loose of the case with my knife were clean and shiny.

I also used an “acid brush” (dry, no cleaner) to knock the accumulated dust and grit loose of the PC boards around the base of every component that penetrates the top cover and get the boards nice and clean again.

The pushbutton foot switches aren’t quite sealed, and I was pretty sure I could see in to the inside along the solder lugs. I sprayed with wiper cleaner/lubricant, worked the switches a bunch of times, and repeated the spray/work process twice more. Shiny!

Akai Headrush E2 Delay/Loop controller pushbutton foot switches, cleaned

Same pedal reassembled about an hour later, with towel lint added for your viewing pleasure.

Akai Headrush E2 Delay/Loop controller, cleaned

And remember, folks, you can’t go around calling yourself anal-retentive if you don’t bother to align your fasteners.

Akai Headrush E2 Delay/Loop controller rear panel

The pedal now works perfectly — no more double-taps from switch bounce and missed taps from stickiness, etc.

It makes such a difference that before cleaning, I couldn’t understand the operating instructions (because the pedal didn’t seem to be doing what they seemed to be saying), and afterward they’re much more clear (although incomplete in failing to mention that it does not record while you’re tapping the tempo in delay mode, pity; and confusing, incomplete, and inaccurate in their description of looping mode operation; but who, bitter, me?).

Seriously, after an order of magnitude shorter time poking around than I had already done before cleaning, I feel pretty comfortable that I understand how to get it to do the things I want to do. Using the delay mode, I can now play a pretty passable rendition of the “Fly Like an Eagle” synthesizer intro. Wonder what to tackle next . . .

Trying to Repair Roomba Scheduler

Monday, December 29th, 2008

Roomba Scheduler

About two and a half years ago, I did something foolish in trusting the wiring instructions from a Roomba battery rebuild supplier and blew up my brand new Roomba Scheduler. Hasn’t worked since, because I wanted to see if I could find the problem and fix it myself before sending it back for factory service. Turns out I can’t (or at least haven’t), but the inside is interesting nevertheless.

Opening

Getting into the Scheduler is easier than getting into the first generation, mainly because it (almost) all comes apart with screws, instead of the (few) latching tabs in the original Roomba. These instructions on fixing the Roomba Discovery “Circle Dance” do a good job of showing the screw locations, although the site then goes on to describe processes specific to cleaning the wheels’ optical sensors that weren’t relevant to my problem.

The most important part that wasn’t obvious to me from the instructions is that the front bumper holds down the front edge of the top, so you must remove the bumper, even if you don’t need to work on the bumper area.

Guts and Wiring

Roomba Scheduler interior, dustbin side

Once the cover is off, the inside looks pretty tidy. As on the original Roomba, there’s one main board sandwiched between the battery compartment and the brush deck, and all the sensors and motors cable up to it.

Roomba Scheduler interior, battery side

I had to pull all the cables before I could get the board out, and most of the cables had only one place they’d logically plug back in, but I still took pictures to make sure I’d know how to put it back together again, shown here for the convenience of all the king’s horses and all the king’s men who might be trying this themselves at home.

Roomba Scheduler wiring cluster

Having removed all the cables, there’s still an optointerruptor at each end with a bumper lever latched into it. It took some prying to get those loose — port (left when in motion, right when facing it to work on it) side first, then pull the board itself loose of the starboard side.

Main Board

Roomba Scheduler motherboard, component side

And here’s my main board, with nothing that I can see wrong. No scorched components,

Roomba Scheduler motherboard, solder side

no scorched traces. Foo. (The battery connector is J7 on the solder side, in case you want to trace out from there and try to debug this for me.)

With the component spacing so tight on the board, and no obviously damaged components to investigate first, I didn’t feel like bothering to plug all the connections back in and trace battery voltage while the board was out of its little home. So I gave up (for now, anyway), contacted iRobot to ask about repair, and reassembled the Scheduler.

Reassembly

The most noteworthy thing about reassembly is getting the bumper’s port-end (I think) mounting bosses back into their mating holes. Do those first, then the starboard (I think) end of the bumper, then ease the rest of the port end the rest of the way on. Whichever end it is, do the posts first.

Dirt Sensors

The last thing to mention while we’re in here anyway is the dirt detectors. The second or third generation of Roomba introduced dirt detectors that are supposed to be able to tell when Roomba is actually picking up dirt, so it can spend more time vacuuming that area. I think my dirt typically has a fairly uniform distribution on my floor; but maybe some folks like to send Roomba out to clean up knocked-over flowerpots and whatnot.

Anyway, I’ve always wondered how it could tell when there was dirt — some fancy-schmancy optical sensor pointing at the floor??? — and here’s the answer.

Roomba Scheduler dirt detector piezo sensors

Piezo sensors. Dead simple. Dirt hits them, ting-ting pting tang, and they translate the sound / force into an electrical signal that the Roomba interprets as the influx of dirt. Brilliant!

Next

iRobot promises to respond to a customer inquiry within one business day of receipt, so . . . they’re late. But we’ll see what they say about repair service and cost. I understand they also sometimes have returns and refurbs available for purchase; and at the right price, that could get me a new Scheduler and leave me a spare for parts.

Hm, looks like entire used Schedulers are running ~$100 on eBay, and I just found someone selling the circuit boards for $20 plus shipping. I can’t imagine iRobot touching that price for a factory repair, so it looks like I may be able to do this myself after all. Maybe get a spare Scheduler just for the fun of it, too.

A6276 LED Controllers for “Organic Energy Cloud”

Monday, December 29th, 2008

My earlier edge-lit plexiglass demo was a study for an art/technology collaboration with Lisa Rundstrom that became known as “Organic Energy Cloud,” installed at Diver Studio for the November 28 Final Friday.

Lisa and I ended up agreeing on 200 LEDs (and ultimately installing 160). I had decided early on that I wanted to use two A6276 16-LED drivers to a board, for distributed LED control, all run by an Arduino. Once I got all my parts, over the November 22 weekend, I designed and began assembling the driver boards.

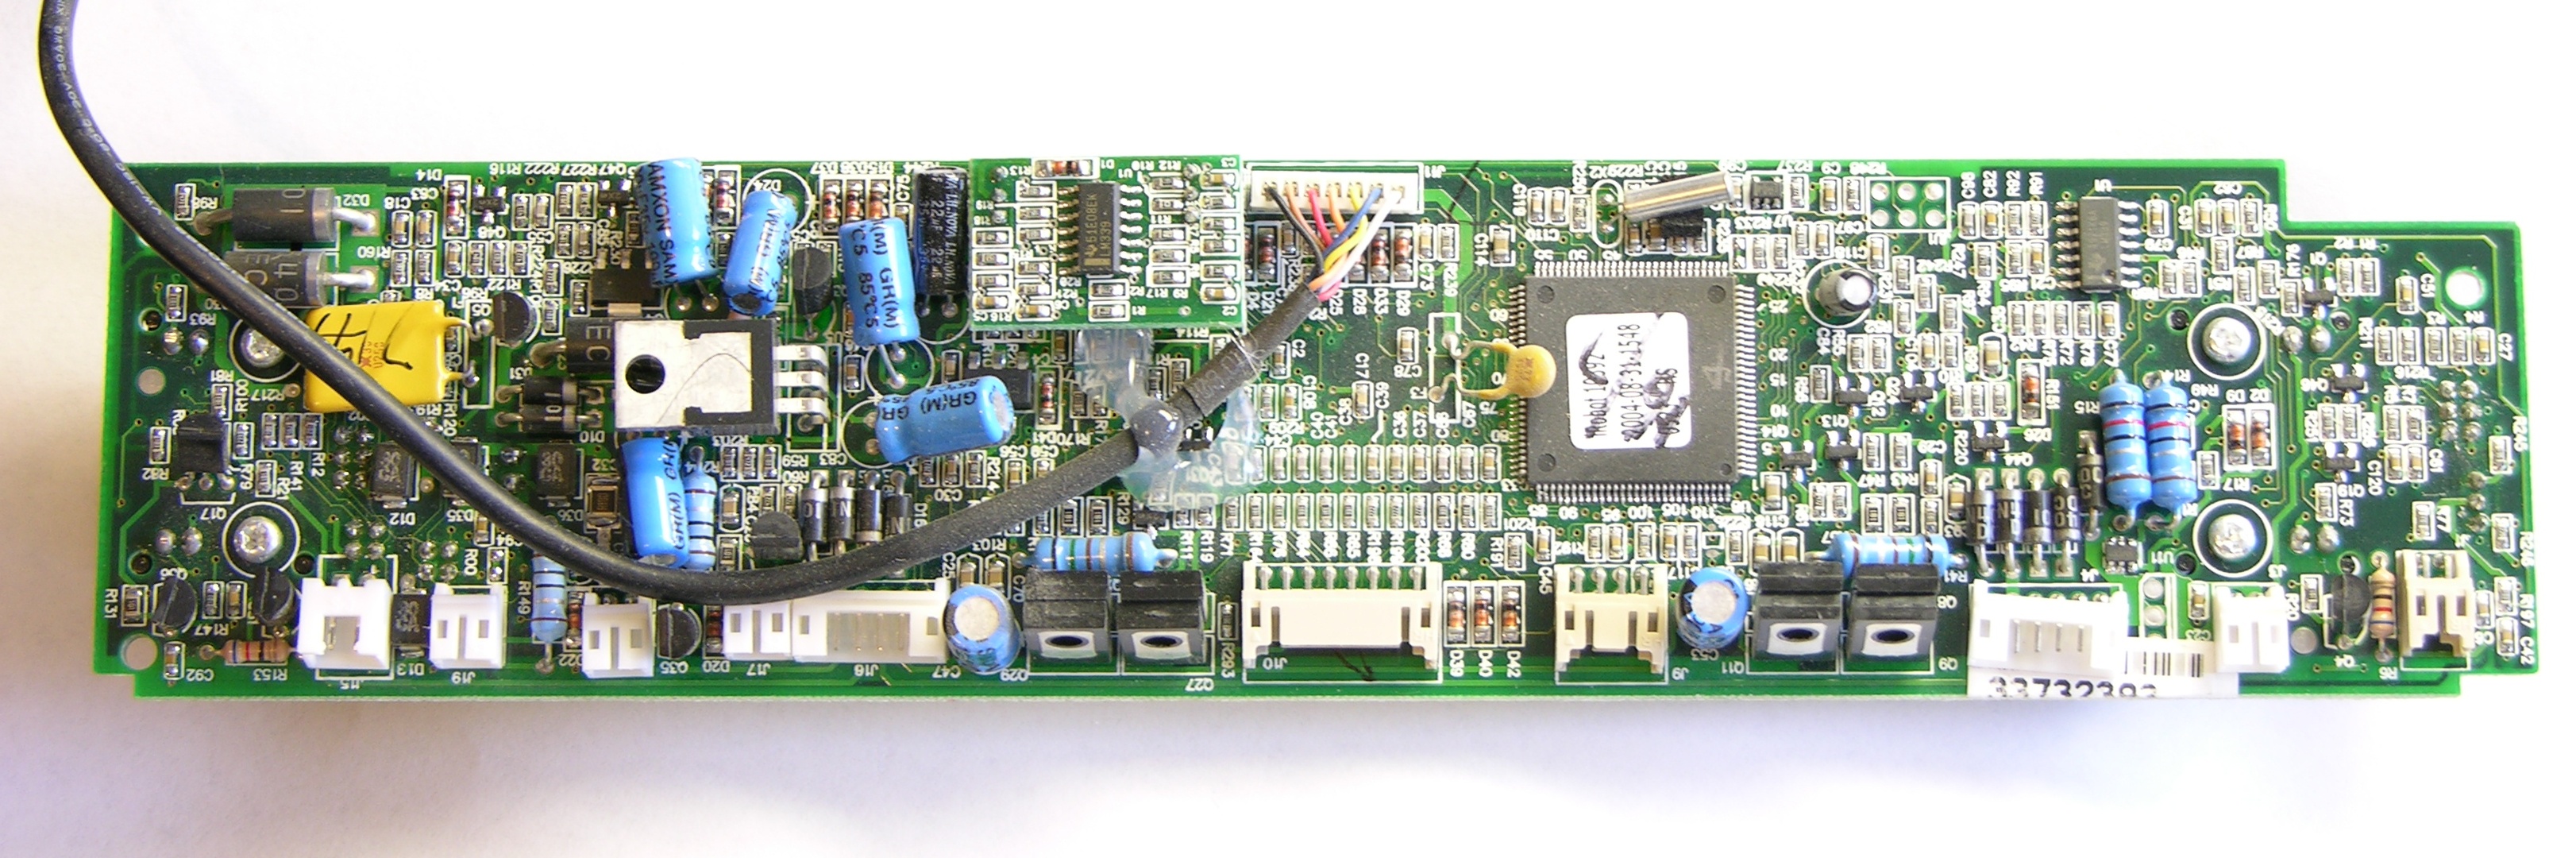
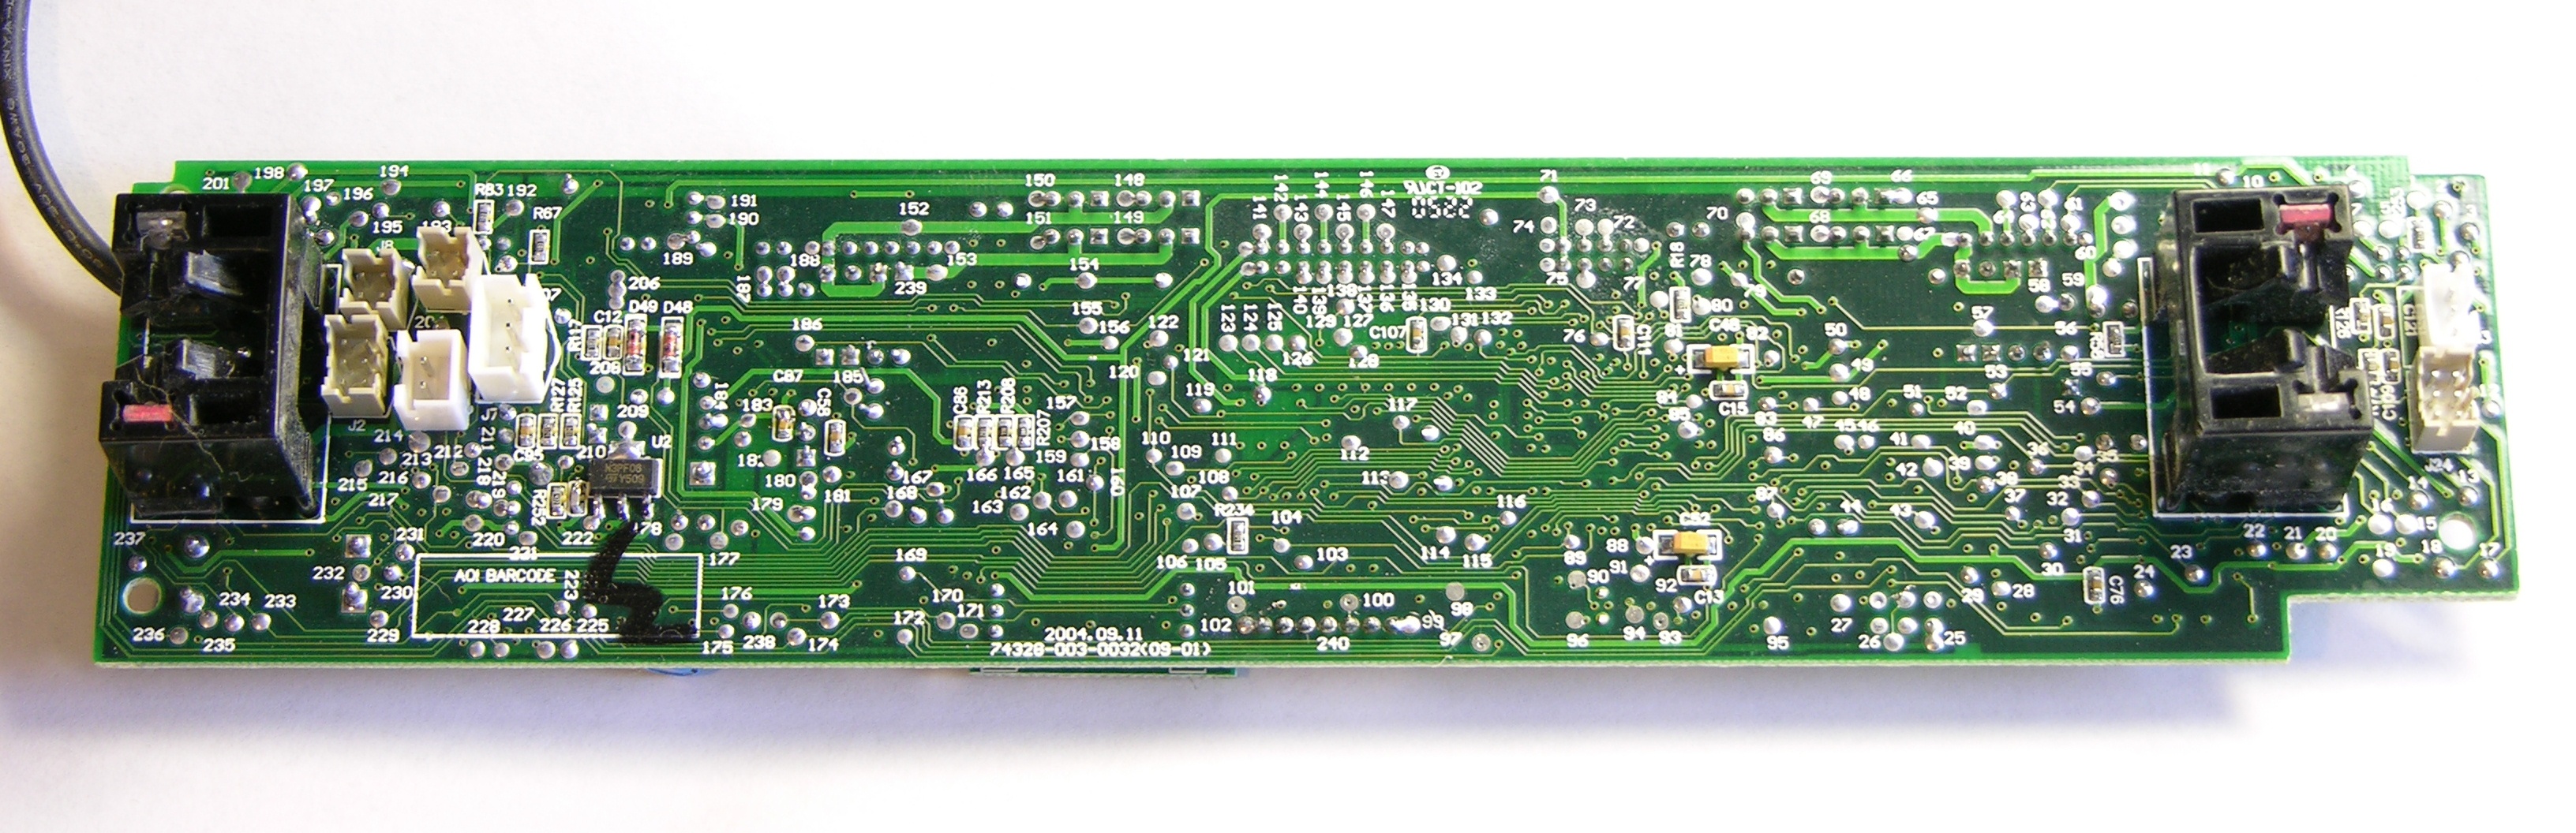
Schematic and Boards

A6276 32-LED driver schematic

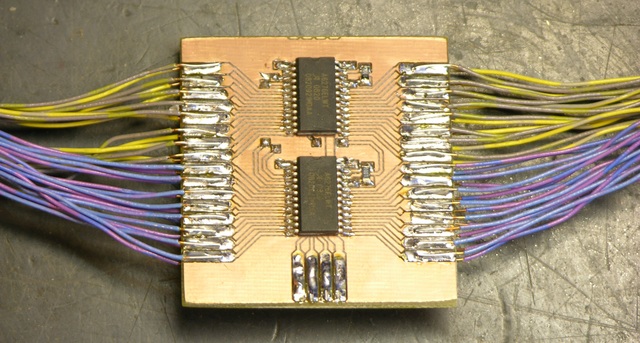
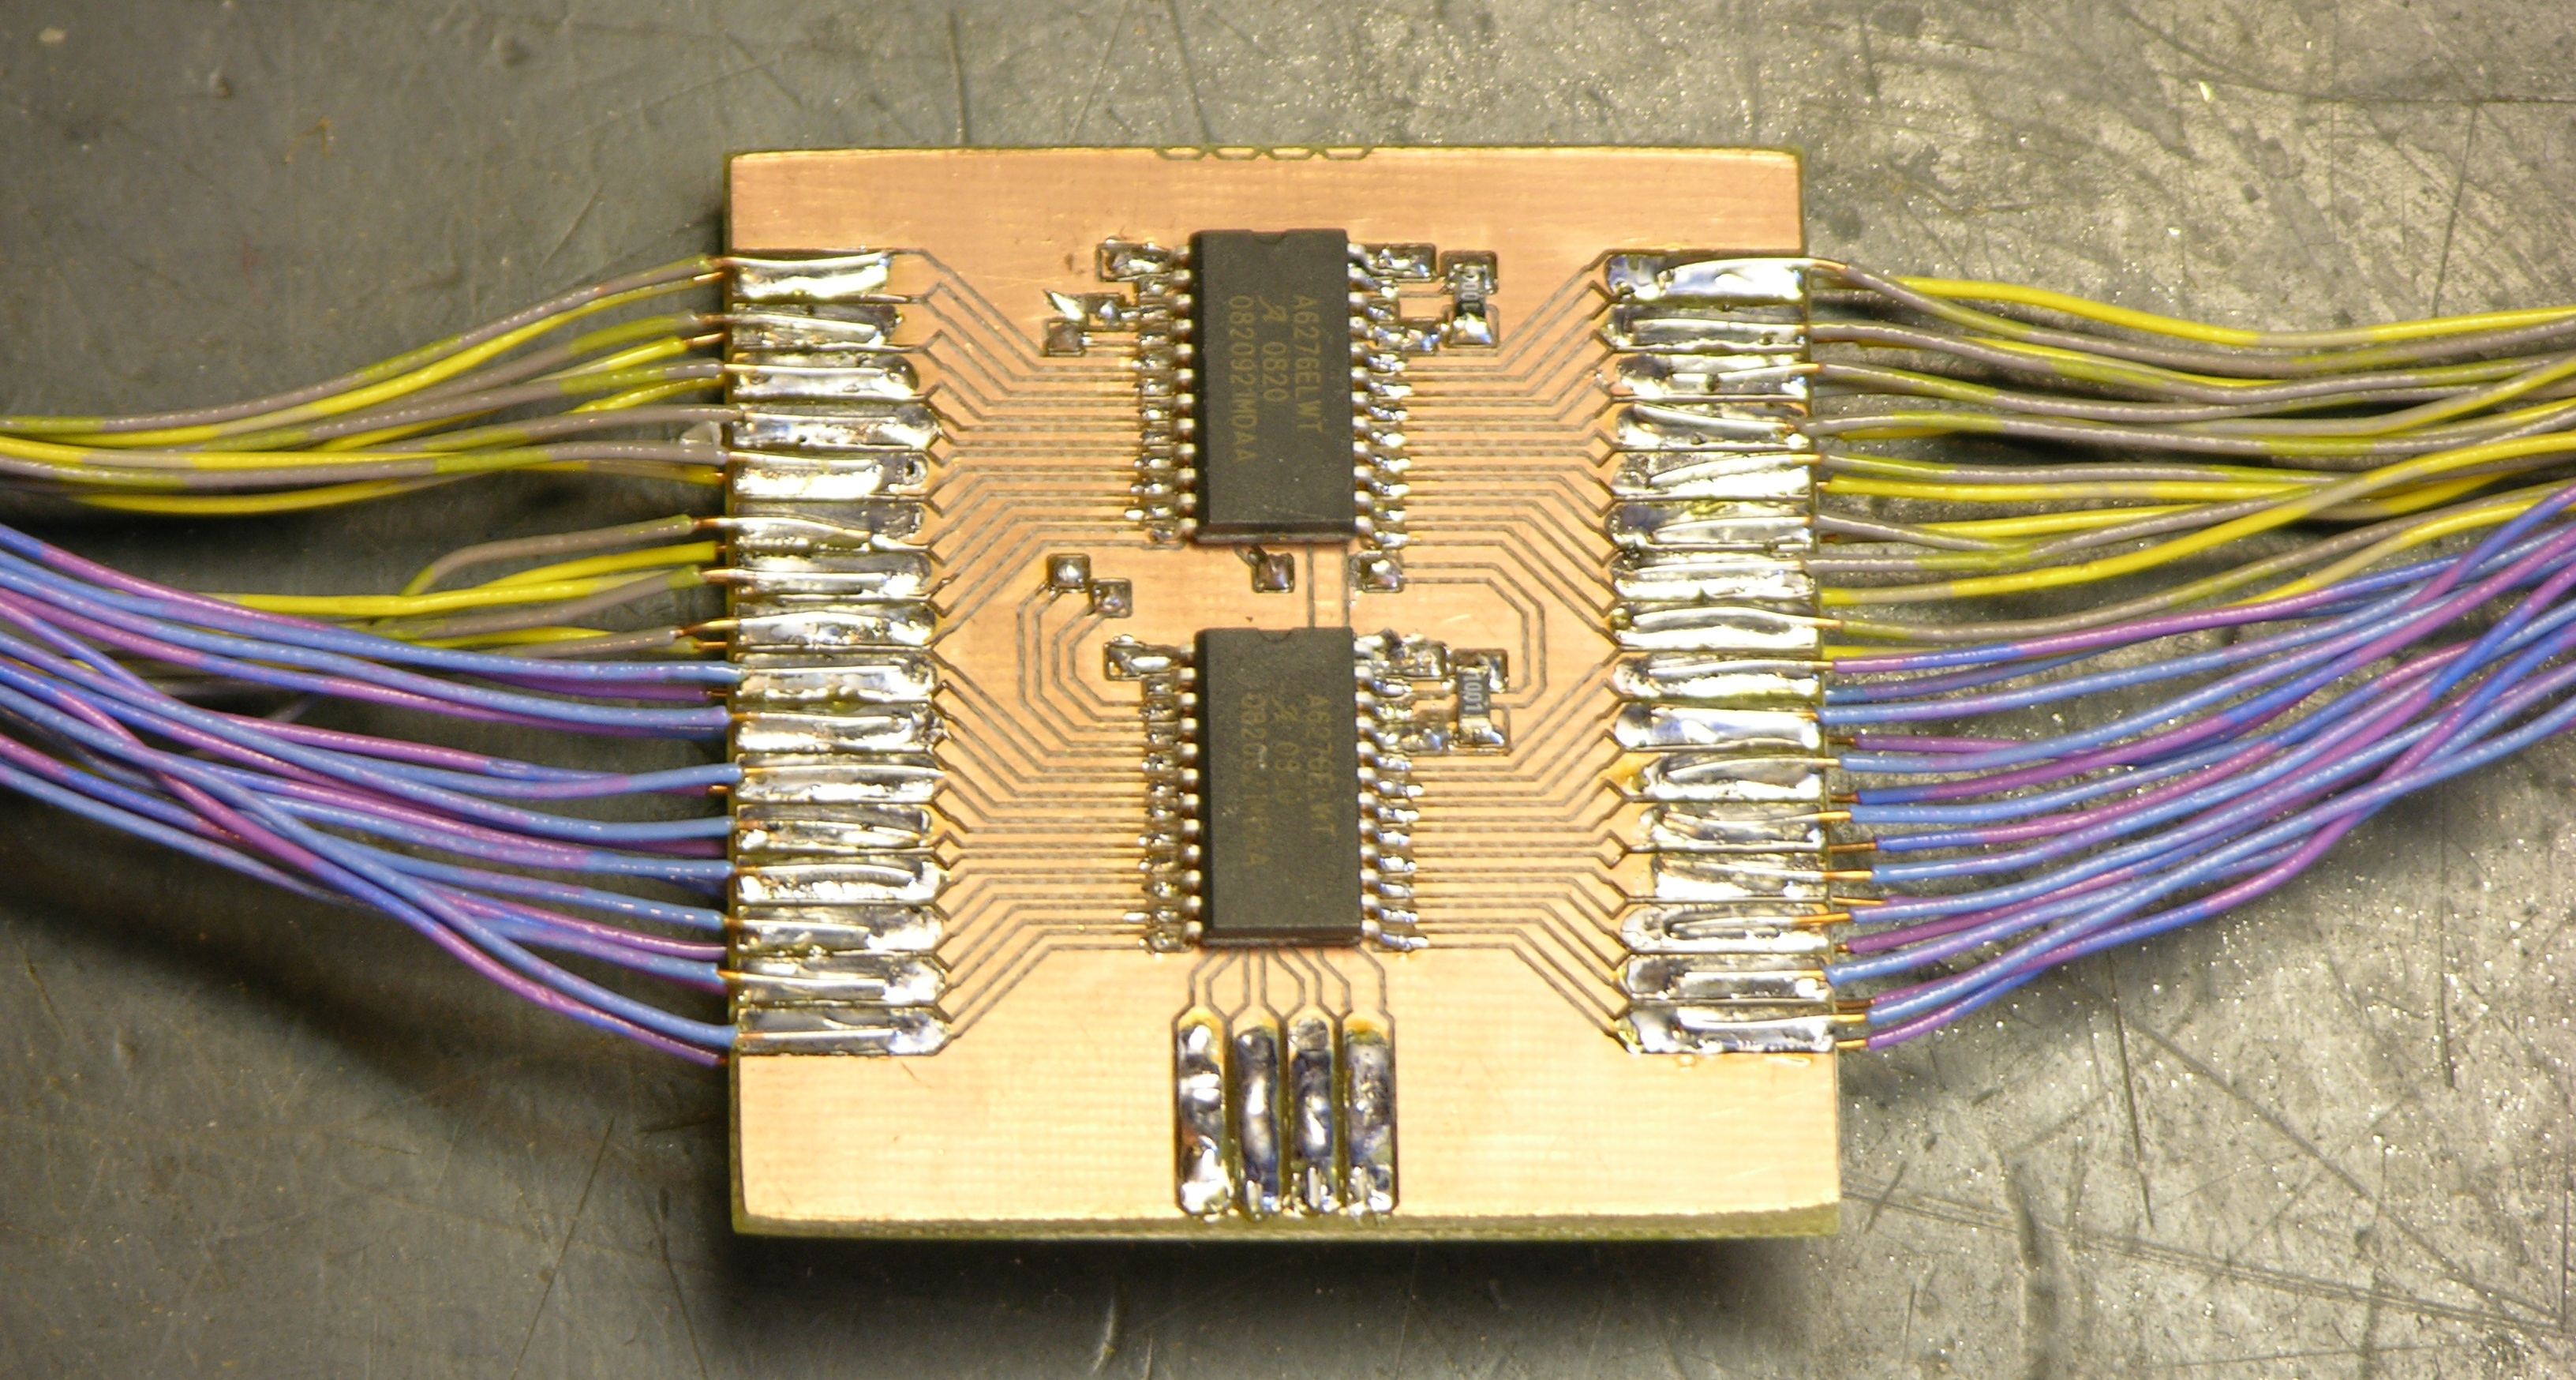
The schematic is dead simple — daisy-chained A6276es, common clock and latch lines, output enable tied active (low). For speed and cost, I planned card-edge connectors to solder all the LED and “umbilical” connections to. Although the A6276 doesn’t have separate digital and analog grounds, I used separate wires in the umbilical for digital and LED V+, and I doubled the GND and LED V+ lines for current-carrying capacity.

Copper PCB with A6276 LED control boards milled

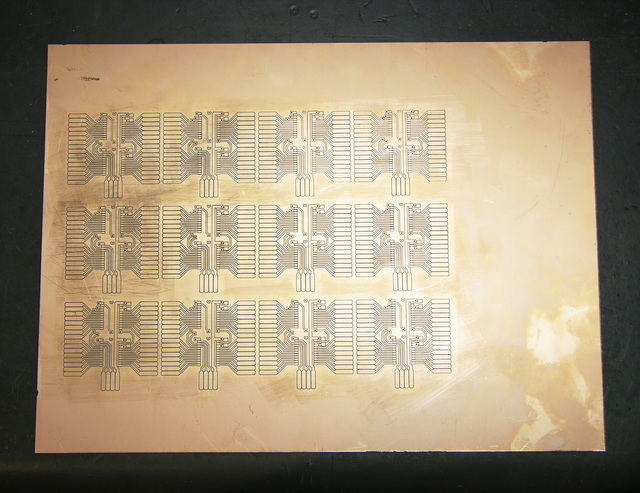
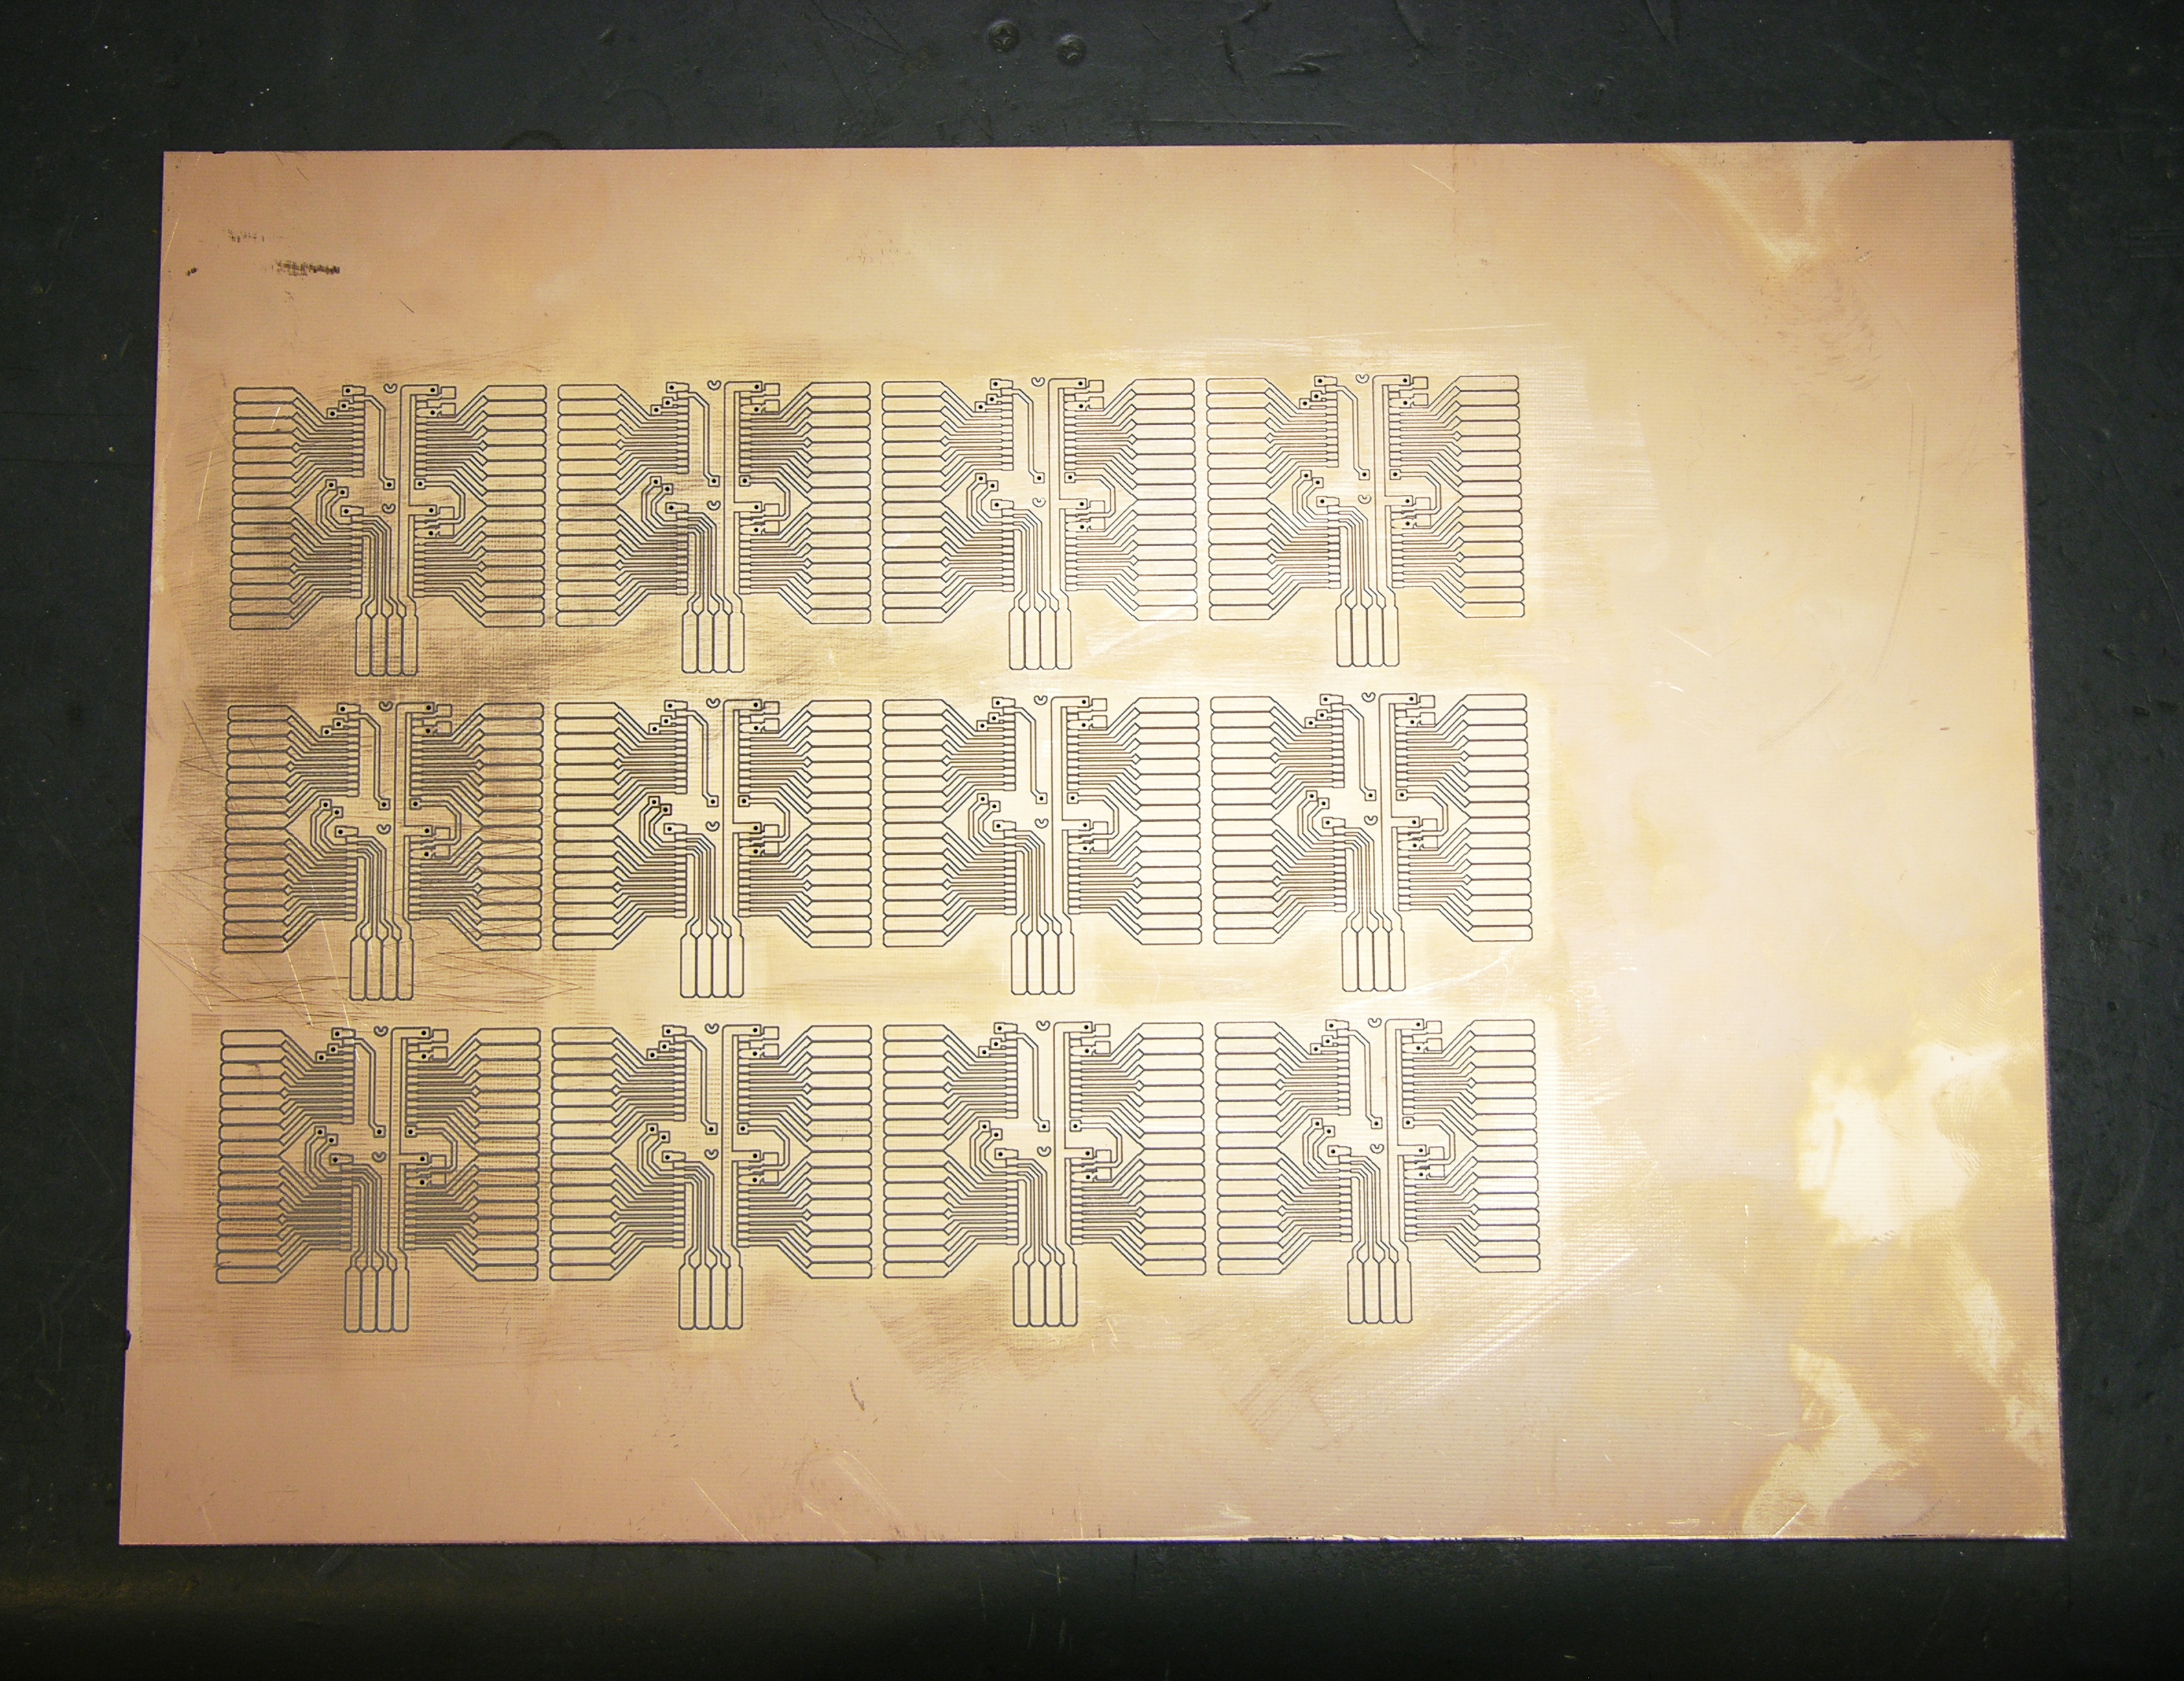
I hand-etched a prototype PCB to make sure the design worked, but it was pretty time-consuming and not my most beautiful work (especially being a two-sided board). Tom McGuire milled me a much more beautiful set of boards (although not using that mill), and did a very nice job using the drill holes as registration marks to line up the milling for the back side.

Assembly

Monday the 24th, I started pressing my friends into service for slave labor. Jeremy and Mindy were my first victims, and together we got all the PCBs and about half the LEDs assembled. Jeremy was stripping wire ends and Mindy and I were soldering — she did a fantastic job, especially for someone who had never soldered electronics before.

Soldering wires to SMT LEDs with clothespin vise

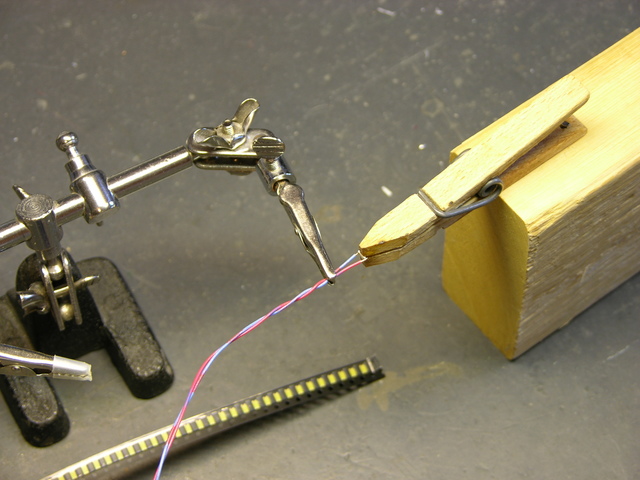
The key to retaining a shred of sanity while soldering wires onto SMT LEDs is a good soldering jig. Sunday night while assembling my prototype control board, I had tried to assemble LEDs with just the helping hands vise, and the LEDs kept going crooked in the alligator jaws. It took me about an hour to solder sixteen, and I knew that wouldn’t get 200 done in time.

I figured my mom still had some wooden clothespins, and after a little quality time on the disc sander, I had some perfectly elegant, incredibly functional SMT LED soldering jigs. Production speed skyrocketed; frustration plummeted; stabbiness dissipated.

Assembled 32-LED controller

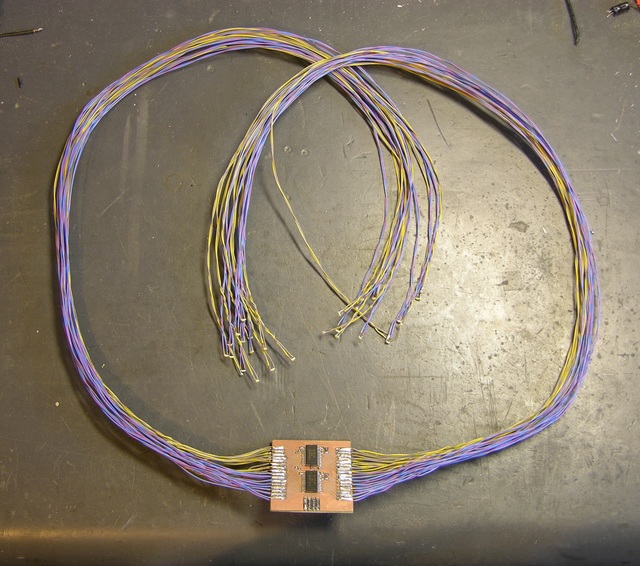
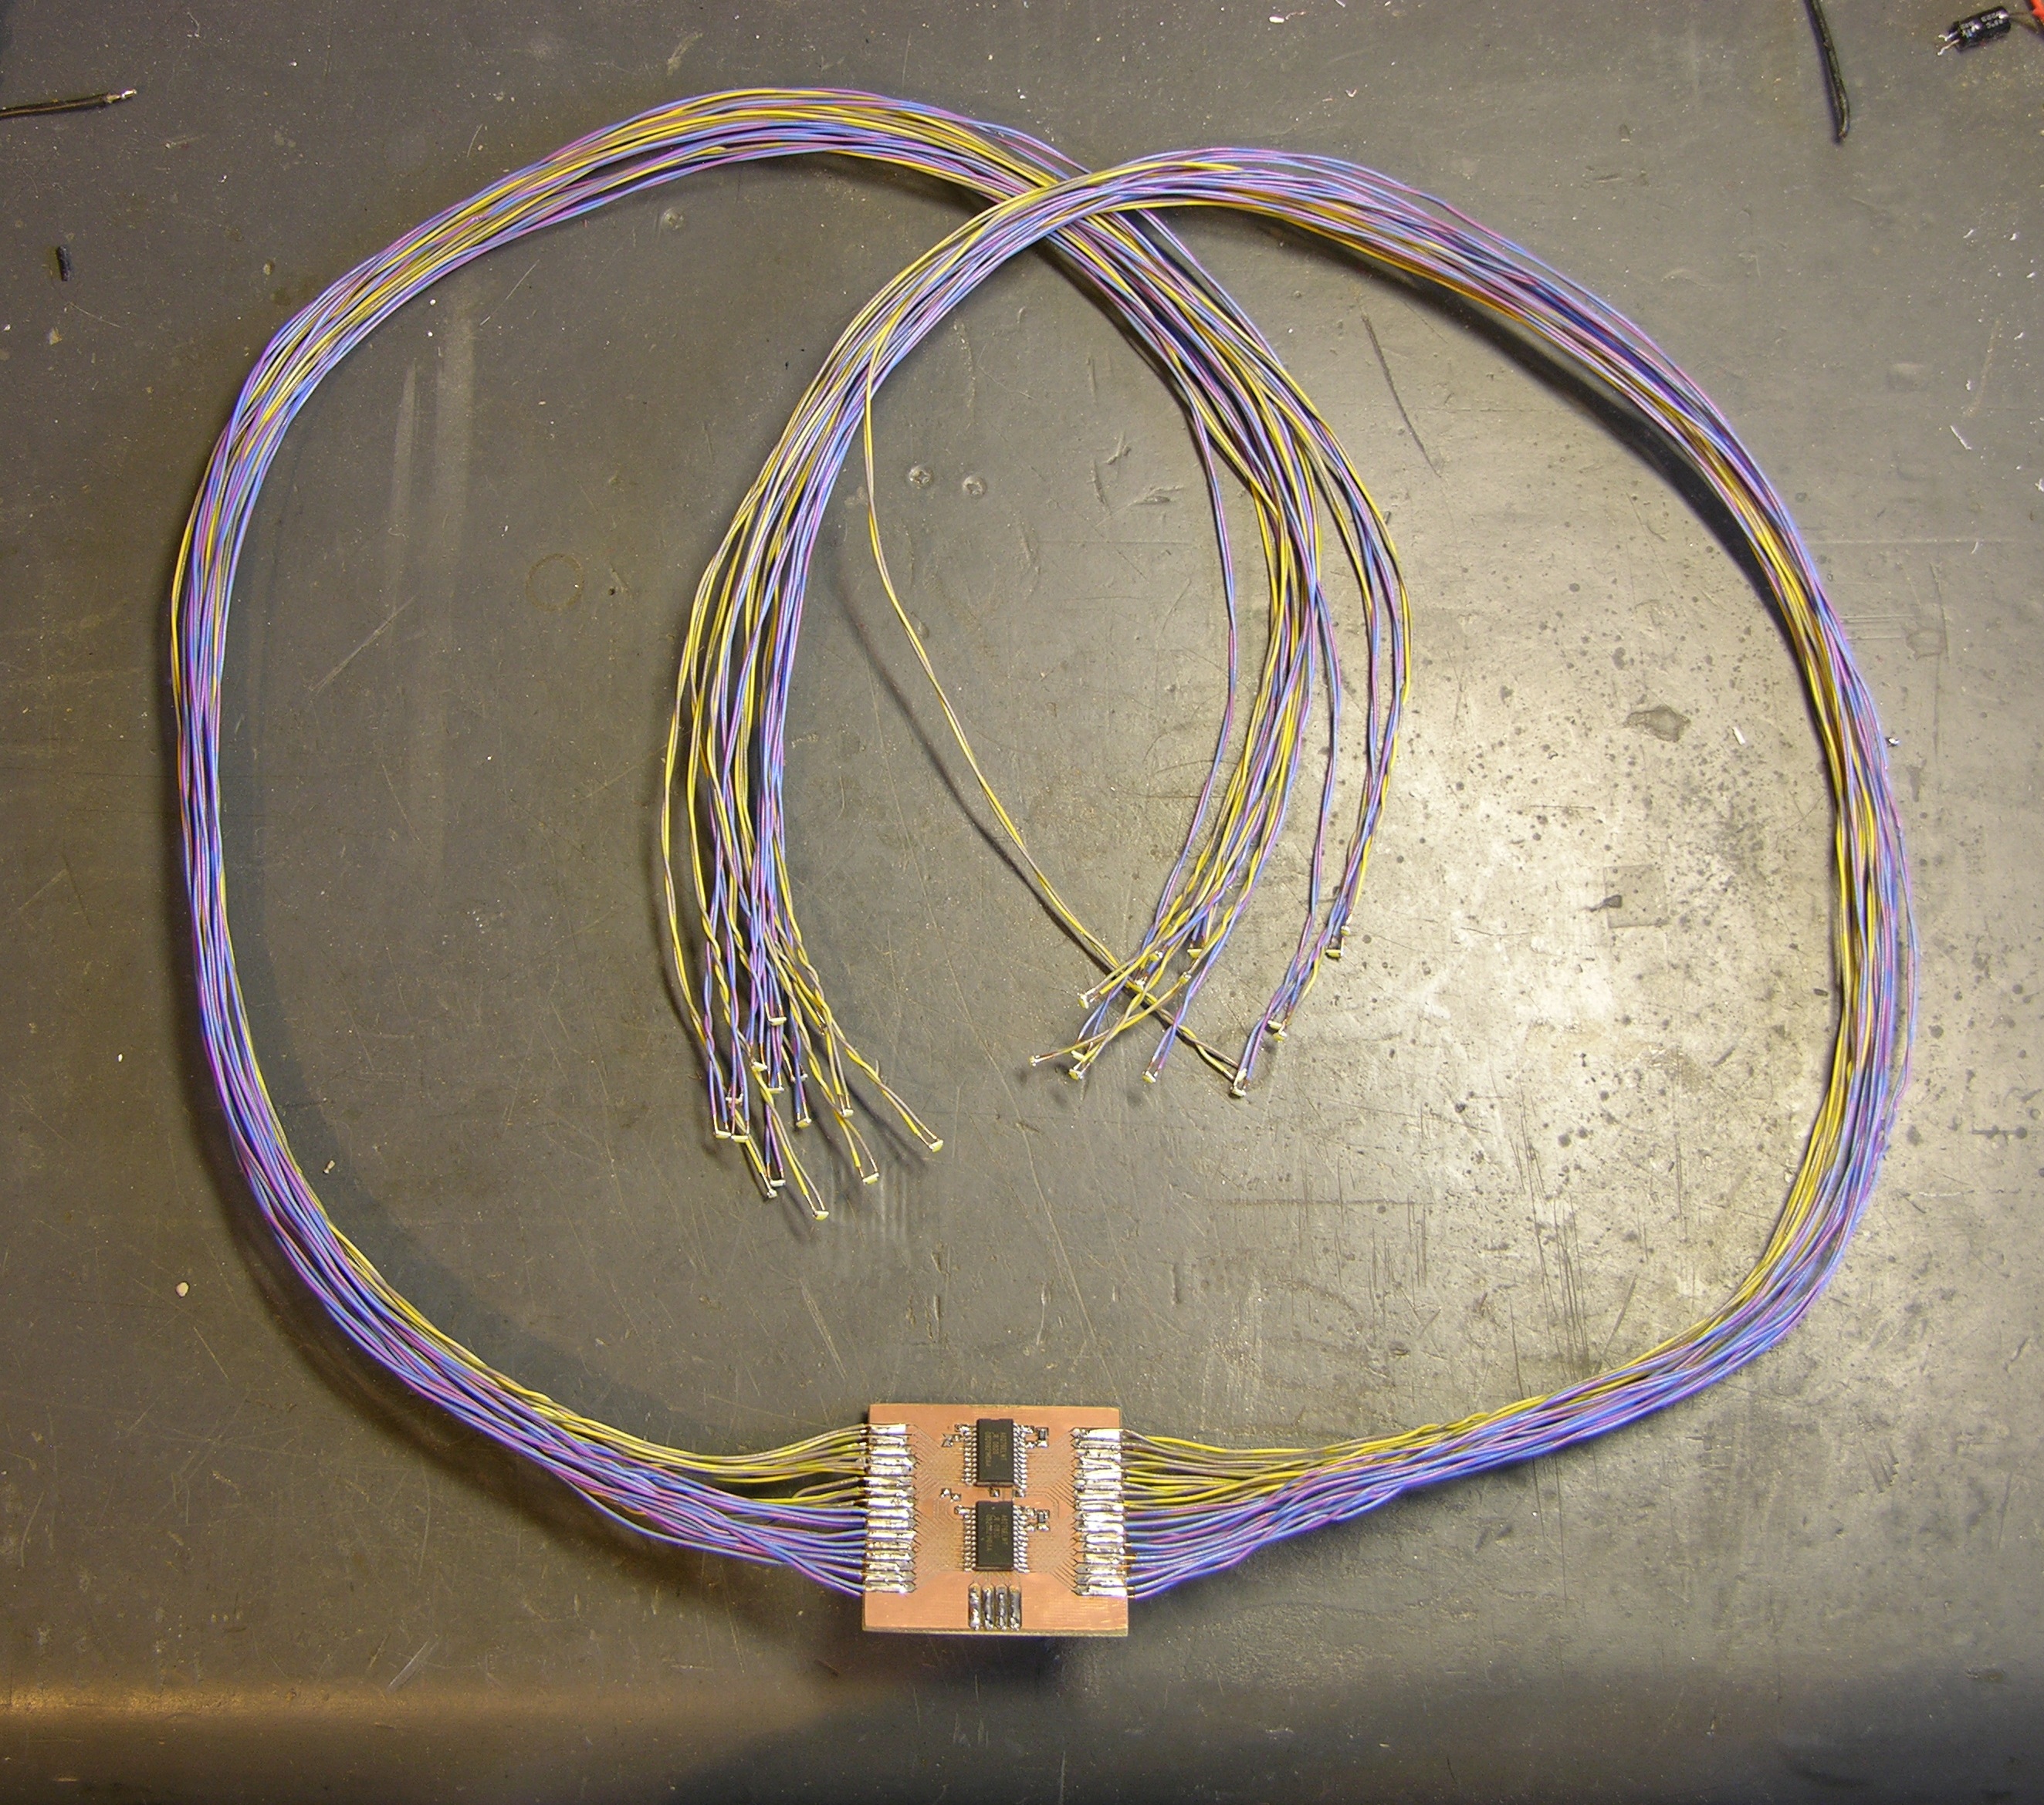
With the LED wires attached, and especially once the umbilicals were on (not shown here), the controllers really reminded me of facehuggers.

Rather than try to size LED wires specifically for LED placement within the piece, we made them all the same length. Lawrence, Gail, and the kids (especially Phill and Jake) stayed up late the next night helping me finish soldering LEDs and assembling the controllers.

Bus

I designed the controllers so that the clock and data lines would run in parallel to every board, but each board would have a separate latch line. It doesn’t matter what’s in the A6276′s internal serial buffer — it only matters when that chip gets its buffer latched to the outputs — and this arrangement made for a minimum of connections to the Arduino.

I knew we were going to be plugging and unplugging the umbilicals from the Arduino multiple times before we got everything assembled; but because of the parallel bus arrangement, there were too many wires to plug the umbilicals directly into the Arduino’s headers. I thought about plugging the bus together on a breadboard, but it would have made for a lot of jumper wires for the paralleled lines.

Organic Energy Cloud bus

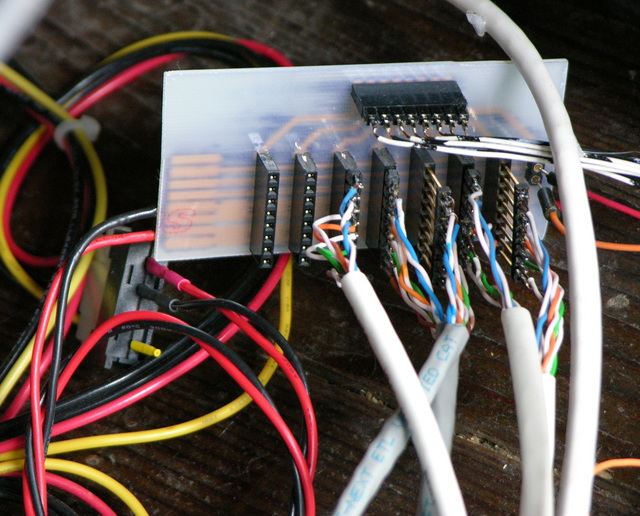
It ended up feeling easiest to design a small bus board with female headers on it, with the power, data, and clock lines bused, and the latch lines run to a separate 8-pin header at the top. (The bus board could run eight controllers — 256 LEDs — although we only ended up using five controllers.) I would have chosen to use ribbon cable to connect the latch header to the Arduino, except I forgot about that jumper and had to make something quickly out of borrowed wire while we were doing the gallery installation.

All Together

Because I was prepared to run 200 LEDs at ≥ 20mA each, the small power supplies I have weren’t going to be up to the task, and I used a PC power supply, not visible here except for its DC power cables.

Arduino and Organic Energy Cloud bus/wiring

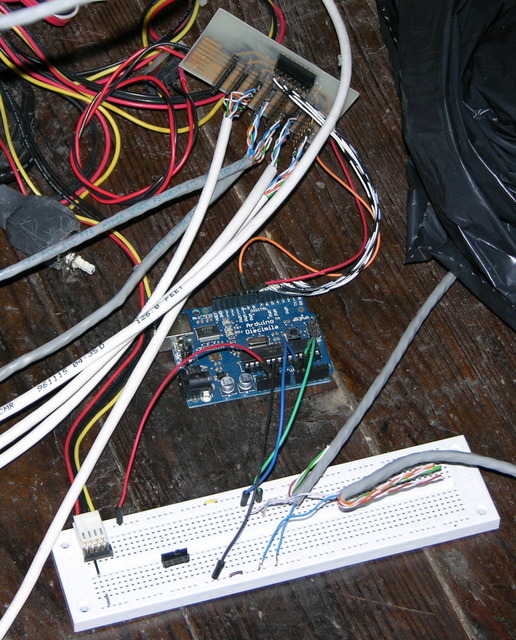
The Arduino is plugged into the bus and the PC power supply, and in the foreground is a breadboard for a part of the project that didn’t come to fruition. This is actually how it sat during the show — Lisa is fascinated by technological infrastructure, and the mess of wires was part of the “organicness” of the piece. More on that in a follow-up post on the installation.

Controller Enhancements

32-LED controller, closeup

Soldering all the LED wires to the card-edge connectors turned out to be a bit of a chore with someone helping with two vises and a needlenose pliers, and incredibly tedious to do alone. All along, I’ve been thinking about how I could design or redesign the controllers so they’d be practical for artists to use without me there to assemble everything, and these boards just aren’t suitable. I have three crucial considerations that weren’t anywhere near met:

  • Wiring the LEDs to the board needs to be easy. (Soldering individual wires was time-consuming and hard to do alone.)
  • Replacement of burned-out LEDs needs to be easy. (Desoldering wires from the controller and resoldering new wires isn’t practical, especially once the board is installed in a piece.)
  • Replacement of burned-out boards needs to be easy. (Desoldering all the wires from a bad board would be a nightmare.)

So ideally I’m looking for a connector that would make it quick and easy to change individual connections on the LED side, and also quick and easy to change a whole batch of connections on the board side — like a daughtercard with an edge connector on the bottom and jacks for LED wires on the top.

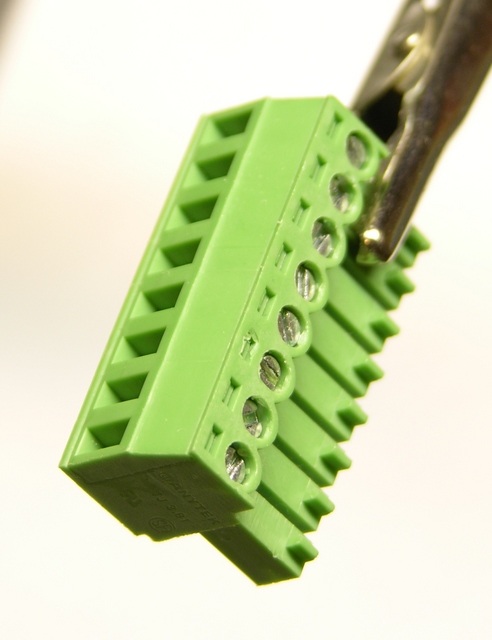
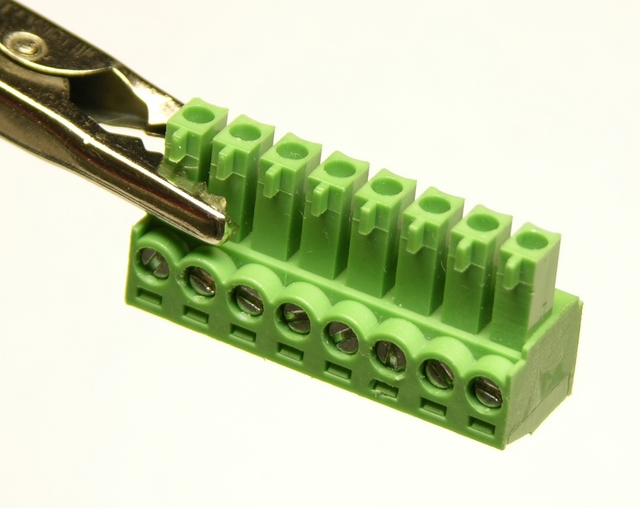
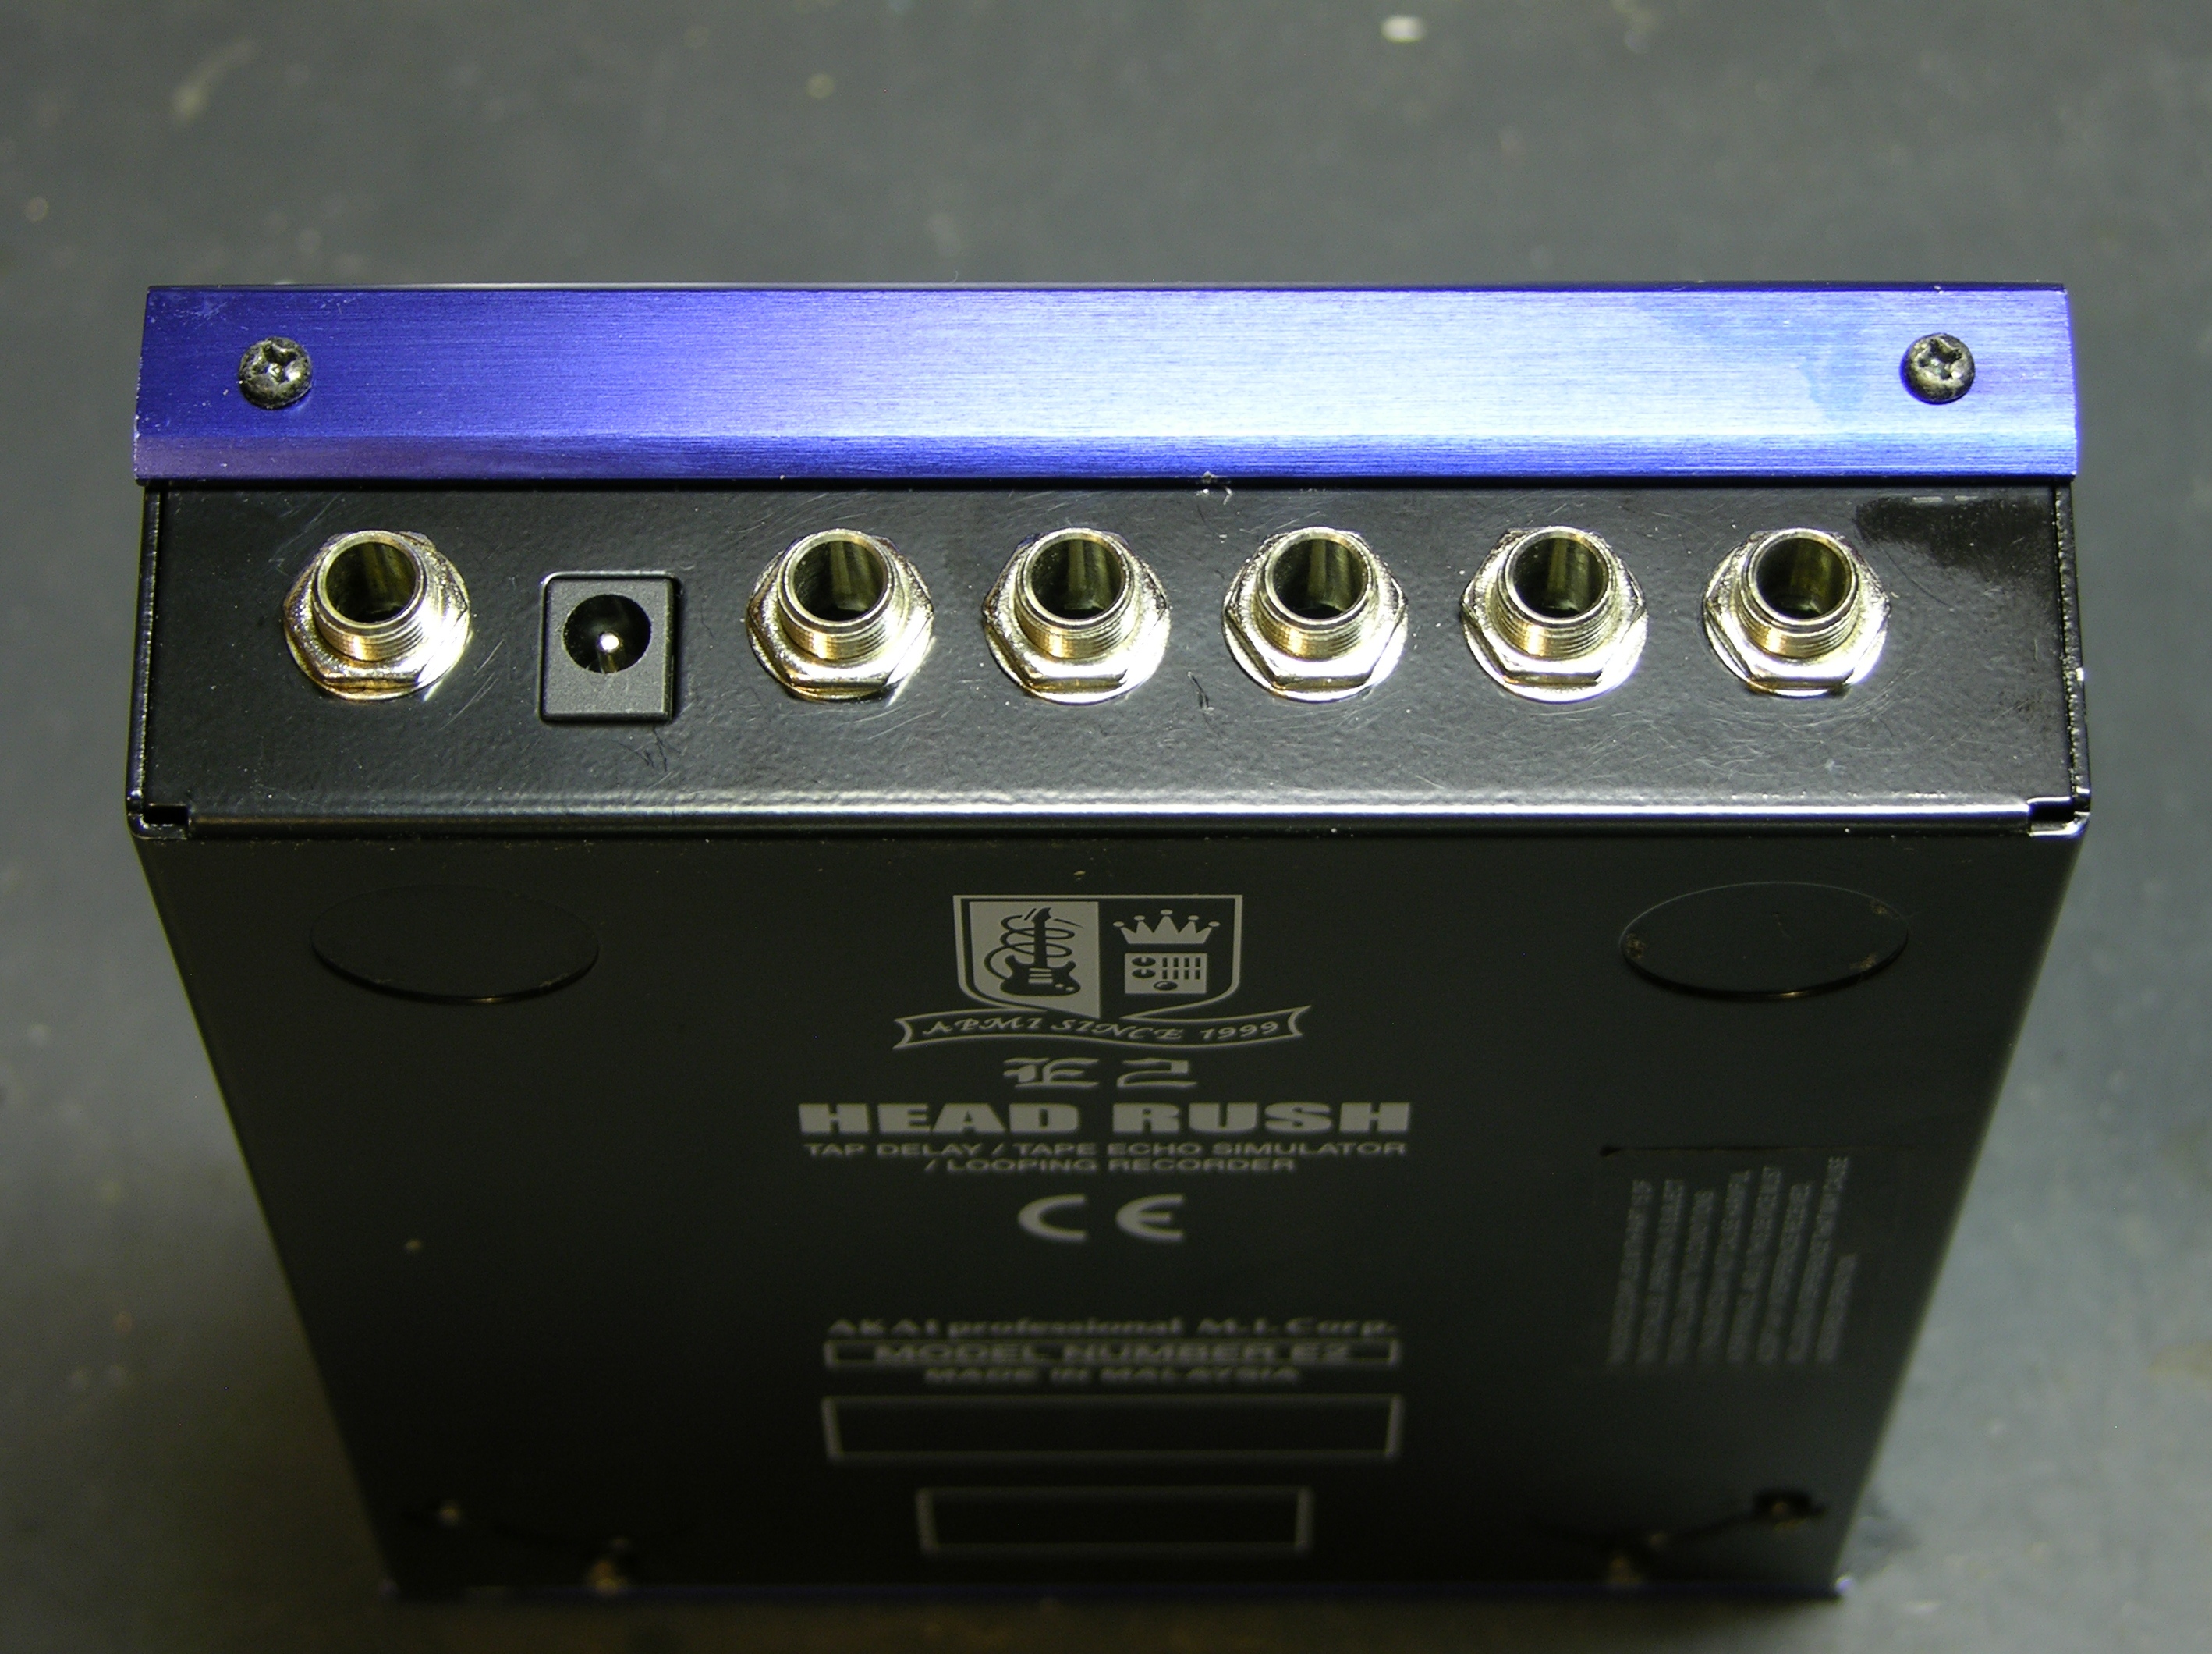
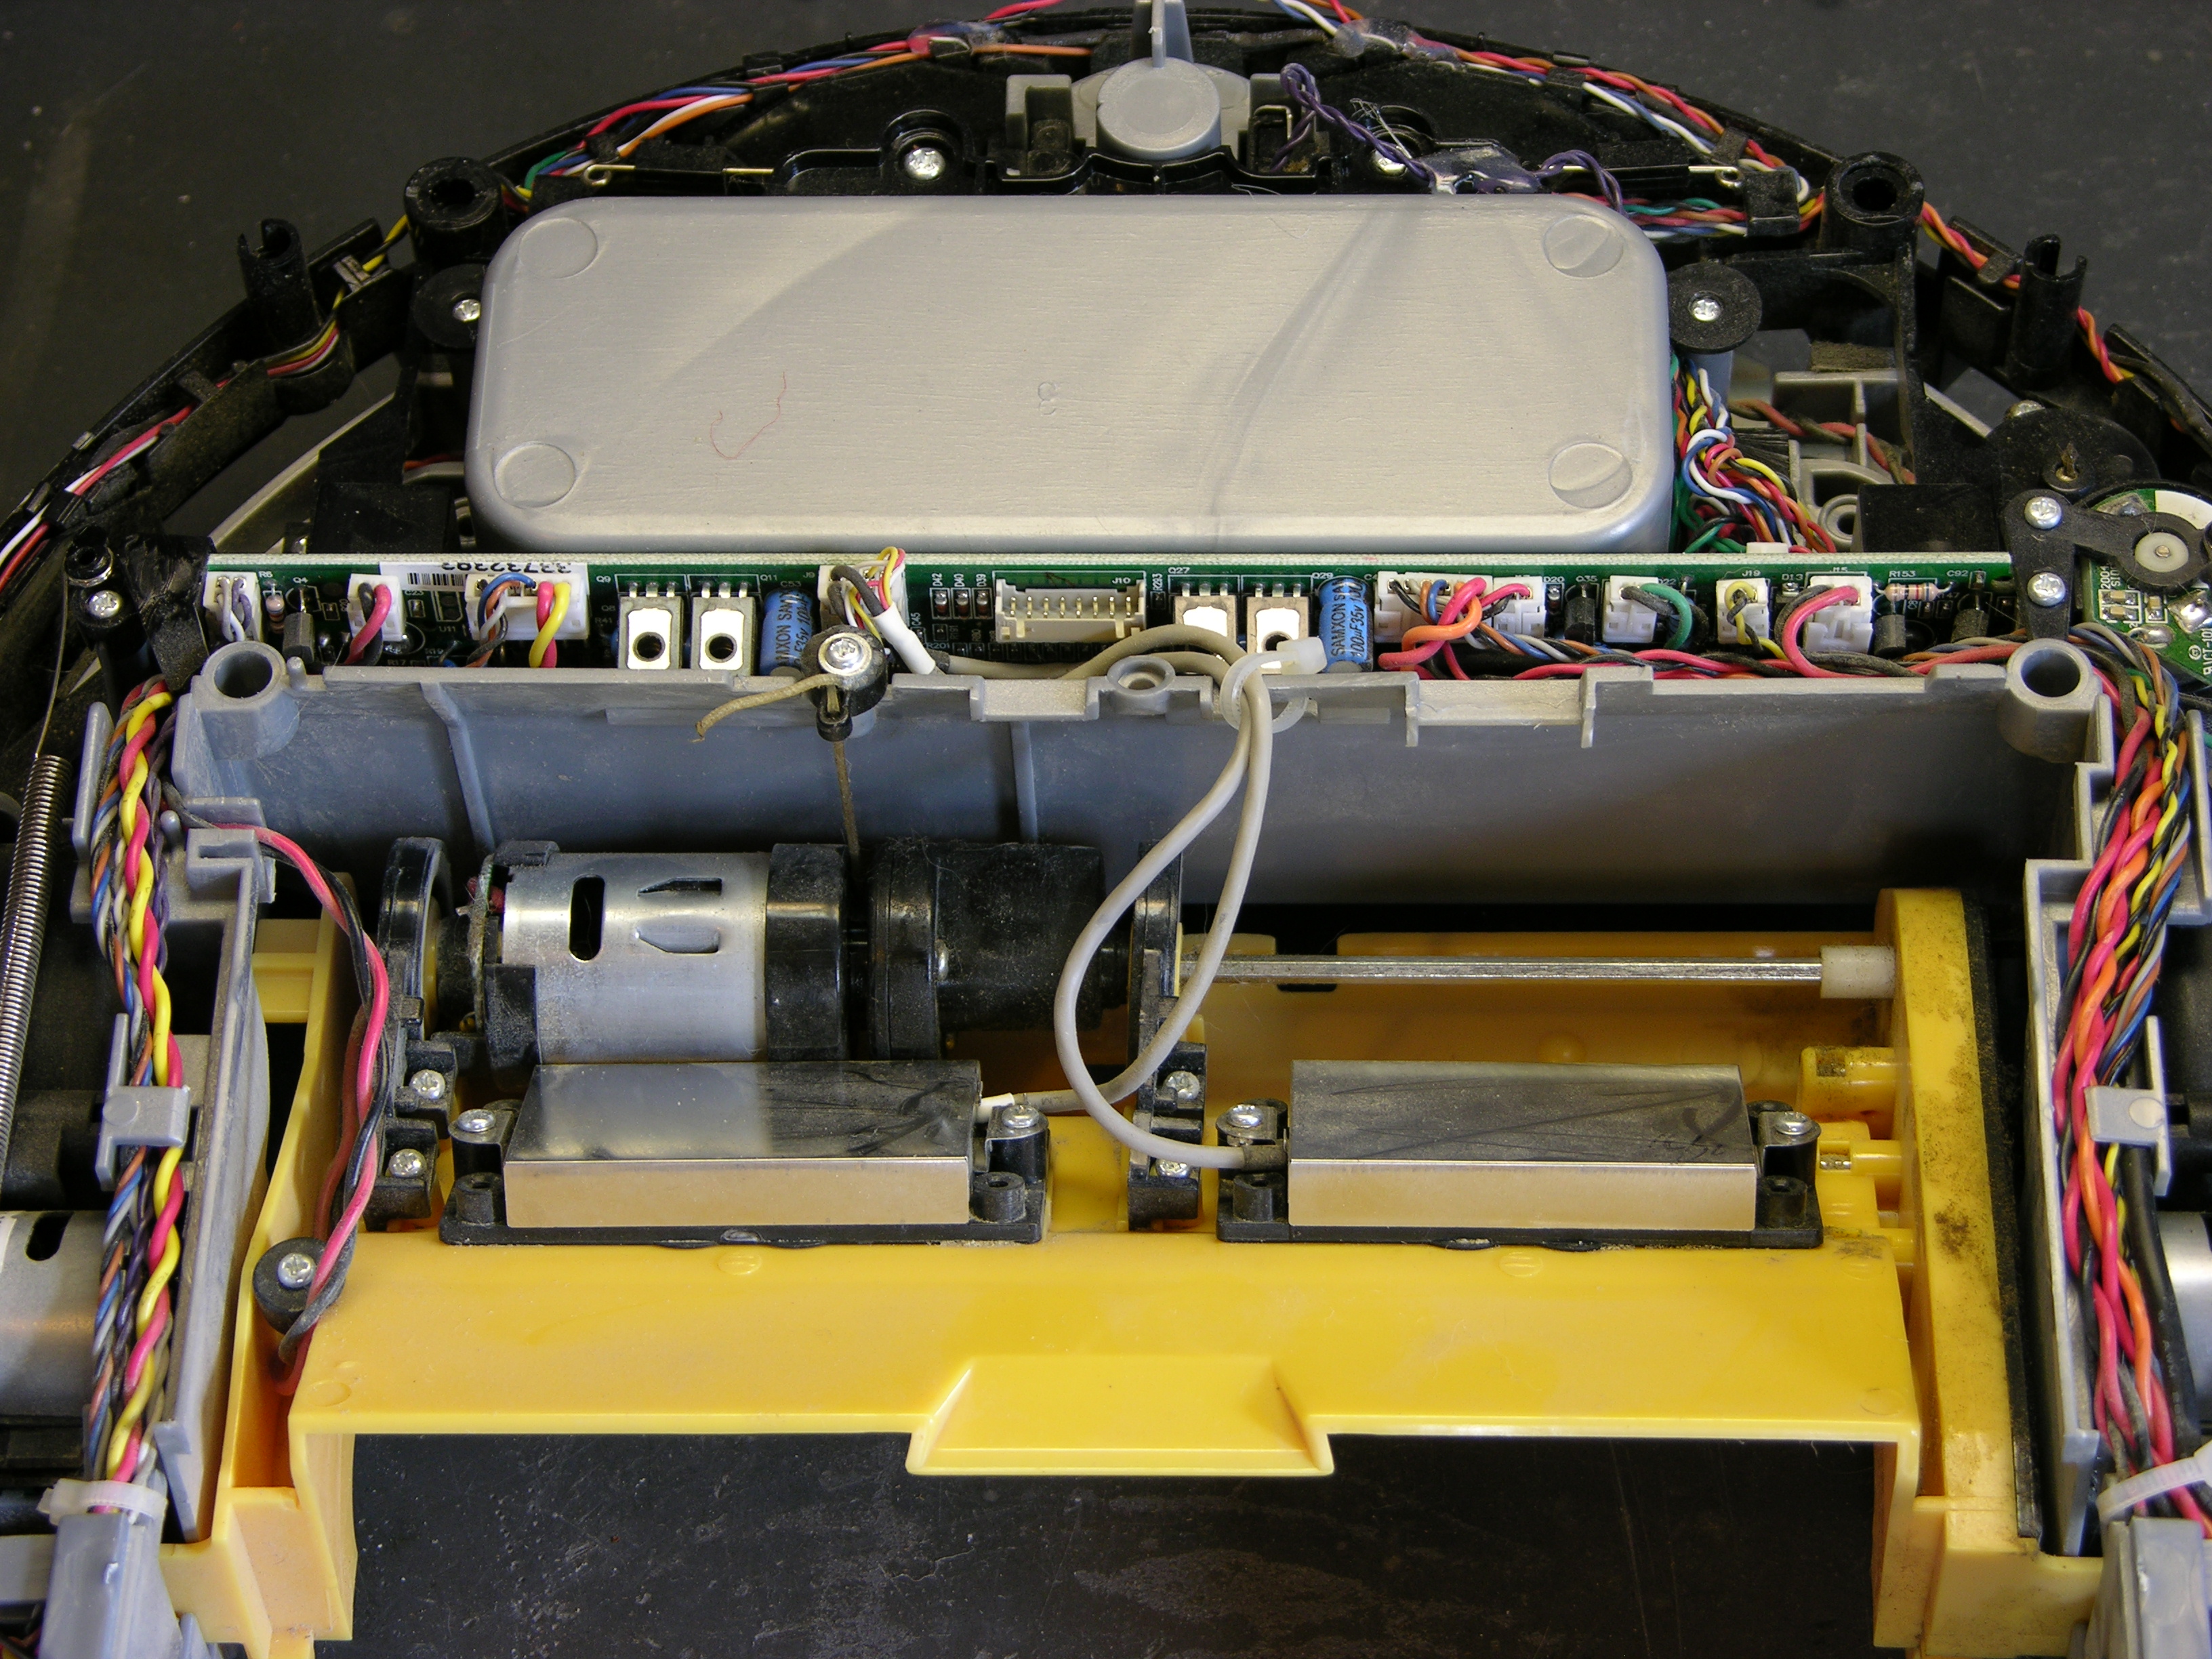
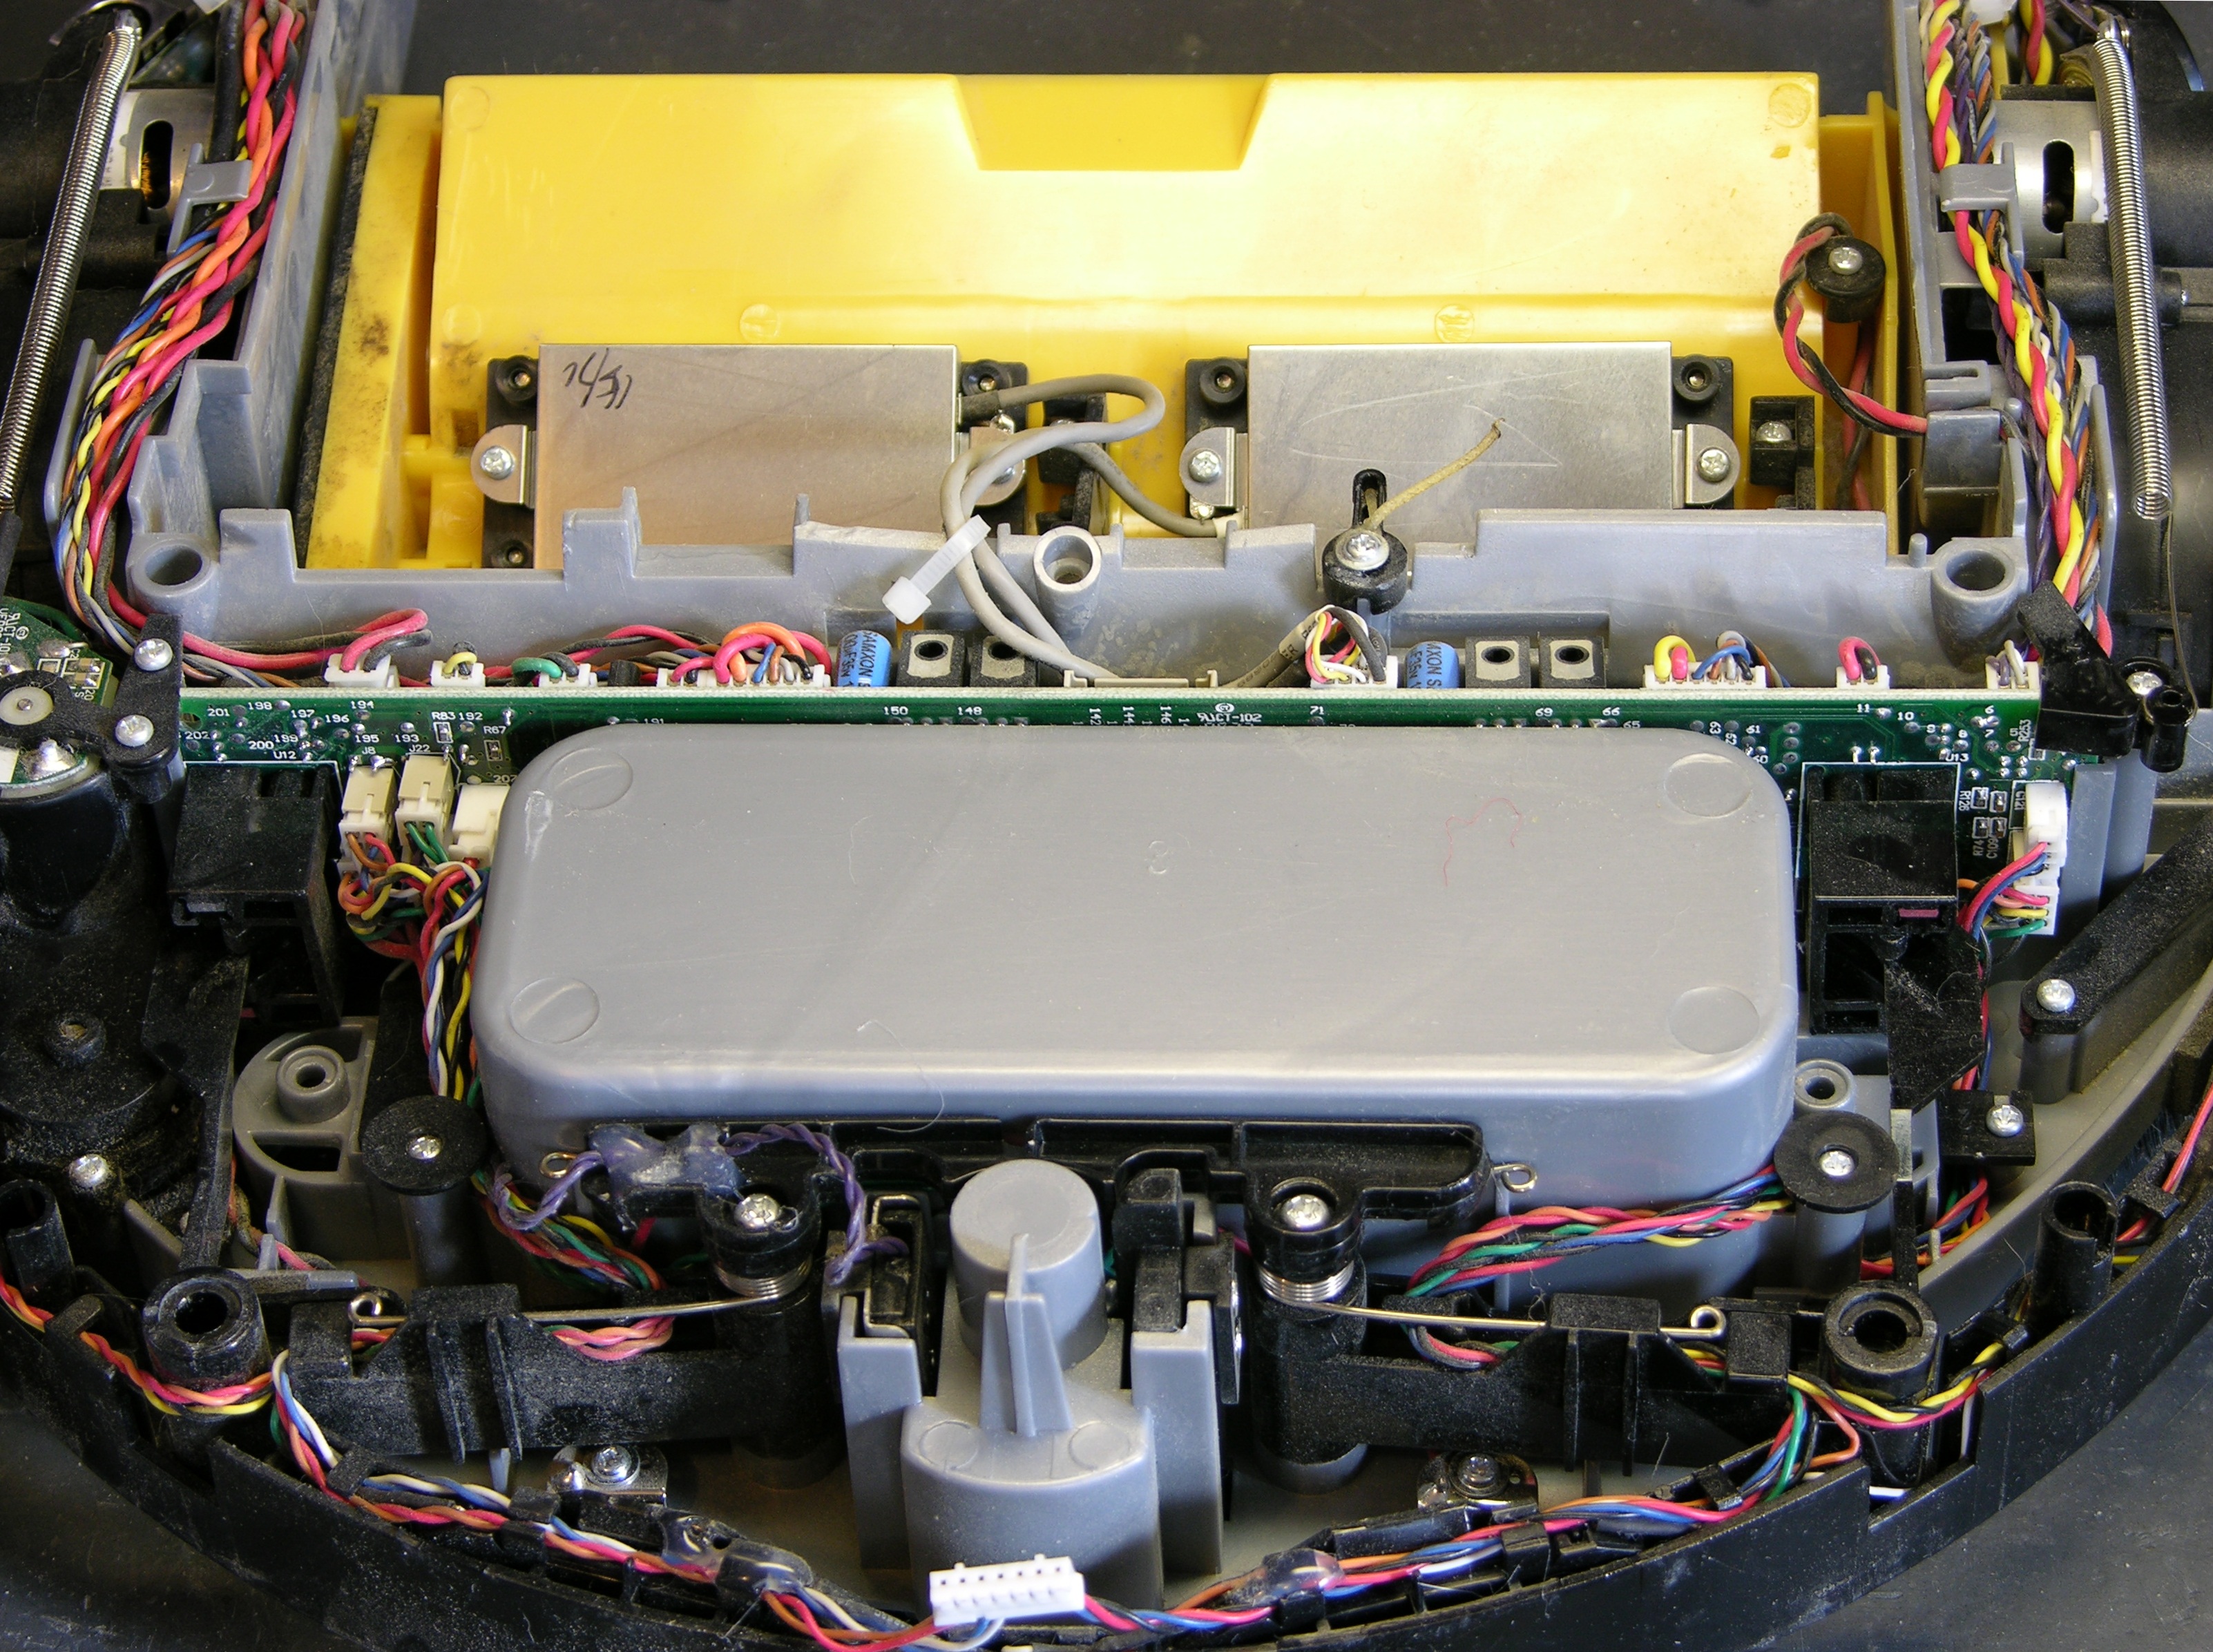
Coincidentally, the week after the show, I was at Anixter’s Chicago facility evaluating replacement keycard door access control systems for work, and I found what looks like the perfect connector on the back side of some HID card readers. The connector has screw terminals on the top for the wires that go to the door strike, motion sensor, etc., and plugs on the bottom to snap the whole thing into the socket on the card reader. The guys from the lab told me they think it’s called a Phoenix or Buchanon connector, and kindly gave me one to take home!

Pluggable terminal strip, top side

Pluggable terminal strip, bottom side

Now I just need to spend some time going through about a hundred pages of the Digi-Key catalog to see whether they carry this, and maybe to see what else they have that’s similar and might be even better.

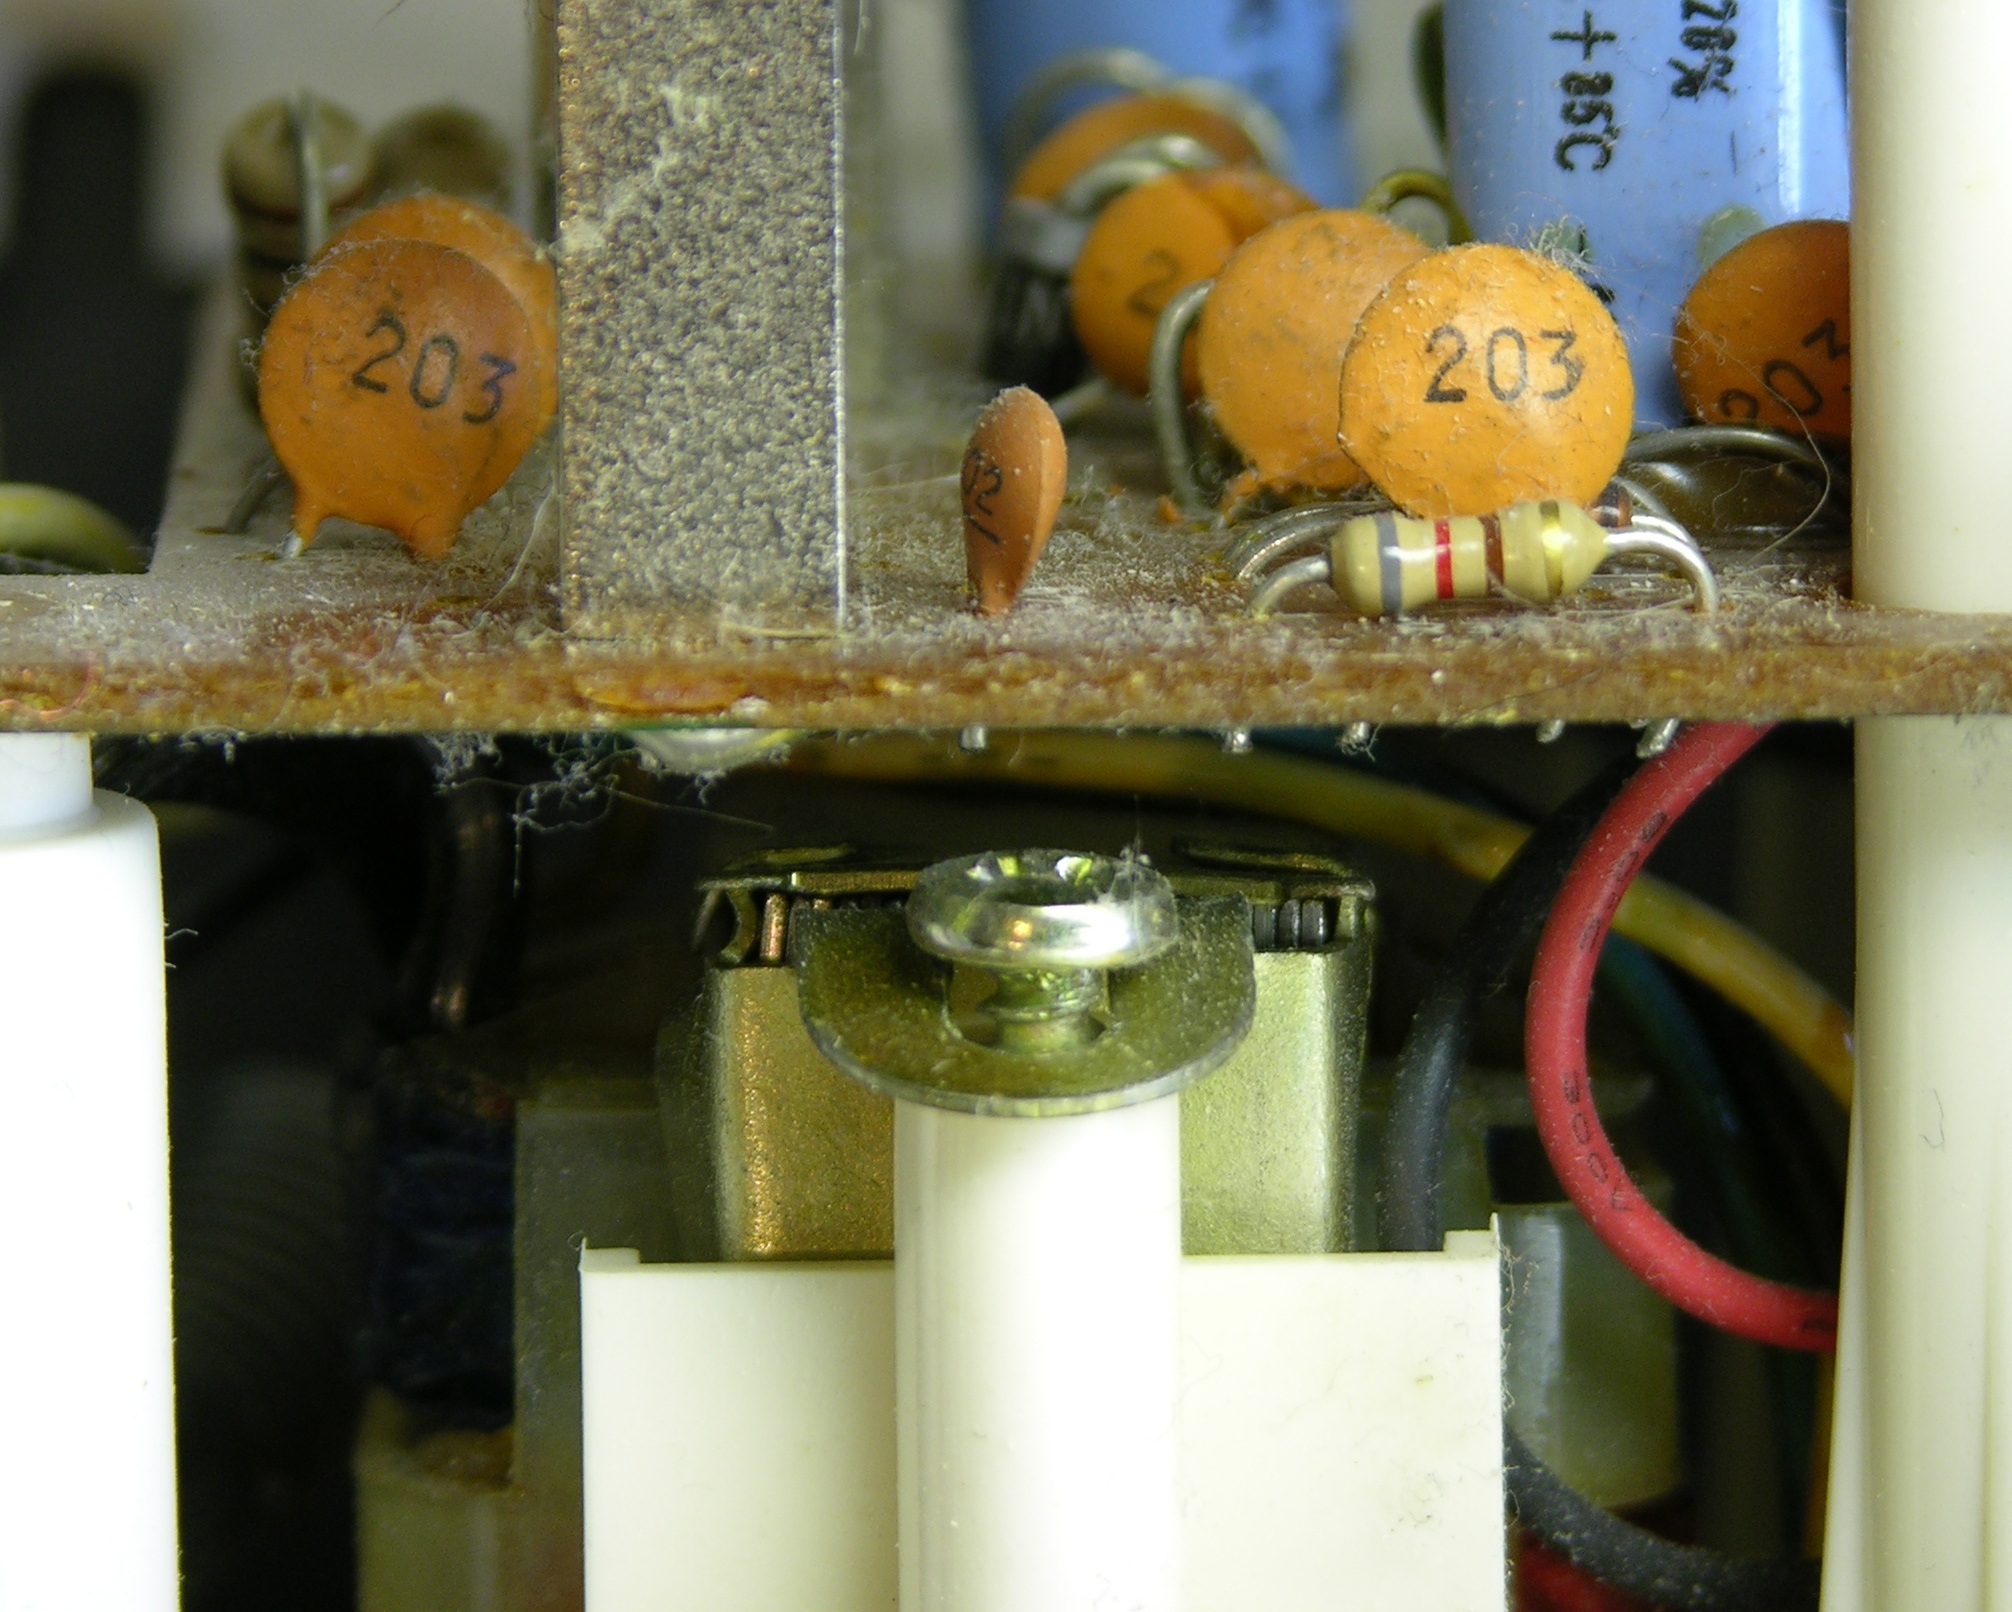
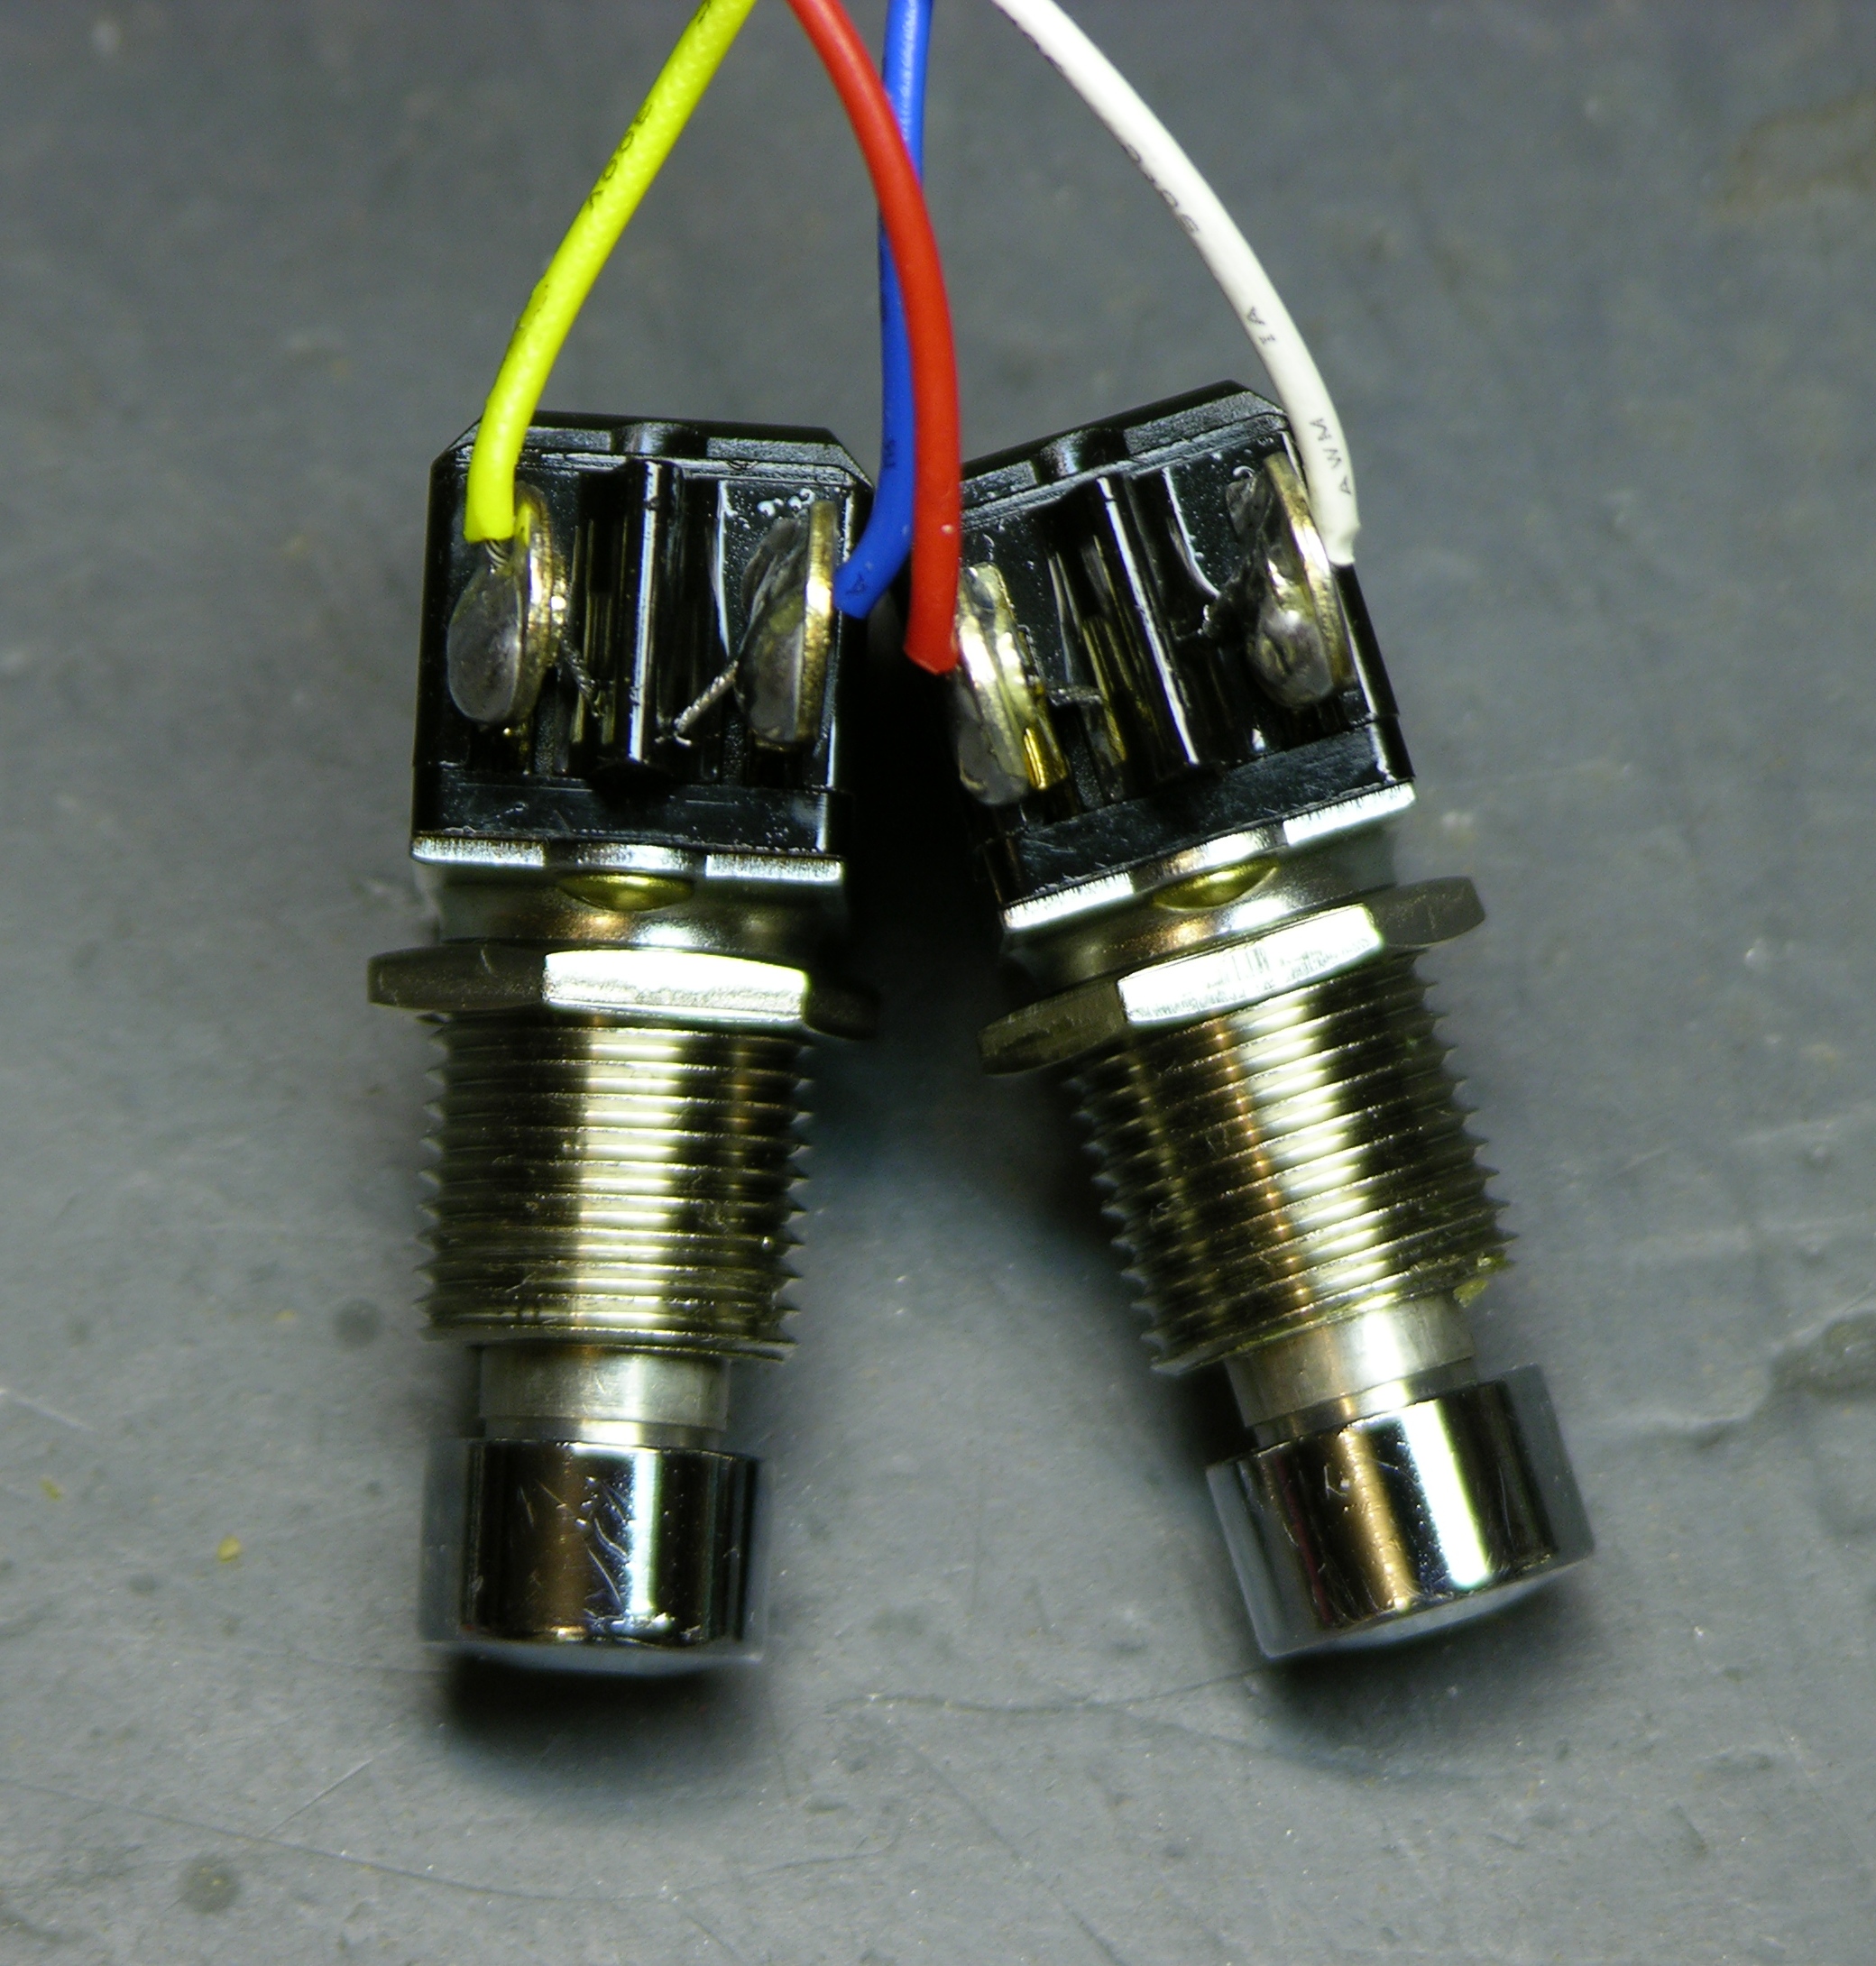
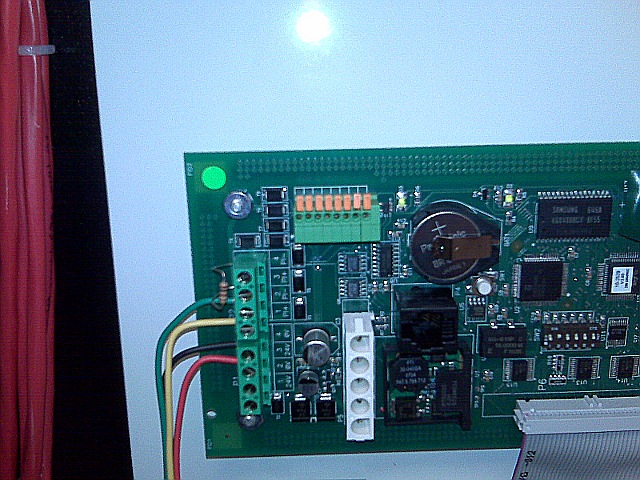
Meanwhile, this past weekend during a scheduled power outage in our computer room for some kill switch and fire suppression work, I found this connector (upper left) inside the fire alarm control panel. (BlackBerry camera + closeup == fuzzzzzzz . . .)

Fire suppression control panel with quick-release wire connectors

Fire suppression control panel with quick-release wire connectors

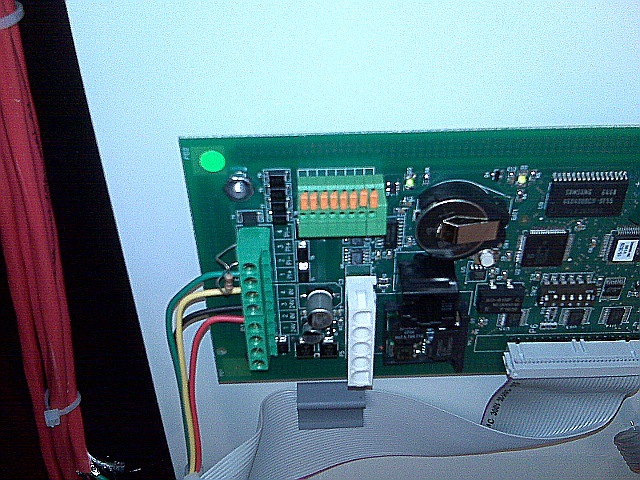
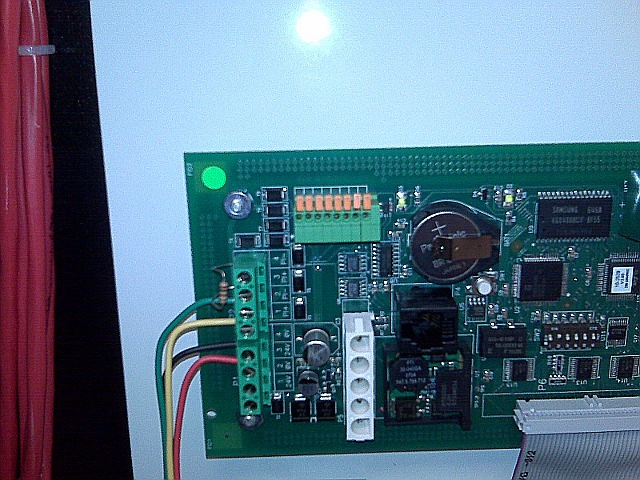
I really like the orange quick-release levers on this — it’d sure be handy for hooking up the wires in the first place (presuming, as with the screw terminals above, that one is using a large enough gauge of wire that one can clamp them and make good contact). I also love that the wires feed out the top of the connector instead of the side. But it doesn’t offer bulk plug action like the above Phoenix-or-Buchanon connector.

Especially if the two had the same pin spacing, maybe one could offer boards with choice of connector. I think I’d pick the quick-release connector for use in a project with only one or two controllers, and the two-level connector for use in a project with lots of controller boards.

More quality time with Digi-Key for me.