My boss’s in-laws have some property in the country where they like to camp out on weekends, and they have a trailer parked there with propane heat for cold evenings. This summer or fall, my boss asked me whether I knew of a gas leak detector; his dad-in-law thinks the tank or plumbing is leaking, and they’d like to fix the leak before using it much this winter.
I said that I didn’t know where to buy one and he could Google for them as easily as I could; but (only half tongue-in-cheek) that I could build him one. He said he needed it by this winter (harrumph!) and went on his way.
I actually had an ace up my sleeve: I already have a box of flammable gas detectors.
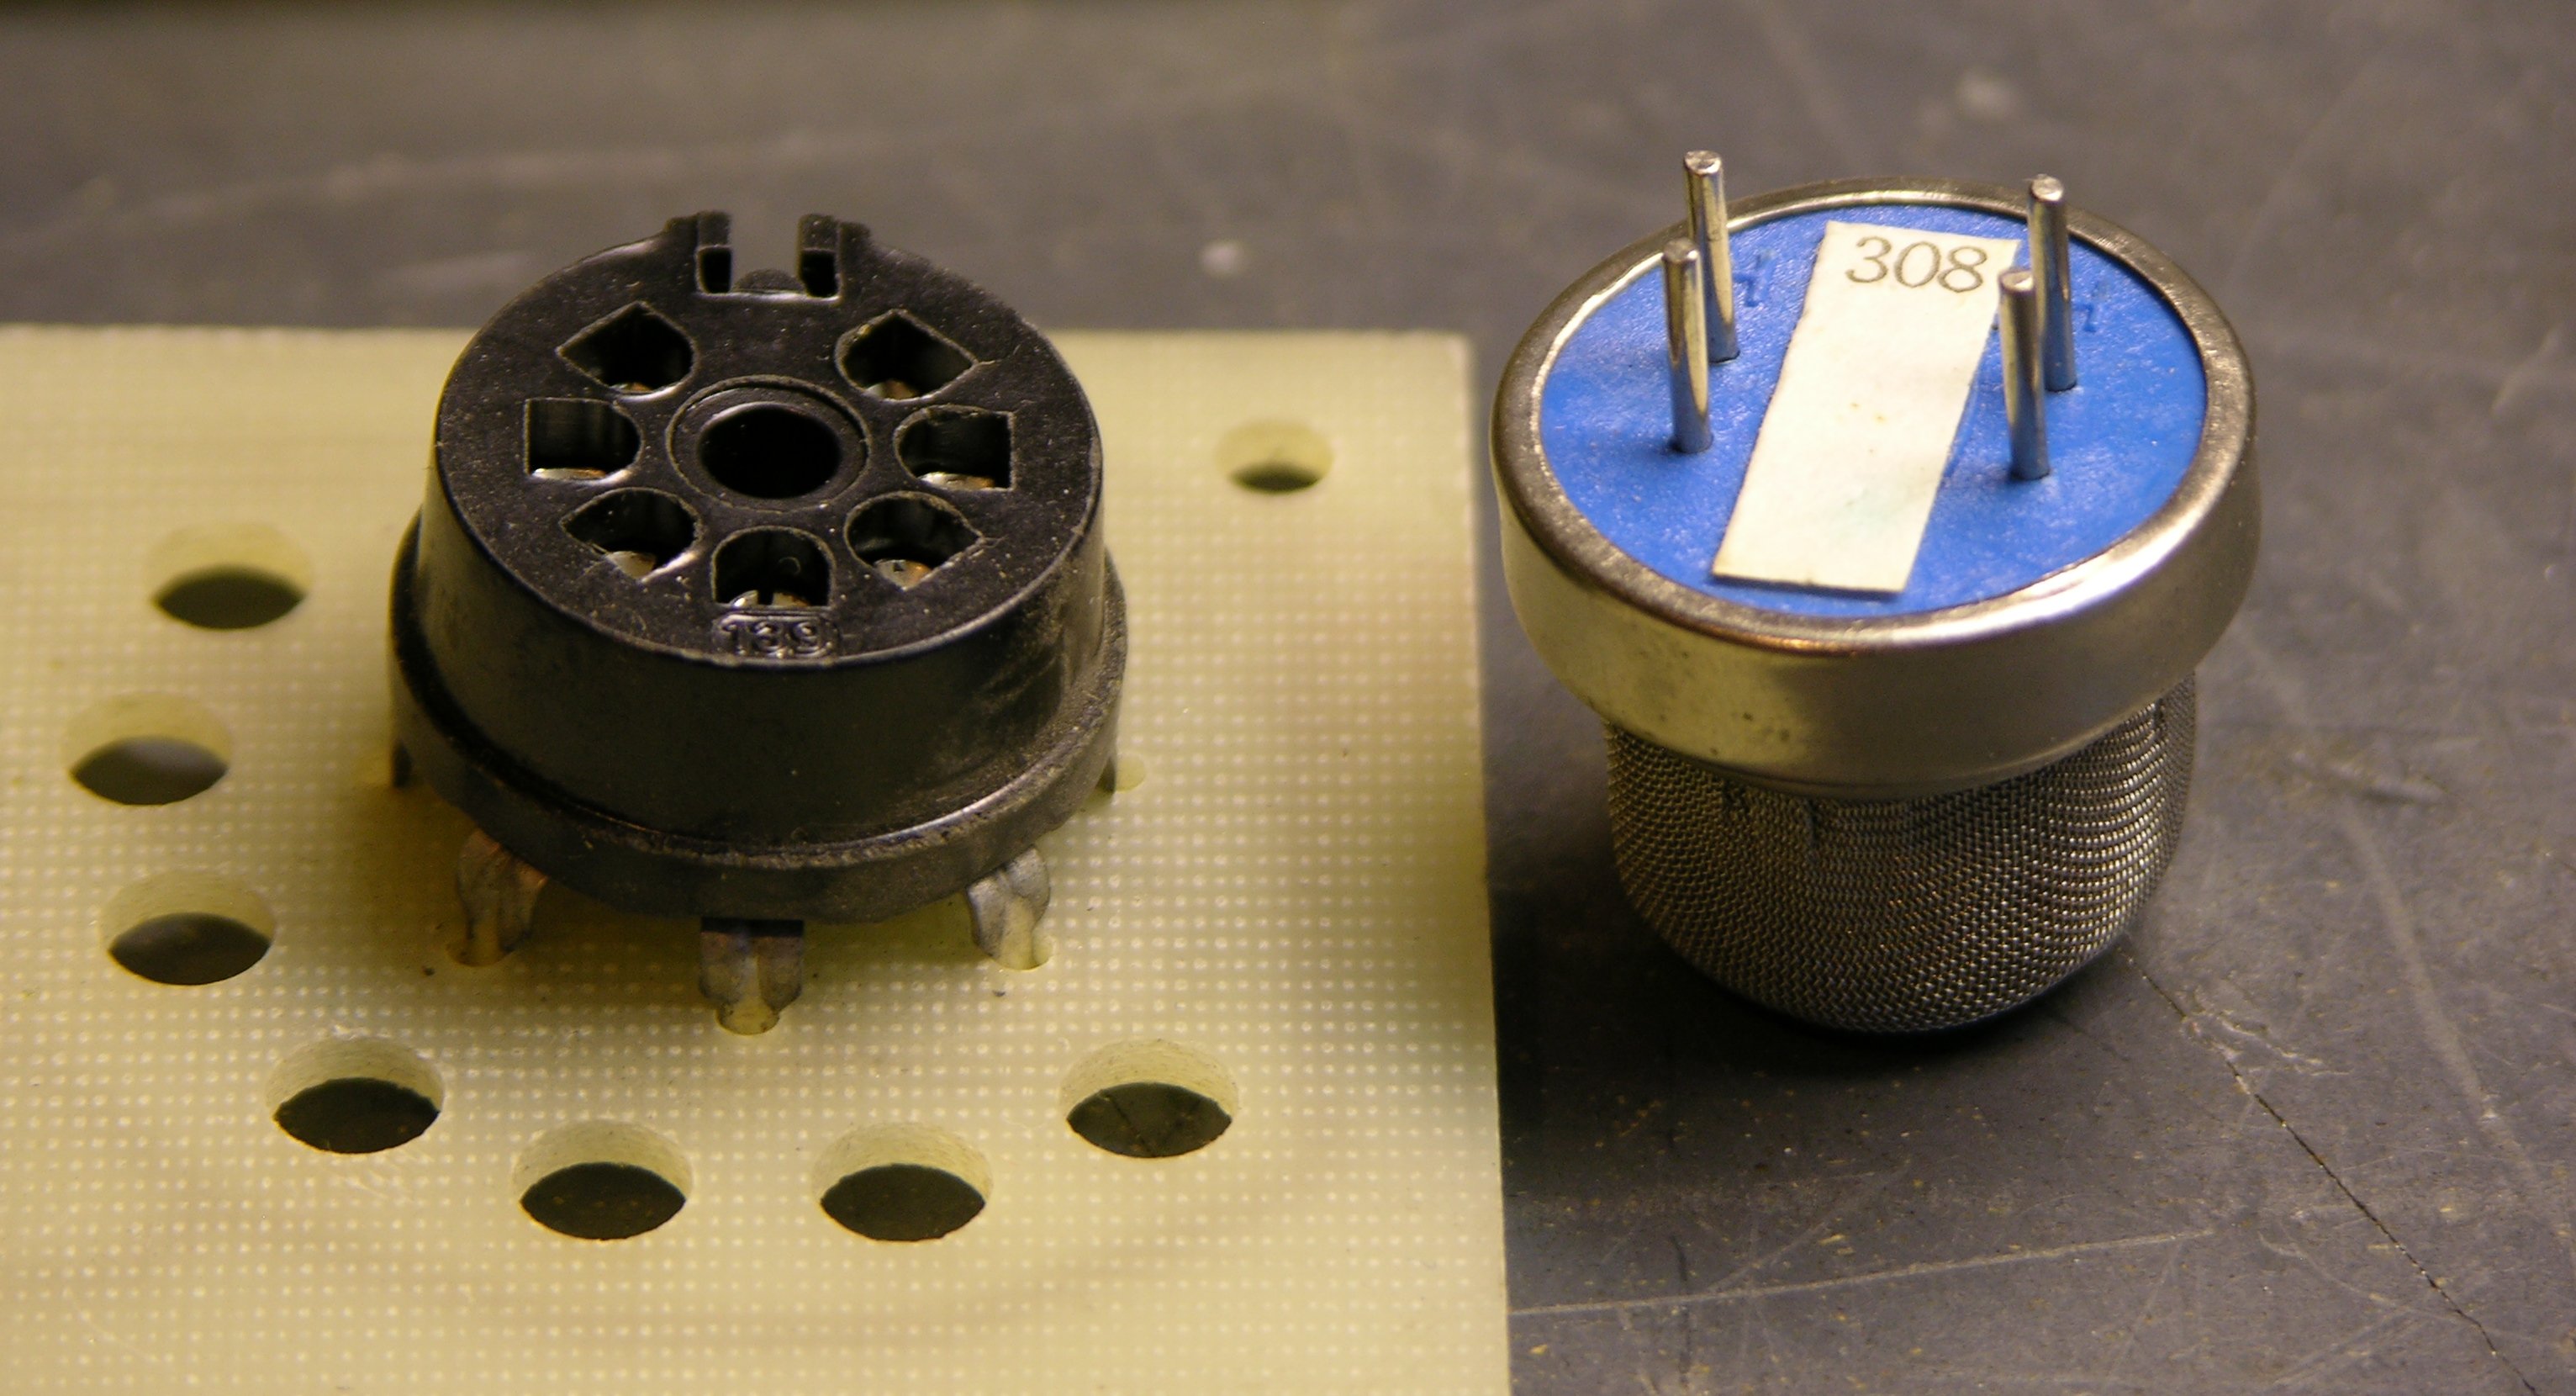
I picked up several of these at Lloyd’s electronics about eighteen years ago, I think for $1 each, in one of their dump bins. At the time, I was probably after the buzzers more than anything else. But I remember that I had hooked one up long enough to test it, and it worked. Trim the sensitivity and blow flammable gas into the element, and the buzzer goes off. (Flammable gas . . . mechanical buzzer . . . never mind . . .)
Now, I could loan him one of these, but they require 110VAC, they’re not safely packaged for mobile use, and they only give a binary output. So I figured I could reuse the sensor element from one and construct a tricorder handheld unit with analog (or at least more than binary) readout.
I didn’t make any promises and haven’t mentioned that I’m pursuing this, so there’s no pressure. But once it occurred to me, it seemed like an interesting project; so here I go.
Drawing the Whole Schematic
Why draw out the whole schematic? Because I had no idea how the sensor element worked. I wasn’t rapt to know how some unknown manufacturer had designed an alarm circuit; I simply needed to know how to work the sensor. With no part number on it and no knowledge of the field of gas detection, the easiest method seemed to be to see what the original circuit did and make guesses about the sensor from there.
In retrospect, everything I need to know about the sensor I could have figured out with my multimeter instead of figuring out the circuit rather than after figuring it out. But no harm done.
Scanning and Drawing
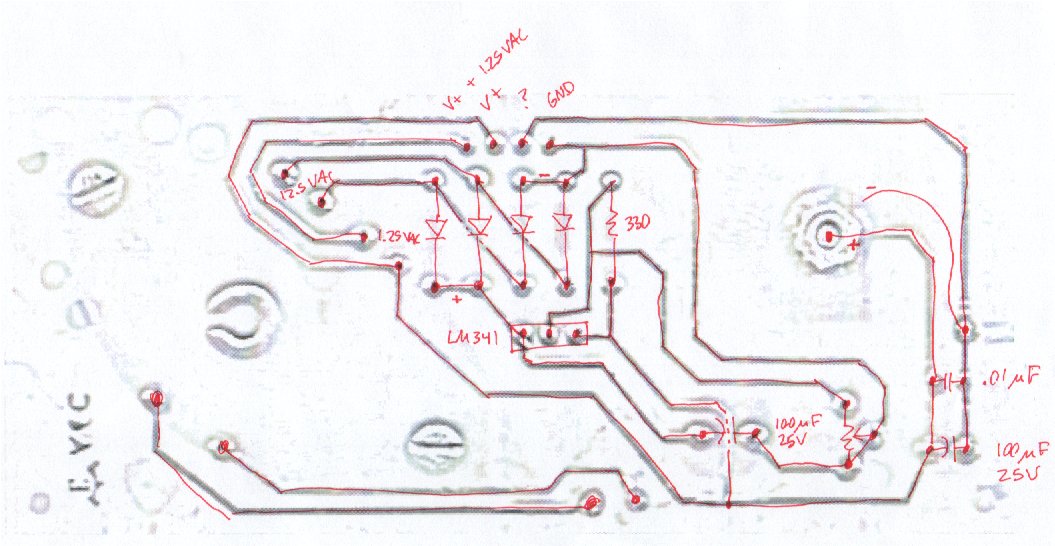
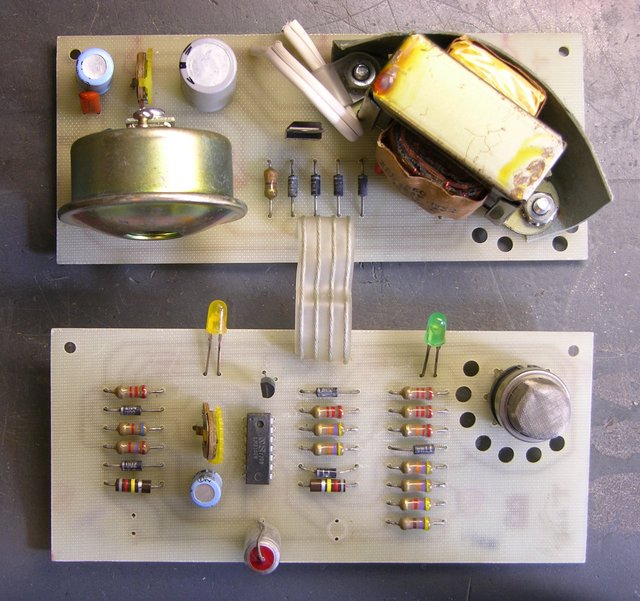
I started by scanning the solder side of both boards into the GIMP and mirroring them to give me a top-side view. The power board is pretty simple, so I ran an edge-detection to emphasize the traces against the light-colored board, printed it, then highlighted the traces and hand-drew the components.
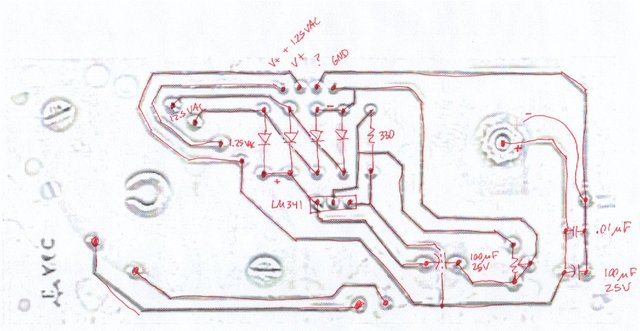
It has a bridge rectifier with a floating LM341 that’s presently delivering ~15VDC, the buzzer, and 1.25VAC from a separate transformer secondary that gets added to DC V+ and sent on one pin to the sensor board.
For the main sensor board, I set the scan at 1:1 scale in the GIMP and dragged rules over it so I could quickly identify the coordinates of each pin. (I didn’t draw them as lines, so they don’t show in this export.)

I then created an EAGLE schematic / board layout, adding and placing each component and then each trace, until my EAGLE copy matched the scan (more or less).
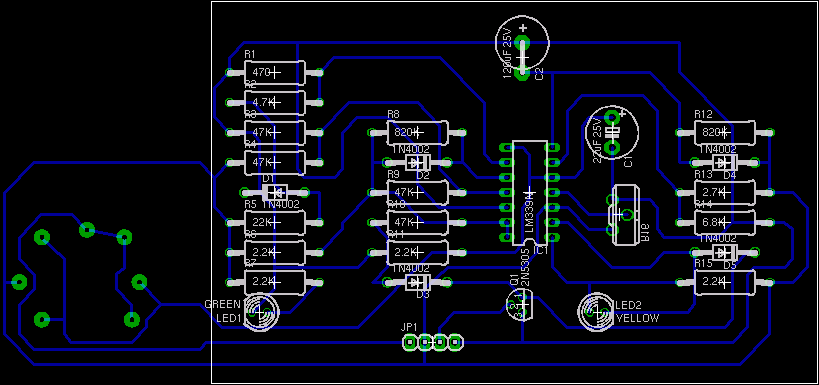
I first placed the parts on the schematic in the same place as on the board, to help keep track of what I was doing, so the schematic looked really ugly:
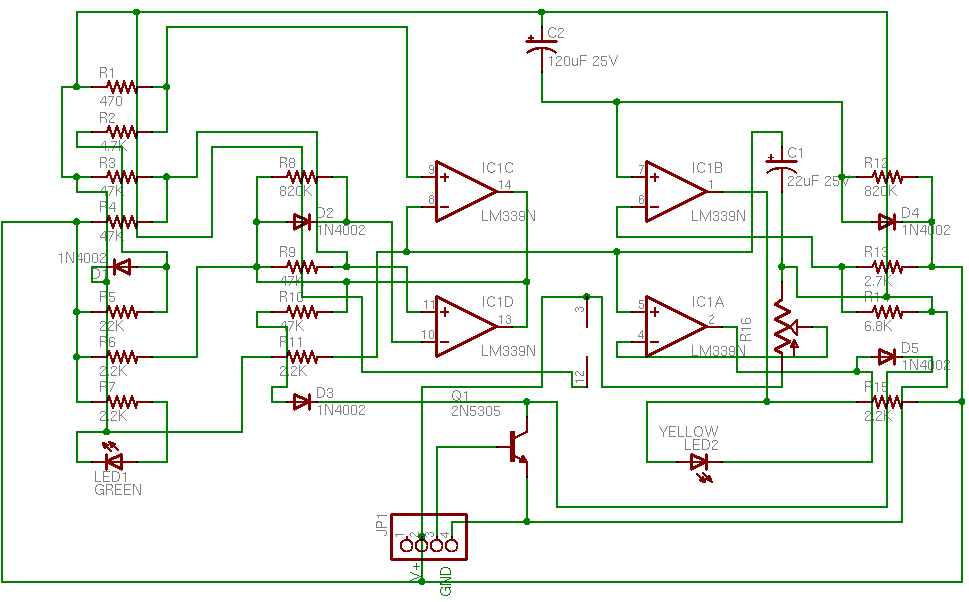
And then it was just a matter of dragging the schematic around into a more logical configuration.
The image compresses badly, so you’ll need to open that into a separate window if you’re interested in following along.
How It Works
In high-level terms, the sensor element (lower left) puts out some kind of voltage that runs through a bunch of comparators, and switches an NPN transistor that grounds the buzzer. Detect gas, make noise. But it took me a while to figure out why so darn many comparator stages are used.
First, it’s worth remembering what the LM339 comparator does. It has open-collector outputs, so you can tie its outputs together in a wire-AND (or active-low OR) configuration. If any output is low, the line goes low; if all outputs are high(-impedance), the pull-up resistor pulls the line high.
This configuration is used twice in the circuit: In R15, IC1B, and IC1A; and in R6, IC1D, and IC1C. IC1A and IC1B can each pull down R15 and keep its high signal from getting through to Q1; likewise IC1C and IC1D can each pull down R6 and keep its high signal from getting through. Diodes D3 and D5 perform diode OR logic: either one permits a high signal through to Q1, but a low signal is blocked and can’t pull down the other’s high signal.
So Q1 will have its base pulled high and activate the buzzer when
(IC1A AND IC1B) OR (IC1C AND IC1D)
Comparators
Now we just need to know what each comparator is doing.
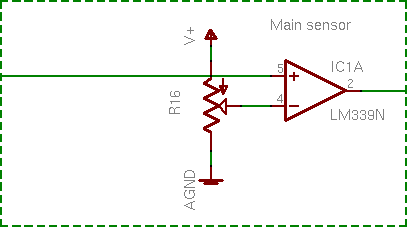
IC1A is simple: The sensor’s voltage is compared to an adjustable reference. This is the main action of the whole device.
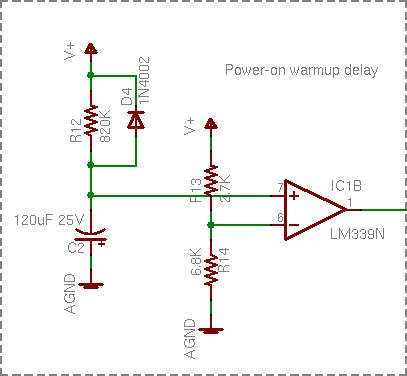
IC1B was the next one I figured out, although I didn’t have it quite right at first. Capacitor C2 charges through R12 and IC1B compares its voltage to a reference, so it’s a power-on delay. I wasn’t paying attention to how high R12′s resistance is (820kΩ), though, and I figured IC1B’s purpose was to keep the alarm from blatting when the power first comes on and before it stabilizes. That’s not quite it, which I’ll explain in a bit.
Before I move on, note the entire signal chain of V+, R15, IC1B, LED2, IC1A, D5, and Q1 along the right edge of the full schematic. IC1B and IC1A can each ground R15 and prevent it from pulling up Q1′s base.
IC1B also controls LED2, though. LED2′s cathode is grounded through either IC1A or Q1, so IC1A has no impact on LED2; but IC1B can pull down LED2′s anode. In English, LED2 indicates that the circuit is warmed up and ready to operate.
I find this extremely elegant. It’s not complicated; but in today’s world of cheap microcontrollers and FPGAs, I think clever thought has too often lost way to throwing lots of gates at a problem.
Continuing:
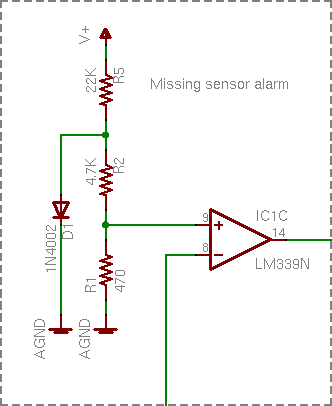
IC1C’s voltage divider seemed a bit odd, but it’s just establishing a very low reference. D1′s forward voltage is about .5V, and R2 – R1 divide that down to .05V. If this reference is higher than the sensor voltage, then trigger the alarm. Ahhh, it’s a missing sensor detector. The sensor is pluggable; if it got knocked loose, or broken, or maliciously removed, the alarm sounds a warning. Very nice.
IC1D I still don’t get. Best I’m able to measure it in circuit, it appears to be oscillating around 1.3MHz at startup until IC1C pulls it low and shuts it down. I have no idea what it’s supposed to be doing. And yes, I’m fairly sure I drew its schematic right.
Comparator Recap
So if the sensor element is missing (IC1C), the alarm sounds. Otherwise, once the circuit is warmed up (IC1B), a high enough voltage from the sensor (IC1A) sounds the alarm. Simple!
And it still doesn’t tell me how the sensor works. Feh.
The Sensor
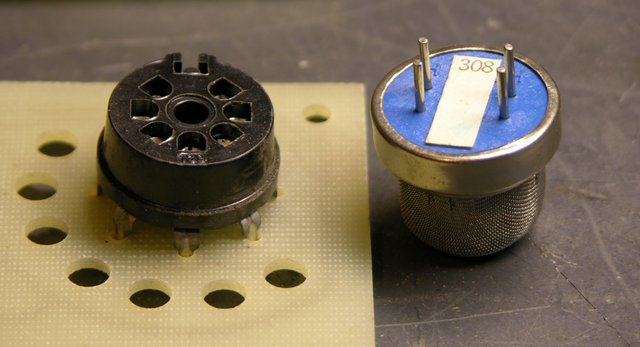
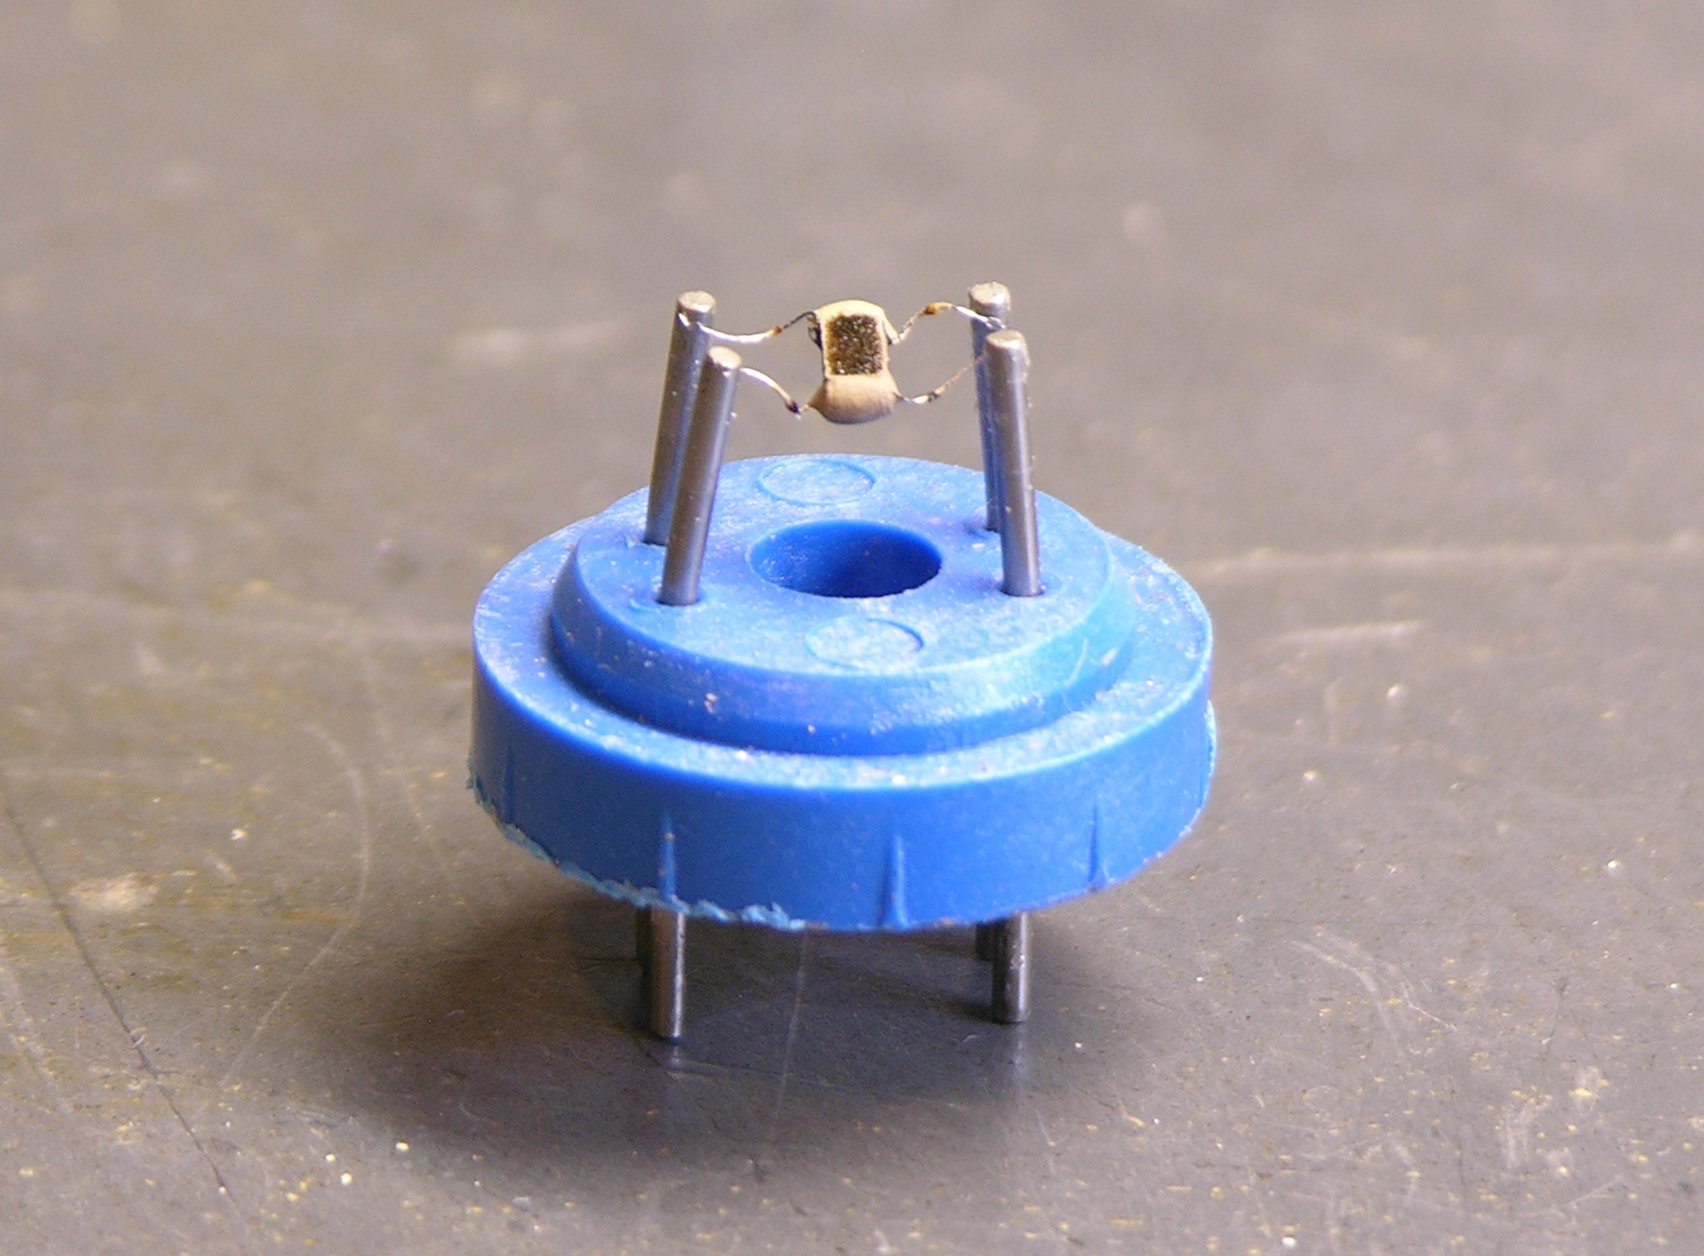
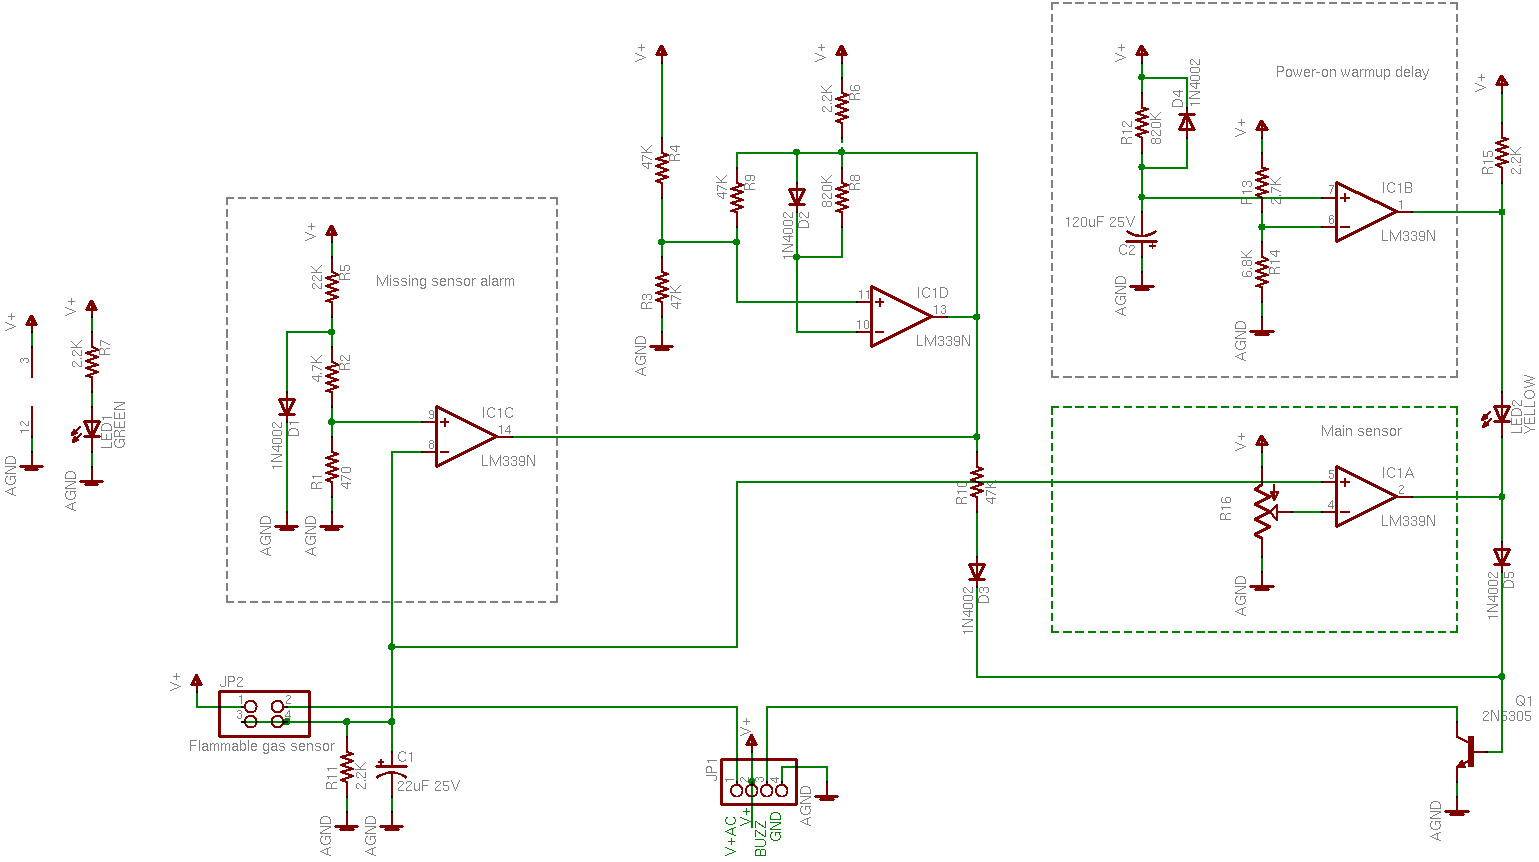
It’s not obvious from the aerial photograph of the whole board that the sensor has four pins in a rectangle, and that the socket has seven pins and the sensor can fit it in two different rotations. From the solder-side picture, though, the socket is wired such that (assuming the sensor is electrically symmetric) the sensor will be connected the same either way. So assume that the sensor is symmetric electrically as well as physically — that is, the pairs of pins are functionally interchangeable.
Looking back at the board layout and tracing carefully, V+ and V+AC connect across one long side of the sensor’s pinout rectangle. The other long side is wired directly together and functions as the output, connecting to R11 and C1 (both grounded) on the way. So: The sensor normally has a high resistance between its power pins and output pins; that resistance lowers when flammable gas is nearby, changing the sensor – R11 voltage divider and raising the voltage.
But why supply 15VDC + 1.25VAC to the power pins? I didn’t understand, so I cleaned the power supply board, insulated its 110V traces with electrical tape, plugged the circuit in, and took some measurements — and still didn’t get it. So I looked through my box for the sensor with the most-crushed windscreen and peeled it apart.

And I searched for flammable gas sensors online, eventually finding this slide on catalytic sensors from an OSHA workshop titled What to Look for in Gas Detection and Measurement Instrumentation.
It doesn’t match exactly, but the basic idea seems to be that you heat up a specially-coated thermistor bead; flammable gas oxidizes on it, heating it further; and you measure the change in resistance due to the increase in heat.
And things start to make more sense. You heat the bead with a small amount of AC across pins 1 and 2, and you run that AC on a DC offset so you can more easily measure resistance changes between pins 1-2 and 3-4 by making it part of a much higher voltage DC voltage divider. I can deal with this.
Sensor Measurements
Running the open sensor in the live circuit shows that its bead heats up to about 160°F — and it takes about half a minute to warm up, hence the long delay from R12 – C2 – IC1B before turning on the yellow “ready” LED. (Not just a power-up delay, but a warmup delay.) The sensor also responds a lot more rapidly to approaching and dispersing gas with the windscreen removed.
The sensor output voltage across C1 is 0V when the circuit is first powered up, rises to about 4V when the element is warm, and climbs as close as I care to measure to V+ (15V) when gas is present. The sensor and R12 (2.2KΩ) form a voltage divider across the 15V supply, so:
| Condition |
VC1 |
Rsensor |
| cold |
0V |
∞ |
| warm |
4V |
~600Ω |
| gas present |
15V |
<< 2.2KΩ |
Finally, I measure each “long leg” of the sensor at 2Ω and I measure about half an amp flowing on the “heater” side. And that’s all I need to know about the sensor.
Building a Handheld
That’s next. I’m not keen to build a biased AC supply into a handheld unit, but nor do I need to. I can heat the element with a high-frequency square wave; that simply means that the sensor output will also be a square wave, and I can deal with that by integrating the output or using a peak level detector (essentially the same thing).
It takes about half a watt to heat the bead to 160°F, and that’ll drain a 9V battery fairly quickly with constant use, but I use rechargeables anyway. And I may find I don’t have to heat it quite that much.
Where am I going to find a reasonable socket for the darn thing? I’d really prefer a nice rectangular configuration, instead of perpetuating the weird any-rotation-you-want of the original.