Replacing My PowerBook Screen, Part 12: G4 550 Reassembly, Bottom Side
Quick Links
Background
Part 1: G4 500 Disassembly, Bottom Side
Part 2: G4 500 Disassembly, Top Side
Part 3: G4 500 Disassembly, Back Edge Screws
Part 4: G4 500 Disassembly, Removing the MB and Screen
Part 5: G4 550 Disassembly, Bottom Side
Part 6: G4 550 Disassembly, Top Side
Part 7: G4 550 Disassembly, Back Edge
Part 8: G4 550 Disassembly, Removing the MB and Screen
Part 9: G4 550 Reassembly, Screen
Part 10: G4 550 Reassembly, Motherboard
Part 11: G4 550 Reassembly, Top Side
Part 12: G4 550 Reassembly, Bottom Side
Aftereffects
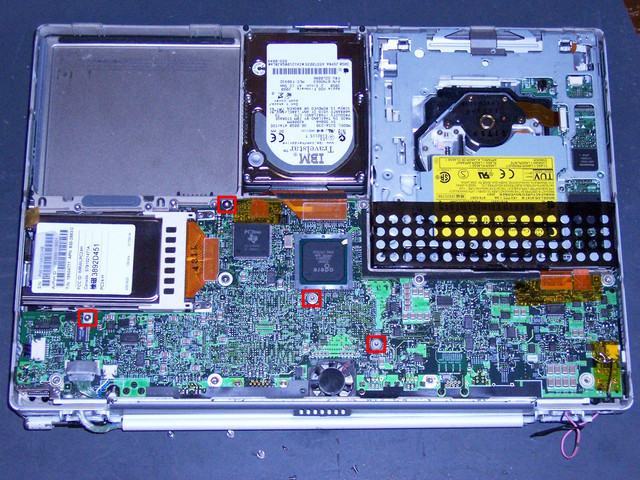
Flip the PowerBook over one last time and reinstall the four T8 screws that hold the motherboard to the case from underneath. Take care not to put them into holes used to hold on the back cover, or you’ll just have to move them again in a few minutes. (Ahem.)
Set the back cover onto the computer, slightly forward of its actual position, and slip it down and back into place. Reinstall the eight identical T8 screws that hold the cover on.
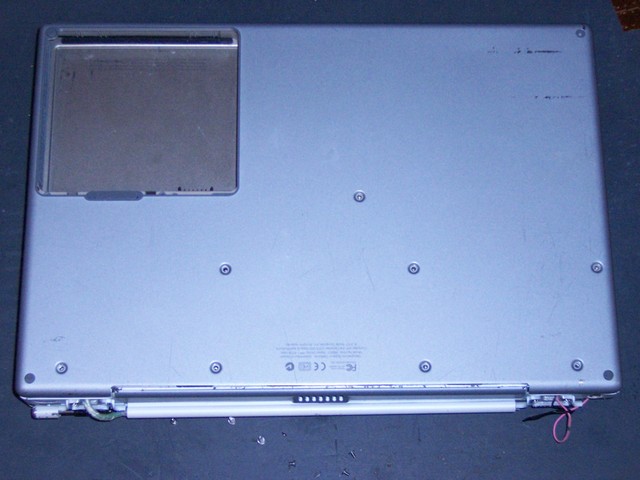
Finally, replace the hinge covers and reattach them with the four remaining T8 screws, routing the wires carefully through the hinge channels and poking the excess into the interior of the case.
Milestone 3: Reassembly Complete!
Congratulations! The hard part is over! Snap in the battery, power up the computer, and enjoy your repair!
Next: Aftereffects
Sections
Background
Part 1: G4 500 Disassembly, Bottom Side
Part 2: G4 500 Disassembly, Top Side
Part 3: G4 500 Disassembly, Back Edge Screws
Part 4: G4 500 Disassembly, Removing the MB and Screen
Part 5: G4 550 Disassembly, Bottom Side
Part 6: G4 550 Disassembly, Top Side
Part 7: G4 550 Disassembly, Back Edge
Part 8: G4 550 Disassembly, Removing the MB and Screen
Part 9: G4 550 Reassembly, Screen
Part 10: G4 550 Reassembly, Motherboard
Part 11: G4 550 Reassembly, Top Side
Part 12: G4 550 Reassembly, Bottom Side
Aftereffects