Replacing My PowerBook Screen, Part 07: G4 550 Disassembly, Back Edge
Quick Links
Background
Part 1: G4 500 Disassembly, Bottom Side
Part 2: G4 500 Disassembly, Top Side
Part 3: G4 500 Disassembly, Back Edge Screws
Part 4: G4 500 Disassembly, Removing the MB and Screen
Part 5: G4 550 Disassembly, Bottom Side
Part 6: G4 550 Disassembly, Top Side
Part 7: G4 550 Disassembly, Back Edge
Part 8: G4 550 Disassembly, Removing the MB and Screen
Part 9: G4 550 Reassembly, Screen
Part 10: G4 550 Reassembly, Motherboard
Part 11: G4 550 Reassembly, Top Side
Part 12: G4 550 Reassembly, Bottom Side
Aftereffects
Hinge Covers and Hinges
Turn the case so the hinges are facing you, close the lid and remove the four T8 screws holding the hinge covers, and remove the covers.
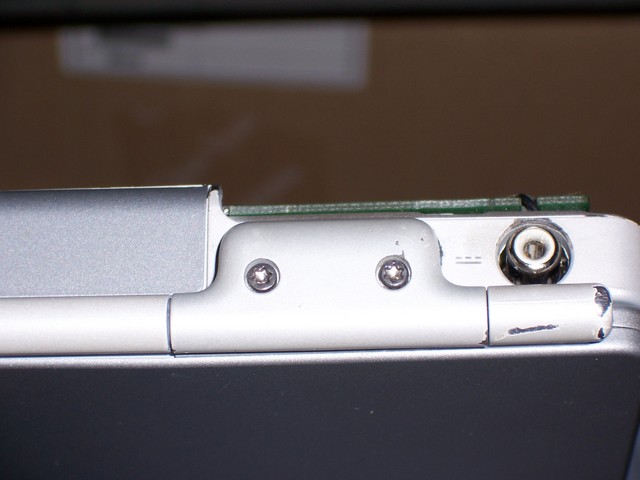
Remove the four shiny Phillips #1 screws that hold the two molded hinge standoffs to the body. As on the 500, don’t bother removing the black screws that hold the hinges to the standoffs–the hinges and standoffs will stay with the lid when it’s removed.
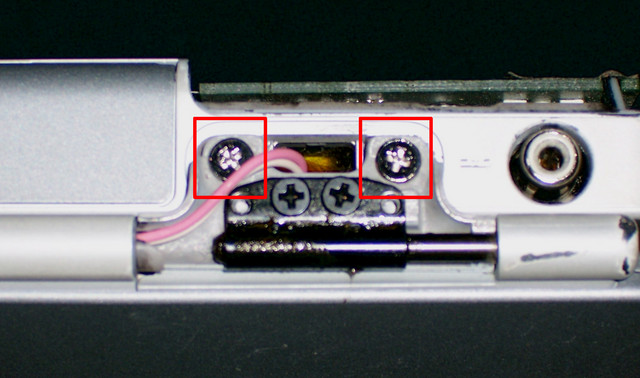
Back Edge Screws
As on the 500, I can’t see any way that this step is actually necessary. Try going on to the next step to tilt up the motherboard, and if you have trouble, you can come back and try this.
Remove the four tiny Torx screws that hold the motherboard to the back edge of the case. (Again, I used a .05″ hex wrench because I didn’t have a Torx screwdriver small enough.)

The motherboard should now be loose in the case.
Next: G4 550 Disassembly, Removing the MB and Screen
Sections
Background
Part 1: G4 500 Disassembly, Bottom Side
Part 2: G4 500 Disassembly, Top Side
Part 3: G4 500 Disassembly, Back Edge Screws
Part 4: G4 500 Disassembly, Removing the MB and Screen
Part 5: G4 550 Disassembly, Bottom Side
Part 6: G4 550 Disassembly, Top Side
Part 7: G4 550 Disassembly, Back Edge
Part 8: G4 550 Disassembly, Removing the MB and Screen
Part 9: G4 550 Reassembly, Screen
Part 10: G4 550 Reassembly, Motherboard
Part 11: G4 550 Reassembly, Top Side
Part 12: G4 550 Reassembly, Bottom Side
Aftereffects