Replacing My PowerBook Screen, Part 05: G4 550 Disassembly, Bottom Side
Quick Links
Background
Part 1: G4 500 Disassembly, Bottom Side
Part 2: G4 500 Disassembly, Top Side
Part 3: G4 500 Disassembly, Back Edge Screws
Part 4: G4 500 Disassembly, Removing the MB and Screen
Part 5: G4 550 Disassembly, Bottom Side
Part 6: G4 550 Disassembly, Top Side
Part 7: G4 550 Disassembly, Back Edge
Part 8: G4 550 Disassembly, Removing the MB and Screen
Part 9: G4 550 Reassembly, Screen
Part 10: G4 550 Reassembly, Motherboard
Part 11: G4 550 Reassembly, Top Side
Part 12: G4 550 Reassembly, Bottom Side
Aftereffects
When I came back to finish the screen replacement, I had to start by disassembling the PowerBook G4 550. Most of the process was the same as on the 500, so I’ll speed through the description and highlight mainly the differences.
Disconnecting the Motherboard, Bottom Side
Once again, I had already removed the battery, the eight cover screws (this time T8), and the back cover. I left in the hard drive and DVD, since I had learned that they didn’t need to come out.
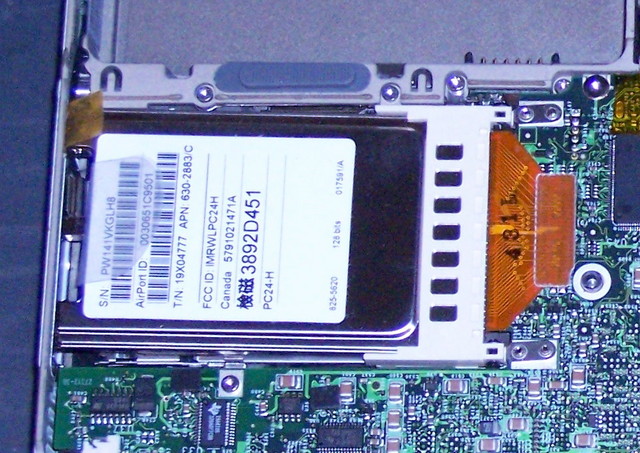
Since the 550 had an AirPort card in it, I removed that first. To get it out, lift the tape holding the antenna cable to the card, unclip the card from the metal hold-down clip at the left end, lift the card and unplug the cable, and pull the card out of the socket.
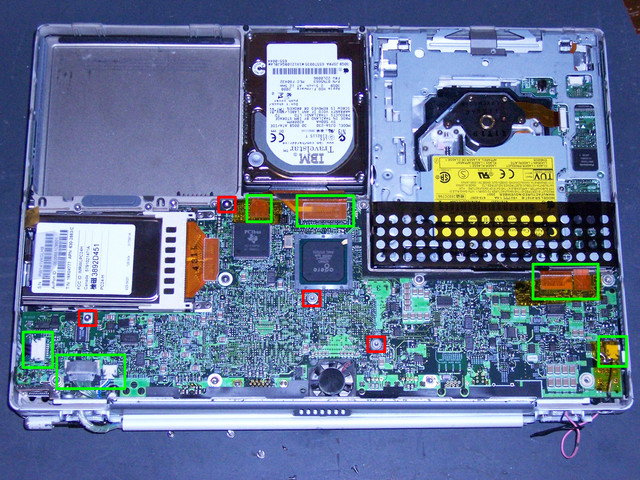
With the AirPort card out of the way, remove the four T8 screws holding down the motherboard (shown in red); and unplug the connectors for (going clockwise from the top) the thing to the left of the hard drive connection, the hard drive, two for the DVD drive, the hibernate heartbeat light, the video and backlight, and the unknown connector with all black wires (shown in green). For some reason, most of these connectors had more tape of them; I just lifted the tape with the connectors and put it back when I was done.
Remember, the motherboard is still screwed to the case from the top side, so you can’t lift it yet.
Next: G4 550 Disassembly, Top Side
Sections
Background
Part 1: G4 500 Disassembly, Bottom Side
Part 2: G4 500 Disassembly, Top Side
Part 3: G4 500 Disassembly, Back Edge Screws
Part 4: G4 500 Disassembly, Removing the MB and Screen
Part 5: G4 550 Disassembly, Bottom Side
Part 6: G4 550 Disassembly, Top Side
Part 7: G4 550 Disassembly, Back Edge
Part 8: G4 550 Disassembly, Removing the MB and Screen
Part 9: G4 550 Reassembly, Screen
Part 10: G4 550 Reassembly, Motherboard
Part 11: G4 550 Reassembly, Top Side
Part 12: G4 550 Reassembly, Bottom Side
Aftereffects