I crave a CNC mill for trace-isolation milling prototype PC boards and I haven’t managed to get my CupCake filament deposition machine calibrated so I can use it. (Build platform leveling and filament feed are my current showstoppers. I’ll get back to it.)
I knew that someone had proposed mounting a Dremel in place of the CupCake’s extruder and that MaskedRetriever had modeled a mounting bracket; but curiously, I haven’t heard any more about using the CupCake for milling. Surely someone has done it; I just haven’t run across it.
Last night while I was asleep, the facts and the immediacy of the situation came together: EAGLE can output trace-isolation g-code and ReplicatorG reads g-code and drives the CupCake. Really??? PCB trace-isolation milling is that simple???
Yes. Yes it is.
PCB-GCode
I have plenty of sample PCB layouts I could use for testing and I knew exporting trace-isolation g-code from EAGLE required a User Language Program (ULP) but couldn’t remember the details. It turns out to be the marvelous PCB-GCode written by John Johnson, which is a free download from CadSoft’s user-contributed ULP page. Don’t be distracted by pcb-gcode-wizard; it’s a viewer you can use after running PCB-Gcode.
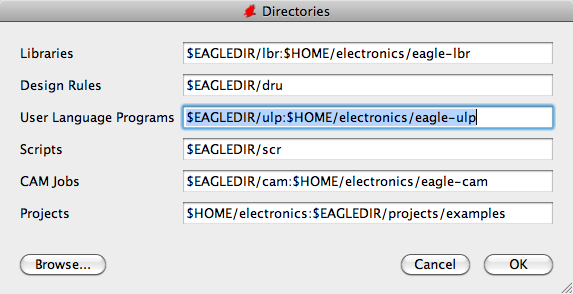
As noted in a forum post, if you have multiple directories in your ULP search path, PCB-Gcode only finds its supporting files in the first directory listed. Be sure to unzip it to the application ULP directory (not my first choice, as it’s overwritten every time a new EAGLE version is installed) or list your private ULP directory first (not my first choice, as that leads to a long directory-clicking experience every time you want to run an EAGLE-supplied ULP).
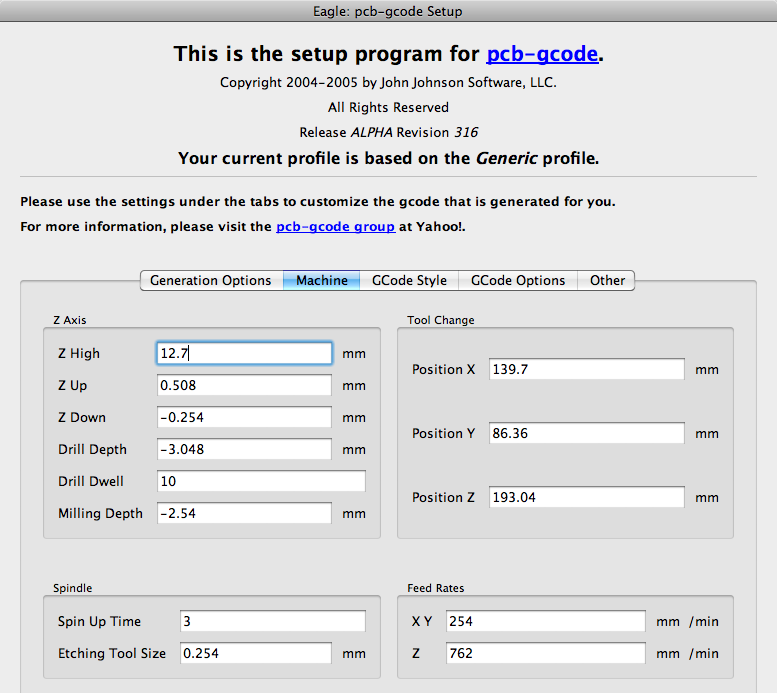
You begin by telling PCB-GCode a little about your milling machine, including positions and feed rates (and that ReplicatorG wants dimensions in mm). Once configured, running PCB-GCode is almost anticlimactic. It flashes some things on and off in your board layout while it figures toolpaths, then drops several *.nc g-code files in your directory. ReplicatorG really likes g-code files to be named *.gcode, so I copied the top-side file accordingly.
Testing with a Pen
To be sure PCB-GCode’s output was compatible with ReplicatorG, I first loaded the resulting g-code file and ran the CupCake with the extruder still mounted, far above the build platform. It appeared to be moving the platform appropriately.
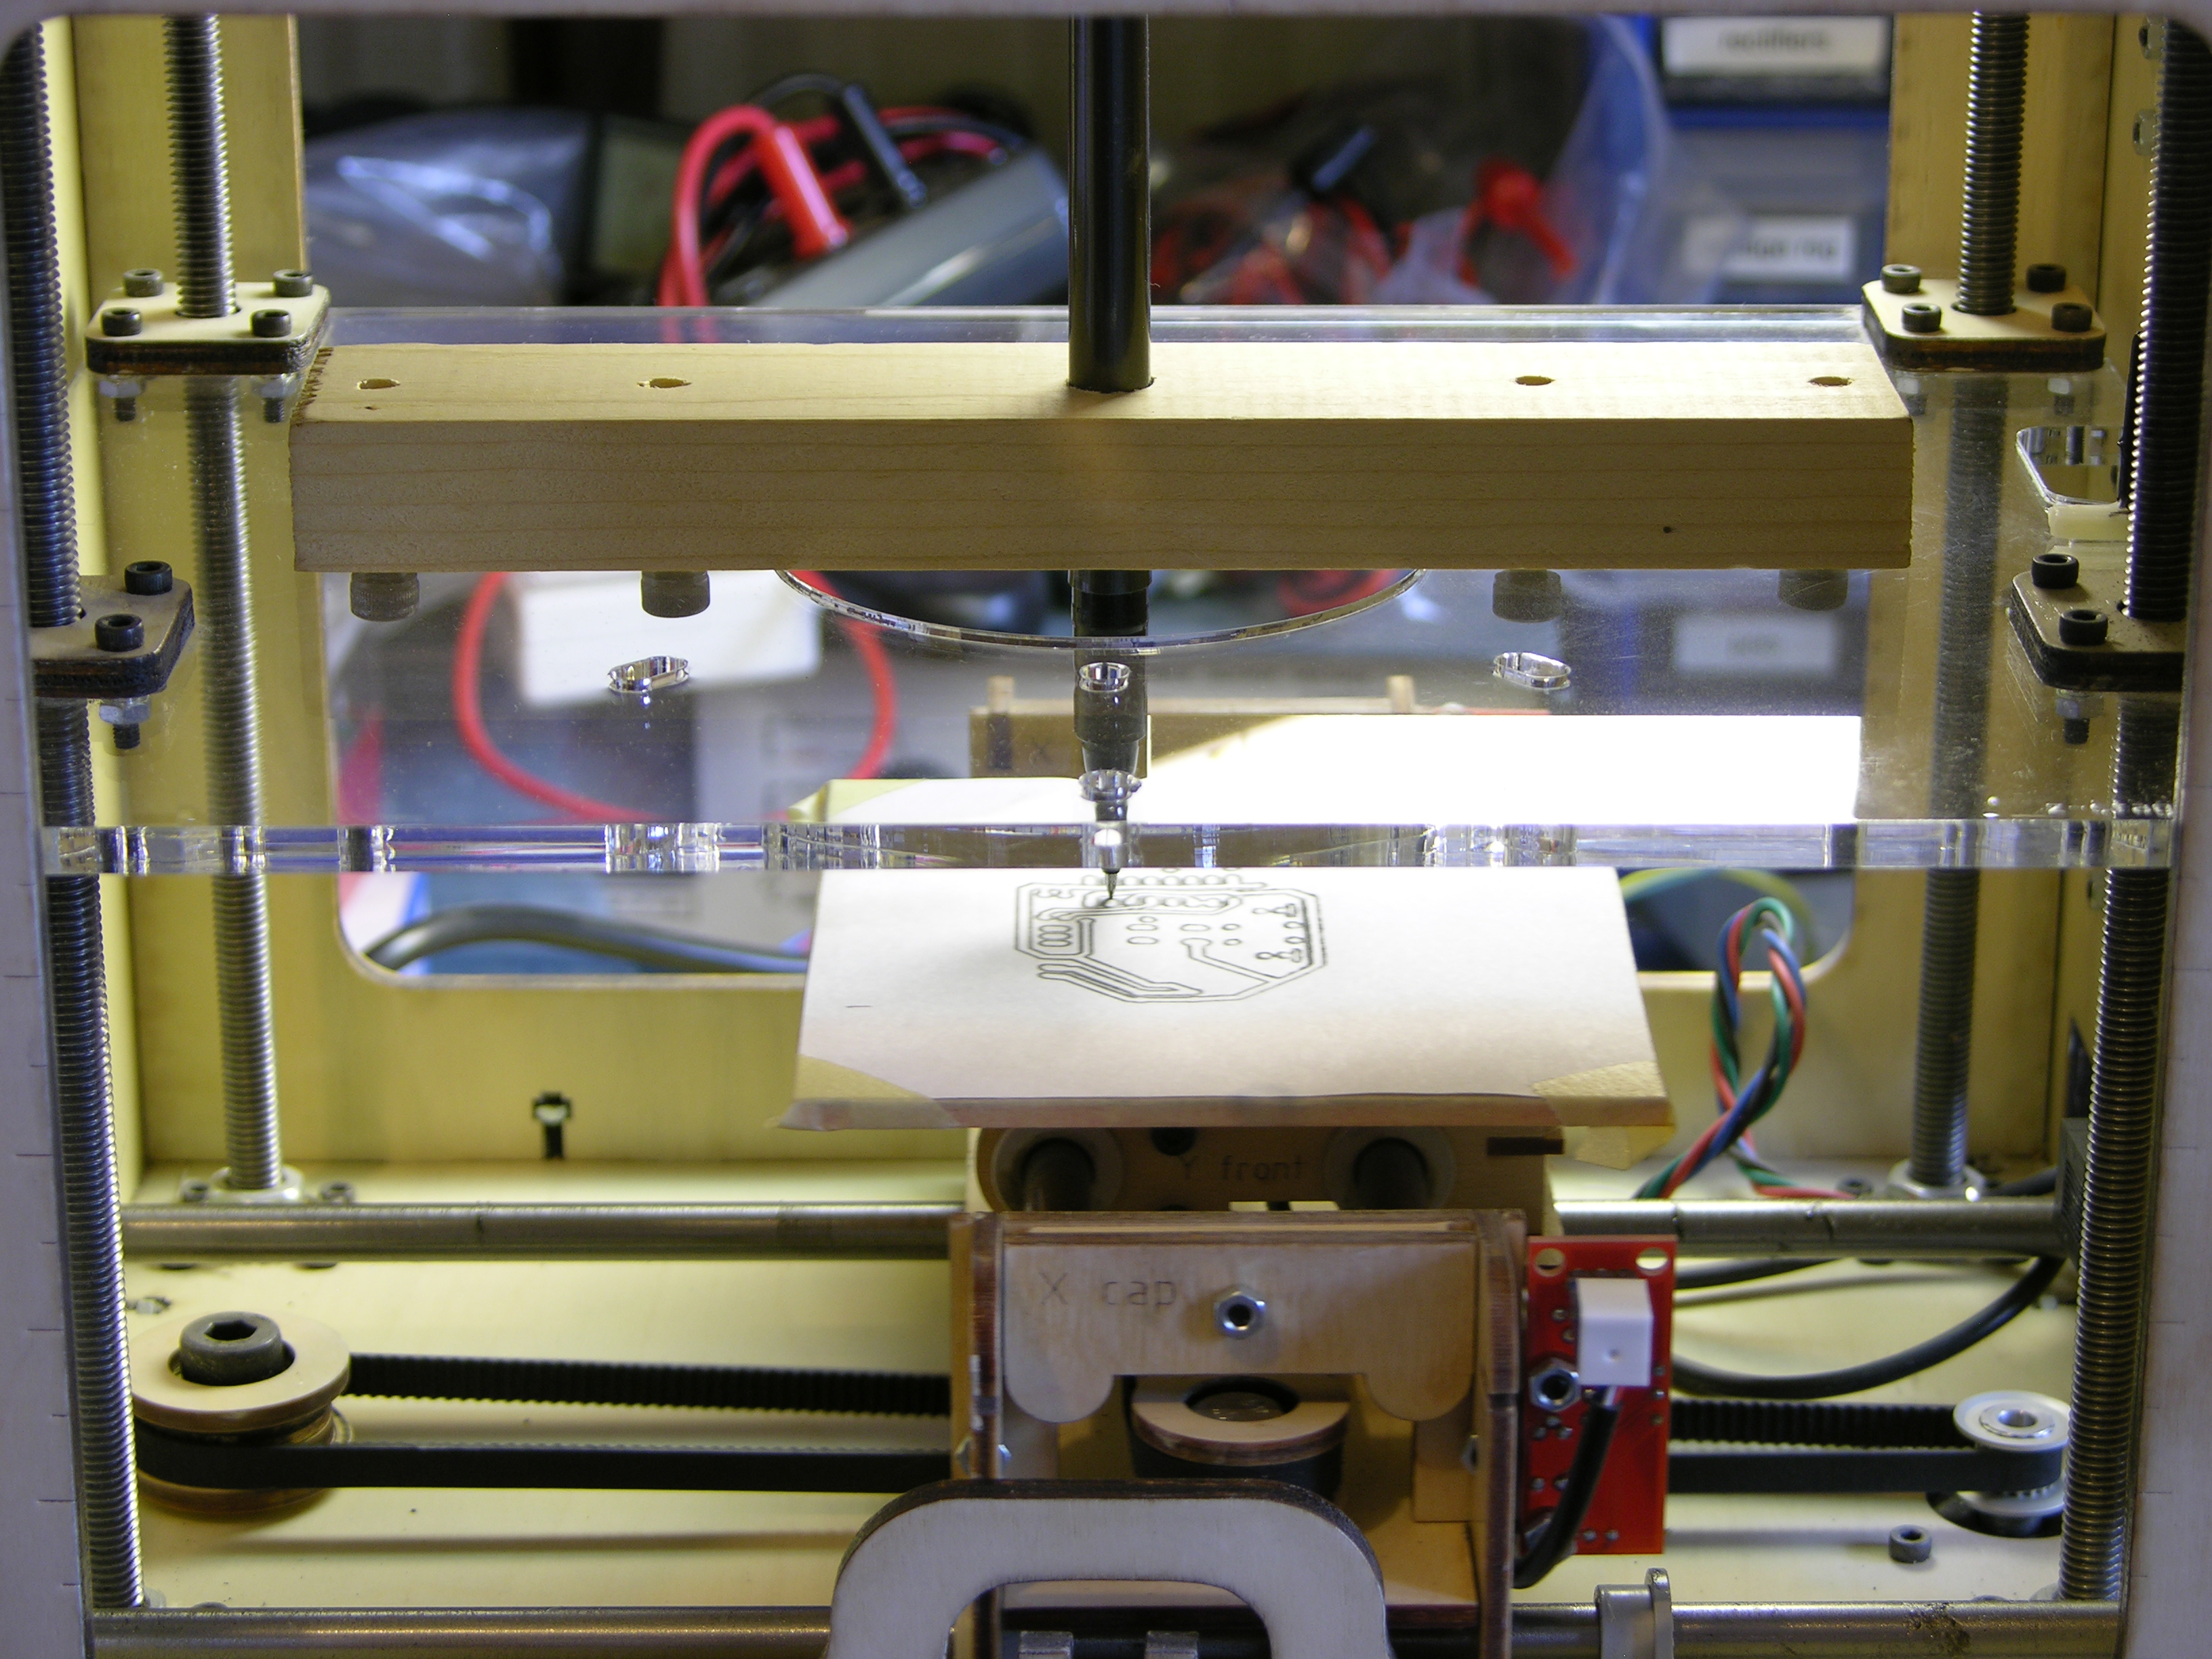
Next I wanted to test that the orientation and scale were as I expected, and for that I needed a bit more permanent record of the movements of the machine. I used the extruder’s dino mounts to mark four hole positions on a stick, drilled another hole for a pen, mounted it on the Z stage, and had a $0 version of the $85 Unicorn pen plotter.
I attached a spare acrylic base plate from my heated build platform to the Y stage with double-stick foam, covered it with a cutout from a cereal box, and taped paper to that.
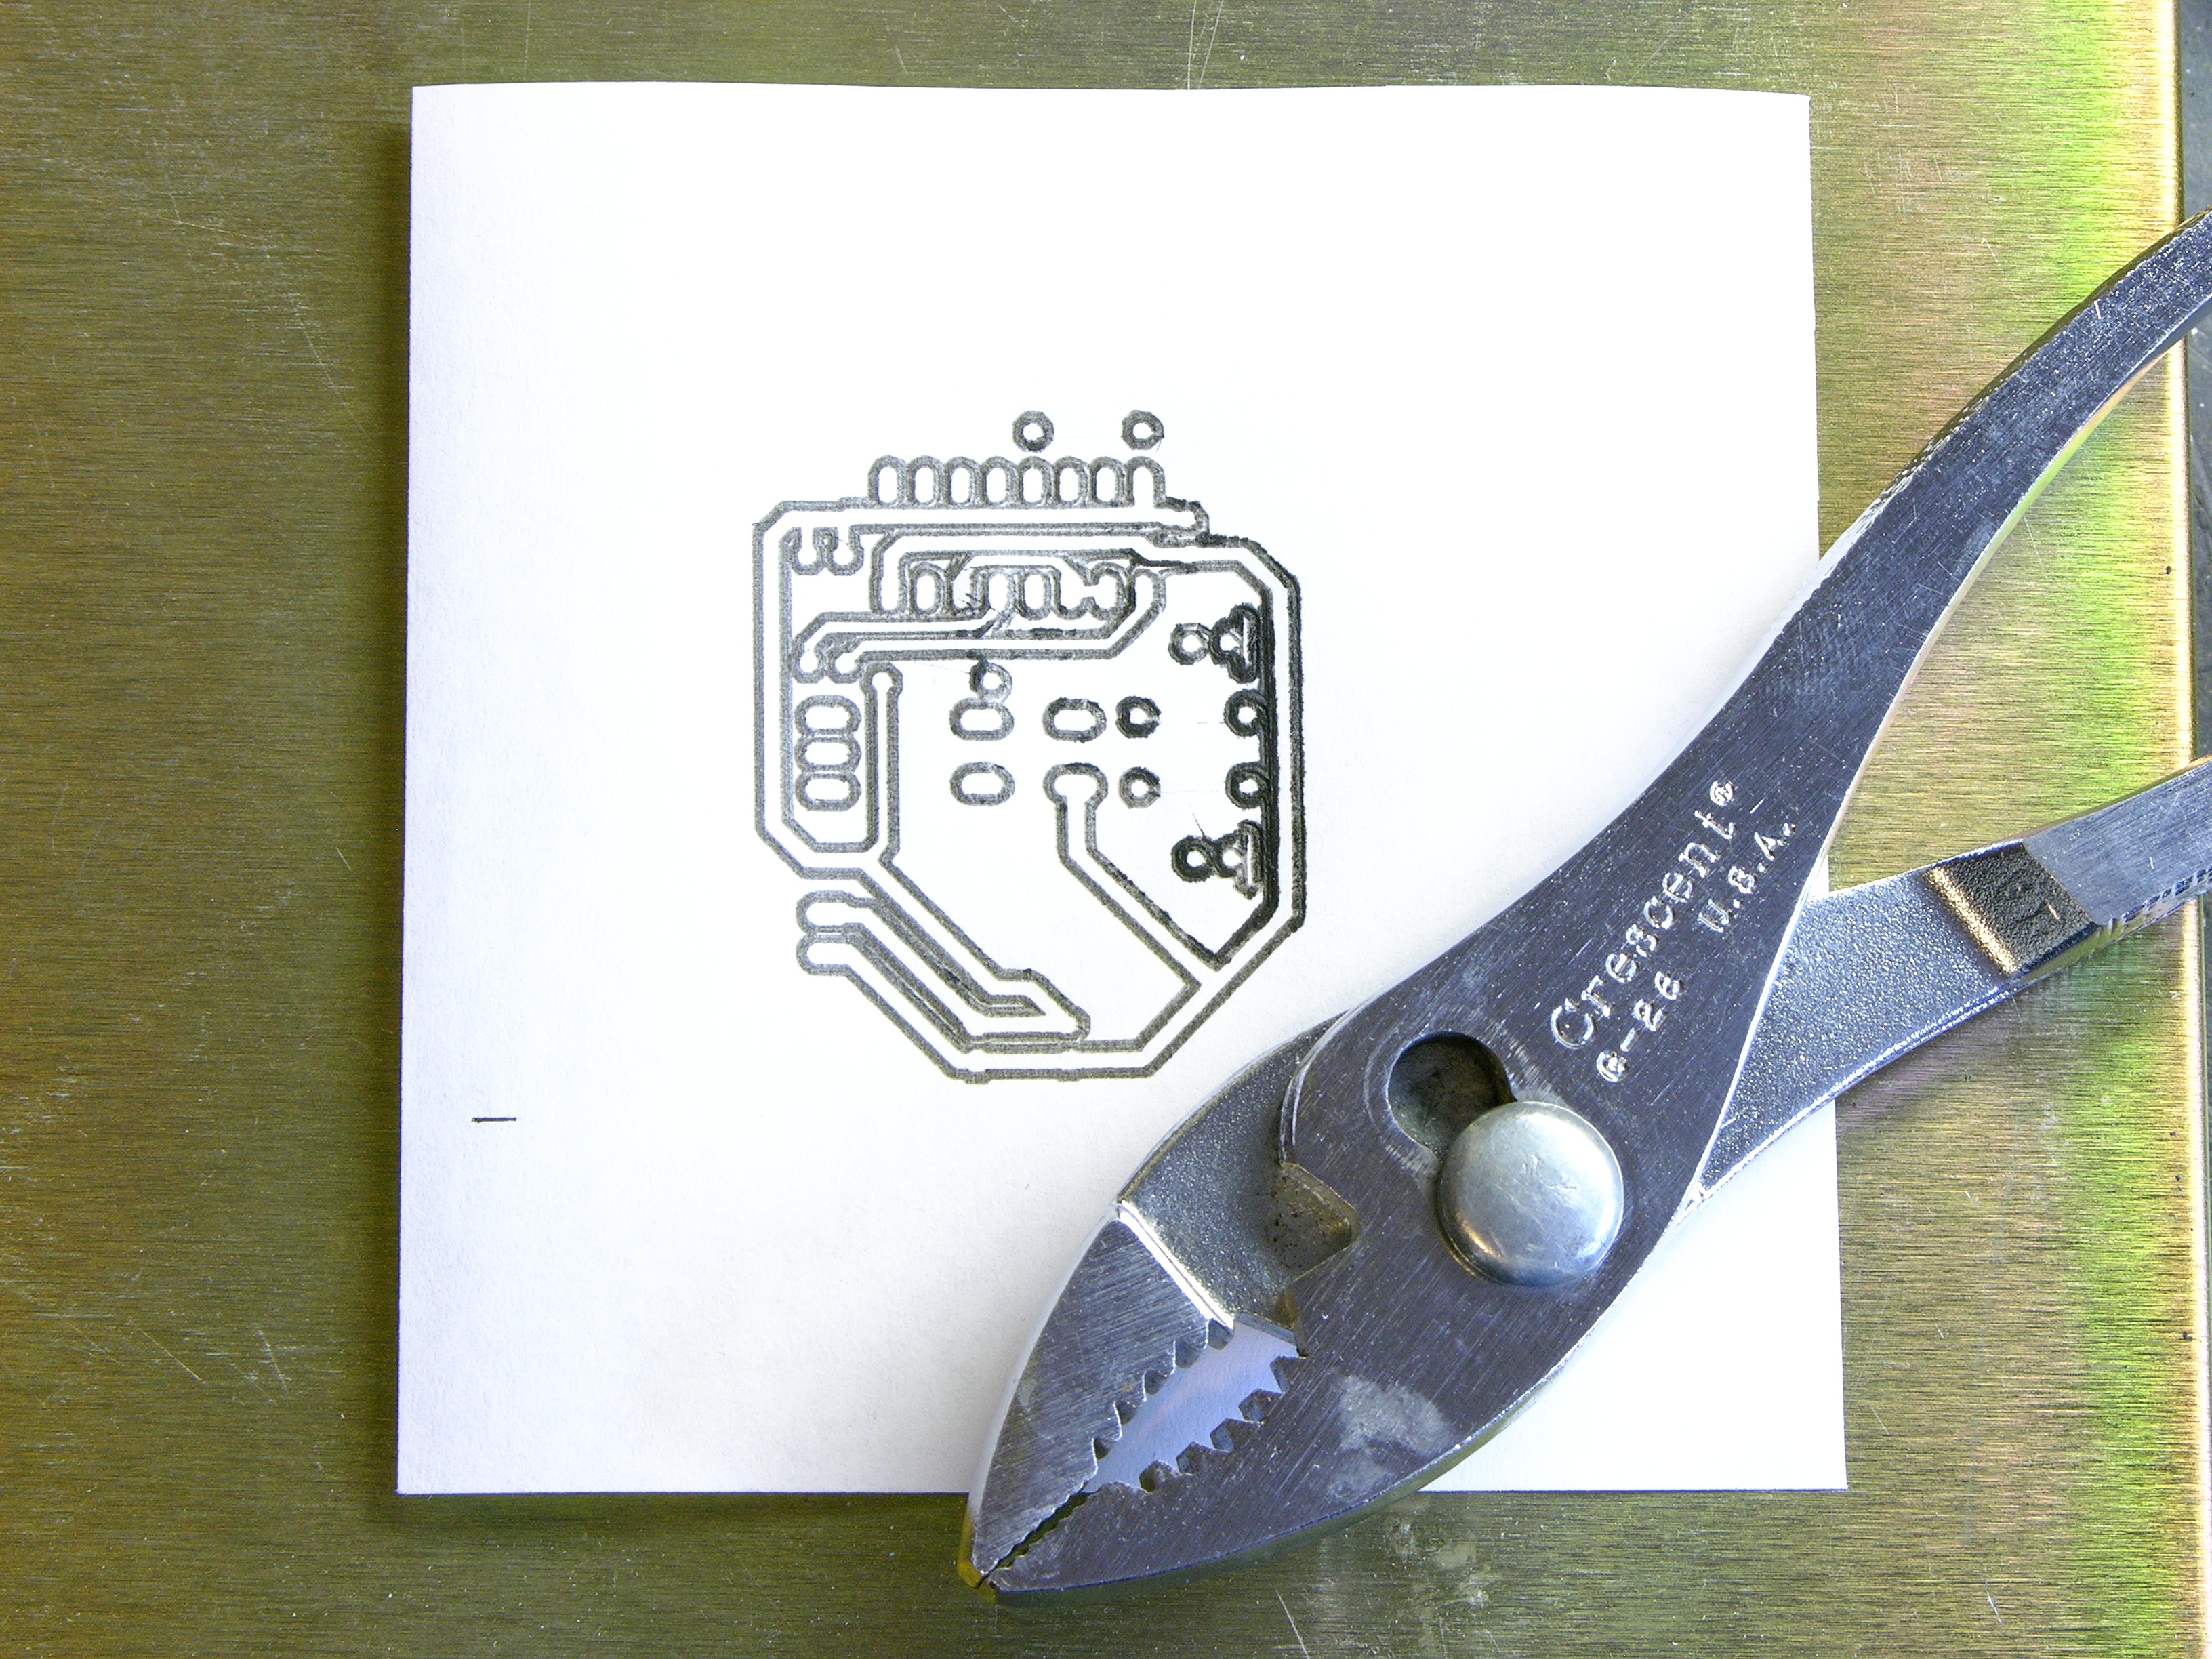
As shown above, EAGLE → CupCake pen plotter worked great! Orientation and scale were as expected on the first try; and I got to see the multi-pass isolation milling, which should ease some of my troubles with solder bridging over milled gaps.
Milling

For my milling attempt, I turned to the Handy Grinder (tastes like real octopus!) that I bought a loooong time ago with the intent of building a CNC drill/mill. The advantage it offers over a Dremel is that it’s nearly cylindrical — and almost exactly 1.75″ diameter — so instead of making a fancy mount, I used a hole saw to cut a recess in the side of another stick, lined the recess with a couple of strips of adhesive foam, and held the tool in place with zip ties.
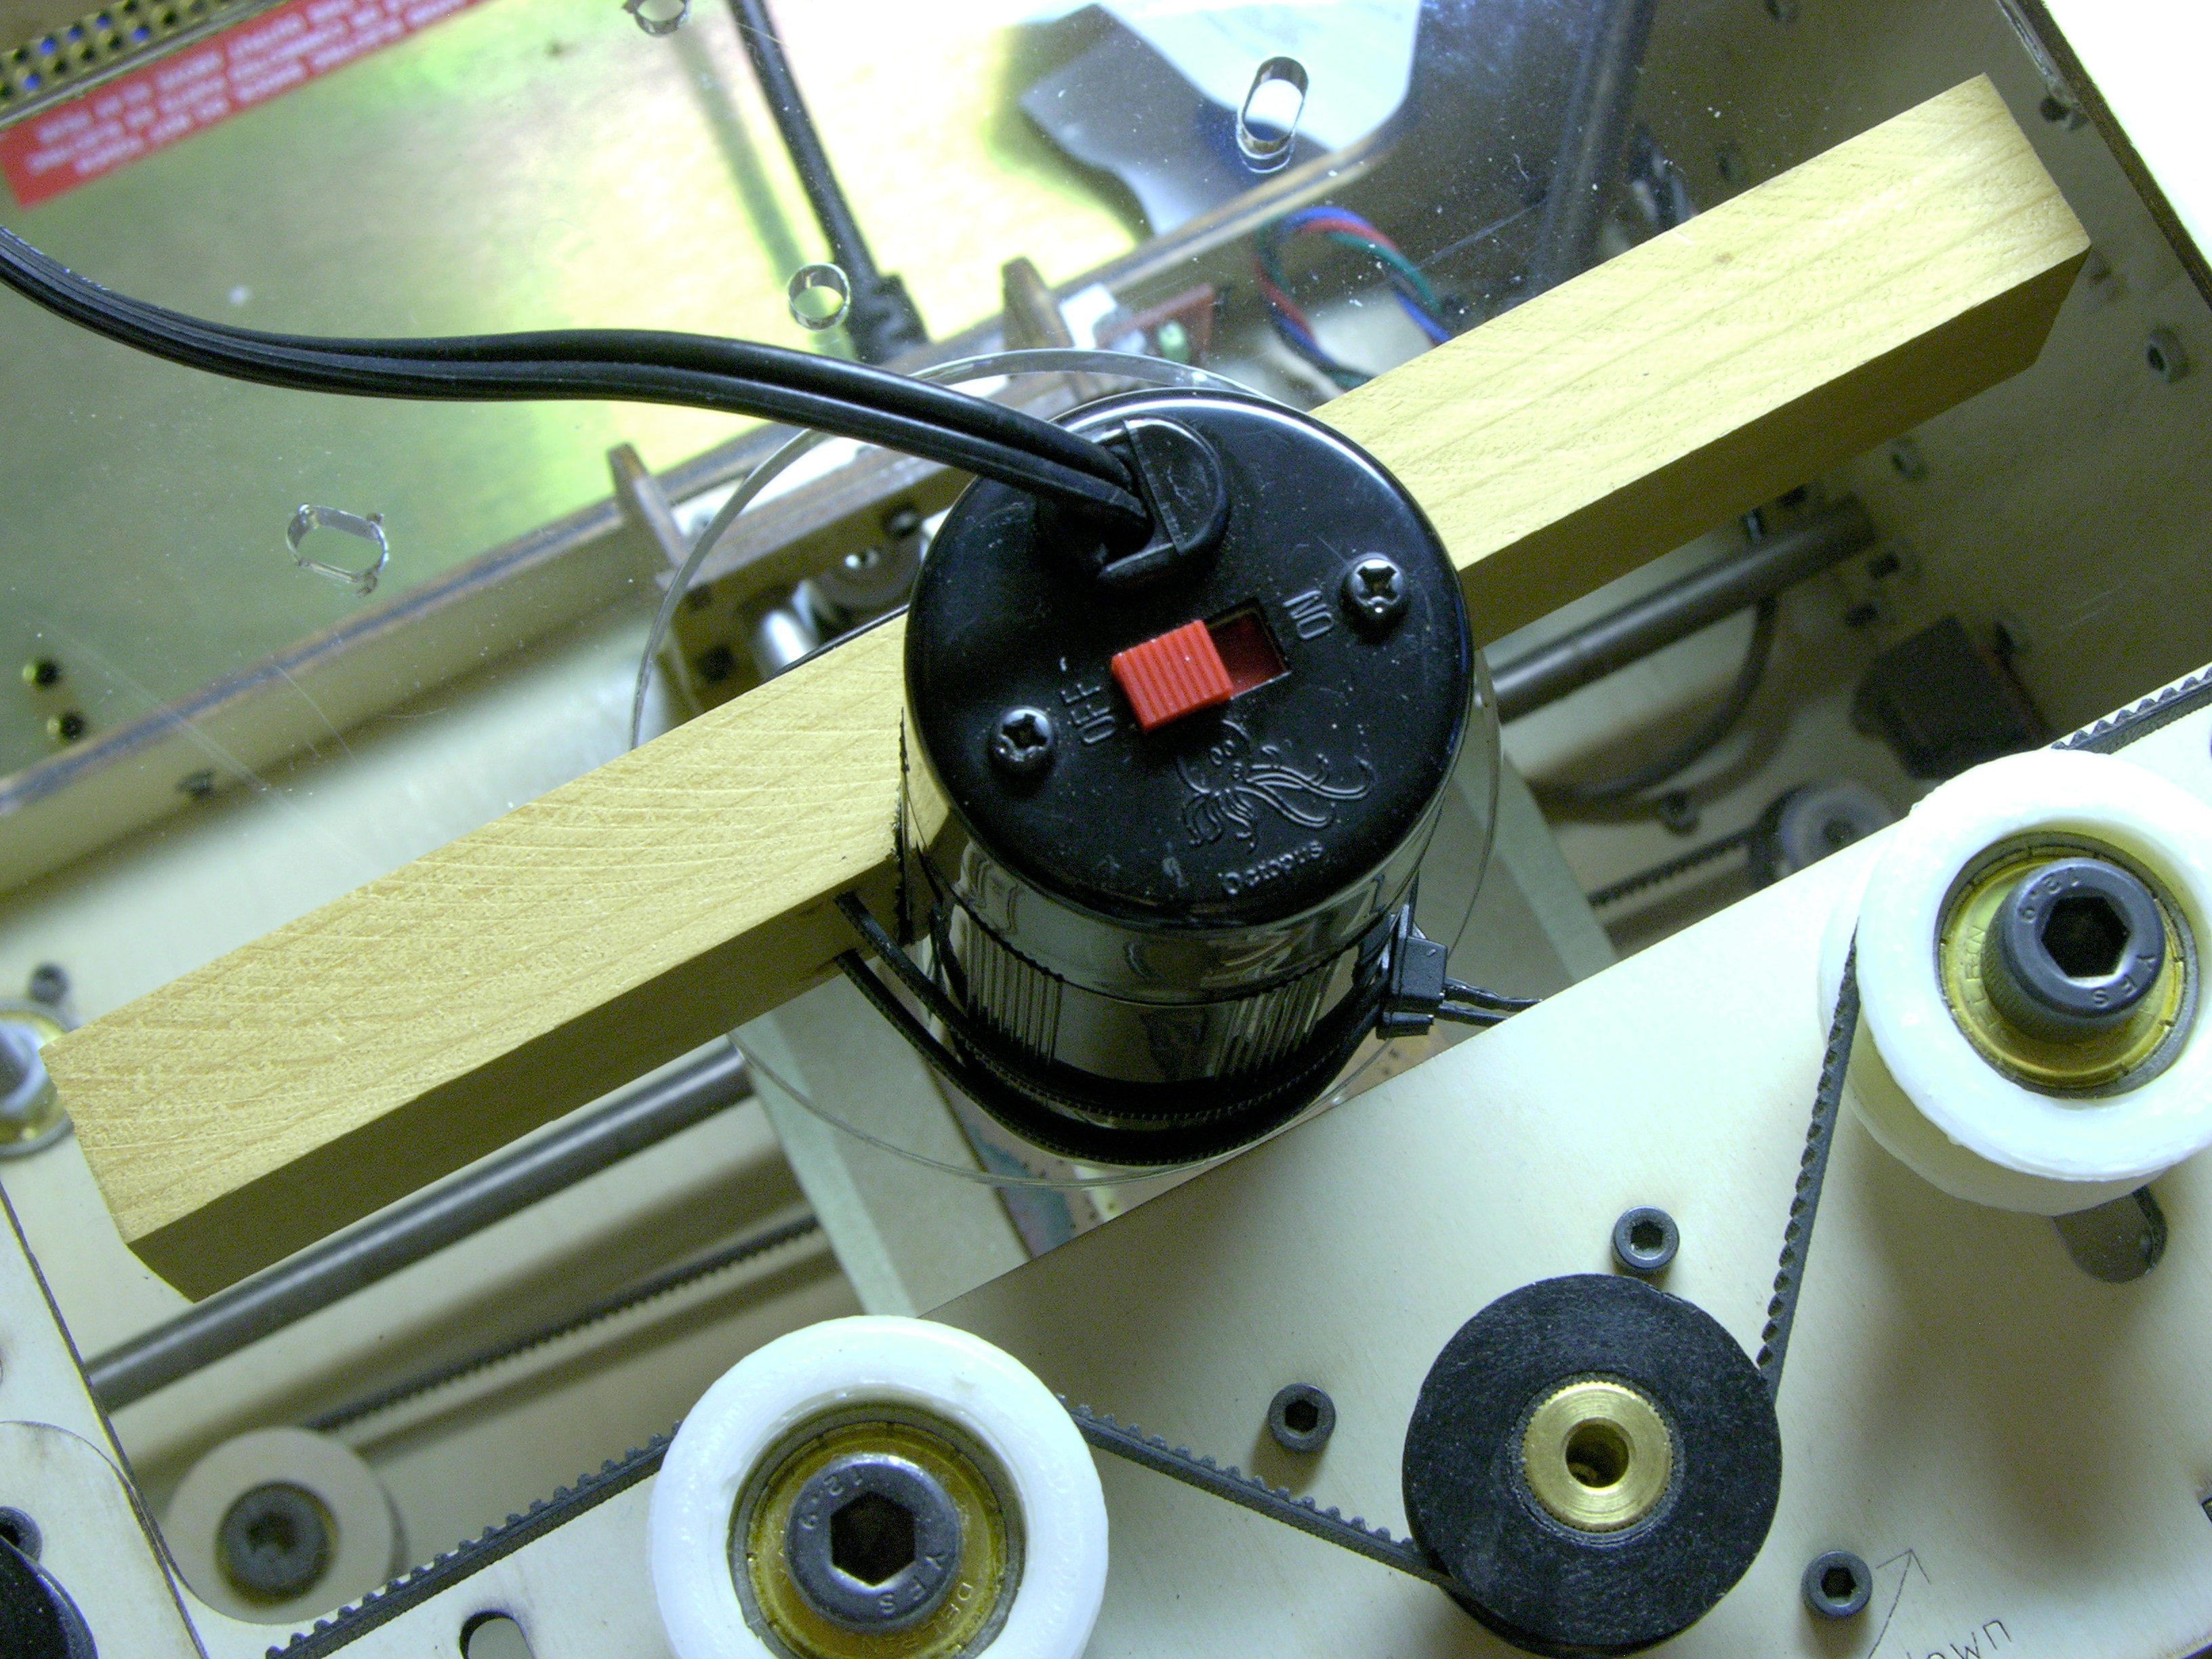
Sure, it’s eccentric in the Z stage’s extruder hole; but with no homing system, I’m eyeballing the starting position anyway. Frankly, the tool doesn’t even need to be perfectly vertical — as long as the point of the milling bit is the first thing to contact the work surface, it’ll do the job.
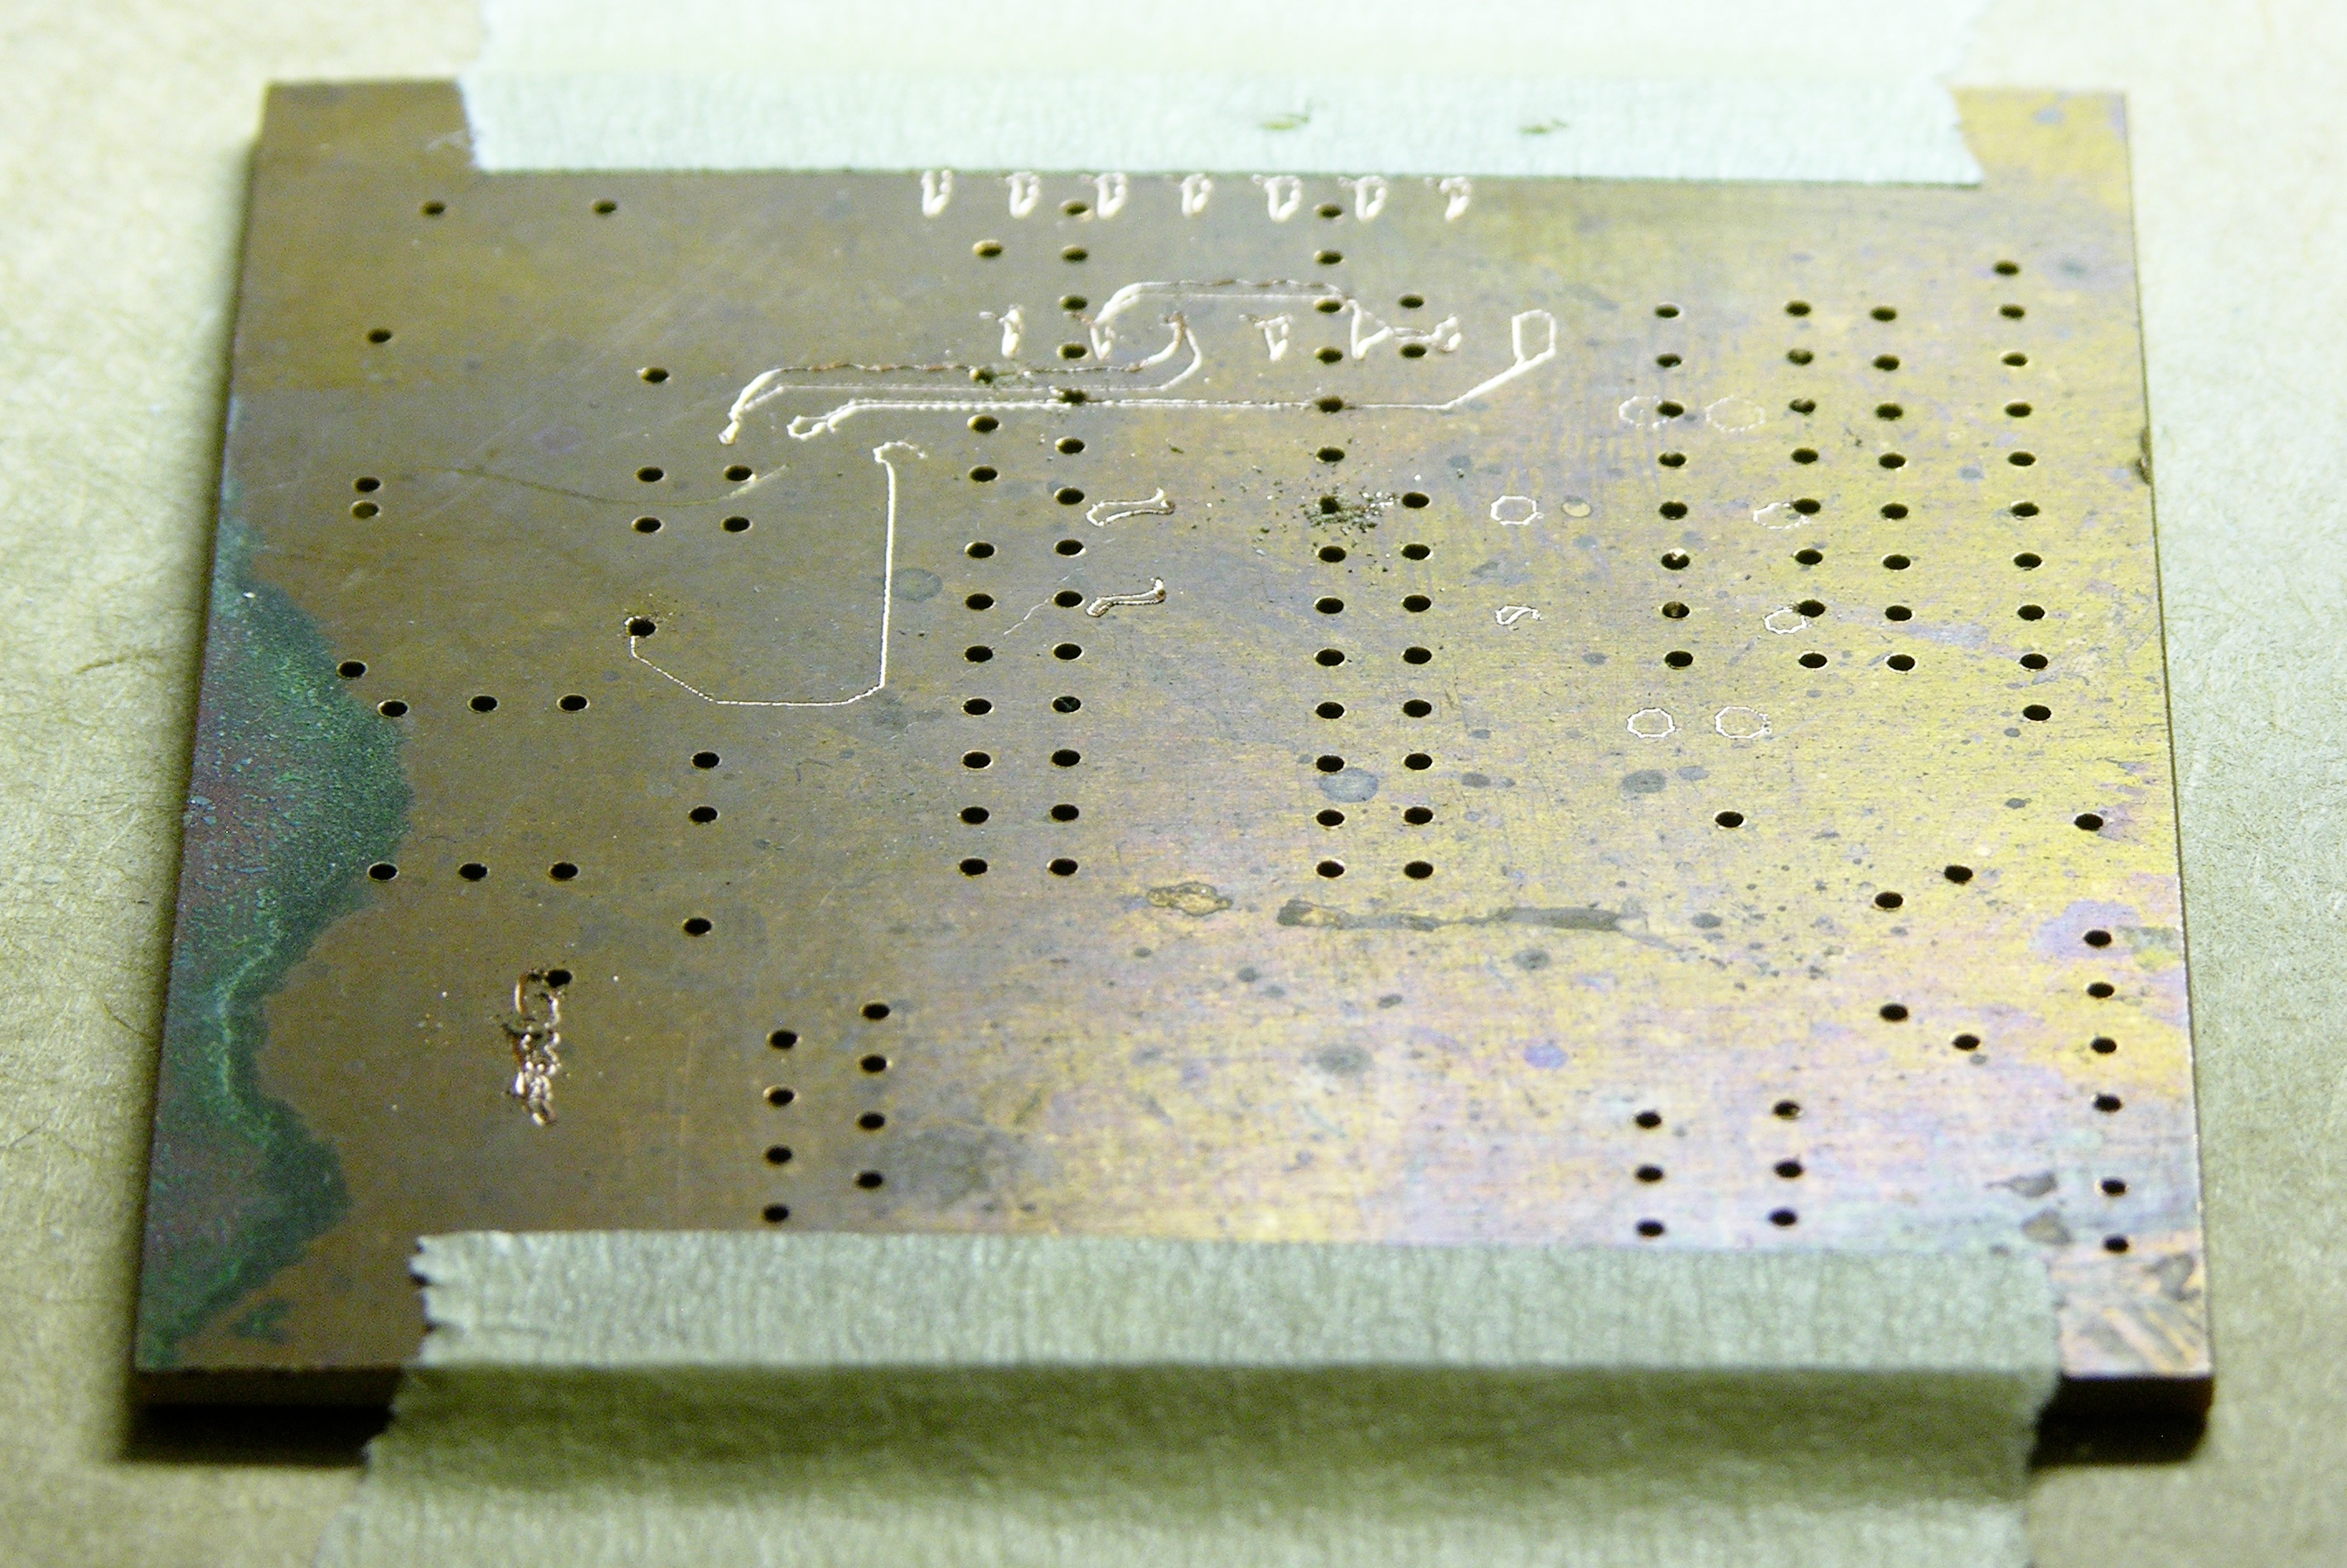
Well, it would do the job if it were up to the job. Unfortunately, the Dremel bit isn’t the right shape for milling copper, as you can see by the ferocious blows (er, gentle scratches) it dealt the PCB; and the Handy Grinder collet’s runout is tremendous, as you can see by the mill marks that double back on themselves as the collet bent along with the PCB movement. Nope, this combination is not going to work.

That’s a whole lotta collet and not nearly enough bearing. That’s also a pseudo end mill that I tried after the V-grooving bit, with no better results.
And I was so close!
Looks like I need to go shopping for a new spindle and for a proper milling bit. Suggestions welcome, even if the right tool has a complex profile so I can’t simply use a hole saw to make a mounting system out of a stick.
I do think the method is viable. My Z stage is an early enough model that it can lift right off the nuts on the threaded rods; but I can add retaining plates if the right spindle and bit need more downward pressure than their own weight.
You can buy 1/32″ and 1/64″ end mills on ebay for like $10. I’m working on building a PCB CNC from scratch that is based off of http://makeyourbot.org/start (and by $100 CNC, he means $300)
Andy, 1/64″ is a little over 15 mil, which is a pretty large inter-trace distance on some of the boards I make. I hope to find a pointed-tip bit with which I can make narrower isolation cuts (when desired).
The Make Your Bot guy does seem to have a pretty effective spindle setup, though! I might give that a shot if nothing else pops up first.
Hi,
You can use carbide engraving bits from ebay. Ex: http://cgi.ebay.fr/5-Carbide-PCB-Engraving-Bit-CNC-Router-Tool-45-0-1mm-/250768483594?pt=LH_DefaultDomain_0&hash=item3a62f7650a
If you can, buy high quality bits, epoxy on board is hard for your tools
Pierre
Hi Keith,
I had better results when I mounted my Dremel off my mill on a bungee and connecting a flex-shaft to the z-axis. The reduced vibration made a huge difference in cut consistency. See this post:
http://www.kwartzlab.ca/2010/06/pcb-cnc-mill-rocking-out-board/
DW
Pierre, I just ordered a set of bits from the same seller on the US eBay site. Thanks for the pointer!
Darin, great-looking boards and nice job on the meticulous improvements! I’d love to find a spindle well-balanced enough that it doesn’t require remote mounting, but I’ll keep that in mind.
What’s the bit you’re using in the picture above “The tie wraps work well?” I like collared bits, so I might be interested in trying some of those.
Keith, I’m using a 60 degree v-shaped bit. It’s a hand-me-down used bit from a friend that runs a pro LPKF mill. For pro purposes the bits are swapped out after so many inches of cut, but for my less-discriminating and low-budget application these are fine. Obviously with the v-shape I need to be careful about how far I plunge into the copper as the cut gets wider the deeper you go. This causes grief where traces are tight together and the toolpath out of pcb-gcode is fixed at a certain width. I know 45 degree v-bits are available and would be less sensitive to this phenomenon, but no experience with those.
For a different spindle design, check out Dave’s work: http://makeyourbot.org/ on the Mantis 9 mill. If I had better shipping rates to Canada from http://www.sdp-si.com/ and http://www.mcmaster.com/ I would have already built one of these.
Really like your site. It’s a must-read in my RSS feeds.
DW