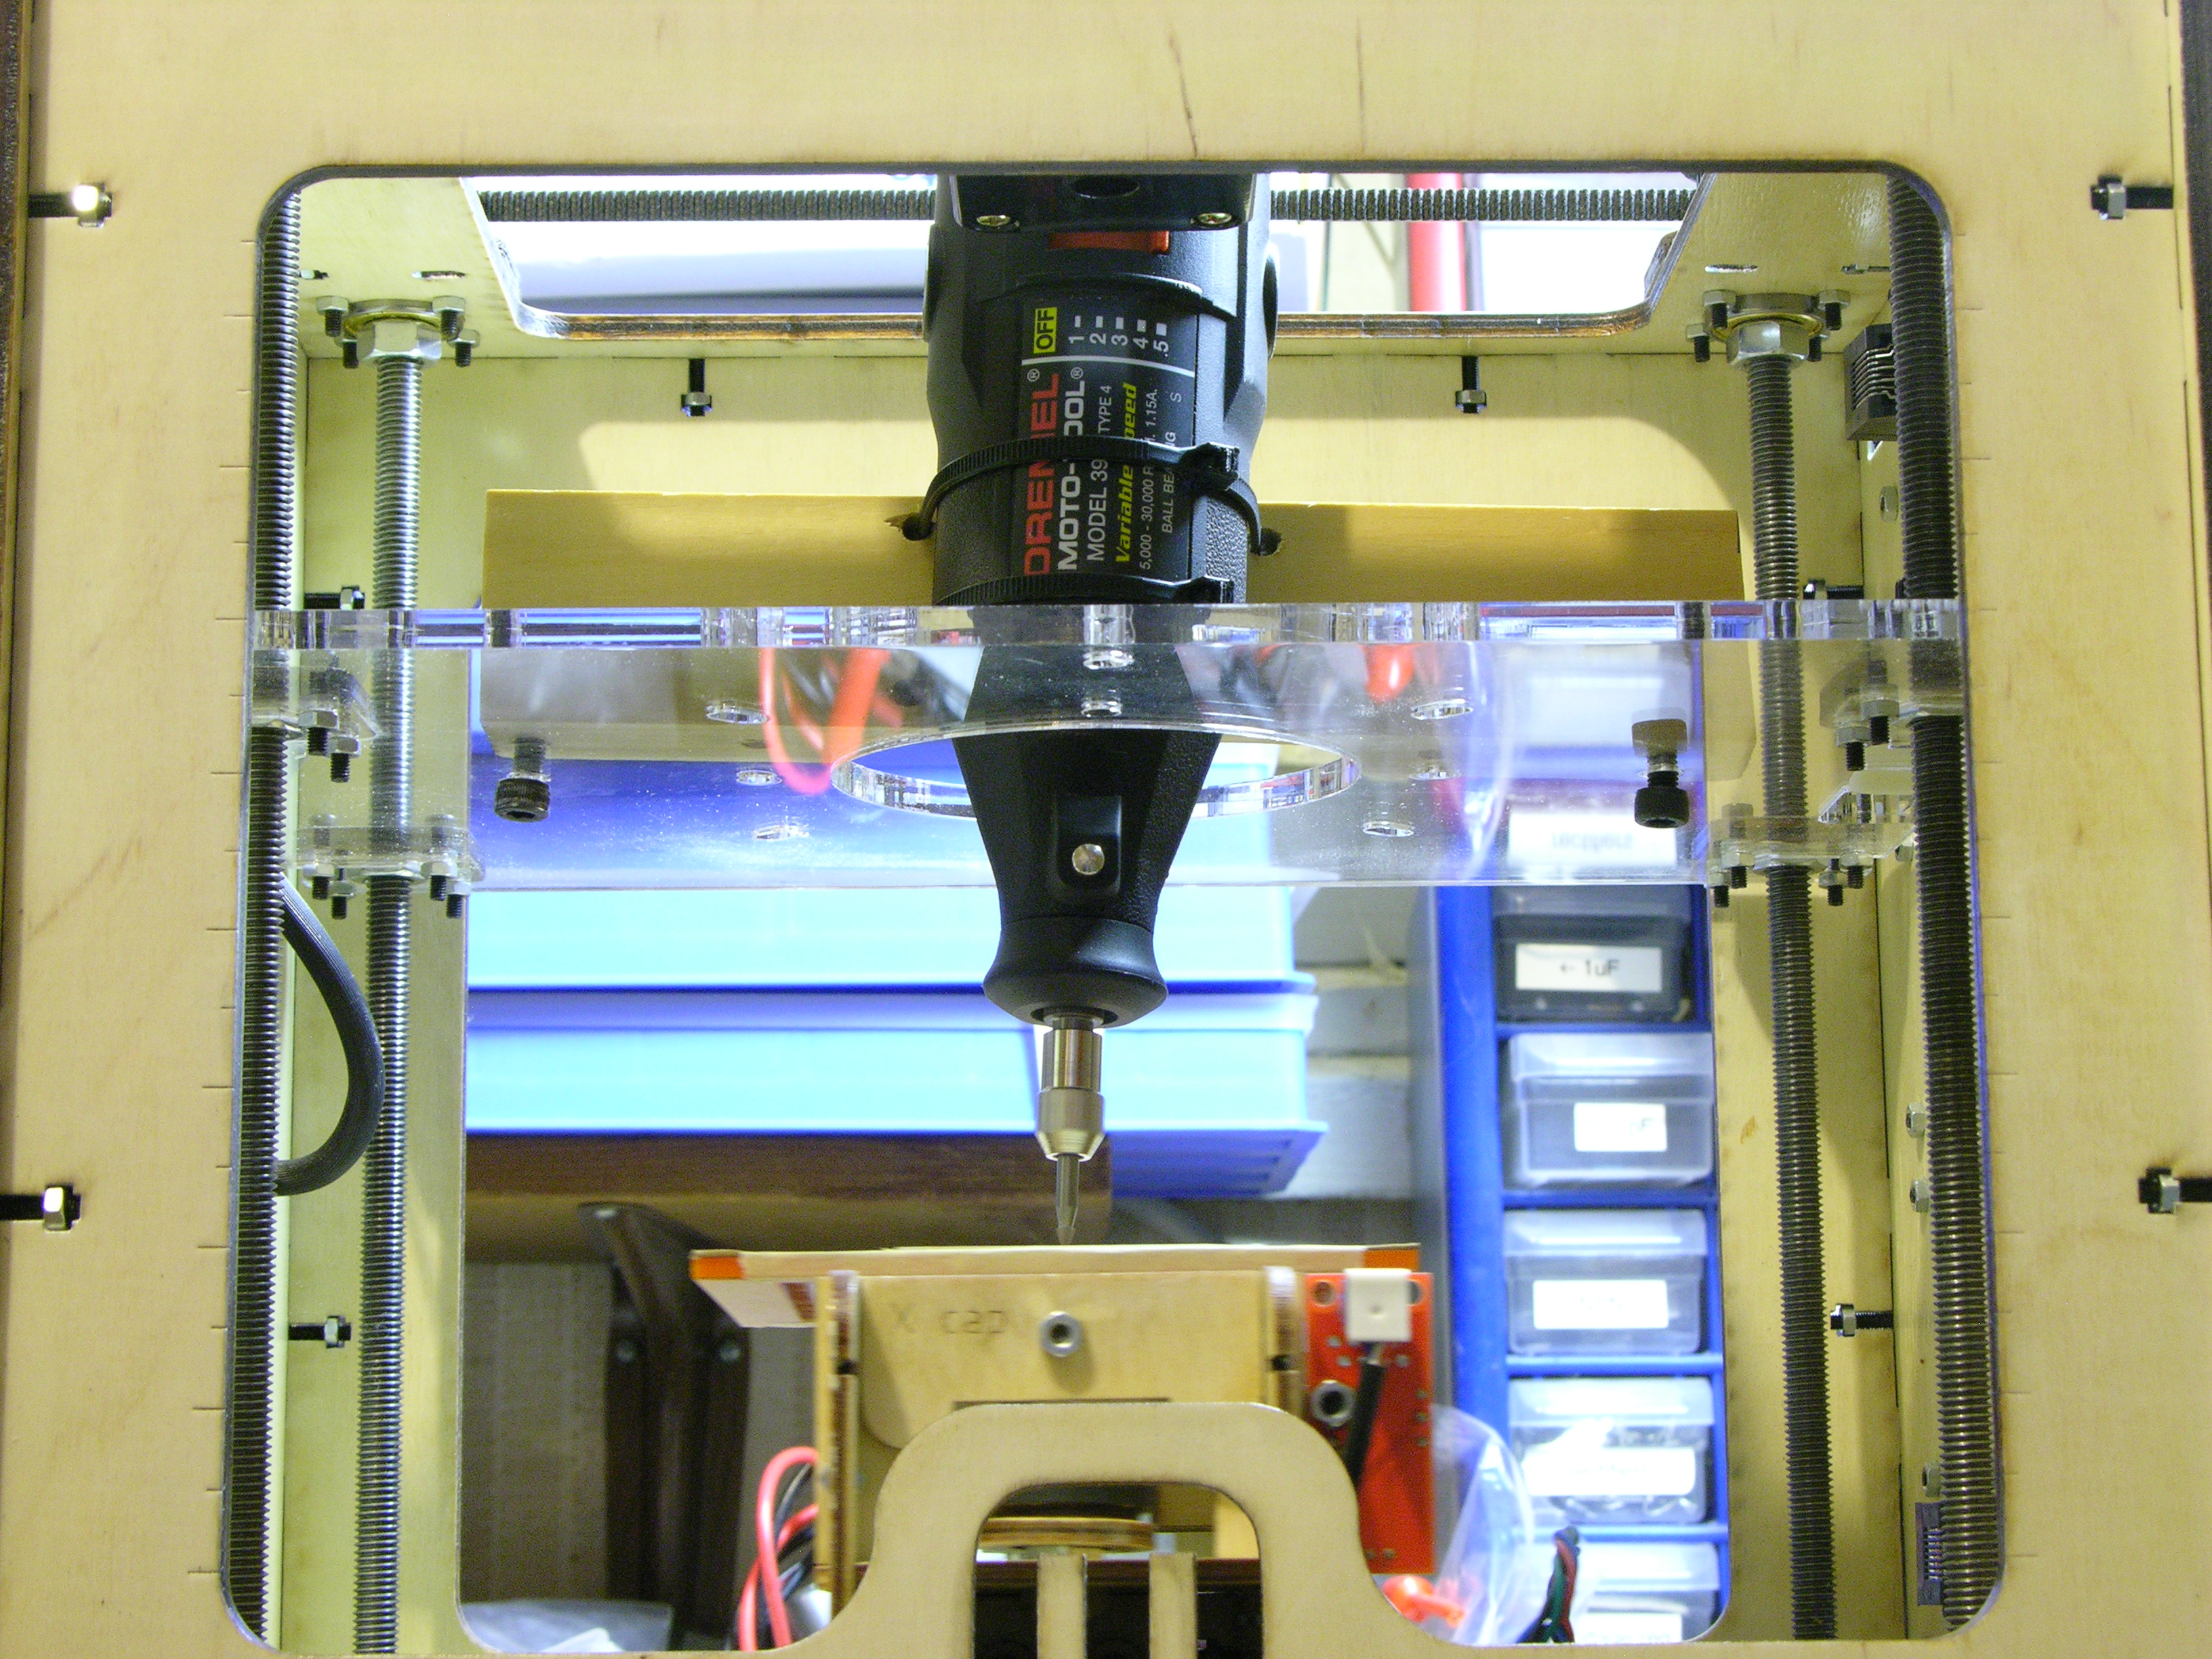
My Dremel’s spindle had much more solid bearings than the Handy Grinder, so I mounted it in the CupCake tonight to try milling with it.
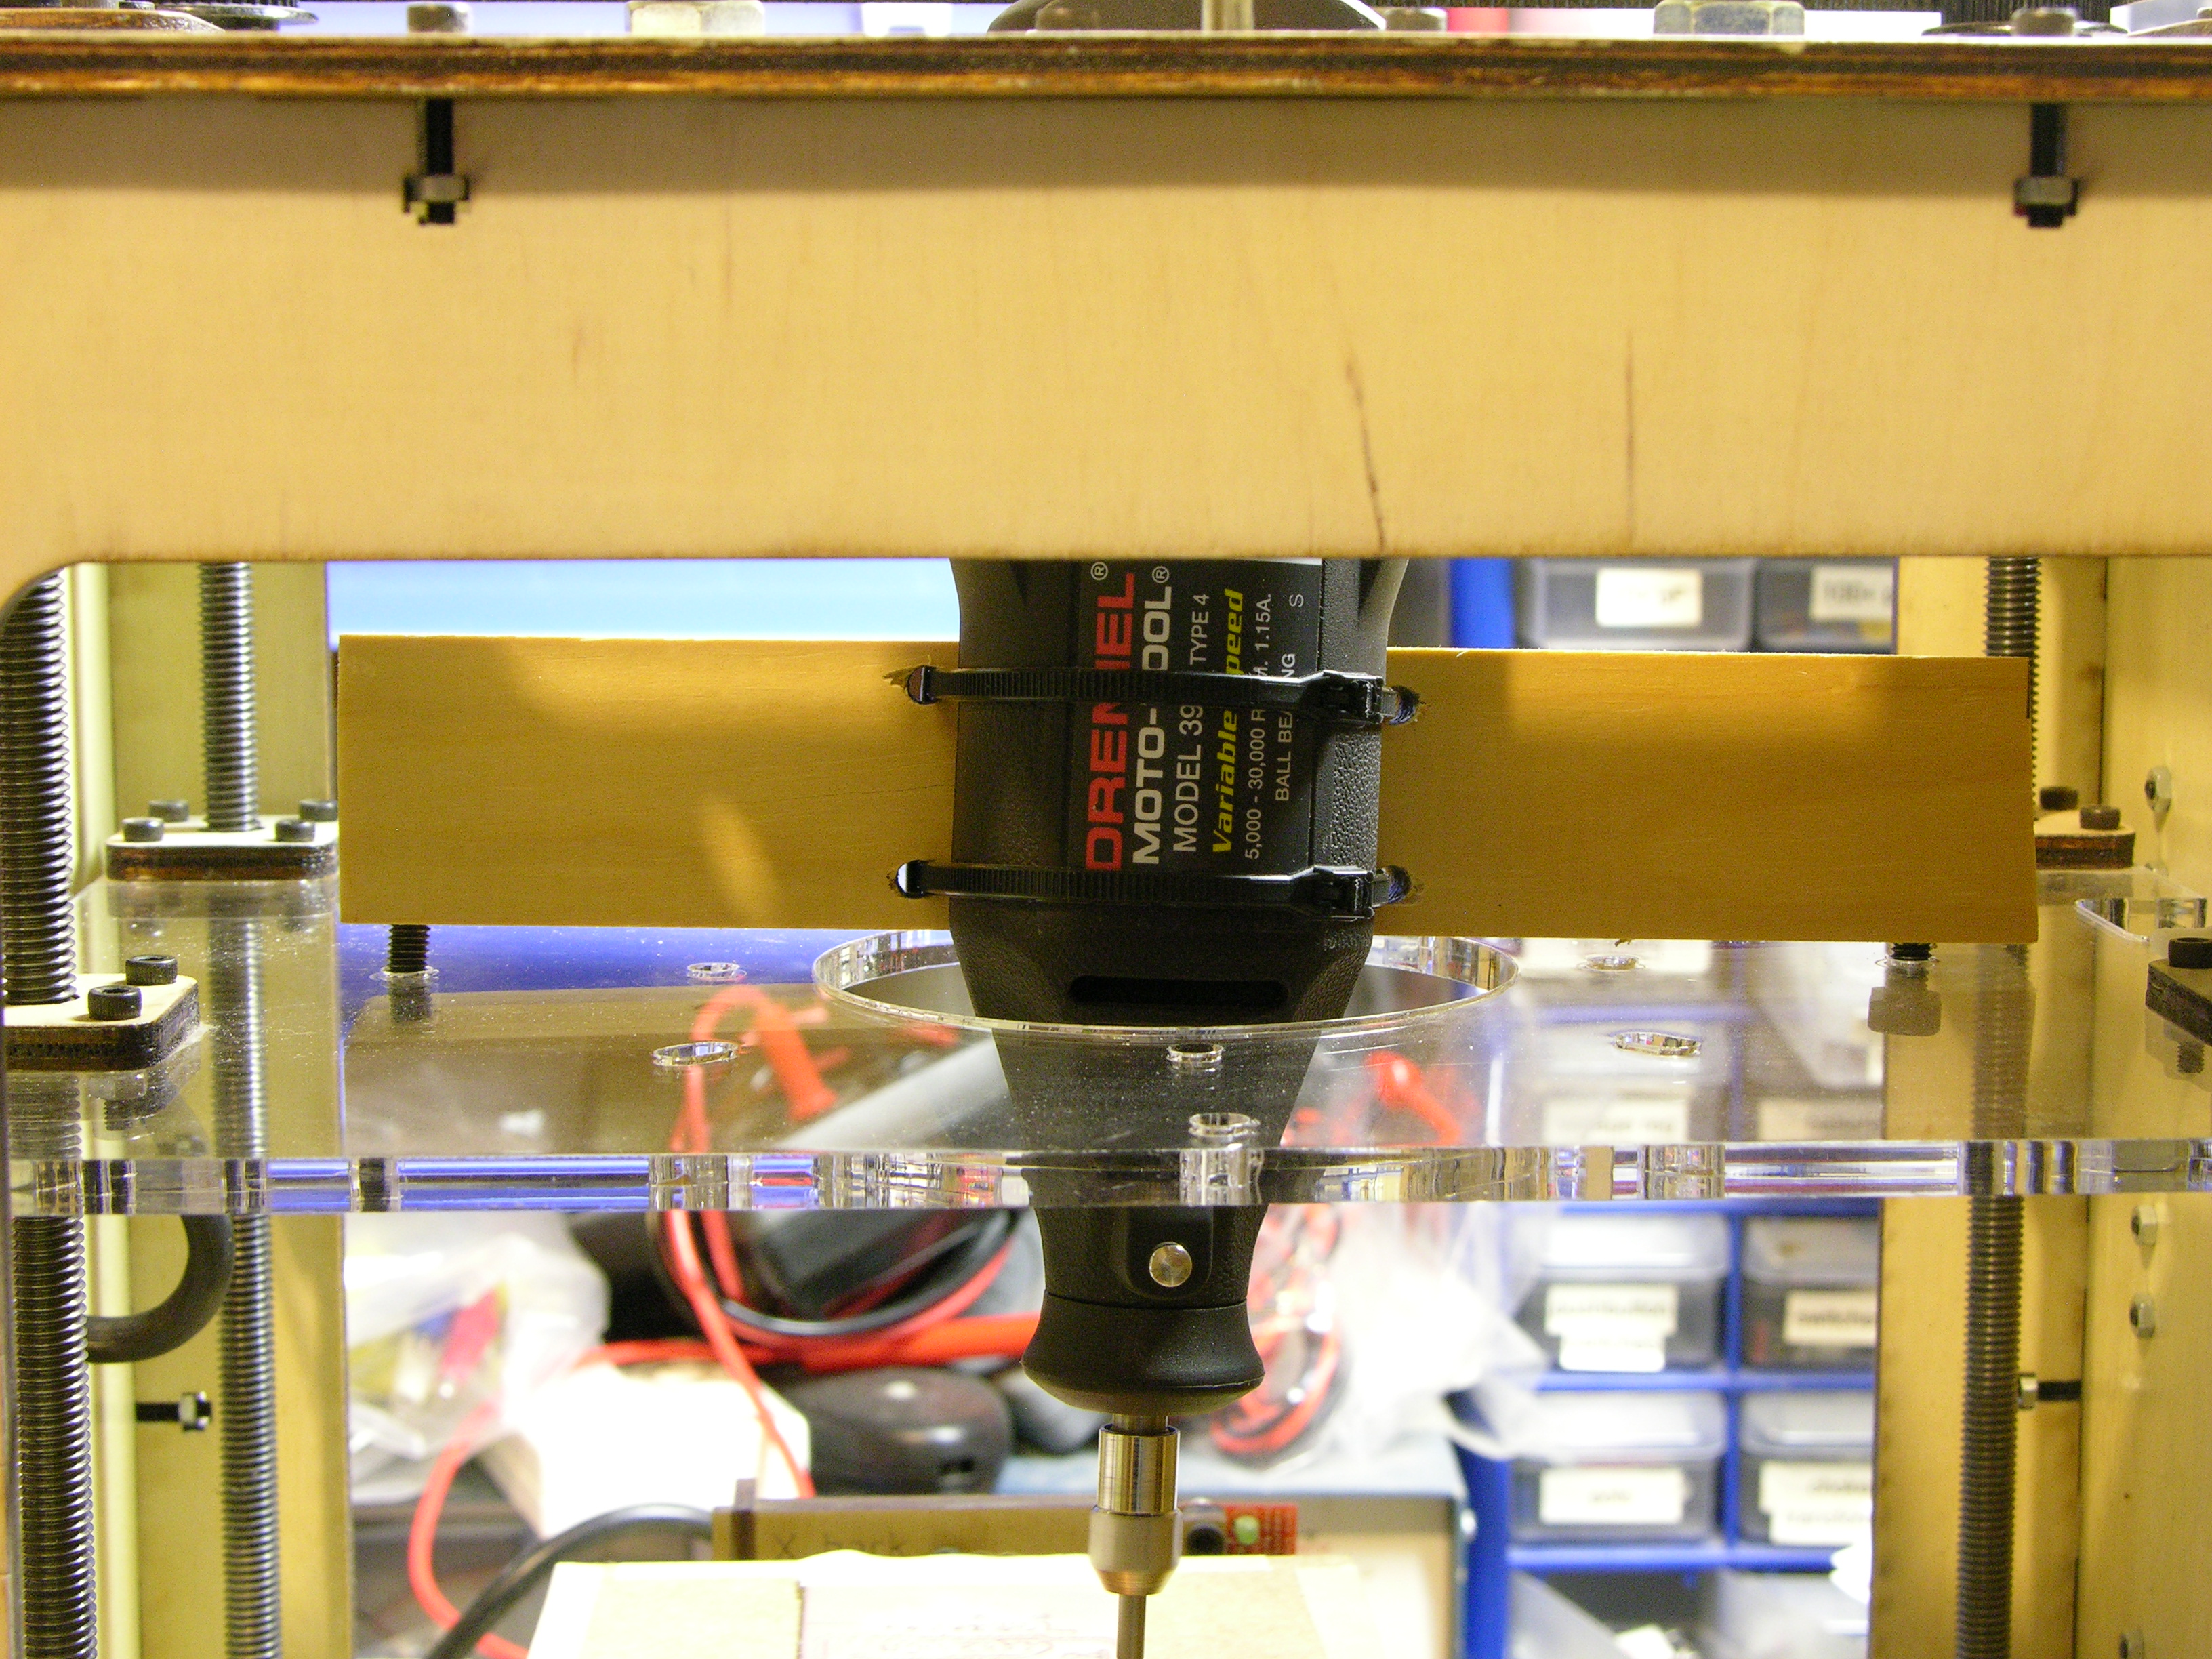
It fit even worse through the Z stage than the Handy Grinder, but I remember having said something about the drill not even needing to be vertical as long as the bit’s tip made contact with the workpiece.
The XY platform wasn’t quite level (deeper cutting on the right than the left); but the real problem was that the Z stage was flexing. Not lifting off the Z stage guides — I could feel the acrylic bending as the tool direction changed. This demanded backing off the Z axis to an extremely shallow, ineffective cut to keep the milling tip from tracking the cutting direction as it did with the Handy Grinder.
Increasing the rigidity of the Z stage by bolting a large plate to it while mounting the Dremel is my top priority for getting closer to usable performance.
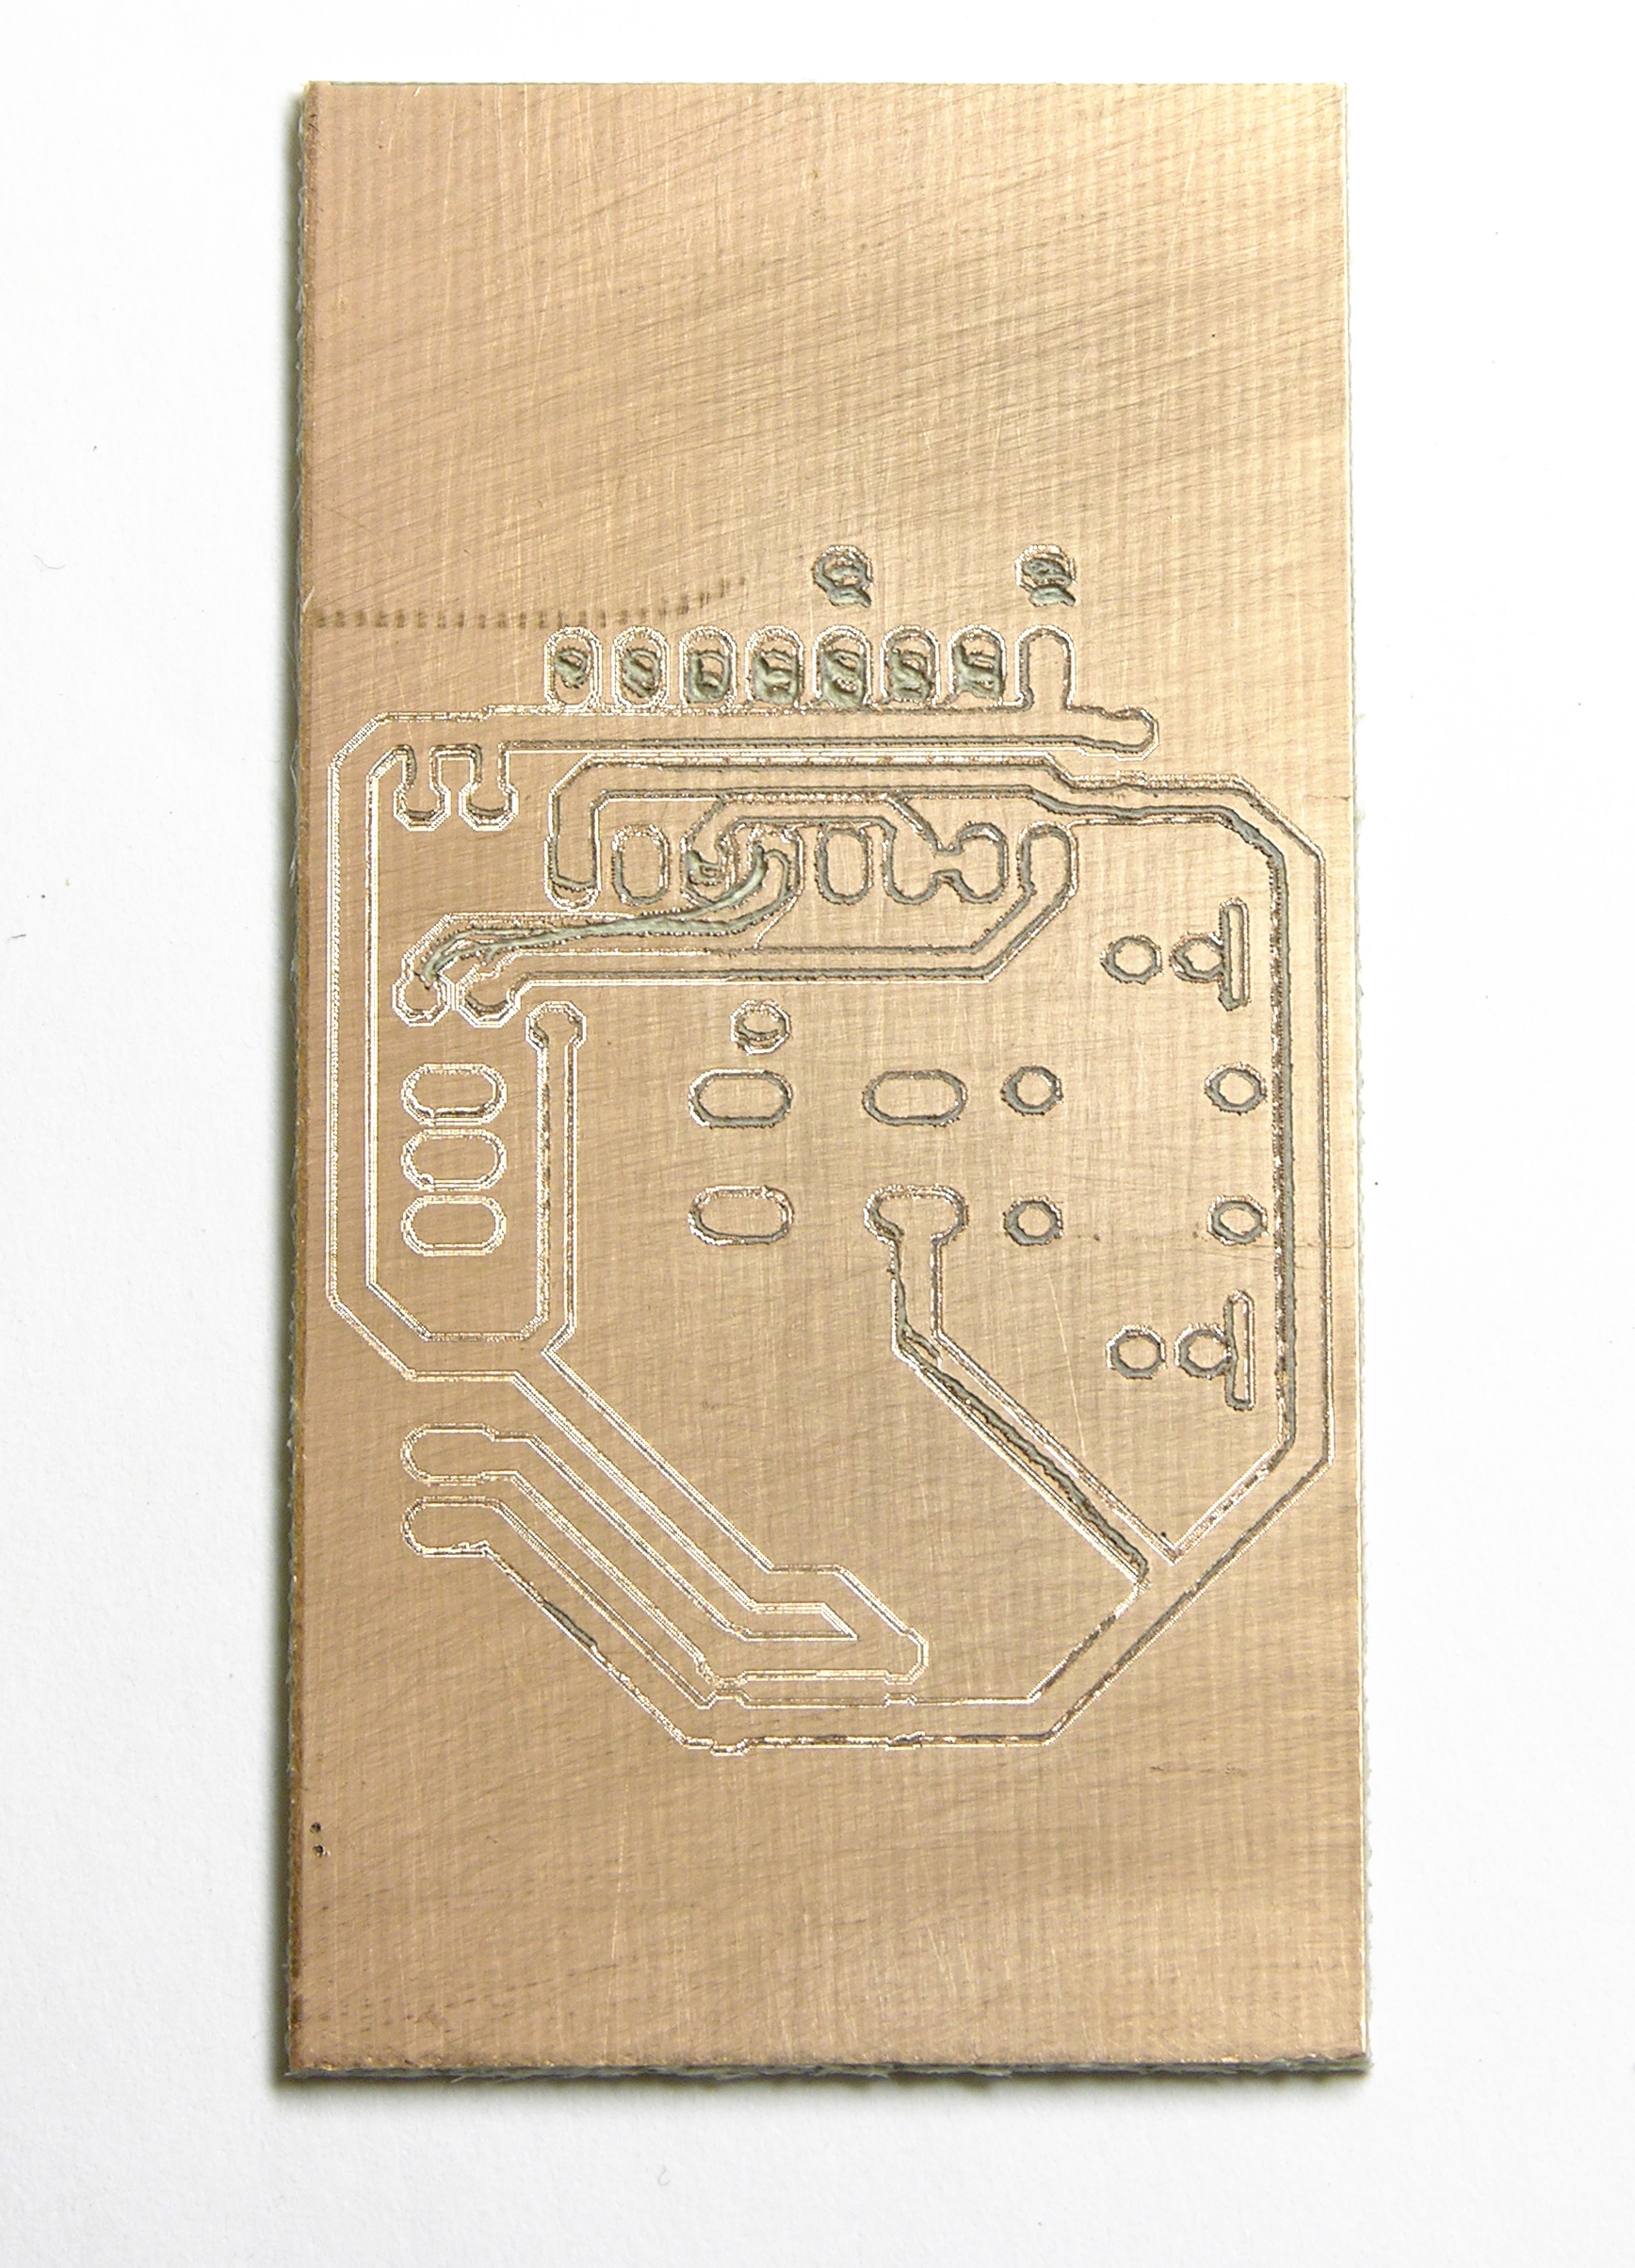
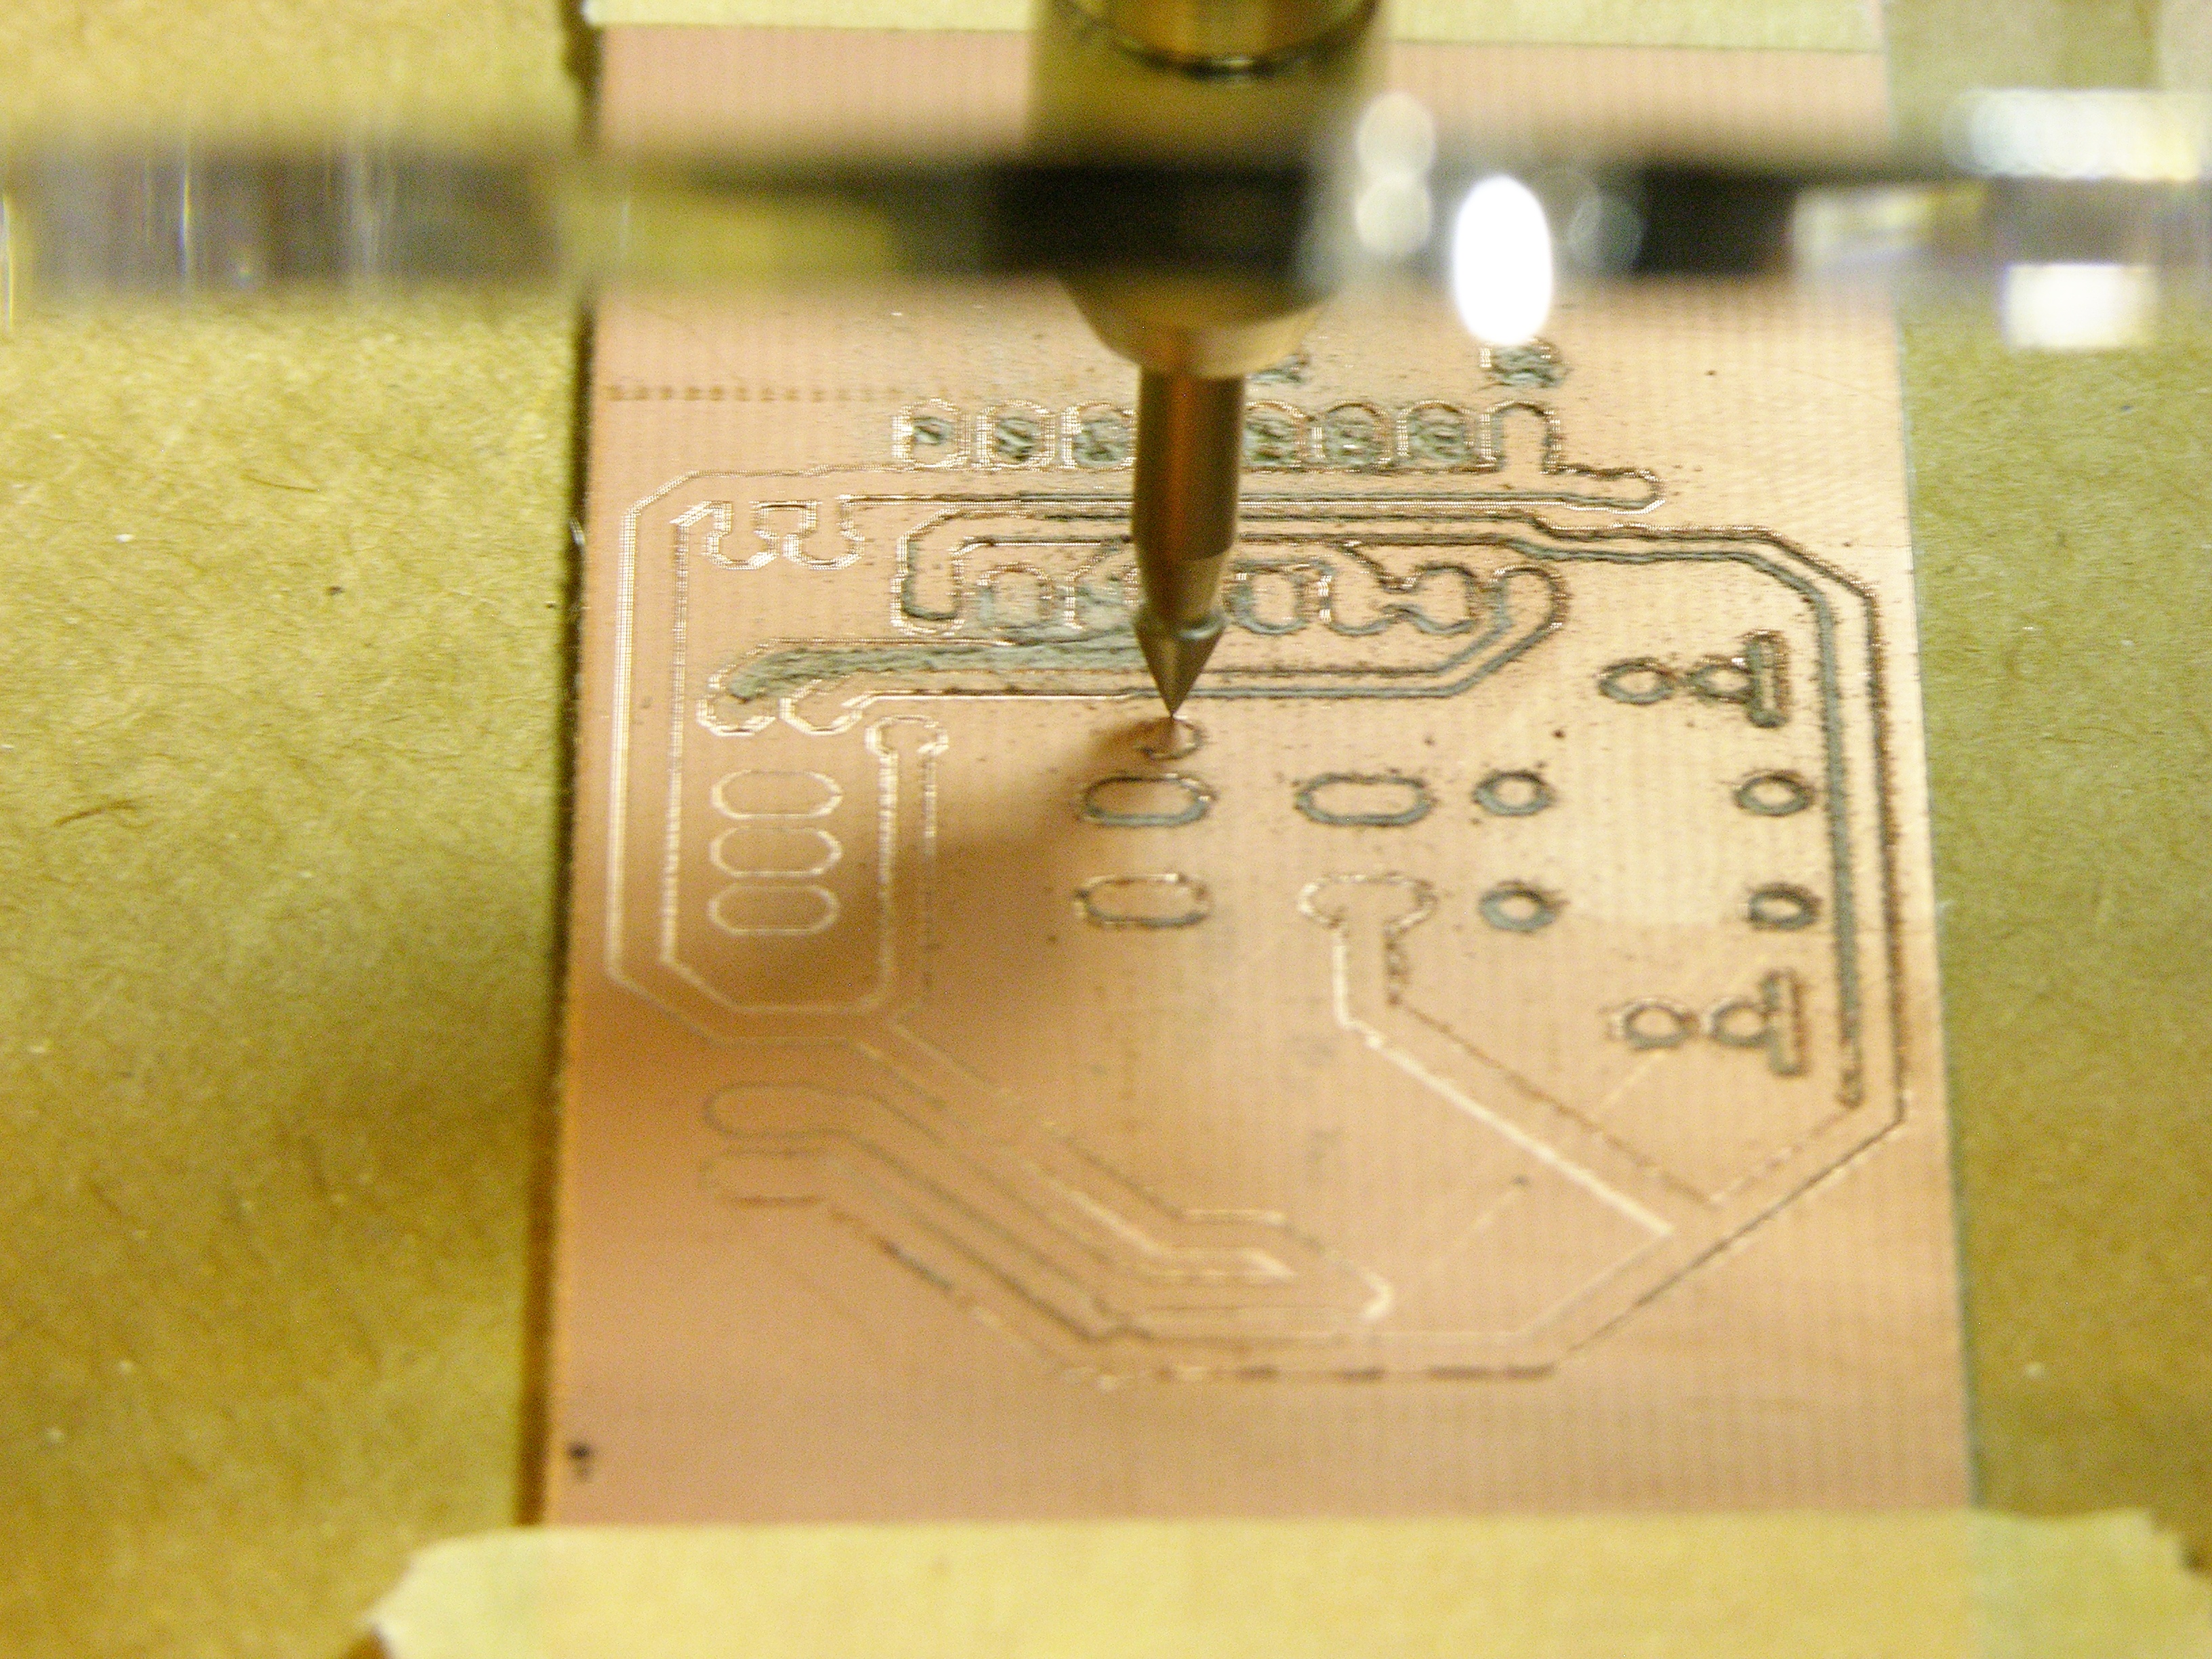
Straight off the mill after a variety of different attempts on the same workpiece. Parts of it almost look usable …
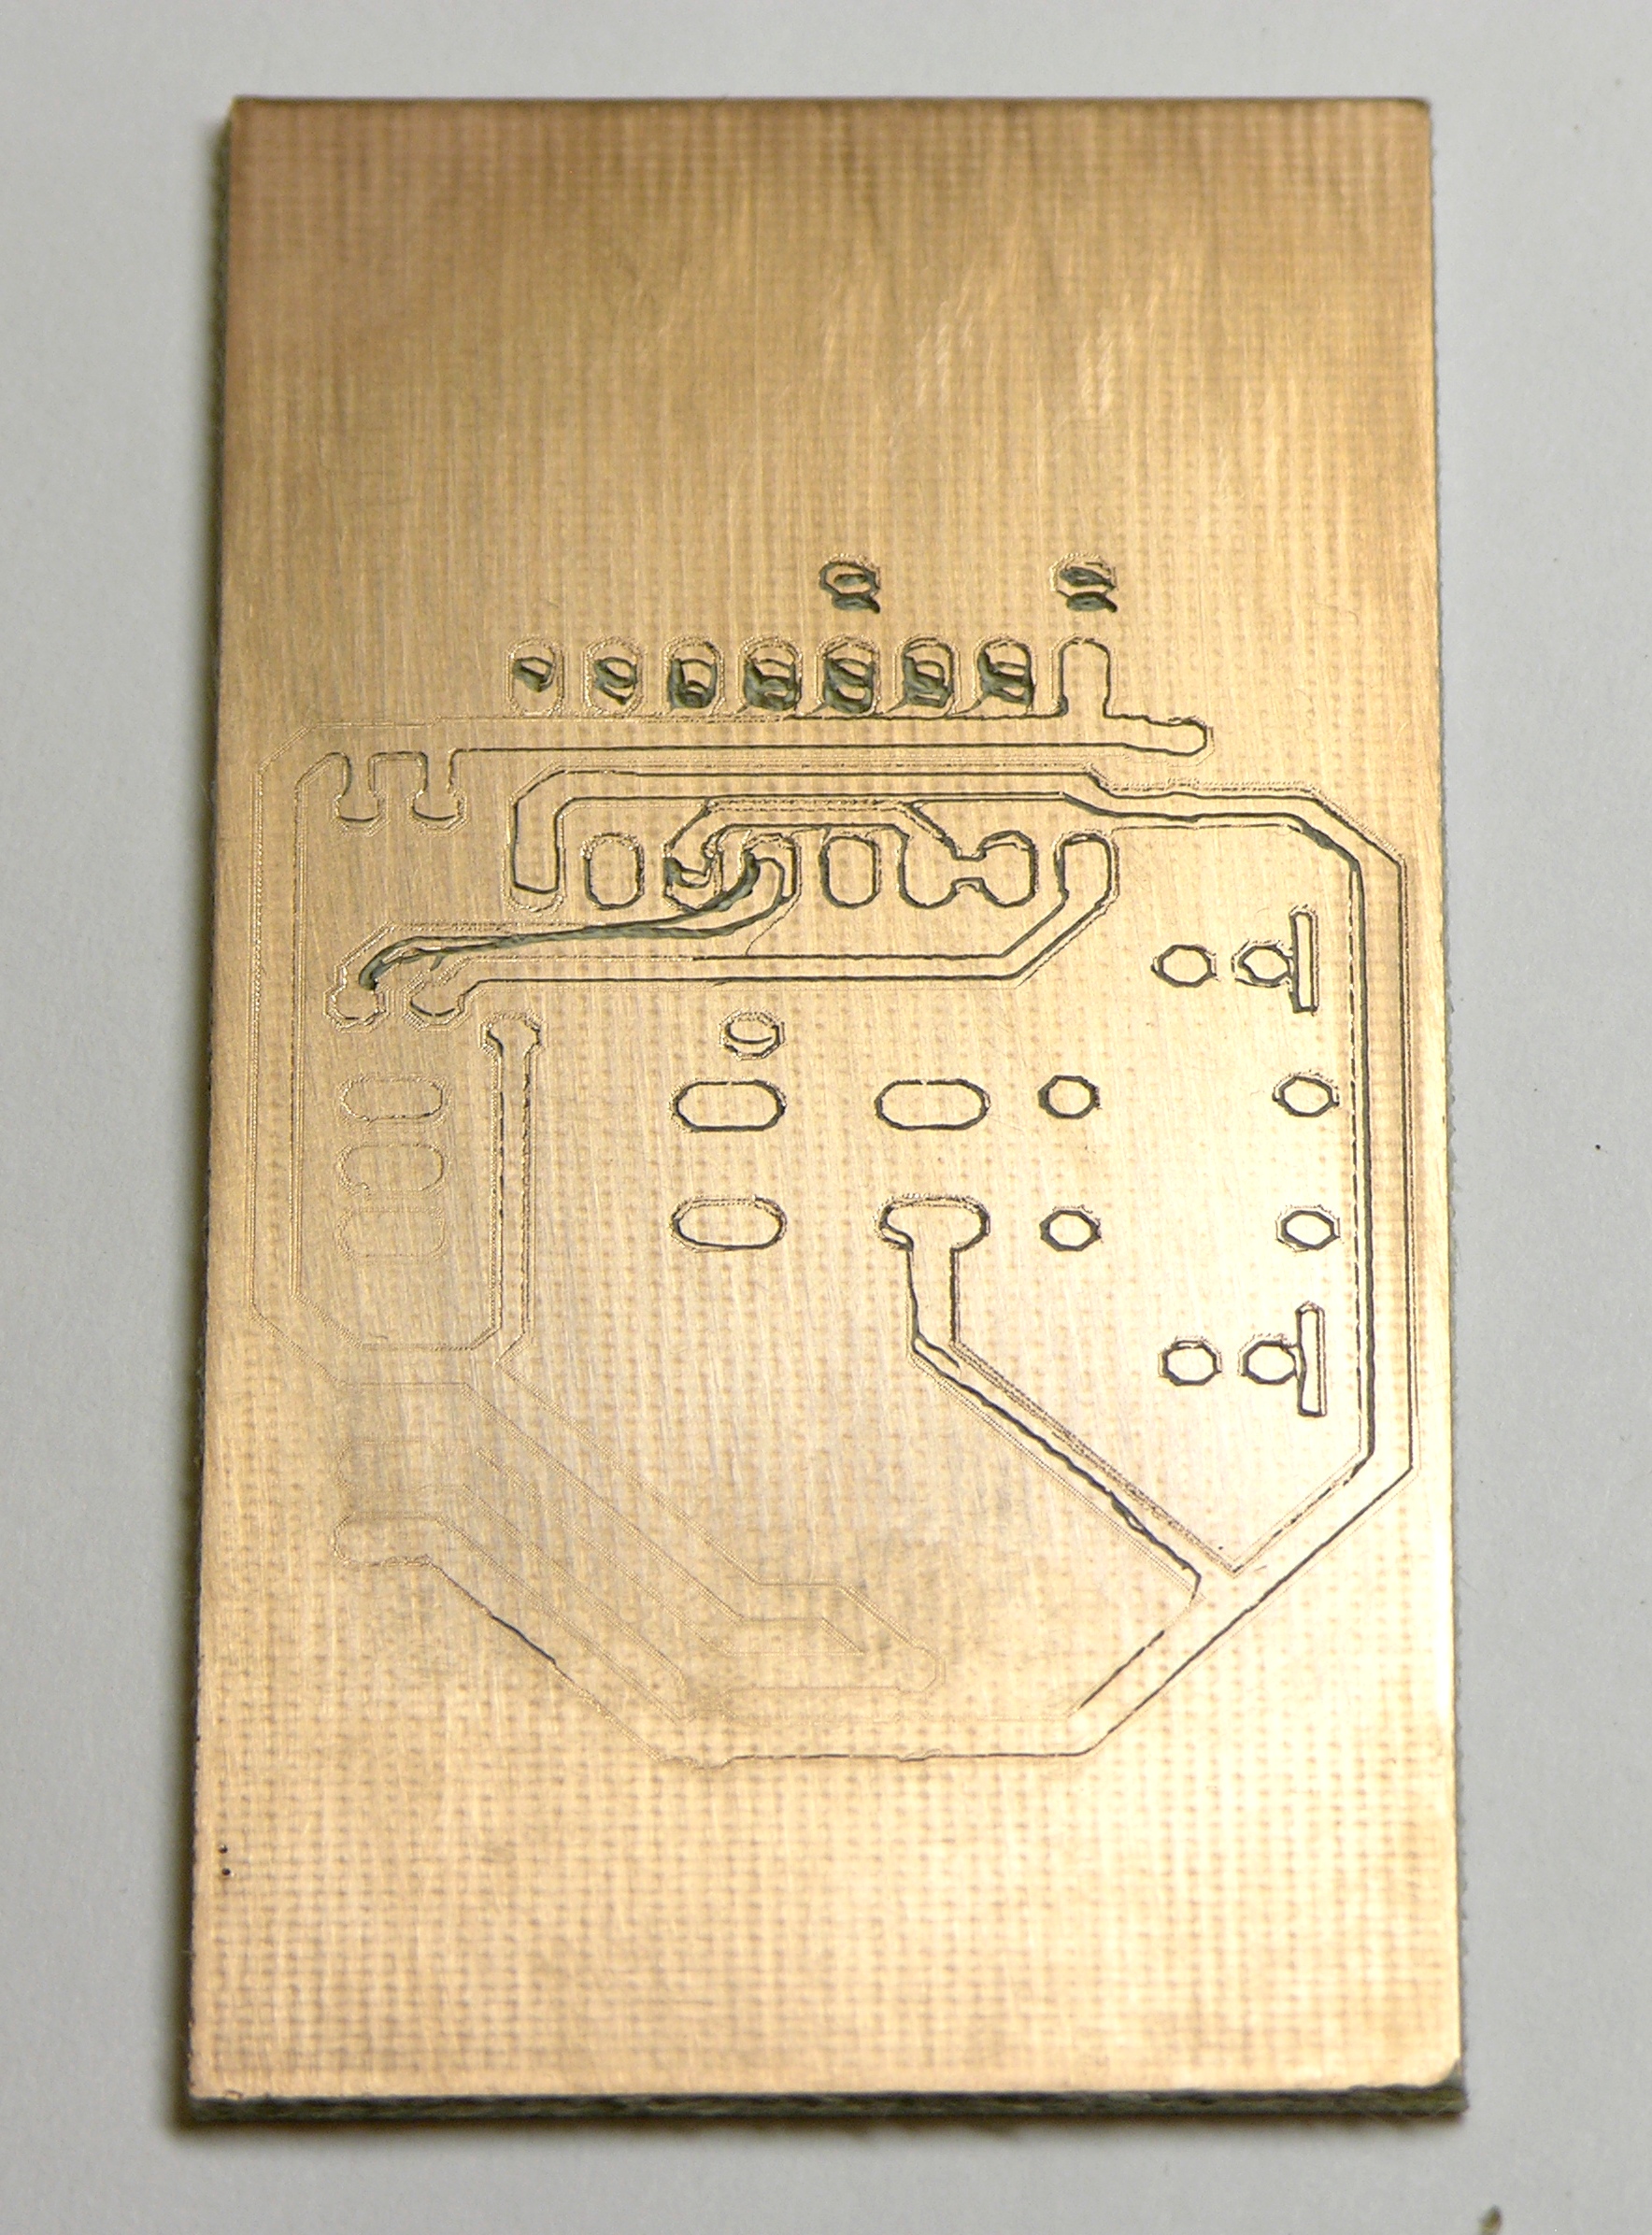
But sanded, it’s clear that in most places the bit barely scratched the copper and wasn’t even close to scoring through, because of the obligatory shallow cut.
Hi Keith,
Your images are not accessible here. They all come up with “connection reset”.
Nophead, I’m not sure what was going on — server maintenance, perhaps? Do you still see that happening?
Would making a slower cut reduce the horizontal force?
Yes still no pictures and it has been like that for the last few posts.
FYI, the pictures work fine here.