Archive for the ‘Repairs’ Category

Replacing a Broken Power Jack on a DBX 266XL Compressor

Sunday, April 11th, 2010

I recently bought a DBX 266XL audio compressor/limiter on eBay. The seller described it thus:

Has light scratches, small amount of rack rash, in perfect working condition- no issues whatsoever. Has been used in my guitar rig for the past several years with no problems.

Broken C-14 power jack on DBX 266XL compressor

It arrived oddly but adequately packed and … as you can see, not in perfect condition. I would go so far as to say it had issues. I suspect had I tried to use it, I would have had problems.

Well … I could complain to the seller, who would tell me it was damaged in shipping, and then I could try to deal with the USPS who I don’t think broke it, and I could spend a lot of time and frustration and maybe get some money back and probably end up with no compressor. Or I could just fix it myself and have a little fun in the process.

(more…)

“New” Crumar T2 Organ Part 2: Easy Fixes and Investigation

Monday, January 4th, 2010

As mentioned previously, I recently bought a Crumar T2 organ manufactured in 1978 and started ascertaining its condition. Here’s what I’ve been able to fix so far and what I’ve been able to determine about the parts I haven’t yet fixed.

Crackly Volume Knobs and Stuck Master Tuning Potentiometer

Several of the volume knobs were pretty crackly.

Crumar T2 organ with control panel lifted

Most Crumar keyboards are wonderful to service because of how easy it is to get inside. After removing a few screws, the top panel lifts back on its rear hinge, without even having to take the knobs off all the controls.

(more…)

Reconing an Eminence JAY7010 Subwoofer Driver

Sunday, January 3rd, 2010

Earlier this year I bought some PA speakers at auction. The auction company was cagey enough to list them all as “untested / condition unknown,” but I suspect they had a pretty good idea of the condition.

Eminence JAY7010 18-inch driver on chair

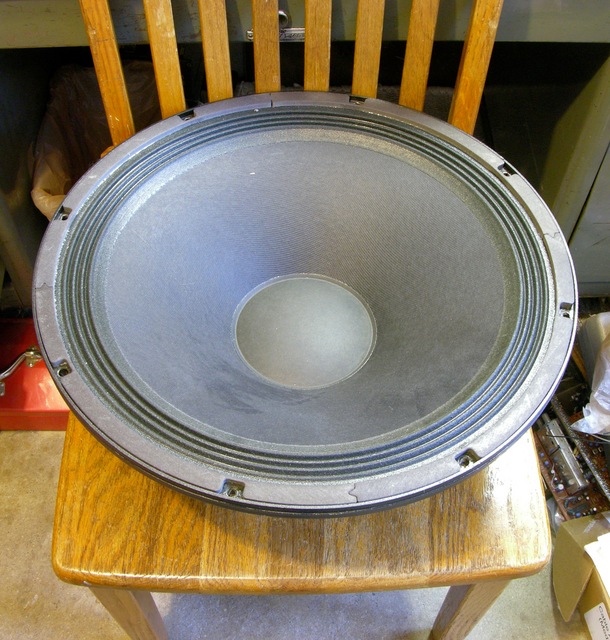
I ended up with a Yamaha SW1181VS 18″ 500W subwoofer, a Yamaha Yamaha CW218V dual 18″ 1220W subwoofer, and a spare Eminence JAY7010/7011 18″ driver. All four of the Eminence drivers were nonfunctional — some dead shorts, some open. This was a bit disappointing.

My four drivers all look the same, but are labeled JAY7010, J7010, and J7011. From what I can tell, Eminence OEMed these drivers for Yamaha and they don’t seem to be available for direct sale. I found a speakerplans.com forum post with specs sent by Yamaha listing the drivers as 600W. I also found a Google listing summarizing an expired eBay auction claiming that these are the same as the Eminence Sigma Pro, which is a 650W driver widely available at around $160.

For the prices I paid for the Yamaha speakers, new drivers at $160 each would go a long ways toward the cost of entire new speakers — the CW218V (dual) is available from Musician’s Friend for a little over $700 with free shipping.

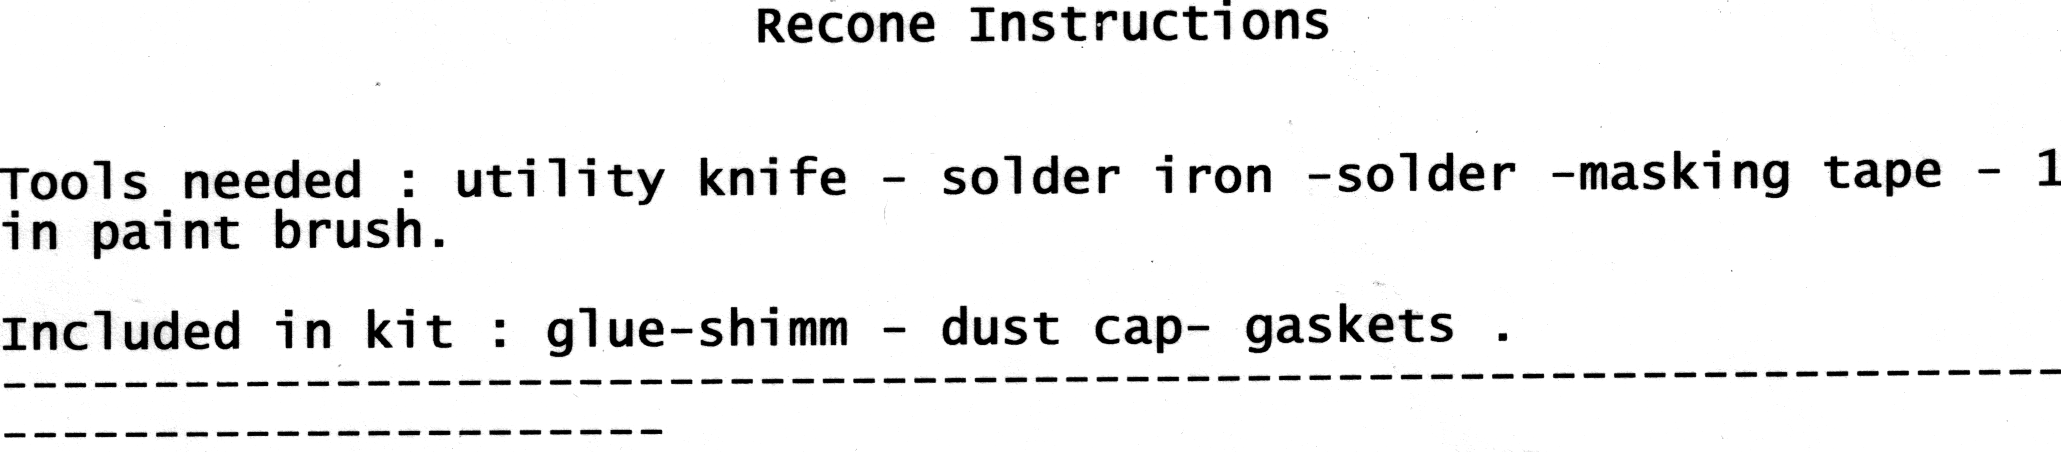
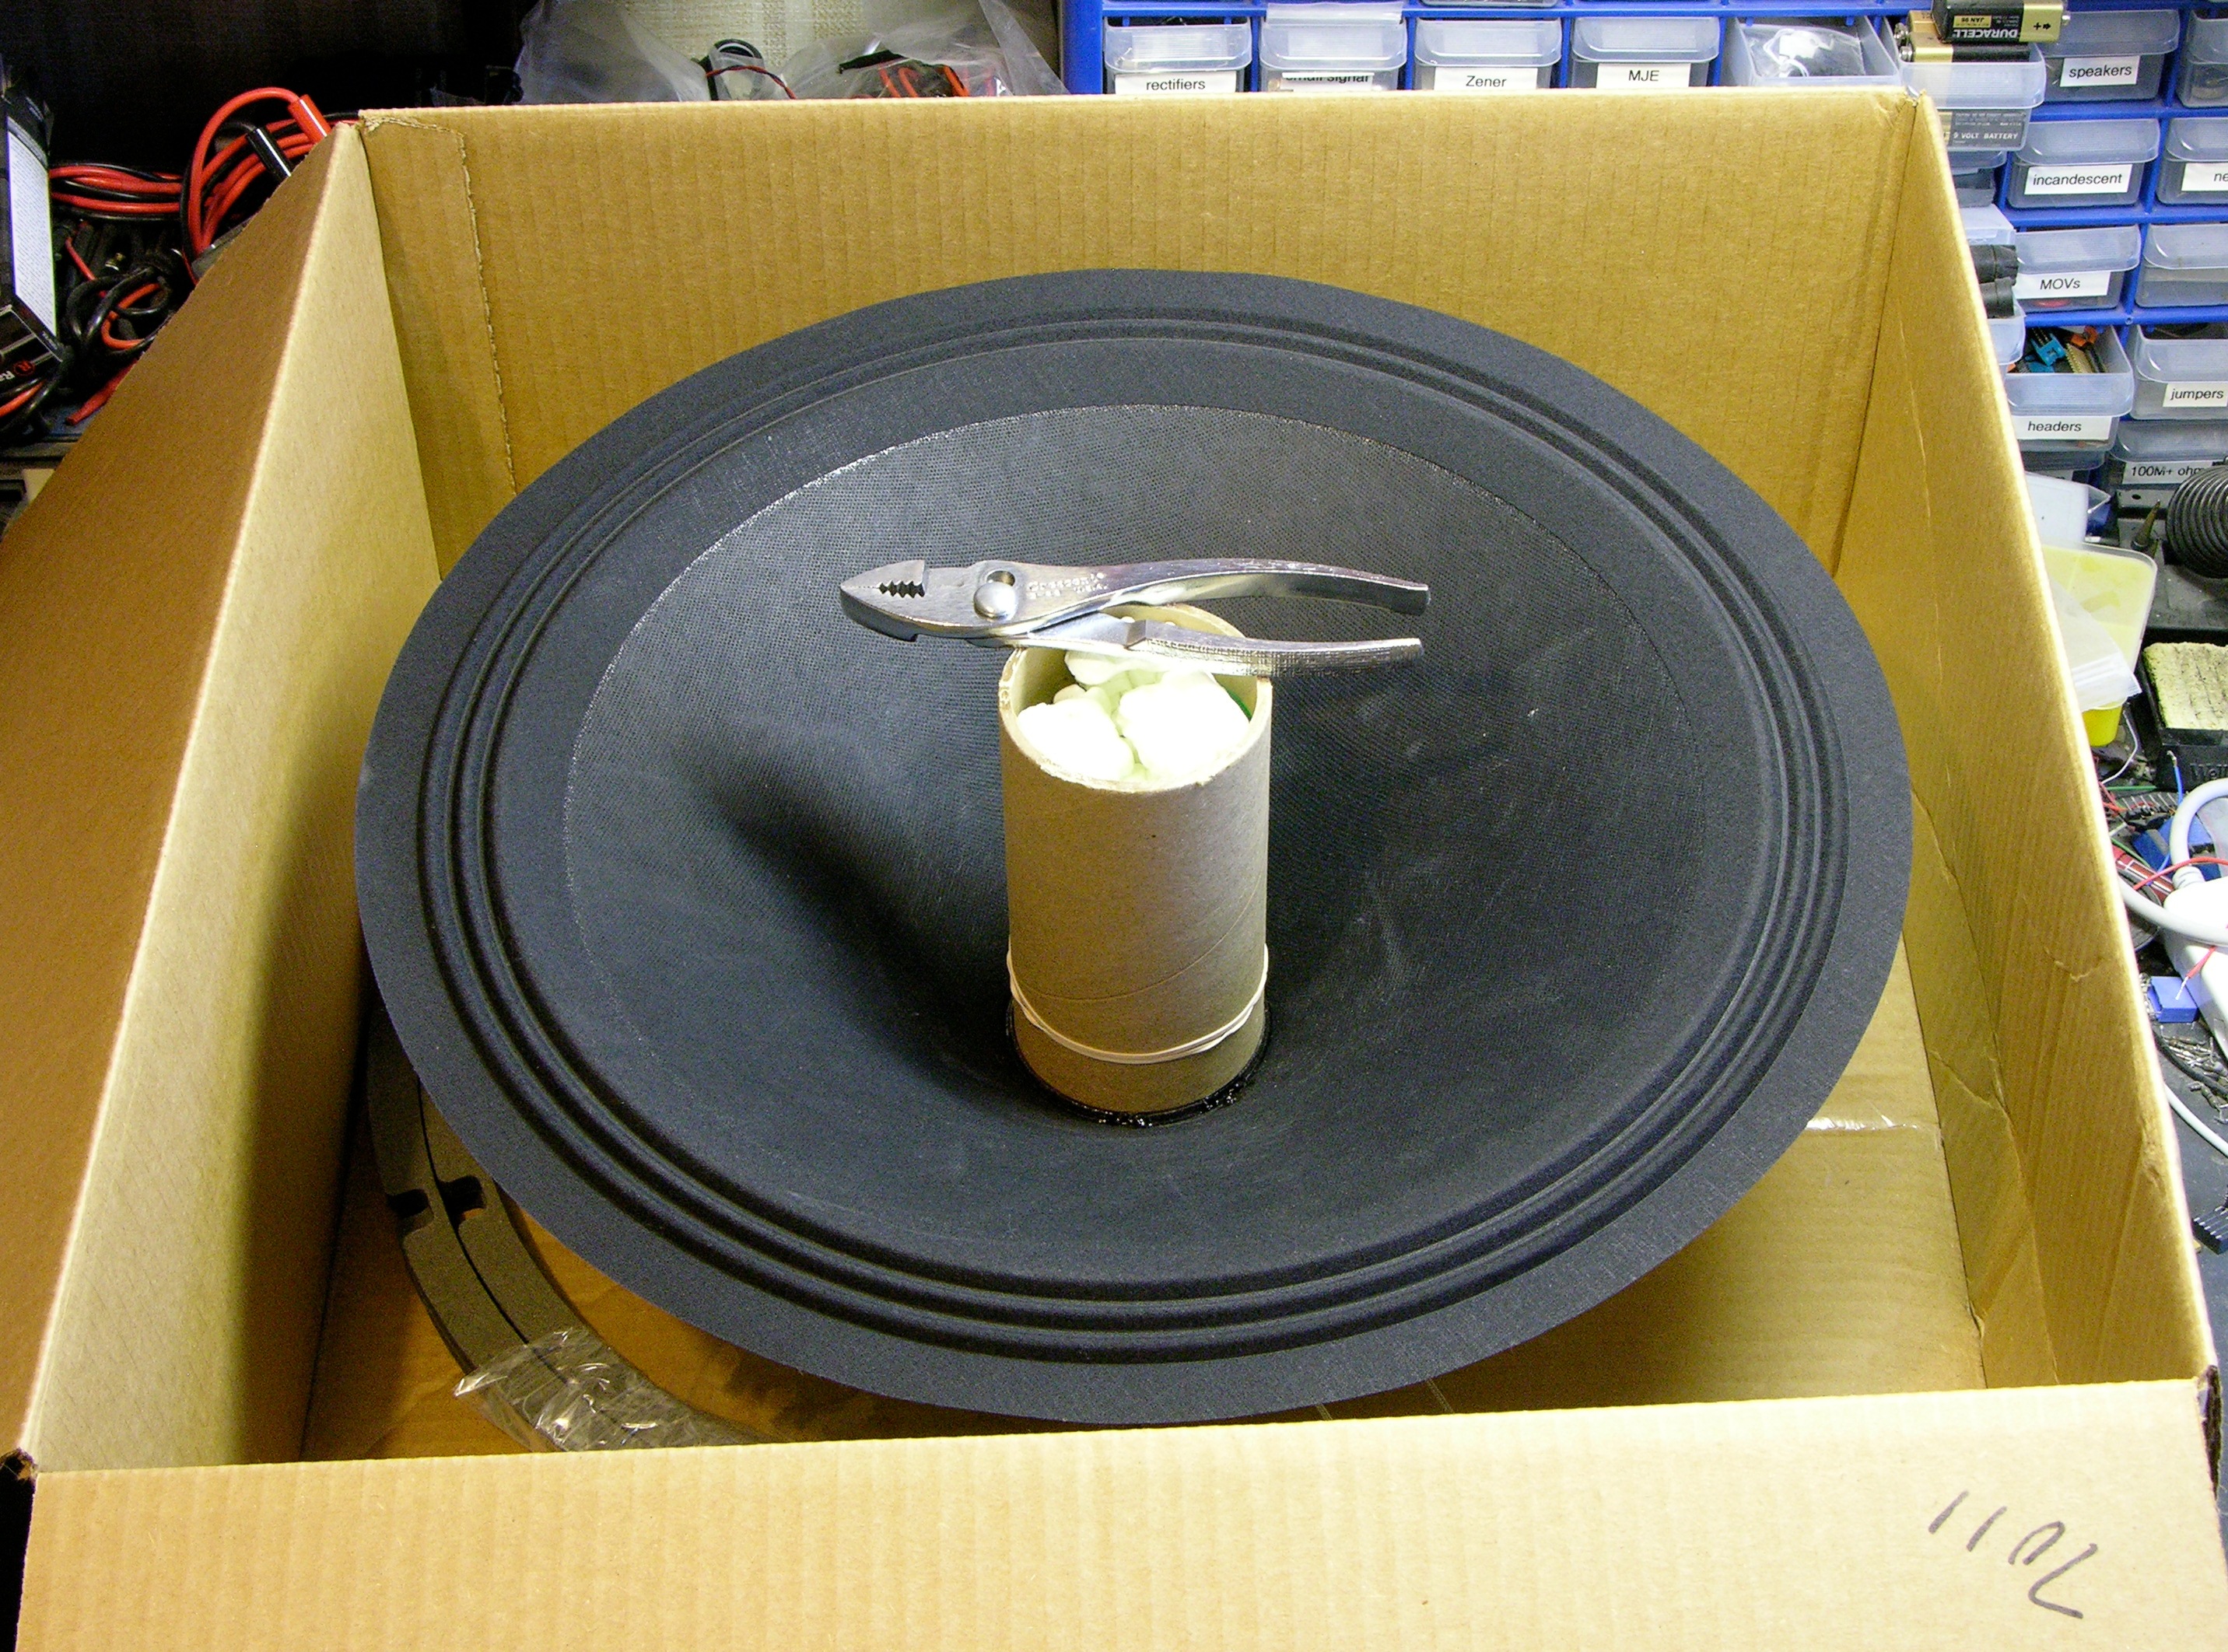
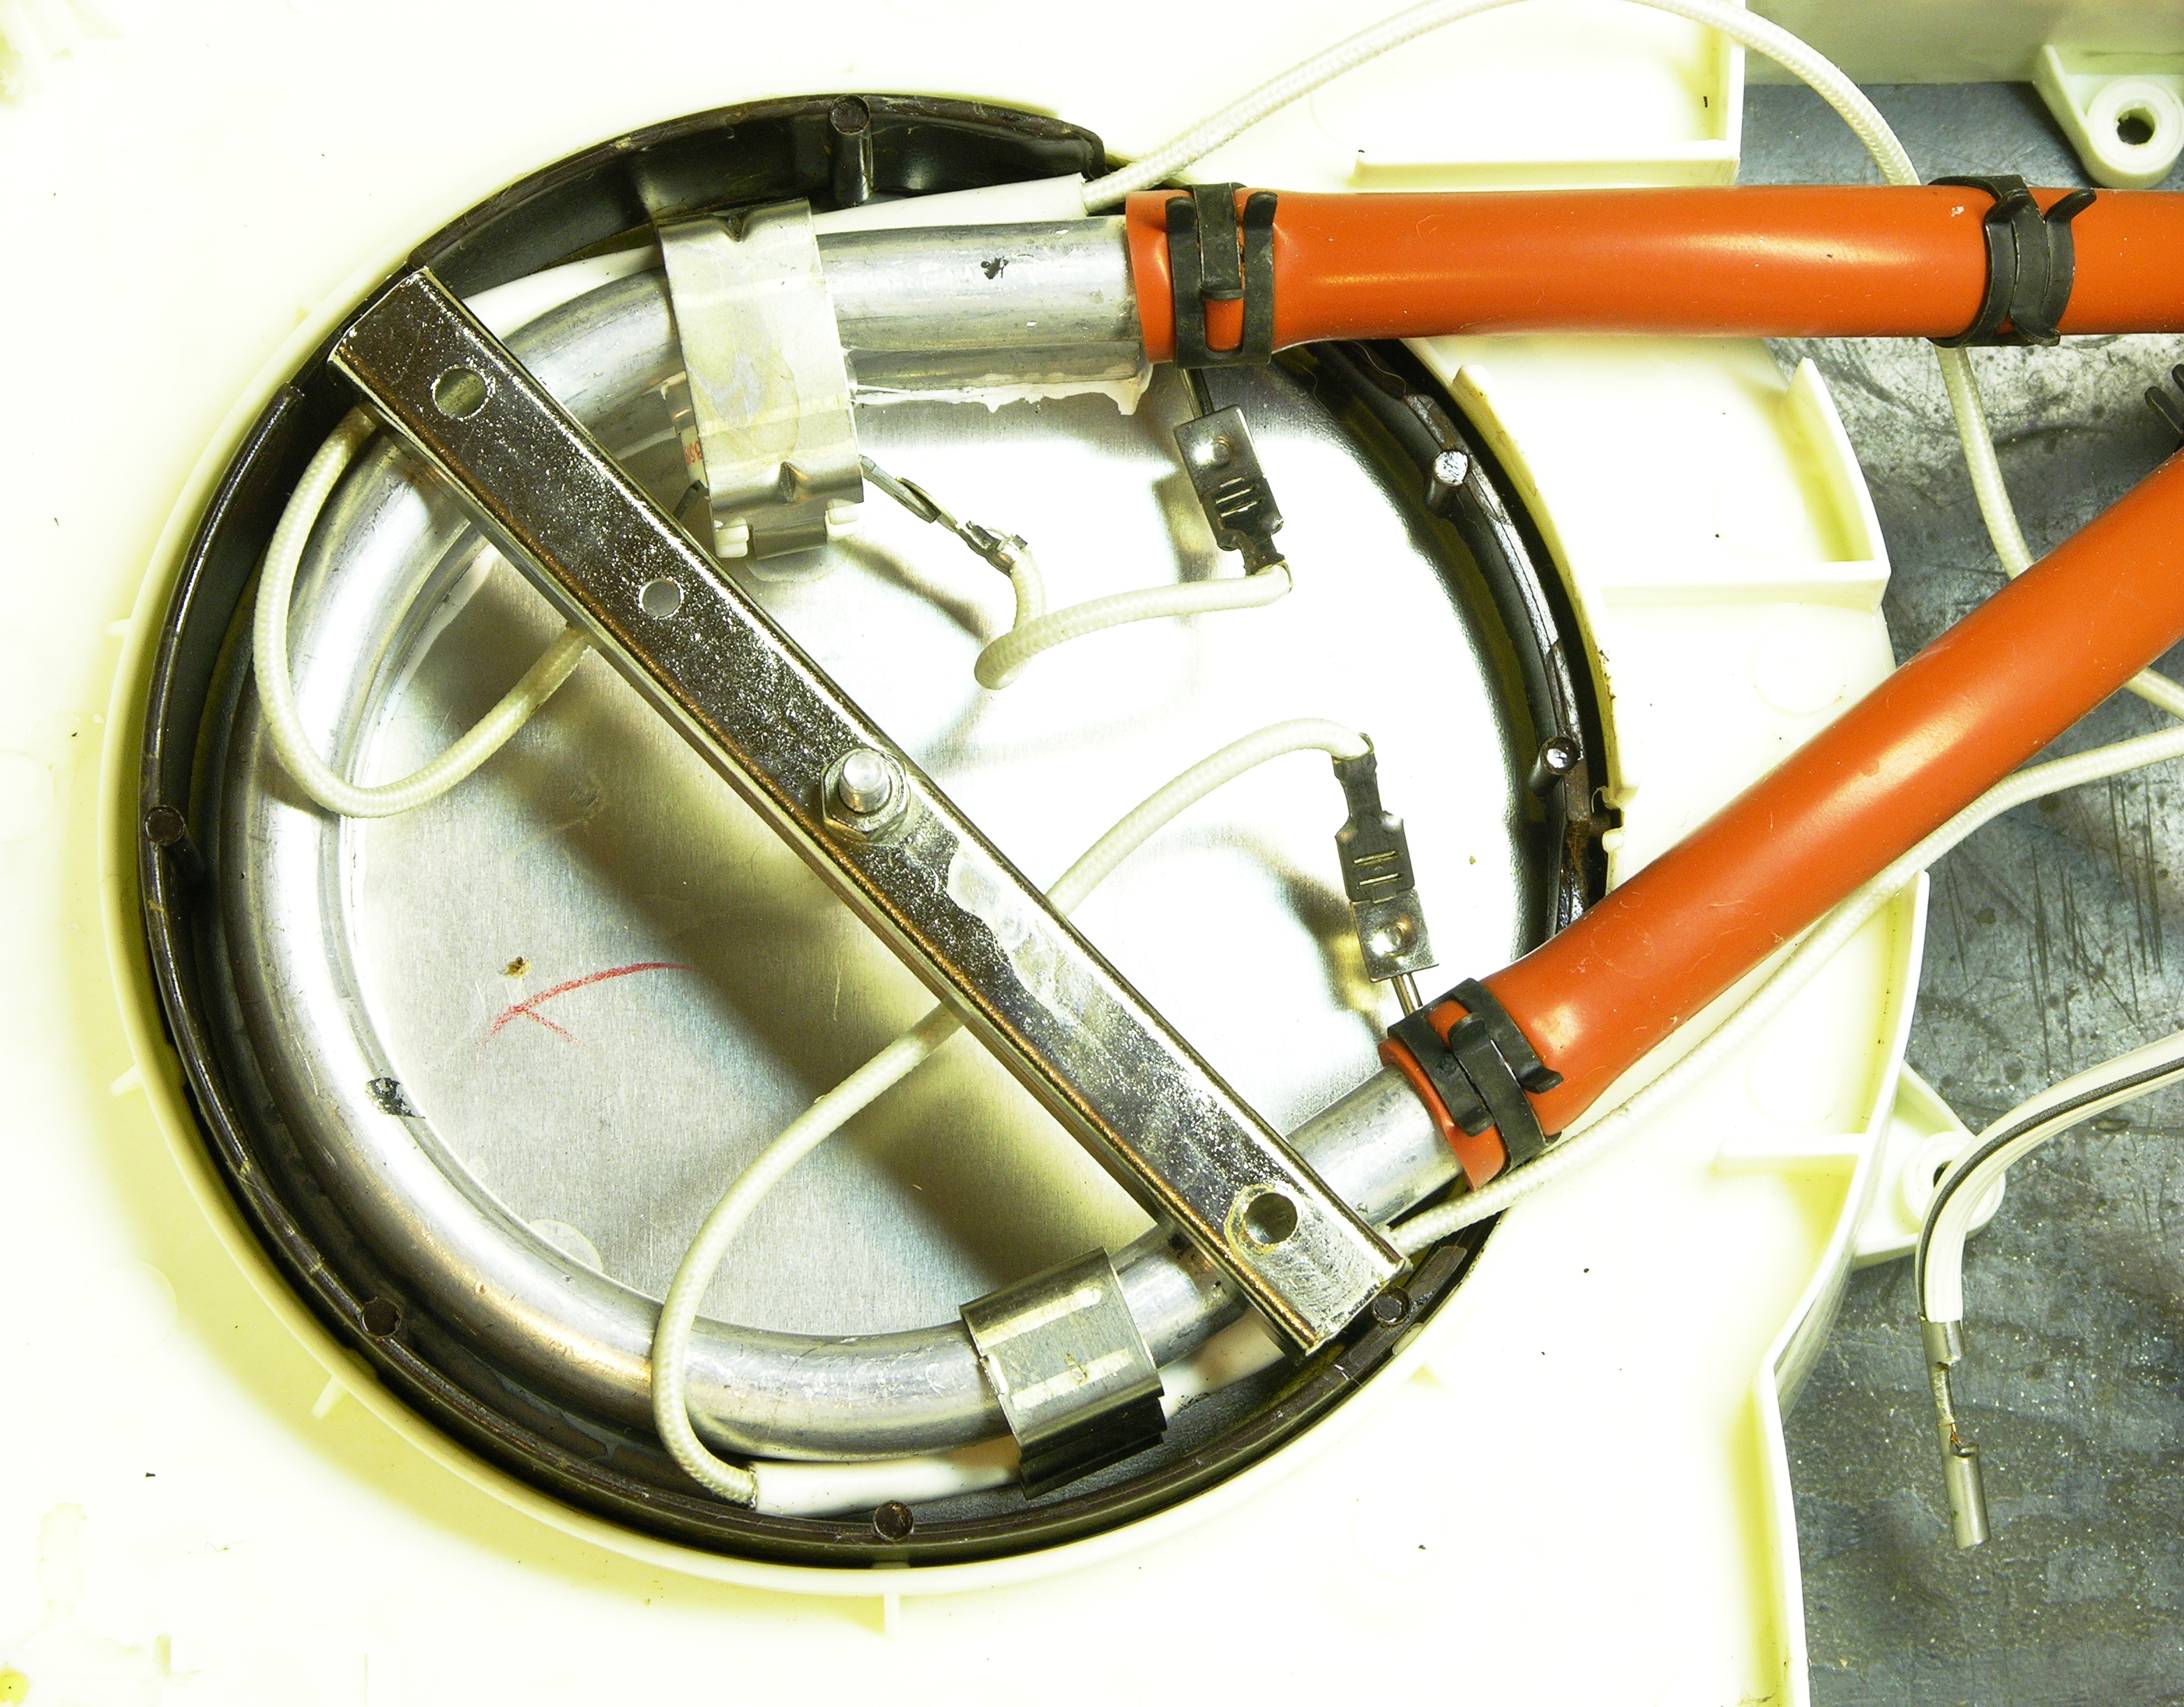
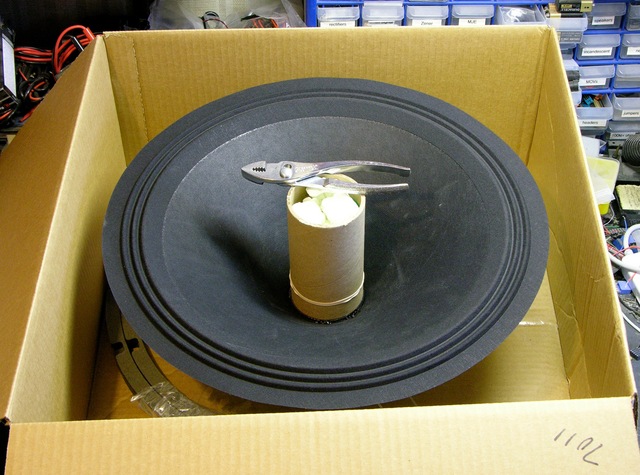
I had never before heard of reconing drivers, but quickly ran across it in my Google searches for J(AY)7010/11s. The idea is that the basket and permanent magnet are still good, that a new voice coil and cone cost less than the whole thing, and that you can replace them yourself at home with a little time and care. Eminence offers recone kits for all their consumer drivers, but recone kits for custom and OEM drivers are available only to the OEM customer.

Although soundspeakerrepair.com has a great instructional video on the reconing process, I ended up getting my kit from reconekits.com for $69.23 + $13.95 USPS Priority Mail flat rate. Over the holiday break, I took the time to install the kit, and the results have been fantastic.

The Kit

Speaker reconing kit instructions: contents

Speaker reconing kit in box

(more…)

New Power Supply for (Home) Electric Lock System

Saturday, December 26th, 2009

For over a decade, my (self-installed) electric lock system from the garage to the utility room has been running on a used PC power supply. The cooling fan had stopped turning, the power supply was discarded, I peeled up the foil sticker over the bearing and added oil, and the fan worked again for another five years until its next service appointment.

This fall, the power supply stopped altogether; and that became the impetus to install a smaller, silent (passively-cooled), non-PC power supply.

Electric lock wiring panel and power supply

Power supply via Extreme Recycling of Topeka; mounting brackets courtesy of MakerBot CupCake. The slight delamination on the right bracket is because I’m still tweaking the best extrusion width over height and the perimeter was too sparse.

Repairing Mr. Coffee

Thursday, September 3rd, 2009

A few weeks ago, my wife’s coffeemaker quit working, and this became A Problem. Not too long after that (or should I say, slightly too long after that) I opened it up, found I couldn’t easily fix what was wrong, and hacked it to bypass the broken part.

Heating element from Mr. Coffee

The symptom was that it wouldn’t power on anything — not even the timer display and the power LED. I suspected that something must have failed on the control PC board; but just to be thorough (and because they were easy to get to), I continuity-tested the thermal switch and the heating element first. No problems there.

(more…)

CupCake Pilot Assembly

Wednesday, September 2nd, 2009

MakerBot CupCake, all motors installed

As of a weekend ago, we are assembled! There are changes to be made, but they’ll clean up along the way.

Notes from the process:

All of the cables will get proper cable management. I won’t show closer pictures of them until they do.

(more…)

Repairing a Vintage Electromechanical Metronome

Sunday, August 23rd, 2009

Passing behind a church-operated thrift store a month or two ago, I saw a black bakelite box in the area where they discard stuff they don’t want, about to get rained on. After seeing that it was a metronome, I rescued it and made it mine. This weekend I tried it out for the first time and ended up repairing the motor. The motor’s workings were unfamiliar to me, but its repair was self-evident.

Vintage electromechanical metronome

Oh, and I cleaned it up a bit, too.

(more…)

Installing a Behringer DSP8024 Equalizer and Upgrading Firmware

Monday, June 8th, 2009

I’m interested in faithful audio reproduction on my home stereo, not just sheer loudness; and even if I don’t end up choosing to stay there, I’ve always wanted to start with a flat frequency response — that is, every pitch that’s played back coming out of the speakers (more to the point, reaching the listener) at the same volume.

My Sony TA-E9000ES preamp / processor has a white noise generator for calibrating the volume of the surround speakers — it sends “static” to each speaker one at a time going around the room. Because I can hear a distinct difference in the “color” of the static when it goes from my main front speakers to my center channel, I already assumed that my different speakers are not providing the same reproduction of the signal going into them — which means that at least some of them (and probably all of them) are not delivering a flat playback.

Behringer 8024 digital equalizer

While poking around on Behringer’s web site, I came across their discontinued DSP8024 digital equalizer. It offers thirty-one 1/3-octave bands of graphic equalization from 20Hz to 20kHz — but more importantly, it offers real-time analysis of your audio system. Connect a reference microphone and turn on auto-equalization and it plays pink noise through your speakers and adjusts the EQ to give you flat response.

And because it’s discontinued, I figured a used one would be a cheap way to get into real-time analysis and flat frequency response. Within a week or so I had picked one up on eBay with the ECM8000 reference microphone.

After flattening my room response, the sound coming through my DSP8024 is simultaneously absolutely awful and absolutely glorious.

(more…)

Refurbishing My Isolation Transformer

Thursday, April 30th, 2009

An isolation transformer, as used in electronics testing and repair, is a line-powered transformer with 1:1 windings (e.g. in the US, ~110VAC in, ~110VAC out). It’s used to isolate a circuit under test from line power for two main reasons (that I know of):

  • With line-powered equipment, if you were to touch a hot part of the AC side of the circuit while it was plugged straight into wall power, you could become a return path to ground and get electrocuted.

    The transformer isolates it from the rest of the world, so your risk is reduced to becoming a return path within the circuit, and you’re not at risk of conducting from any single point to ground. This doesn’t eliminate the need for care, but it reduces the hazard.

  • Some line-powered circuits use a local ground that is something other than earth. (The mixer power supply I repaired recently uses a local ground on its primary side that’s at about -85VDC with respect to earth.)

    If you want to use test equipment (oscilloscope, line-powered meter, etc.) to probe the circuit, you need to connect the equipment’s ground to the circuit’s ground. If they’re both line-powered and the circuit uses something other than earth as ground and you connect the equipment’s real-earth-ground to the circuit’s specifically-non-earth-”ground,” you’ll create a short circuit fatal to one or both pieces of equipment.

    The isolation transformer “floats” the circuit so its local ground is safe to connect to your test equipment’s ground. Of course, this potentially reintroduces the shock-to-earth hazard mentioned above, during the time you have the grounds connected for testing.

Viz WP-31A isolation transformer with carrying handles removed

While repairing the aforementioned power supply, I dug my isolation transformer out of the basement. I had acquired it grungy and broken (and this is odd, but I don’t remember whether I got it from Slim or purchased it at Lloyd’s) and it had been through a basement flood, so it needed rework before I could use it. I’ve just polished off the last of the repairs.

(more…)

Reducing Kickback Noise in Soundcraft Spirit E6 Mixer Switching Power Supply

Sunday, April 26th, 2009

Last weekend, I had repaired a Soundcraft mixer switching power supply, but still had switching noise spikes from the transformer primary showing up on the circuit’s ground, and asked whether anyone could suggest how to reduce them or whether they were an artifact of the way I was using the oscilloscope.

Soundcraft Spirit E6 Audio Mixer

Many thanks to everyone who wrote in with ideas! Because of your suggestions, the mixer is now fixed (enough), back together, and ready to go back to the radio lab.

Here were the ideas and their results:

(more…)