Archive for the ‘Inside’ Category

Electronic Circuit in Panduit Labelmaker Cartridge

Monday, January 18th, 2010

Panduit labelmaker cartridge

I don’t remember exactly where at work I found this empty labelmaker cartridge, but this view isn’t what caught my attention.

Panduit labelmaker cartridge, PC board visible

Here’s what piqued my interest — a tiny PC board inside the cartridge.

Panduit labelmaker cartridge, edge view

I’m aware of inkjet printer manufacturers adding PC boards to their ink cartridges and then perverting the intent of the Digital Millennium Copyright Act‘s anti-circumvention measures to prohibit third parties from producing compatible ink refills. Would Panduit stoop to such depths? I had to know. What was that chip???

PC board from Panduit labelmaker cartridge

Easily answered — the sole IC on the PC board looks like a harmless 24C16 I2C serial EEPROM. It probably informs the labelmaker of the label size and shape. No big deal!

And now I have another 24C16 in my parts bin.

Blu-ray Theft-Prevention Case and Hard Drive Magnets

Monday, January 18th, 2010

I don’t have a Blu-ray player yet, but I’m doing the same thing I did when I switched from VHS to DVD — buying in the new media when I think prices are reasonable, then buying a player after I have enough media to justify it.

Blu-ray movie in theft-prevention case

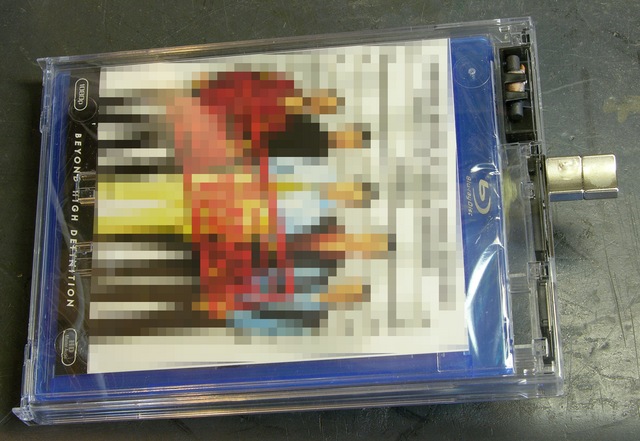
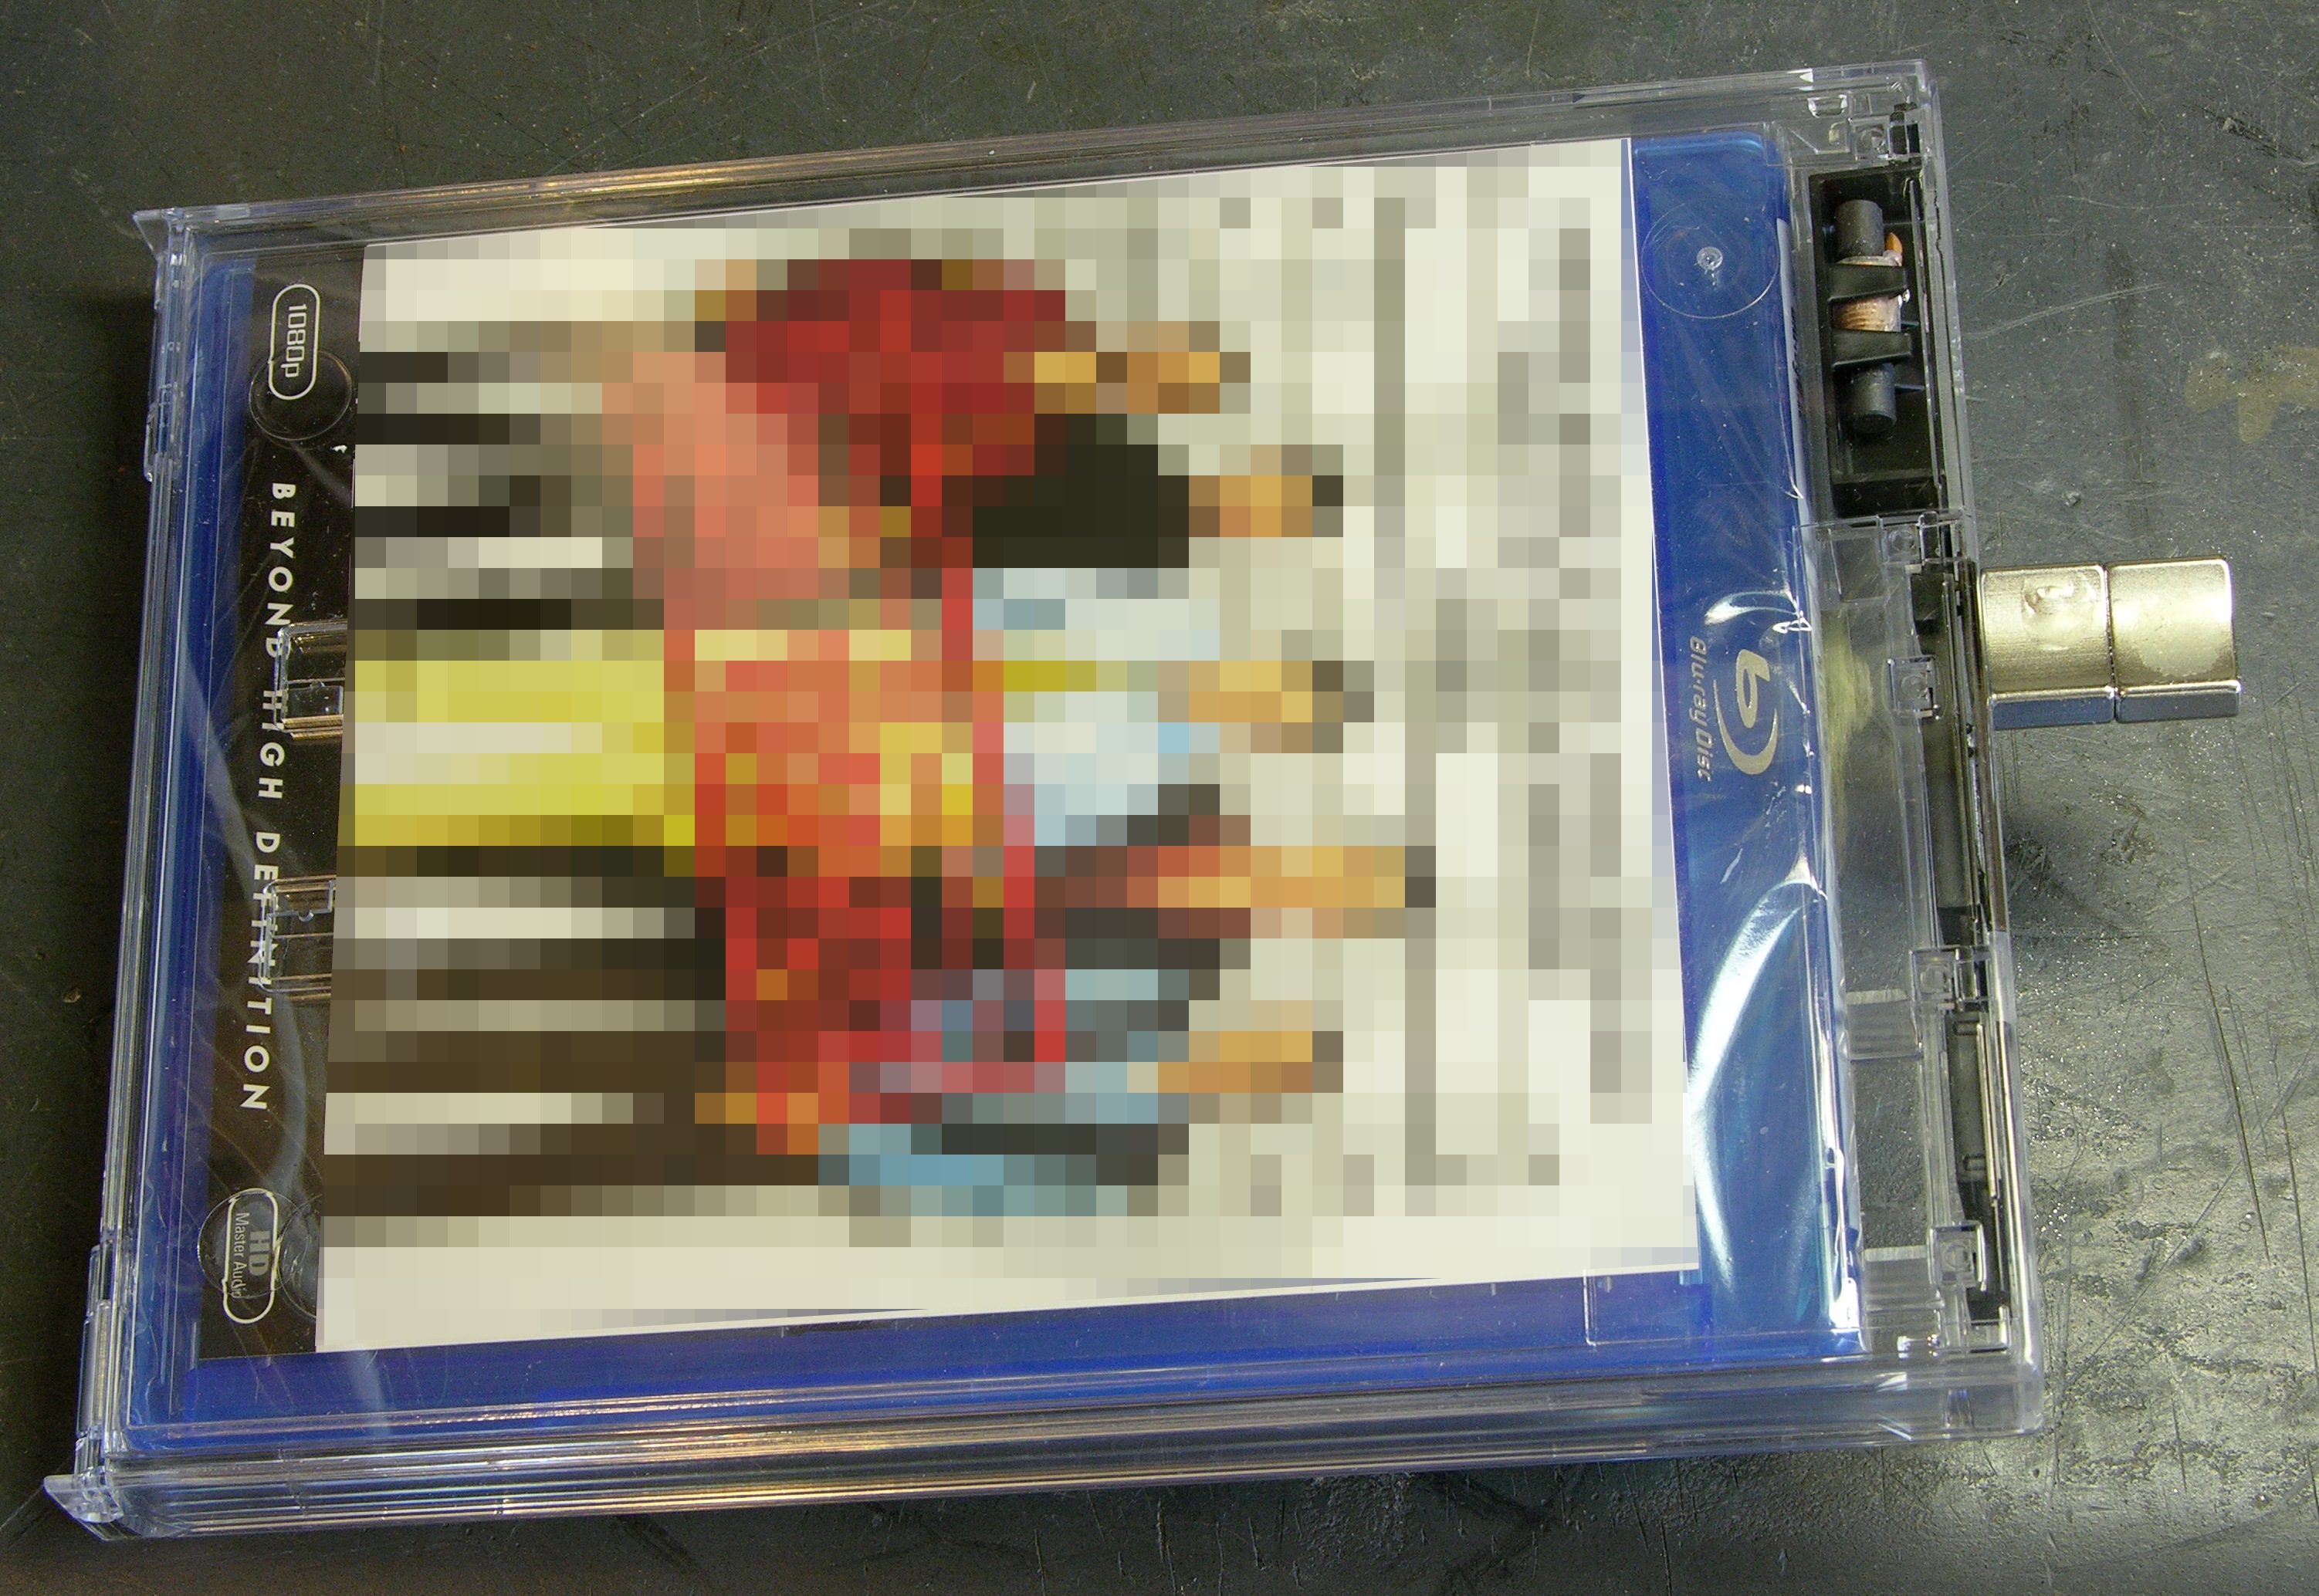
Here’s one of my first such purchases, with the cover image obfuscated to protect the copyright-holder’s interest in their artwork. (Note that this is one of my highly-favored movies and I already have two different DVD editions. Wouldn’t want anyone to think this was the first copy I was buying.)

You can see that Target somehow neglected to remove my purchase from their theft-prevention case. I don’t know how that happened, but I do have the receipt. I could easily have ruined the case (bandsaw) to remove my movie, but that would have been so inelegant.

Please use this information only for good.

Blu-ray movie case theft-prevention mechanism

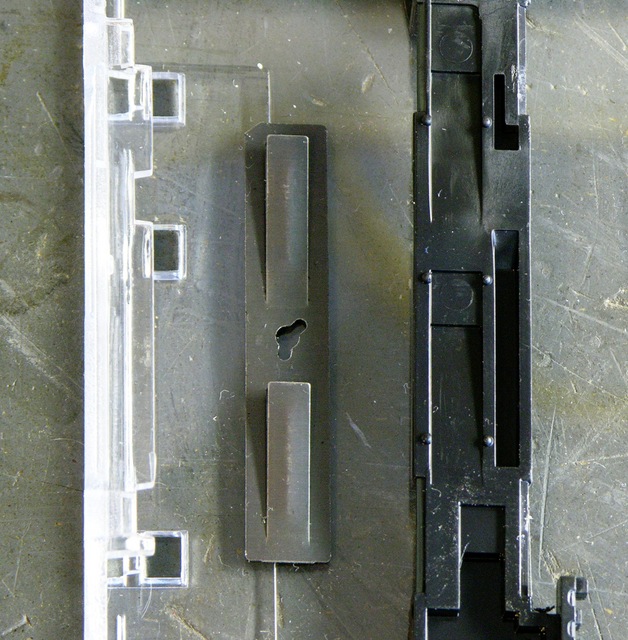
The case hinged open at the bottom of the movie and was held closed by a sliding black plastic strip at the top, shown disassembled here. The strip locks the case shut and in turn is prevented from sliding to the open position by two ratcheting leaves protruding from a metal strip that’s pinned to the case.

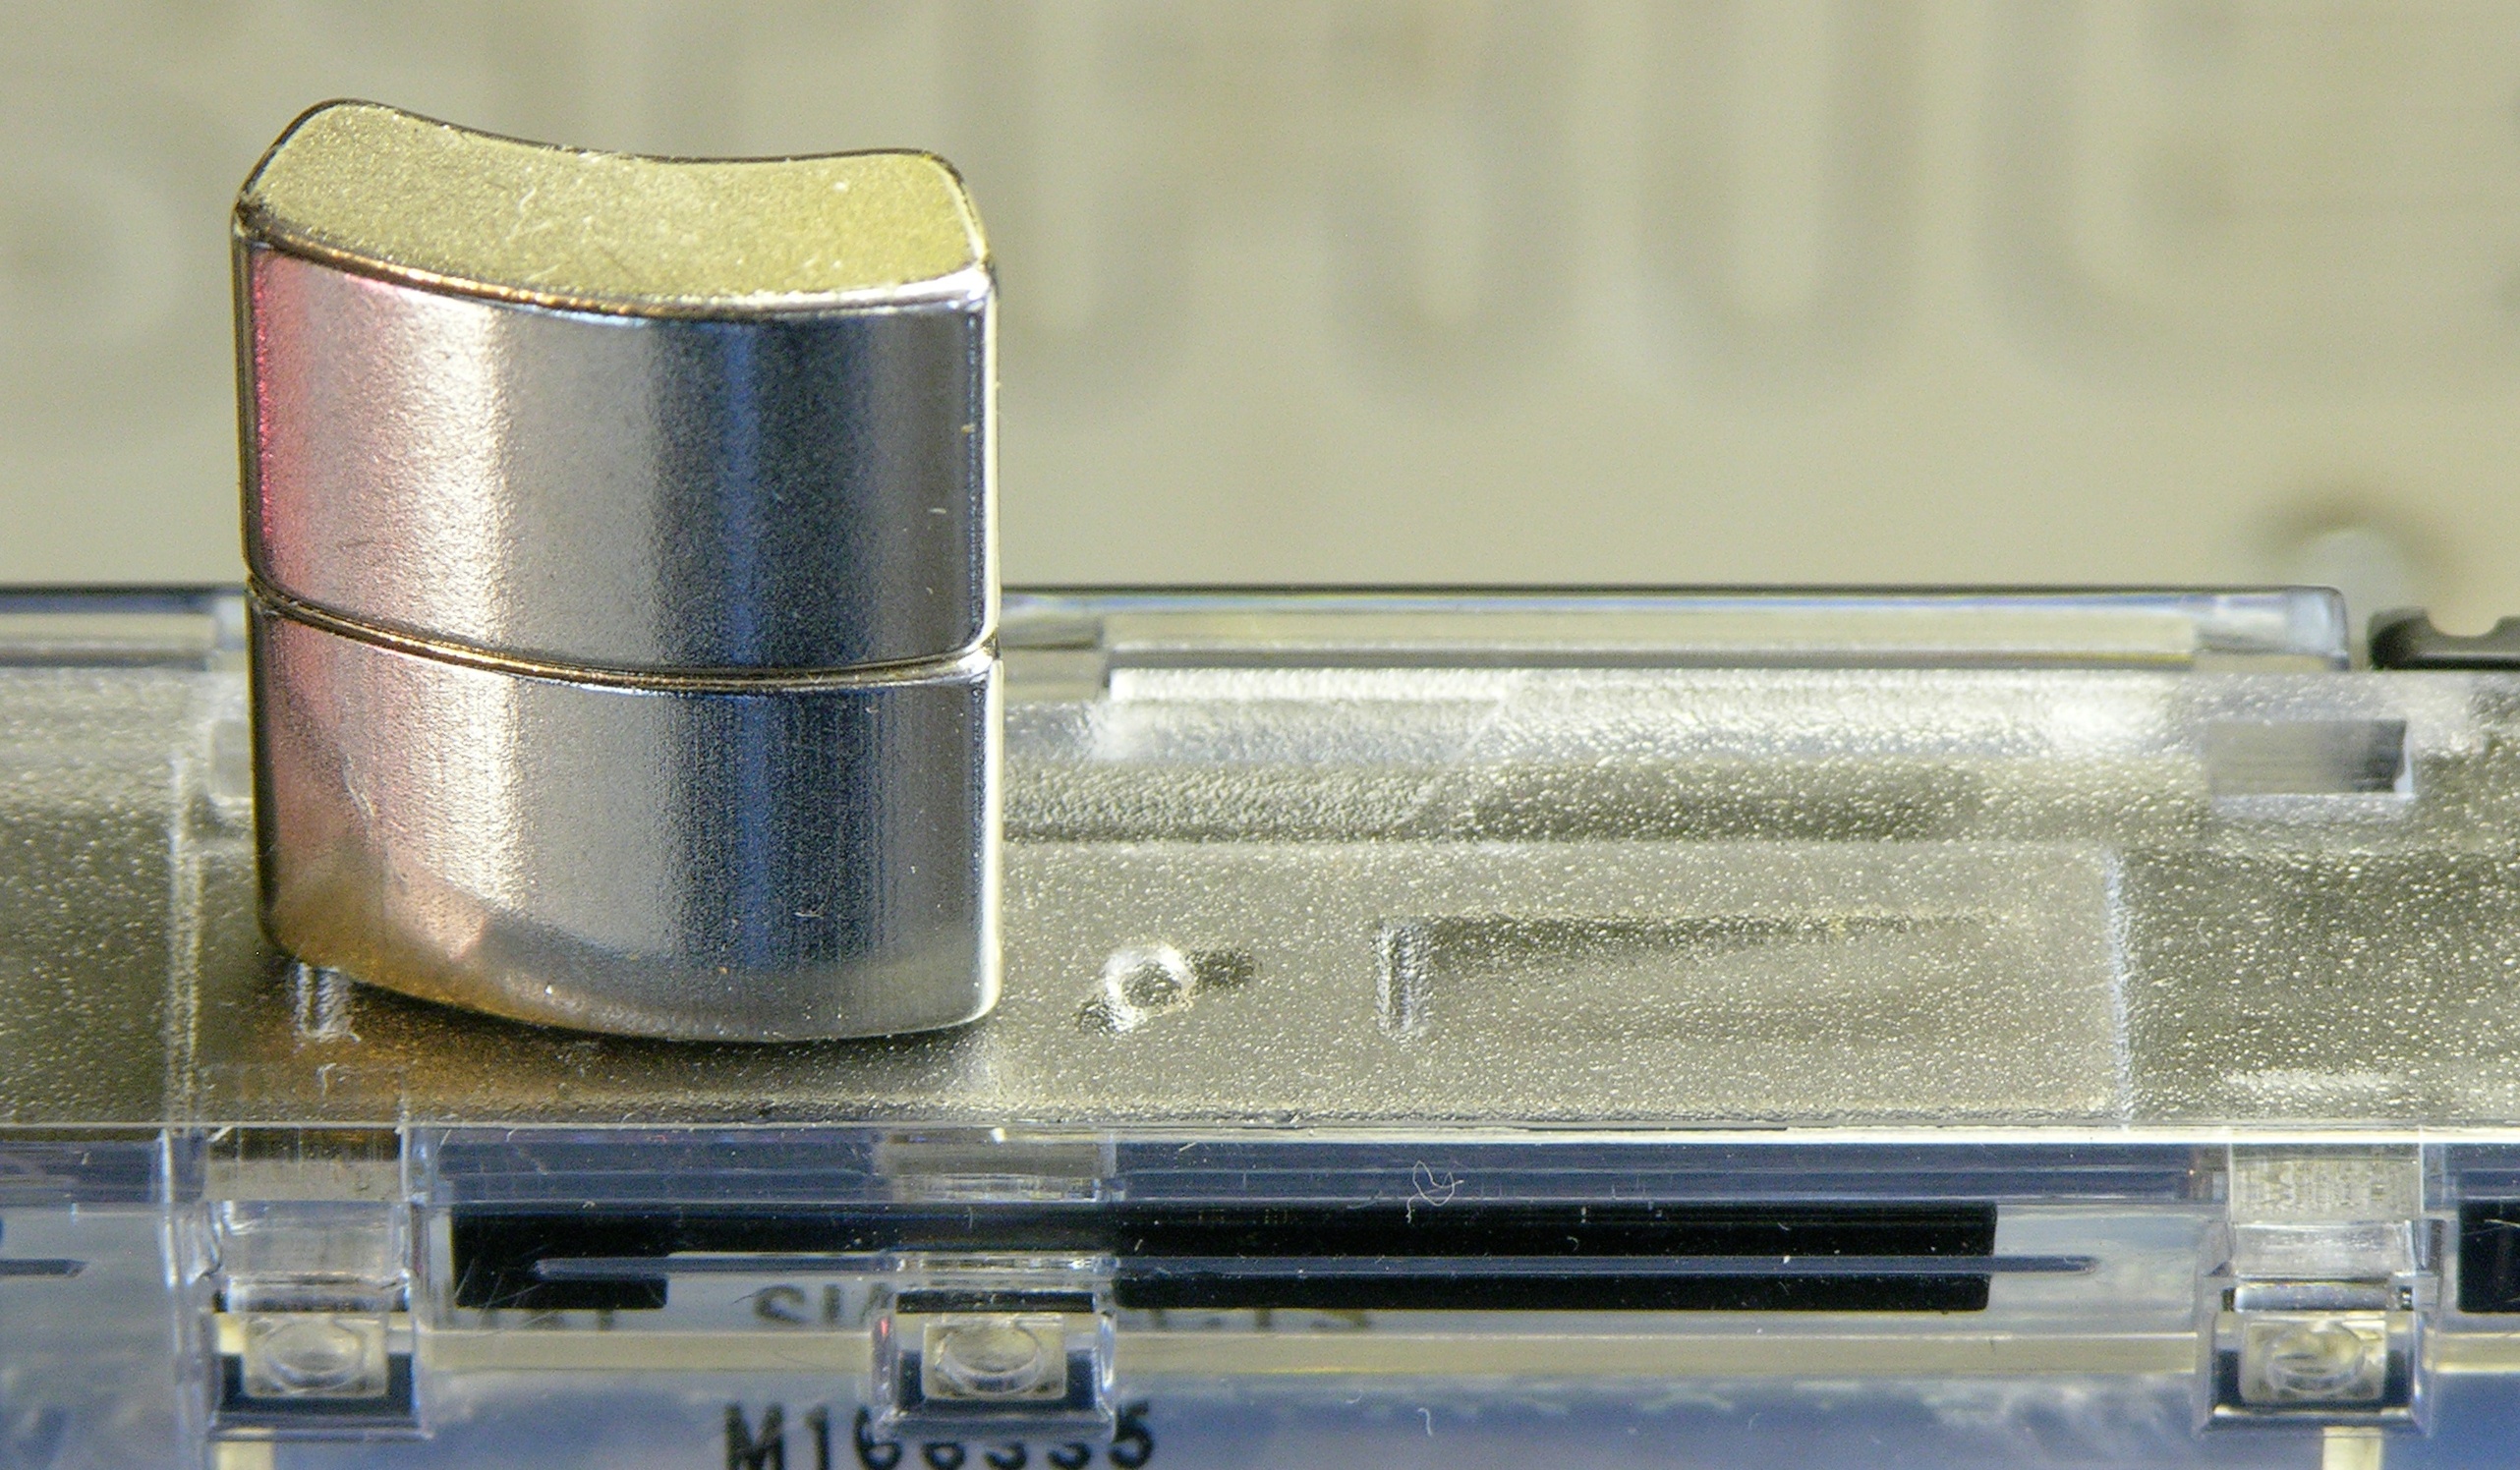
Examining the case, I couldn’t find holes where pins could enter to withdraw the leaves, so I guessed magnets. The metal strip did seem to be attracted to magnets, but the ones I had on hand weren’t strong enough to pull the leaves. I knew I had to find a sacrificial hard drive to take apart.

Seagate Barracuda hard drive with PC boards torn away

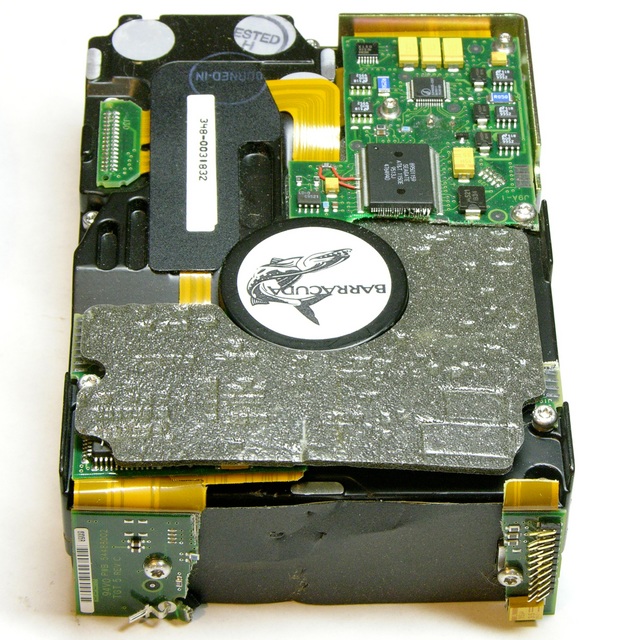
I got this drive that had been removed from a decommissioned PC at work and, um, “read-protected” by one of our technicians. (I’m afraid it may not have been zeroed first, and I’m hanging onto the platters until I can figure out whether I have something strong enough to degauss them.)

Magnets on Blu-ray movie case

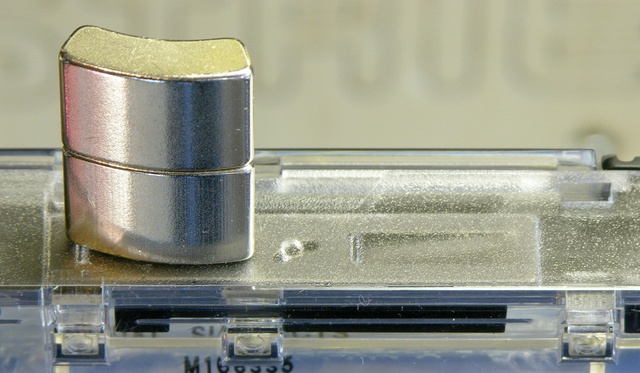
The permanent magnets from the head-positioning assembly retract the leaf springs quite nicely, allowing me to slide the locking strip and open the case. Of course I actually held one magnet on each spring to unlock it, but I wasn’t able to keep them that way for the photo.

Voila! One open case, and one more Blu-Ray movie for Keith.

“New” Crumar T2 Organ Part 2: Easy Fixes and Investigation

Monday, January 4th, 2010

As mentioned previously, I recently bought a Crumar T2 organ manufactured in 1978 and started ascertaining its condition. Here’s what I’ve been able to fix so far and what I’ve been able to determine about the parts I haven’t yet fixed.

Crackly Volume Knobs and Stuck Master Tuning Potentiometer

Several of the volume knobs were pretty crackly.

Crumar T2 organ with control panel lifted

Most Crumar keyboards are wonderful to service because of how easy it is to get inside. After removing a few screws, the top panel lifts back on its rear hinge, without even having to take the knobs off all the controls.

(more…)

Reconing an Eminence JAY7010 Subwoofer Driver

Sunday, January 3rd, 2010

Earlier this year I bought some PA speakers at auction. The auction company was cagey enough to list them all as “untested / condition unknown,” but I suspect they had a pretty good idea of the condition.

Eminence JAY7010 18-inch driver on chair

I ended up with a Yamaha SW1181VS 18″ 500W subwoofer, a Yamaha Yamaha CW218V dual 18″ 1220W subwoofer, and a spare Eminence JAY7010/7011 18″ driver. All four of the Eminence drivers were nonfunctional — some dead shorts, some open. This was a bit disappointing.

My four drivers all look the same, but are labeled JAY7010, J7010, and J7011. From what I can tell, Eminence OEMed these drivers for Yamaha and they don’t seem to be available for direct sale. I found a speakerplans.com forum post with specs sent by Yamaha listing the drivers as 600W. I also found a Google listing summarizing an expired eBay auction claiming that these are the same as the Eminence Sigma Pro, which is a 650W driver widely available at around $160.

For the prices I paid for the Yamaha speakers, new drivers at $160 each would go a long ways toward the cost of entire new speakers — the CW218V (dual) is available from Musician’s Friend for a little over $700 with free shipping.

I had never before heard of reconing drivers, but quickly ran across it in my Google searches for J(AY)7010/11s. The idea is that the basket and permanent magnet are still good, that a new voice coil and cone cost less than the whole thing, and that you can replace them yourself at home with a little time and care. Eminence offers recone kits for all their consumer drivers, but recone kits for custom and OEM drivers are available only to the OEM customer.

Although soundspeakerrepair.com has a great instructional video on the reconing process, I ended up getting my kit from reconekits.com for $69.23 + $13.95 USPS Priority Mail flat rate. Over the holiday break, I took the time to install the kit, and the results have been fantastic.

The Kit

Speaker reconing kit instructions: contents

Speaker reconing kit in box

(more…)

Repairing Mr. Coffee

Thursday, September 3rd, 2009

A few weeks ago, my wife’s coffeemaker quit working, and this became A Problem. Not too long after that (or should I say, slightly too long after that) I opened it up, found I couldn’t easily fix what was wrong, and hacked it to bypass the broken part.

Heating element from Mr. Coffee

The symptom was that it wouldn’t power on anything — not even the timer display and the power LED. I suspected that something must have failed on the control PC board; but just to be thorough (and because they were easy to get to), I continuity-tested the thermal switch and the heating element first. No problems there.

(more…)

Mouse Cables for CupCake Endstops

Tuesday, September 1st, 2009

I finished assembling my CupCake a week and a half ago — more detail in a separate post. For now, information about my decision to use mouse cables to wire up the endstops.

The CupCake comes with CAT5E (ethernet, among other things) patch cords to use to connect everything together. The X stage doesn’t have room for 8P8C (RJ-45) connectors on the Y-axis endstops, so you have to butcher the cables and put one new end on each. Ethernet patch cords are pretty bulky and unsupple; and I figured since I had to terminate my own cables anyway, I might as well use something more to my liking. I don’t fault MakerBot for supplying patch cords — it’s a great choice for most makers, and weirdos like me can always roll their own.

I only needed three conductors and headphone cable is pretty supple; but the very fine stranded wires inside headphone cable can be a bit of a challenge to work with. Cords from dead mice seemed like a better fit, even though they have an extra conductor I didn’t need. So I grabbed some from the “Keith box” at the office and got to work.

Mouse Guts

Interior of optical mouse

For those who haven’t seen it before, here’s the inside of an optical mouse.

(more…)

Repairing a Vintage Electromechanical Metronome

Sunday, August 23rd, 2009

Passing behind a church-operated thrift store a month or two ago, I saw a black bakelite box in the area where they discard stuff they don’t want, about to get rained on. After seeing that it was a metronome, I rescued it and made it mine. This weekend I tried it out for the first time and ended up repairing the motor. The motor’s workings were unfamiliar to me, but its repair was self-evident.

Vintage electromechanical metronome

Oh, and I cleaned it up a bit, too.

(more…)

SparkFun Tour

Sunday, August 23rd, 2009

At the end of July, I was traveling in the Boulder area and had the privilege of getting a tour of the SparkFun headquarters. I got my first Arduino from them; and although I’m not a terribly frequent shopper, I follow their blog assiduously and I love what they do, so it was a pretty thrilling experience.

SparkFun headquarters, exterior

SparkFun posts a lot of pictures on their site and they’re not shy about showing off their facility, but the online photos don’t give quite the same perspective on their operation that an outsider gets when coming through for the first time. They told me there was nothing I couldn’t photograph and post, so I wanted to share a bit from my tour.

(more…)

Disabling Wireless Transmission on a VR3 Automotive Backup Camera

Sunday, August 2nd, 2009

After backing my bus into my neighbor’s mailbox, I ordered a backup camera from Amazon. The camera touts wired and wireless operation, and I already knew I’d want to use the wired connection for best picture quality.

VR3 backup camera with LCD

Since the Amazon product description for the related VR3 backup camera with 2.5″ LCD says the wireless connection is 2.4GHz and that’s the same frequency band as 802.11b/g, I also knew I’d want to be sure the wireless transmission was inactive so it didn’t interfere with wi-fi reception in the bus. The support document says:

Some of our cameras have the ability to be hardwired to the monitor. This will eliminate interference by completely shutting down the wireless reception.

Which sounded pretty good. All you need is their $20 extension cable … well, no. Their cable is only 25′, and I’ll need about 50′ to get from the back of the bus to the front. Plus I don’t feel like paying $20 each for cables I’d have to chain together when I can just as well build a cable customized to my own liking.

Testing Wired Operation

I was visiting Cort in July anyway, so I took my new camera along for him to help me try out wiring it up and disabling the wireless transmission. As an avid amateur radio operator and repeater maintainer, he’s even better equipped for this than I, and his spectrum analyzer sure came in handy.

(more…)

Copycat PID-Controlled Solder Hotplate

Monday, May 4th, 2009

In early February, a correspondent pointed me to Jeff Keyzer’s mightyOhm blog. I immediately ran across his homebrew PID-controlled soldering hotplate and improvements, and immediately knew I had to have one.

I contacted Jeff through his blog and he was great about sharing his knowledge. He’d built his hotplate using the last of some surplus parts he’d picked up at a now-closed store in the Valley and was considering ordering a batch of parts to make a few for all the folks inquiring about them, but hadn’t done so yet. I was eager, decided it’d be quicker to make my own (and three months later, that may actually have been correct), and went off to eBay to find myself some parts. I also bought aluminum and took a practice run at polishing it.

Most of the CupCake PC boards are SMT; and although I’m very comfortable soldering SMT by hand, I really wanted to get my hotplate up and running and use the CupCake boards as a chance to try out reflow soldering. (That’s why I started by assembling the opto endstop boards, which are the only all-through-hole boards in the kit.)

PID-controlled SMT soldering hotplate

So last night I got a working proof-of concept hotplate going, and tonight I can start on the CupCake SMT boards. W00T!

Here’s the tale of how to build a copycat PID-controlled hotplate, with a digression into how lucky I got buying exactly the right PID controller with no idea what I was doing.

(more…)