Archive for the ‘Miscellaneous’ Category

Vibratory Tumbler for Cleaning Parts

Sunday, October 12th, 2008

A few weeks ago, I bought a “vibratory tumbler” at Harbor Freight for $40. I’ve been wanting one for quite a while — it seems like a good way to de-paint Altoids tins / clean old car parts / faux age woodcarvings / whatever.

Vibratory tumbler from Harbor Freight

You fill it 2/3 of the way with grit, throw crud-covered stuff into it, run it for a few hours, and out comes a shiny new pony! Or so goes the theory.

I wasn’t sure whether the Harbor Freight package included the requisite grit, so I didn’t buy any. It wasn’t included, so today I experimented with common household materials.

Conclusion: Kitty litter, no matter how hard the little gravels may feel underfoot in the morning, is way too soft. Driveway sand is extremely dusty and too smooth and/or large. Real grit or polishing compound is in my future.

Even so, the results were promising. Trey in Chicago asked for a few SO-239 jacks from Slim’s distribution cabinet, and they were pretty oxidized and seemed like a good opportunity to try the tumbler.

Oxidized SO-239 jacks

After a few hours of polishing:

Cleaned SO-239 jacks

Not bad.

Weird Stuff from Work

Friday, October 3rd, 2008

The Operations group at work is cleaning house, and they’re finding some odd things tucked away.

Multi-line phone breakout

Amphenol connector (male on one side, female on the other), an RJ-11 jack with two wires pinned, and a five-position (plus off) rotary switch. I’m assuming this went inline between a 25-pair cable and a key system telephone, to attach an answering machine to a line of your choice.

Real nice metal box, rotary switch, and lovely clunky knob.

And then this pretty much speaks for itself:

Wire splint box, front cover

Wire splint box, back cover

Wire splint

The wire mesh looks like it was dipped through a solder bath to hold it together.

Let’s just say I hope I’m never in a mine and get a fractured arm.

Interesting Bits of Old Motherboards

Monday, September 1st, 2008

I’m salvaging parts from some very old, dead (leaking capacitors and batteries, corroded components) PC motherboards and found some interesting bits.

ICs inside IC socket

14-pin ICs mounted inside a 40-pin IC socket (that was populated). Very cute. Makes me want to do something extra-naughty, like mount an SMT IC underneath a DIP (no socket needed).

18/20-pin IC sockets

18/20-pin IC sockets, so you could pick which size L2 cache chips to install. Although it’s not obvious from straight above, these are not hacked together out of regular sockets — they were manufactured this way.

I found them on two different vendors’ boards, and I had never noticed them when I was servicing PCs during that era. I guess it solves the problem of knowing which end of a regular 20-pin socket to stuff an 18-pin IC in; or maybe the 18-pin and 20-pin ICs didn’t have compatible pinouts.

Novell 8088 motherboard with onboard ethernet

A Novell 8088 motherboard with onboard ethernet. Various other curiosities are visible in the large version of the picture, but worth noting is the “PC TERM. BIOS,” which leads Joel to question whether this was a dual-function PC and network terminal.

Free: Boxed Manuals → Cases for Prototyping On the Go?

Wednesday, June 25th, 2008

I’ve been saving these relics of the Information Age forever, initially because I had the computers to go with them, then out of nostalgia, then because I forgot I had them, and now because it seems like the boxes should be useful. But really, I’d just like them to go away.

Anybody want some three-ring binders with matching boxes, maybe to put an Arduino and breadboard in to take with you on vacation and play with circuits when you’re stuck in Saint-Tropez for a couple of weeks with nothing to do? The rings oughtta be good for holding baggies of parts, or something.

Seriously, if anyone wants any of these, they’re yours for the cost of shipping. The MS-DOS Operating System is missing one of the two volumes from the double-wide case; the Wordstar and Operating Instructions are intact in single-wides.

Meta: Enabled HTTP Compression

Wednesday, May 7th, 2008

I just enabled HTTP compression for all text content on my blog. (Images are hosted externally on a server I don’t directly control.) For anyone viewing my site directly, I’d be curious whether it seems to load faster, and of course if any problems are experienced.

Homebrew SMT Probe Tweezers

Saturday, February 23rd, 2008

Closeup of SMT probe tweezers in use

Some surface-mount resistors have their values printed on them, but all 1206 and smaller SMT capacitors that I’ve seen are completely blank. The only way to determine their value — after salvaging, that is — is to measure them.

My multimeter has a capacitor tester, but its connections are slots in the body of the meter rather than the regular probes, so it doesn’t work at all for SMT capacitors. (In fact, most salvaged capacitors’ leads are much to short to make contact with the meter’s sockets.) Lately I’ve been plugging a couple of long wires with tinned ends into the meter so I can use the other ends to check the values of SMT capacitors on my workbench.

This is a pain.

Ever since I started salvaging SMT components, I thought it’d be great to have a pair of tweezers wired as meter probes — grab the component, pick it up to put away, and check its value all at the same time. There actually are such things available, but the ones I’ve found start at $35 with a custom connector for that manufacturer’s meter. Not much to my liking.

I figured on building my own, maybe by finding a pair of plastic tweezers and gluing some kind of metal foil to the gripping surface. But what kind of metal? I was thinking about this on the drive to work Monday. Copper oxides rapidly and wouldn’t make good contact in the long term; so does solder. Silver would probably be okay. Gold would be perfect, but I have no idea where to get . . . wait a minute. Sure I do.

Circuit board about to be sacrificed

Monday night I sifted through my junk boxes and found a sacrificial circuit board with a nice, wide, gold-plated .156″-spacing card-edge connector on it. I desoldered everything from it the hard way — with a soldering iron — because this time it was about preserving the board rather than removing components as fast as possible.

Circuit board cut into strips

Tuesday I took the stripped board to the lab at school and used the PCB shear to cut it into strips, many of which are almost straight. That night I cut a pointed shape onto the end of two strips on my scrollsaw, doing a terrible job. I did slightly better on the next ones.

I used the bench disc sander to smooth them out and narrow the points to the width of the gold strips, then bevel the edges near the tips so the edges are sharp like a knife instead of thick like a PCB edge — it makes it easier to pick up very not tall SMT components. I also sanded the tip’s angle back from 90° to about 60°, since I’ll be holding these at an angle from my hand down to the workbench.

Two halves of SMT probe tweezers, wired

This afternoon I wet-sanded them very smooth, both faces and edges, then soldered a couple of jumper wires so I could use the existing traces to get from tip to handle, and soldered on two lead wires.

Completed SMT probe tweezers

I taped the points together in alignment, clamped the handle end in a vise with a maple chunk in between, drilled holes through the works, and bolted it together. I had to cut one trace to keep it from contacting the bolts — it wouldn’t have shorted the two leads together, but I still didn’t want the bolts “live” on either side of the connection.

At the far end, I soldered to a salvaged plug (something from a CRT monitor yoke PCB, I think) to fit into the capacitor test slots on my meter.

SMT probe tweezers in use

It works very nicely. The tweezer adds about 50pF to my measurements when it’s wide open, 60pF when I hold it as closed as I can without shorting; so probably 50pF when I’m holding a capacitor in it. That’s only a .05% error on the .1μF SMT capacitors I have in abundance, and I bet my meter itself is two orders of magnitude less accurate than that, so it really doesn’t bother me.

I think I have the jack that mates with the plug, and I want to build an adaptor to banana plugs so I can use this to double-check SMT resistor values, too.

Now I’m out of excuses not to put away all the SMT chips sitting out on my workbench. :-)

Merry Christmas to Me!

Friday, January 4th, 2008

When I thought up the LED puck idea, I went shopping for some bright LEDs to put into it. I don’t like the blue+yellow color of “white” LEDs, and I thought it’d be fun to have green illumination, so I found some green LEDs from a Hong Kong [correction: Chinese] eBay seller and bought ‘em. Since I’m pretty sure it costs about the same to ship a package from Hong Kong China if it has a few more items of negligible weight in it, I kind of went crazy and treated myself to an LED assortment.

I won’t mention the specific eBay seller, because I have mixed feelings about them. On the one hand, their prices were very good and their LEDs seem okay. On the other hand, I’m pretty sure it cost them next to nothing extra to ship my whole package than just my first LEDs; but even after requesting and receiving an additional additional shipping discount, I still paid $30 shipping for $35 of LEDs. And on the gripping hand, I paid on December 9 and didn’t receive my package until December 24. It made a nice Christmas present to me, but it made me feel like I was paying shipping by the day instead of by the pound.

Square 5mm LED

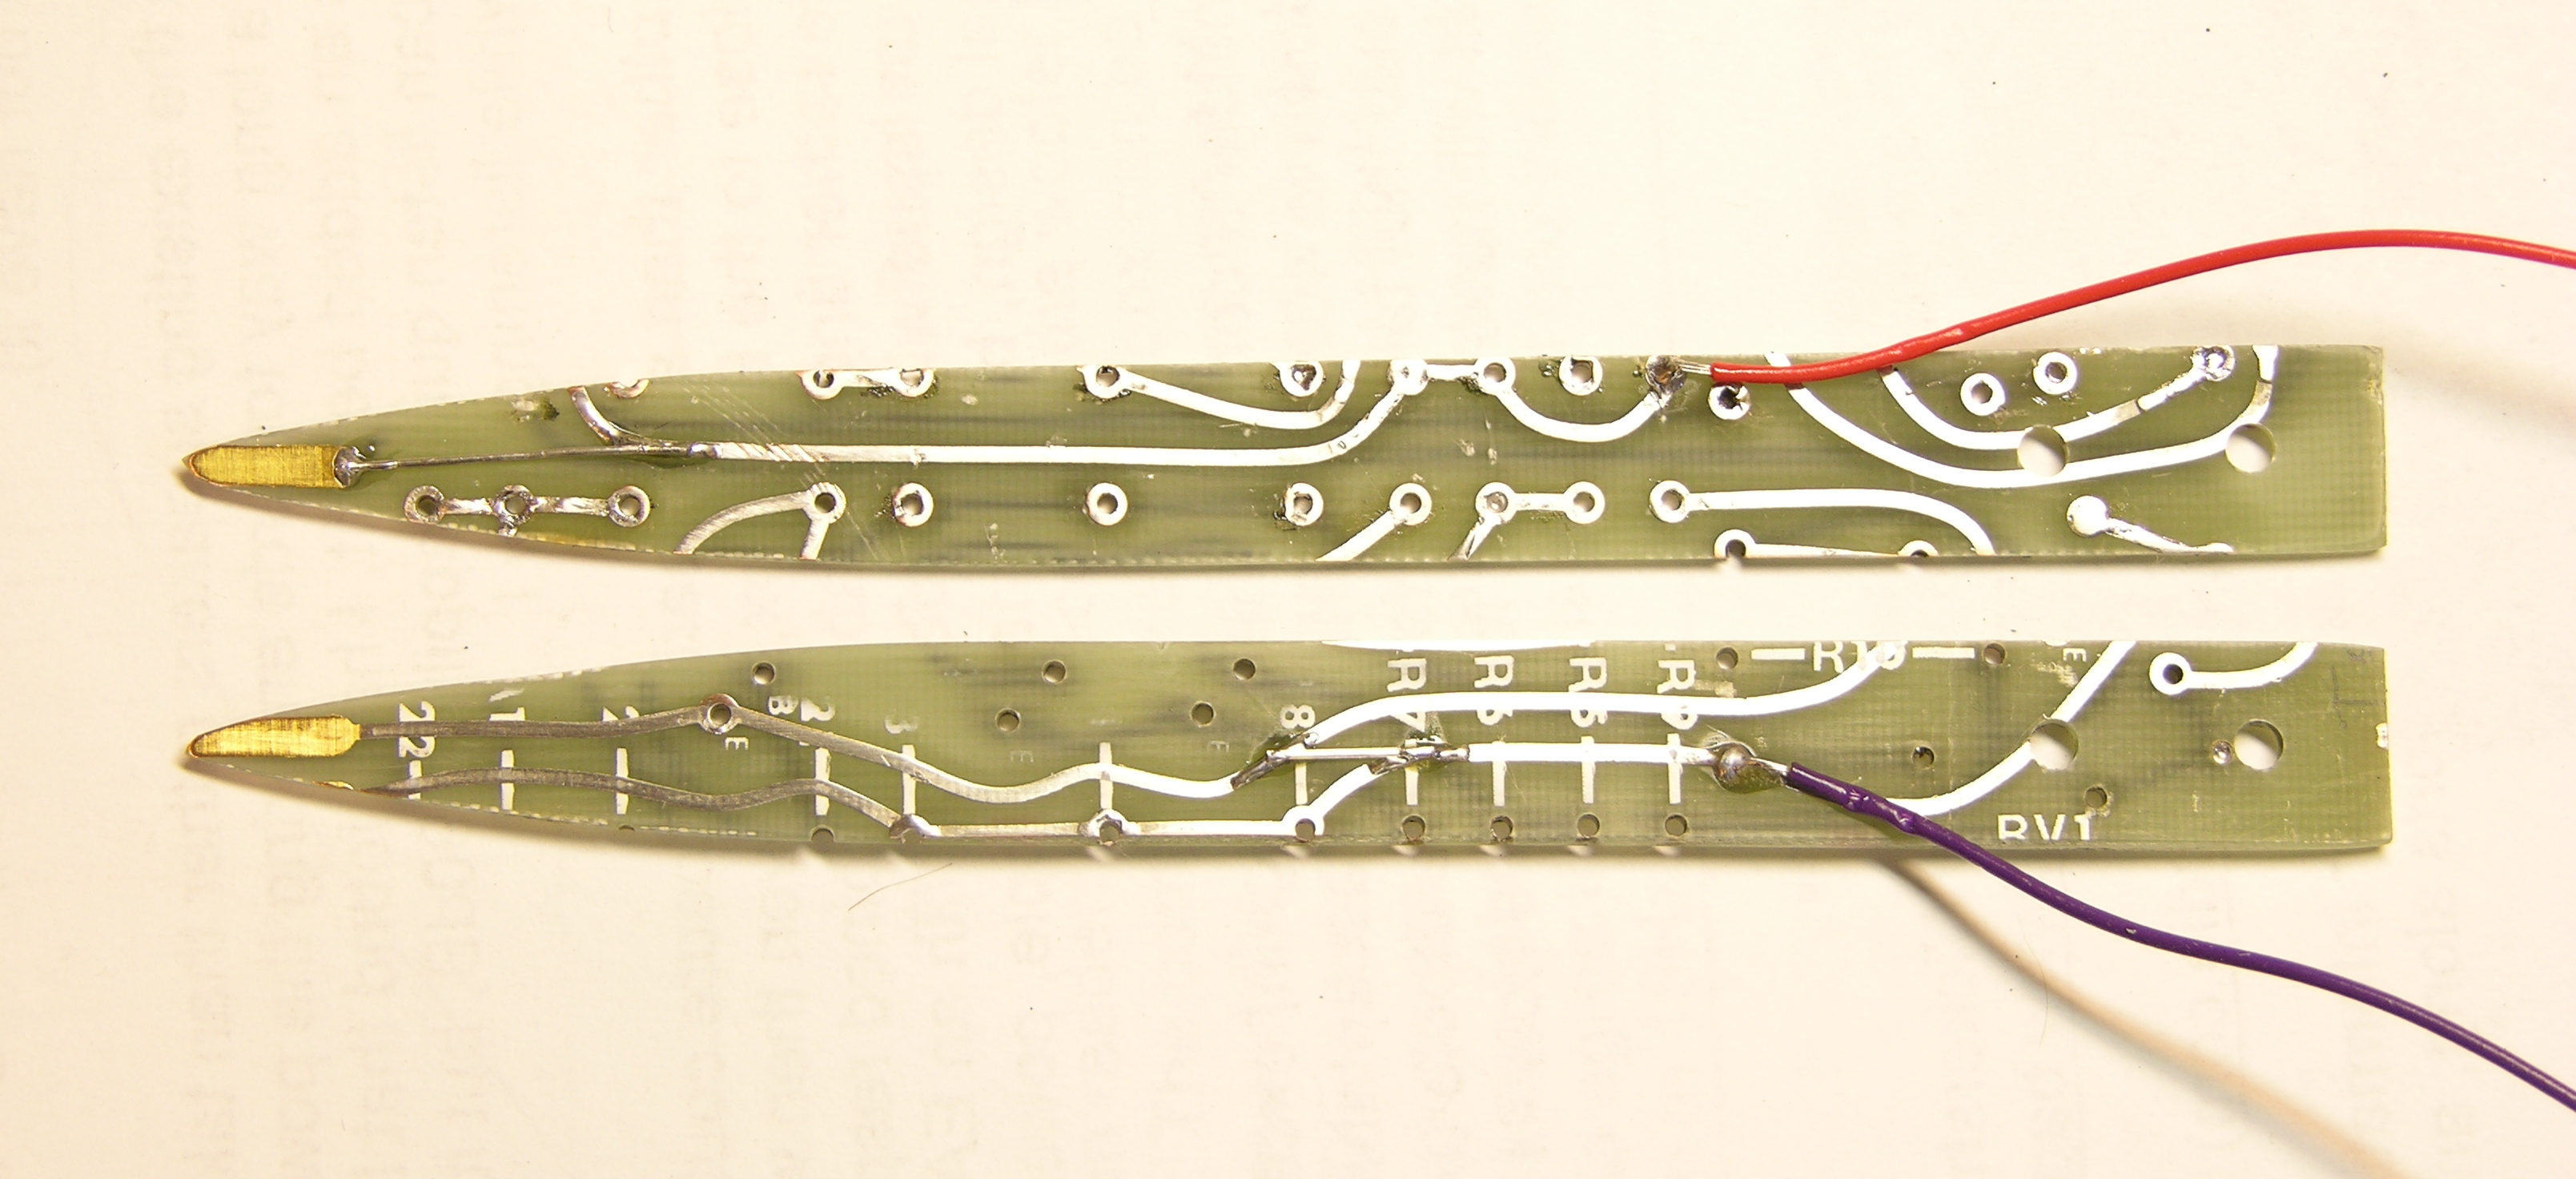
Grumbling aside, the LEDs I was shopping for turned out to be not at all what I was expecting, and probably better in every way. This is because I wasn’t paying enough attention to see that they have four legs (I thought they were two-legged LEDs with a square base), but four legs gives better heat dissipation and allows higher current; and I didn’t realize how squat they are, which makes them fit better into a puck; and I saw that they were 1500 mCd but didn’t realize they had a 120-140° viewing angle, which means they output a whopping 4.7-6.2 lumen each. In contrast, my 10,000 mCd 20° blue LEDs only output .95 lumen.

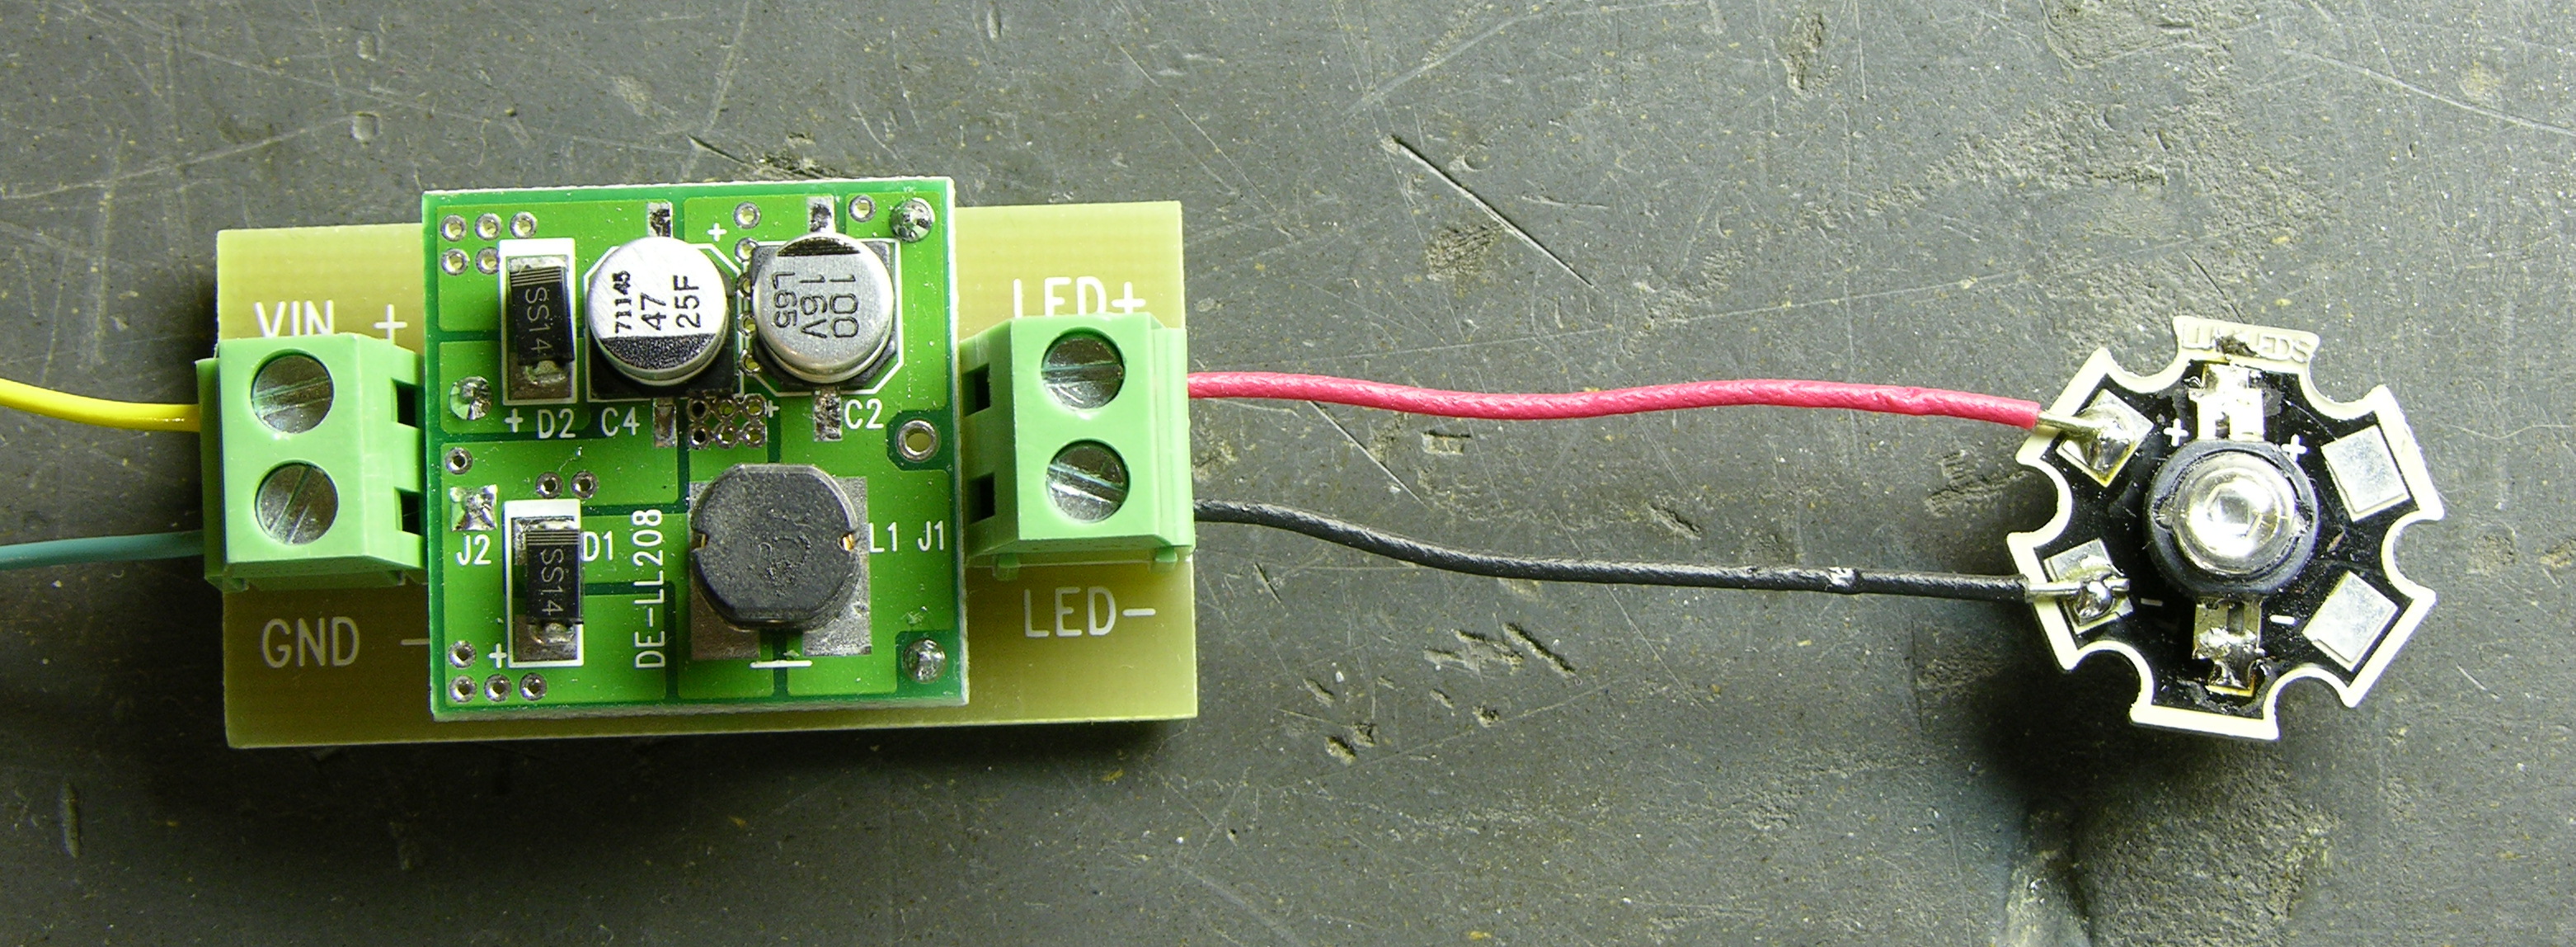
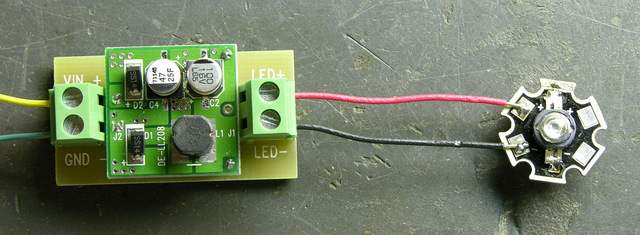
The other stuff I got was a handful of 1W and 3W Luxeon knockoffs, because, y’know, why not; and a constant-current driver board, which I thought would come in handy while testing.

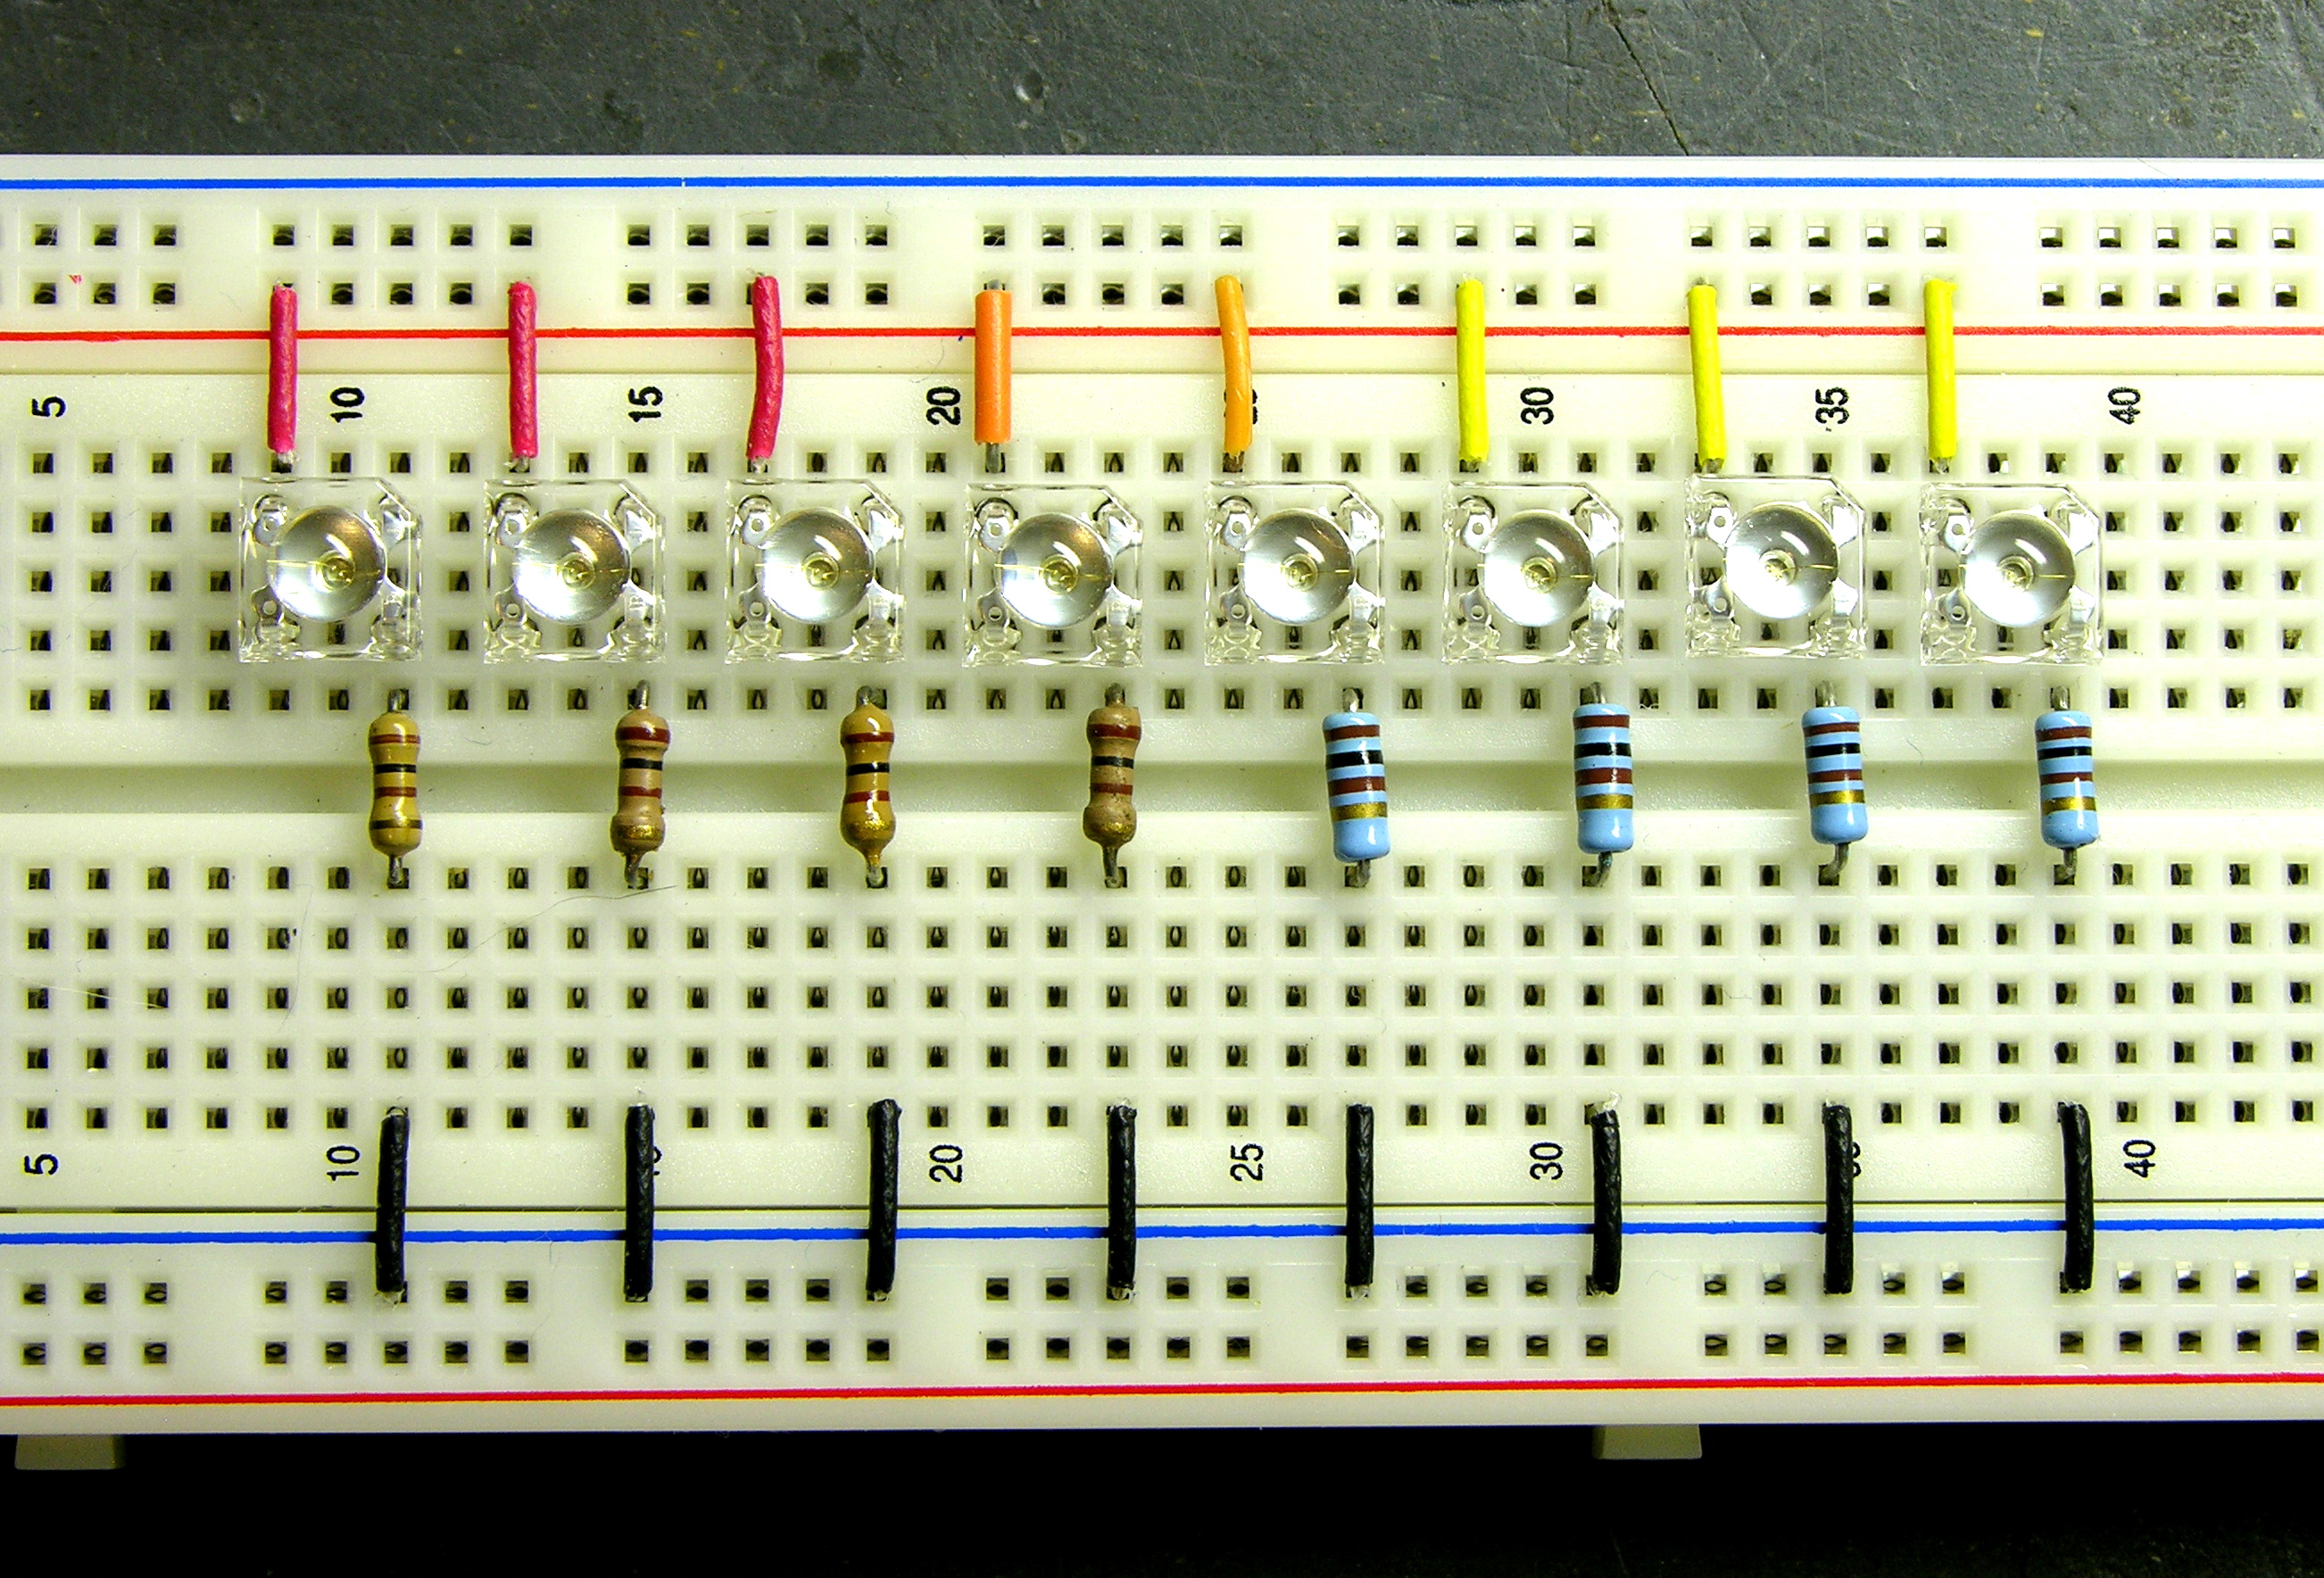
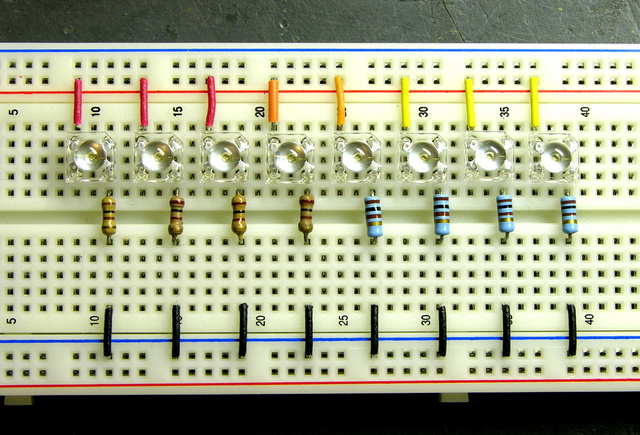
Here are eight of the 5mm LEDs on a breadboard with 100Ω resistors, for about 15mA at 5V or 85mA at 10V (~3V drop). Remember, that’s maybe 5 lumen each or 40 lumen total.

Square 5mm LEDs on breadboard

Let’s see how they fare against the 3W, 70 lumen beast of the apocalypse, wired to the 1W driver without thinking about how that means it’s not running at full power and brightness.

LED driver and 3W green LED

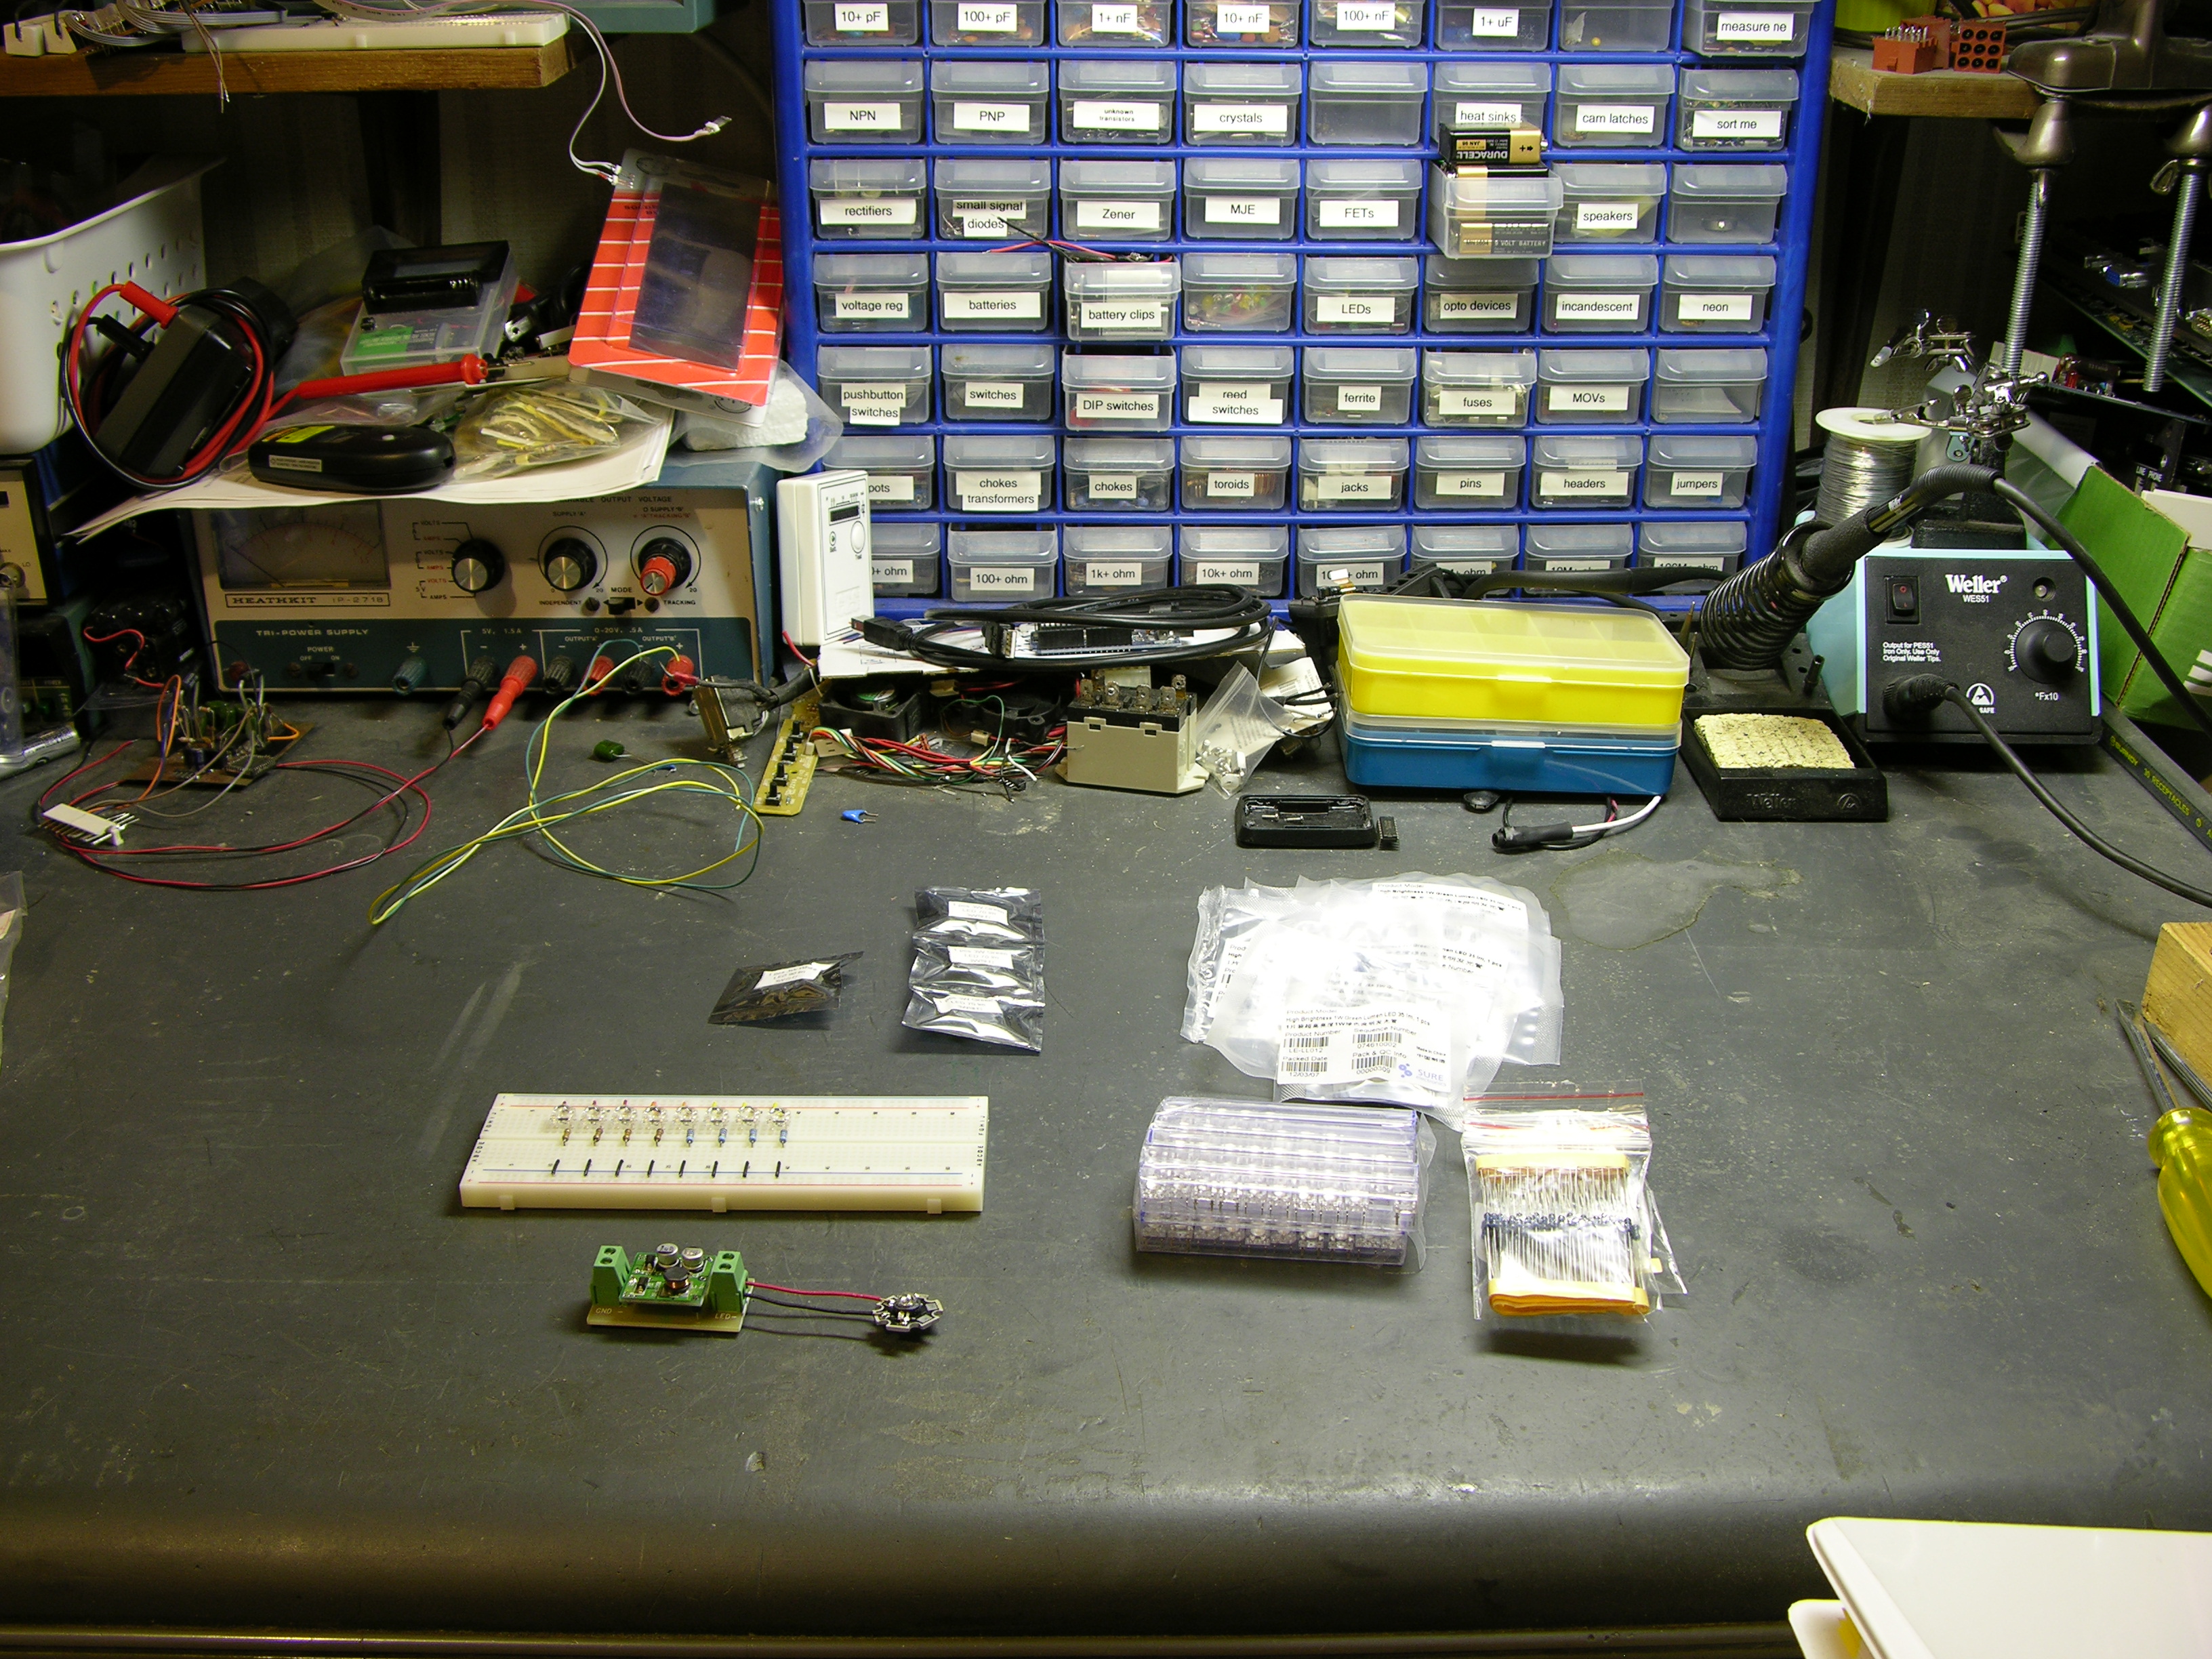
Here’s my desk with about 200W of fluorescent light from the ceiling fixture and the swing-arm lamp.

Desk lit with fluorescent lights

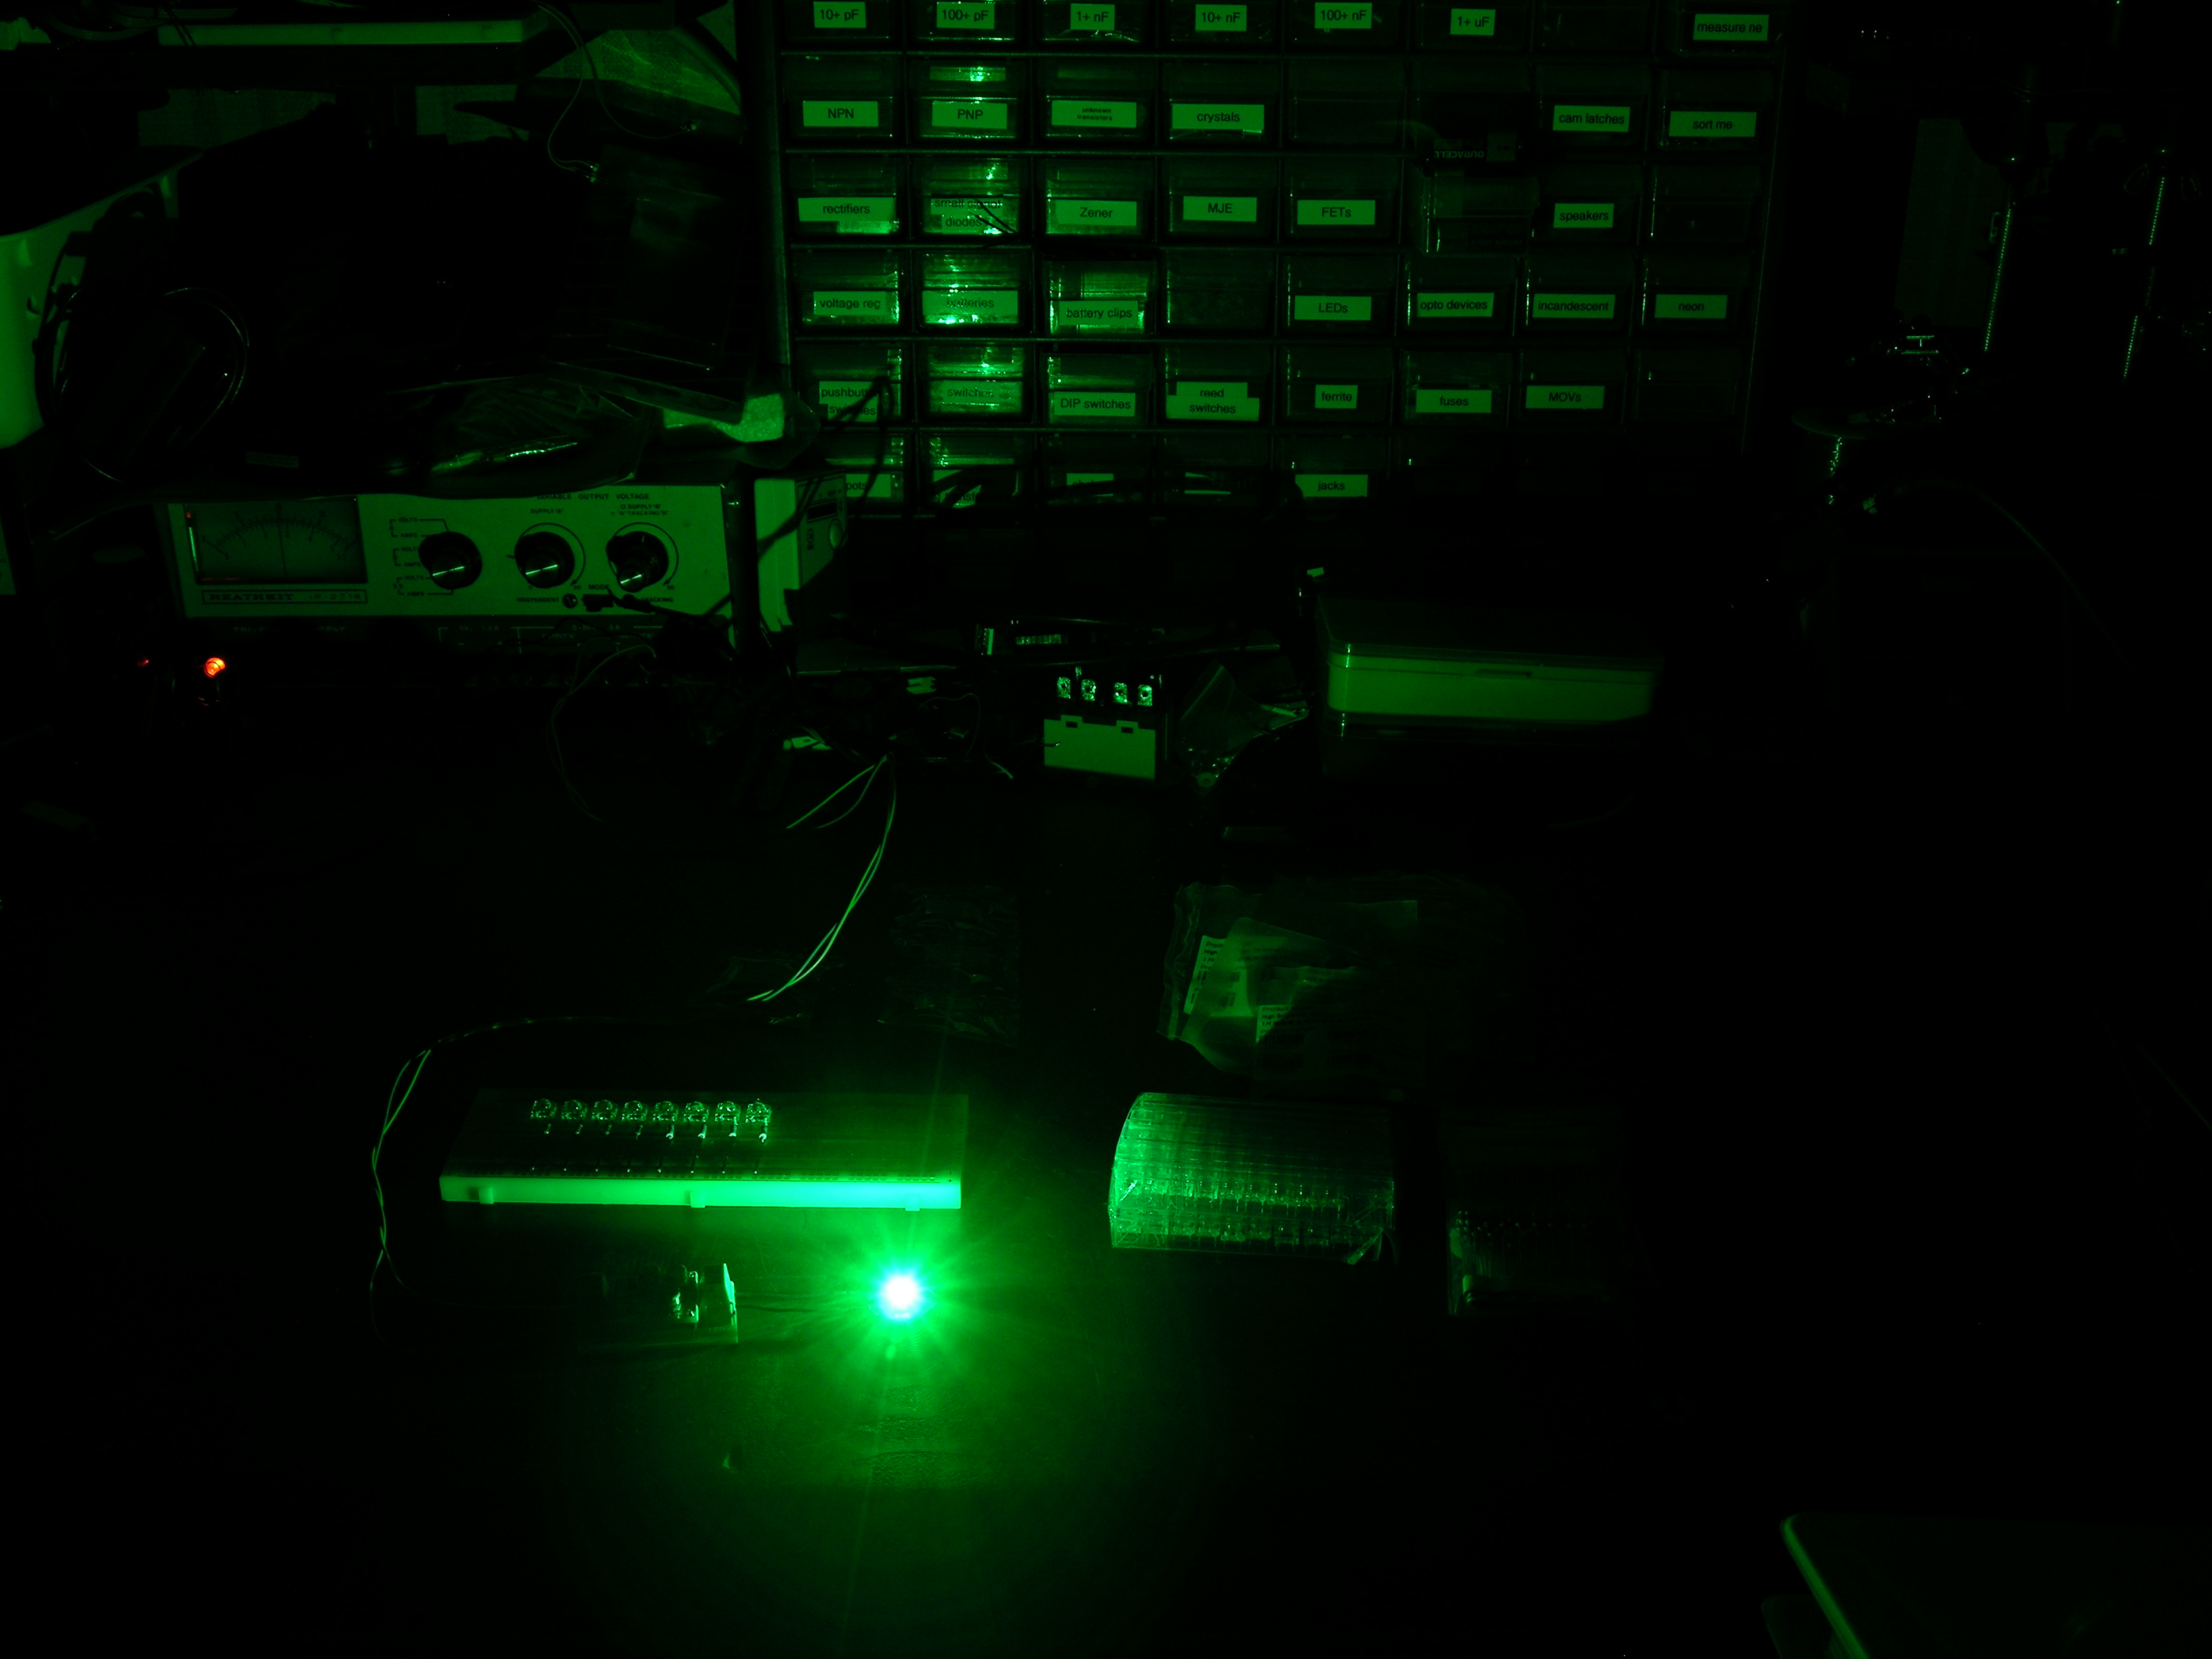
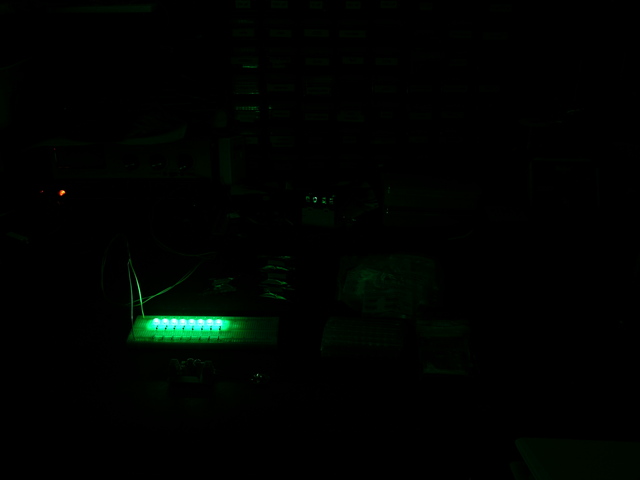
Same scene with the eight 5mm LEDs fed at 10V, and the camera locked to the same aperture and shutter speed:

Eight green LEDs

Same scene with THE BEAST:

3W green LED

Assessment:

The LEDs don’t provide nearly as much illumination as normal room lighting. But then, nobody thought they were going to.

Each set of LEDs does provide enough light to read by, pretty comfortably, even with the light in the same plane as the paper’s surface (i.e. indirect lighting).

According to the camera, half the LEDs for the puck make less light than a single 3W faux-Luxeon driven at 1W. Crap, I should just make a Luxeon throwie and call it a puck. Nah, that’s not really the fun part of the puck idea.

According to my eyes, and my wife’s as well, there’s much less subjective difference in the brightness between the eight 5mm LEDs and the single 3W LED than what the camera appears to show. The math seems to back this up as well (maybe 40 lumen versus some fraction of 70 lumen), so I can’t explain what’s going on in the pictures.

And, oh yeah, LEDs ARE COOL!!!

Garrett’s Wife’s PC Stopped Working

Thursday, December 6th, 2007

Damaged CPU

What Features Do You Want in an LED Puck?

Wednesday, November 28th, 2007

Underworld: Evolution features hockey-puck-sized bombs that click open, disperse visible vapor, and then blow up real good.

Why should the destructive guys have all the fun? I’m inspired to make design an LED puck, for special-purpose lighting. Power goes out and you need to enough light to shut down the UPS-protected computers? LED puck. Camping and you need to find your gear inside your tent? Puck. Kidnapped and locked inside a trunk? Puck. (Also “cocktail party,” but that’s a different movie.) It’s dark and you want to show off a cool gizmo? Puck!

My friend Joel can help me cast it in clear resin to protect the LEDs — but casting it in resin makes it harder to tweak later, so I’d like to get the feature set right on the first try.

What would make for a cool LED puck? Here’s my list.

  • Fairly even light dispersion through a hemispherical pattern. That is, it illuminates the room, not just the ceiling.
  • Enough light to read by at 5′.
  • Can use rechargeable AA or AAA cells. And/or:
  • Can use “Joule thief” technology to use all of an alkaline.
  • Hardy enough to toss around. Like the bombs.
  • Physical on/off switch.
  • Jack for (wired) remote on/off control. (Increases flexibility to use as something other than a lantern.
  • Wireless, addressible remote control. Can control multiple pucks individually. Keyfob. Choop-choop sound. Okay, forget the choop-choop.

Found My Tube Tester

Saturday, November 24th, 2007

I found it up in the garage attic, where I suspected it would be. It’s a Precision Series 912 Electronamic Tube Tester from my uncle’s auction.

Precision Series 912 Electronamic Tube Tester

I found a manual for it online at http://www.geocities.com/precision_testers@sbcglobal.net/. It’s a scan and occasionally a bit hard to read, so I’ve rekeyed the four pages of text and posted it here. The last page of the original is a schematic showing that the tester comprises a many-tapped transformer and a bunch of selector switches to different socket pins.

Between the instructions and the schematic, I’ve come to the conclusion that this tester is pretty much a filament continuity tester, and little more. What kind of tester would I need if I wanted to test tubes quantitatively to put together matched pairs? Pointers to eBay auctions for <= $30 welcome.

I was intrigued by the power plug:

plug

It’s not polarized, and both leads are fused. Today we’d think of that as a great way to inadvertently open the neutral connection and make the whole device hot, but I suppose it made sense at the time.